DaVinci Resolve 15 on elementary OS & Ubuntu
Up-to-date as of April 5, 2019
Note: This guide currently only covers setup and installation for users with AMD graphics cards, as I lack Nvidia hardware to test with at this time.
Introduction
Ah, video editing on Linux...
Many professional video editors would argue that the options we have available aren't quite up to the task, like Adobe Premiere or Final Cut Pro are.
As far as free and open source video editing software goes, we do have quite a few options. OpenShot, Kdenlive, Shotcut, and a newer one, Olive, just to name a few. All of them are absolutely usable, but perhaps not at the level that a more professional user would need. In my own experience, the most common issues with them are performance and stability (though, Kdenlive will have a new, refactored release soon, and Olive is very promising for performance).
So, maybe the FOSS options don't meet your needs. What else do we have available? Two of the most prominent, if not only options, are Lightworks and DaVinci Resolve. Lightworks has always felt weird to use for me, but if you're comfortable using it, then more power to you. However, I believe that DaVinci Resolve is much more intuitive and easy-to-use. So, for this guide, I'll be going over how to get DaVinci Resolve 15 up-and-running on elementary OS and Ubuntu, for users with AMD graphics cards (I'd like to cover Nvidia as well, but I currently lack the hardware to do so).
There is also a video version of this guide available, if you prefer watching over reading.
Why elementary OS?
You might be wondering why this guide is for elementary OS and Ubuntu, rather than just Ubuntu proper. After all, Ubuntu has a much larger user base, right? While that is true, I personally believe that elementary OS is the best option for newcomers to Linux. So, I'll be focusing this guide primarily on elementary OS, but most, if not all of the steps will work fine on Ubuntu as well.
DaVinci Resolve and MP4s...
Before we get into it, though, there is a rather big caveat that almost leads me to recommend against Resolve if you're just an average user: the free version of DaVinci Resolve on Linux doesn't support H.264, which is the codec that many video recording software uses to record MP4 videos (e.g. if you use OBS Studio, it uses the H.264 codec). DaVinci Resolve Studio doesn't have this limitation, but... That sets you back about $300, and I'm focusing on the free version for this guide.
So, if you still want to use Resolve, you do have some options here.
Convert existing footage
First, if you want to use footage you already have recorded, you can convert it to a format that Resolve does accept. For this purpose, I recommend installing a program called WinFF, a graphical front-end to ffmpeg.
It will look something like this:
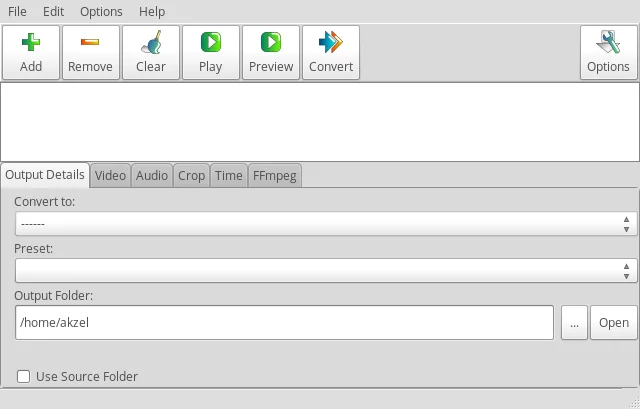
From there, go under Edit, and select Presets. You'll be creating a preset that looks like this:

The Preset Name, Preset Label, and what Category you put it under are up to you; the important part is the Preset Command Line Parameters and Output File Extension. You can just stick with what I've shown you above, and move on to the next section if you'd like, but I'm going to go over what the parameters do. Make sure to click Add / Update, then Save when you're done.
-c:v libxvid is setting the codec to Xvid, one of several that the free version of Resolve does work with just fine; it also results in a smaller file size than other codecs I've tried (though it will still be larger than H.264 recordings).
-q:v 2 sets the quality level for libxvid; the lower the number, the higher the quality. In this case, I have it set to 2, as for the video that I work with, 2 results in no noticeable loss in quality, and keeps file sizes reasonable. You can try adjusting it as you like, though, to see what works best for you.
-c:a pcm_s24le sets the audio format to PCM, a type of uncompressed audio, with a bit depth of 24.
OBS Settings for video that will work in Resolve
I use OBS Studio for almost all of my video recording, so here's how to set up OBS to output video that you can directly use in Resolve, no conversion required (with a big thanks to Silent Robot for these settings).
Under Settings->Output, make sure Output Mode is set to Advanced. Then, under the Recording tab:
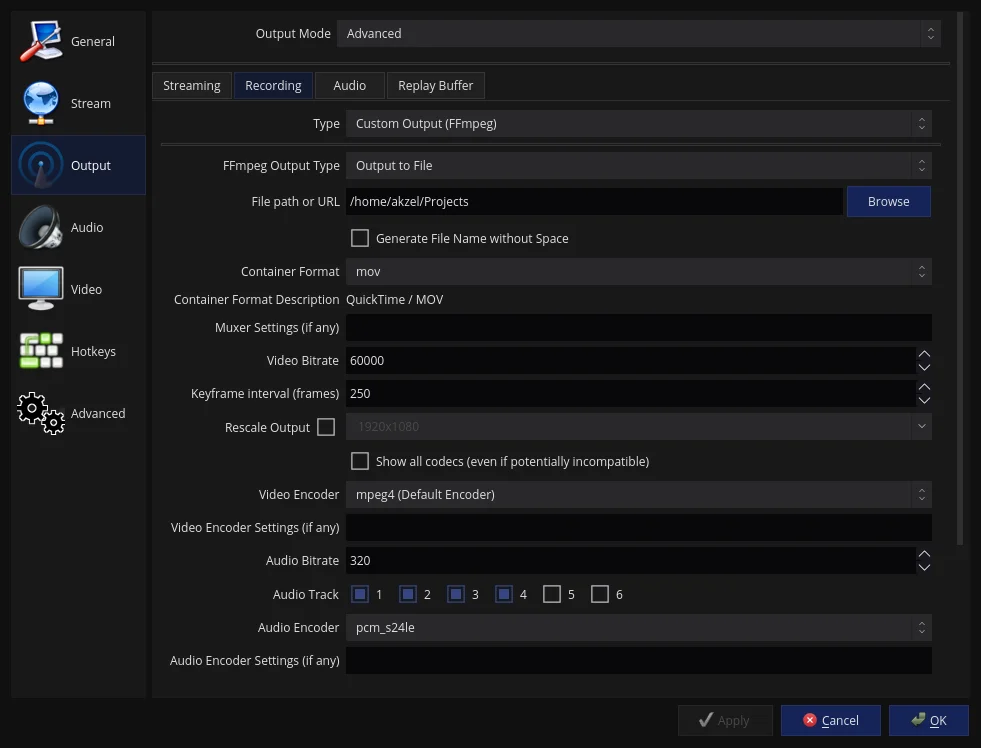
So, first, make sure the Container Format is set to mov.
Video Bitrate is largely dependent on what type of video you're recording, but 60000 works well for me. Play with this and see what works best for you.
Keyframe interval is set to 250; if you set it too low, visual artifacts can occur unless you set the bitrate really high. I recommend sticking with 250, but see what works best for you.
Video Encoder is set to mpeg4, so that Resolve can recognize the video.
Audio Bitrate is up to you, too; the highest you should go is 320, but 192 is a great sweet spot.
Audio Encoder is set to pcm_s24le, as Resolve is finicky with certain audio formats as well. PCM just works.
The other settings shown are largely dependent on your particular setup.
Prerequisites
So, some prerequisites. First, of course, you'll need to download DaVinci Resolve (the download link is near the bottom of the page). I also highly recommend downloading MakeResolveDeb, a script by Daniel Tufvesson that converts the Resolve installer into a DEB package, to allow for proper installation on Ubuntu- and Debian-based systems. You'll need to make sure that the MakeResolveDeb version matches the version of DaVinci Resolve you downloaded (i.e. MakeResolveDeb 15.3-1 and 15.3-2 would work with DaVinci Resolve 15.3, but may not with 15.3.1). Keep in mind that if there's a brand new release of DaVinci Resolve, you may need to wait a day or so for MakeResolveDeb to be updated.
Now, for what you need to be able to run Resolve. DaVinci Resolve requires OpenCL or CUDA. As I lack Nvidia hardware to test with, and AMD cards can't use CUDA, we'll be focusing on OpenCL.
For OpenCL, there are two options: the proprietary AMDGPU-pro drivers, or ROCm, AMD's open source compute stack. We'll be going with ROCm, as AMDGPU-pro has been known to cause problems.
Installing ROCm
The information presented here is paraphrased from, and references the ROCm GitHub page.
First, make sure your computer is fully up-to-date. Then, open a terminal window, and sudo apt install libnuma-dev.
Next, you'll need to add the ROCm apt repository:
wget -qO - http://repo.radeon.com/rocm/apt/debian/rocm.gpg.key | sudo apt-key add -
echo 'deb [arch=amd64] http://repo.radeon.com/rocm/apt/debian/ xenial main' | sudo tee /etc/apt/sources.list.d/rocm.list
Then, add yourself to the video group:
sudo usermod -a -G video $LOGNAME
The next step depends on what kernel you're running. You can check with uname -r.
Kernel 4.15
If you're on version 4.15,
sudo apt update
sudo apt install rocm-dkms
Then, reboot your computer.
If you are using Ubuntu, or an official Ubuntu flavor, you should be good to go. However, Ubuntu derivatives like elementary OS or KDE Neonmay run into problems. There's a workaround, but my recommendation is to upgrade your kernel, and reference the next section.
You can do so with the following command, as outlined here:
sudo apt install --install-recommends linux-generic-hwe-18.04 xserver-xorg-hwe-18.04
Kernel 4.18 or later
If you're on version 4.18 or later,
sudo apt update
sudo apt install rocm-utils
Then,
echo 'SUBSYSTEM=="kfd", KERNEL=="kfd", TAG+="uaccess", GROUP="video"' | sudo tee /etc/udev/rules.d/70-kfd.rules
And finally, reboot your computer.
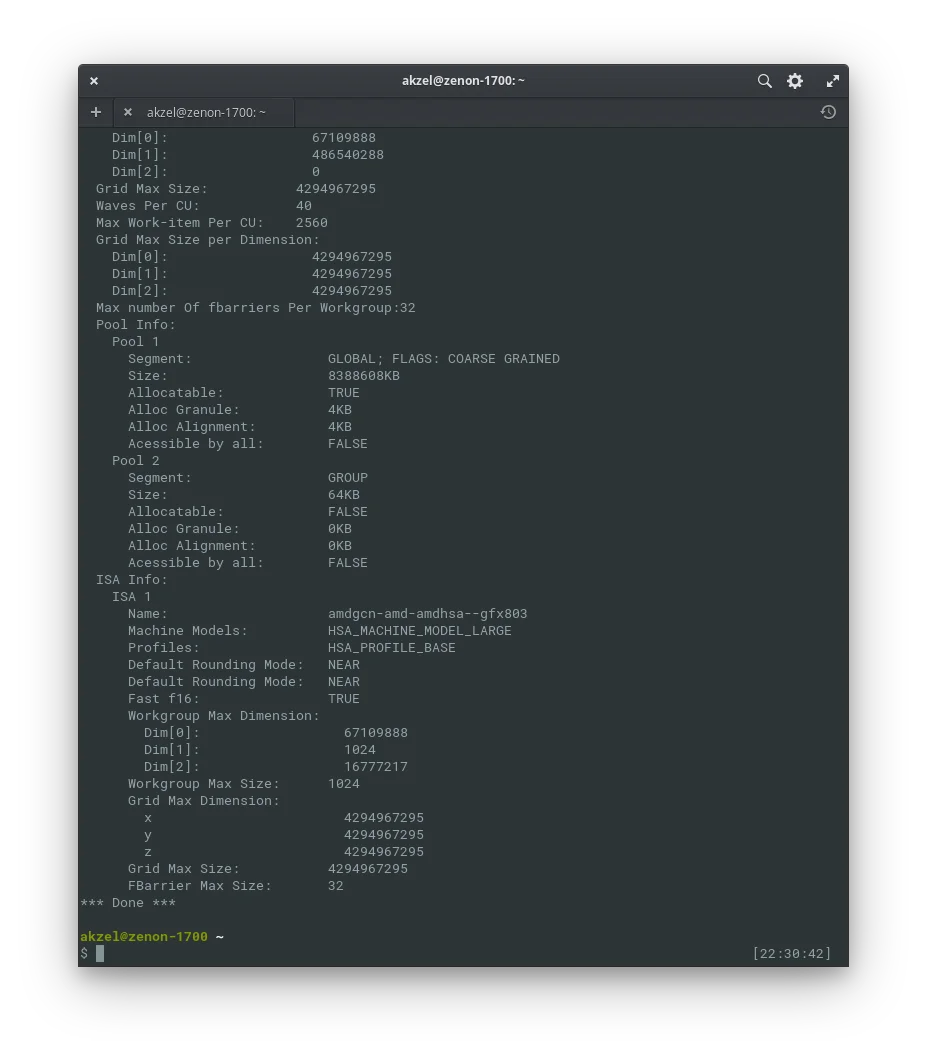
Test ROCm setup
After installation, to make sure ROCm was installed properly, run /opt/rocm/bin/rocminfo. The output should resemble this:
Installing DaVinci Resolve
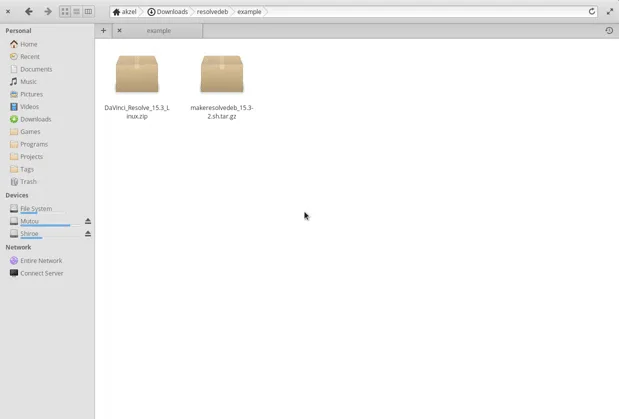
Go to where you downloaded DaVinci Resolve, and extract it (on elementary, right-click and Extract Here), then drag the MakeResolveDeb tar.gz into that folder, and extract it within.
Open a terminal and navigate to that folder. You'll need to sudo apt install xorriso, as MakeResolveDeb requires it, then,
./makeresolvedeb_version-number-here.sh
version-number-here being, of course, replaced with the version number of MakeResolveDeb that you downloaded. makeresolvedeb_15.3-2.sh, for example.
After it runs, you can install the newly-created .deb with Eddy on elementary; with Ubuntu Software; or with sudo apt install ./davinci-resolve_version-number_amd64.deb
Conclusion
If all went well, you should now be able to run DaVinci Resolve. If you ran into any problems along the way, or if you have suggestions for how this guide could be improved, please feel free to reach out to me through my website.
`Til next time, readers.