saschofield

I think education should be free but online ads suck. Thanks for reading my posts & supporting content creators.

This is a continuation of my previous walkthrough “Raspberry Pi - Sense Hat”, which itself is part of a series describing setup of a Raspberry Pi (RPi) computer and beginner's Python programming.

To keep the previous walkthrough brief, I only described scrolling messages, today I'll explain another function of the SenseHat module. This will again be about the 8x8 LED array as these are functions you can visibly see even when using the emulator.

You may not have a Raspberry Pi, you can still follow along with this web browser emulator on any device: https://trinket.io/sense-hat

Fair warning – This'll be a long one...

We left last with a scrolling message, we begin here with showing letters. Open “Thonny Python IDE”, found in the “Programming” section of your application menu, press “Ctrl+N” to open a new file.

Next you'll need to import the necessary modules and packages, this allows your Python code to perform tasks. By typing from sense_hat in the script area we're asking the Raspberry Pi's GPIO pins [Those 20 pins on your RPi's board] to communicate with the Sense Hat accessory. If you don't own the accessory, you'll need to type “from sense_emu” instead to use the emulator. Continue by typing the following:`

from sense_hat import SenseHat

import time

or

from sense_emu import SenseHat

import time

Please remember that Python is case-sensitive and syntax is important too. For example, if you mistakenly type “import senseHat” and later ran the program an 'ImportError:' will be shown like this...

import SenseHat” in this situation just required an upper-case “S”.

We'll now give the function “SenseHat()” a name, “LED”, this makes the code you're writing just that bit simpler. Type the following:

LED = SenseHat()

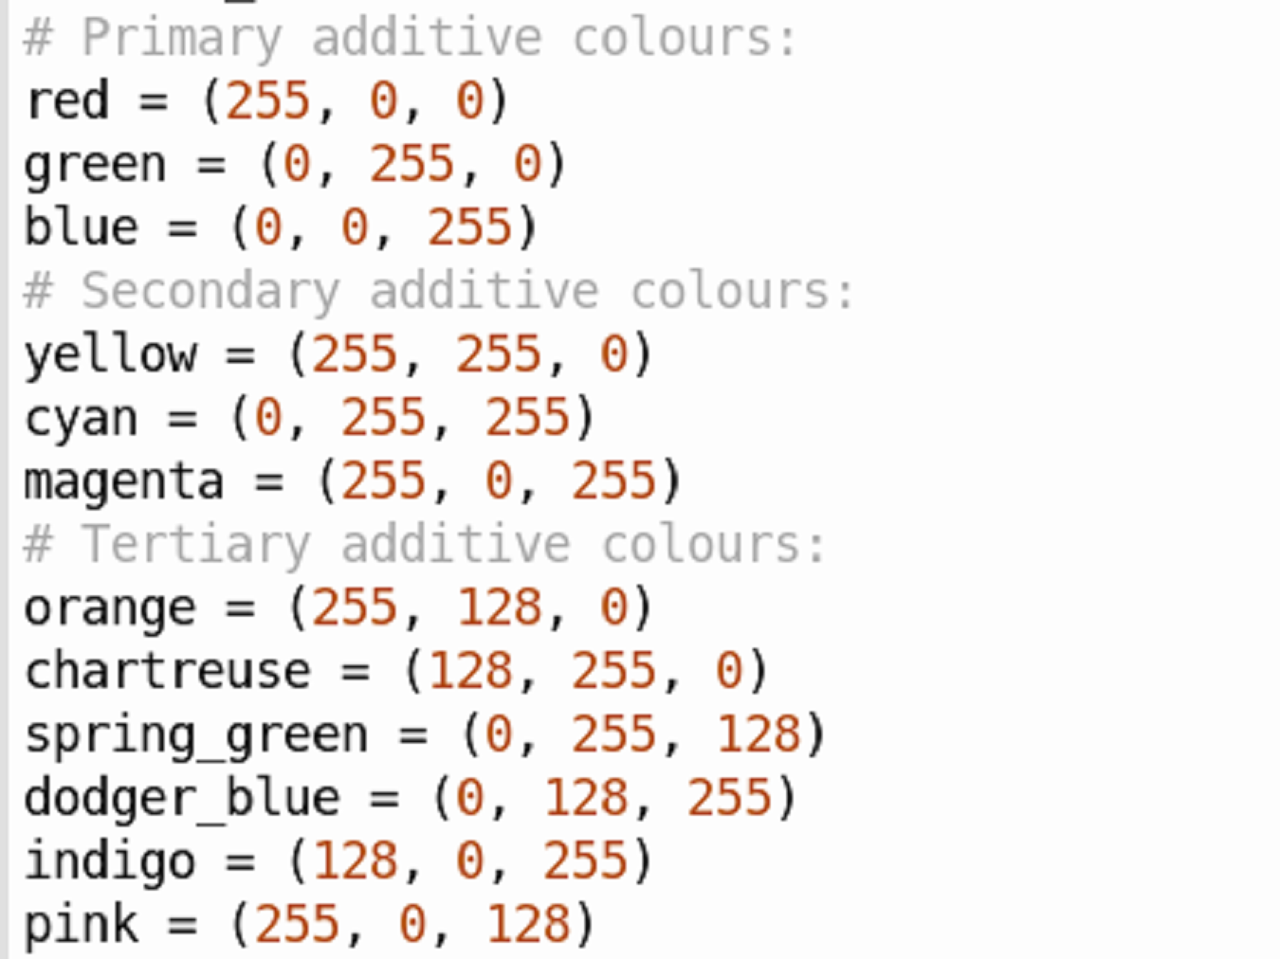
We'll be adding colour to our letters. Using the RGB colour code, which would normally look something like (210, 160, 255) can be a pain though so we simplify our code by naming some colour codes first, then we only have to include the name later:

red = (255, 0, 0)

green = (0, 255, 0)

blue = (0, 0, 255)

I've included more colours in the screenshot, give them a try.
With our names ready, we can write some code so that a letter appears on the Sense Hat accessory, or the emulator program. You can do this by adding the renamed “LED” SenseHat() function to another function, “.show_letter()

It should look like this: LED.show_letter()

In the brackets you can add a letter to display on your LED array, inside quotation marks like this: LED.show_letter("A")

At this point, it is time to save, use the keyboard shortcut “Ctrl+S” and give your code a name. As usual I recommend using only lowercase, without spaces but underscores “_” are fine. If you reach a point in the future when you're using the Linux command-line, you'll be glad you did. Remember to include the suffix “.py” so Linux knows how to use the file you've made.

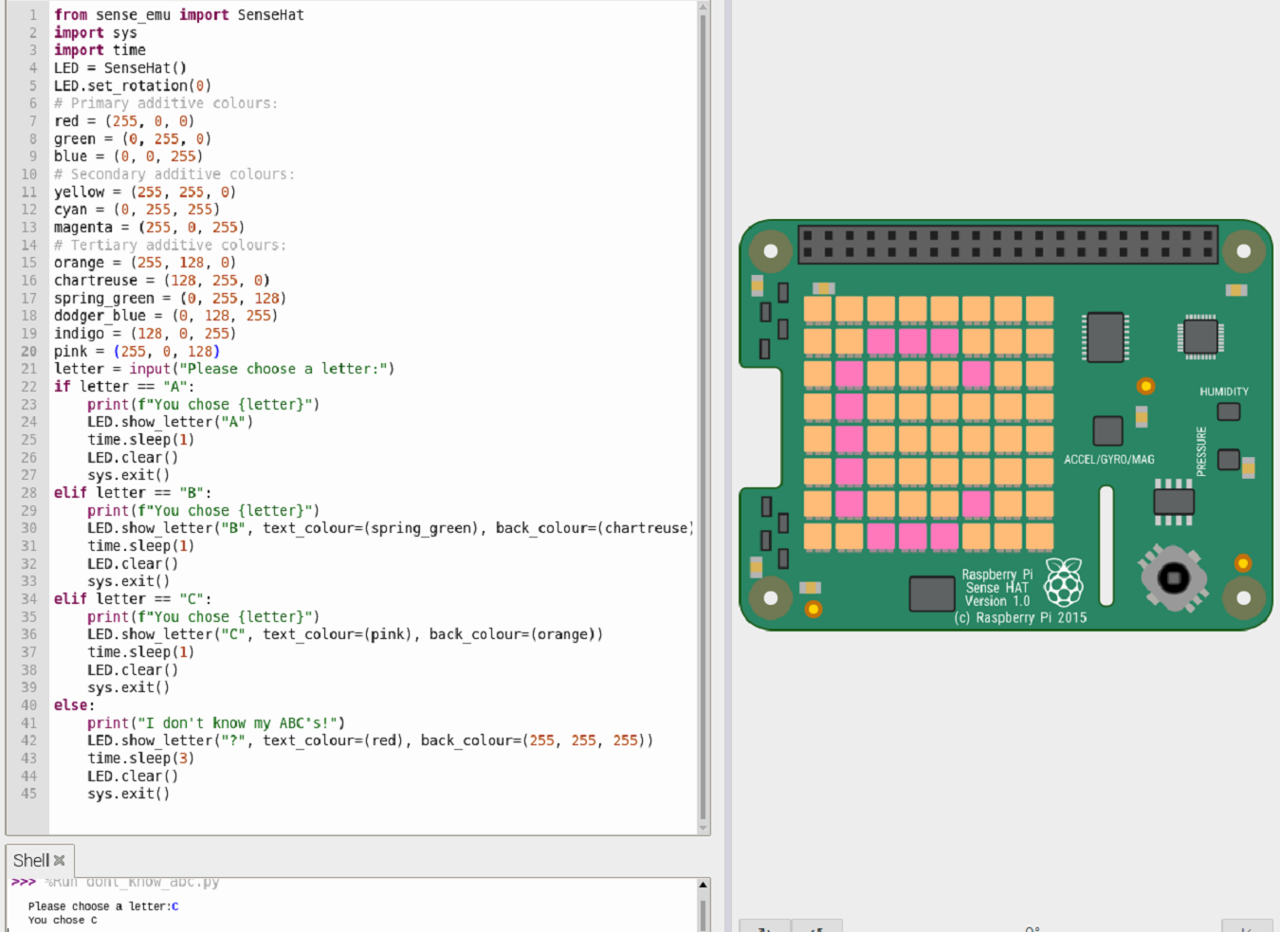
The image above shows another program running in the Linux Command-Line, I named it “dont_know_abc.py”, you can see the name below the asterisk line.

Back at the script area, your work isn't done, if you ran the code now, a letter will appear but it wouldn't disappear again. No worries. At the beginning of this code you typed “import time”, you can now use this to briefly 'pause' the program before it performs the next task by typing time.sleep(2.5), you can use any number here, it is the time in seconds to pause for.

Then you add another line of code, telling the Raspberry Pi to turn off the 8x8 array. Type: LED.clear() which is the same as LED.clear(0, 0, 0), we used in the previous walk-through . You could clear the letter and add a colour at the same instance by changing the “()” or “(0, 0, 0)” to any RGB code up to and including “(255, 255, 255)”

Save once more (Ctrl + S) and press the F5 button to run your code.

Once the code has finished running, press the red stop button in the taskbar. We'll add colour to the text now. Inside the bracket of LED.show_letter(“A”) add a comma and a colour you've already named. For me this will look like:

LED.show_letter("A", spring_green) Try running your code again to see the change.

If you want to be even more specific, you can add parameters to change colours for both text and background. To do this alter that same bracket again by including text_colour=() and back_colour=() like this: LED.show_letter("A", text_colour=(spring_green), back_colour=(indigo)) Please pay attention to my use of brackets.

That line could have also been typed like this: LED.show_letter("A", text_colour=(0, 255, 128), back_colour=(128, 0, 255)). We can show more letters by repeating the last three lines of code again with some differences, in my screen-shots, I have colours included.

LED.show_letter("A")

time.sleep(1)

LED.clear()

LED.show_letter("B")

time.sleep(1)

LED.clear()

LED.show_letter("C")

time.sleep(1)

LED.clear()

The entirety of your code so far should look something like this:

The keen eyed here will notice I've added a new line [at line “8”]. “Led.set_rotation(180)”, this new function rotates the LED display around. Just in case you have the real Sense Hat Accessory and your letters are all upside down... You could replace this number with “0”, “90” and “270” it looks the right way up for you.

User input, Python Output

Well that was easy enough, so let's begin a new code and add user inputs using a keyboard. We'll ask the user to pick a letter and then code the Raspberry Pi to output a response. I'll be keeping this very simple, writing long-hand at first, even repeating code. I can already feel the eye rolls of seasoned coders out there.

For the sake of simplicity & your sanity however, we march on...

Hit “Ctrl+S” to save and then “Ctrl+N

As before we import SenseHat and time modules, except this time we'll import a new module “sys”. This will help us automatically end our program once it has run.
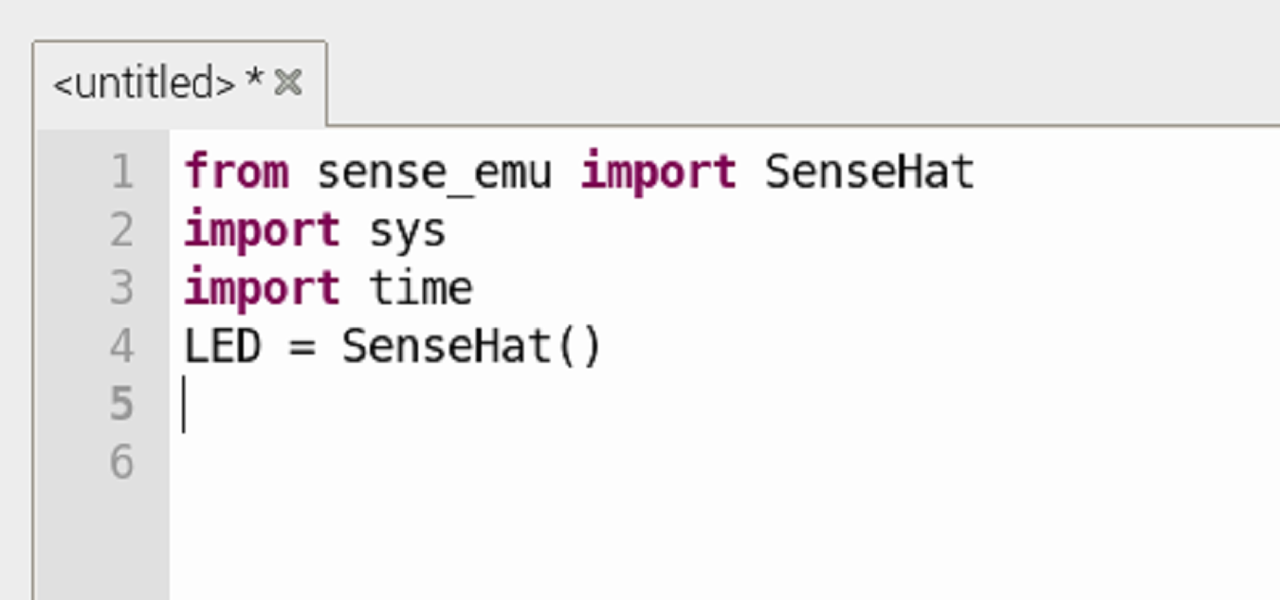
Again we give the SenseHat() function a name, “LED”.

To save on code, I copy-pasted the named colours from the code we typed earlier. You may want to type it again for practice, or change some colours completely.

Next we'll want to define the user input with a name. When I was coding & screenshotting for this walk-through I used the word “letter”, you could use another word, “value” is a popular choice and in hindsight would have saved some confusion so I'll write “value” in this article so it's understandable.

So type in: value = input("Please choose a letter:") The “value” here is whatever the user inputs, inside the brackets will be printed instructions for the user. We then add conditions with a block of commands for Python to perform if the letter “A” is chosen. When creating a block we finish our condition with a colon “:“, tasks to be performed are below that, with a tab indent (or 4 spaces) in them.

if value == "A":

print(f"You chose {value}")

LED.show_letter("A")

time.sleep(1)

LED.clear()

sys.exit()

You can see the print function here, which adds text to the shell area of Thonny (or the command-line). Except this version is different as it contains an 'f-string'. Before typing the quotation you'd like to see, add an f, in the example above we have a quote “You chose {value}”. Without the “f”, it will print that exact sentence but with it, that {value} becomes whatever the user input.

Below that we have the now familiar LED.show_letter("A"), which displays an “A” on the 8x8 array. Then a pause time. We ask the array to clear and finally we ask the program to end using sys.exit().

We'll need some outputs for situations when the user doesn't press “A” known as “else-ifs”, they're other options you can choose for the Python code to acknowledge when the first condition is False and respond in a specific way. We type it “elif”.

elif value == "B":

print(f"You chose {value}")

LED.show_letter("B")

time.sleep(1)

LED.clear()

sys.exit()

elif value == "C":

print(f"You chose {value}")

LED.show_letter("C")

time.sleep(1)

LED.clear()

sys.exit()

You might like to go back and add colours to the LED's also.

For all other responses we'll add an “else:” condition.

else:

print("I don't know my ABC's!")

LED.show_letter("?")

time.sleep(3)

LED.clear()

sys.exit()

Ctrl+S” to save, then “Ctrl+F5” to debug this longer code. The program will fault-find. Once errors are fixed. You can run your code. Type an input and see how it behaves.

That's the longer way of typing this and sure enough you could add every letter with “elif” conditions, but what if you'd prefer a one-size fits all short piece of code for every letter... Read on.

Defining Functions

I introduced basic Python coding like “functions” in the third part of this RPi series, “Raspberry Pi – Python Coding”, and how to define new custom functions. We're now going to create one to make our typing more efficient.

Add the following code just below where you had named the RGB colours:

def action():

print(f"You chose {value}")

LED.show_letter(f"{value}")

time.sleep(2.5)

LED.clear()

sys.exit()

As you can see, the LED.show_letter() function no longer has a quoted letter in it, instead I've added an f-string that shall show the user input. You can still add text/background colour in the brackets, after the quotation marks. Try not to forget syntax like commas.

Anything below the line that reads “value = input(“Please choose a letter:“) can be deleted, replaced with only one line:

action()

We've now defined a function, that will respond to any one-character input from the user. You can also change LED.show_letter() to LED.show_message() to see the user's input scroll along the Sense Hat.

An important skill to learn when coding and in life is “Lateral Thinking”. A part of that is the ability to take information learned and apply it some other way. Perhaps something you've just tried today can be used somewhere else, in another code? Well the best way to find out is to try it out. Practice, practice, practice.

Thanks for reading another one of my walk-through, These can get wordy. Hopefully it helped? I welcome feedback through my Twitter.

If you'd like, you can follow me on Twitter and call me an idiot every day of my miserable life, at the link below:

https://twitter.com/SASchofield52

Note: You'll have to forgive my mismatch of images in this walk-through, as it was created over several weekends; I may change them to match the text exactly at some point in the future.

Disclaimer: Images are my own, opinions are my own

In this, the fourth part of my Raspberry Pi Computing series, we move onto the addition of accessories. Namely the add-on board called a “Sense Hat”. Don't worry though, if you don't have one the Raspbian OS we installed in Part 2 has an emulator program that is free to use and works the same way.

You may not have a Raspberry Pi, you can still follow along with this web browser emulator on any device: https://trinket.io/sense-hat

It will help you a lot if you have some experience of writing Python script because I'd like to move along briskly. If not, please consider trying my earlier walk-through first:

https://tinyurl.com/yb65cnqd

We start, once again at the Raspbian GUI desktop. If you will be using the emulator program, you can find it by:

Clicking on the Raspberry icon in the top left corner –> Hovering over “Programming” –> Selecting SenseHat Emulator. For convenience you may want to drag and drop it to the right of your display.

Next we shall open the “Thonny Python IDE” program. Usually it opens the last script you wrote, which if you've been following this series, might be “HelloWorld.py”.

In the taskbar of Thonny –> Select “File” –> Select “New”.

You could also use the keyboard shortcut “Ctrl + N”.

To help our new script and our Raspberry Pi to communicate with the Sense Hat or its emulator, we will need to request that Python use a “library”, this library allows us to use functions that wouldn't otherwise work.

For this walk-through I will be demonstrating code for the emulator because it doesn't require you to buy a real one. If you're going to use a real Sense Hat, please remember that whenever I use the term “sense_emu”, you should change this to “sense_hat”.

Click inside the Script Area and type the following:

from sense_emu import SenseHat

By typing “from” we call upon Python to search a library. “sense_emu” is the name of a library for the emulator. The “import” statement asks Python to access a module and that module is “SenseHat” which adds extra functions.

Now we shall add to our code, we'll give the SenseHat() function a simpler name, “sight”.

from sense_emu import SenseHat

sight = SenseHat()

sight.show_message("Show me the money!")

sight.clear(0, 0, 0)

Yeah that's right, I quoted 1996 film, 'Jerry Maguire'.

.show_message()” is a function of the SenseHat module. It lets the Python program know that any quotation marked text wrapped inside the brackets should be displayed on the 8x8 LED array.

The sight.clear(0, 0, 0) function clears the LED array of any pixels still illuminated. “0, 0, 0” refers to the RGB colour-code for black, which means 'off'.

Before running this script, you'll need to save it (shortcut “Ctrl + S”). Remember to include the suffix “.py” so your RPi knows it is reading a Python script. I will name mine MoneyMoney.py.

Back at the Thonny screen, whether you have the emulator or the real Sense Hat fitted, it's now time to see if we have any errors. As our script relies on other libraries and for some of you, a physical accessory, I think it wise to bug test before running. We can debug the script by pressing the button beside the green “Play” button (Ctrl+F5) If all is well, you can stop the debug script.

You can now press the green “Play” button (shortcut F5) and watch the results of your work so far. Believe me, seeing it on the real Sense Hat is very exciting, inspiring you with all the possibilities.

Once done, press the red “Stop” button in the taskbar (Ctrl + F2).

A quirky thing to note is that the final task of a python program is permanent until a new task supersedes it or the RPi is shutdown. Don't believe me? Try changing the last line in your script so it looks like: sight.clear(255, 0, 0) then save and play the script again. Your LED array will be red when finished, hit the “Stop” button... Still red? Yeah... Many a Raspberry Pi has fried that way.

In the script area, add a line of code below the first: import time

, line 4 can be changed to sight.show_message("Money!"), then on line 6 add the code: time.sleep(0.75). We've now added the ability to control delays and speed of our script.

Using parameters inside our .show_message functions, we can choose text colour, background colour, scrolling speed...

text_colour=(x, x, x)” Where “x” is replaced by colour code.

back_colour=(x, x, x)” Where “x” is replaced by colour code.

scroll_speed=(x)” Where “x” is replaced with speed in secs.

You can toy with these parameters however you please but for this tutorial we'll be adding three more lines of code.

Line 7. sight.show_message("Show me the", text_colour=(255, 255, 255))

Line 8. sight.show_message("money!", text_colour=(0, 255, 0), back_colour=(0, 150, 0))

Line 9. sight.clear(0, 0, 0)

Line 7 's text colour “255, 255, 255” is white. Line 8's text colour “0, 255, 0” is green with a background colour that is a darker shade of green. Line 9 clears the LED array, turning it off.

This will be the last time we run the MoneyMoney.py script, perform a debug check and amend any errors you may have had.

The libraries we added also tell the RPi which pins to power and which LEDs to illuminate. The SenseHat() function we renamed to “sight” chooses which LEDs are switched on automatically but in the next part we will be controlling each one manually with our script.

Why not take this time to try out your own code, change the LED text, it's colour and speeds.

For your reference ~ The array uses the RGB Colour Coding system so: “0, 0, 0” is black/off and “255, 255, 255” is white/on. Any numbers between that are achievable, “255, 0, 0” should be a red hue, “150, 0, 0” should be a dimmer shade of red. A combination of “255, 0, 255” appears magenta.

You can read my last post, basic Python coding here:

https://tinyurl.com/yb65cnqd

You can follow me on Twitter at the link below.

https://twitter.com/SASchofield52

Disclaimer: Images are my own, opinions are my own.

Coding, Hollywood movies love to depict coders as wizards of electrickery. They're not wrong, a dark art to many, coding is the back-bone of almost everything we use daily. However, I'm here to tell you anyone can learn the basics of coding. With our lives becoming ever more digital, now is as great a time as any to rip the band-aid and recognise that it is a language like any other.

There is a saying, “Once you understand, you know and once you know, you never forget.”

It is easy to copy-and-paste code, but just like using Google Translate to convey an idea in another language, sometimes you should UNDERSTAND and KNOW what you're saying so there aren't any misunderstandings. In coding a mistake or forgotten line can have odd results.

Don't let that deter you, simpler code is safer code.

As part of my Raspberry Pi (RPi) computing series of articles, I'd like to teach the basics of one coding language – Python. A general purpose, high-level programming language, created by Dutch programmer Guido Van Rossum and first released in 1991. It is one of many programming languages; you may have also heard of “Java”, “C++”, “JavaScript” to name a few. Being general purpose,

Python can be used for many tasks whilst the term 'High-level' just means the wording is often human-readable with the machine aspects being removed.

You can use Python on any computer but as this is a Raspberry Pi series, I will be describing the specifics of use on Raspbian OS.

If you'd like to know more about RPi computers, please view the first part of this series here:

https://tinyurl.com/yboutodt

This tutorial will require your Raspberry Pi being setup already. If you haven't used your RPi until today you may want to read the second part of this series, a setup walk-through:

https://tinyurl.com/y7pb39zn

The Journey Begins Here...

We'll begin this tutorial at the desktop of your RPi, open the application menu by clicking the Raspberry icon in the top left, then “Programming”, before clicking on “Thonny Python IDE”.

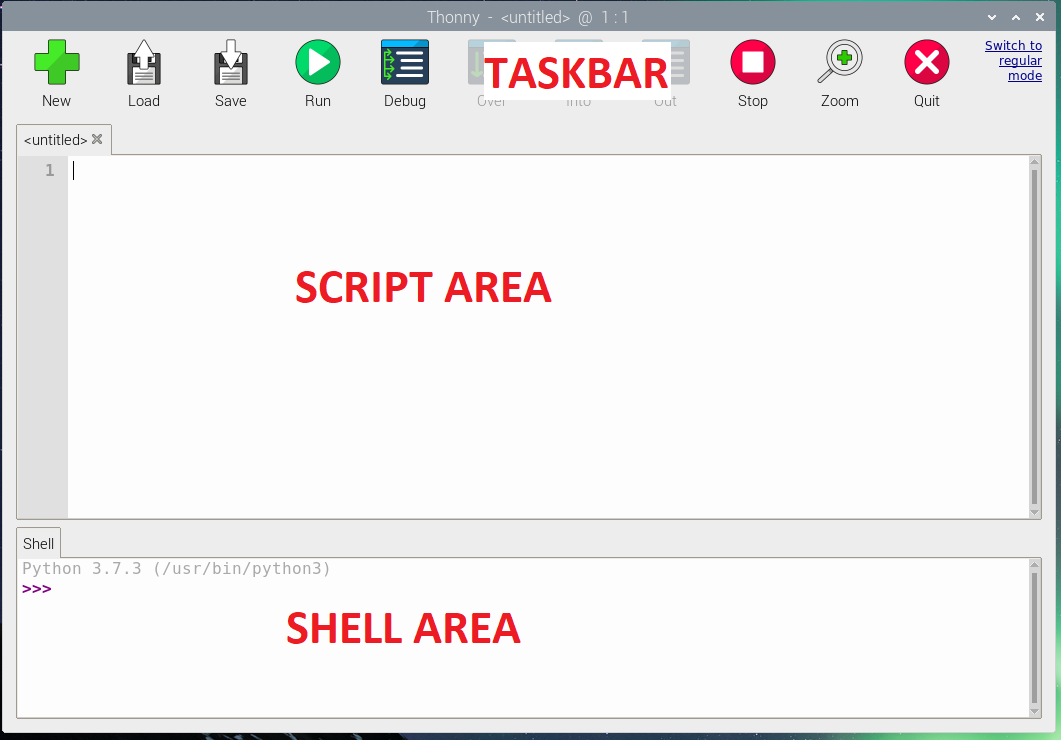
Once opened you'll find a toolbar at the top, the Script Area below this and at the bottom is the “Shell” area. You may also have a box to the right. This box is usually for “Variables” which will be explained later.

The 'Script Area' is where you will be writing your code (or Script), as you type you'll notice to the left that it keeps count of how many lines have been wrote.

The 'Shell Area' is where you can input instructions when your script is running. It will also show you the progress of the script, whether it has errors.

Let's begin with what has now become a tradition in coding, “Hello World”. It is important to remember that Python is case-sensitive, use of capital and lowercase letters is important so please pay special attention to that.

Hello World!

In the Script Area, please type the following: print("Hello World")

You will notice the word 'print' will appear in purple. In Thonny this represents a “Function”, a piece of code that performs a task. Functions should always appear with parenthesis “( )” after them. Inside the parenthesis we include information, which we call an “Argument”, in Thonny these are green. When put together in our first line of code, our function and argument will tell your RPi to show “Hello World!”.

After writing your script: Go to the taskbar –> Click Save –> A pop-up will appear, to the right click the icon to add a new folder –> I'll name mine “PythonScript”.

It is good practice to avoid spaces when naming folders or files. Inside your new folder –> click the “Name” box and give your script a name, mine will be “HelloWorld.py”. As Raspbian is a Linux based OS you MUST tell it what type of file you're saving and what purpose it will serve. This is why we MUST add the suffix “.py” so that your RPi will run your script as a Python program.

The same is true for text docs, which would require the suffix “.txt”.

Once saved you will be returned to Thonny. Click the green “Play” button in the taskbar and watch your script run in the Shell Area.

If your script was correct you will now see “Hello World” displayed.

What if you typed your script incorrectly? Well, if you forgot one or both quotation marks you will see a 'Traceback' in red, showing you where Thonny believes the error is. It will also tell you that this was a 'Syntax Error', or to put it simply, you forgot a special symbol (The quotation marks)

Regardless whether correct or not, the script will still be running, so select the red “Stop” Button in the taskbar. Fix errors if there are any, then save again.

As I mentioned before you can also add instructions to the Shell Area, let's go full Ainsley Harriott and have your RPi print “Why Hello, Jill!”.

In the Shell Area, please type the following: print("Why hello, Jill!")
Then hit the “Enter” button to see the results.

Even more ways to Function,

There are many built-in functions, but you can also create new functions that perform tasks you want when requested by using the 'def' keyword.

Back in your Script area, please type the following:
def new_function():

print("Did I just make a new function?")

By using “def” you are telling the python program that what follows is a custom function. I've named mine “new_function()” but it can be almost anything with some exceptions, like numbers or special characters aren't allowed. You CAN NOT define a function like this “def 1():

A function must include the parenthesis “( )” and when defining this new function we include a colon:”. This colon tells the python program that we are making a block of code to follow. The keen eyed amongst you may have noticed the next line is indented, this is important to note. When creating blocks of code you may need to do add this manually by pressing the “TAB” button on your keyboard or pressing the space-bar four(4) times. This helps indicate which block of code a statement belongs to and will affect how your code behaves.

Right... Back to your new function...

If you have saved this, you can now press the “Play” button. Notice that “Did I just make a new function?” doesn't appear. This is because so far you have defined the function but not requested that it be performed. To do this return to your Script Area, make a new line and type the following: new_function()

Be sure that any indentation on this line is removed so that the python program knows it isn't part of the last block.

Your entire script so far should look like this:

print("Hello World!")

def new_function():

print("Did I just make a new function?")

new function()

Save your script, then press the “Play” button once more. Your Shell Area should now include new text.

Why not take this time to try defining your own functions by having Python print a different sentence or another sentence as well.

Remember to use correct syntax like parenthesis, quotation marks, colons and indentations.

My next post, Python script for Raspberry Pi “Sense Hat” add-on, can be found here:

https://tinyurl.com/y7cmolfr

If you'd like, you can follow me on Twitter at the link below:

https://twitter.com/SASchofield52

Disclaimer: Images are my own, opinions are my own... Except Ainsley Harriott, his greetings and GIFs are all his own. The bloke probably also makes a delicious Spaghetti Bolognaise.

If you've recently purchased your first Raspberry Pi computer and are looking for a guide on setting up, then hopefully this guide will be of use to you. If you've no idea what on Earth I'm talking about then you can read about Raspberry Pi here in my last article, below -

https://tinyurl.com/yboutodt

This will be a step-by-step guide, including where to find software, formatting a MicroSD card, and installation. Unlike a typical off-the-shelf laptop or computer, the Raspberry Pi (RPi) will not “work” right out of the box and will require a bit of finesse. It is all part of the learning experience and the hobby.

So before beginning ensure you have:

  • Access to a computer/ Laptop with internet connection (For this I'll be using a Windows 10 PC)
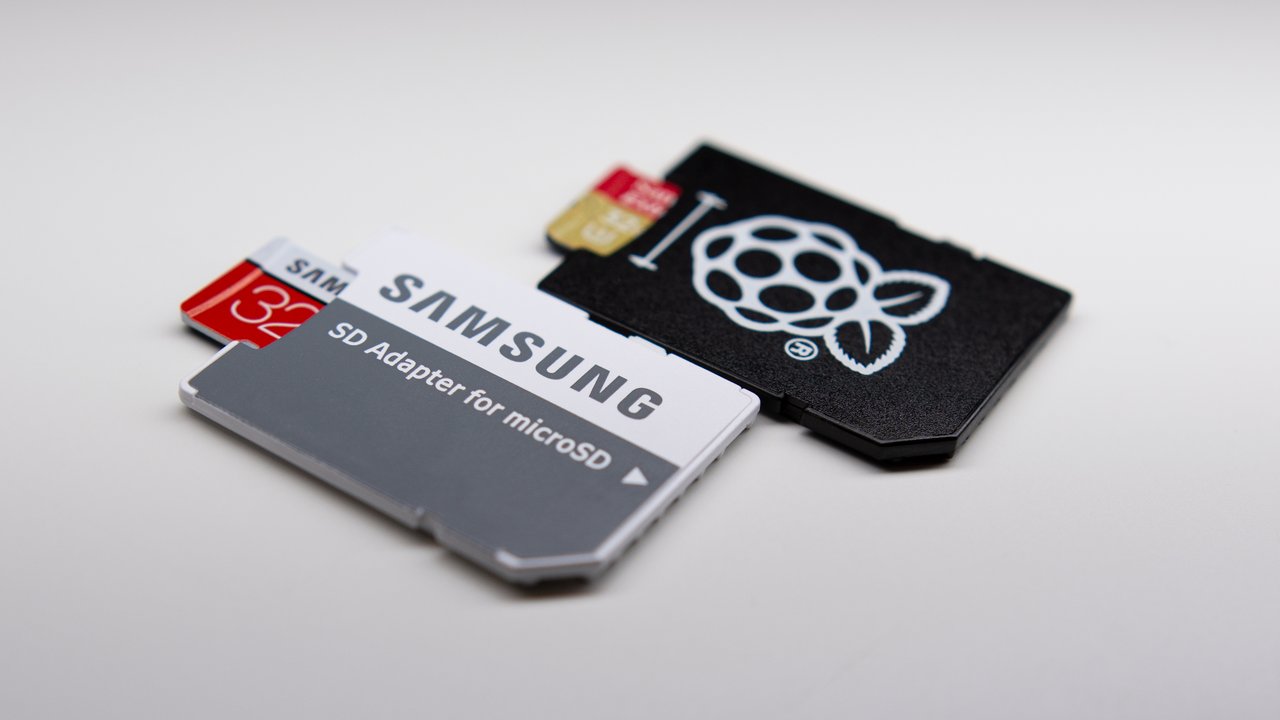
  • A Micro SD card, recommended minimum 16 GB memory
  • An adapter if the computer doesn't have a Micro SD port

Download Raspbian OS

Using a computer, navigate to https://raspberrypi.org/downloads/ where you'll be greeted by this view.

You can see that there are three 'imagers' depending on your computer's operating system and two options below that, 'Raspbian' and 'NOOBS'.

  • Raspbian is a free, lightweight operating system for Raspberry Pi that is based on Debian (Buster) Linux.

    NOOBS, meaning 'New Out Of the Box Software, has Raspbian also and is just meant to make installation simpler.

As this may be your first time installing an operating system for a RPi, I'll walk-through NOOBS. Hover over and click the NOOBS button and on the next webpage you will find more option.

Again, I'll make the assumption that you won't have a network connection immediately for your RPi. Please click “Download ZIP” for the NOOBS install. The lite version requires internet access because Raspbian isn't present, so avoid this for now.

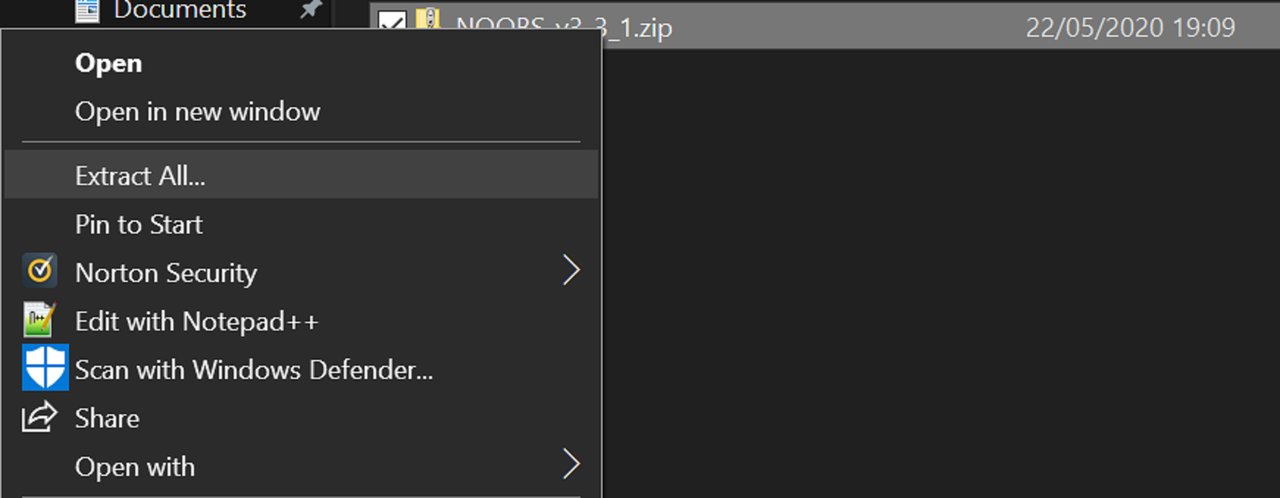
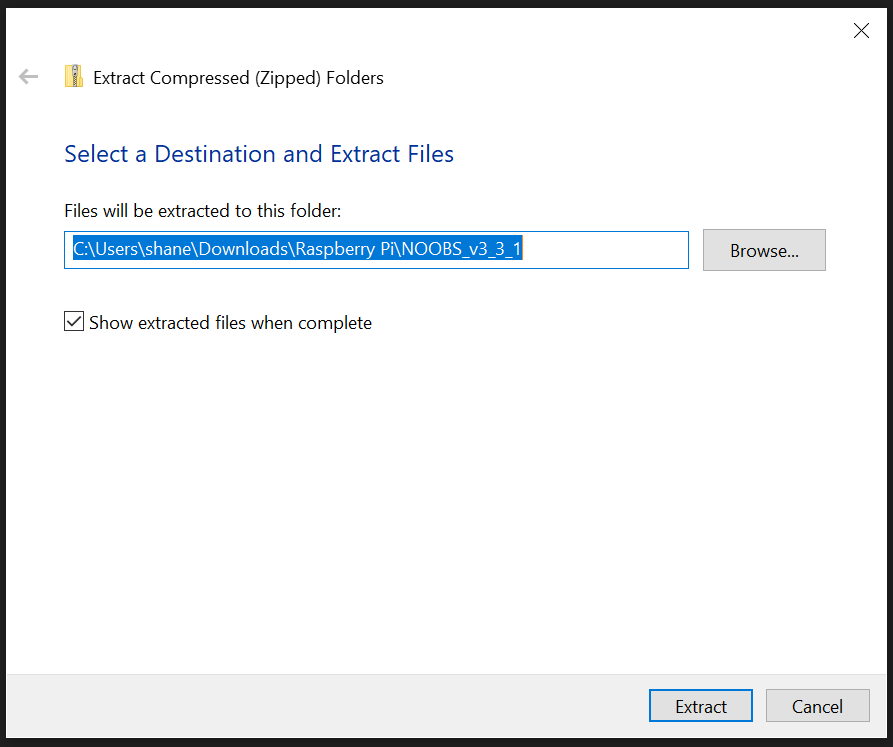
Find the downloaded ZIP folder and extract the data by right-clicking and selecting “Extract All...”, then select an appropriate location to keep the file on your computer. Do not extract to the MicroSD card.

Open the newly created folder.

Format the Memory Card

At this point I'you should format your Micro SD card to 'FAT32', the RPi won't recognise exFAT and reformatting will hopefully prevent any corruption of file data. You can download the official SD card formatter directly from the SD Association's website: https://www.sdcard.org/downloads/formatter/index.html

You will be prompted about the risk of deleting any data stored on the MicroSD card. Please be sure to check that important data has already been moved to a different storage before formatting.

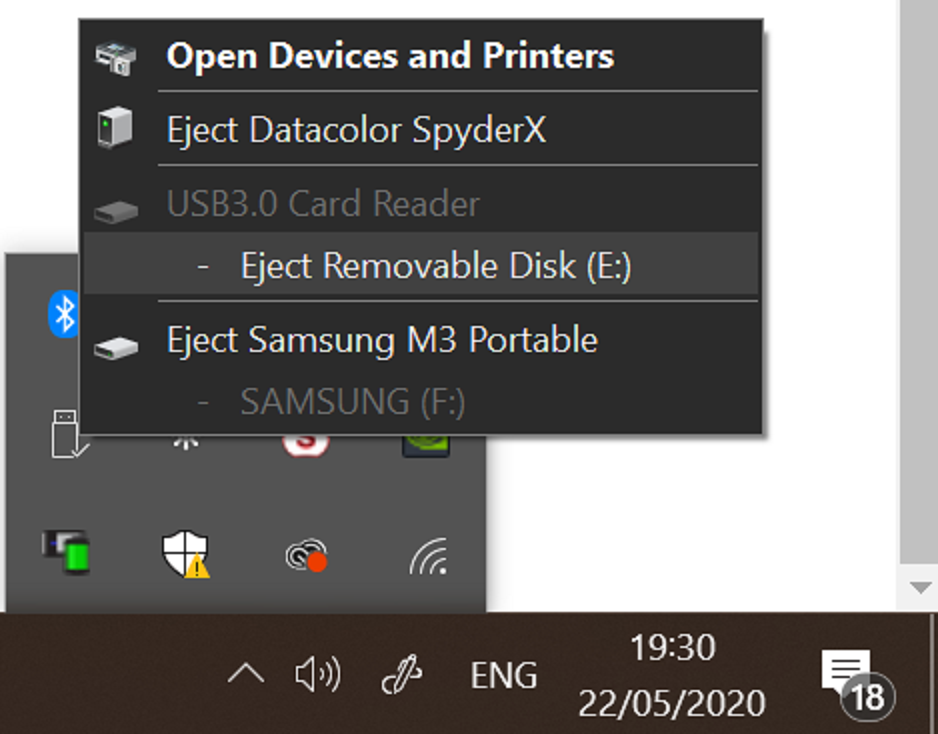
Once formatted, you should safely eject, physically remove it from the port and then re-insert your MicroSD card. Safe eject is found in the taskbar's system tray, on the bottom right of your screen.

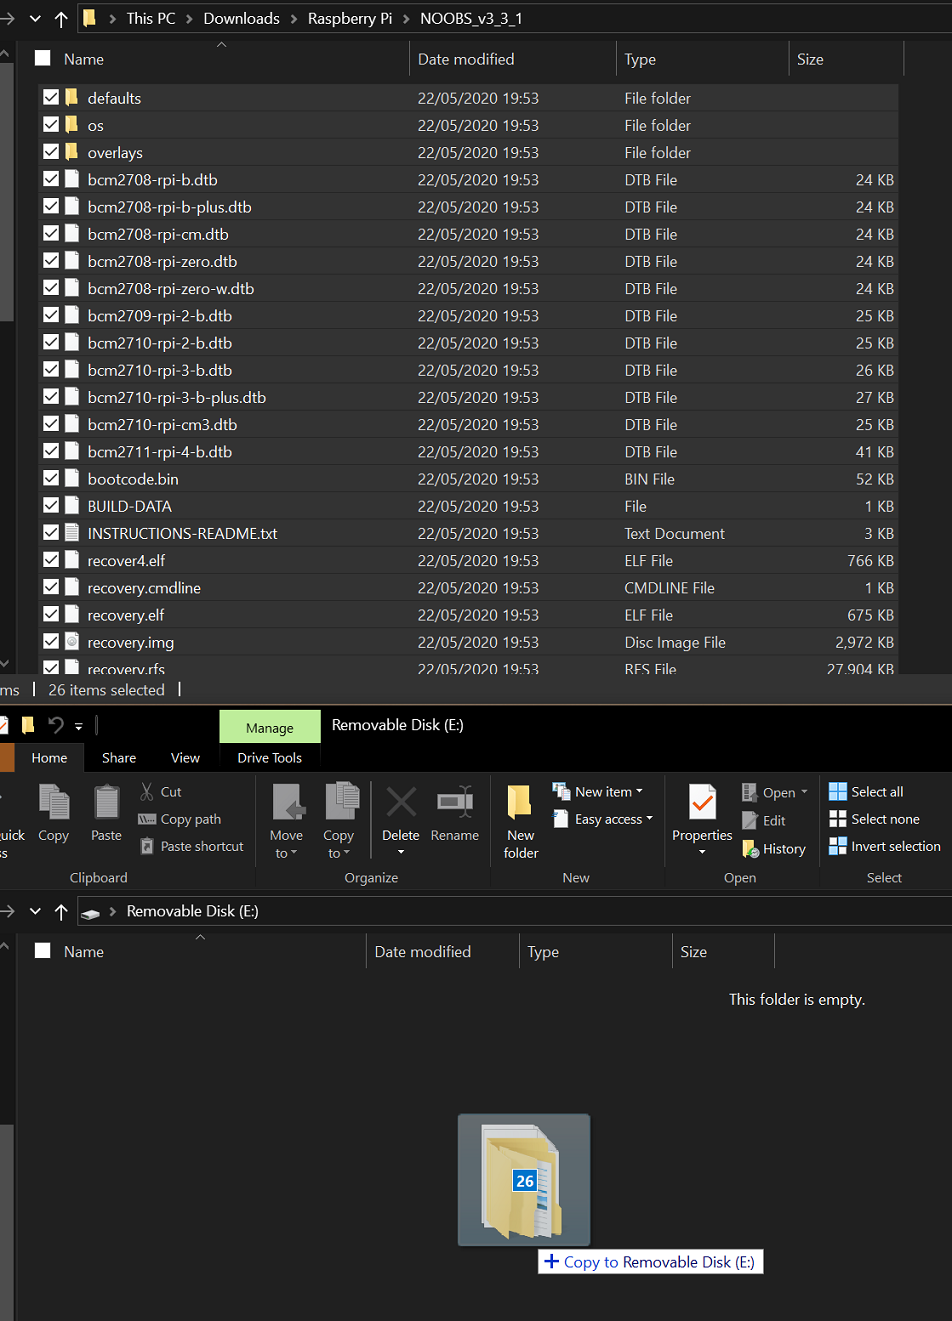
Once re-inserted, confirm the MicroSD card is empty.

Remember the recently extracted folder? With it open, select all items then drag-and-drop them into your MicroSD folder.

Close both folders and safely eject your MicroSD card from your computer.

Preparing Your Raspberry Pi

For Raspberry Pi 4:

Begin with all cables DISCONNECTED,

Insert your MicroSD card, into connector

Connect a Micro-HDMI for the display

(Note: RPi4 can use two displays)

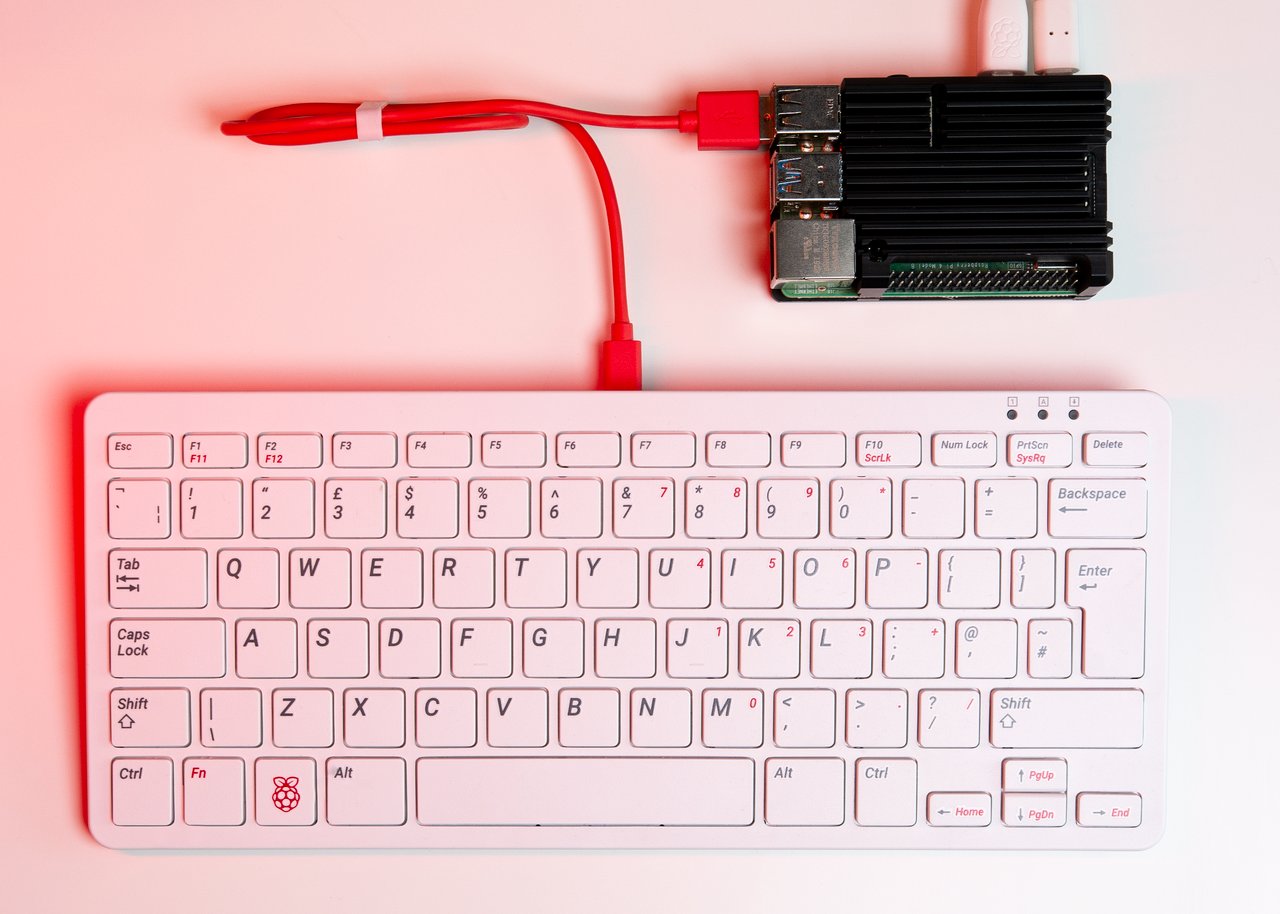
Connect a keyboard to a USB port

Connect a micro USB-C 5.0V >2A supply cable

For Raspberry Pi 3:

Begin with all cables DISCONNECTED,

Insert your MicroSD card, into connector

Connect a Mini-HDMI for the display

Connect a keyboard to a USB port

Connect a micro USB-B 5.0V >1A supply cable

For Raspberry Pi Zero:

Begin with all cables DISCONNECTED,

Insert your MicroSD card, into connector

Connect a mini-HDMI for the display

CARE POINT: Connect a keyboard using adapter, ensure this goes in the micro USB-B port labelled “USB”, it is the port closed to the Mini-HDMI port.

CARE POINT: Connect a micro USB-B 5.0V >1A supply cable to the port labelled “PWR IN”.

(Note: Do NOT unplug keyboard once powered on, the Pi Zero doesn't like it, power will be disrupted.)

Software Installation

The Raspberry Pi should now power-on, you should see some flickering LED's and then see a splash screen for only a few seconds, this should look like an RGB ('Rainbow') square.

Next should be a new screen, if this doesn't appear see “Troubleshooting” below.

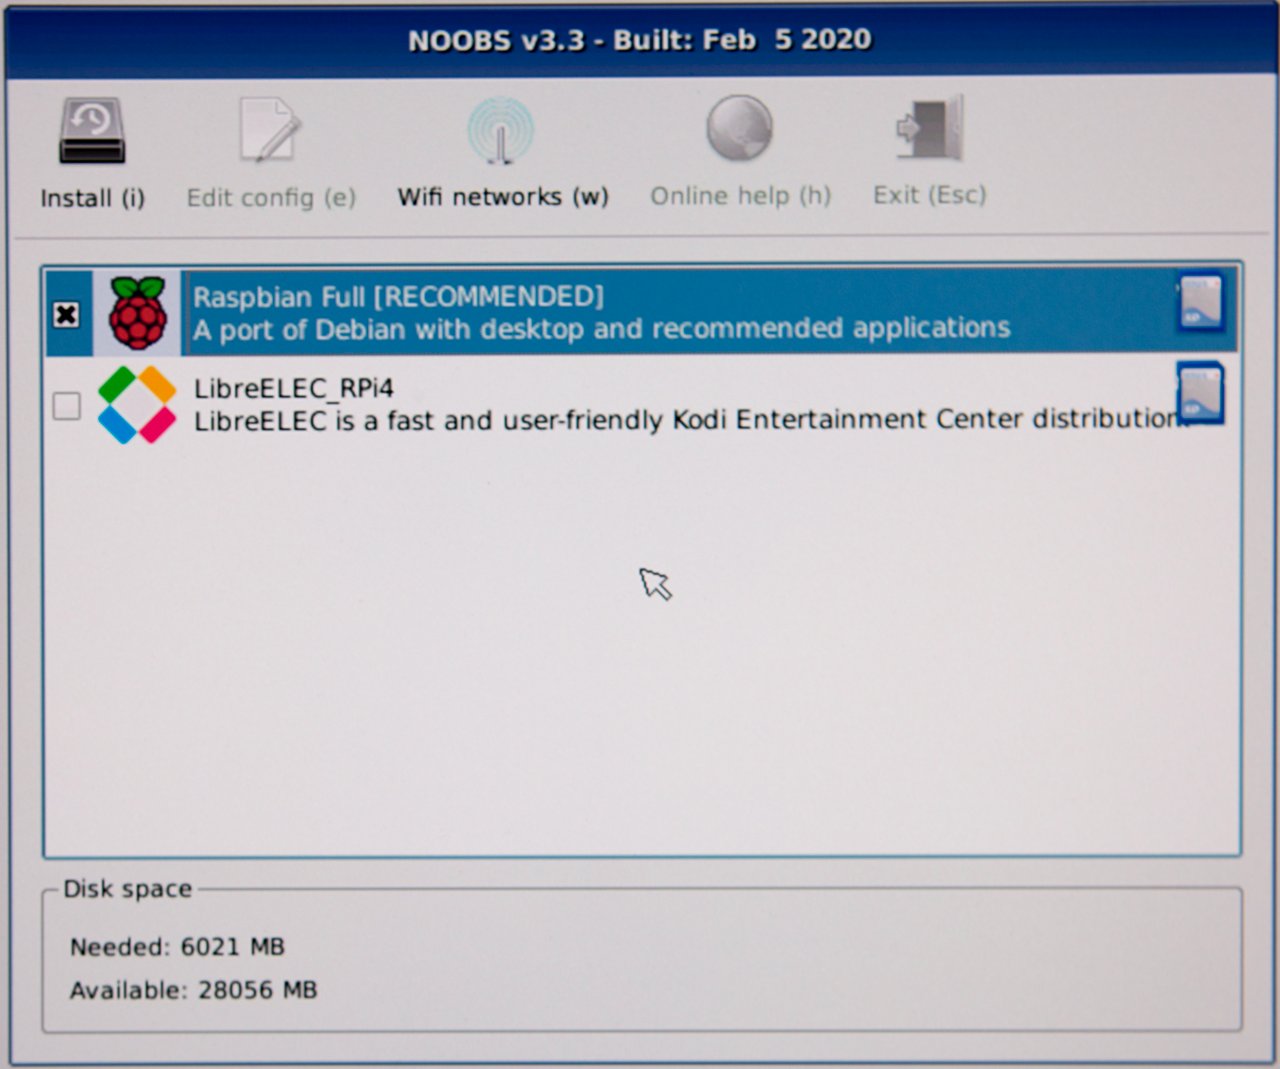
Using directional buttons, or mouse, select “Raspbian Full” and then press the 'i' letter button on your keyboard to begin installation.

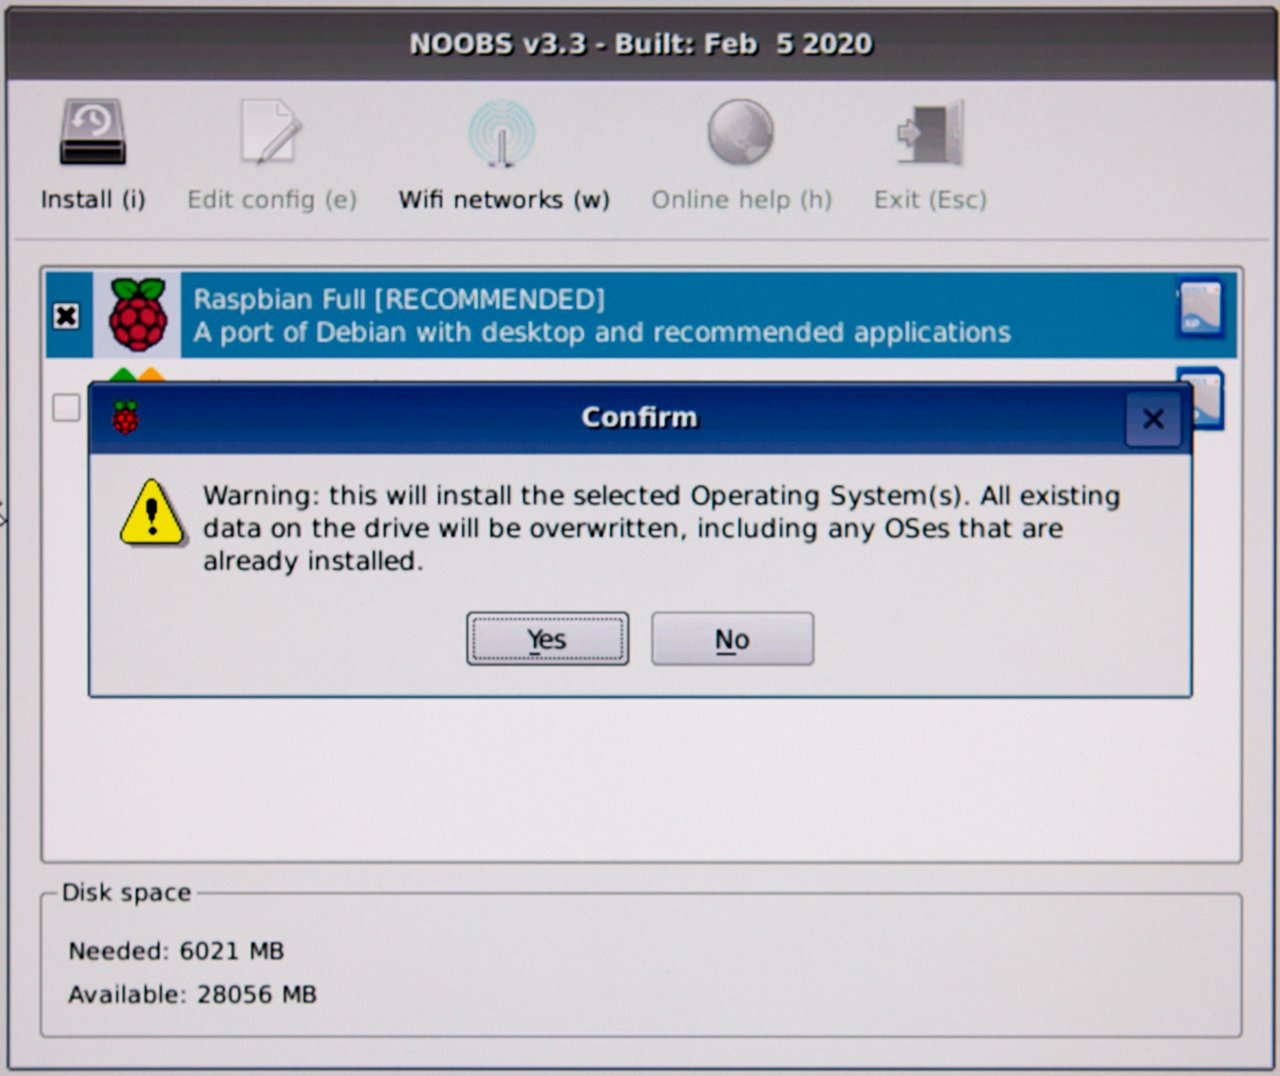
A confirmation warning will appear, select “Yes” then press 'Enter'.

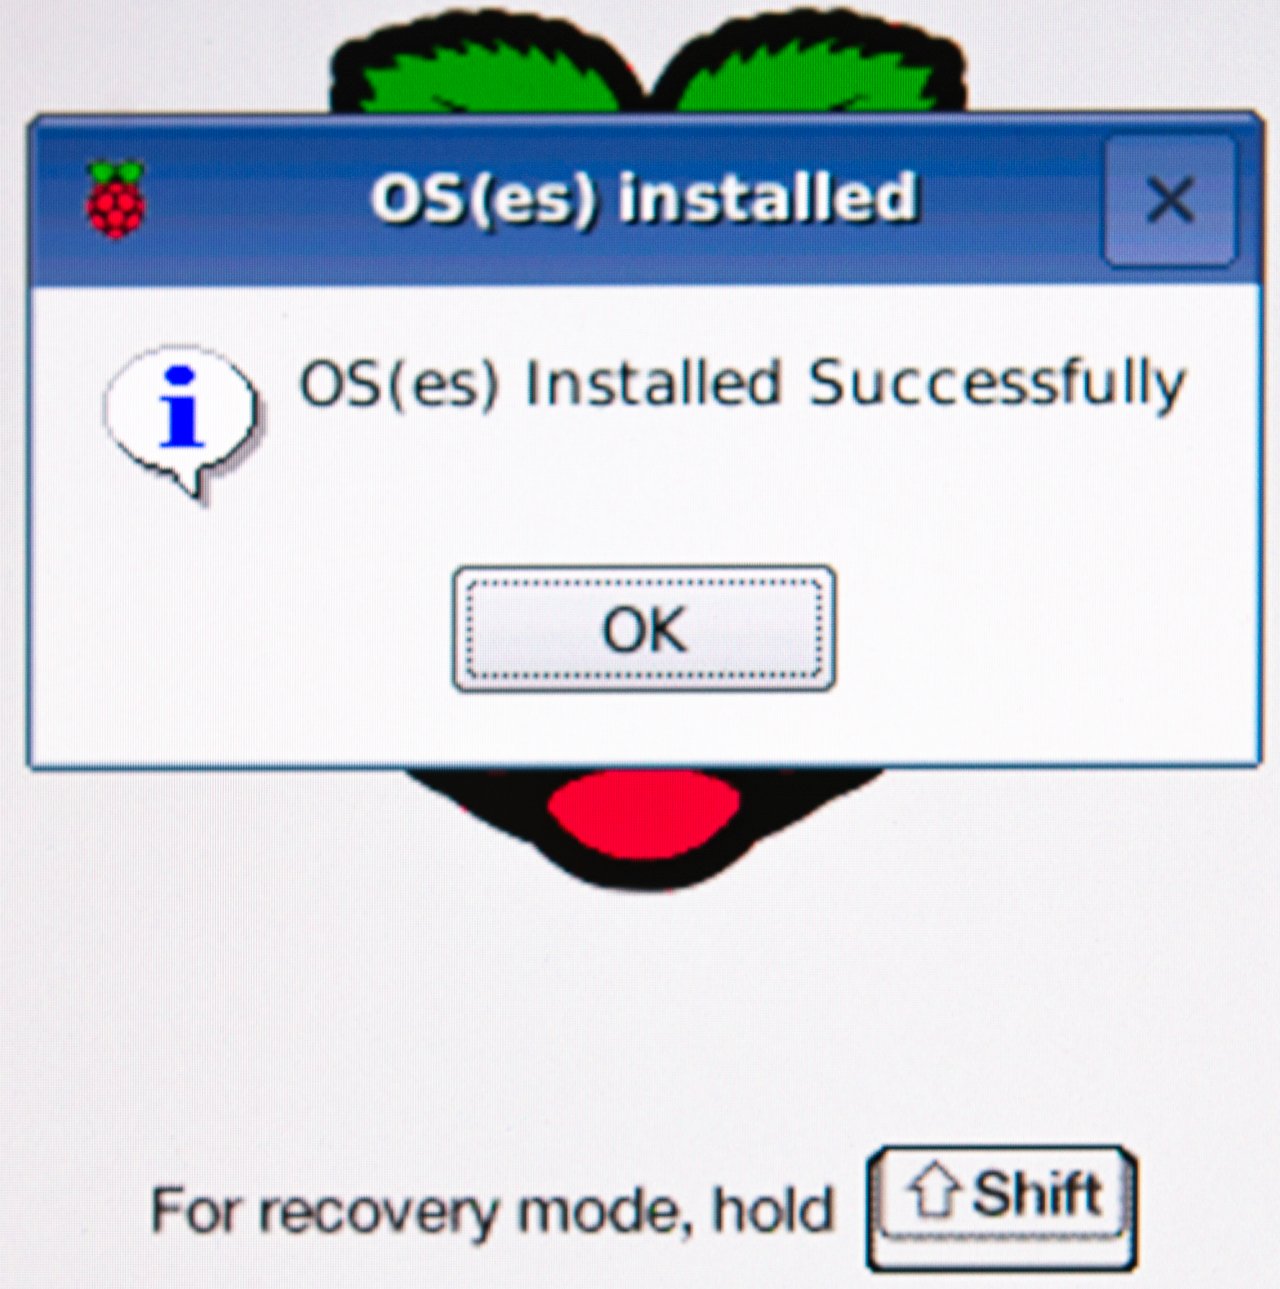
After installation has completed press 'Enter'.

The RPi will now finish its booting process and bring you to a very familiar looking layout known as a GUI (“Gooey”) with a welcome message.

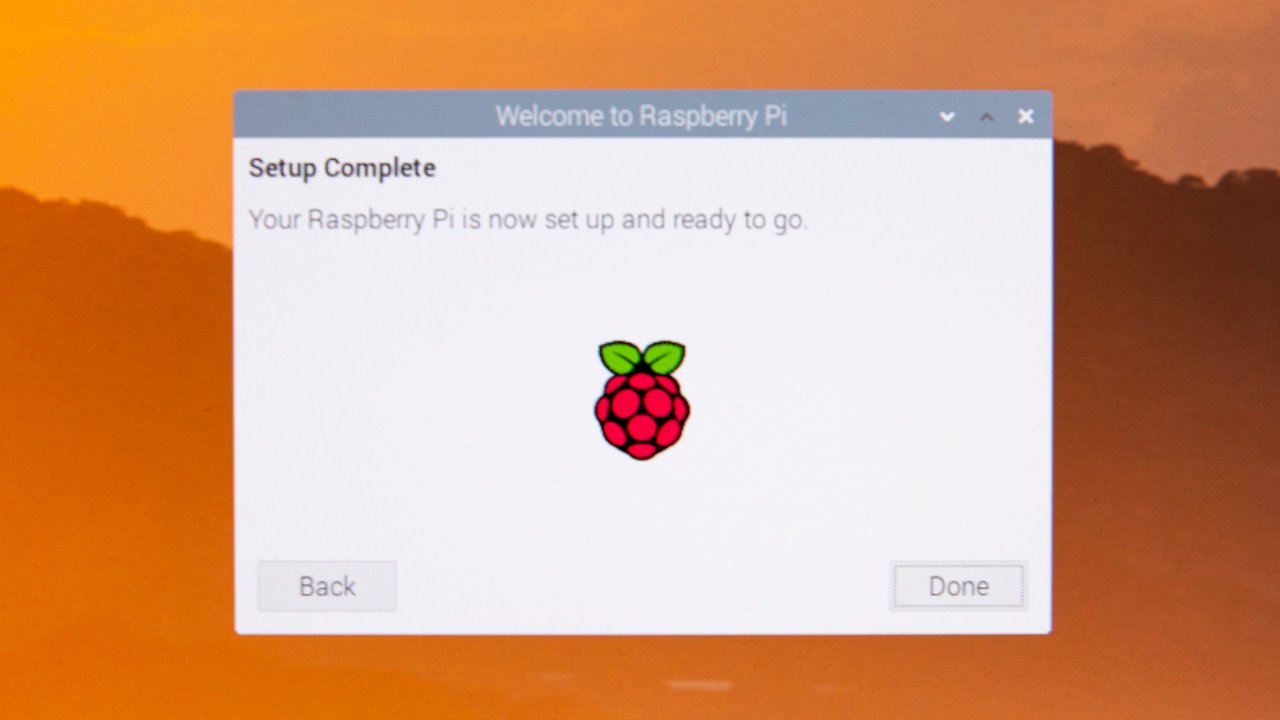
I'll briefly describe this process but it is self explanatory; select “Next”; select your country and language preferences, using 'Tab' button to change selection and then press 'Next'; create a security password, the default settings are User – “Pi” Password – “Raspberry”. If you are planning to connect to the internet CHANGE your password; the next pop-up is screen set-up; after that is Wi-Fi Network set-up, you can “Skip” this if you wish or find a network to connect to; the final pop-up is software updates. Assuming you followed the above instructions, you'll have the latest version already and can “Skip” this part.

Freedom to Explore

Once the Welcome Wizard is complete, you are free to explore your new Raspberry Pi with Raspbian OS. Having a keyboard & mouse combination will help, however, if you only have a keyboard the GUI is still navigable.

Depending on the keyboard you use, pressing the Win-Key (Windows), or the Raspberry Logo button on the RPi official keyboard will open the application menu. Using the directional buttons, you can navigate through its apps.

After exploring the many apps, you'll be wanting to SHUTDOWN.

You can find this option at the bottom of the application menu. As the RPi shuts down, its LED's will flicker, your monitor will go dark and disconnect. Your RPi's red LED will remain steady on – This is considered a safe point to disconnect its power supply.

*... and that's it.* Hopefully you had no issues but if you did, I have covered a few common symptoms and how to fix them below in “Troubleshooting”.

My next post is a taster of how to use Python coding on your RPi.

Troubleshooting

If the rainbow splash screen doesn't go away, the OS image hasn't booted correctly, the saved files were likely corrupted. You will need to unplug the power supply and remove the MicroSD card. You will then need to follow the whole software install again, this is a notoriously troublesome part of the process and may take multiple attempts.

Insert MicroSD into your network-accessible computer –> Delete data on MicroSD –> Use SD formatter –> Safely eject and physically remove MicroSD from port –> Reinsert MicroSD –> Copy data from inside the NOOBS extracted folder –> Safely eject and remove MicroSD.

Please attempt to boot up the RPi once more, ensuring the MicroSD is inserted before adding the power supply.

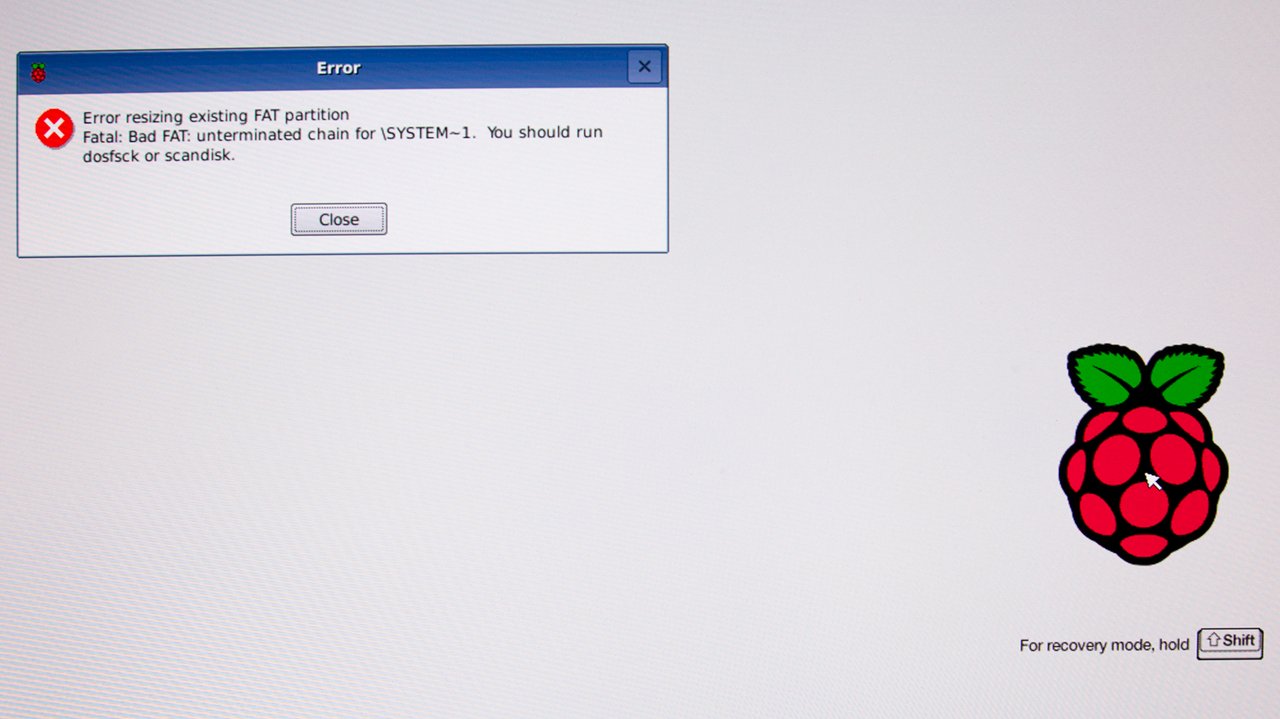
If the OS image boots correctly but when you arrive at a new screen, the RPi attempts to read the MicroSD then you may get a warning here, “Error resizing existing FAT partition”, this would suggest that the SD Formatter hasn't correctly sized your card.

On Windows PCs you can try this: Put MicroSD card back into the computer. In file explorer, navigate to the removable disk, in my case Removable Disk(E).

Right click –> Properties –> Tools –> Error checking –> Check.

Once completed, safely eject, insert into your RPi and it should behave itself.

Notes:

I'd strongly advise avoiding alternatives to the official SD Formatter suggested here, I found although others were more effective my anti-malware programs all freaked out due to Trojan coding being hidden in the download wizards.

It is also advisable that any device you use is updated whenever possible, as software creators find vulnerabilities constantly so they release patches to protect you and your personal information.

You can read my next post, basic Python coding here:

https://tinyurl.com/yb65cnqd

You can follow me on Twitter at the link below.

https://twitter.com/SASchofield52

Disclaimer: Images are my own, opinions are my own.

As with all great things that come in little packages – in the world of home-brew electrical projects, the Raspberry Pi, a small computer about the size of a credit card, has proven to be a great companion. Built for use in schools as a teaching aid in computer science, it can be used for fun tasks like creating games or sending coded messages to a friend, you can even build social media bots or better yet control household gadgets.

Being so simple and very cheap to buy, it has become a favourite for hobbyists. As many as 30 million+ units have been sold globally, they've even appeared on the International Space Station (I.S.S) as part of the European Astro Pi Challenge, where children can place code on these devices.

Hopefully I've piqued your interest so far but you may be thinking, “So what, I can code with this thing, which is all well and good but how is that any different to a laptop?”

Easy. The Raspberry Pi (RPi) has a collection of electrical pins along its board and these can be connected to all manner of gizmos, buzzers, switches, thermometers, motors... They are teeny tiny too, you can squeeze them into nooks around the home or office to control lights or document goings on (With consent of course)... You can attach camera lenses... Stack them to make nested web servers... or you could just browse the internet too I suppose.

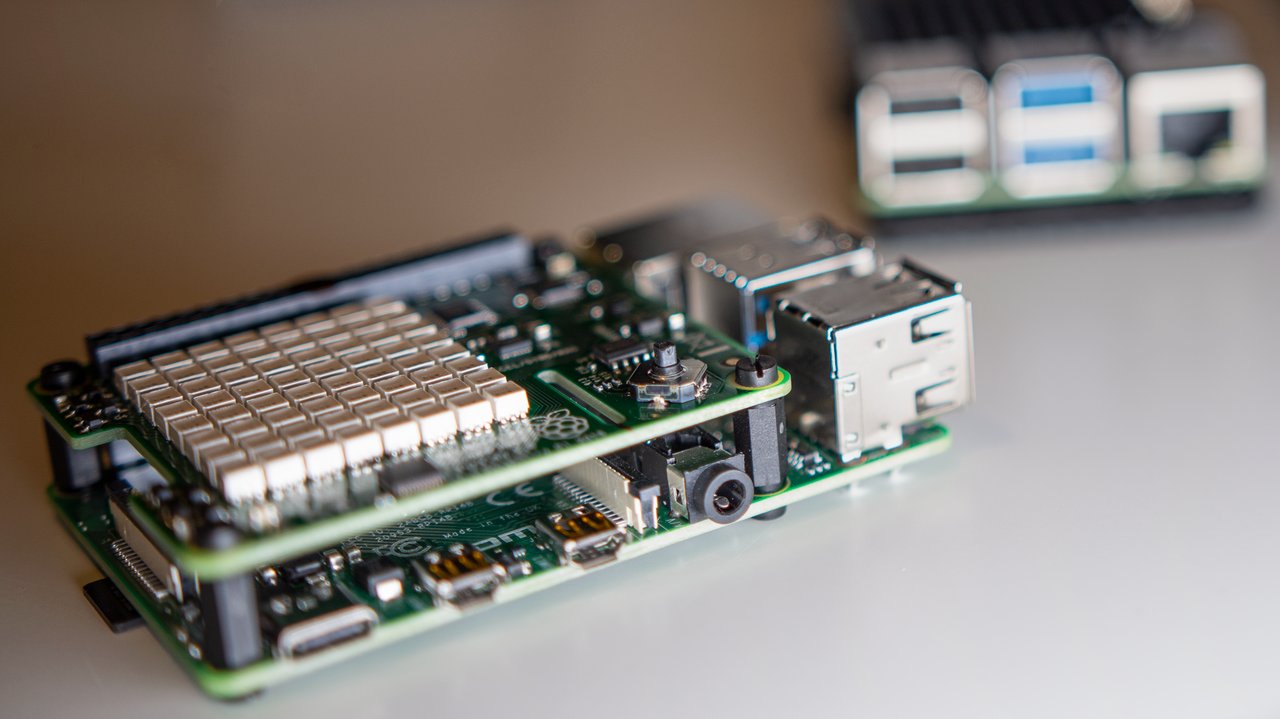
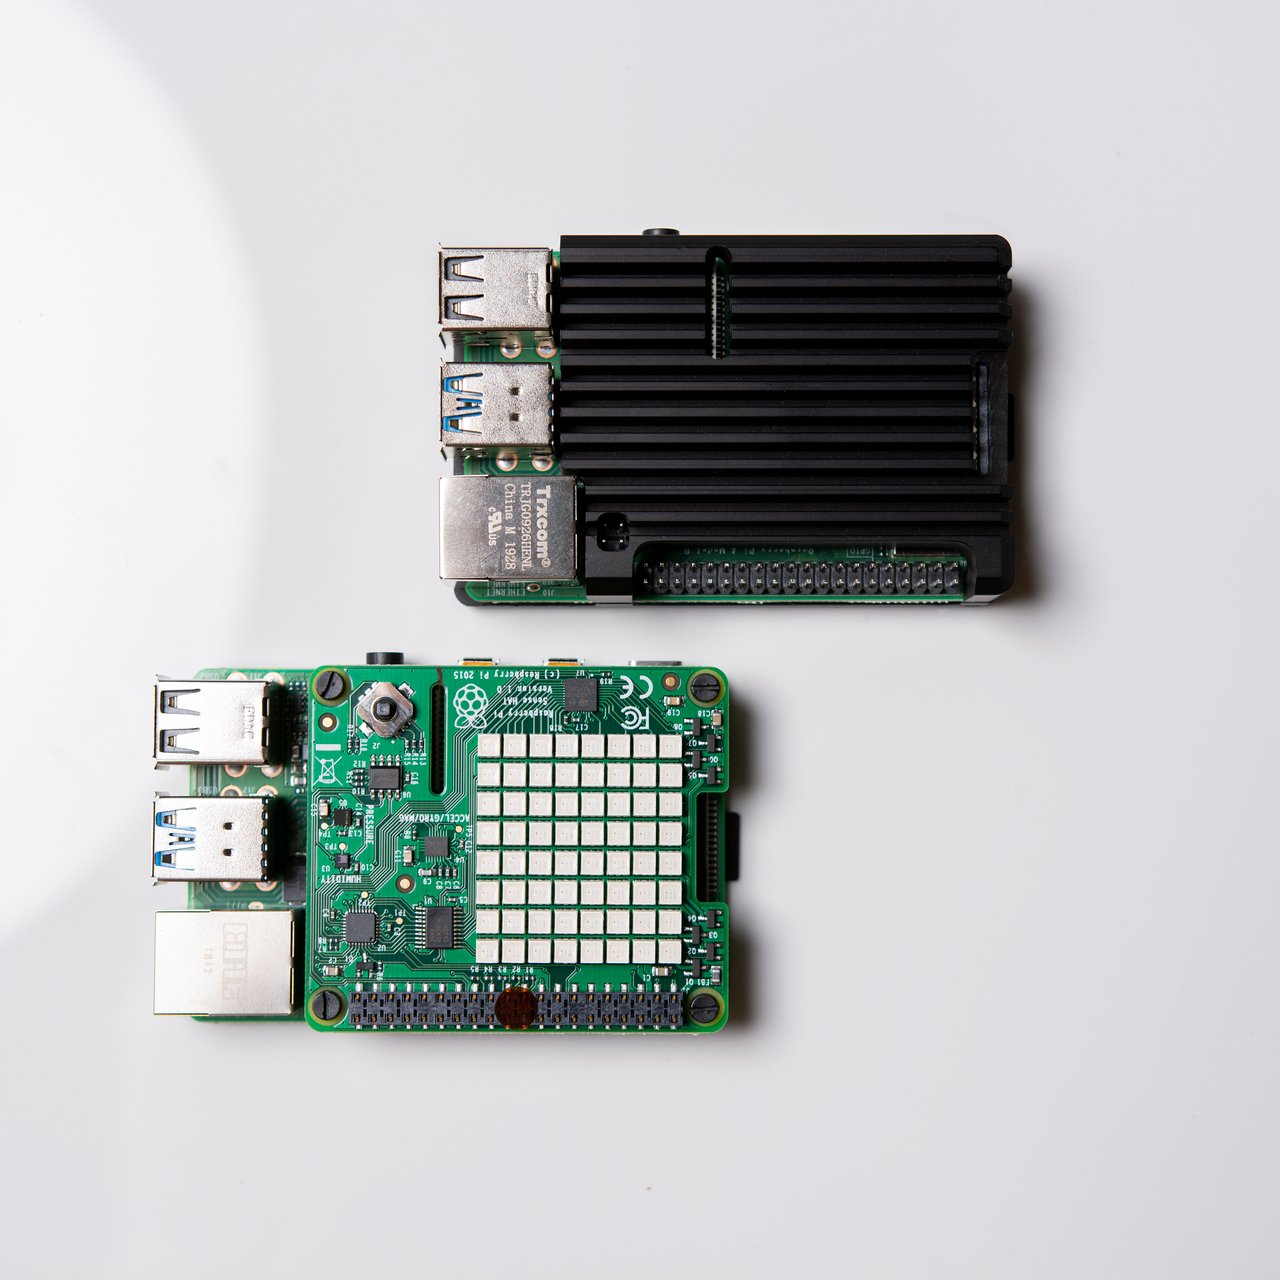
Raspberry Pi computers are easily customisable and stackable. In the picture above two fourth generation RPi (RPi4) are shown. The top has a passive cooling case with fins, the bottom has a “Sense Hat” board bolted on which adds 64 RGB programmable LED's, a joystick and a variety of sensors.

You might be a little daunted by all this, coding sounds scary at first but don't be, there is plenty of information and educational videos available online to help you get started. There's even a free scaled-down version of Minecraft just for the RPi where you can play as normal, or change the game with code.

If you want to find out what all the fuss is about, you are in luck because they're very cheap,. You can buy a RPi Zero for less than £10. With a new Raspberry Pi, the RPi4, costing around £35. (Not including other accessories)

I'd encourage anyone to give coding a try and the Raspberry Pi has made it more accessible than ever. Below will be some useful links. In my next article I discuss setting up and running your first Raspberry Pi.

Raspberry Pi Foundationhttps://www.raspberrypi.org/

A charity formed in 2009 to encourage education in computing, they quickly realised the opportunity for a small and very basic computer to allow this as cheaply as possible. 2012 the first RPi was sold to the general public.

Minecraft Pi Editionhttps://www.minecraft.net/en-us/edition/pi/

The official Minecraft website, where you should be able to download the game safely and for free. You can download elsewhere but please be mindful when allowing children internet access.

MagPi Magazinehttps://magpi.raspberrypi.org/

Yes, the Raspberry Pi community has access to a magazine to keep them up-to date with news. It is digital and can be found in the app-store.

The next article in this series – How to set-up your Raspberry Pi

https://tinyurl.com/y7pb39zn

You can follow me on Twitter at the link below.

https://twitter.com/SASchofield52

Disclaimer: Images are my own. Opinions are my own.

In an earlier Coil blog, I visited the XSongs music sharing platform, to trial its front-end Beta & decided to document my experience as a first-time user. This included a step-by-step walk through. I was pleasantly surprised by the platform but had a few bugbears. You can find the blog here:

https://tinyurl.com/w3n73fr

Craig DeWitt, the creator of this platform, had read my blog that day & has addressed some of them already. I'd quite like to use this follow-up, “XSongs: Revisited”, to document updates to the Beta as they appear.

Changes made:-

  • Songs purchased using the Payburner wallet are now downloadable. During my first visit to XSongs, I used two methods to purchase a song & found I was unable to download to a device after using Payburner. Craig has addressed this in “My Music Library”, now any songs you own can be saved.

    With the new addition of a download button.

  • Speaking of Payburner, there is now a payment notification. After purchasing a song, there wasn't a notification or clear instruction as to what happened. Craig has also addressed this too.

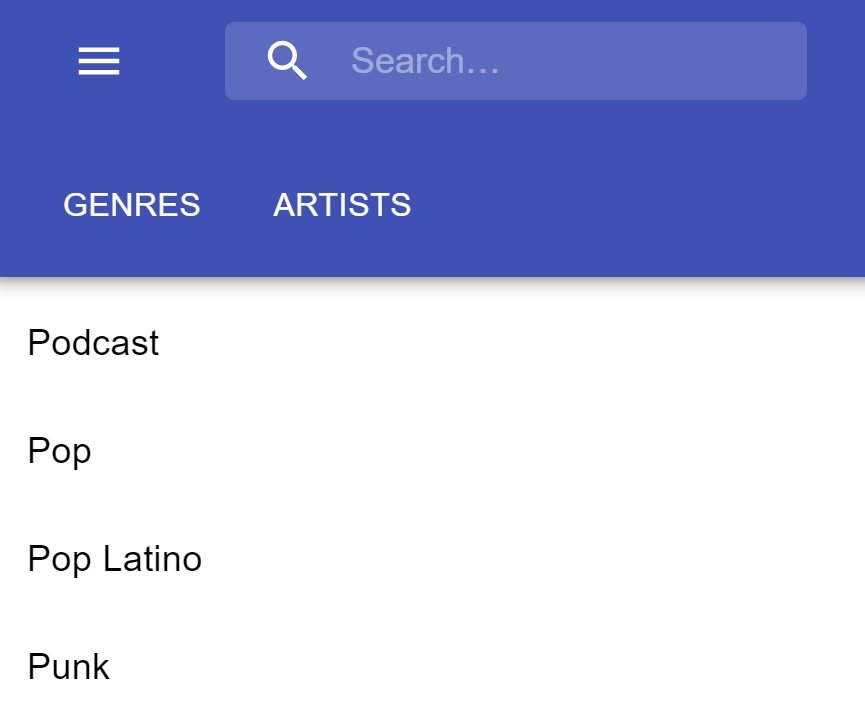
  • The addition of genre search now allows you to find musicians creating the sound you're most fond of. Added 07-Jan-2020.
  • Larger files can be uploaded too, allowing Podcast authors to add their content for download.

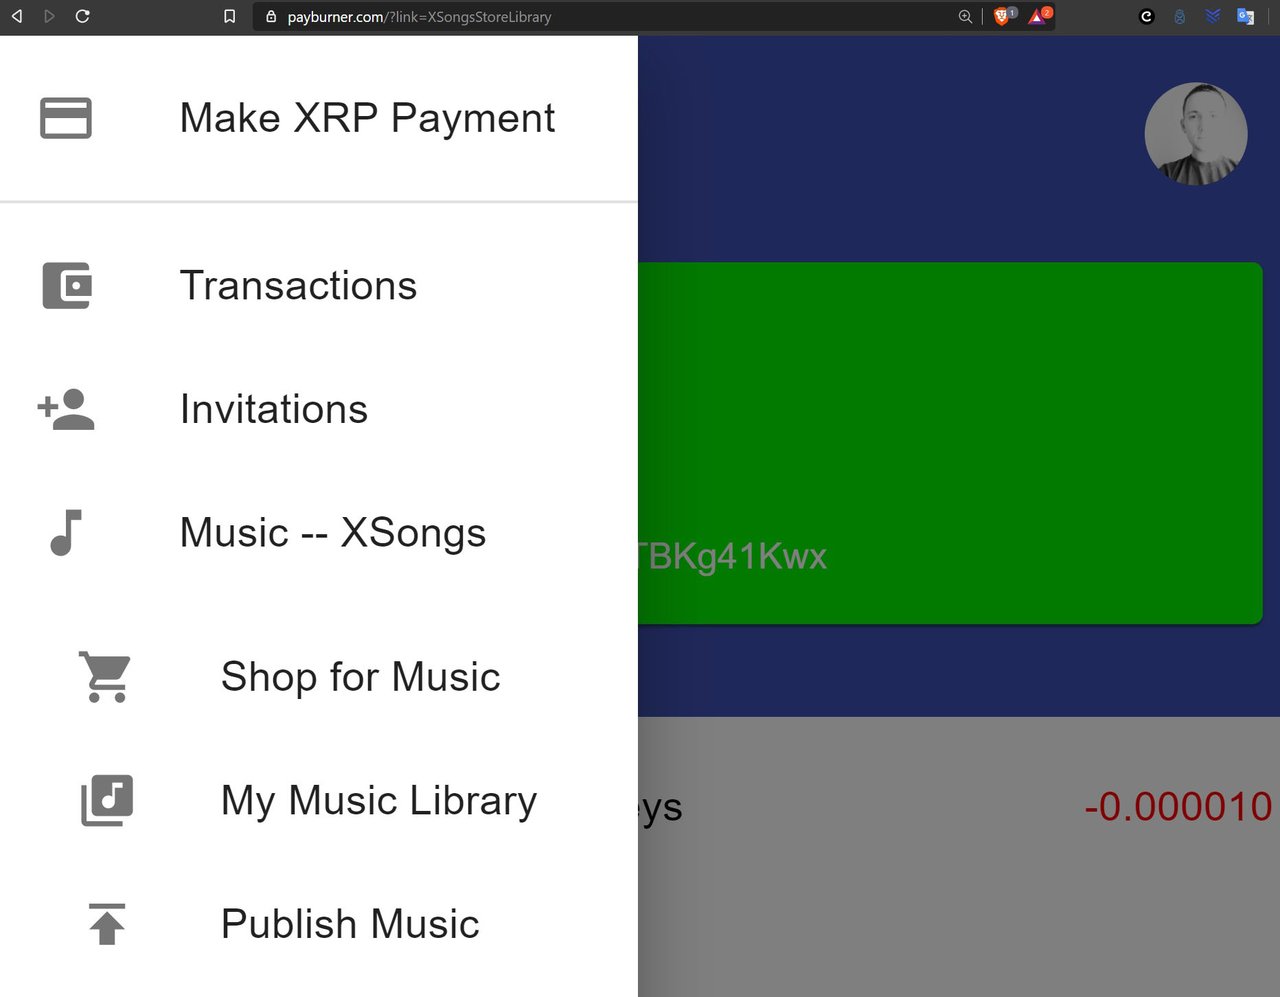
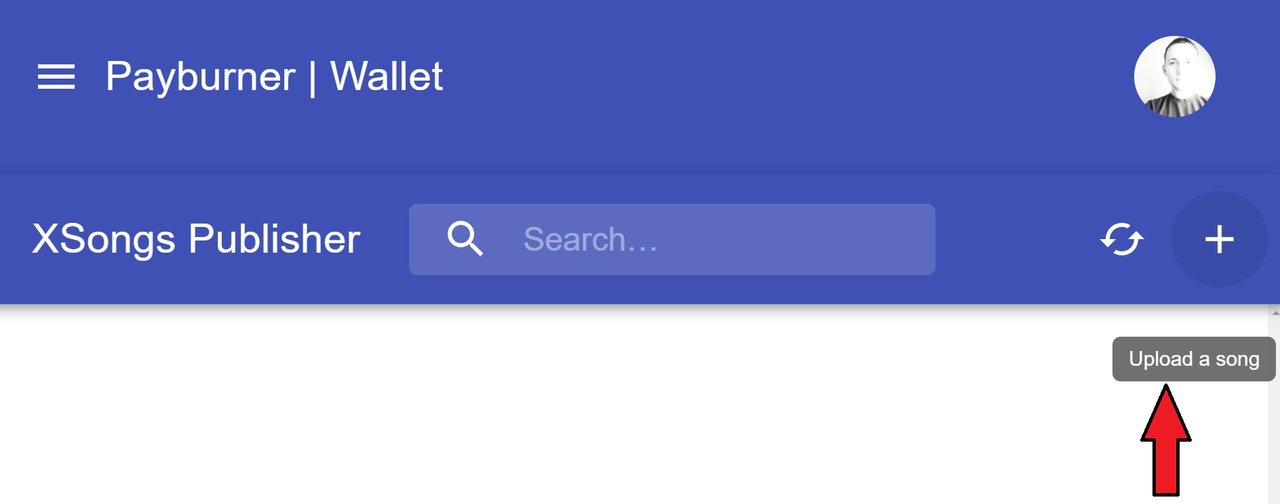
  • With the Payburner update, new features have been added directly into its website. Like a drop down menu with access to XSongs features. You can even find new songs without the need to change sites by clicking “Shop for Music”. Users of Payburner are also able to upload their songs using the “Publish Music” link and then selecting the “+” button to the right-hand side. All available on the Payburner web application.

  • As an aside, Payburner's web application locally hosts your private key (That is to say, your XRP wallet is safely stored on your device) and allows you the ability to send payments. In the drop down menu select “Make XRP Payment” and then add details in the pop-up box. You will need to know the recipient's 'Destination Tag' if they want money sent to an exchange wallet but this isn't needed if the recipient has a Payburner account too.

THIS IS A WALK THROUGH OF THE XSongs WEBSITE

Recently news broke of a personal project by Craig DeWitt, Director of Product at Ripple. This project is a service he calls XSongs that allows music fans to buy & sell songs. A musician is expected to receive 100% of revenue from sales of their songs.

XSongs is currently in Beta but has seen plenty of interest from musicians within the digital-asset community. The front-end site is now available for those wishing to listen to these musicians, they are currently paid with the digital-asset XRP. It is important to remain realistic here as we know this isn't production ready. It won't be amazing out the gate.

Beginning this article, I have not used the platform & wanted to experience the necessary steps required to download a music-track on XSongs as it sits in Beta now. I take you through these steps here.

First note is that this is still very much an XRP-centric project. It will be easy to understand if you've been in the cryptocurrency market for a while but may be confusing if you're here for the music. I'll try my best.

-——

Today, the front-end of https://www.xsongs.store/store-app/ looks like so:

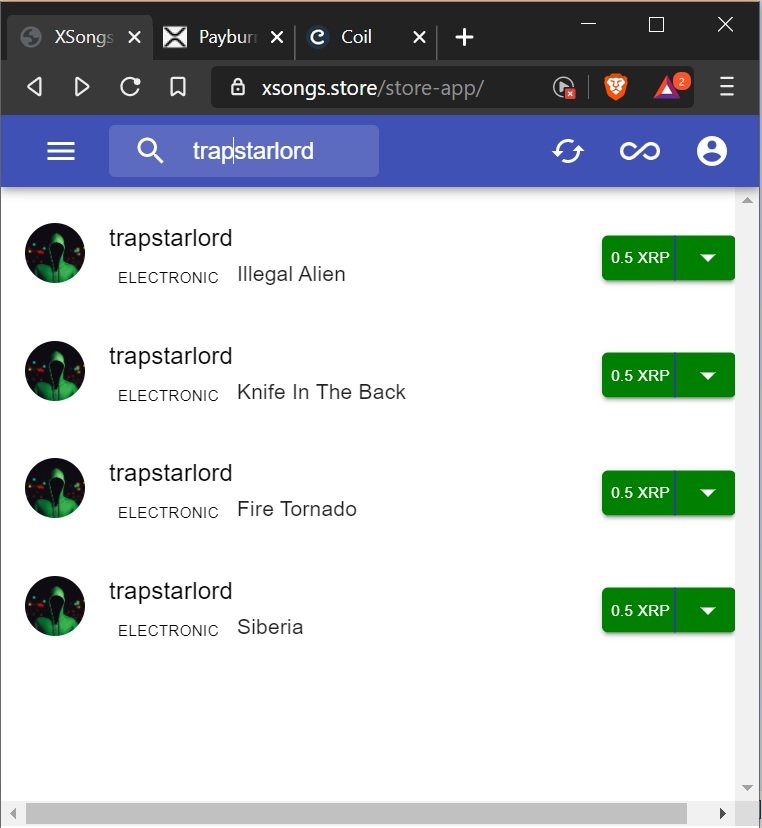
To the left we see musicians' avatars, their username & below that the genre of song alongside its name. To hear a 30 second snippet of each song simply click on the musician's avatar:

To the right we see the price in XRP (Valued at $0.195 today) for downloading a song and a heart, so you can let people know how much you love it!

Scrolling through Twitter, I find @trapstarlord has uploaded songs to the platform and with a quick search on the XSongs site we find his profile with four songs available.

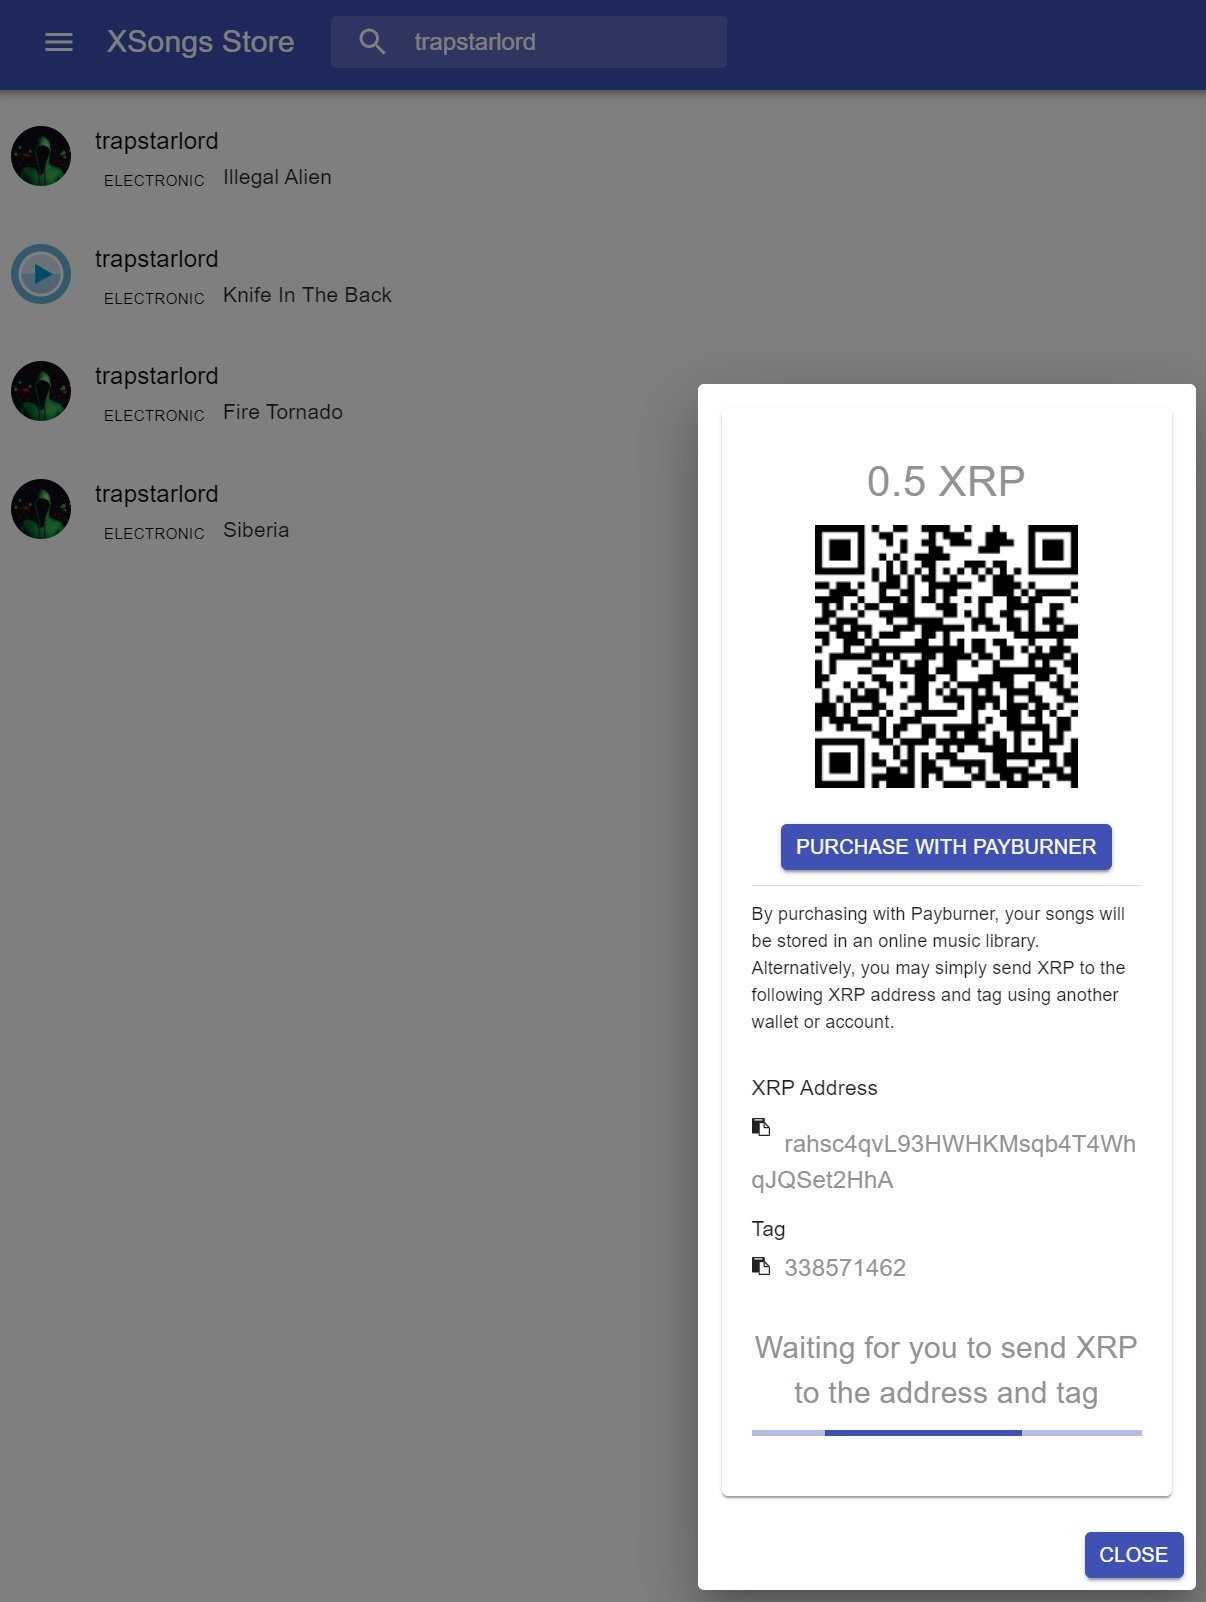
Well I decided I quite liked the sound of “Knife in The Back” and reckon 0.5 XRP isn't too bad a price at all. I click to pay and am presented with this:

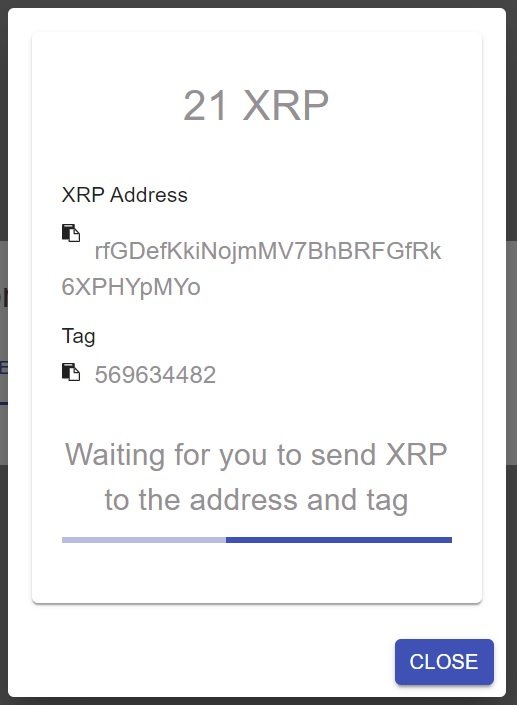
Here, I have two options; I could “Purchase with Payburner” another of Mr DeWitt's projects, or I can pay to the XRP Address with Destination Tag below that.

Let's try the second option first... Tags on XSongs are payment specific, if you close the pop-up then re-open it, the Tag will have changed.

If you've received XRP before on Twitter, Discord, Reddit or through Coil then you have an XRPTipBot account, which you can log into at the website. It also has an accompanying app.

I first try scanning the QR code with the @XRPTipBot mobile app then recalled that this wasn't possible due to how the app's QR scanner works. To pay with this method I would instead need to use the in-browser version of the TipBot and make a withdrawal. The scanned code behaves oddly on the ToastWallet app also. I'm not sure what its intended purpose is.

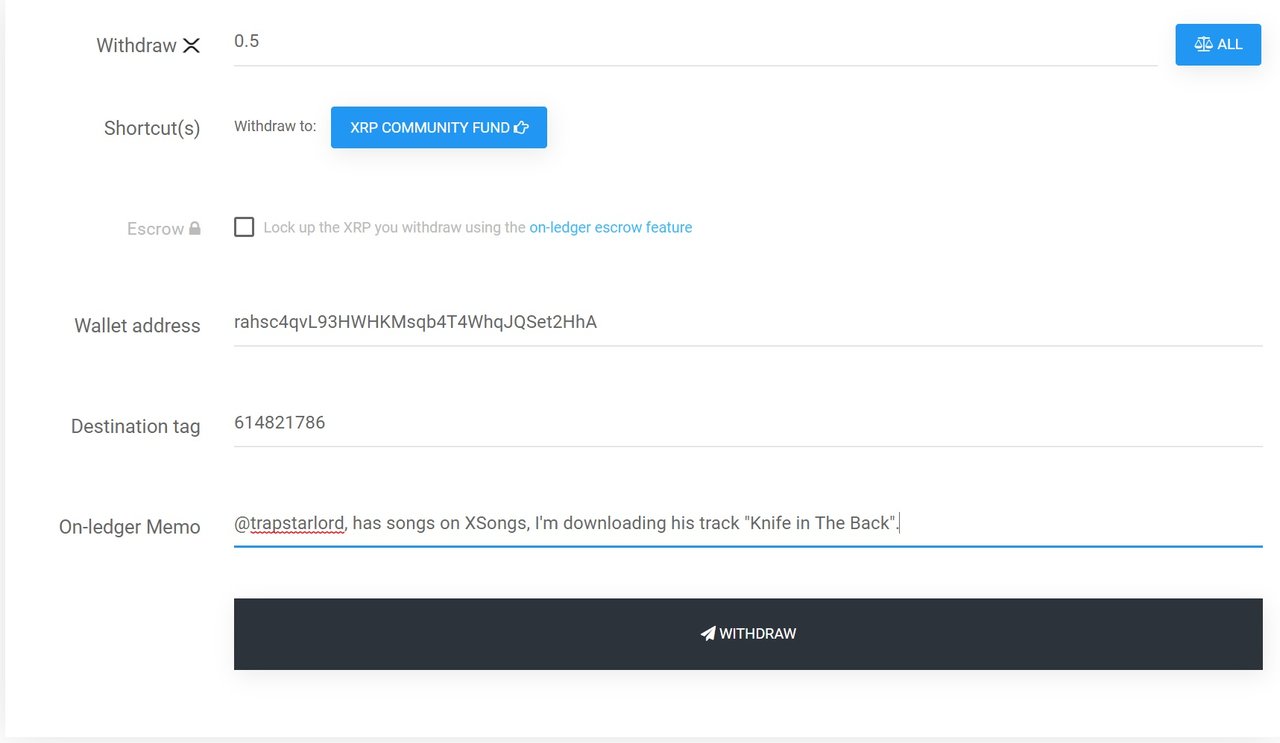
You could use a personal XRP ledger account or exchange address if you wished but I think most people like their privacy so I chose the TipBot. With the TipBot you can also add memos. I performed this withdrawal at 12:50.

Only two minutes later it was processed by the TipBot, the withdrawal appears on the ledger and nearly instantly I receive this message to download the song to my PC. Relatively painless, if you have funds in your XRPTipBot account.

-——

Great, but I was certain I was missing out on other features of the XSongs website so chose to try logging in to the XSongs store.

It requests that I connect with Payburner, as I mentioned before this is another of Mr DeWitt's projects. An online wallet that can be used to purchase with XRP. We'll now walk through this process too.

Clicking the link will bring you to the Payburner website, with a pop-up:

If you already have a Payburner account, there is an option to import. I do not so I click “Create Account”. The next part can be confusing but I shall explain, invitation codes were offered to early musicians by Mr DeWitt so they didn't have to spend XRP to set-up their accounts.

The XRP ledger requires a reserve amount of 20 XRP for each account, this will be unspendable for now. The remainder is usable.

As most people will be funding an account I will choose option one.

After paying the sum of 21 XRP I receive an invitation code. I won't be putting that here but after the initial username and password set up it will ask you to export your Payburner account. Be sure to do this as Payburner will not have any access to your ledger account details – These are saved by you.

You can see below that my Payburner account has a public address, which you can find on any XRP Ledger explorer like Bithomp.

[ If you're feeling nosy, you can find it here - [https://bithomp.com/explorer/r4uwc12opGrq38D95HQAJ1xmSTBKg41Kwx](https://bithomp.com/explorer/r4uwc12opGrq38D95HQAJ1xmSTBKg41Kwx)]

-—-

My thoughts at this point are too many steps just to reach this point, I think in later versions of both XSongs and Payburner this may become a lot simpler.

-—-

Back at XSongs we connect to Payburner...

To log-in click your Avatar and use your Payburner password.

My Payburner account currently has 0.9989 XRP that is spendable in it. The mandatory reserve of 20 XRP is equivalent today to $3.90.

I'll now buy a song with Payburner.

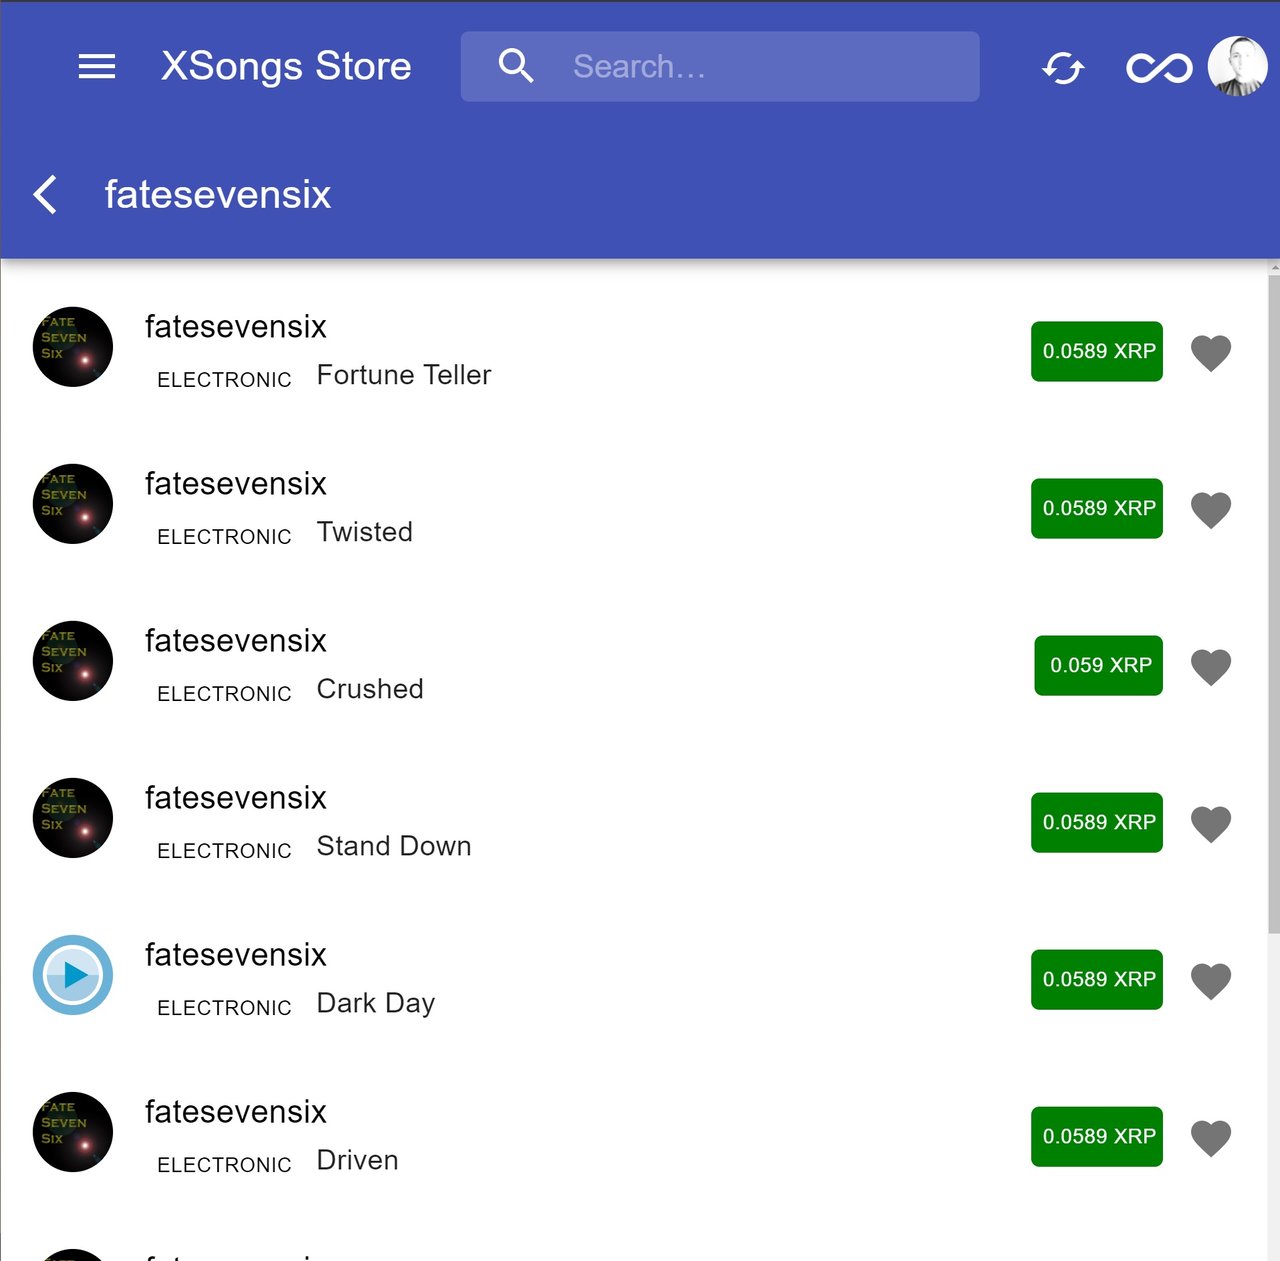
Here is @FateSevenSix's profile on the XSongs site:

Their songs are currently 0.0589 XRP each. If we'd like to listen to a snippet of every song we can click that “Infinity” loop button in the top-right. The refresh list button is convenient on the homepage, it is alongside.

I'm going to buy the song “Crushed”, we have that same payment screen as before. I think the QR code may be for a later feature using a phone?

At any rate, I'll be paying with Payburner.

It takes me back to the Payburner connection page, where I have to sign in again, I'd include pictures but they're above as part of log-in.

This is tedious like being logged out but not quite. Again unnecessary.

After this, I am returned to the XSongs homepage with no confirmation of purchase... I find myself staring perplexed for a time at the XSongs website... Before clicking the top-left menu button.

Clicking on “My Music Library” presents me with the track I just bought.

However, unlike my initial purchase without using Payburner, I'm unable to download this song at all? I can play it at length by clicking the avatar but am otherwise stuck. Please remember though that this is in Beta. [Ed: This has since been resolved. You can now download.]

-————————————————————————————————————————————

You've now been through my rather wordy walk through.

To summarise what we know about the XSongs.store Beta:

  • It is in Beta! Please remember that it isn't production ready.
  • You'll need to already own the cryptocurrency XRP.
  • I found it easier to buy songs with a typical XRP transaction.
  • Plus – I could actually download the song afterwards.
  • Signing into and using Payburner is complicated.
  • Payburner has an initial set-up cost. Currently 21 XRP ($4.10)
  • After signing in with Payburner & purchasing a song you can only access it on XSongs at this time. Downloads aren't an option yet. [Ed: This is no longer accurate, downloads possible.]

If you're already an XRP user then the XSongs Beta is easy enough to navigate and use, I'd suggest purchasing with an XRP transaction at this time if you want to download a song to your phone/PC.

It isn't “user-friendly” yet as it requires an understanding of digital-assets so don't get too excited and expect this to revolutionise the music industry tomorrow.

Craig DeWitt has built a great site, giving musicians 100% revenue for their song sales. With time I think he will make it easier for anyone to use especially those without a knowledge of cryptocurrencies.

You've got to admire the time he has committed to both his projects in between his work career and I'm sure you'll agree they are ambitious.

Looking forward to his progress because the idea is brilliant.

-——

[Ed: After writing this blog, Mr DeWitt has made changes addressing some bugbears I had. Most notably, you can DOWNLOAD after a *Payburner payment*. A follow-up blog here -

https://tinyurl.com/scq4q95

Ripplepay, the brainchild of Ryan Fugger in 2004 which helped form the XRP Ledger we know today, relied on a concept Ryan called “Rippling”. It was the namesake of his project and for good reason.

For context: As a kid, you may have been promised £10 for house chores but you couldn't go to the shop and spend that money before receiving it. You had to wait, until you were given it. The same is true today, you can't just wander down to the grocery store, with a debit card in hand and spend money that isn't in your account.
[Below, the Ripplepay logo]

Ripplepay was different. It relied on a network of trusted friends and businesses; you didn't have to trust everyone in the network, you only had to trust the person you were exchanging with.

“Rippling” occurs when more than a single 'trust-line' in a network is adjusted to make a payment. This can be confusing so I shall attempt to explain “Rippling” with a short story:-

Let's say you're a joiner, your name is Bob and you've offered to hang your neighbour's new kitchen door. Alice, your neighbour doesn't have cash to hand but you're very confident that she will pay eventually – After all your wife has a fiery temper when it comes to money.

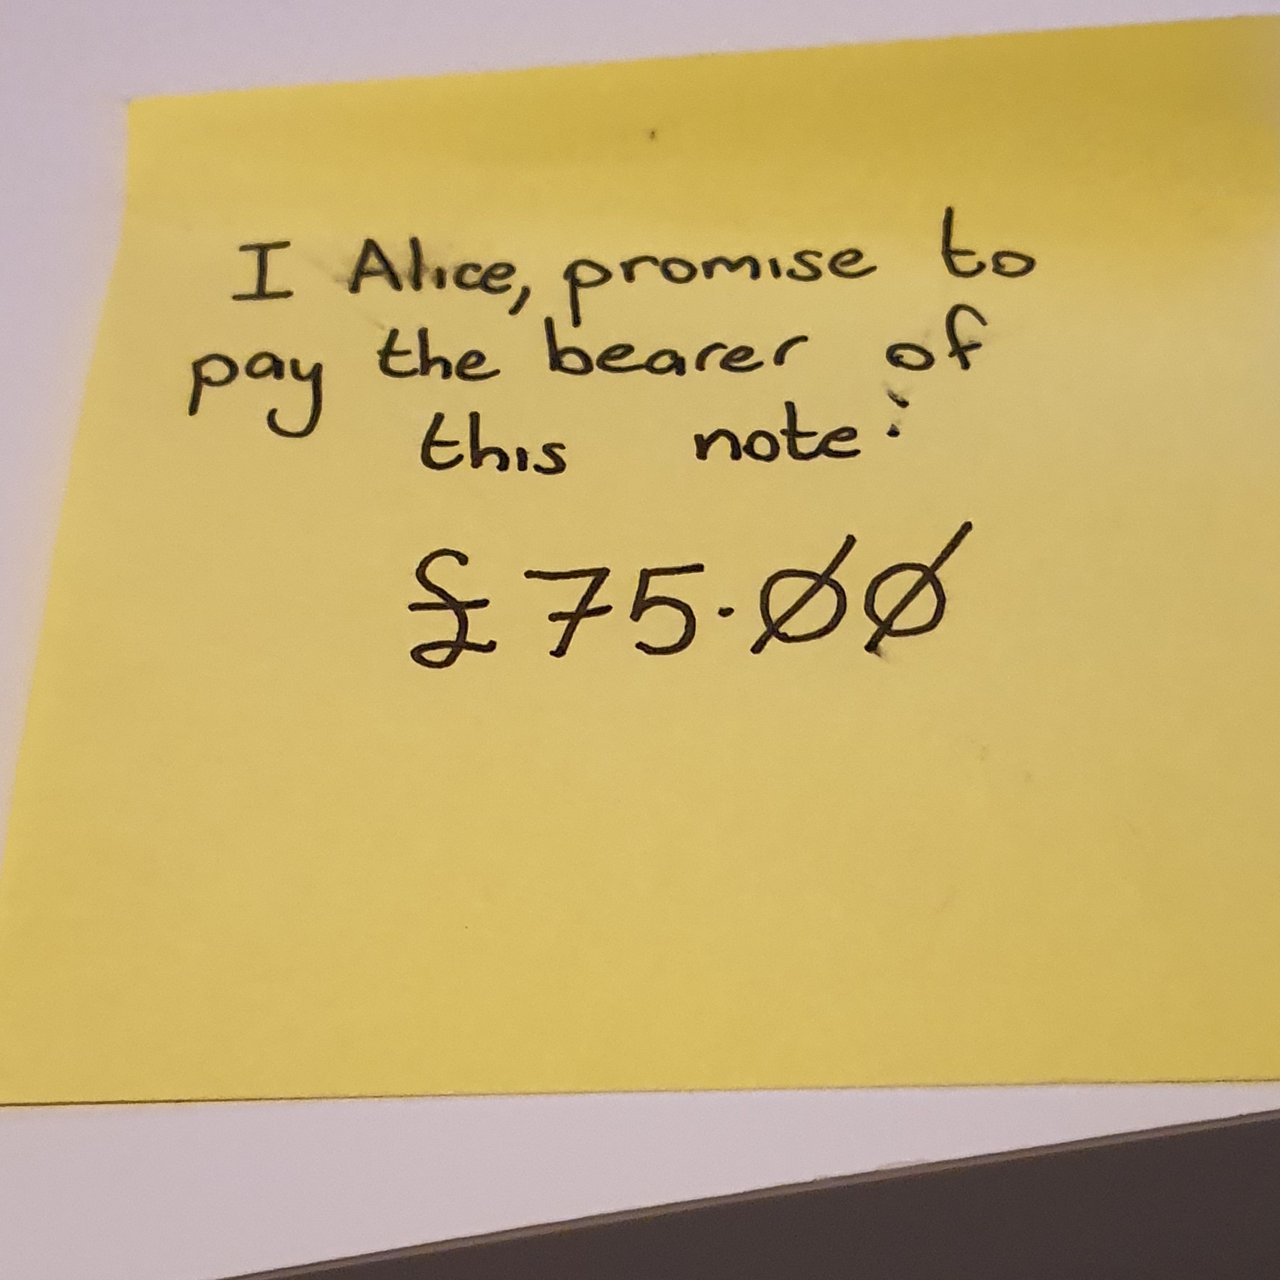
Alice promises to pay you £75 for your hard work and even offers you a post-it note, *"I Alice, promise to pay the bearer of this note: £75.00"*. You leave but remember the grocery store.

  • At this point Alice owes you, Bob, £75 for your labour.

You arrive at the store with a hand scribbled note, a £75 IOU, you've collected your groceries before arriving at the check-out counter. The shopkeeper scans your items and requests £30... Bother... You only have that note from Alice?

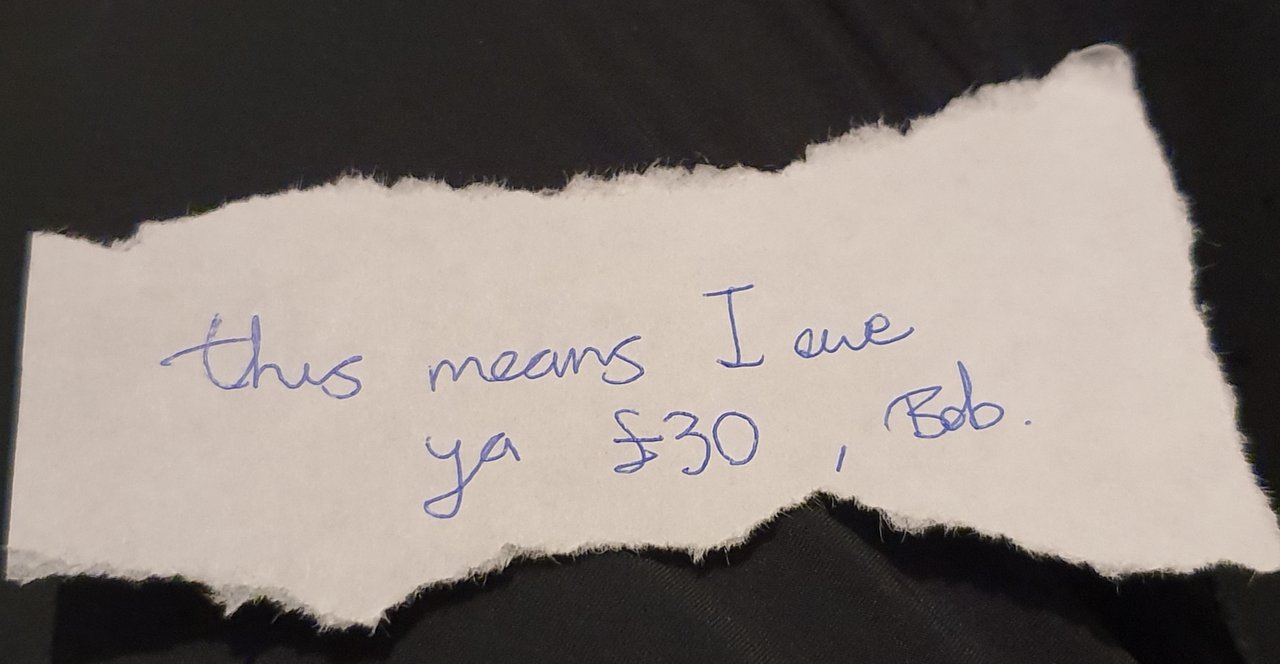
You ask for a pen and paper, the shopkeeper produces some torn-up scrap from under his counter and you scribble down “*This means I owe you £30"*. It's a good thing this is a small town. You know Daniel the shopkeeper rather well as you both have a fondness for drinking real ale.
  • At this point Alice owes you, Bob £75 for your labour...
  • and you just promised the shopkeeper, Daniel £30 of that.

We now find you at home with your wife and daughter Charlie, who would quite like her pocket money. She too wants to visit the store before it's dark. You have no cash as Alice only gave you a post-it, so this time you hand-write another for £10.

  • At this point Alice owes you, Bob, £75 for your labour...

  • just earlier you promised the shopkeeper, Daniel £30 of that.

  • You now also have a note Charlie is carrying, for £10.

Daniel is busy tidying the shopfront when Charlie arrives at the store. He sets aside his broom and waits by the counter... Soon after Charlie reappears with sweets which Daniel buzzes promptly through.

“That will be ten pounds then, please.” Daniel postures.

Rather awkwardly, Charlie presents a slip of paper with your writing scrawled across it.

“Hmm,” Daniel grumbles, “Your Bob's little-girl then? You'd best tell 'im he owes me forty quid!”

  • At this point Alice still owes you, Bob, £75 for your labour...

  • and earlier you promised the shopkeeper, Daniel £30 of that.

  • Charlie was carrying a handwritten “IOU” for £10...

  • ... but then again, she used that at the store...

  • ... so you figure Daniel will be wanting that too.

When you began the day working at Alice's you hadn't planned on all this. Daniel expects you to pay up, he doesn't know you're relying on Alice, he just knows you're good for the money... Usually.

  • Now that last bit is important, Daniel didn't have to know Alice who was the original IOU scribbler, indeed he didn't really have to know Charlie either. He knew you well enough. Alice's IOU has “rippled” through this pool of people.

Once Alice gives you that £75 tomorrow, you'll only have thirty-five left as £40 is rightfully Daniel's. Unfortunately the next day you are far too busy to see your neighbour, but by happenstance you do greet Daniel.

Daniel requests his money and to his bewilderment you say,

“My neighbour Alice owes me seventy-five quid, if you knock at the door with those notes in hand, I'm sure she'll give you the money...”

With your phone in hand, you call ahead and Alice says there is £75 waiting for you.

“Well...” you start, “I didn't have any cash so I wrote a few notes too and as it happens, I've sent the shopkeeper your way...”

So from this story I hope we learnt that “Rippling” is the ability to ask Alice to use some of the money she owes Bob, to pay Daniel; it is the ability to not only promise somebody payment but to instead actually pay them with an IOU for goods/services. This relies on the trust that when the time comes to collect what is owed, the issuer is good for it.

In smaller communities this IOU ideology works quite well & is successfully used throughout the developing world. With the advent of the Ripple Consensus Protocol in 2011, Ryan Fugger's original vision has morphed somewhat. Perhaps due to a less user-friendly interface at the time, it didn't catch on as well we hoped.

XRP is the ledger's native asset and can be exchanged for any IOU utilising the built-in decentralised exchange, it typically garners the most attention. Not surprising as it has no counter-party risk & cannot be “frozen” in any way.

In part ii, I hope to explain how developers shall utilise Rippling in their consumer-ready apps to allow ease of payment and other related topics.

[For Coil subscribers, below I go into some aspects of Rippling today on the XRP Ledger and what its drawbacks are.]

Read more...

Spending online seems to get easier and easier with each passing year, we rarely stop to ask why that is, after all it is so convenient these days that it is hardly worth a second thought.

You do your online shopping; you're mighty proud of your choices then punch that checkout button to find the usual brand logos of AMEX, Mastercard, PayPal and VISA. Not more than a few seconds later, you have parted with your money.

A trend began to emerge though, a want not only to spend and send money but also to protect it. Soon after the rise of the internet came the rise of “digital assets”, the most (in)famous being Bitcoin. These newfound, decentralised global currencies though impressive, had a flaw. Us. People have a bad habit of leaving information laying around & sure enough when a villain finds it, they've taken everything from you.

Protecting your money & information has never been so important.

Enter XUMM (Pronounced “Sum”); a banking app built to keep up with the lifestyles of today, built atop a distributed ledger to allow near instant transactions between your family, friends, merchants and their customers. A banking app for everyone.

Created by a team of three developers, XRPL Labs is working out of The Netherlands, headed by Wietse Wind. Their app can offer many capabilities current payment methods lack, especially digital assets payments, that can be very confusing sometimes.

In late May 2019, the three developers announced their latest project “xign” (Now “XUMM”) a payment signing platform with tiered security to protect its users' funds.

The great thing about a platform like Twitter, is you can ask anyone anything and the topic of this article is no different. I wanted to know more about XUMM, to better understand what it can offer. I'm a simple man after all, I can't just stare at code and know what I'm looking at.

This is a Question & Answers session, with Wietse Wind.

Morning Wietse Wind, as you & your team work on Xign banking app, I had some questions. Will the fiat currencies be IOUs issued by @XRPLLabs, appearing as a balance in the customer's XRPL account or have you chosen to allocate destination tags & store balance information privately?

I'd be interested to know whether XRPLLabs will custody these currencies (I believe that is why you've applied for a European banking licence) and if so does XRPL Labs intend to settle off-ledger via ILP or perhaps by utilising a global payment network, for atomic payments?

Wietse – “XRPLLabs is not going to issue IOU's. XUMM is a platform, code, infra & app, and will support existing IOU's. We are looking into issuing Euros by obtaining the required licenses in the EU, but that'll be a new entity.”

Wietse – “There will be no issuing and no custody by XRPLLabs because we will just be about developing code. The new entity @Mr_HvD and I are in the process of founding will focus on Euro IOU issuing at first, and custody after that, yes. We aim to support our issued EUR on ILP as well.”

[XRPL Labs intends to use the existing infrastructure of the distributed ledger, Weitse mentions a project here with Twitter user @Mr_HvD, a glimpse into how serious Wietse is about supporting the XRP distributed ledger from which his company found its name.

Why "XRP"? It is the native digital asset and allows many payment options, Wietse's team utilises the ledger's capability to its fullest.]

Excellent, self-custodied banking will offer a lot of confidence, especially amongst this community. Can we expect to pay with this banking app at any till, a la bankcard, or will this be more like PayPal, “We accept XUMM”?

Wietse – Definitely not a bank card. That would not make sense: that would introduce all fees and caveats that exist today.
“We accept XUMM”: you bet! We'll work on e-commerce plugins at first.”

*With self-custodied currencies, comes the question of trustlines & exchange sign-up. Let's say a merchant is using XUMM, accepts payment but for accounting purposes they would like to receive USD Bitstamp instead of USD Gatehub.
*

Can XUMM perform the task of real-time exchange?

Wietse – *”*No need for XUMM to do that: XUMM will just use the awesome XRPL 'auto-bridging' feature, taking care of the exchange (on ledger) of whatever the user sends to whatever the beneficiary wants to receive.”

[Auto-bridging is a capability of the XRP ledger to perform automatic swapping of a currency during a transaction. An often overlooked feature of the ledger is its built-in decentralised exchange, offering the best possible exchange rates and fees. An unusual currency exchange may actually use XRP to source liquidity. Auto-bridging isn't a typical payment option however, this lead to some further questions.]

*Am I right to assume that XUMM will make use of payment path-finding across the XRPL, offering a seamless transaction for the payer and merchant? Could the payer use any currency & have the merchant receive the currency they prefer?
*

I'd say that's a great usecase & simple enough for anyone to use.

Wietse – “Exactly. Let's say I pay a webshop. The webshop wants to receive EUR issued by their bank. The consumer wants to spend Bitstamp USD: this will happen in one on ledger transaction 😎 Or I want to pay you a beer, I spend XRP and you receive Bitstamp BTC 👌 Using the XRPL DEX 😍

[You can tell he was excited about this aspect.]

Currently the XRP Ledger offers push payments, will XUMM be able to offer pull requests, so merchants/entities can request payment?

Wietse – “Definitely, pull payments – by offering a platform and ecosystem where beneficiaries, developers and consumers (app users) can “get together- is one of the most important features of XUMM. We really want our platform to be the go-to platform if you want to get paid or pay. We're pretty close to the first (early) developer beta to test the pull mechanism.”

So will we be able to connect current XRP accounts to XUMM?

Wietse – “You can import your existing accounts, using either a mnemonic or family seed (or HEX private key for advanced users). This information will be stored securely, encrypted, in the device keychain. We encrypt based on either a PIN or passphrase.”

For simple folk, like myself, how will their accounts be protected?

Wietse – “In case of spending (XRPL) accounts with lower amount of funds stored, we allow Face ID/ Fingerprint as well by asking for the PIN to unlock the app, after which Face ID/ Fingerprints will be enough for approving a payment.”

Big bucks = mandatory passphrase.” – Wietse

*Lots of protection to keep everyone's money safe, good to hear.
*

How easy will it be to find other XUMM users and merchants, can we search by name, email address and phone number? We've all been using [another of your apps] XRP Tip Bot for awhile, can we expect this to be as easy, with QR codes?

Wietse – “You can definitely expect it to be easy. User friendly, a “non-crypto feel” is our #1 priority. I haven't thought about a central directory, but (especially when starting) that would make a lot of sense.”

I'll close here. I think the XRP community has an opportunity to really understand XUMM before it releases. A customer facing app, for everyone.

  • I appreciate you taking the time to reply, today.*

Wietse – “I think the questions + answers will paint a good picture about what we're working on and what people (both devs and end users) can expect.”

[This blog post was uploaded with permission. Once again I'd like to thank Wietse Wind for his time and to thank you, the reader, for patiently getting this far. I'm no writer but hopefully this has given you some idea of what to expect from XUMM.]

If you'd like to follow the developers of XRPL Labs on Twitter, their usernames are currently:

@WietseWind

@baltazar223

**@ThisIsTRISS
**

You might also want to follow:

@Mr_HvD

@XRPLLabs

@XRPTipBot

If you'd like to learn more about the distributed ledger which XUMM uses and many of its features, you can start here:

https://xrpl.org/index.html

Or here for other Devs and insight:

https://xrpcommunity.blog/

[Author's note: Firstly, where I typed "Xign" I of course meant the re-branded XUMM app. Secondly, the distributed Ledger XUMM is built upon can have digital versions of Euros, Pound Sterling, Dollars or just about any kind of tradeable commodity you can think of. These digital versions are often referred to as IOUs ("I owe you") or as issued currencies.

As a disclaimer, I hold digital-assets, including XRP. This article is not about that though. This is about everyone's desire to learn, everyone's desire to progress.]