Understanding Tuckpointing: Enhancing the Lifespan of Your Brickwork

Tuckpointing, a common term in the world of masonry, is an essential process for maintaining the structural integrity and aesthetic appeal of brick structures. This procedure, often confused with repointing, involves the careful removal and replacement of deteriorated mortar in brickwork, enhancing not only its visual appeal but also its lifespan.
What is Tuckpointing?
Tuckpointing is a method of using two contrasting colors of mortar in the brickwork's mortar joints, with one color matching the bricks themselves to create an illusion of very fine joints. This practice is not only aesthetic but also functional, as it helps protect the bricks from the damaging effects of weather and time.
The term 'tuckpointing' originally referred to a less sophisticated technique used to create the illusion of well-formed brickwork. Today, it is mostly synonymous with the repointing process, although the two are slightly different in their application and aesthetic results.
The Importance of Tuckpointing
Bricks, known for their durability and longevity, are a widely used material in building construction. However, the mortar that holds bricks together is often less durable and requires periodic maintenance. This is where tuckpointing comes in.
Tuckpointing serves two primary objectives:
- Structural integrity: Over time, the mortar used to fill the joints between bricks deteriorates, even if the bricks themselves remain in good condition. This can lead to structural instability, especially in load-bearing walls. Tuckpointing replaces the deteriorated mortar, restoring the structure's integrity.
- Aesthetic Appeal: Tuckpointing enhances the aesthetic appeal of brickwork. By using mortar that closely matches the brick's color and applying a thin line of contrasting putty, it creates the illusion of thin, well-maintained joints.
When is Tuckpointing Required?
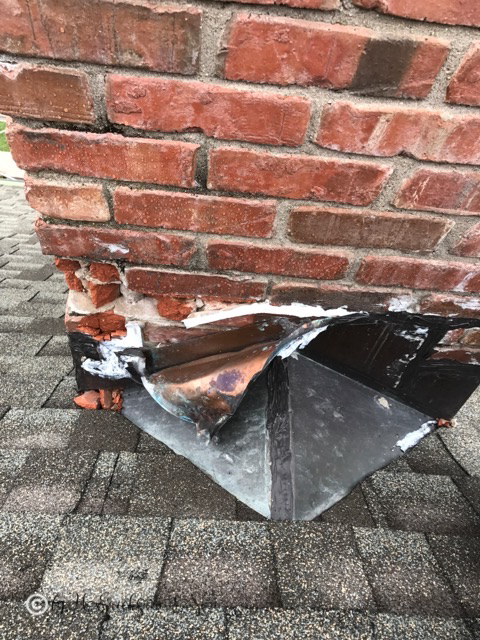
The need for tuckpointing is typically signaled by visible signs of mortar deterioration. These may include:
Mortar joints eroded more than ¼ inch.
Crumbling mortar falling out from the joints.
Visible cracks in the mortar.
Voids or gaps in the mortar.
Vines or other vegetation growing through the mortar joints.
If such signs are observed, it's advisable to act promptly to avoid further damage and potential structural problems.
Tuckpointing vs. Repointing: What's the Difference?
Although 'tuckpointing' vs 'repointing' are often used interchangeably, they represent different processes with distinct aesthetic outcomes.
Repointing involves the removal of old mortar from joints and replacing it with new mortar, typically matching the existing mortar color. The result is a uniform and seamless appearance, maintaining the original brickwork's look.
Tuckpointing, on the other hand, involves the application of two different kinds of mortar. The first, color-matching the bricks, is applied to the joints. Then, a thin line of contrasting mortar or putty (usually white) is applied down the center of the joints. The outcome is a brickwork that appears to have very fine joints, imparting a distinct aesthetic appeal.
Tuckpointing: A Do-It-Yourself Project or a Job for Professionals?
Tuckpointing is a labor-intensive process that requires precision and expertise. Therefore, while it is possible for homeowners to undertake this as a DIY project, it is often advisable to hire a professional. A professional tuckpointing job ensures that the finished work not only looks clean and precise but also enhances the structure's longevity.
The Cost of Tuckpointing
Tuckpointing costs can vary based on factors like the size and accessibility of the project, the height of the wall, the standard rate for mason services in the area, and whether the structure is a historic property. On average, professional tuckpointing costs between $5 and $25 per square foot.
The Process of Tuckpointing
Whether you opt for a DIY approach or hire a professional, understanding the steps involved in tuckpointing can be valuable. The process typically involves the following steps:
Removal of Old Mortar: The existing mortar joints are removed to a depth of approximately one inch. This can be done using an angle grinder or a hammer and chisel.
Cleaning the Joints: Once the old mortar is removed, the joints are brushed clean of dust and debris.
Mixing the New Mortar: The new mortar is mixed, often with a pigment, to match the existing brick color.
Filling the Joints: The cleaned joints are filled with the new mortar, beginning with horizontal joints.
Smoothing the Joints: After the mortar is applied, it's smoothed to either a flat surface or a slightly indented curve, depending on the desired look.
Creating the Lines: When the new mortar begins to harden but is still semi-pliable, straight lines are scraped in the centers of the newly filled joints.
Applying the Putty: Finally, lime putty is carefully applied to the scraped lines to form contrasting “fillets”, and any excess is cut away.
Conclusion
Tuckpointing is a crucial maintenance practice for any brick structure. Whether you're a homeowner trying to extend your house's lifespan or a property manager aiming to maintain the aesthetic appeal of a historic building, understanding and implementing proper tuckpointing techniques can make a significant difference. By ensuring the regular maintenance of your brickwork, you can avoid costly repairs in the future and ensure your property continues to stand strong and look beautiful for many years to come.