Raspberry Pi – Set-up How to...
If you've recently purchased your first Raspberry Pi computer and are looking for a guide on setting up, then hopefully this guide will be of use to you. If you've no idea what on Earth I'm talking about then you can read about Raspberry Pi here in my last article, below -
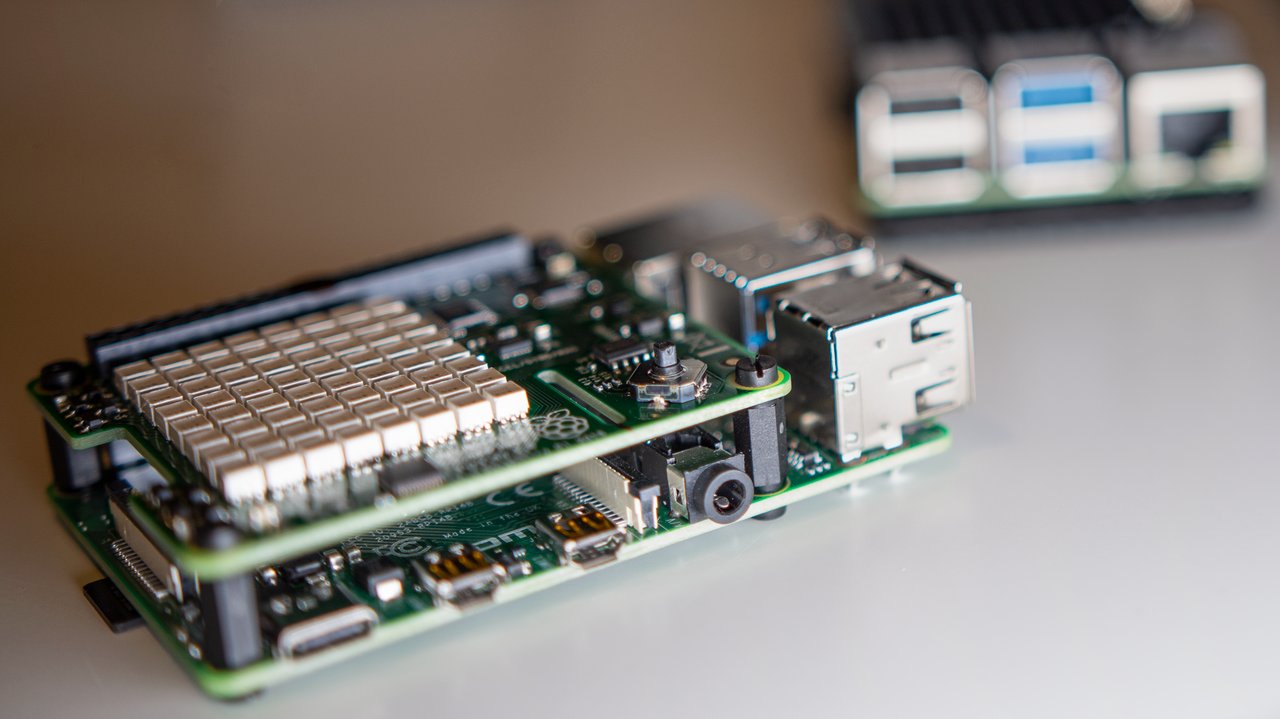
This will be a step-by-step guide, including where to find software, formatting a MicroSD card, and installation. Unlike a typical off-the-shelf laptop or computer, the Raspberry Pi (RPi) will not “work” right out of the box and will require a bit of finesse. It is all part of the learning experience and the hobby.
So before beginning ensure you have:
- Access to a computer/ Laptop with internet connection (For this I'll be using a Windows 10 PC)
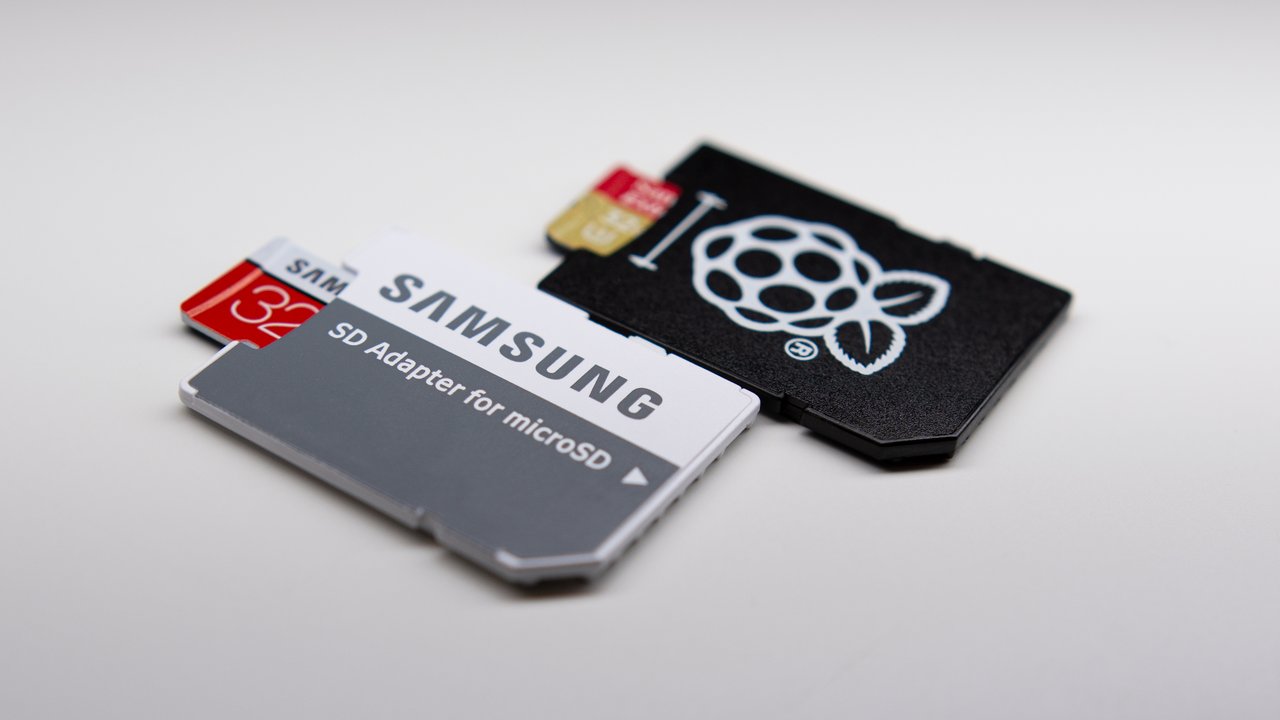
- A Micro SD card, recommended minimum 16 GB memory
- An adapter if the computer doesn't have a Micro SD port
Download Raspbian OS
Using a computer, navigate to https://raspberrypi.org/downloads/ where you'll be greeted by this view.

You can see that there are three 'imagers' depending on your computer's operating system and two options below that, 'Raspbian' and 'NOOBS'.
Raspbian is a free, lightweight operating system for Raspberry Pi that is based on Debian (Buster) Linux.
NOOBS, meaning 'New Out Of the Box Software, has Raspbian also and is just meant to make installation simpler.
As this may be your first time installing an operating system for a RPi, I'll walk-through NOOBS. Hover over and click the NOOBS button and on the next webpage you will find more option.

Again, I'll make the assumption that you won't have a network connection immediately for your RPi. Please click “Download ZIP” for the NOOBS install. The lite version requires internet access because Raspbian isn't present, so avoid this for now.

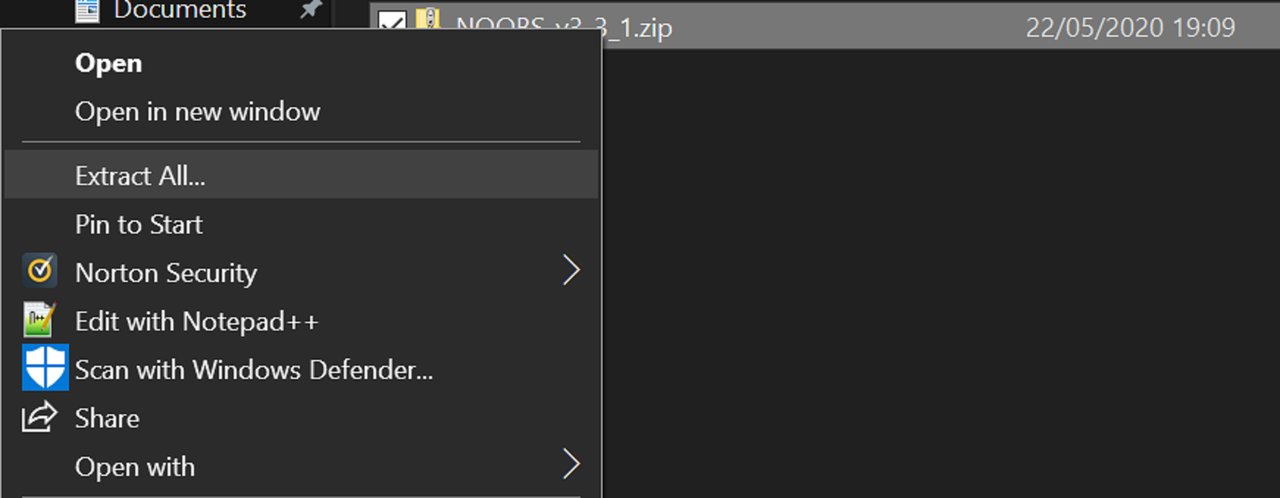
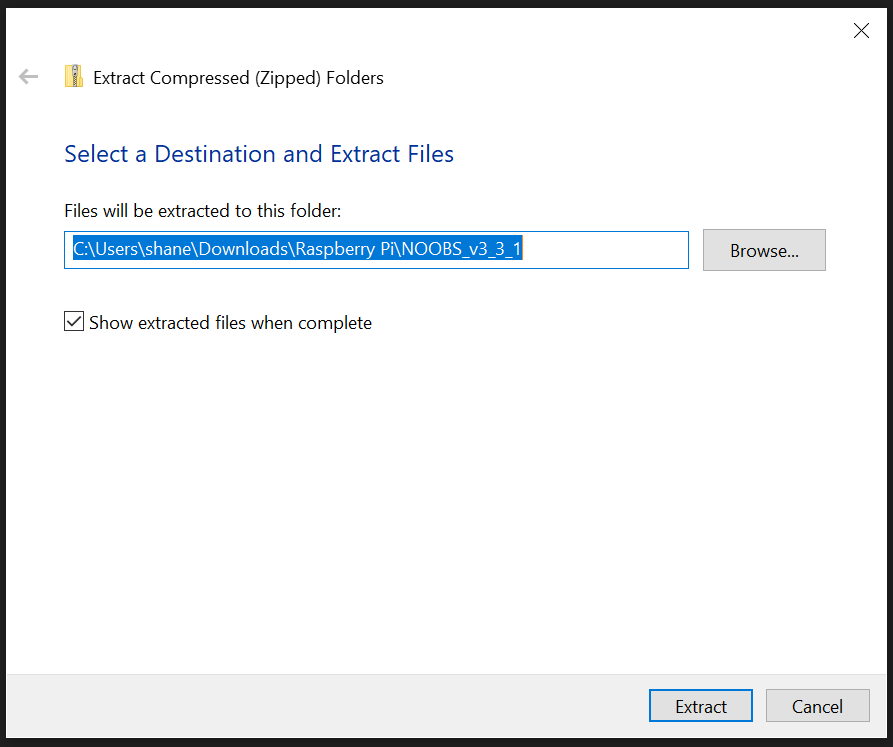
Find the downloaded ZIP folder and extract the data by right-clicking and selecting “Extract All...”, then select an appropriate location to keep the file on your computer. Do not extract to the MicroSD card.
Open the newly created folder.
Format the Memory Card
At this point I'you should format your Micro SD card to 'FAT32', the RPi won't recognise exFAT and reformatting will hopefully prevent any corruption of file data. You can download the official SD card formatter directly from the SD Association's website: https://www.sdcard.org/downloads/formatter/index.html

You will be prompted about the risk of deleting any data stored on the MicroSD card. Please be sure to check that important data has already been moved to a different storage before formatting.

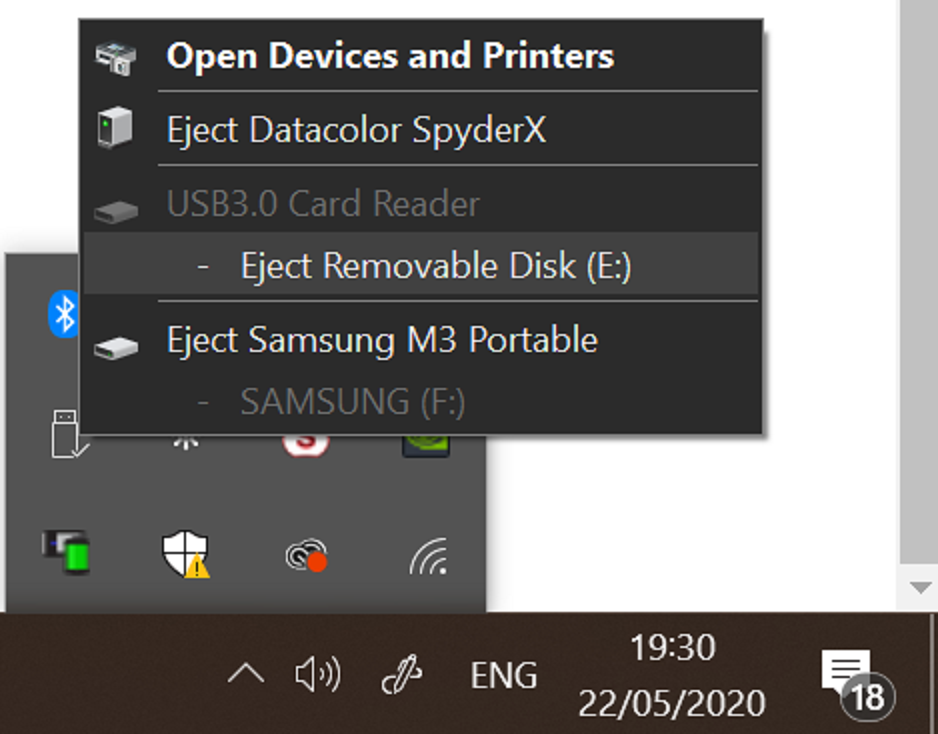
Once formatted, you should safely eject, physically remove it from the port and then re-insert your MicroSD card. Safe eject is found in the taskbar's system tray, on the bottom right of your screen.
Once re-inserted, confirm the MicroSD card is empty.
Remember the recently extracted folder? With it open, select all items then drag-and-drop them into your MicroSD folder.
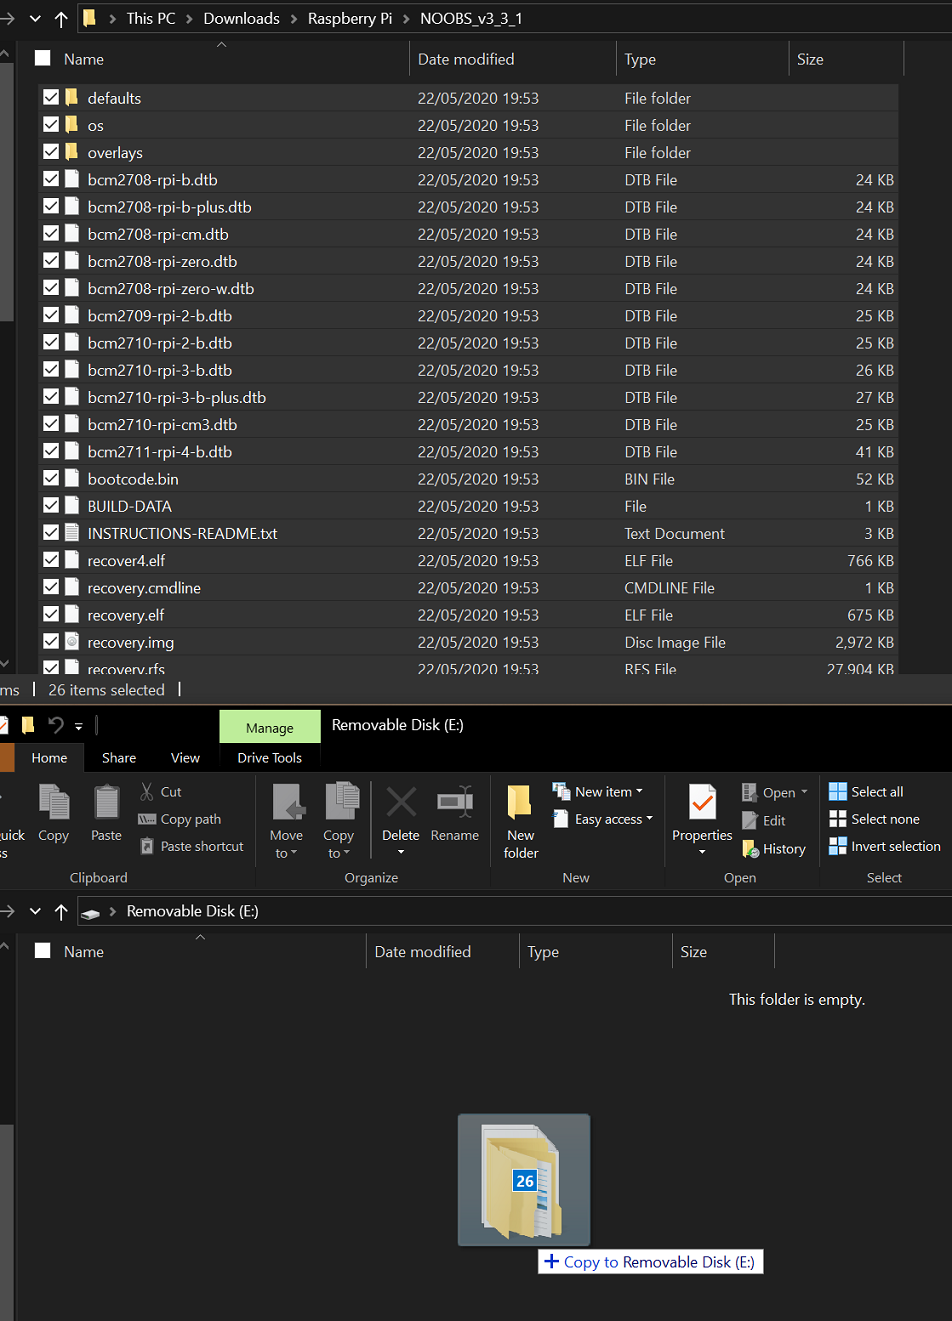
Close both folders and safely eject your MicroSD card from your computer.
Preparing Your Raspberry Pi
For Raspberry Pi 4:
Begin with all cables DISCONNECTED,
Insert your MicroSD card, into connector
Connect a Micro-HDMI for the display
(Note: RPi4 can use two displays)
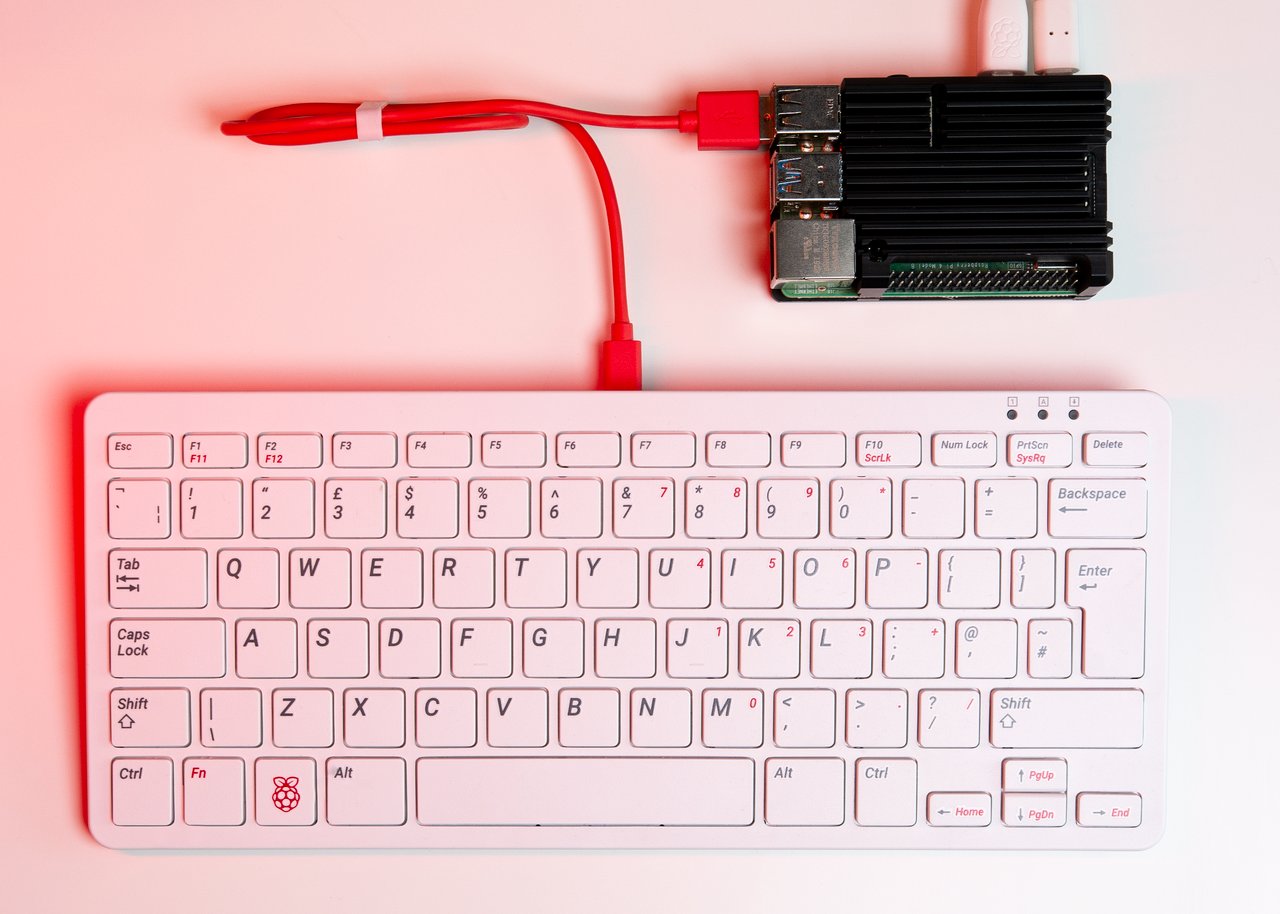
Connect a keyboard to a USB port
Connect a micro USB-C 5.0V >2A supply cable
For Raspberry Pi 3:
Begin with all cables DISCONNECTED,
Insert your MicroSD card, into connector
Connect a Mini-HDMI for the display
Connect a keyboard to a USB port
Connect a micro USB-B 5.0V >1A supply cable
For Raspberry Pi Zero:
Begin with all cables DISCONNECTED,
Insert your MicroSD card, into connector
Connect a mini-HDMI for the display
CARE POINT: Connect a keyboard using adapter, ensure this goes in the micro USB-B port labelled “USB”, it is the port closed to the Mini-HDMI port.
CARE POINT: Connect a micro USB-B 5.0V >1A supply cable to the port labelled “PWR IN”.
(Note: Do NOT unplug keyboard once powered on, the Pi Zero doesn't like it, power will be disrupted.)
Software Installation
The Raspberry Pi should now power-on, you should see some flickering LED's and then see a splash screen for only a few seconds, this should look like an RGB ('Rainbow') square.

Next should be a new screen, if this doesn't appear see “Troubleshooting” below.
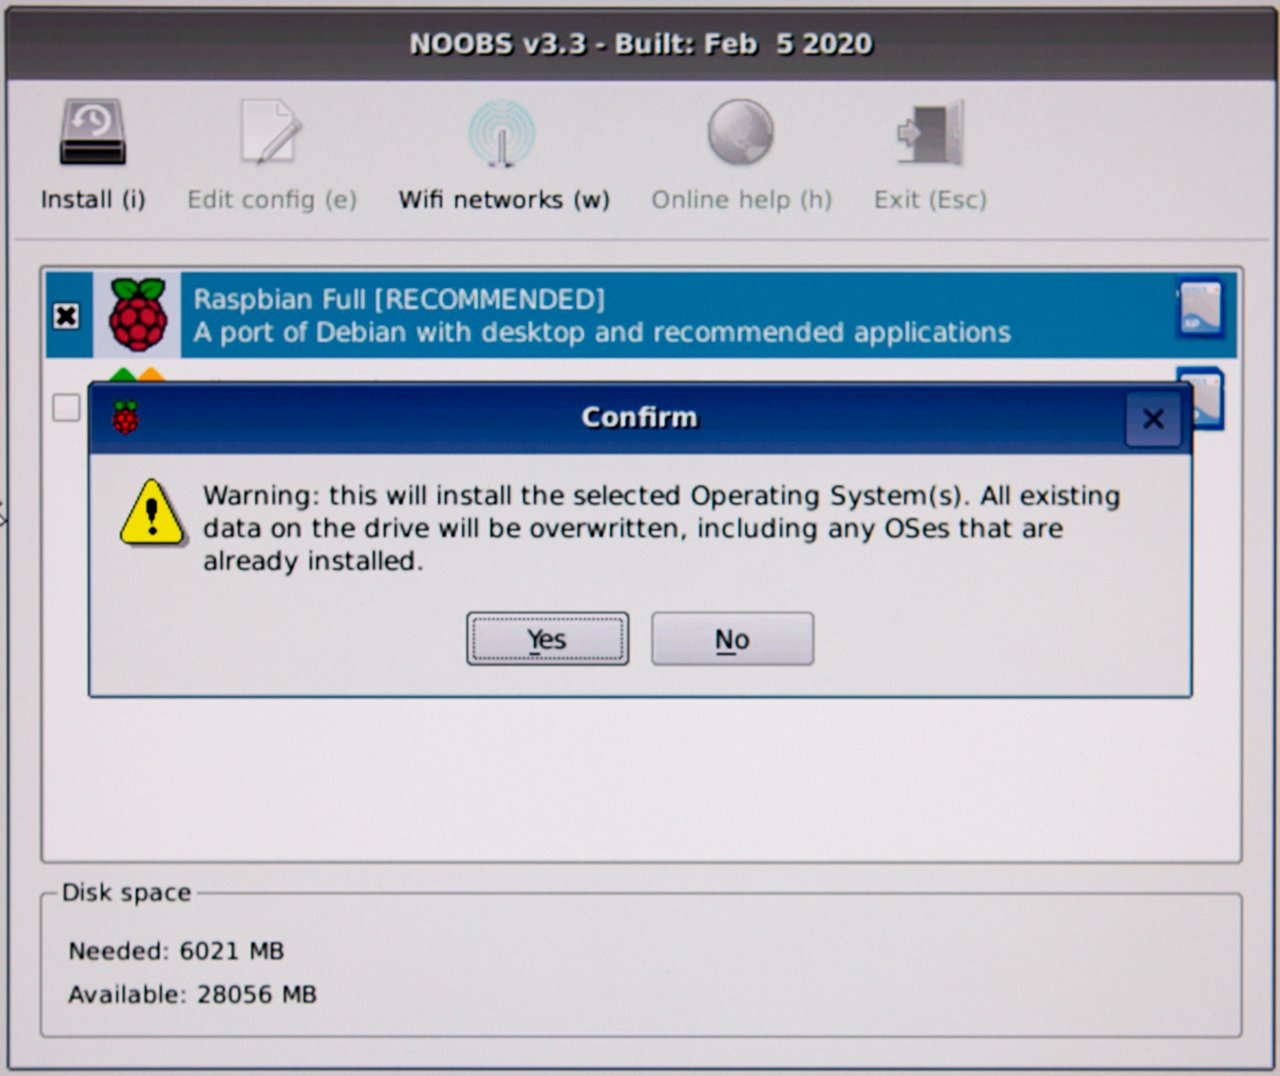
Using directional buttons, or mouse, select “Raspbian Full” and then press the 'i' letter button on your keyboard to begin installation.

A confirmation warning will appear, select “Yes” then press 'Enter'.

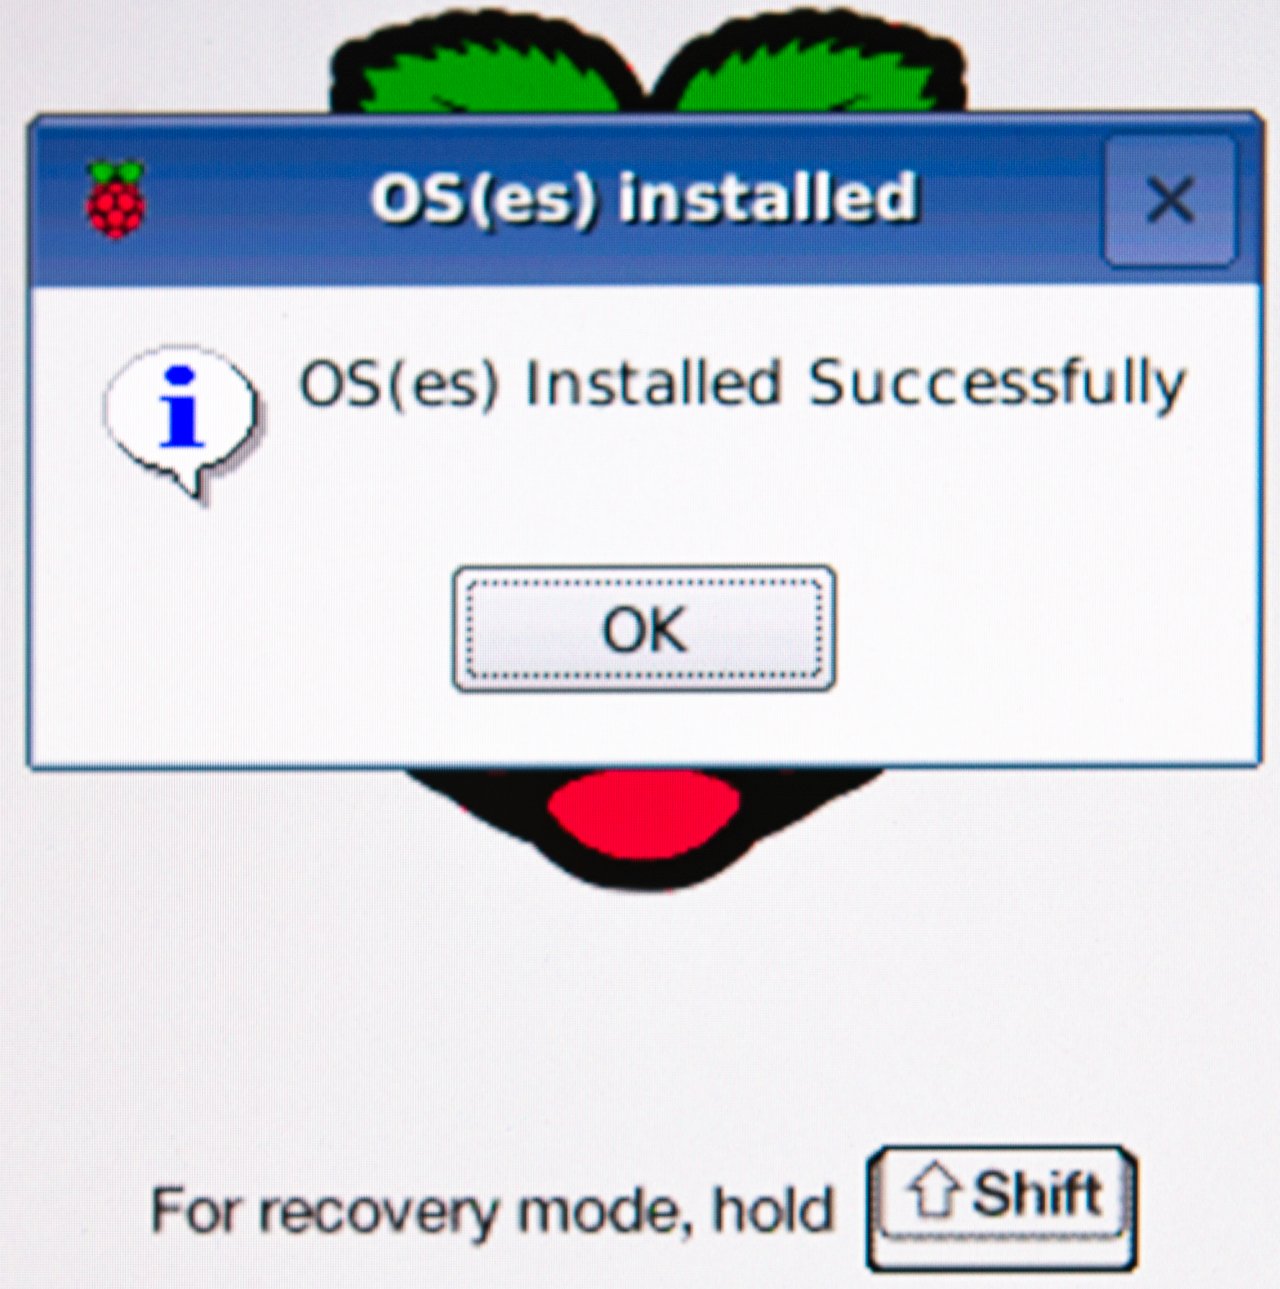
After installation has completed press 'Enter'.
The RPi will now finish its booting process and bring you to a very familiar looking layout known as a GUI (“Gooey”) with a welcome message.
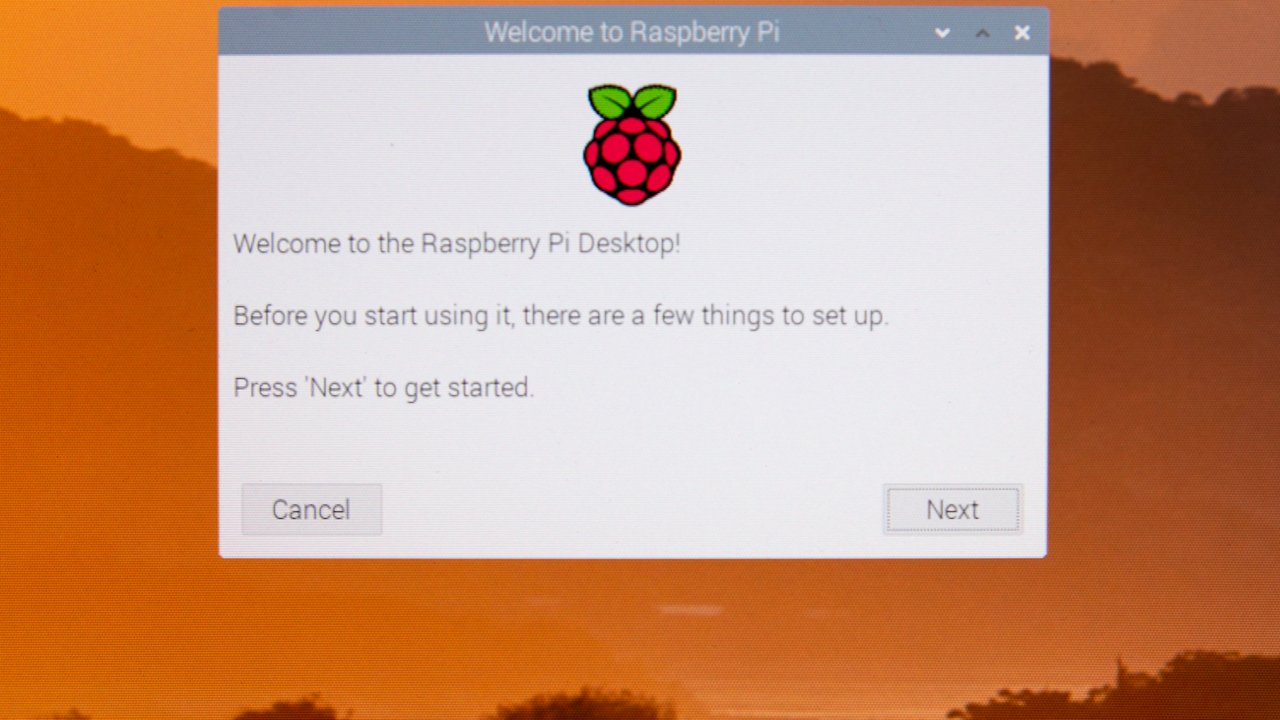
I'll briefly describe this process but it is self explanatory; select “Next”; select your country and language preferences, using 'Tab' button to change selection and then press 'Next'; create a security password, the default settings are User – “Pi” Password – “Raspberry”. If you are planning to connect to the internet CHANGE your password; the next pop-up is screen set-up; after that is Wi-Fi Network set-up, you can “Skip” this if you wish or find a network to connect to; the final pop-up is software updates. Assuming you followed the above instructions, you'll have the latest version already and can “Skip” this part.

Freedom to Explore
Once the Welcome Wizard is complete, you are free to explore your new Raspberry Pi with Raspbian OS. Having a keyboard & mouse combination will help, however, if you only have a keyboard the GUI is still navigable.

Depending on the keyboard you use, pressing the Win-Key (Windows), or the Raspberry Logo button on the RPi official keyboard will open the application menu. Using the directional buttons, you can navigate through its apps.
After exploring the many apps, you'll be wanting to SHUTDOWN.
You can find this option at the bottom of the application menu. As the RPi shuts down, its LED's will flicker, your monitor will go dark and disconnect. Your RPi's red LED will remain steady on – This is considered a safe point to disconnect its power supply.
*... and that's it.* Hopefully you had no issues but if you did, I have covered a few common symptoms and how to fix them below in “Troubleshooting”.
My next post is a taster of how to use Python coding on your RPi.
Troubleshooting
If the rainbow splash screen doesn't go away, the OS image hasn't booted correctly, the saved files were likely corrupted. You will need to unplug the power supply and remove the MicroSD card. You will then need to follow the whole software install again, this is a notoriously troublesome part of the process and may take multiple attempts.
Insert MicroSD into your network-accessible computer –> Delete data on MicroSD –> Use SD formatter –> Safely eject and physically remove MicroSD from port –> Reinsert MicroSD –> Copy data from inside the NOOBS extracted folder –> Safely eject and remove MicroSD.
Please attempt to boot up the RPi once more, ensuring the MicroSD is inserted before adding the power supply.
If the OS image boots correctly but when you arrive at a new screen, the RPi attempts to read the MicroSD then you may get a warning here, “Error resizing existing FAT partition”, this would suggest that the SD Formatter hasn't correctly sized your card.
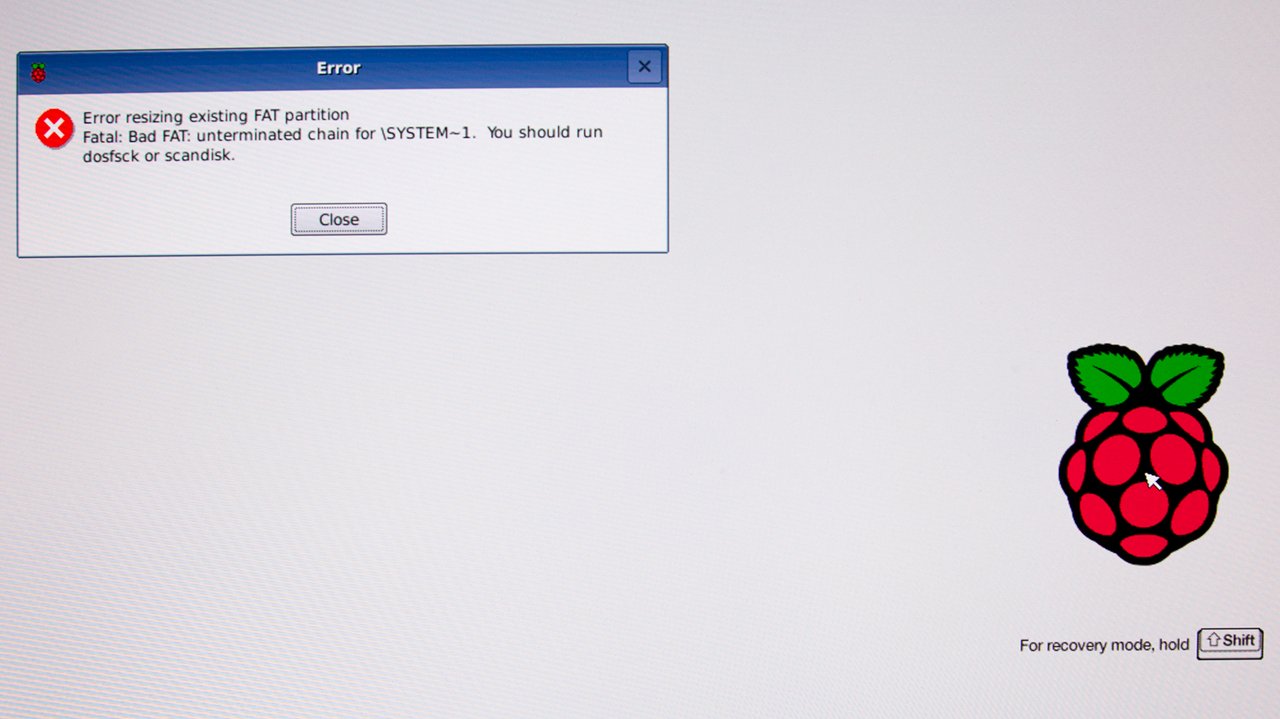
On Windows PCs you can try this: Put MicroSD card back into the computer. In file explorer, navigate to the removable disk, in my case Removable Disk(E).
Right click –> Properties –> Tools –> Error checking –> Check.

Once completed, safely eject, insert into your RPi and it should behave itself.
Notes:
I'd strongly advise avoiding alternatives to the official SD Formatter suggested here, I found although others were more effective my anti-malware programs all freaked out due to Trojan coding being hidden in the download wizards.
It is also advisable that any device you use is updated whenever possible, as software creators find vulnerabilities constantly so they release patches to protect you and your personal information.
You can read my next post, basic Python coding here:
You can follow me on Twitter at the link below.
https://twitter.com/SASchofield52
Disclaimer: Images are my own, opinions are my own.