Walk Your Own World (Game World 4)
Today I focus on making a walkabout engine, so that you can walk around your self-created game world. It's a return to a technical post after a few design-oriented ones about world shapes. I will start very simple here, but in future tutorials I'll be sure to add more layers and details, as we work towards a fully functioning game. To do this, I use PyGame and Repl.it, because with a bit of wobbling I actually managed to get a semi-smooth engine working.
Whenever I think of a walkabout engine, I always have to think back to the first RPG I got truly hooked on, hence the header image ;).
Initialising the Walkabout Engine
Okay, time to get going. To start this off, we first need to create a PyGame Repl, which is explain in my previous post here. Then, we need to initialise PyGame, and create a display with a background color. You can do this with the following 7 lines of code:
import pygame
import time
pygame.init()
width, height = 800, 600
backgroundColor = 0, 0, 0
screen = pygame.display.set_mode((width, height))
screen.fill(backgroundColor)
Next up, we need to load a map image of our choice:
map_img = pygame.image.load('Equirectangular_projection_SW.jpg')
(I uploaded the file and use the example from the first Game World tutorial.)
And store its height and width in pixels for later use.
map_width, map_height = map_img.get_rect().size
We also define four variables:
x = 0
y = 0
px = 0
py = 0
Here, x and y are the base map coordinates of the top left corner of the viewing screen, and px and py are the coordinates where our player resides.
The Main Loop
In the main loop, we will be doing something new, because today's walkabout demonstrator is going to be interactive. You will be able to use the arrow keys to move around your character (which I represent as a circle) across the map.
To do this, let's define the loop:
while True:
And use PyGame's event handling system to figure out which key has been pressed:
for event in pygame.event.get():
if event.type == pygame.QUIT:
break
keys = pygame.key.get_pressed()
Now keys will contain a dictionary of 0s and 1s, but we now need to extract each key from that dictionary and check it. We start doing that with the left key:
if keys[pygame.K_LEFT]:
px -= 5
px = max(0,px)
Now what do I do here? In the first line I check whether the Left arrow key has been pressed. If so, then I move the player 5 pixels to the left (2nd line) and set the x coordinate to 0 if the player happens to move off the map on the left side (px<0).
Next, we repeat this exercise for the right key:
if keys[pygame.K_RIGHT]:
px += 5
px = min(px,map_width)
, which is identical, except that we set the x coordinate to the map_width if the player happens to move off the map on the right side (px>map_width).
Next, we add similar handling for the up and down keys:
if keys[pygame.K_UP]:
py -= 5
py = max(0,py)
if keys[pygame.K_DOWN]:
py += 5
py = min(py,map_height)
Now that we have the player coordinate correctly, we need to calculate where the camera should be positioned:
x = max(0, min(px - int(width/2), map_width-width))
y = max(0, min(py - int(height/2), map_height-height))
In a nutshell, we essentially want the player to be in the center (px - int(width/2)), but we also don't want to show parts beyond the edges of the mape (hence the max and min functions).
Lastly, we render the map:
screen.blit(map_img, (0, 0), area=(x,y,width,height))
Then draw the player, so it ends on top of it:
pygame.draw.circle(screen, (255, 255, 255), (px-x, py-y), 15, 0)
And finally, print the player coordinates for convenience, display our graphics, and sleep for 25 ms, which translates to a maximum of 40 frames per second:
print("px: {}, py: {}".format(px,py))
pygame.display.flip()
time.sleep(25 / 1000)
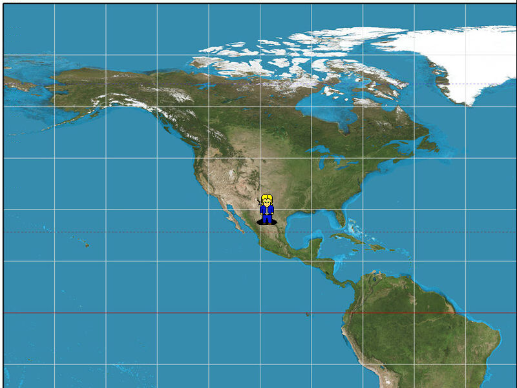
And with all that, if you provided the right image, you should get something like this:
Closing thoughts
We're building our Game World with baby steps, but this time around we can finally traverse the map. As usual I've attached the source code and a Repl for your convenience. Also, for subscribers I've added a small example featuring an animated character.
However, if you're not a subscriber don't worry, as we will be touching upon animated character movement soon enough! :)
Appendix 1: Full Game Code and Repl
Here's the full source code:
import pygame
import time
pygame.init()
width, height = 800, 600
backgroundColor = 0, 0, 0
screen = pygame.display.set_mode((width, height))
screen.fill(backgroundColor)
map_img = pygame.image.load('Equirectangular_projection_SW.jpg')
map_width, map_height = map_img.get_rect().size
x = 0
y = 0
px = 0
py = 0
while True:
for event in pygame.event.get():
if event.type == pygame.QUIT:
break
keys = pygame.key.get_pressed()
if keys[pygame.K_LEFT]:
px -= 5
px = max(0,px)
if keys[pygame.K_RIGHT]:
px += 5
px = min(px,map_width)
if keys[pygame.K_UP]:
py -= 5
py = max(0,py)
if keys[pygame.K_DOWN]:
py += 5
py = min(py,map_height)
x = max(0, min(px - int(width/2), map_width-width))
y = max(0, min(py - int(height/2), map_height-height))
screen.blit(map_img, (0, 0), area=(x,y,width,height))
pygame.draw.circle(screen, (255, 255, 255), (px-x, py-y), 15, 0)
print("x: {}, y: {}".format(x,y))
pygame.display.flip()
time.sleep(25 / 1000)
And here's the Repl.it link.
Continue reading with a Coil membership.