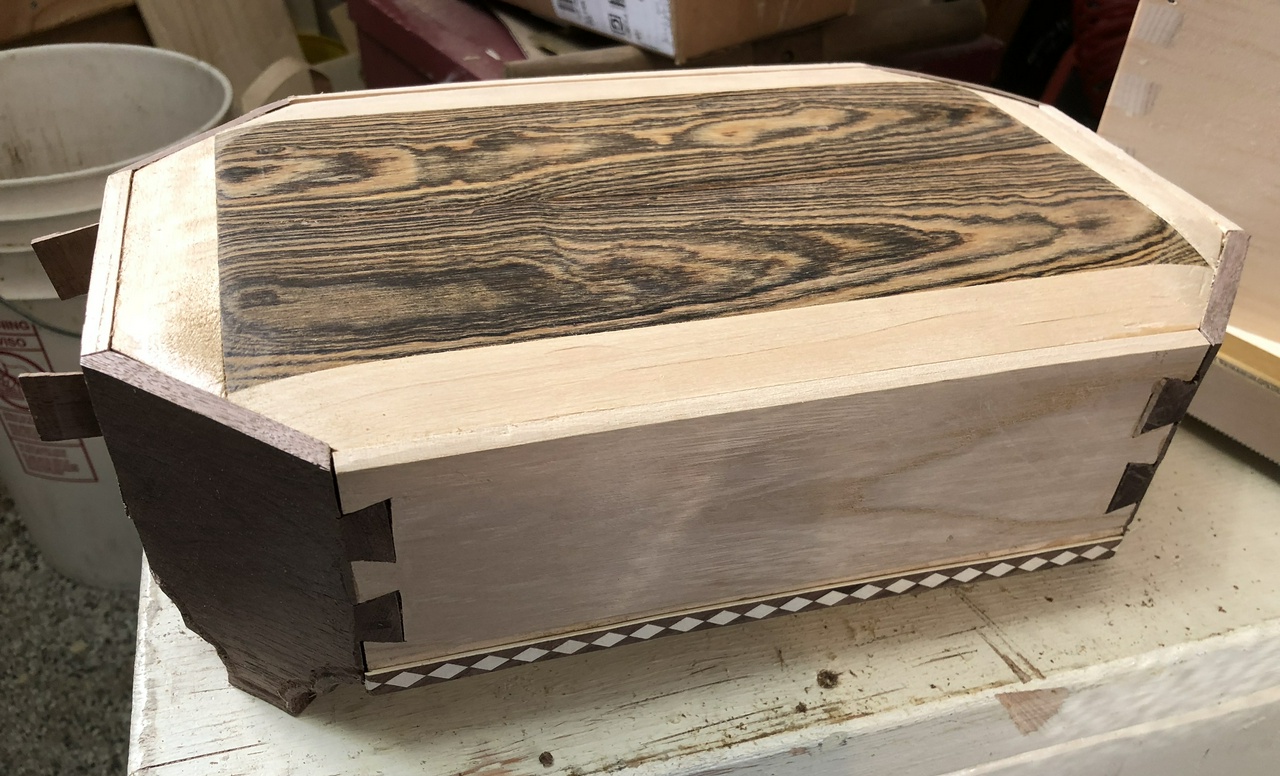
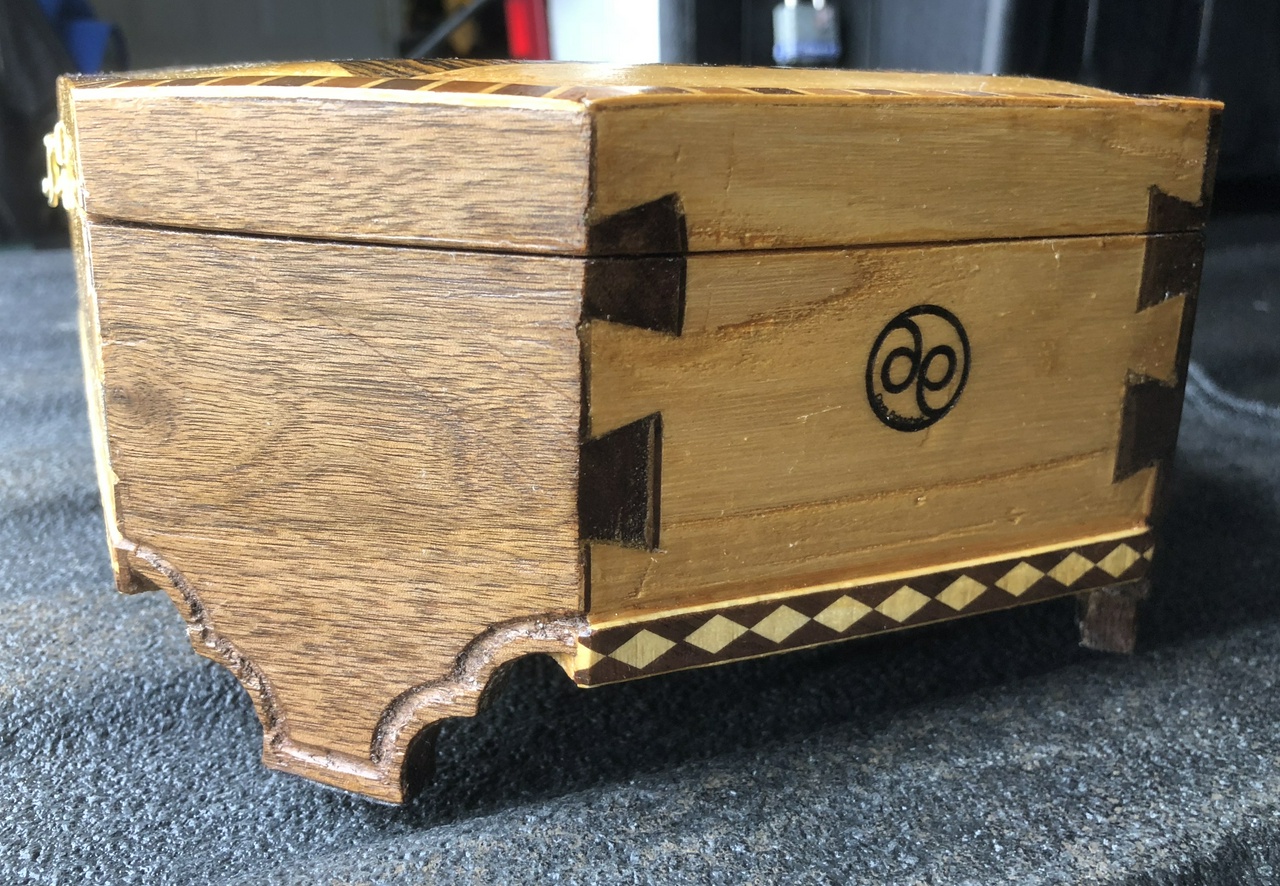
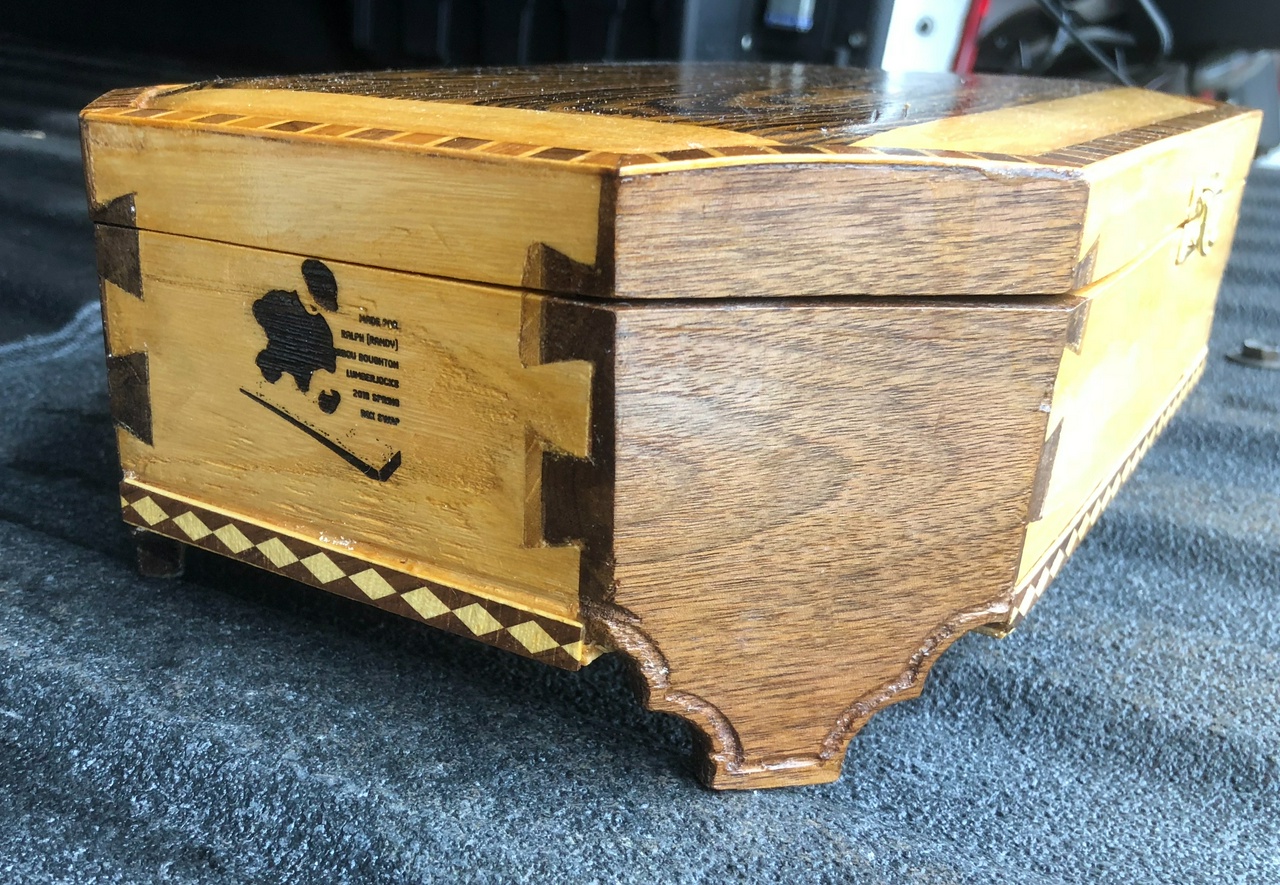
Dovetailed octagonal box
Originally written May 3, 2018
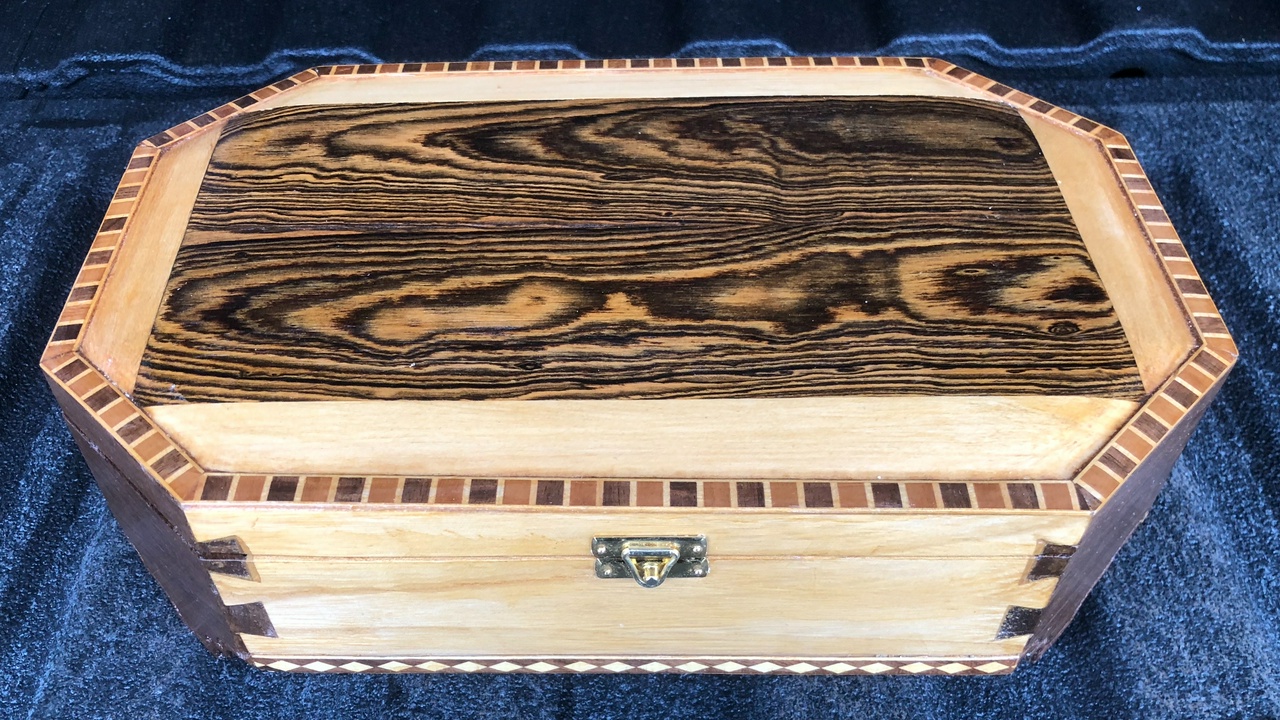
I wanted the box I built for the box swap in 2018 to be different. I looked through nine-hundred-some box projects on Lumberjocks and saw that octagon boxes, while not common, weren't entirely rare either. But none that I saw were dovetailed. What the heck, I had just learned to cut dovetails this year, so how hard could it be?
I started with some sketches. As you'll see, the design diverged a little from the sketches, but some things stuck all the way through.
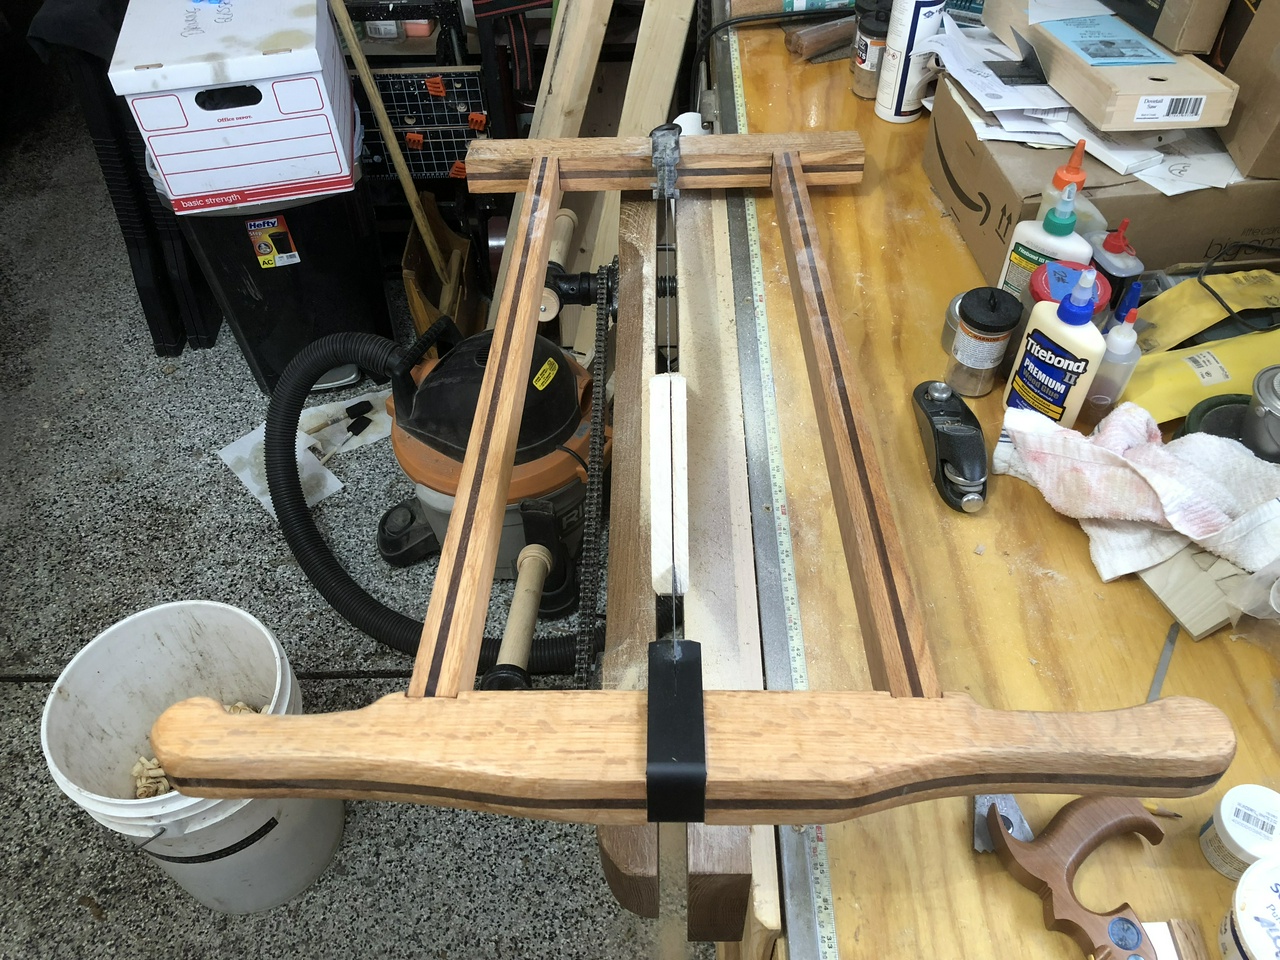
I started out with experiments in cutting 135 degree dovetails and built a jig to help me get them right.
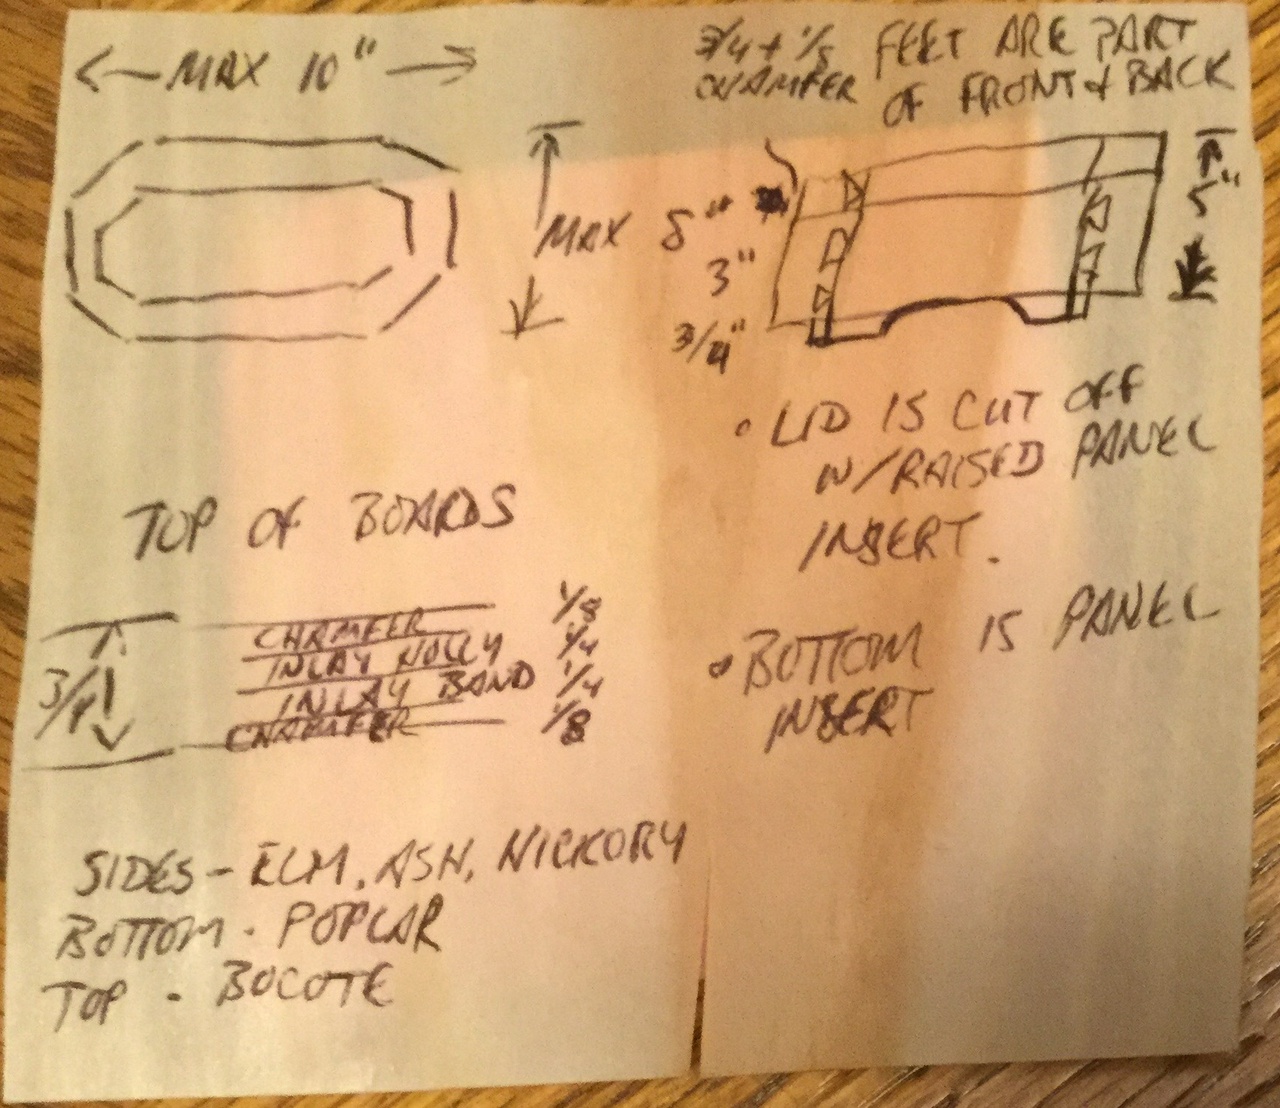
I also started resawing the wood I was going to need to build the box. I had some ash that had nice grain, plus some walnut that would look good for the corners. I also had a piece of bocote that I planned to use for the lid. First step, resawing the ash.
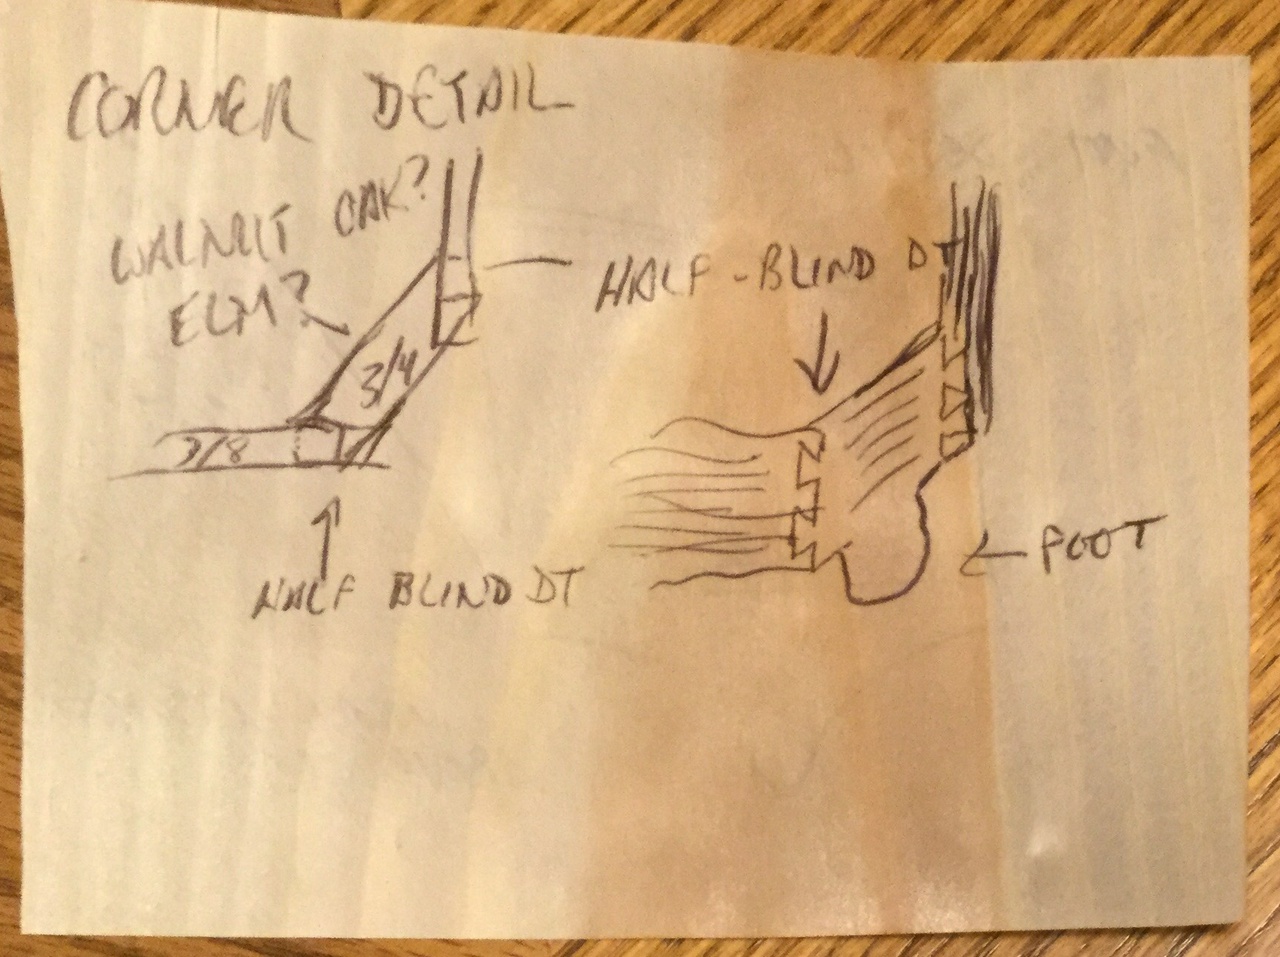
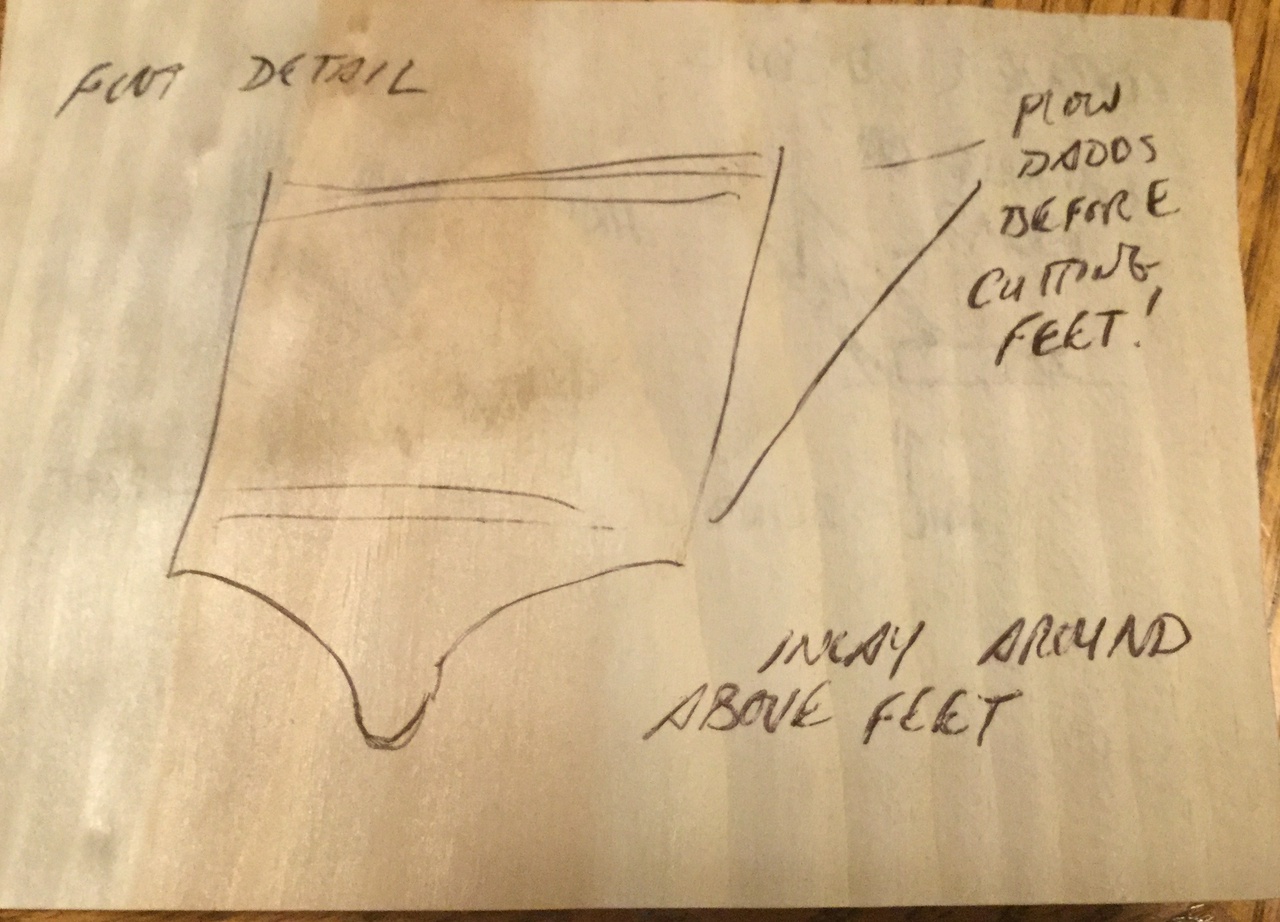
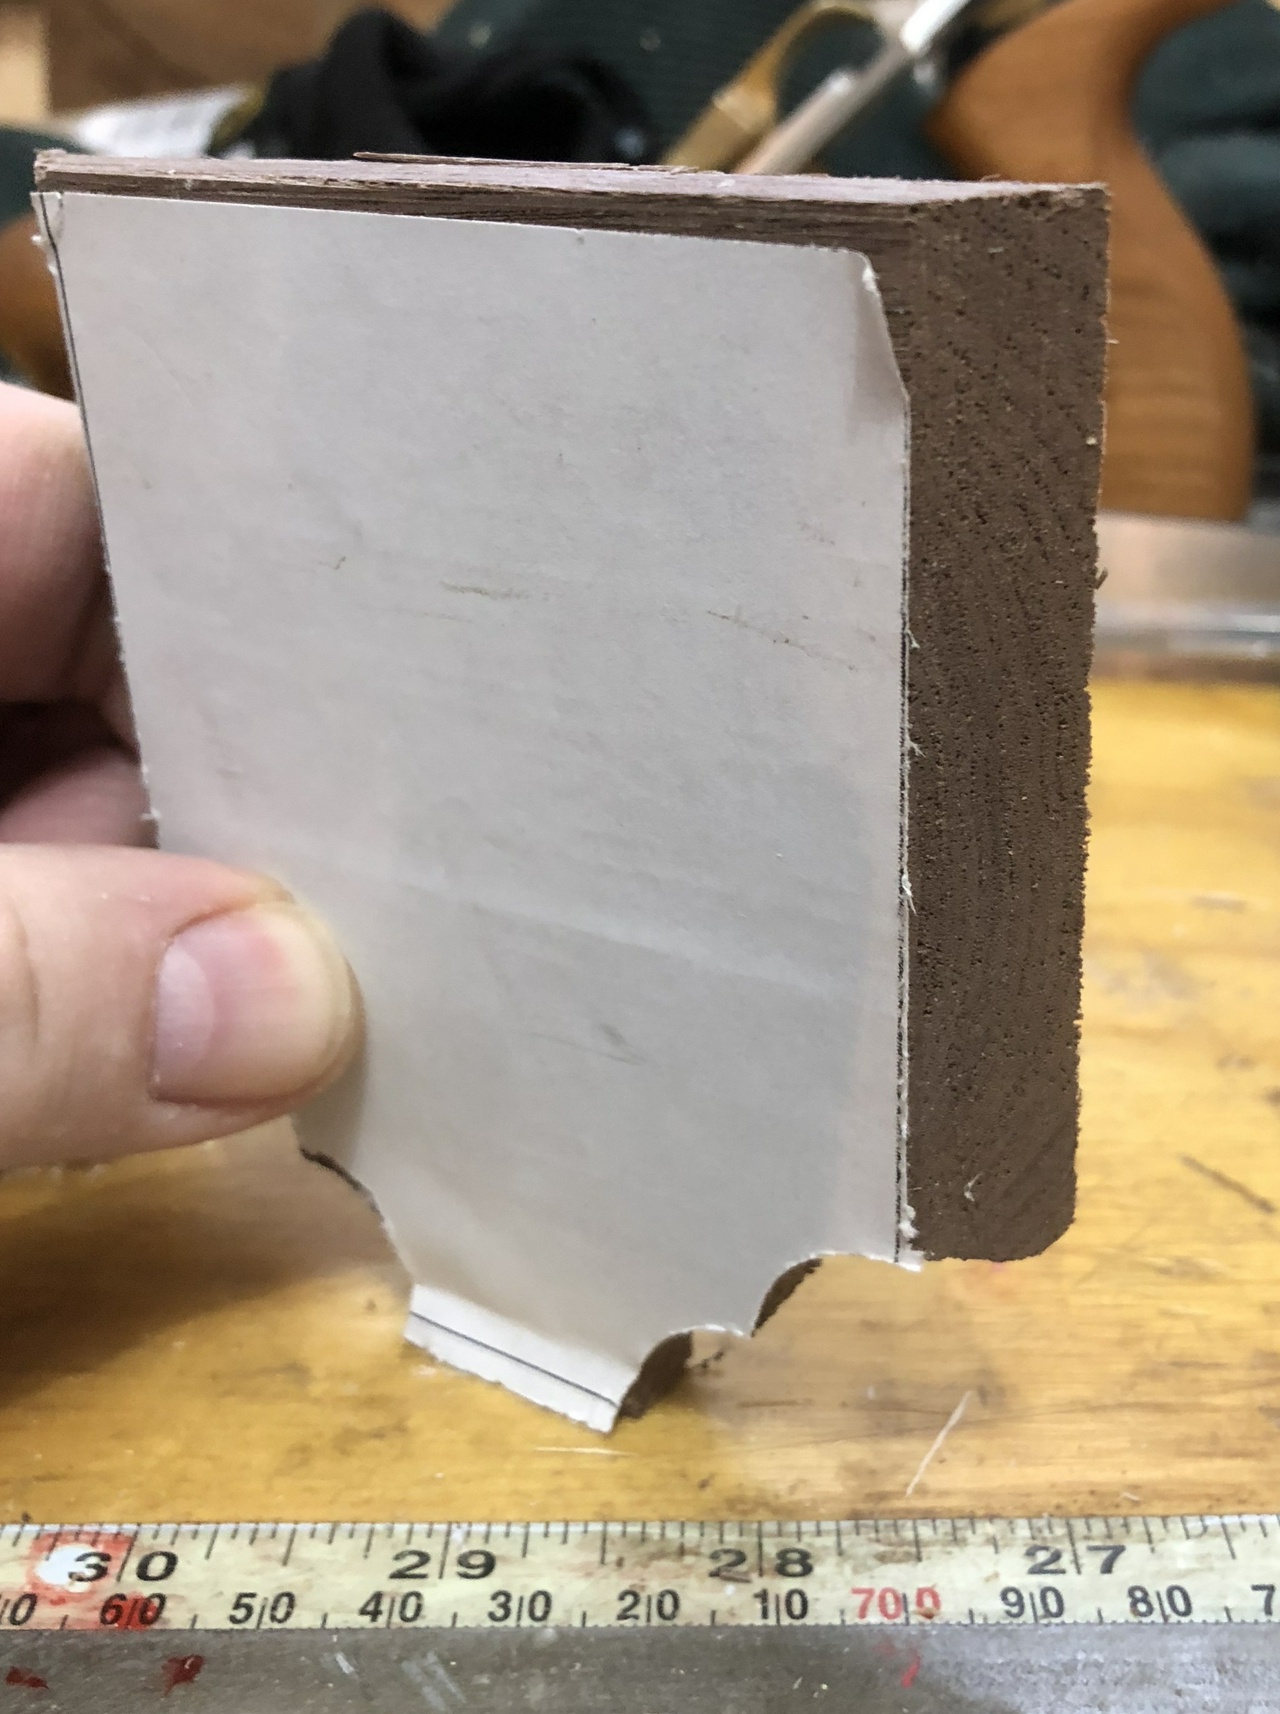
Once that was done, I made a template for the corner / feet and printed out a half-dozen copies of it. I would only need four, but I figured a spare or two might prove handy along the way.
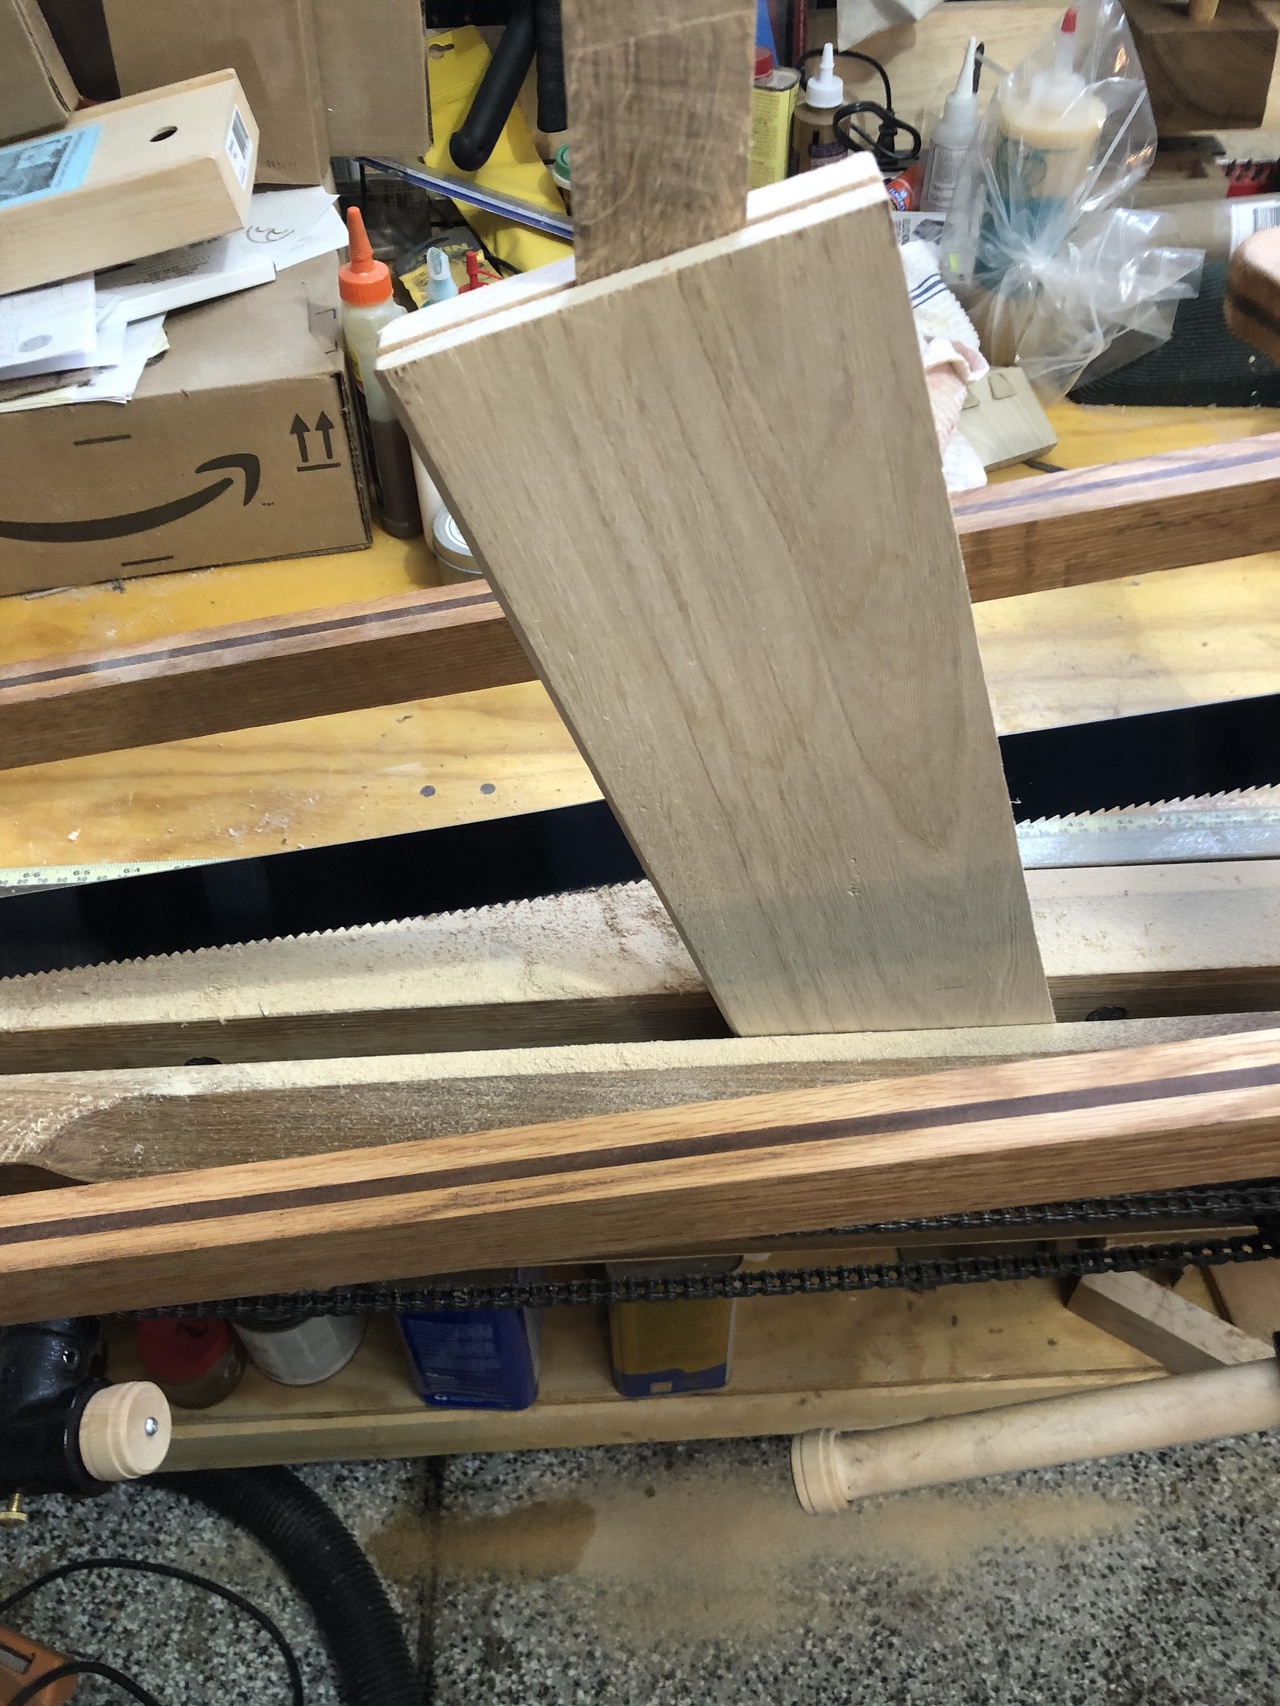
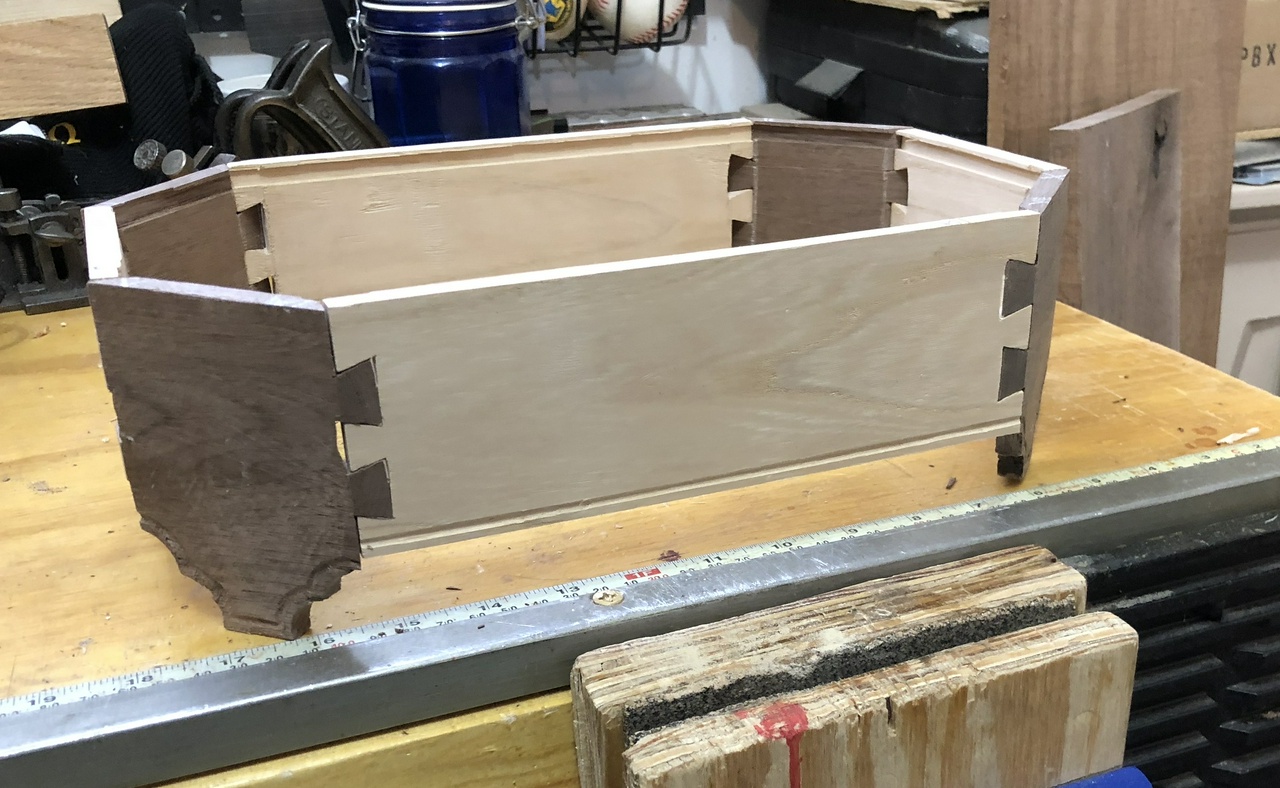
I glued the templates onto the walnut and cut out the corners. Took them to the miter jack to put 45 degree ends on them. Then basing the height of the sides on those templates, I cut the sides, using the usable lengths of ash I had (my resawing wandered a little, as it usually does, so I had about half the length of the boards that was actually usable).

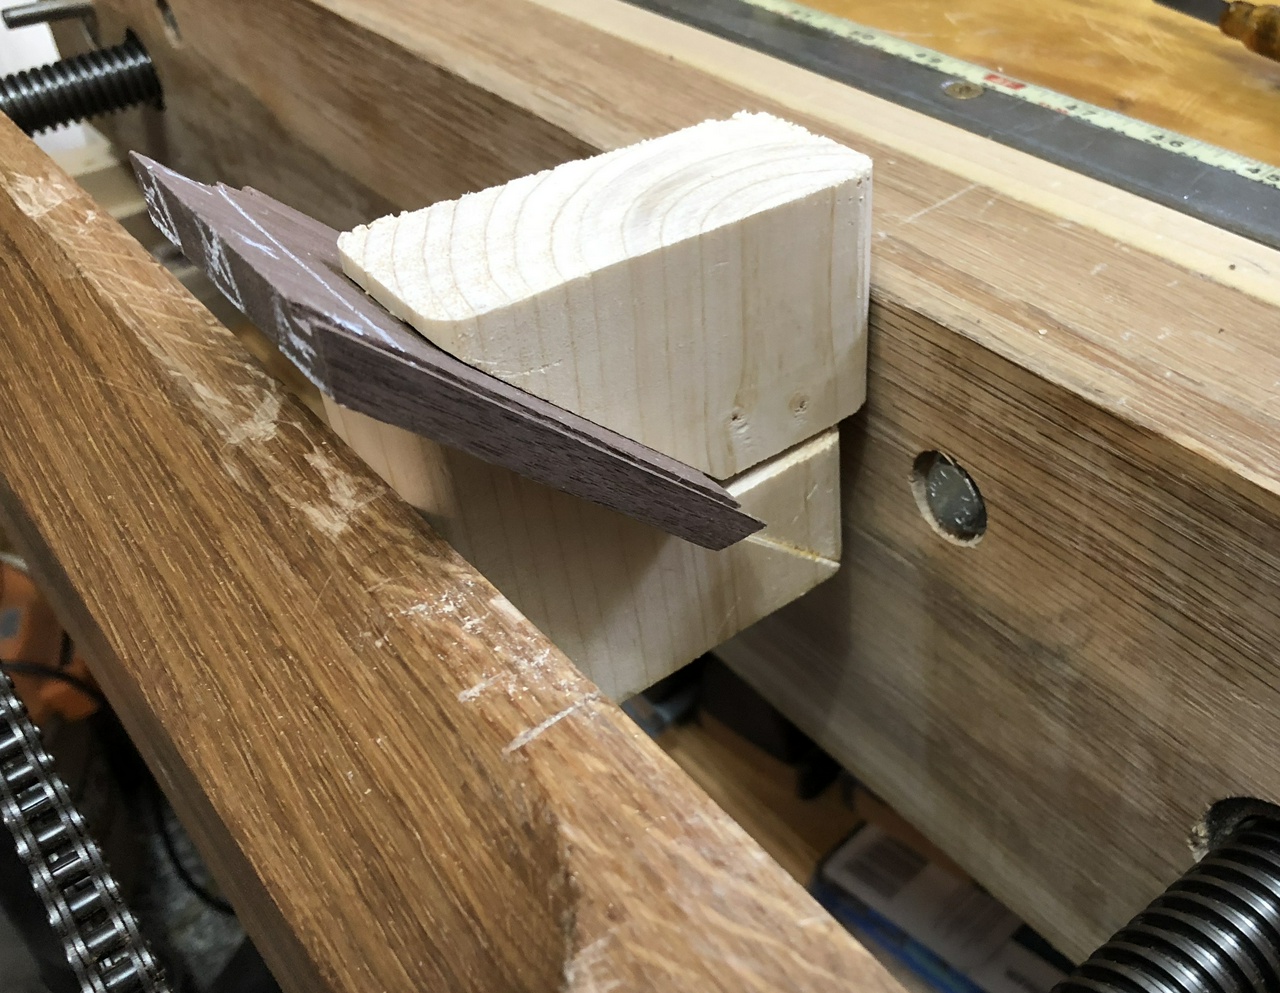
Then I cut the pins in the walnut. Not everything went perfectly, but I figured the worst case was that I'd cut the ends off and try again.
With all the dovetails cut, I tried my first test-fit. It wasn't great and the dovetails were gappy in spots, but the box felt pretty solid, so I'd done well enough.
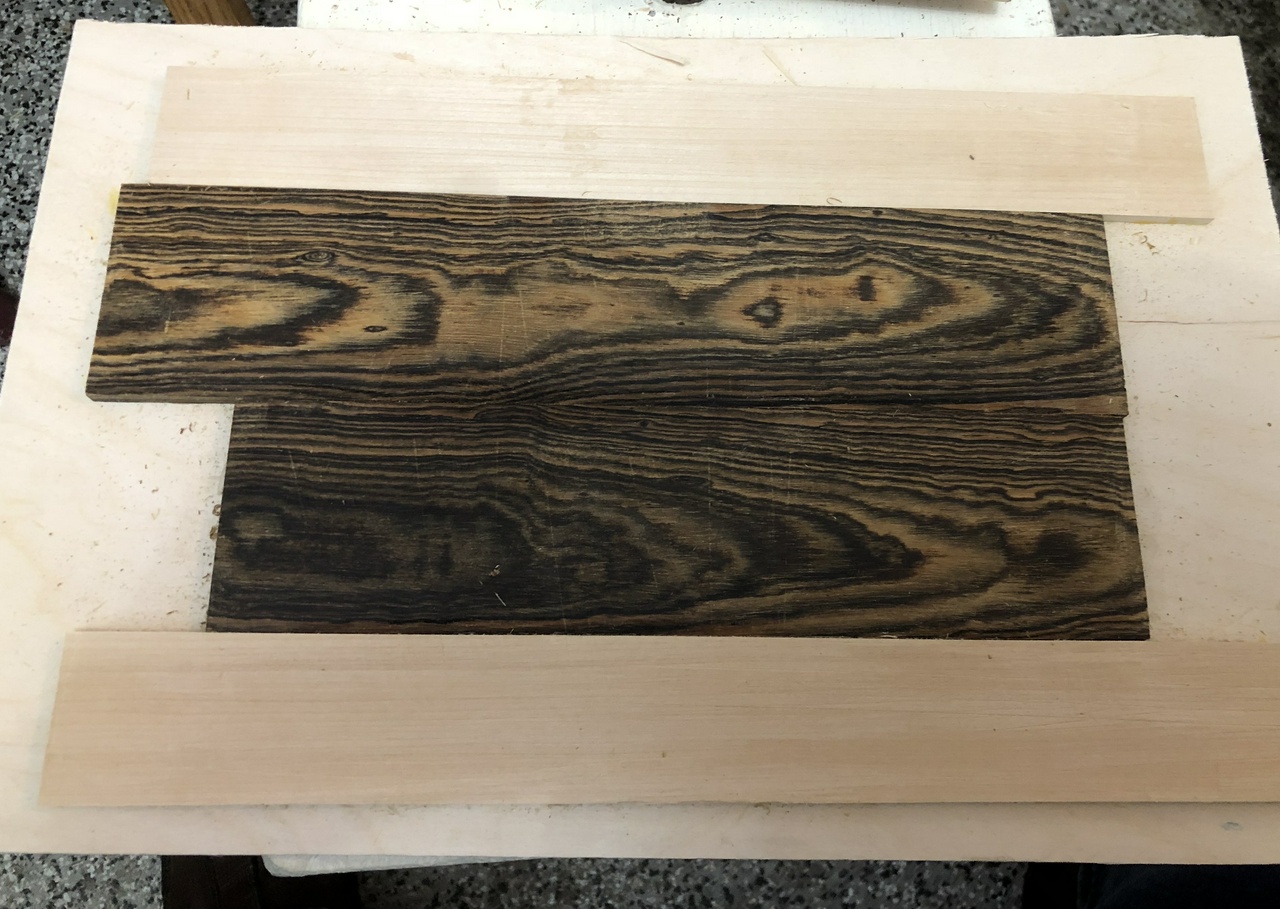
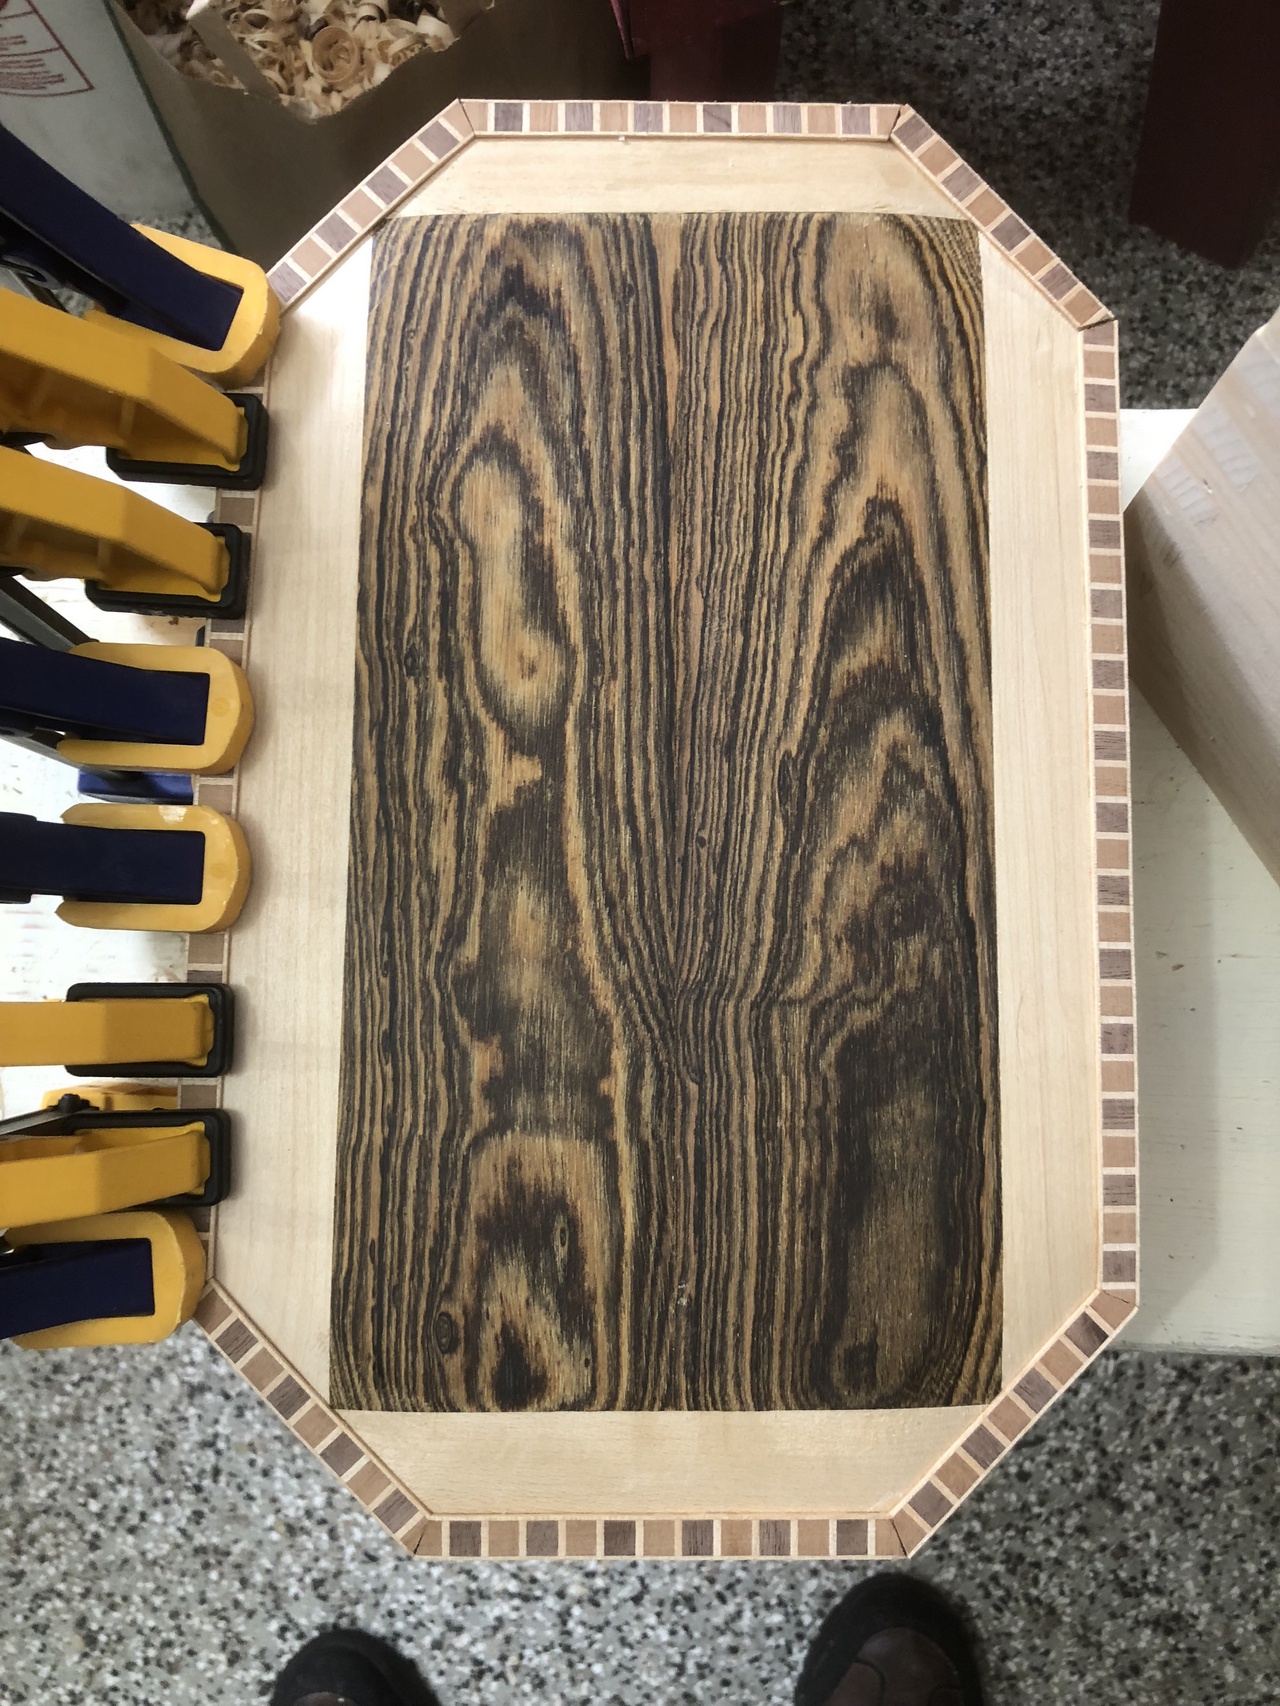
Now it was time to get started on the top. I glued up the bocote with some basswood on a piece of ¼” birch plywood. I had originally planned to use some holly around the bocote, but the pieces I had weren't large enough to work with the box-sides I'd cut, so I had to switch to something larger. I lined up the bocote to make the grain pretty to my eyes, then put the basswood around it. I forgot to take a picture of trimming it square and then putting on the end pieces. Oops.
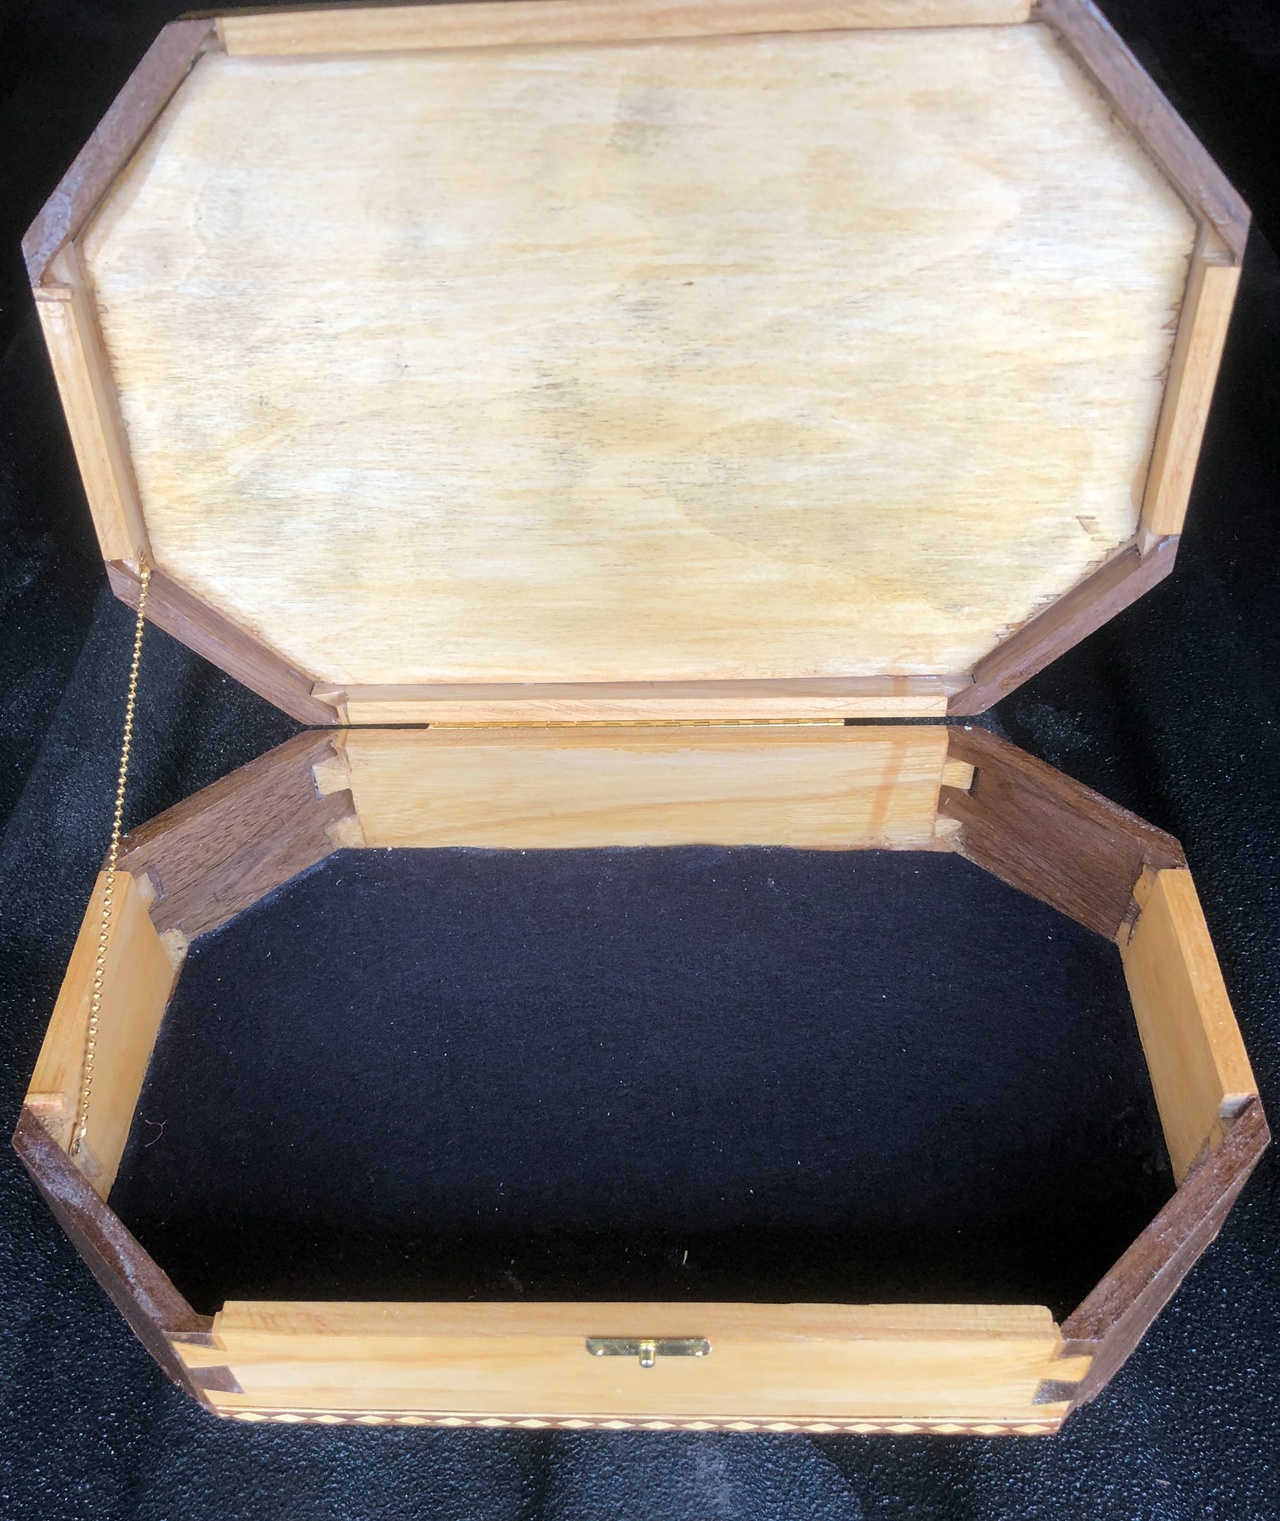
Next up was the bottom. I cut the angled cut-outs for the corners with a coping saw, leaving the flats plenty long, then trimmed them to size with the plane. I've found this helps me sneak up on a good fit slowly. I just wish I'd been able to think of a way to do that for the corners too, since they ended up with gaps between them and the corners when I test-fit everything. Oops.
With the top and bottom cut, it was time for the initial assembly.
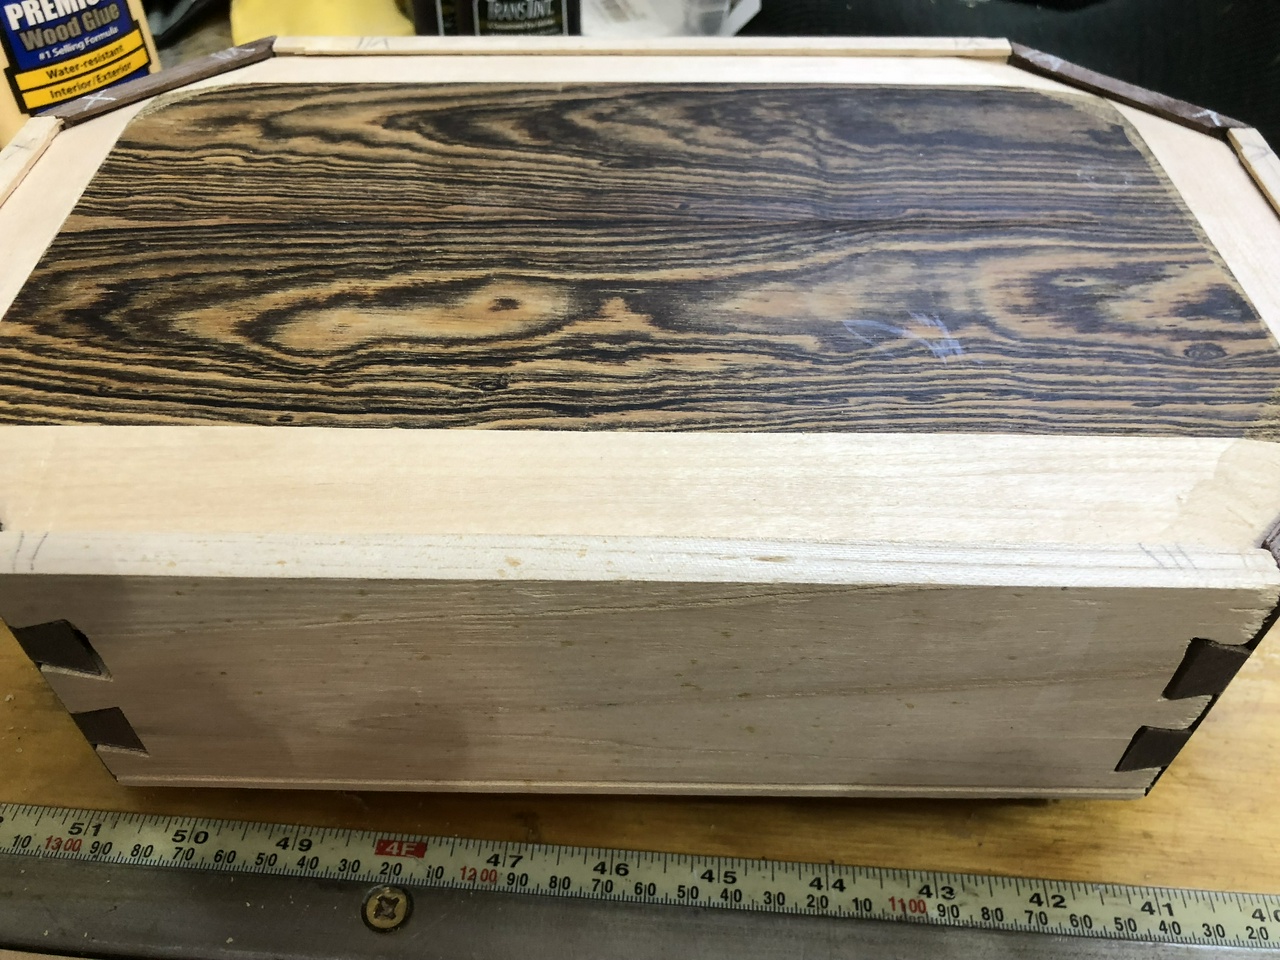
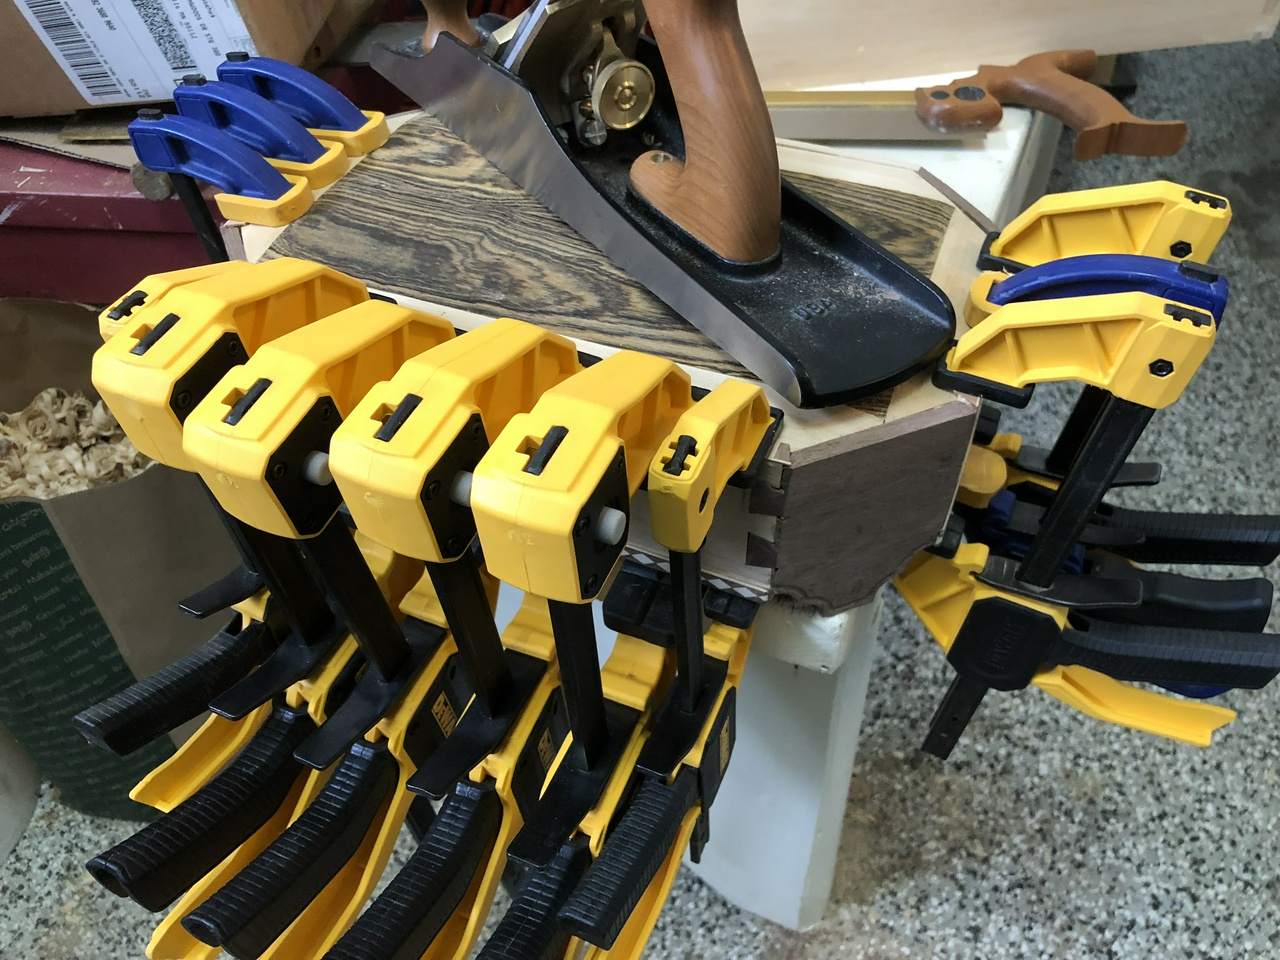
I glued everything together and crossed my fingers. Since I could see that the top wasn't a great fit, and I'd have the edges of the plywood exposed, I got online at inlaybanding.com and ordered some banding. I figured that could cover the edge of the plywood nicely, and also could dress up the top of the box.
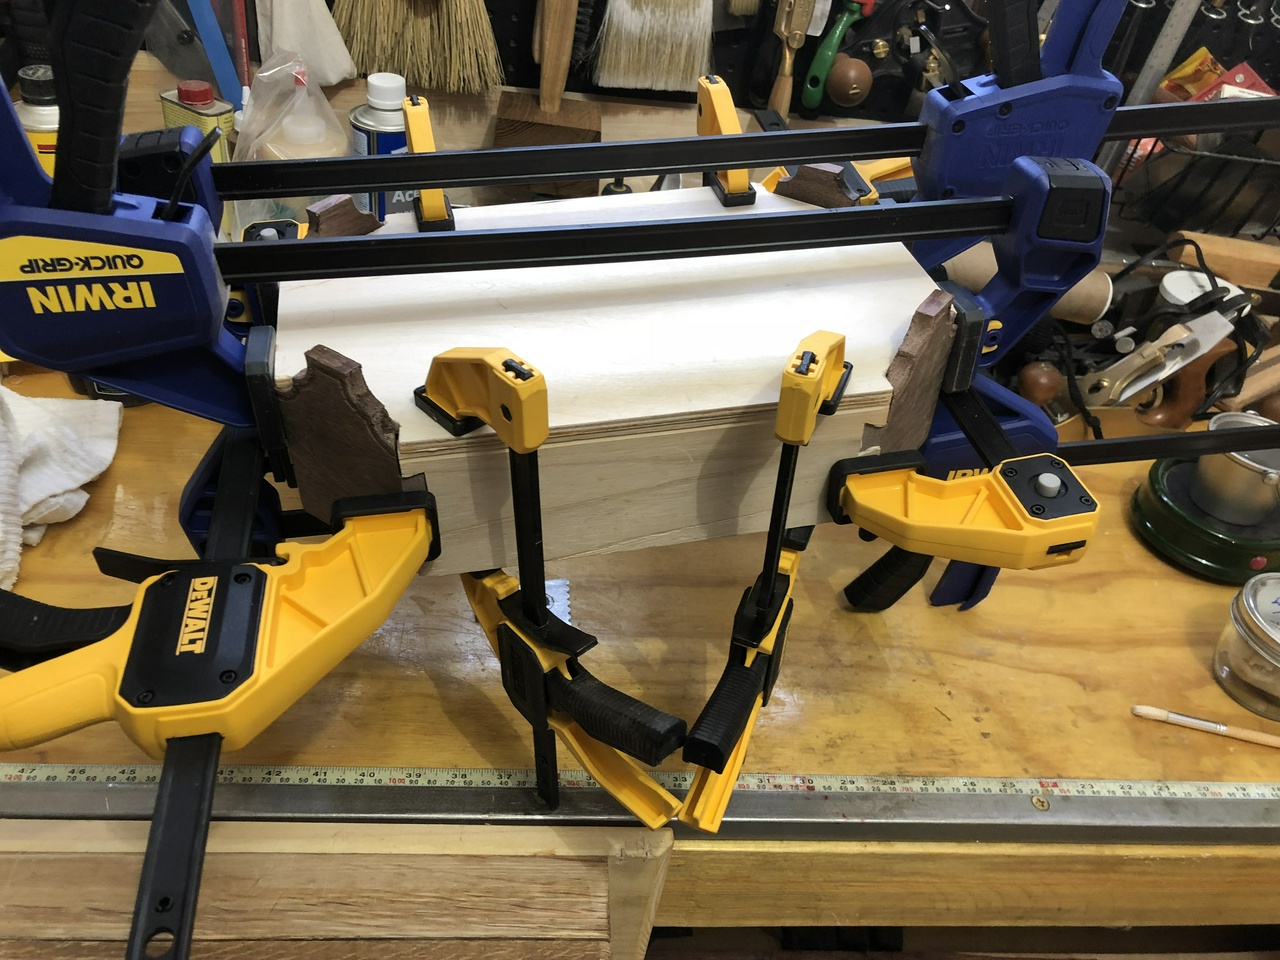
While I waited for the banding to arrive, I planed the top down, essentially freeing the top from the dado (or turning it into a rabbet). But as the top was glued in, it held, and I wanted a level surface to attach the banding to.
I glued the banding to the edge of the plywood, but the banding I'd picked was ⅜” so it extended beyond the ¼” plywood and almost covered the groove I had put in the ash sides.
I also realized that I needed a way to cut the miters for the top. I built a guillotine for cutting the banding using some scraps and a utility knife blade.
With the banding on, it was time to fill the gaps. I used sawdust (mostly ash) to pack the gaps, and then wet it with CA glue. I've found this a pretty good trick for filling small gaps. I also dripped CA glue into the tiny gaps in the banding and then went over it lightly with a sanding block while the glue was still wet, pushing dust into the gaps. That filled the gaps in the banding reasonably well, too.
I put five coats (two of platina, then three of orange) shellac on the outside of the box at this point. I wanted to get to the final color before cutting open the box, and it was a lot easier to pad on the shellac with the box intact.
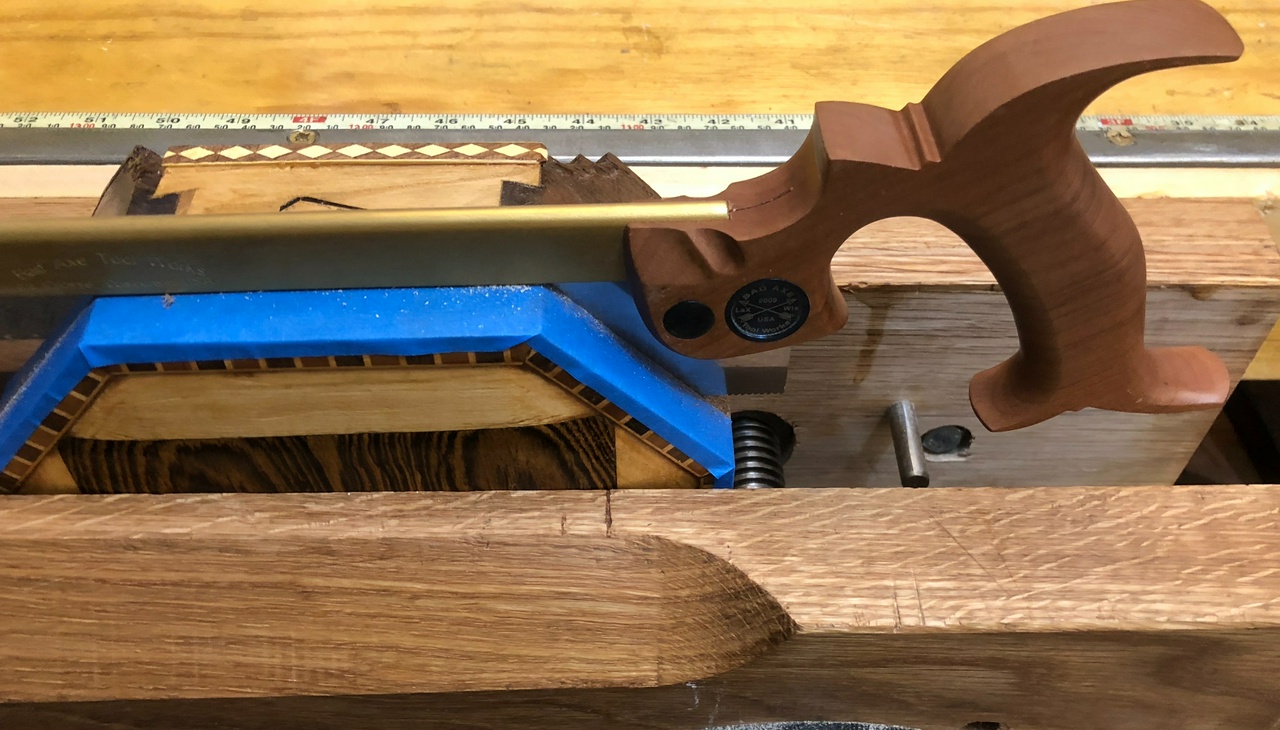
Next up was sawing off the lid. I had never done this before, and we were getting close to the end of the swap, so a mistake at this point would have been catastrophic. I carefully applied blue tape to the box where I wanted to cut, and then started sawing. It all went well, but I was sweating up a storm in the 45 degree shop that day.
With the lid off, all that was left was applying the hinge and latch, putting a couple coats of shellac on the inside, and then gluing in the felt bottom with contact cement (handy tip: do one half of it first, then once that's in straight, do the second half). I had done it!
Discuss... Reply to this in the fediverse: @davepolaschek@writing.exchange