davepolaschek

project

Small chokecherry bowl, top view

This is a smaller chokecherry bowl, turned from the other half of the trunk that made the larger bowl.

Rough turned in early January, I finished it the second week in February 2024. Bowls seem to go very quickly, but then I think of the time I spent fussing over the finish on this one, and suddenly they’re not as quick any more.

#bowl #project #woodturning

Discuss... Reply to this in the fediverse: @davepolaschek@writing.exchange

Cholla and epoxy bedside lamp, unlit and lit

After the first bedside lamp with its wooden base, I wanted to try making one with a cholla and epoxy base. I started by pouring tinted epoxy into a 16 ounce cup from the dollar store, with some cholla pieces jammed into it. For smaller molds like this, I may need to start using partial pieces of cholla, as there ends up being a lot of empty space that needs to be filled with the epoxy. And pouring large amounts of epoxy can lead to a runaway exothermic reaction which causes the epoxy to foam and bubble and set very quickly, which generally isn’t usable.

Epoxy and cholla, fresh from the snowflake-adorned mold

With a successful pour, I pulled the blank from the mold and rough-turned it to a shape I thought would work. The only dimension I was really worried about was the top, which would have the top of the lamp meeting it.

Rough turning of cholla and epoxy

Looking at the rough blank, there wasn’t enough room for a battery, so I glued on a round piece of cherry, which I thought would look good, then I poured a small pour of epoxy to make sure the base and the lamp body were stuck together real good.

Wood round glued to bottom of cholla and epoxy blank

Next I turned the base, aiming to leave it as wide as possible, giving me the most flexibility with the battery.

Wooden base rough-turned

With the base turned, I bored a hole into the base of the lamp body. The largest diameter at the bottom was 2½ inches, but I stepped that down to an inch to make sure I didn’t make the inside of the lamp bigger than the outside.

Boring the hole in the bottom so I can assemble the parts and insert the battery

With the hole bored and the top of the lamp assembled, I carved out an opening for the battery and glued on some feet to give a little clearance for the battery, so the lamp wouldn’t rest on the battery.

Bottom of the lamp, showing the carved space for the battery, feet, and signature

After signing the lamp, I finished it. The epoxy portion is polished with a plastic polish. The wooden base was finished with multiple coats of Tried and True Danish Oil. After the finishes have had a chance to cure, I’ll probably add a coat of furniture wax to make it easier to dust.

Completed cholla and epoxy lamp, unlit

Completed cholla and epoxy lamp, lit

#woodworking #project #lamp

Discuss... Reply to this in the fediverse: @davepolaschek@writing.exchange

Unlit lamp

A while back, my sweetie expressed a desire to have a bedside lamp and a night light. I worked with a few different ideas for the lighting part of it before finding the Lanterna 3-Stage Battery Powered Lamp at Lee Valley. It’s just about exactly what I want, except it takes 3 C-cells. More on that later.

So I started by making a twisted tangential turning roughly the shape I wanted for the lamp base.

Taped-together wedges which will form a twisted tangential turning

I also went searching for a rechargeable battery for the lamp. Turns out our door cameras have a battery which is just about perfect. The battery has charging circuitry built-in, and the terminals are on one end of the battery, and the charging jack on the other, so I ordered a spare battery. The only question was whether the 3.7 volt battery would drive the light circuit which was expecting 4.5 volts (yes, yes it does).

Then I disassembled the Lanterna and figured out what I could use. It was pretty easy, as there is a ⅜ inch threaded rod down the middle of the lamp holding everything together and carrying the wires from the head to the base. All I needed to do was cut off the battery holder, shorten the rod to fit my base, and then solder the wires onto the rechargeable battery terminals.

Lit lamp

Then because my base was a little short, I cut a piece of walnut and carved out a battery-shaped hole in it, leaving the hole just large enough to slide the battery through, but tight enough that the battery won’t fall out when you pick up the lamp.

Lamp base, showing micro-usb charging port

With the walnut base glued to the twisted base, finishing was just a matter of a few coats of danish oil, a coat of shellac, followed by two coats of violin varnish, and then a thin layer of carnauba wax so the lamp should be easier to dust.

My sweetie thinks it’s wonderful.

Technical notes: the battery charging circuit may not support operation of the lamp while charging. I don’t think this is a big problem, but that’s part of why the charging jack is on the bottom of the lamp. It’s less tempting to try and use the lamp while it’s charging this way. Also, Ring doorbell batteries are about half the price of the TP-Link batteries, but the charging jack and battery terminals are on the same end of the battery. Depending on your design, this may be good or bad.

Finally, the three stages of the lamp were chosen fairly well. The dimmest is slightly too-bright for a night-light, but putting a colored lens in front of the LEDs would solve that. And would be easy given the way the lamp screws together. And the current draw is low enough that the lamp should last 10-20 hours at full power, and almost a full week in nightlight mode. I think that’s a pretty decent life.

#project #lamp #woodworking #woodturning

Discuss... Reply to this in the fediverse: @davepolaschek@writing.exchange

I recently had our HVAC guy out to clean my shop mini-split. He commented that it really needed the cleaning, and he was surprised it was still working well. And that I really ought to keep it cleaner. So I decided I would built a box to hold some filters to clean the air going into the split, so it would be happier in the future.

First step was building a frame to hold two of the filters I’m going to use. These are the filters I already use in my Rikon 62-450 air cleaner, so I generally have them on hand.

Frame to hold two filters

With the frame built, I measured the mini-split and the space between it and the ceiling. My goal was to put the filters sitting vertically, rather than the horizontal filters built into the mini-split, which sit horizontally at the top of the split, and catch dust even when the split isn’t running. I figure the filters will last longer if they’re only collecting dust when the split is running.

Everything looked as though it would fit, so I built two frames for the box. The one in the left had to work around the mounting system for the post for my post drill, which I needed because it was impossible to buy a straight 6x6 during the early COVID days, so I got a twisted one and figured a way to make it work.

Two side frames for the filter box

With the side frames built, I cut panels to fit on them from a scrap of MDF I had. Then I used more scraps to connect the two side frames together and provide an opening for the filter holder.

Completed frame for the filters

Next up was to seal up the large gap between the mini-split and the filter box. But I couldn’t build anything rigid here, since the front of the split pivots up when it opens so you can clean the filter. My solution was to tape in a piece of ¼ inch MDF. Hopefully the tape will remain flexible enough that I don’t need to remove it, but can simply flex the piece out of the way.

Taped-in insert between the filter box and the mini-split

With that, it was time to put the filter carrier in place. I had hoped that it would stay with no attachment, bu it wanted to tip forward, so I put a single screw in to hold the top of it in place.

Filter carrier placed in the front of the filter box, secured by a single screw at the top

And with that, everything was done except inserting the filters. With them in place, it’s done. The filters don’t seem to hurt the airflow from the split when they’re clean, but I’ll need to keep an eye on things as they get dirtier. It wouldn’t do to burn out the fan in the split.

Completed filter box with filters

#project #woodworking #airFilter

Discuss... Reply to this in the fediverse: @davepolaschek@writing.exchange

Carving skew

While working on the Altai Project Logo carving, I discovered I needed a narrow skew in order to get down into some of the corners. I have a handful of ½ inch wide unground blanks I got from the Mountain Woodcarvers clearance page, so I got busy.

Carving blade blank

Carving blade blank

First step was grinding it down to 2-3mm wide. Then I skewed the tip, and put a rough edge on with the grinder. That’s the rough outline of the tip made.

Then I had to re-harden the steel, as the grinding had wrecked the temper. I heated it bright glowing red with a MAP gas torch, and plunged it into a jar of canola oil I keep for hardening tools. Then the blade went into the toaster oven to temper it. I’m aiming for a hardness of 60 or so, which will work well for a carving tool.

With the blade in the oven, I turned to the lathe, and converted a small piece of granadillo into a handle. I also drilled a 3/16 hole for the tang. Because it’s a tapered tang, I drilled a short bit wider with 7/32 and ¼ inch bits. Then I added a ferrule from some ½ OD brass, and filed it smooth.

By this time, the blade was done cooking, so I pulled it out and let it cool, then pounded the handle onto the blade. A bit of hand sanding and a couple coats of tung oil, and it’s ready to go.

Carving skew

#woodworking #tool #project

Discuss... Reply to this in the fediverse: @davepolaschek@writing.exchange

I’ve been needing a single place to store my files, rasps, and floats for a while now. They were stored in two older tills, one of which had been repurposed from a saw till, and another which used to be something else that I don’t remember. Plus I had a number of files laying loose on various flat surfaces around the shop.

File, rasp, and float till, filled.

I started by building three racks to hold the files of various lengths. The largest holds 12 files, the middle holds 15, and the shortest rack can hold 20 files, though only the shortest in length will fit.

The racks are made of ⅜ inch thick oak, either 1 or 2 inches wide. Each rack has a bottom piece with indentations drilled in it, and a cross piece with magnets embedded to hold the files in place. They all pivot on the dowels that mount them (though this isn’t an especially useful feature) so they can be tipped forward or backward to access the files without knocking the ones in the rows in front. The racks were treated with iron acetate to ebonite them, though the solution was a couple weeks old, which is, I suspect, why I got a dark brown rather than a black finish.

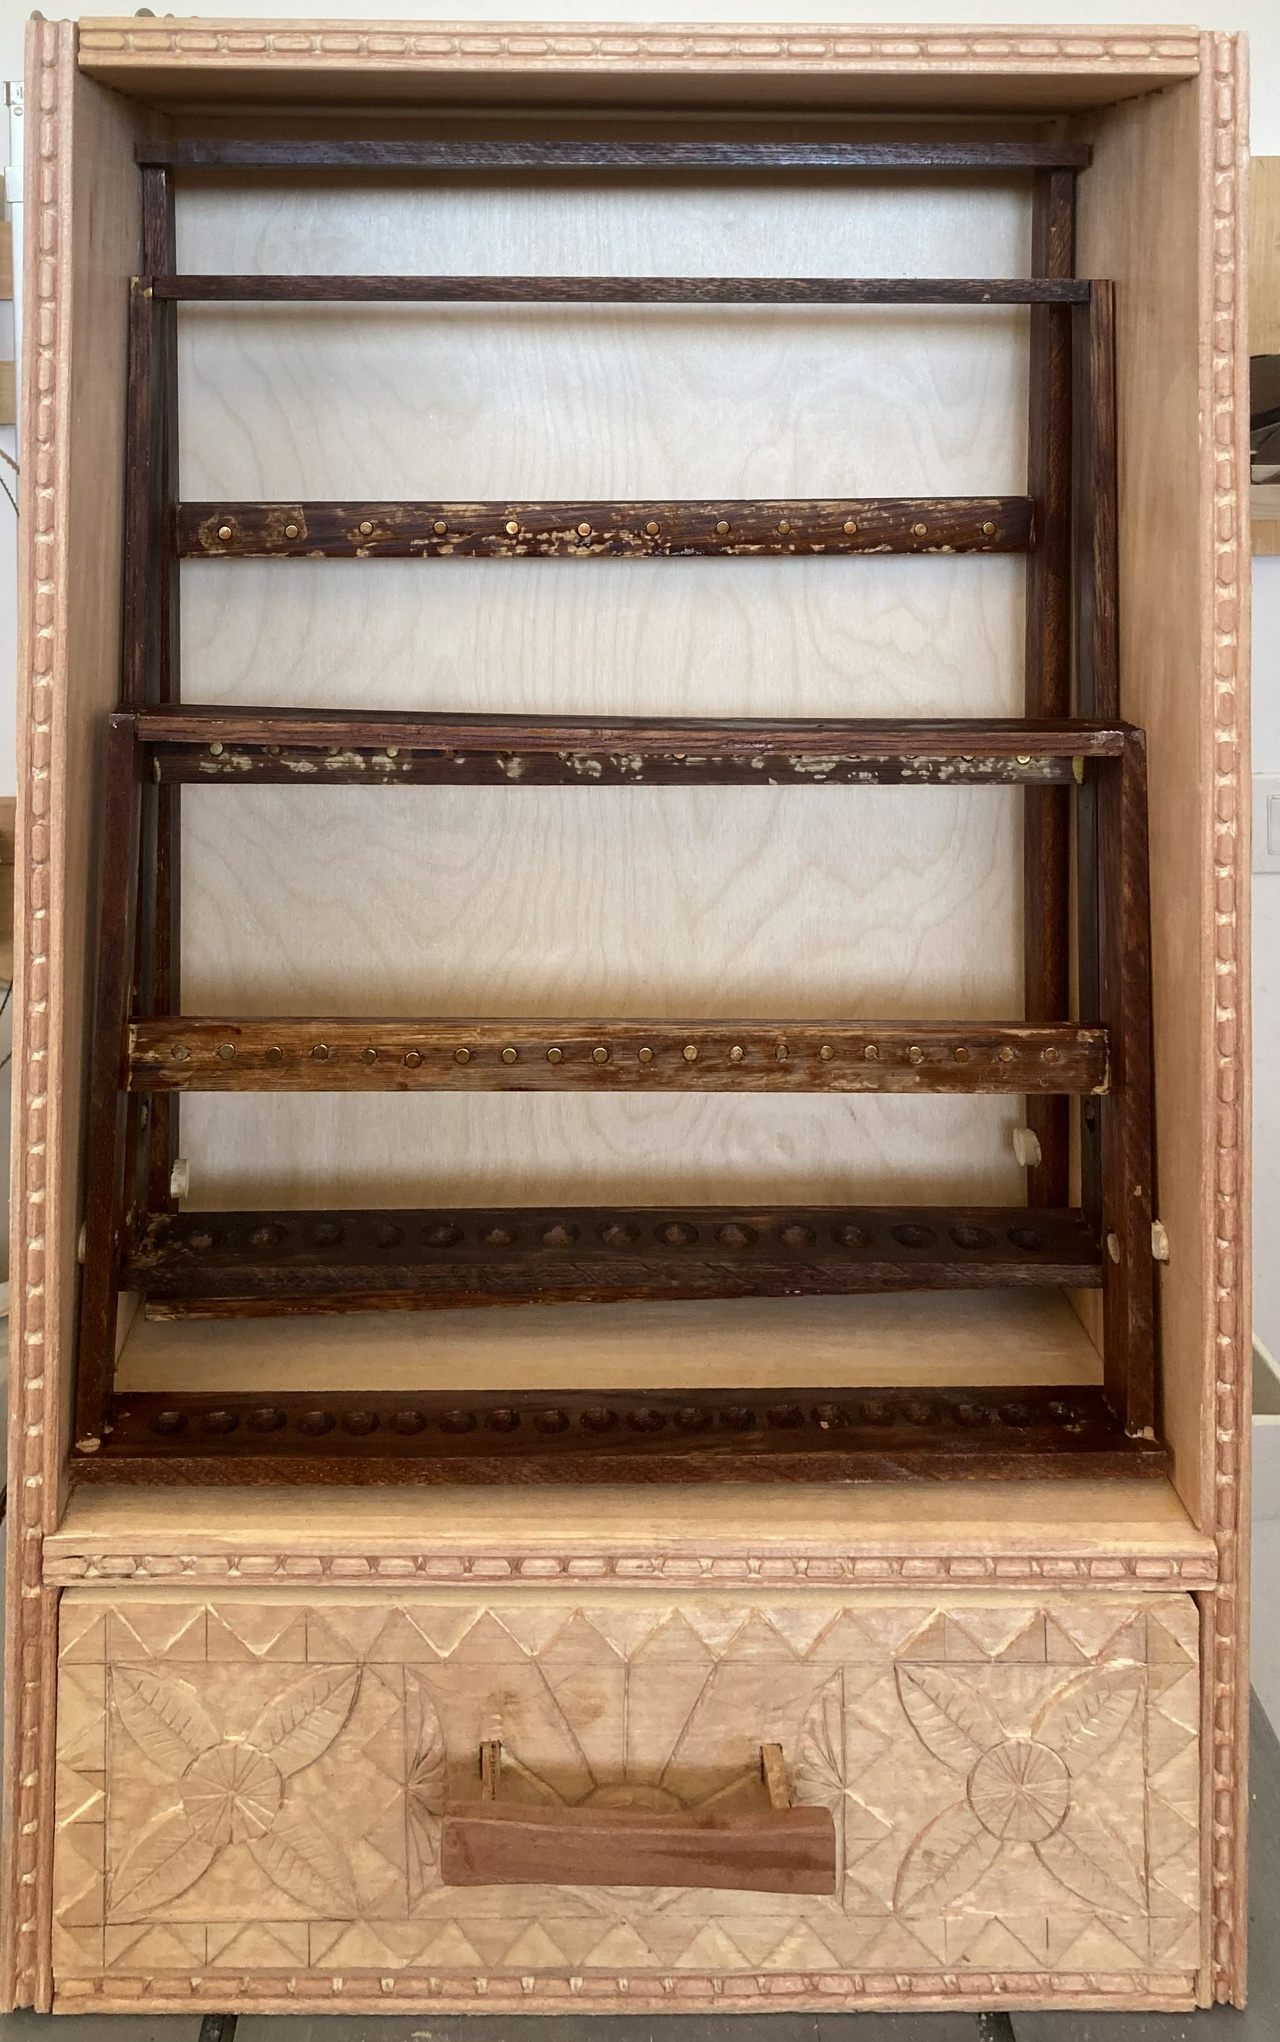
Empty file till

The carcasse is built of ¾ inch thick pine, and dovetailed together, with the shelf above the drawer resting in a pair of ¼ inch deep dadoes. The drawer is also dovetailed, with half-blind dovetails holding the drawer front in place. This is the first time I’ve built half-blind dovetails, so it was good practice. The drawer-front is also carved with a design I made up over a few days of carving.

Carved pine drawer front

The pine is all finished with a coat of kakishibu. It’ll get a few coats of tung oil once it has had a little time to darken, unless I decide it needs a second coat of kakishibu first.

The drawer hold spare file handles, file cards, and needle files. A couple weeks of construction, the added carving on the front of the till makes it feel a little special and I also got to practice barrel and bead moulding which came out nice.

#woodworking #project #woodCarving #shopFurniture

Discuss... Reply to this in the fediverse: @davepolaschek@writing.exchange

Originally written 1. September, 2018

apple tankard, with copper wire wraps and elm handle, glistening with its epoxy finish

apple tankard, with copper wire wraps and elm handle, glistening with its epoxy finish

For the beer swap this year, I had decided to build a tankard. I'd seen tankards in Woodworking in Estonia and thought “how hard could it be?” That usually leads to an interesting build.

A page from Woodworking in Estonia showing some tankards

I had a chunk of crab apple from a tree from my yard. It came down four years ago in 2014, and a friend had slabbed it and had been air-drying it. It was ready to go.

A piece of apple wood, with a saw taking a small board off

The first few cuts were a little ragged, but I soon found my rhythm, and cut off a dozen nice and fairly even pieces of apple wood. The grain in them looked pretty.

A piece of apple wood, now smaller, with a number of small boards next to it

Two book-matched pieces of apple with interesting grain

Not wanting to waste the apple, I also started building a pine prototype. I had picked up a 1¼” by ¼” piece of pine, and that seemed like a good way to figure out exactly what I was going to do.

I started by tapering the pieces of pine. I looked at a stein in my cupboard, and for a 1 liter stein, it looked about an inch narrower at the top than the bottom. I figured that was a little more slant than I wanted to work with, so I decided that ten sides (a dozen pieces of apple, minus a screw-up or two), tapered by a quarter inch would give me two and a half inches, divided by 3 would mean the top would be about about ¾” smaller in diameter than the bottom, which seemed pretty good. And since I'd decided on 10 sides, that meant 72 degree angles on the sides of the staves, so I set up a protractor. I did the tapering in both dimensions freehand with a block plane, but checked my work frequently as I went to make sure I was getting things right.

A piece of pine board, with an out-of-focus protractor showing the edge at 72 degrees

planing the edge of a small pine board with a block plane

Once I got all the sides tapered, I cut out a circular piece of cherry from a 4/4 scrap I had laying around, then resawed it into two ⅜” round pieces. Taping the sides together with gaffer tape, I tested the fit and saw that I was close.

Ten pine boards almost completely encircling the round piece of cherry

I cut a groove on the inside of the bottom of each of the staves for the bottom to ride in, then slowly took wood off the round bottom until everything fit pretty well.

A view of the pieces completely encircling the round piece of cherry with only small gaps at the corners

I also put holes in one of the staves to push dowels through to hold a handle on. I was thinking that maybe I would carve round tenons onto the end of the handle, but it turned out to be much easier to clamp the stave and handle together then drill holes in both and push in a dowel, so I did that.

I cut a couple handles from a scrap of elm I had, and shaped one with rasps, and the other with spokeshaves and knives. I would have rather made the handle entirely with edge tools, but the one finished with the rasps looked nicer, so that was the one for the swap-tankard.

a roughly-shaped handle for a tankard, made from elm

With the help of a few hose-clamps and gaffer tape, I tested everything one last time to see how I was doing. It didn't look half bad.

the pine, prototype tankard, held together with gaffer tape and hose clamps

I used 14 gauge copper wire from the hardware store to wrap the tankard, and it was just strong enough to pull the staves reasonably tight before it snapped. I used a chain-saw file to make a small groove for the wire to ride in so it would be less likely to slip up the side of the tankard (remember the taper) while I was assembling things. I didn't need that in the pine, since the wire could compress its own groove in that, but in the apple, I figured it would make life easier.

pine tankard, held together with copper wire

That was enough experimentation, and it was time to get started on the apple tankard for the swap. I went through the same steps, tapering the sides, cutting grooves on the inside, fitting it to the bottom, and realized that I would also need to plane the sides to a more consistent thickness. That hadn't been an issue with the factory-made pine, but with my hand-cut apple staves, the varying thickness would lead to an uneven looking tankard.

the staves for the apple tankard in the order I would assemble them

apple tankard, showing the uneven thicknesses of the staves

thinning a stave using a block-plane

I also needed to round the inside of the staves before assembling them to make a nice-feeling top on the tankard.

rounding the end of a stave with a rasp

All that done, it was time for a test-assembly.

apple staves surrounding a round cherry bottom, showing a few small gaps

the apple tankard, test-assembled with gaffer tape and hose clamps

Things were looking good. The last step was putting a coat of epoxy on the inside of the staves and bottom so I wouldn't have to worry about getting a nice finish there after things were assembled. I also had glued the dowels into the stave that I picked as the “handle stave” and cut that flush, so the epoxy would help seal up any gaps around those dowels.

pine and apple staves, laid out for finishing the insides with epoxy

It took three coats of epoxy to seal up the insides of the apple. There were just enough punky bits that it wouldn't have held liquid very well without the epoxy, so I was really glad I'd done that before assembly, especially when the first coat almost entirely soaked into the wood.

Once I had the insides coated, it was time for assembly. I hoped I would be able to get almost watertight without massive amounts of epoxy, but the fit around the bottom wasn't great, and it took some sawdust and CA glue filler, plus another three coats of epoxy to seal up the bottom completely.

pine and apple tankards, assembled and held together with hose clamps and gaffer tape - the insides of the staves now appear finished

apple tankard with epoxied handles next to it

With all the pieces together and a few coats of epoxy on the outside (I had initially thought of a varnish finish, but decided the epoxy looked pretty good), it was time to wrap it up. I shaped the outside of the top of the tankard with rasps and sandpaper, applied another two coats of epoxy, sanded lightly with some wet-dry 200 grit paper and put on a final coat and hoped no bugs would land in the wet epoxy (the brand I used has 30-minute open time, but isn't gnat-safe until about 90 minutes – it's fully cured after 36 hours).

I think the finished tankard came out looking okay.

I wrote up the traditional note that accompanies a swap item and got it ready to ship off.

Note accompanying the apple tankard

#project #woodworking #tankard #stave

Discuss... Reply to this in the fediverse: @davepolaschek@writing.exchange
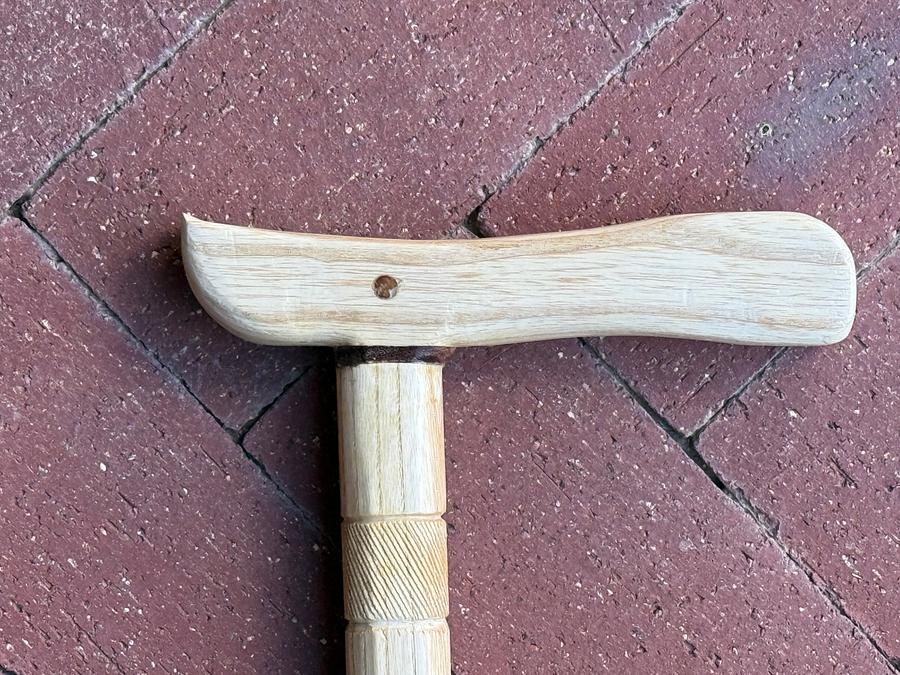
Rack holding a number of spokeshaves

I collected all (?) my spokeshaves yesterday and built a rack to hold them. Cut a piece of ¾x⅜ maple into two pieces, then turned it to make ⅜ inch dowels on the lathe. Glued them into a board and stuck a cleat on the back. Nice quick project. I should probably put some oil on it one of these days, but… mañana.

From the top, here’s a quick description of each, how it’s set up, and what I use it for:

  1. Veritas, set up for general purpose, fairly thin, general use;
  2. Lie Nielsen Boggs with curved base, set up a little thick for concave curves;
  3. Veritas low angle, set thin for end grain;
  4. Home-made low angle spokeshave set up thicker for quick stock removal;
  5. HNT Gordon small, general use, but thin for tricky grain or finishing;
  6. HNT Gordon large, as the small, tricky grain;
  7. Millers Falls cigar shave, not yet tuned, but I hope to get it tuned up and usable, since the round blade is nice for tight concaves;
  8. Kunz travisher, curved base side to side, which is set to hollow chair seats and smooth out adze marks;
  9. Kunz adjustable mouth spokeshave, set relatively thin, generally for use against the grain and sharpened to behave almost like a scraper;
  10. and finally the Stanley spokeshave, which was the first I bought, and showed me all the ways a shave could be wrong.

A shave set for “general use” is usually set for a thinner cut on one side, and a thicker cut on the other, so depending on where on the blade I’m hitting the wood, I can control the depth of the cut. Some are thicker left and others are thicker right, and I have to give each a try to find what’s best for a given job. The two low angle spokeshaves and the two HNT Gordon shaves are generally for end grain or reversing grain.

In all, I probably have twice as many shaves as I really need, but half of them were packed away in a box I didn’t unpack until earlier this week (since we moved almost 4 years ago). So I bought a few more while I was not unpacking that box. The HNT Gordons are completely unnecessary, but they’re pretty and feel nice in the hand (they’re made from gidgee wood), so they have rapidly become favorites.

#woodworking #project #shopFurniture

Discuss... Reply to this in the fediverse: @davepolaschek@writing.exchange

front view of angled carving rest

Sort of a micro-project, but it will enable a lot of other things.

I had a couple triangular braces I’ll be putting on the insides of the legs of a bench I’m working on, and I plan to do a bit of carving on the bench itself and on the legs, but I haven’t done any serious carving for a while, so I thought I should warm up by carving the braces. Plus, they’ll make a neat surprise for anyone who looks underneath the bench.

So I cut some 45°︎ angles in some pine and glued and screwed it together to hold the angled pieces with their faces level. And it works pretty well. I clamp the “hook” at the front end in my face vise, and rest the piece in the trough, and I can carve away without have to worry much about workholding.

angled carving rest and carved triangular brace

Also unpacked a box that had my texturing tools in it yesterday, so now I’ve got those to play with. The bench these braces will go onto will be going to a couple who were in their 50s and 60s when they found each other and got married, so I figured adding paired hearts would be a nice touch.

The wood I’m carving is some “cherry” that came from India in a crate holding a slab of stone. Not sure what it really is, but it’s pretty enough that I feel a little bad using it for mere braces, but there you have it.

#HandyTools #project

Discuss... Reply to this in the fediverse: @davepolaschek@writing.exchange

closed box, from front

I recently acquired a set of the large (12 inch or 300mm) cole jaws for a Nova chuck, and as I do with new tools, I built a storage box for the jaws and chuck, as well as the associated accessories.

closed box, corner view

The box is dovetailed pine construction with quarter inch plywood top and bottom and holds the jaws on the chuck, and has places to hold the jaw extensions which I bought with the jaws (allowing it to hold a bowl up to 15 inches in diameter.

open box, showing cole jaws and accessories

The lid is hinged with a piano hinge, and has a small latch to hold it shut, and the box is finished with French Toast milk paint and a coat of tung oil.

open box, showing accessories and cutout for chuck

#woodworking #project #storage #shopFurniture

Discuss... Reply to this in the fediverse: @davepolaschek@writing.exchange