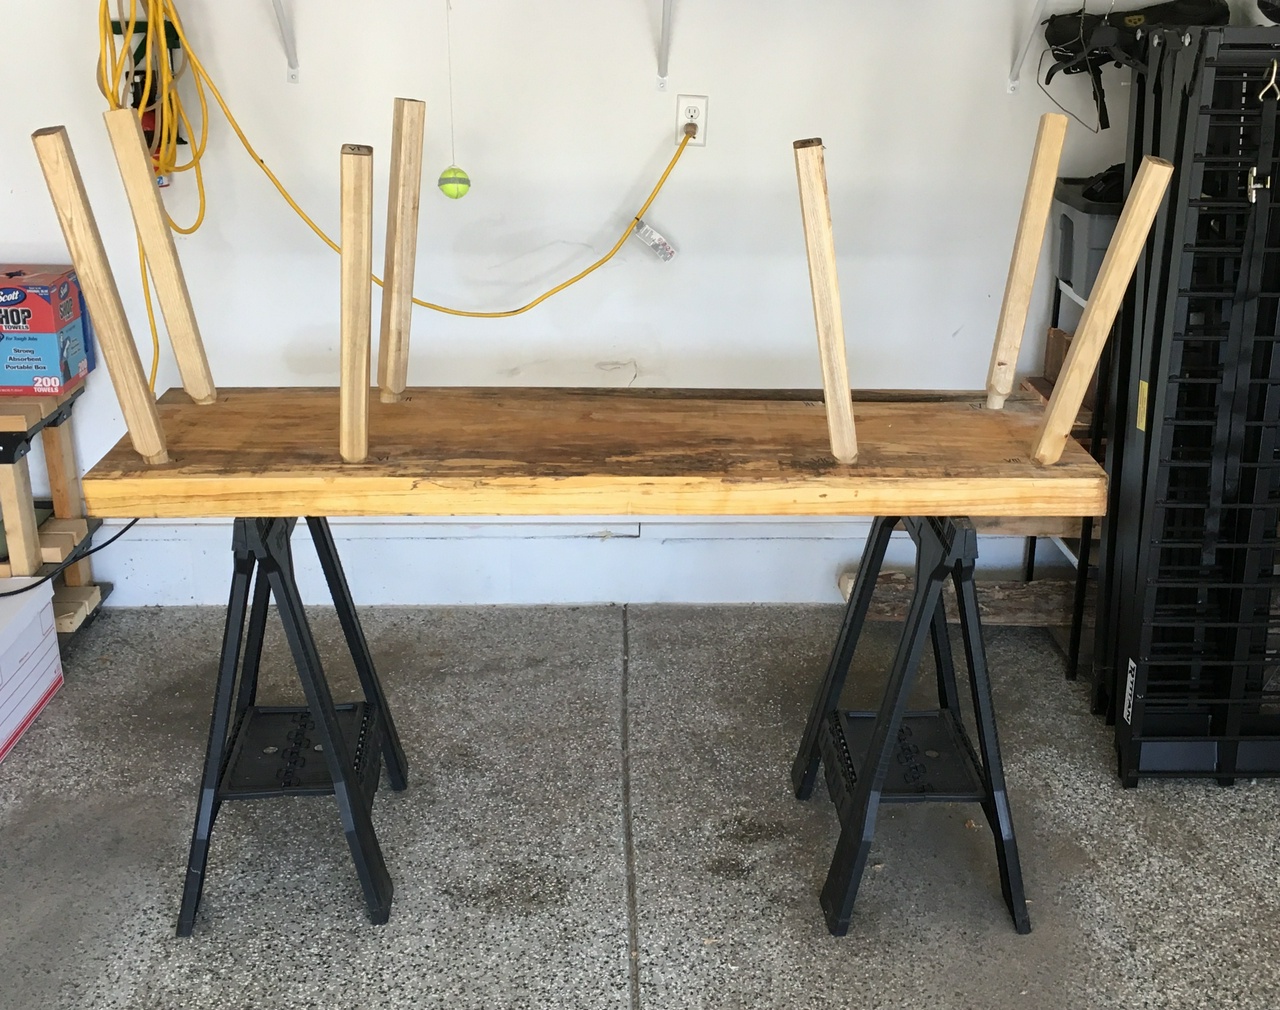
Spalted Elm Low Workbench
Originally written Aug 8, 2017

It all started back in February, when I went down to Minnesota Milling to get a slab of elm. I picked out one that had been outside and was “nicely spalted” and had it squared up, then headed home. I planned to make a low roman workbench, as Chris Schwarz talked about. There's a video here from the Mortise & Tenon guys explaining.

February, March, April, May… I spent a lot of time repairing cracks in the elm as it dried out, putting in a dozen bow ties and filling many cracks with sawdust (usually elm, but sometimes whatever was on hand) and super-glue. I also tried epoxy (didn't like the texture) and a mix of wood glue and sawdust (that wasn't as nice for sanding). I also spent a lot of time planing the bench flat with a jack plane, usually taking much smaller cuts than I should have, but I was learning as I went. I'm much better with a plane now.


In May, I started to make better progress. I cut the ash legs to size, and cut 1.5” tenons on them. Started drilling 1.5” holes in the bench-top for the legs, and after I had finished five holes, broke my drill bit, snapped the power-cord on my electric drill, and tore up the bench a bit. Not sure exactly what happened, but the bit bound into the wood, snapping the drill out of my hands, and somehow it kept running, wrapping the cord around the now-spinning drill. I bored the last two (and a half) holes 1” with a bit and brace and cleaned up the messy one with a knife and chisel.

Holes bored, I needed to reduce the tenons on two of the legs so they'd fit the smaller holes. That was okay, as my tenon-cutting technique (using the now-defunct electric drill) had been a little sloppy. I picked the two smallest tenons and reduced them from roughly 1.3” to 1” using a spokeshave and rasp. Took me an afternoon, but I now had eight legs that all fit pretty well in their respective holes. I numbered the legs and holes at this point so I wouldn't get confused at some point in the future. I also marked orientation so I'd have the grain running the same way as the bench-top (roughly) so staking the legs would be less likely to split either the leg or the top.

Everything marked, I pulled the legs out one by one and sawed a kerf in them with a backsaw. That gave me a 2” deep kerf in a 3” tenon. Once they were all cut, I made some wedges using a scrap of red oak I had on hand, hit the legs with glue, pounded each one into the bench, and then flipped the whole assembly to put in the wedges. On the first wedge, I discovered that the red oak I'd used wasn't the best idea, as it broke off partway into the leg. I dug into my parts bin and grabbed a dozen walnut wedges I'd made back when I was putting together my shop stool and used those. Glue the wedge, hold the leg securely, drive the wedge into the leg, repeat.


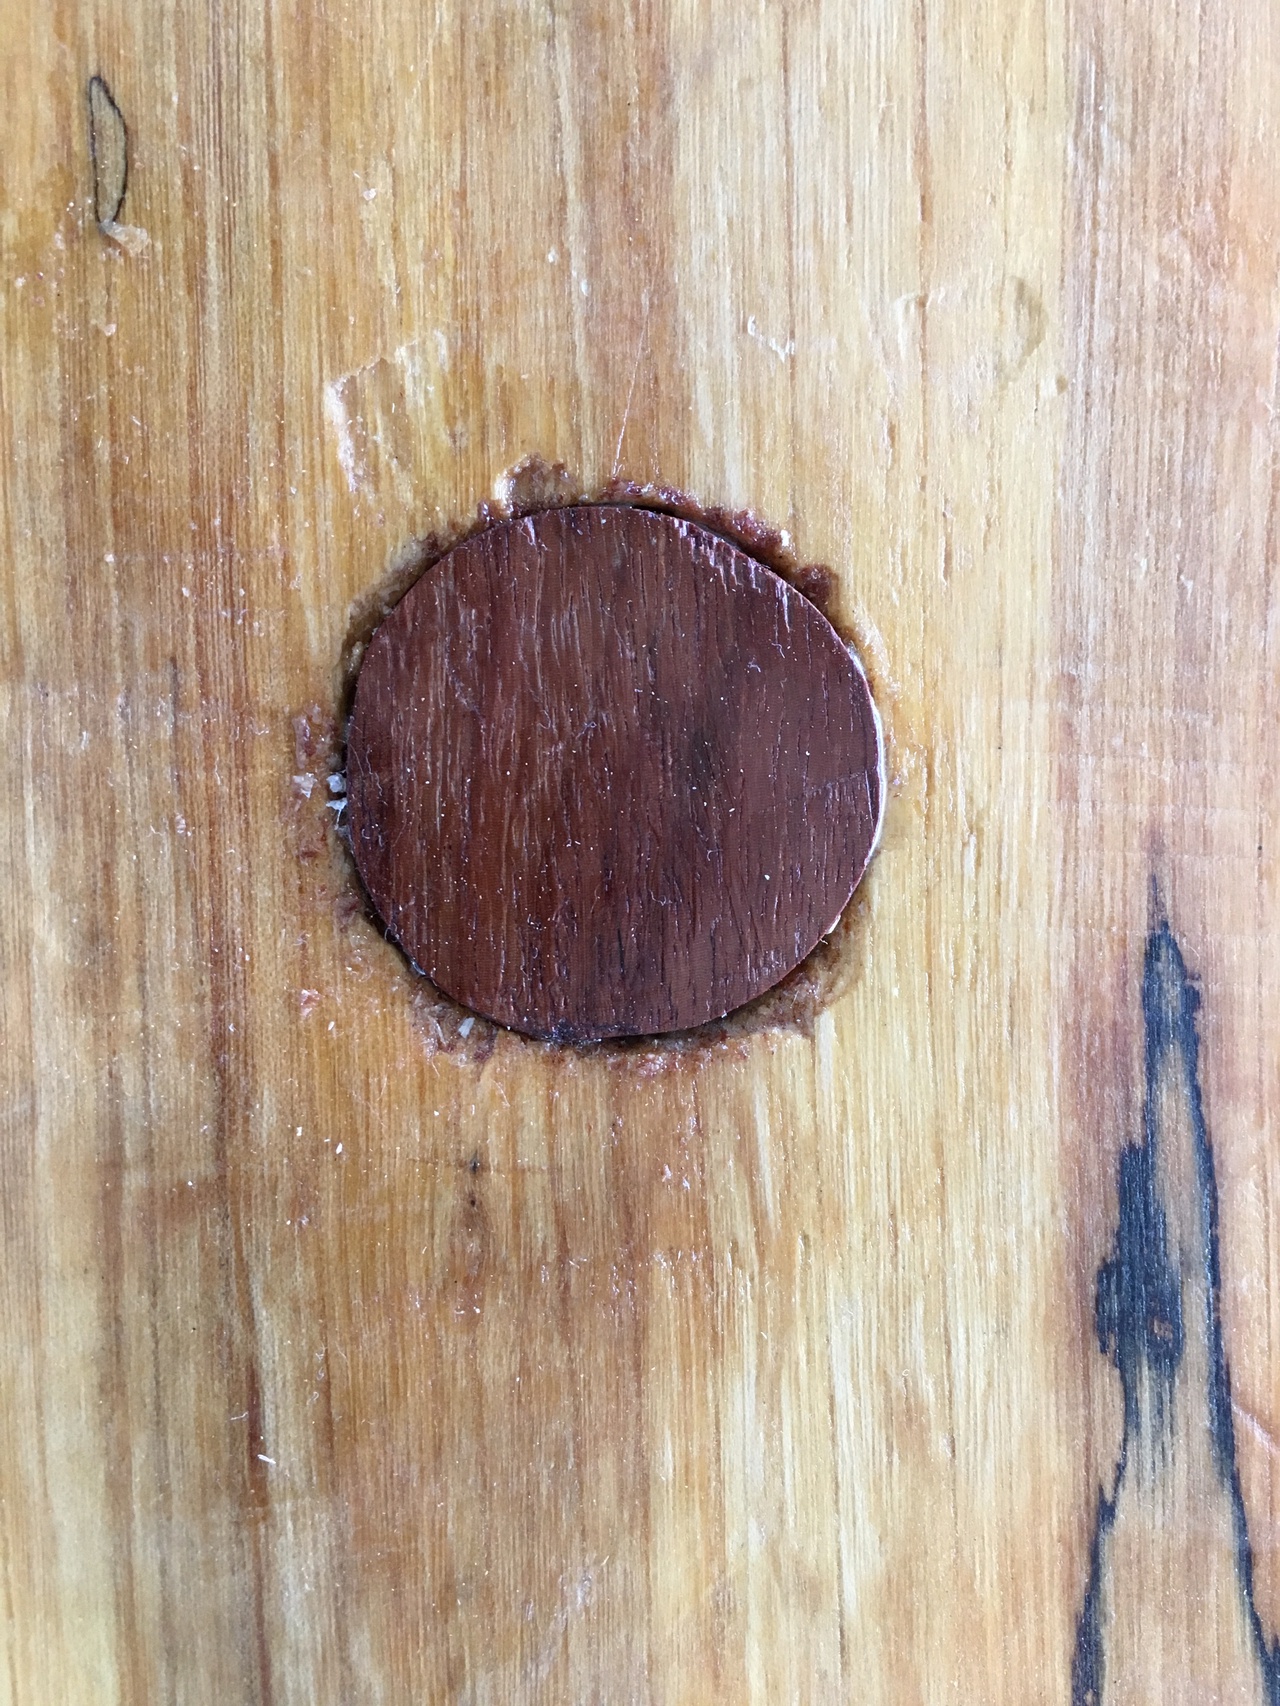
Some of the legs didn't reach the bench top at this point, but I wasn't too worried. The whole 3” tenon was in the bench, but because of the angles (which weren't all the same), some of the legs ended a little short of the top. After everything dried, I sawed off the protruding bits, then went back to filling in the holes with sawdust (this time using a mix of oak and macacauba left over from building the planes for the tool swap) and super glue. In one case, I actually used a macacauba coin to fill the last 1/8” of the hole in the bench-top.


Bench almost done, it was time for some holes. I had three holdfasts made by a co-worker back in March, and they had 5/8” shafts. I have a nice 5/8” wood owl bit, but a hole drilled with that was too tight for the holdfast. I left that first test-hole as-is, and will make a bench-dog / planing-stop to fit it. I drilled other holes with a cheap Chinese 11/16” auger bit, and the holdfasts work great in those.

The last thing was making a few bench dogs. I took a piece of ash that had initially been slated to be a cane, but the grain in it wasn't cooperating with me. But I managed to cut a couple 1” x 5/8” x 6” pieces out of it and then turned them down using a tapered tenon cutter (by hand) to make 3” long 5/8” diameter tenons on them, with a couple inches of conical section leading to a rectangular top. They seem to work pretty well, and I'll make a few more from oak or ash or whatever's handy as I need more bench dogs and put more holes in the benchtop.

The bench has been working really well so far. With a couple holdfasts, I can position small boards for ripping or resawing. If the board moves around on me, I sit on the bench and throw a thigh over the board and now everything's held very solidly. I haven't done any planing on the bench yet, but that'll be soon, and I expect it'll work well once I put in a few more holes for work-holding.

There were also a number of offcuts I used for other things, including my shop stool, a bowl, and some spoons.


When the bench was a year old, a friend asked for my thoughts on the bench. Here's my reply.
For height, about knee high. Width should be narrow enough that you can put one leg on each side of it while sitting on a board on the bench. Length should be 1.5-2m. For thickness, 7-10cm is a pretty good minimum, as that will give enough thickness that a holdfast will hold properly. The eight legs are staked in with 2.5 or 3.75cm round tenons. The legs were 5cm square ash stock planed to octagons.
Can I do everything on it? No. It would be hard to cut dovetails on it. Or do assembly. But I cut and plane wood to size on mine all the time, both standing and sitting. It's very handy for that, and on a nice day I move it outside so I have less mess in the shop to clean up afterwards. I move to a higher bench for cutting dovetails or assembling pieces. I'm very glad I built it and I use it a lot. I still use a high workbench too, though.
I also made a pen from one of the offcuts from the bench in February of 2023. I'm still getting use from that slab I bought six years ago.

Discuss... Reply to this in the fediverse: @davepolaschek@writing.exchange