davepolaschek

cutList

Originally written Nov 23, 2020

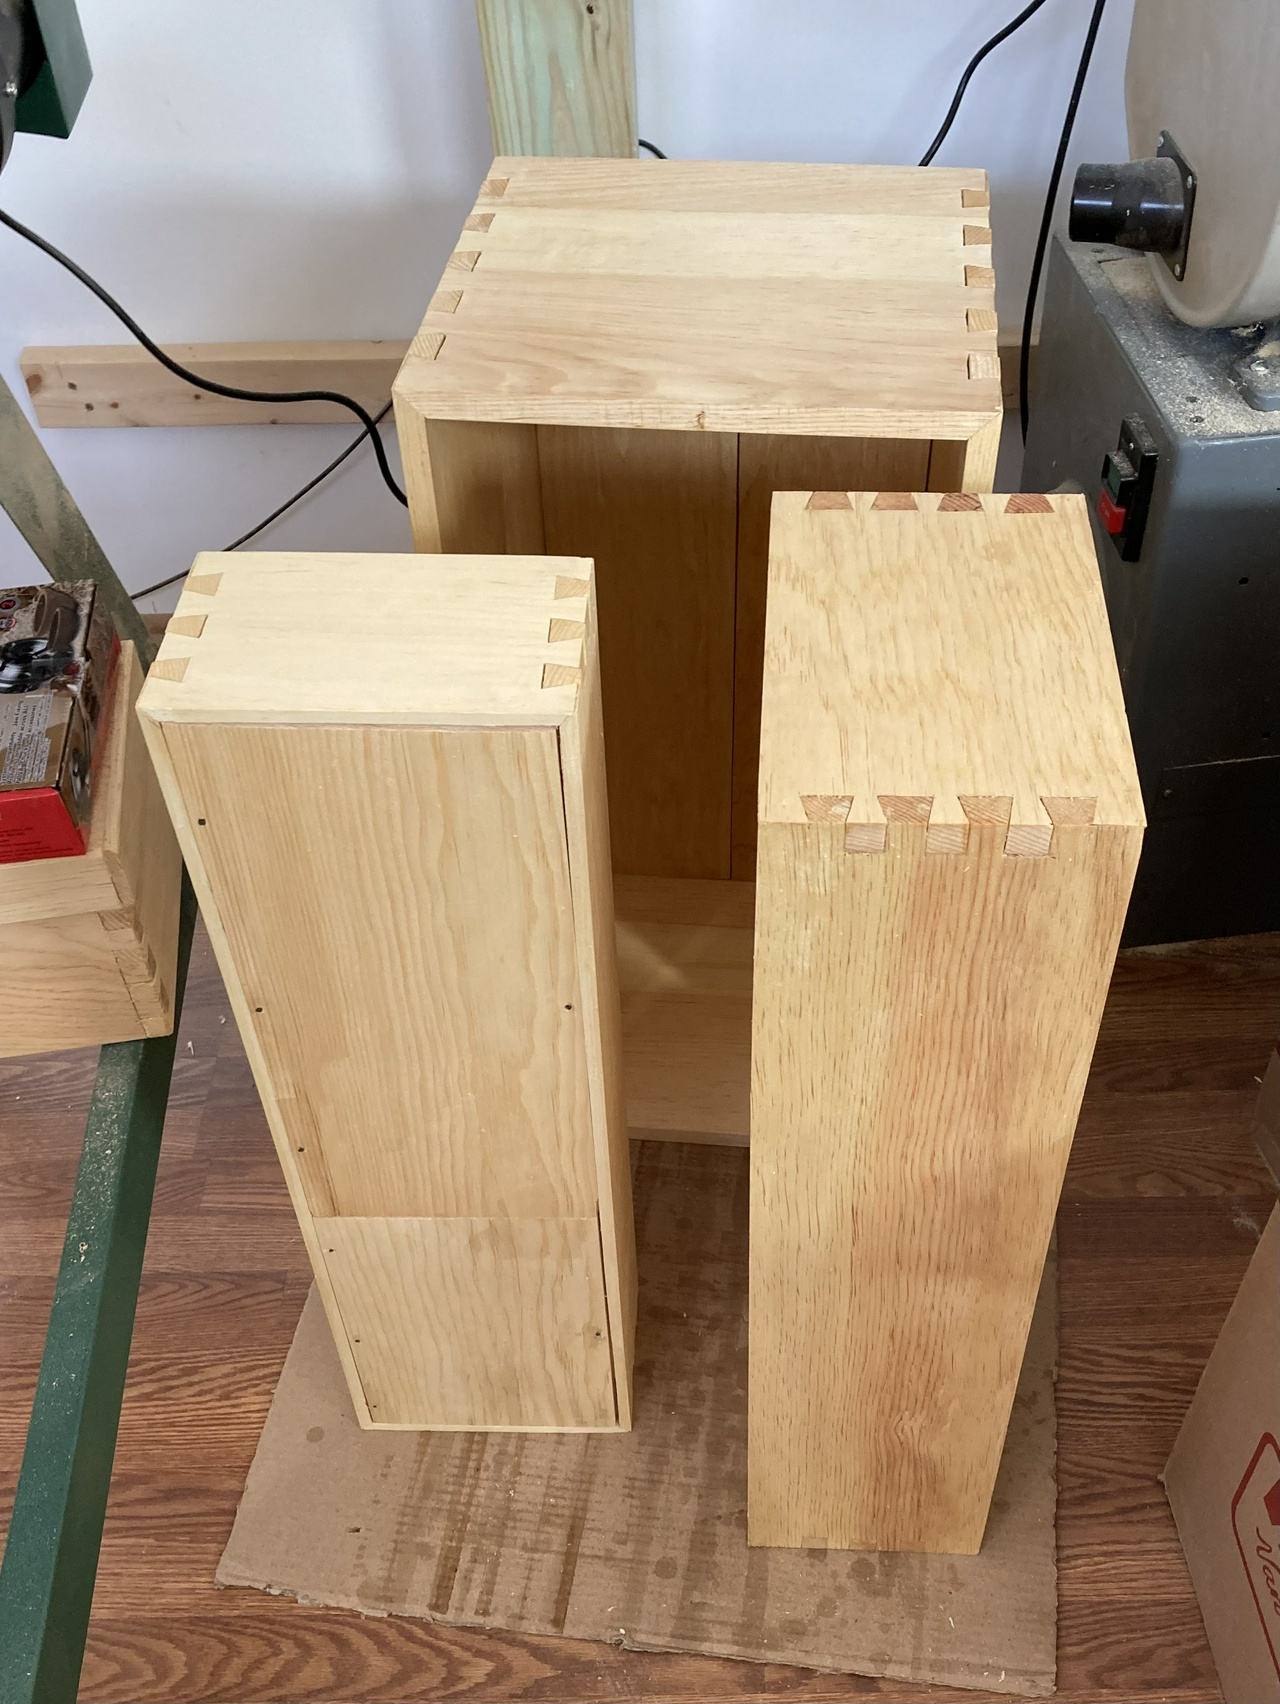
I made a big case recently, and since that will be at the bottom of a stack of cases of books, I needed to make a special-sized plinth for it. And I have a spot behind the bedroom door where I will build a stack of cases with the largest case being the middle-sized case, so I needed a smaller plinth to hold that.

The nice thing about building other sizes of plinths is that they're all the same width, so the front, back and glue-blocks are all the same, it's just the sides that change to accommodate the different depths of cases.

cut list for the basic plinth, with added notes for the other two sizes

As before, the plinths have the following measurements:

Front and back: 2 – 1×4×31 Internal front brace: 1 – 1×4×29½ Glue blocks (front): 2 – 1×1×2⅝ Glue blocks (rear): 2 – 1×1×3⅜

And the sides for the various sizes of plinths are: Small: 2 – 1×4×8¼ Medium: 2 – 1×4×12 Large: 2 – 1×4×15¼

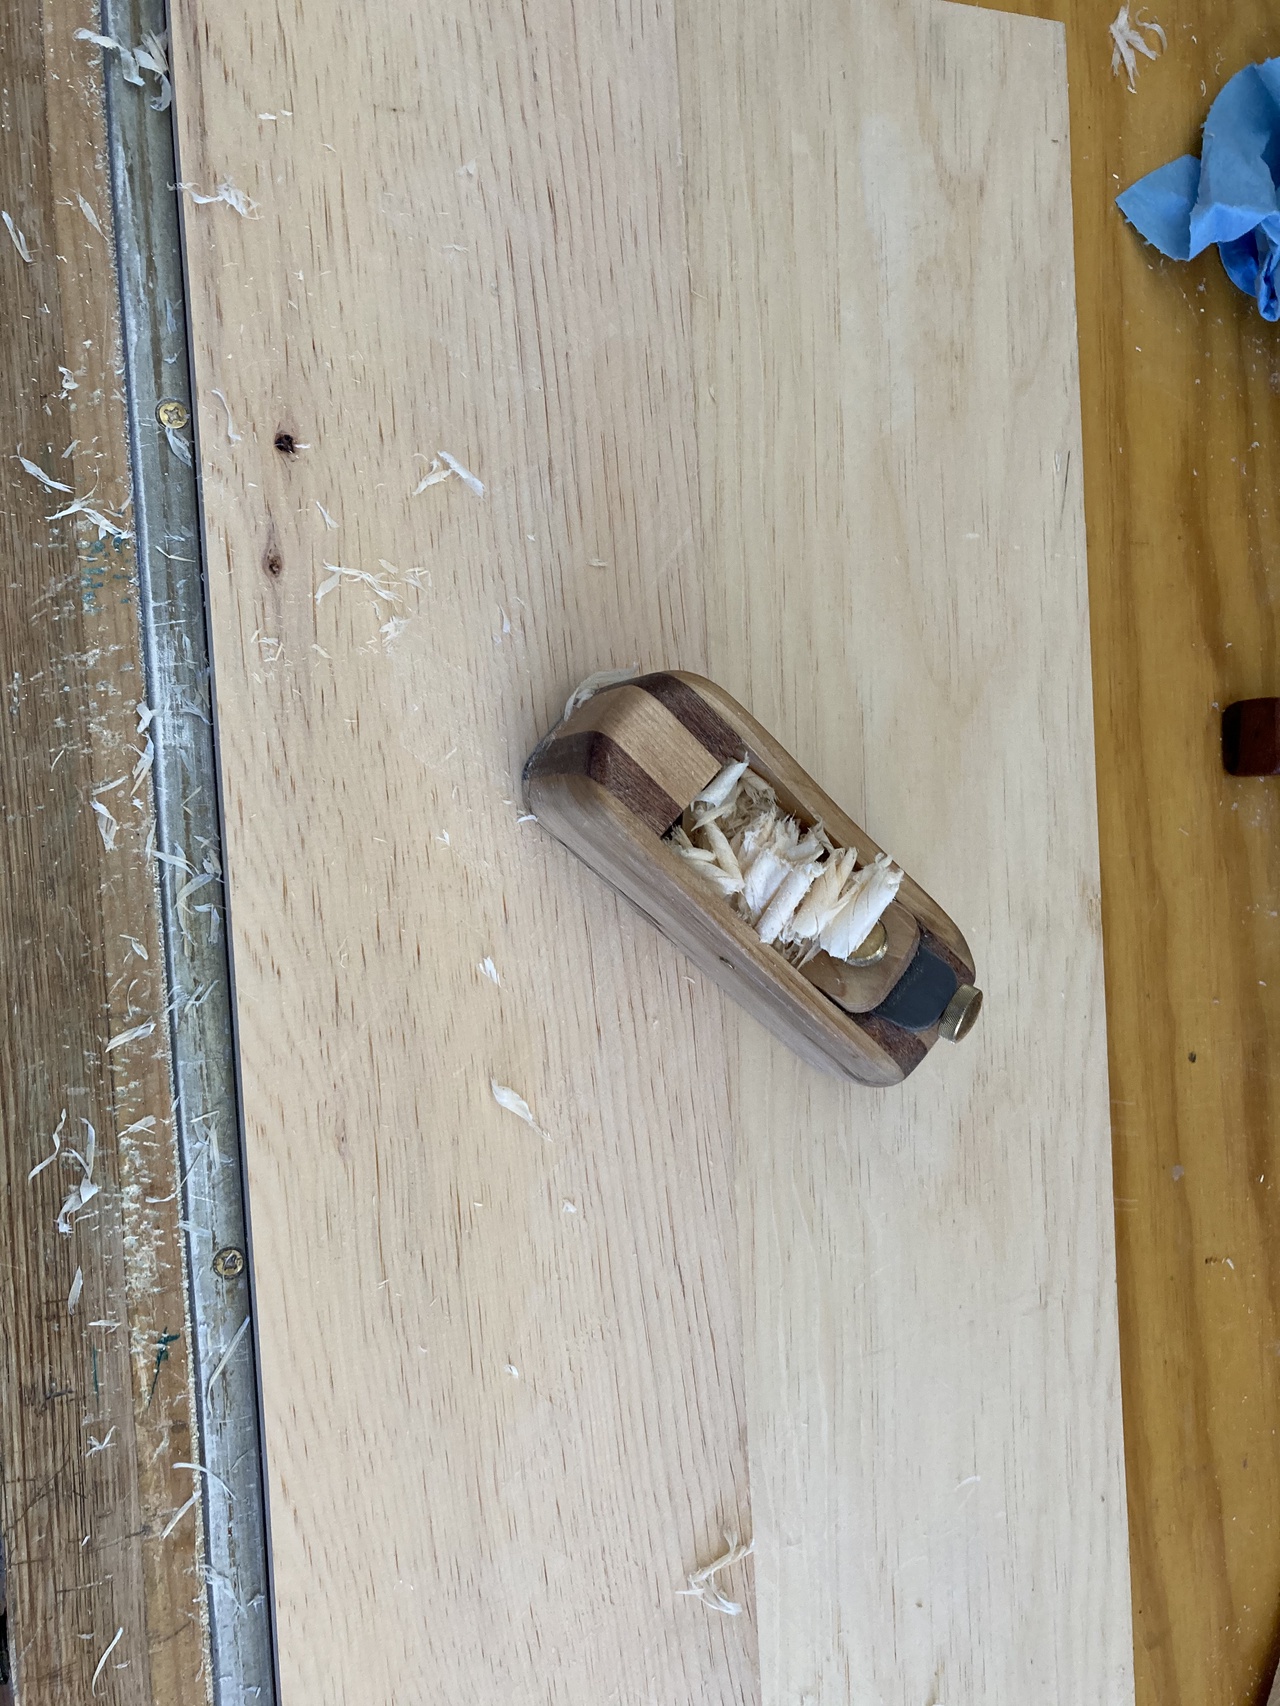
I used the same template for constructing the curve on the front piece, and the same template for the dovetails. As before, the tops of the pieces got a chamfer equal to 8 passes of my block plane at whatever thickness it was set to before. I'm not sure of the exact measurement, but it looks right.

large, medium, and small plinths

With the dovetails cut and everything glued up, I smoothed the sides with my smoothing plane and hit everything with shellac. A second coat of shellac after a quick pass with the 400 grit sandpaper, and they'll be done and ready to hold more stacks of cases.

small, large and medium plinths, with shellac on them


Jefferson Bookcases Contents #woodworking #bookcases #cutList

Discuss... Reply to this in the fediverse: @davepolaschek@writing.exchange

Originally written Nov 22, 2020

I needed to make a little case for some small hardcovers. It's also the size I will need for paperbacks if I don't put them in tall skinny cases.

Cut list for smallest (paperback) case

If that's hard to read, the measurements are (to hold 5¼x7¼ books)

2 – 1×6×30¼ 2 – 1×6×8¾ 1 – 1×8×29⅝

Smallest case, sitting on a piece of cardboard

I didn't have a 30 inch long 1×8 offcut, so I put two shorter ones together. They're ship-lapped. Otherwise it's just like the other cases, just smaller.

Smallest case, medium case, and art book case


Jefferson Bookcases Contents #woodworking #bookcases #cutList

Discuss... Reply to this in the fediverse: @davepolaschek@writing.exchange

I have a bunch of art books that are formatted landscape. They're basically coffee-table books, and they don't fit well in the cases I've built so far, so I decided to make a special case for them. The main problem is that when I figured out the dimensions I'll need, I will need a 1×16 to make the case, and I can't buy 16 inch wide pine here in New Mexico (and shipping a board from the east coast didn't seem especially wise).

Handwritten cut list for the art book case

In case that's hard to read, the measurements are: 2 – 1×14½×30¼ (top & bottom) 2 – 1×14½×15¼ (sides) 2 – 1×8×29⅝ (back)

So I glued up a couple boards. For the sides, I had two 1×12 offcuts left from other cases. I added a piece of 1×4 to the edge of those and was good.

1x12 glued up with a 1x4 to make a 16-inch wide board

1x12 glued up with a 1x4 to make a 16-inch wide board

For the top and bottom, I glued two pieces of 1×8 together to get the needed width, and so that the glue seam wouldn't be in the same place within the board (plus I have more 1×8s on hand – I'm out of the 1×12s except for offcuts).

Two pairs of 1x8s glued together to make two 1x16s

Once the glued up boards came out of the clamps, it was time to flatten them. I did a pretty good job of aligning them, so it went pretty quickly. First some diagonal scrubbing.

Hand-plane oriented diagonally across the seam of the glued-up 1x8s

Then planing with the grain to smooth things out.

Hand plane aimed down the seam between the two boards

Make one side straight, and get the boards to the same width.

Two glued-up 1x16s held in the face vise to put a straight edge on the two boards at the same time

Then square up the ends.

Using a shop-built square to mark an end square to the edge which was just planed straight

Using a low-angle jack plane to plane down to the line drawn in the previous photo

And then cut the dovetails as I have with all the others.

Two boards with the end grain up and the tails marked on them

Three completed cases resting on a piece of cardboard

The only snag is that finishing it is a little trickier because it's so deep, and reaching the inside back corner was a little harder than with smaller boxes.

Next up, the special oversized plinth to hold this case.


Jefferson Bookcases Contents #woodworking #bookcases #cutList #jointing

Discuss... Reply to this in the fediverse: @davepolaschek@writing.exchange

Originally written Sep 20, 2020

Fourteen cases completed with books on each of them

Having finished the three extra-large cases, plus the twelve large cases, it was time for a break. If nothing else, the two block planes and smoothing plane I use to clean up the boxes all needed a sharpening. The smoother has almost a half-dozen divots in the edge of the blade, and was leaving tracks. The last few cases I ended up finishing off with a card scraper.

With the sharpening behind me, and having knocked out another picture frame, plus some other shop maintenance (I need to get a cleat on the north wall of the shop, plus I've been sketching a design for a set of drawers to hold hardware I need in the shop), it was time for the next size of cases. These are the medium cases for hardcovers.

A graphic showing the different sized books I've identified in my collection

According to my notes, these need to hold books 9½ x 6½ inches in size. And there are a few that are ever-so-slightly oversized, so I decided to build the boxes roughly 10×7. They'll actually be about a quarter inch larger than that, as my 1×8s are 7¼ wide. And I'll figure out the exact size of the back once I get the first box built, so here's the preliminary cut list.

A cut-list for the medium-sized cases

Rather than make 12 of these, I'm going to start with eight. And I only have four 1×12s left, so I'll need to either go buy more or piece them together out of a pair of 1×6s. I'll figure it out when I get there. It still takes me about a day per box to knock these out (minus interruptions that happen, like taking a day off to plant flowers), so I don't need to make a decision for a couple more days.

After putting together the first box, I now know I need to cut a ½ inch strip off the edge of a 1×12 to make a properly sized back-board, so the final cut-list is:

2 – 1×8x30¼ 2 – 1×8x11½ 1 – 1×12 (minus a half) x29⅝

I'm probably going to need to build a total of 12 or 16 of these, but I'll get the first four built and a few more books unpacked and then decide if I need to make a trip to the lumber yard for more lumber.


A sharp-eyed reader noticed the Lava Lamp (which I've had since 1978) sitting on the shelves and asked for an action shot of that.

A lava lamp in the "many small bubbles" stage

There's also a picture of the first “medium” case completed and added to the stacks.

First medium-sized case at the top of a stack

And more medium cases completed


Jefferson Bookcases Contents #woodworking #bookcases #cutList #lavaLamp

Discuss... Reply to this in the fediverse: @davepolaschek@writing.exchange

Originally written August 2, 2020 – Note that this is long, and covers how I cut #dovetails in what might be excruciating detail if you already know how to hand-cut dovetails. I won't be offended if you skip ahead.

For this style of bookcase, there is a plinth, which serves as a base, supporting the stack of boxes. Since the plinths are mostly hidden, and the weight is mostly carried by the four glue blocks in the corners, I figured they were a good place to start. Half of the dovetails will be hidden, and only one of the four boards is very visible.

Here's my checklist for building the plinths, along with some pictures of the intermediate steps:

  1. Cut all the boards to length. There are three different lengths of pine 1×4 and two lengths of ash 1×1 glue blocks. Two 1×4×12, two 1×4×31, one 1×4×29½, two 1×1×3⅜, and two 1×1×2⅝.
  2. Mark out and cut tails on side boards (no miters yet). Using a template to mark where the dovetails should be Making small marks for the dovetails Marking line across the board Lines marked on the end of the board Marking the thickness of the pin board Pin board thickness marked Marking the angles for the tails (1:4) Mark waste and rabbet position Saw the edges of the tails With the edges sawn, begin removing waste with turning saw Waste removed from rightmost tail Work left to right, removing remaining waste from each tail Use a rasp to flatten the bottom of each tail
  3. Cut rabbets on side boards, using my kerfing plane with a fixed ⅜ inch fence, and clean them up with a chisel First (vertical) cut with kerfing plane Second (horizontal) cut with kerfing plane Clean up rabbet with chisel
  4. Mark and cut pins on front board, including miter. If you cut the miter on the tail board before marking this, you won't have a full tail to transfer the mark to the pin from, and you'll have to guess where the pin edge should be. That's not a killer, but it'll make for a sloppy joint. Pins marked on pin board, along with double-X marking for where the mitered corner will be Cutting out waste between pins Angled cut for miter
  5. Cut miter on matching corner of side (pin) board.
  6. Test fit. Test fit of first corner
  7. Cut other corner pins on front board, including miter.
  8. Cut miter on matching corner of side board.
  9. Test fit and adjust.
  10. Cut rabbet on front board.
  11. Cut curved cutout on front board. Cutting curved cutout using a turning saw
  12. Smooth cutout with knife and spokeshave. Trimming the end-grain of the cutout with a knife Smoothing the long-grain of the cutout using a spokeshave
  13. Cut pins on rear board, including miter.
  14. Cut miter on matching corner.
  15. Test fit and adjust.
  16. Cut pins on final corner, plus miter.
  17. Cut miter on final corner of side (pin) board.
  18. Test fit and adjust.
  19. Check for square.
  20. Glue up, making sure to glue the front cross-brace to the front board before clamping. The cross-brace's purpose is to reinforce the front board, which has material removed for decorative purposes. It's probably not necessary, as I made a smaller cutout than Schwarz did in his version, but it won't hurt anything, and it helps me ensure that the plinth remains square when clamped up. Plus, as I'm going to be stacking the cases 6 high at a minimum, there will be a fair amount of weight. I'd rather not find out I under built in the middle of some night as books and lumber come crashing to the floor. Thus, the brace. Clamp cross-brace to front board, and clamp plinth together
  21. Double-check for square.
  22. Unclamp after the glue has dried overnight.
  23. Glue ash glue-blocks into corners, short ones underneath the cross-brace board. Note the spacers set in the rabbets so that the glue blocks will be flush with the rabbets, giving good support to the cases. Clamp glue-blocks into corners of plinth, note blocks beneath plinth to help set glue-blocks to the correct height
  24. Plane smooth with a smoother plane, and chamfer the top-outside corners of the boards with a block-plane such that the chamfer is 3/16 inch wide. This should make the top edges more durable as they inevitably get dinged by the cases being set into them. Chamfer top edges of plinth
  25. Three coats of shellac, brushed on. I'm using a 1½ pound cut of blonde shellac.
  26. Sand lightly with 320 grit sandpaper to remove raised grain, dust nibs, etc.
  27. Apply final coat of shellac.

Here's a stack of three of the finished plinths. The middle one is my prototype and doesn't have the mitered dovetails, so doesn't look as nice as the others. I'll hide it in the corner or something.

Stack of three plinths, with prototype version in the middle

And note that while I'm working, I keep all the pieces on my benchtop laid out in order so I can more easily keep track of where I am.

Plinth-parts partway through the procedure, laid out so I can see which part is which

And here's a photo of a completed plinth with the first case sitting on it.

Completed box and plinth


Jefferson Bookcases Contents #woodworking #bookcases #plinth #cutList

Discuss... Reply to this in the fediverse: @davepolaschek@writing.exchange