davepolaschek

projects

I’m going to be making a new top for our dining room table one of these years, and as that will be a 5 foot diameter circle of plywood, veneered and edge-banded, I figured I should practice veneering a bit.

I found a small pine box with no bottom or top (I think it was the excess trimmed off a box to hold one of my lathe chucks) which was slightly under 6 inches square, by about 2½ inches tall. And I found some 6 inch wide hardwood “micro lumber” which was ⅛ inch thick that I used to make a top and bottom for the box. They’re simply glued on.

Small (5½ x 5¾ x 2⅝ inch) pine box, with top and bottom of ⅛ inch tropical hardwood.

While that was drying in the clamps, I dug through my veneer sampler box that I bought from Veneer Supplies (mine was an 8½ x 11 x 6 inch box) and found a sheet of lacewood or snakewood which should be big enough (it’s 8 inches by 10½ inches) to cover all four sides of the box.

Small sheet of lacewood or snakewood veneer, approximately 8 inches by 10¾ inches.

Next up will be softening and flattening that sheet (I think I’ll use a couple pieces of picture framing acrylic and a stack of wood for a press), mixing up a new batch of glue, and cutting the sheet into four pieces the right size for the sides of the box.

We’ll see how it goes!


Small veneered box with some of the veneer torn loose.

That answers part of the question. I definitely need to treat the cauls I use so the glue that seeps through the veneer doesn’t stick to them.

Veneer stuck to the caul I used while clamping the small box

I’ve stuck a piece of packing tape on each caul, and did the other two sides of the box. If that works, I’ll remove the damaged side and find another piece of veneer in the sampler box to try.


With fresher glue today, I also had to thin it a bit more so I had a decent working time. By the time I got all the clamps on the box, this had happened:

Veneer on box, but it crept.

So I soaked that side of the box down again, and used a card scraper to gently peel up the veneer, scrape off the glue, put on new glue, and try again. I can see that my strategy of leaving the veneer overlarge and trimming it back to the box dimensions after the glue has dried won’t work, so I learned at least two things this morning.

But I think that’s it for today. I’ll maybe look for a piece of veneer for the badly damaged side and cut it to size, but I need to let the box dry before trying to do anything more with it.


After a few days of no shop time, I got back out to the shop this morning (Saturday, the 17th). I planed the wrecked veneer off the side of the box using my Carter mitre plane, then found a piece of birch burl which I thought would look nice and glued that on.

Small veneering-practice box, with the wrecked veneer planed off.

When I removed the box from the clamps and cauls after a half-hour, the new veneer looked good, so I set it on the bench to finish drying while I worked on some other things. After a half-hour, I noticed the burl veneer had curled almost into a circle as the side not glued to the box had dried faster than the side next to the box. I didn't take a photo, but I basically wet everything down and re-glued the veneer down. Hide glue was invaluable here, since hide glue will stick to dried hide-glue. PVA glues would have required completely removing the veneer and sanding the underlying pine clean, since almost nothing will stick to dried PVA glue.

Small veneering-practice box with a Carter mitre plane which I used to clean up the edges of the veneer sitting next to it.

With the burl glued on, and given a couple hours to cure, I pulled the box from the clamps again, and proceeded to trim the edges of the burl veneer. I used one of my gent saws with the finest teeth (32 tpi, I believe) to cut as close to the edge of the box as possible, then used the mitre plane to get the edges baby-butt-smooth, and hit the box with a coat of tung oil. The result is above.

The next session in the shop, I'll cut this box open, add hinges and a latch, and do some serious finishing. I think I'll probably French polish the box.


I cut the box open and put in an ash liner, which serves to align the top, and hold it in place. I decided against hinges and a latch, preferring a piston fit.

The small veneer practice box, open; the interior is visible, including the spalted elm corner reinforcements

The ash liner needed some reinforcement at the corners, so I cut some spalted elm into triangular shapes and glued it in the corners. More visual interest, and much-needed reinforcement.

Small veneer practice box with lid just barely open; The birch burl side is frontmost.

I also added some edge-banding to the top and bottom surfaces that were exposed when I cut the box open. This makes the box look much more finished. I should have been more careful about trimming the inner edges of the banding for a better look, but had the edges been all the same size, I would not have needed to do the trimming. I also didn’t have quite enough of one of the styles of banding to go all the way around the box, so one side got a different pattern. It looks a little goofy, but again, more practice!

Small veneer practice box, slightly open; the edge-banding on the bottom section is visible

And then I started French polishing, but at some point the already-applied finish pulled a bit (I probably did not have enough oil on my pad) and left a bit of a mess, so I sanded the box back a little bit with 0000 steel wool and started applying Tried and True Varnish Oil, which will be my final finish. It’s nearly fool-proof, though a bit slow, as each coat needs to dry overnight before the next coat can be applied, but it’s simpler to apply, and looks really good once enough thin coats are built up.

A think a few more days of this slow finishing regimen will see the box complete. At that point I’ll give it a few days to cure, and then apply a coat of paste wax. I’m not sure what I’ll do with the box, but I suspect it will get given away.

#projects #veneering #buildBlog

Discuss... Reply to this in the fediverse: @davepolaschek@writing.exchange
Originally written Jul 24, 2020

For the 2020 Barbecue Swap that I ran, I decided to make a kit of bbq tools, along with a small briefcase to hold them. Given that I'm still settling into my shop, I figured this would give me the ability to switch between the different components as I needed to find tools, rearrange my bench, or other distractions. I'll try to break this into three sections, the briefcase, the tools, and the shakers.

The briefcase

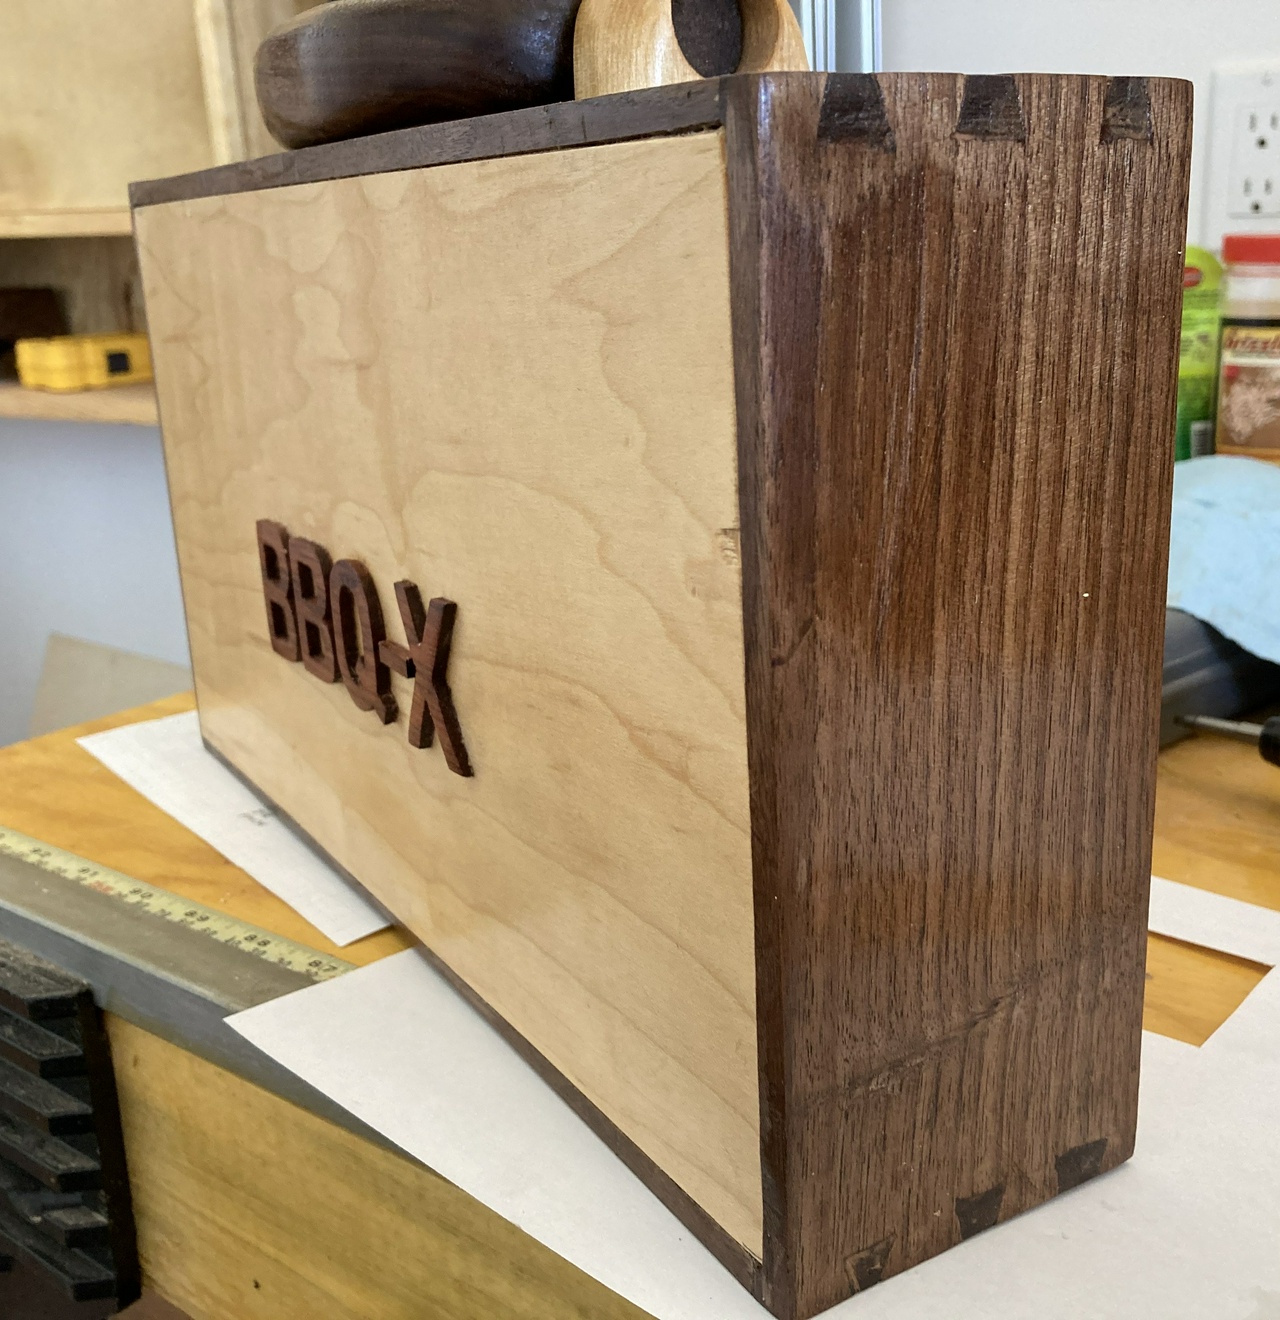
oblique view of the briefcase, showing the letters on the front and the dovetails on the sides of the case

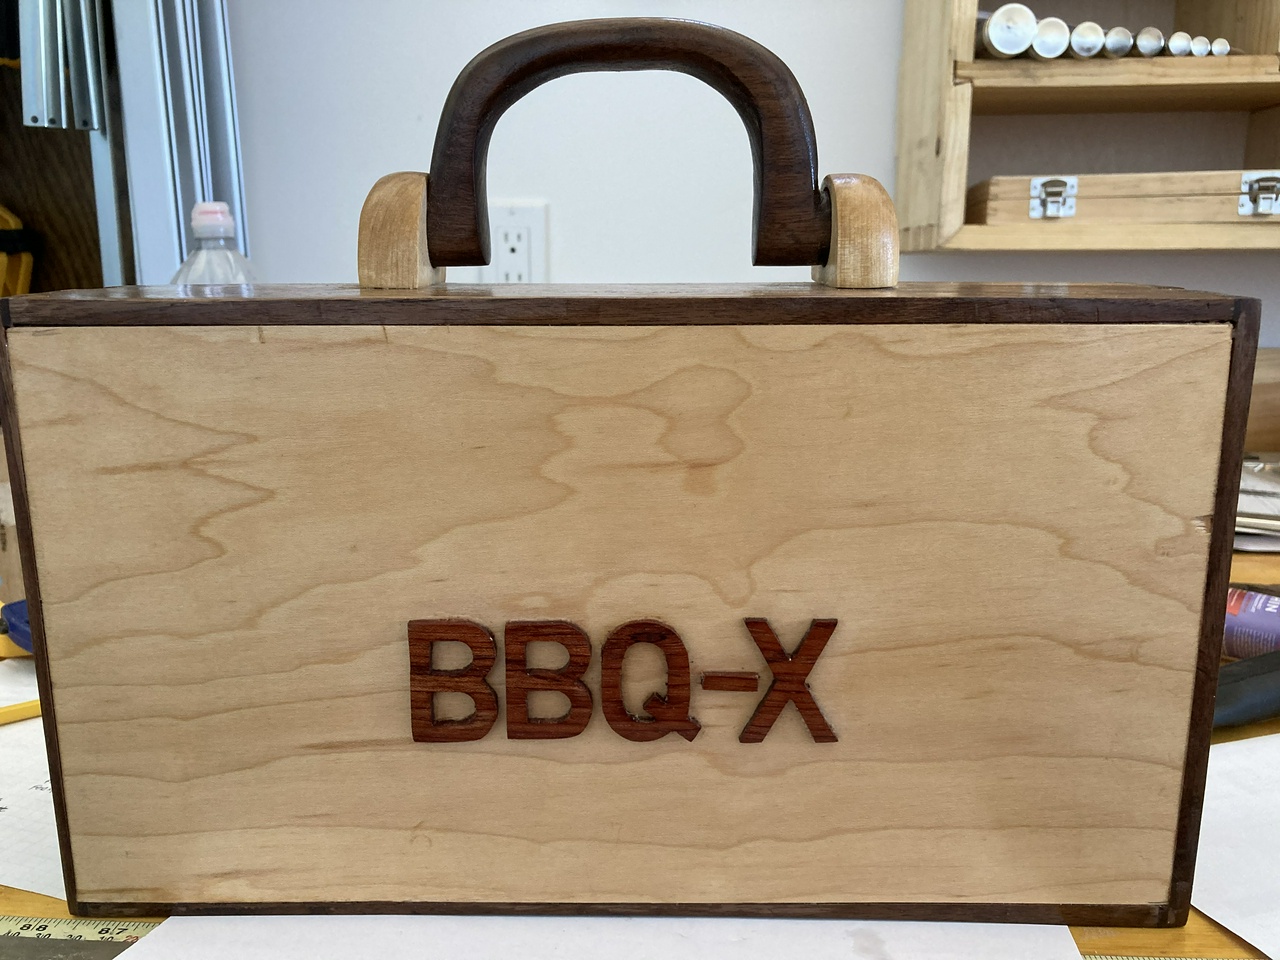
front view of the briefcase, clearly showing the BBQ-X front panel

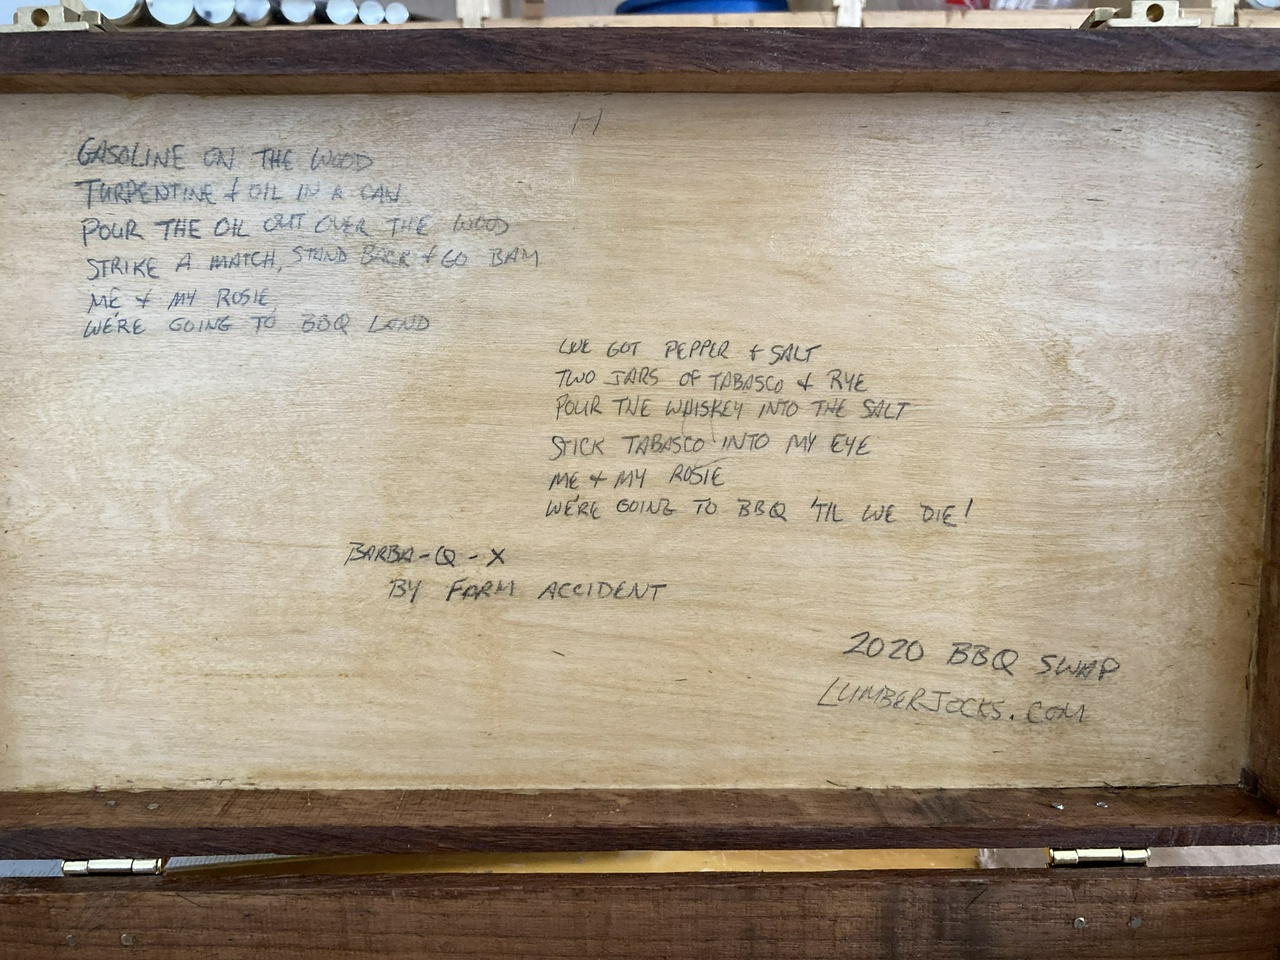
inside of the briefcase, showing the hand-written lyrics to Barba-Q-X by Farm Accident

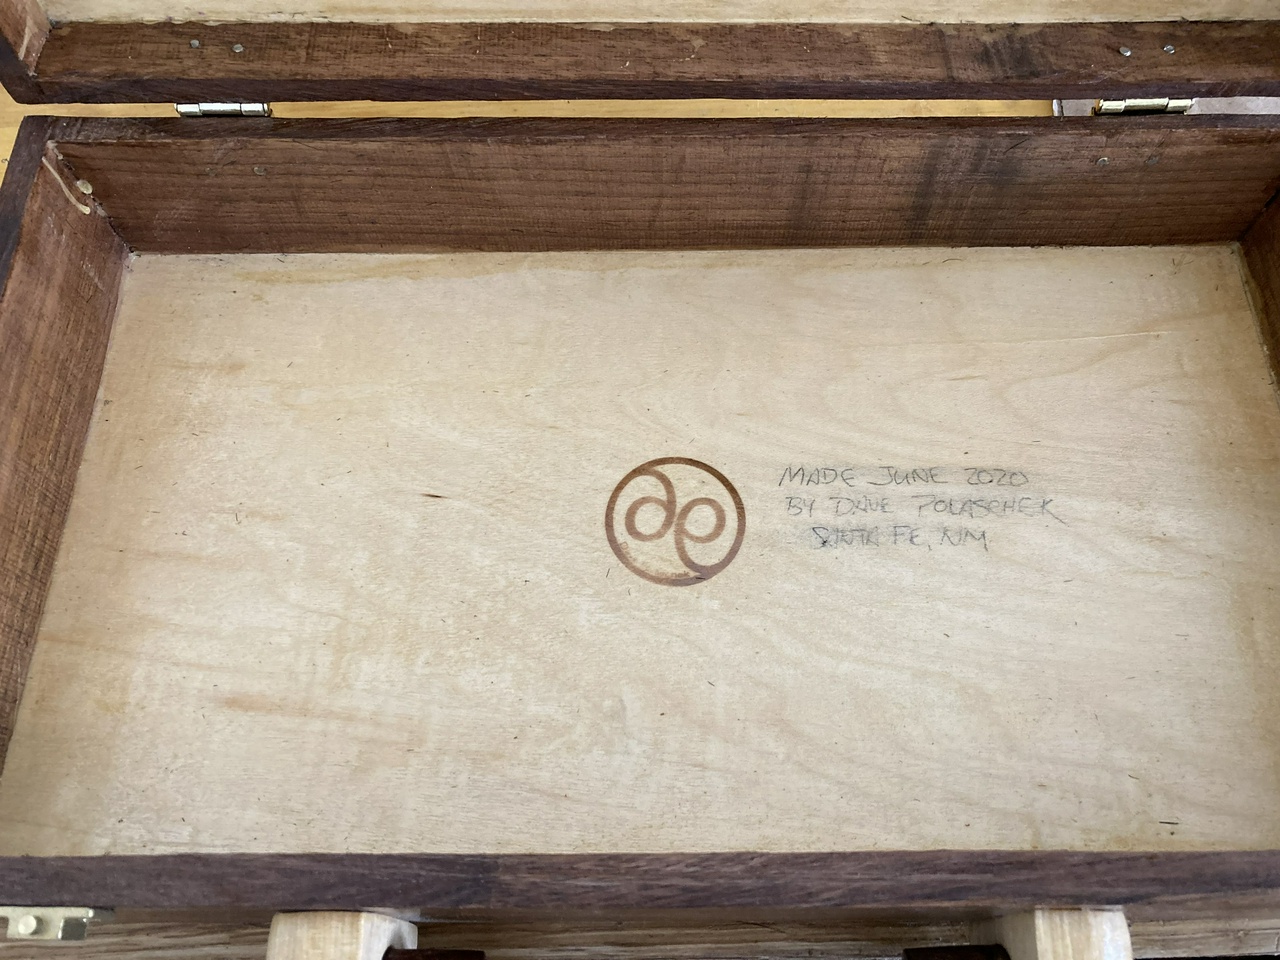
inside of the briefcase, showing my makers mark and the date the case was made

I wanted to make sure the briefcase fit into a USPS medium flat rate box so I looked that up and figured my briefcase had to be about 13-¾ inches long at longest, about 8 inches wide, and a little more than 3 inches thick. I cut a piece of walnut I had down into two book-matched pieces that were 22 long and 3¼ wide by about ⅜ thick. I roughly smoothed the outside of the pieces, but left the rough, inner, book-matched surfaces alone for now. Those would become the outside of the box, and I've found that it's easiest to smooth them after I've assembled the box, especially when working with thin stock.

I cut grooves near the edges of the wood, which would be the grooves that held the top and bottom of the case. Did ¼” grooves, about an eighth from the edge of the board.

Then I dovetailed the ends, paying some attention to where I would want to cut the box open, and trying to lay the tails out so I would be sawing a tail in half when I cut the box open. And rather than assemble the top and bottom of the box immediately, I planed off the spare eighth turning the groove in the boards into rabbets.

I also sanded and finished the front panel of the case at this point so when I put the handle on it, I wouldn't have to try and sand around that.

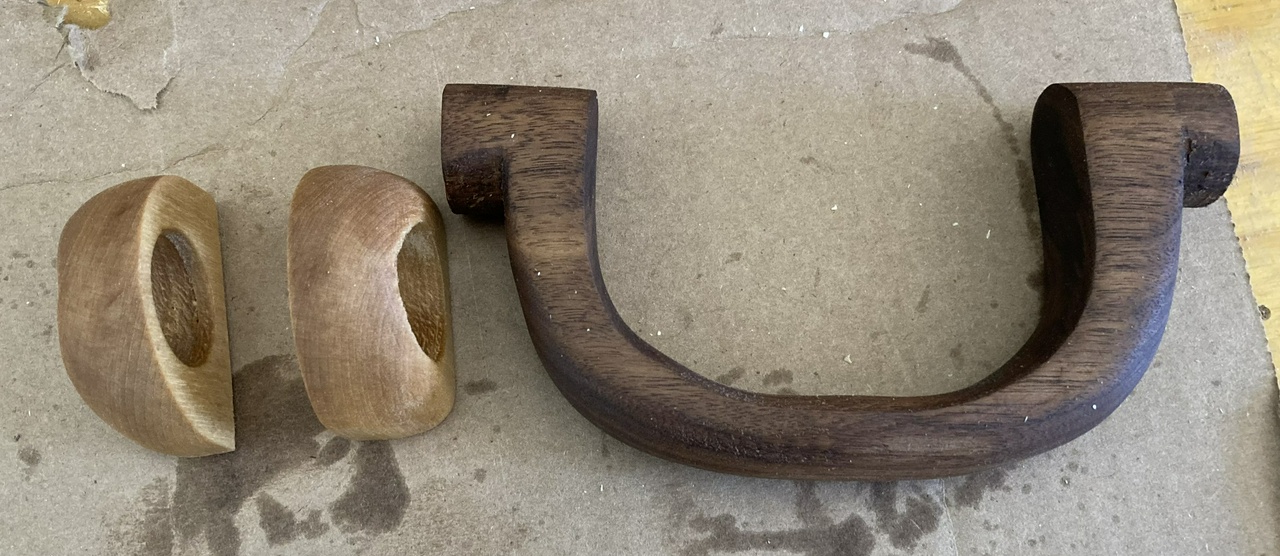
The handle was a piece of 4/4 walnut, hand-carved to a handle shape. I then made octagons on the end of it, guesstimated they were going to end up about an inch in size, and drilled a one inch hole in a piece of birch. I then cut it in two, and hand-shaped it to make brackets to hold the handle, and then turned down the ends of the handle to match the holes using my hollow auger. I also drilled a couple holes to align the handle brackets while I could still get inside the box to clean up the holes.

Handle and brackets for the handle

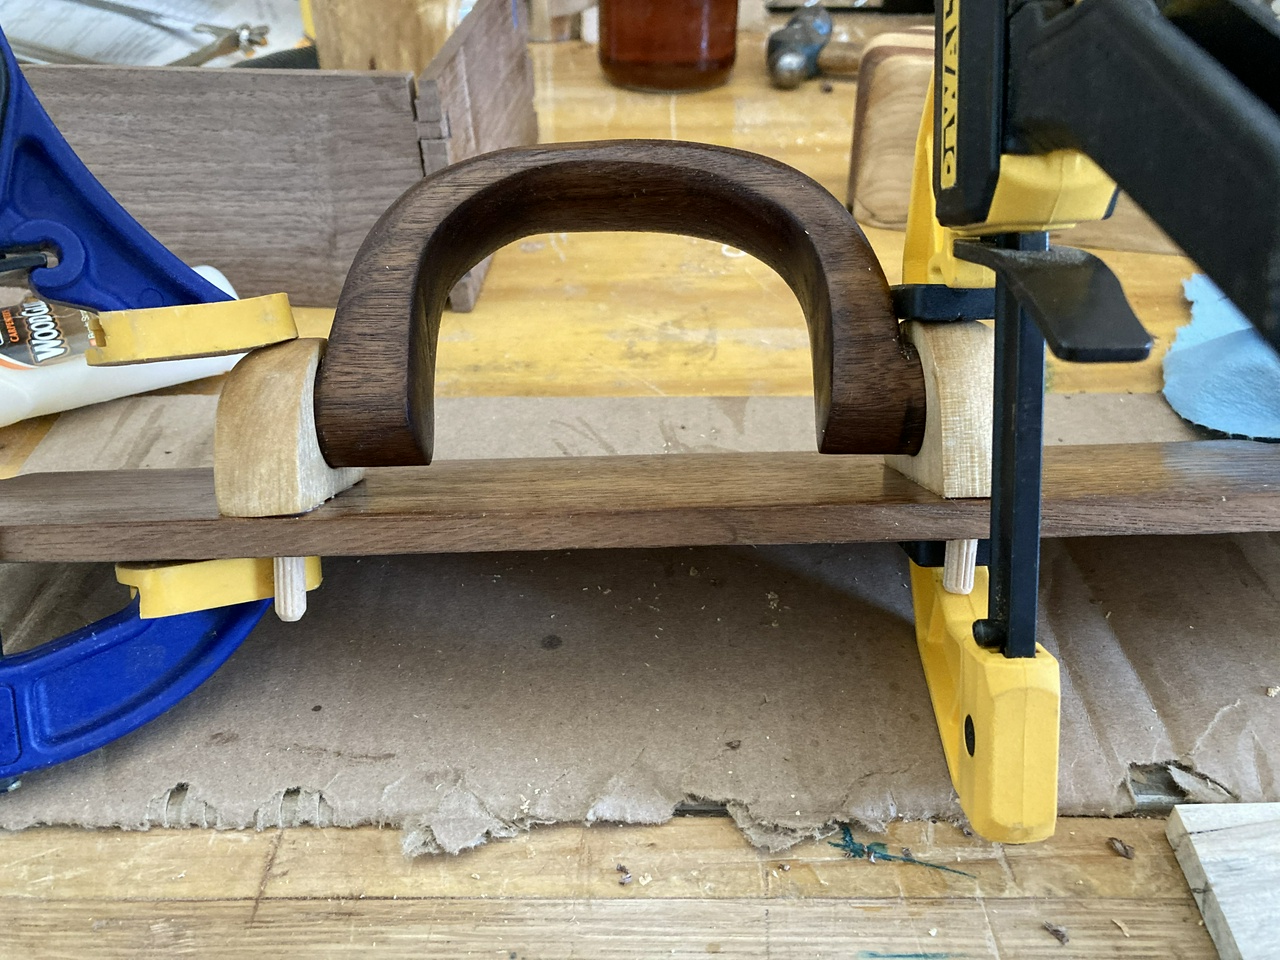
Attaching the handle to the front panel of the briefcase

I glued up the dovetails, and just set the top and bottom of the box in place for now to help keep things square. And then I took the case to the belt-sander to finish sanding the sides.

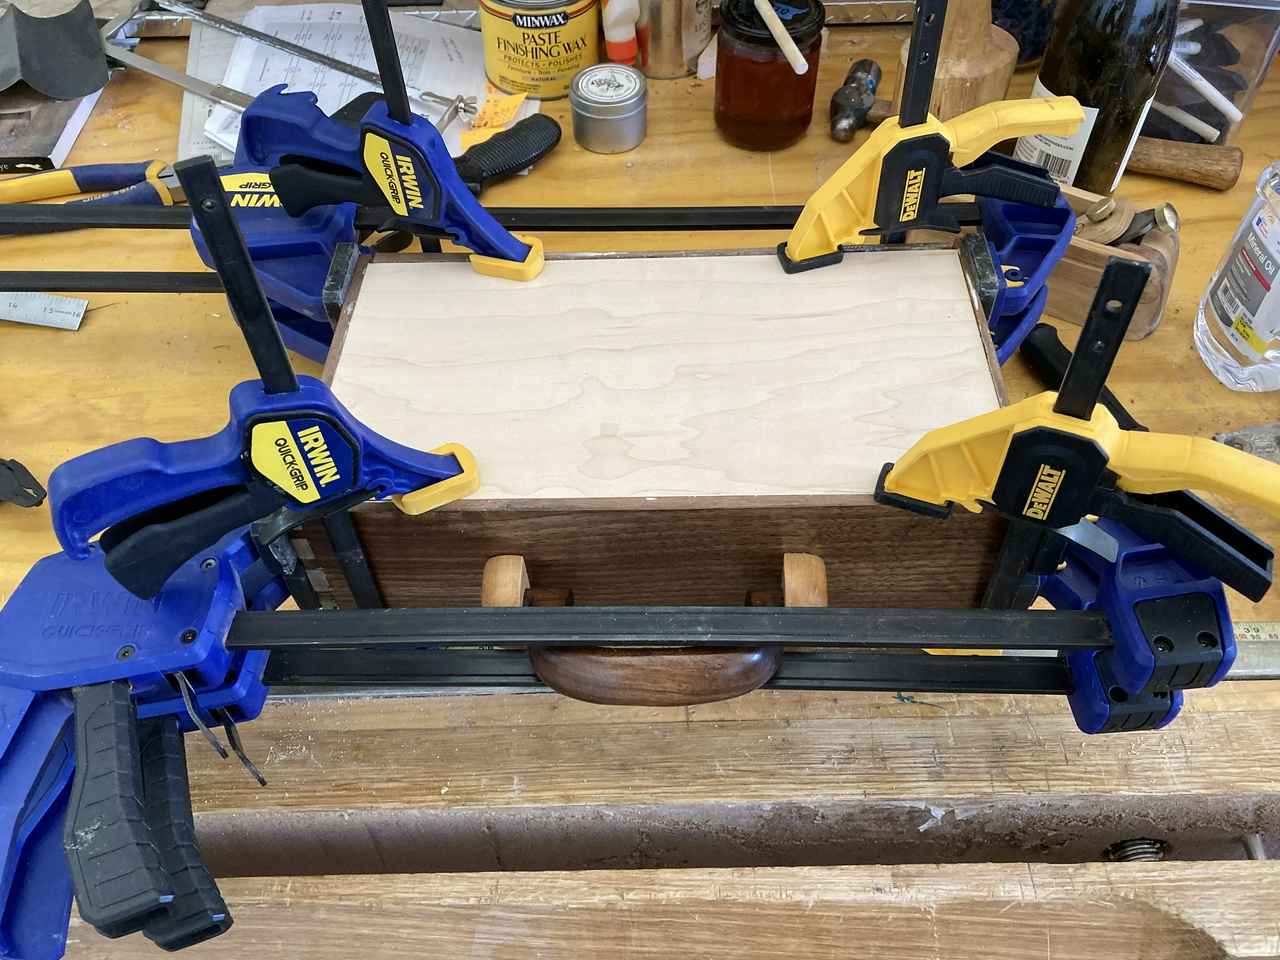
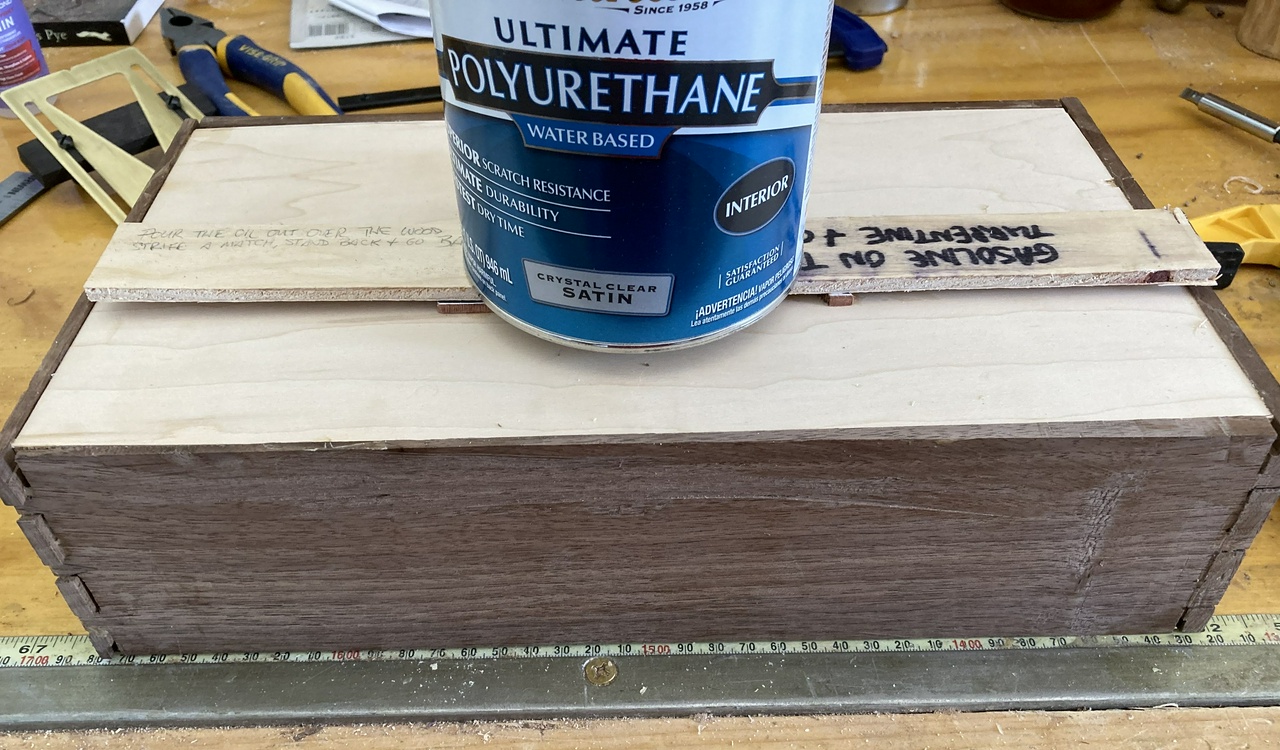
That done, I finished the exterior of the case. This included cutting the BBQ-X letters from some thick (1/8” or 3/32”) bubinga veneer, hand sanding them, and gluing them to the lid. I oiled the box, handle, brackets, lid and bottom, and then glued on the letters, and glued the top and bottom into their rabbets, and glued on the handle. Clamping everything took a little improvisation.

clamping the edges of the box

clamping the letters to the front of the box with a can of polyurethane as a weight

The name comes from a song by the band Farm Accident, who were friends of mine who played in Minneapolis back in the 1980s. If you look at the third picture, you can see the lyrics to the song, which I wrote on the inside of the box.

The box assembled, I hit it with four or five coats of super-blonde shellac, padding it on. Then I cut the box open, put on the hinges and latches, and called it done.

Whew!

The Tools

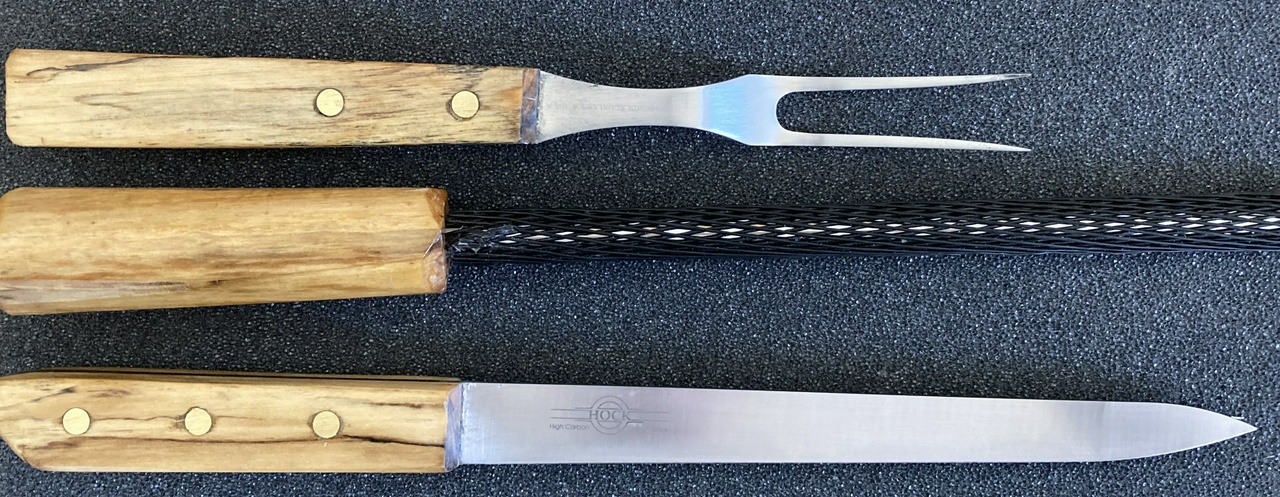
The bbq tools, a fork, steel and carving knife with stabilized birch handles

The tools were made with stabilized birch for the handles. The birch came from Timber Bay Resort in Babbitt, MN. There had been a big wind-storm just before we went up there in 2018, and I scavenged a bunch of birch, brought it home, sliced it up, and stabilized it.

The knife and steel are from Hock Tools. Ron Hock is a great guy, and when I asked him about a barbecue fork, he said he didn't make them, but suggested the steel (which I had forgotten they made) and pointed out that he sold aprons which were certainly bbq related. Nice job up-selling me, Ron! The fork ended up being from eBay. I bought one that had a rough-looking handle, but was made in US steel, peeled the old wooden handle off, and put on a new handle. Nothing too fancy with the tools, but I left them slightly oversized so Grant could reshape them if he liked.

The Shakers

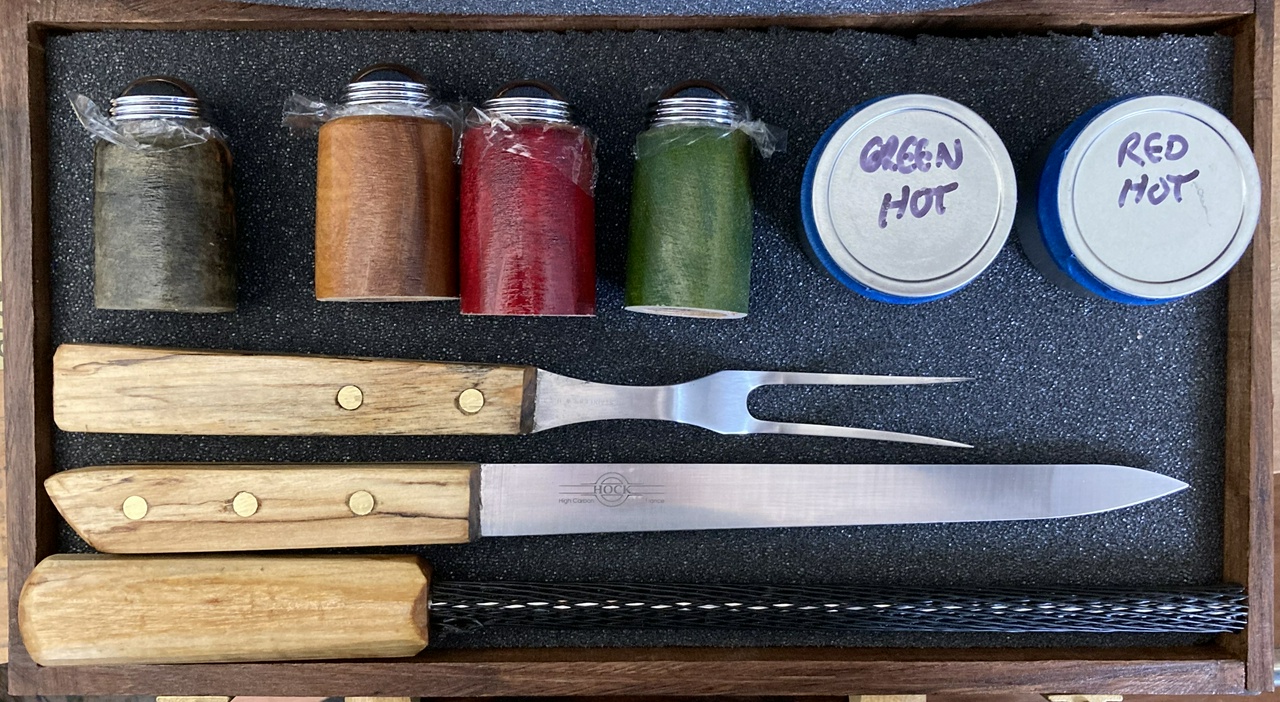
shakers, spare chile, and tools arranged in the case

And then the shakers. After thinking about turning them, and cutting my own threads for lids, I decided that was too much to bite off this year, and I bought some shaker inserts from Lee Valley. They're about 15/16 in diameter, and slightly tapered, so I drilled holes in some pieces of birch. I had initially planned to have the grain in the birch running up and down on the finished shaker, but my 15/16ths auger bit has a bad lead screw, and drilling into end-grain in the stabilized birch proved to be too tough, so I oriented the grain cross-wise, which made drilling much easier.

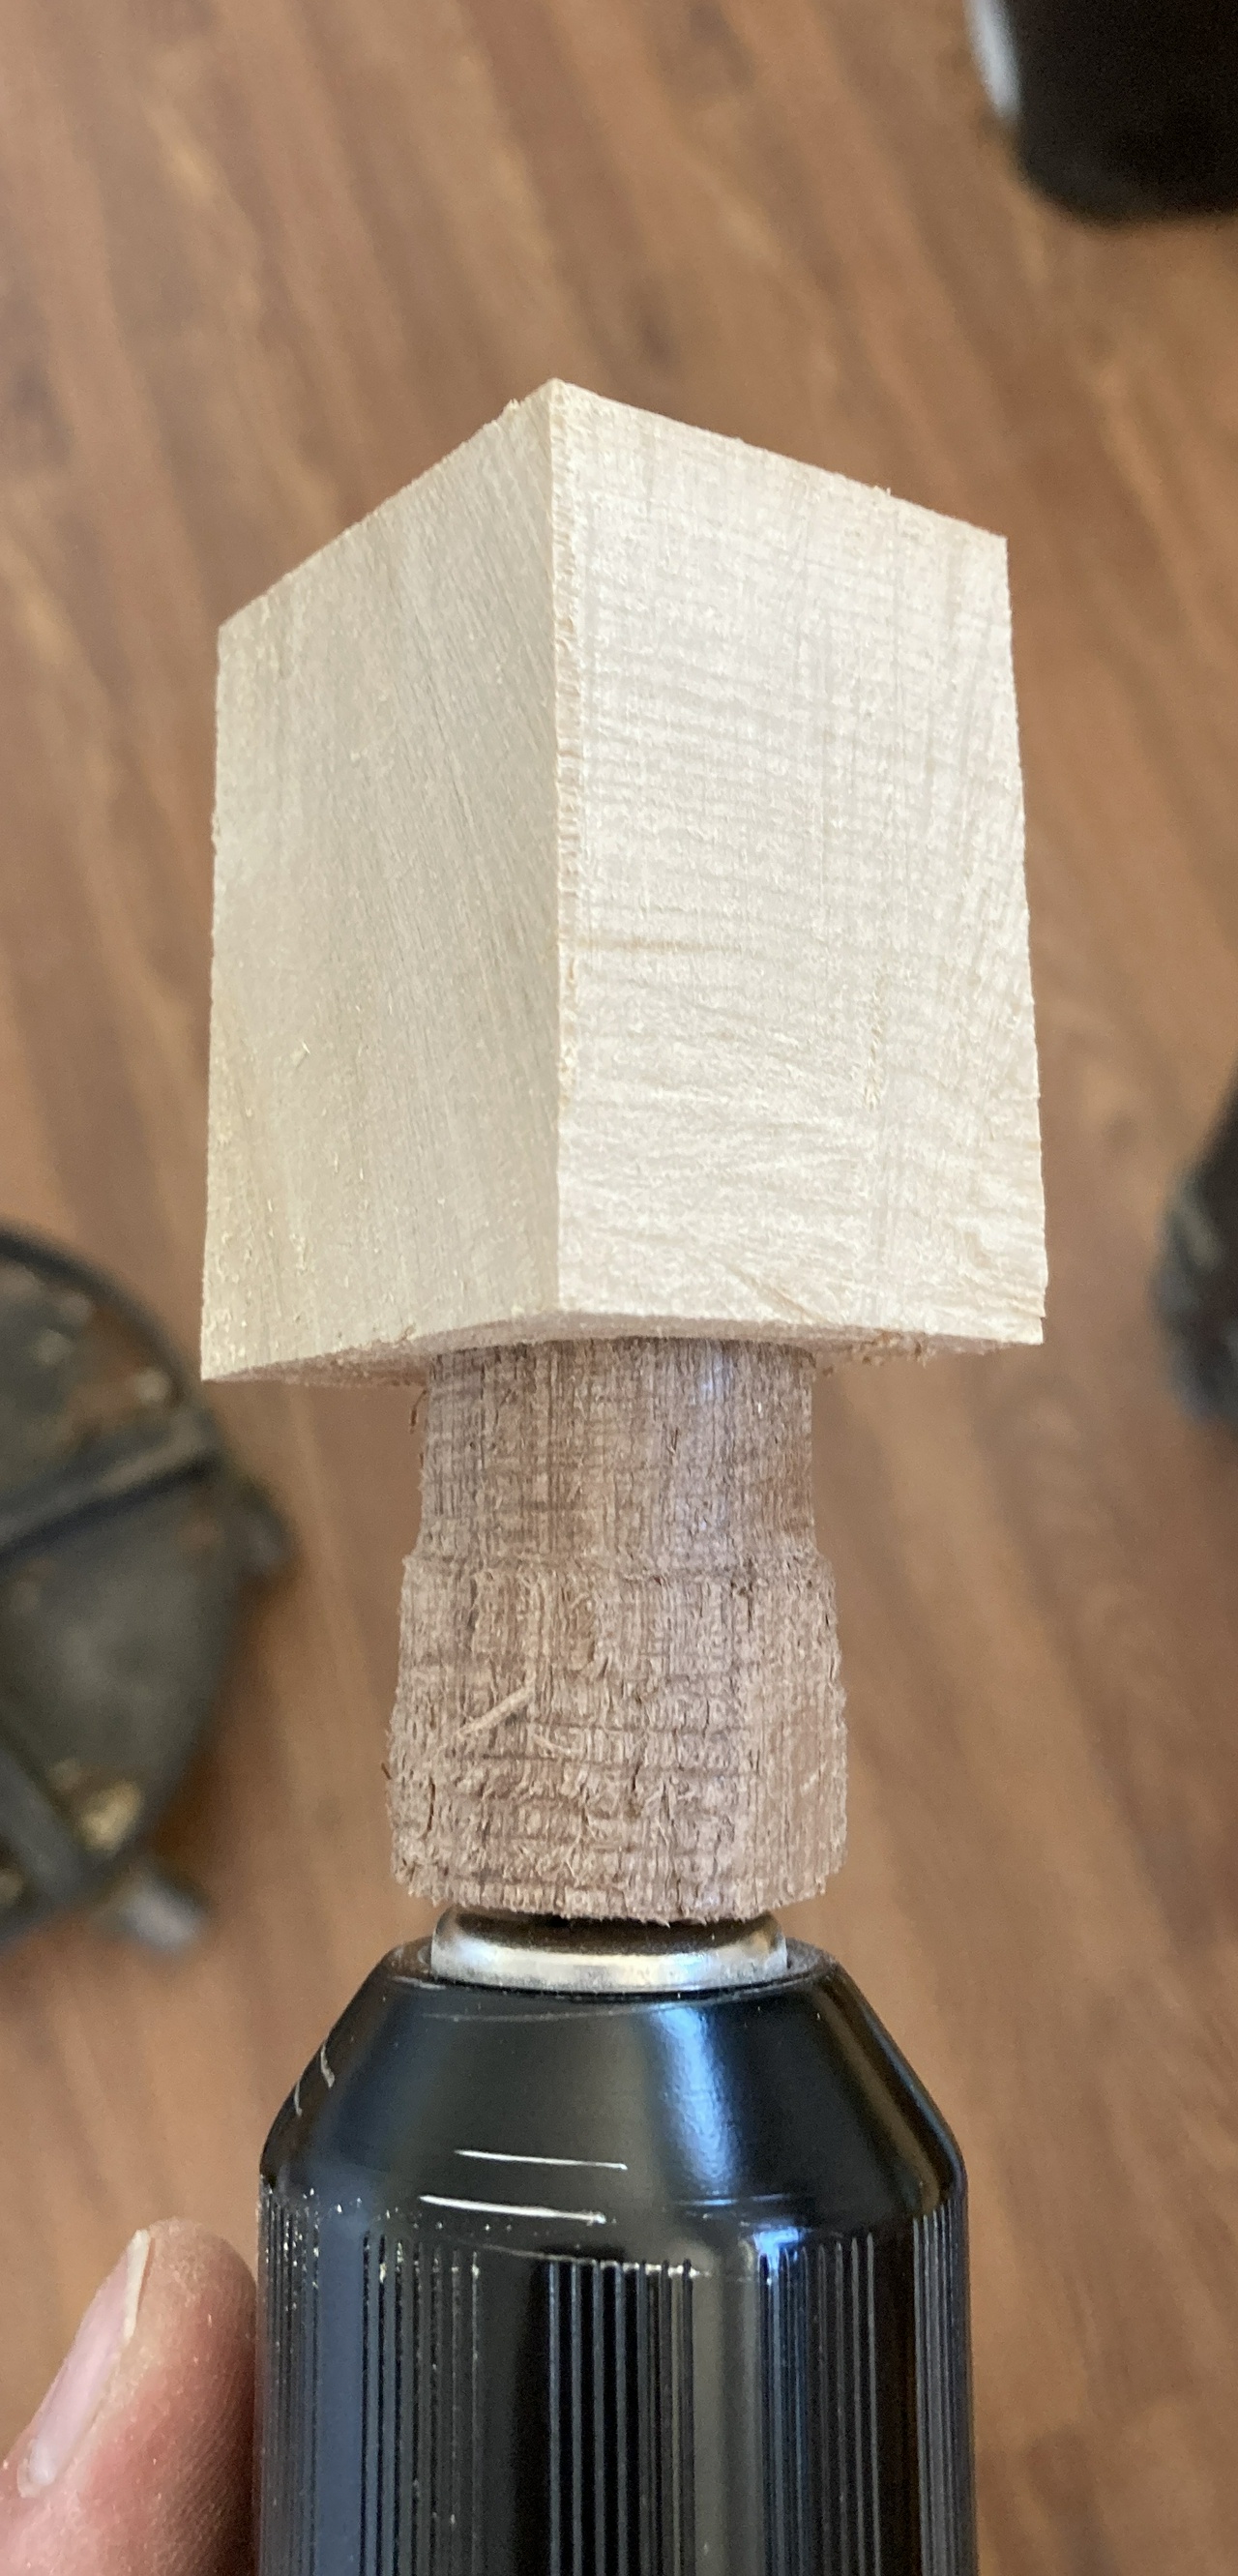
With the holes drilled, I started figuring how to shape the outsides. I had planned to use a spokeshave to turn the birch from squares to octagons, and then to round, but that was when the grain was running the other way. I tried using the shave cross-grain and broke one of the shaker bodies. After some thought, I took one of my walnut offcuts, put a deck screw into it, shaped it roughly round by spinning it against my (running) belt-sander, and decided that would work well enough on the birch.

a block of wood on the end of a drill which is about to serve as a mini lathe

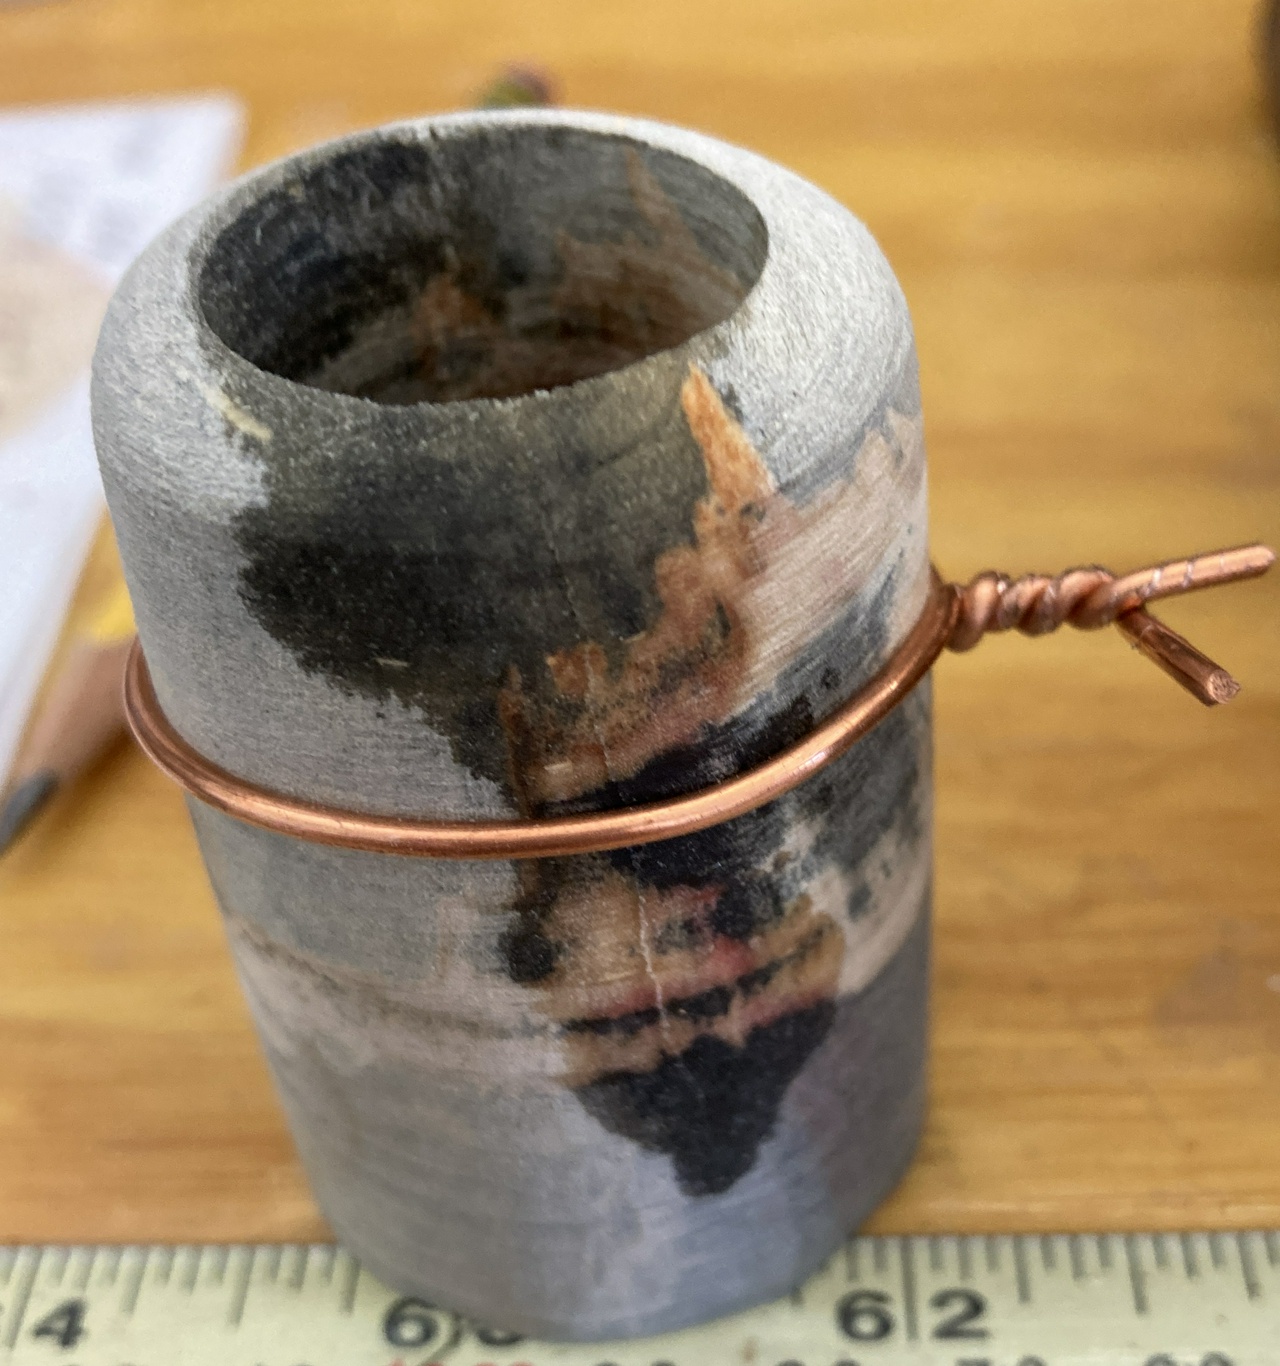
I also experimented with dyeing the stabilized birch, and decided that for the red and green, I was best using non-stabilized birch, especially after I cracked one of the pieces while rounding it. Learning as I go!

cracked and mended shaker with a piece of 12 gauge copper wire holding it together while the glue dried

With the four shaker bodies dyed and finished (I used shellac, tinting it with TransTint dyes), I took a tapered reamer to get the holes to the final size, then put a tiny bit of CA glue on the insert, and pressed them into the bodies. I ran a little extra CA in from the bottom to make sure everything held. Note that the inserts say “DO NOT USE EPOXY” and they mean it. The acrylic that's used in the inserts kinda dissolves if you try to epoxy it in place. CA glue is the right glue for this job!

I packed the knife, fork, steel, and four shakers into the case with foam inserts, then packed the case into the flat rate box with a Hock apron, another cow-spotted apron my sweetie found, and tossed in a couple tins of extra chile from New Mexico and the box was full, and ready to be on its way.

And then, of course, I realized I'd forgotten to include the note in the box, so I had to open it up again. At least I remembered to take pictures of the complete stuff for this writeup while I had the box open. ;–)


#woodworking #projects #swap

Discuss... Reply to this in the fediverse: @davepolaschek@writing.exchange
Completed chisel and gouge till

Over the past few weeks I built a till to hold all of my chisels and gouges, and here it is. It had a total of five rows of tools, and each tool sits in a one inch diameter hollow, with the sharp end of the tool held to the panel behind it by a 3mm x 6mm rare earth magnet.

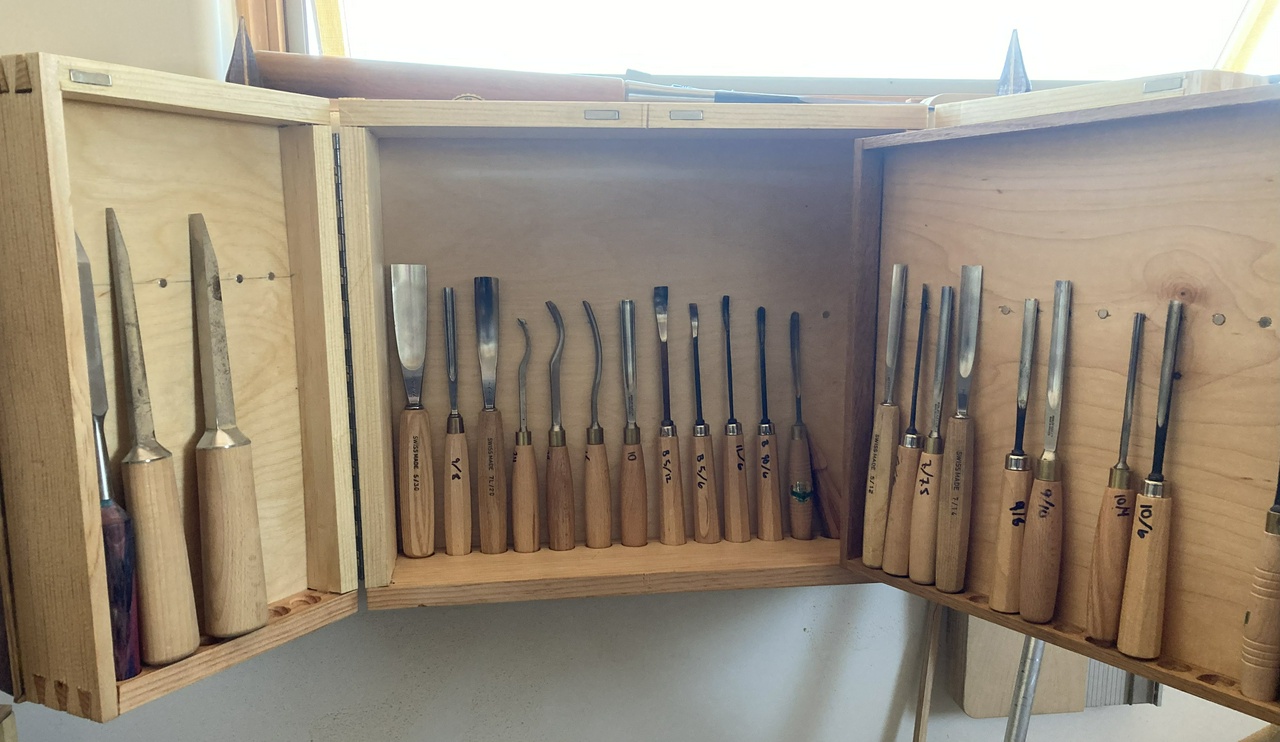
Innermost storage of the chisel and gouge till

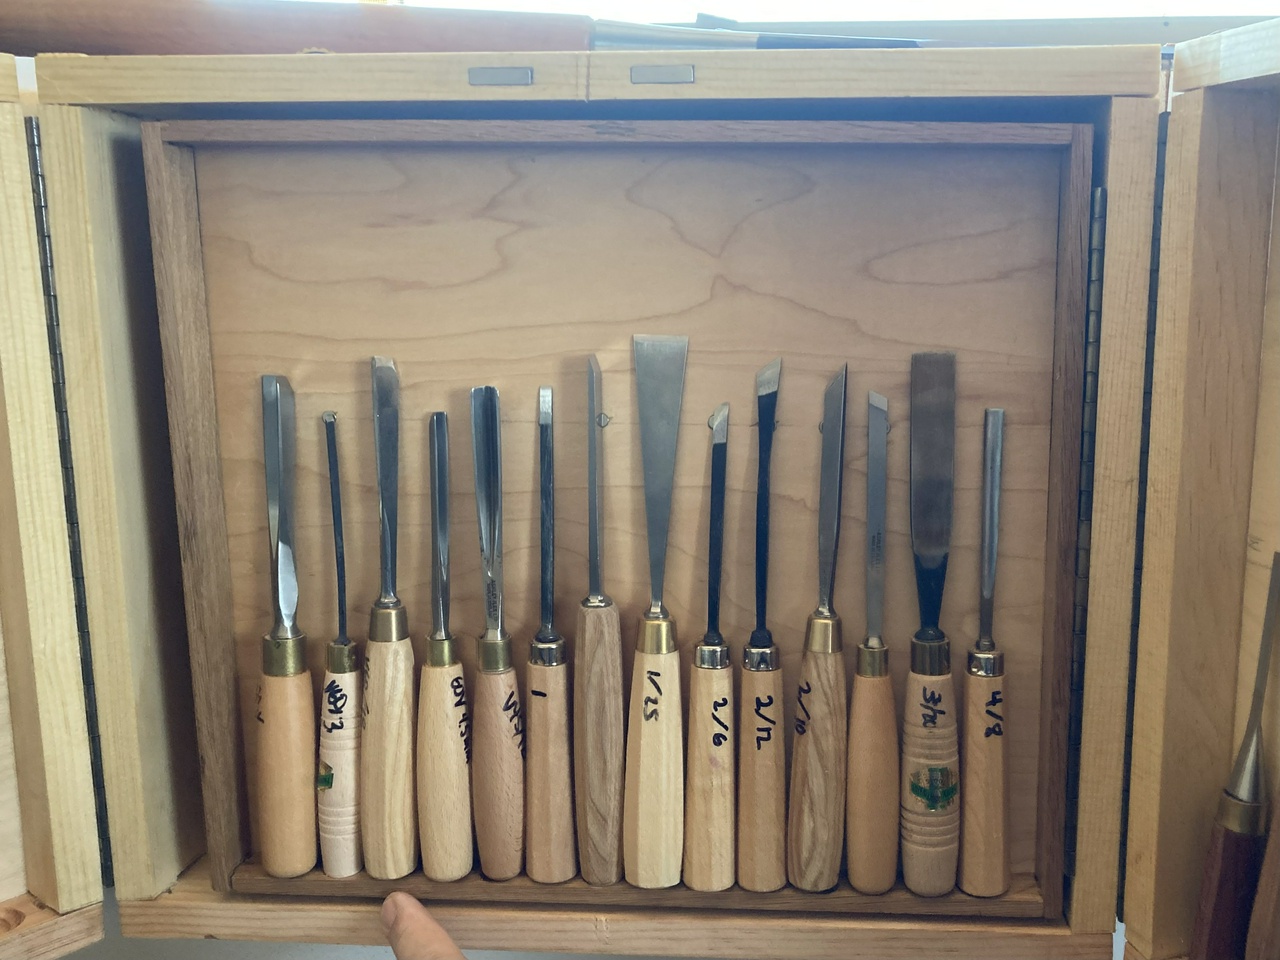
The back row (farthest inside) holds my bent gouges and spoon gouges. They’re not used very often, so hiding them deep inside is fine. Opposite them are straight gouges in higher curvatures. I use them pretty often, so this isn’t ideal, but I’ll get things sorted better over time.

Outside of the inner door of storage

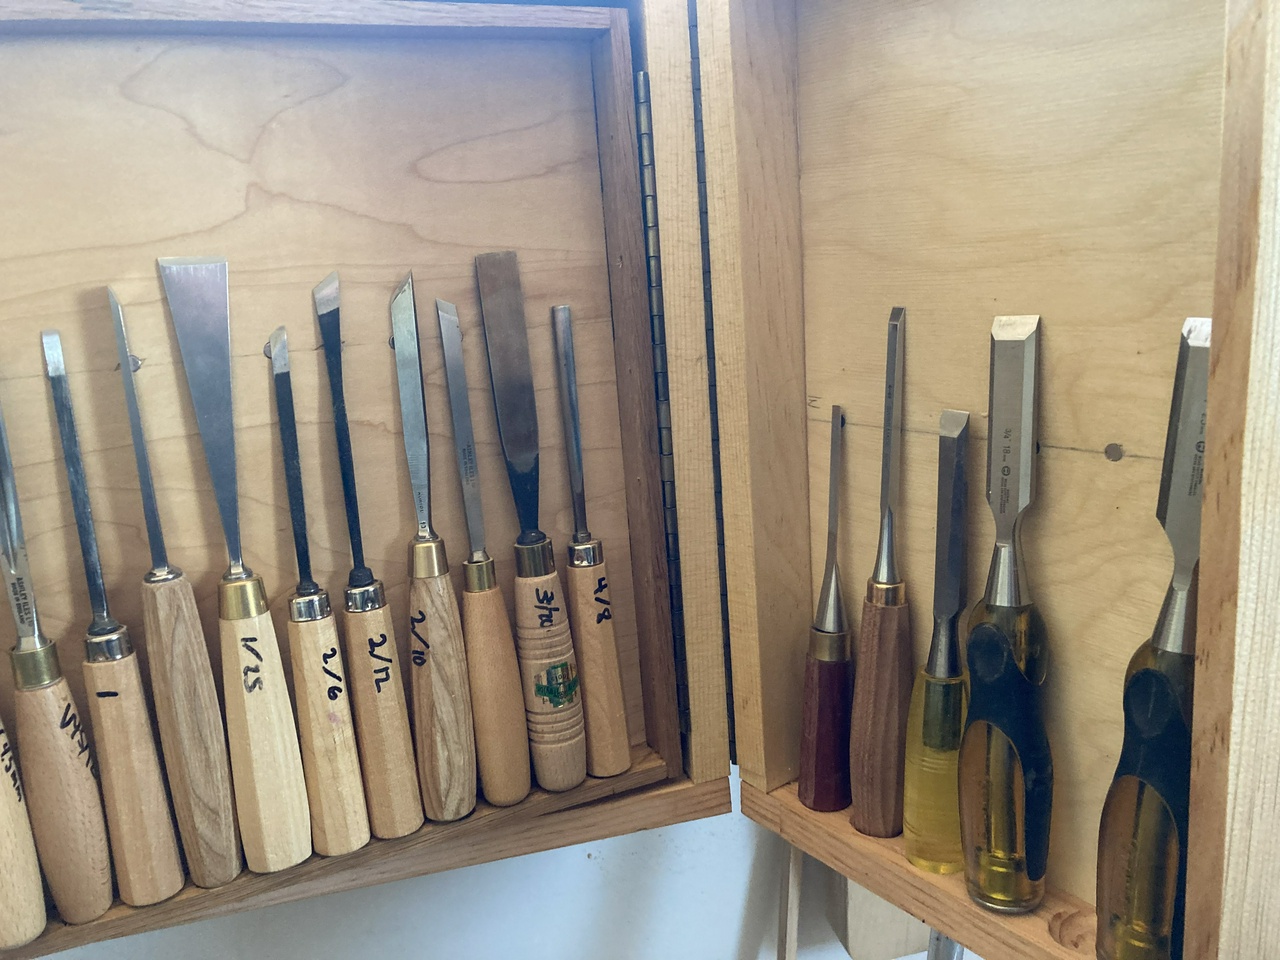
On the outside of the inner door of the storage are the straight gouges and lesser curves. Also the V gouges are here, as I use them fairly often.

Inside left door

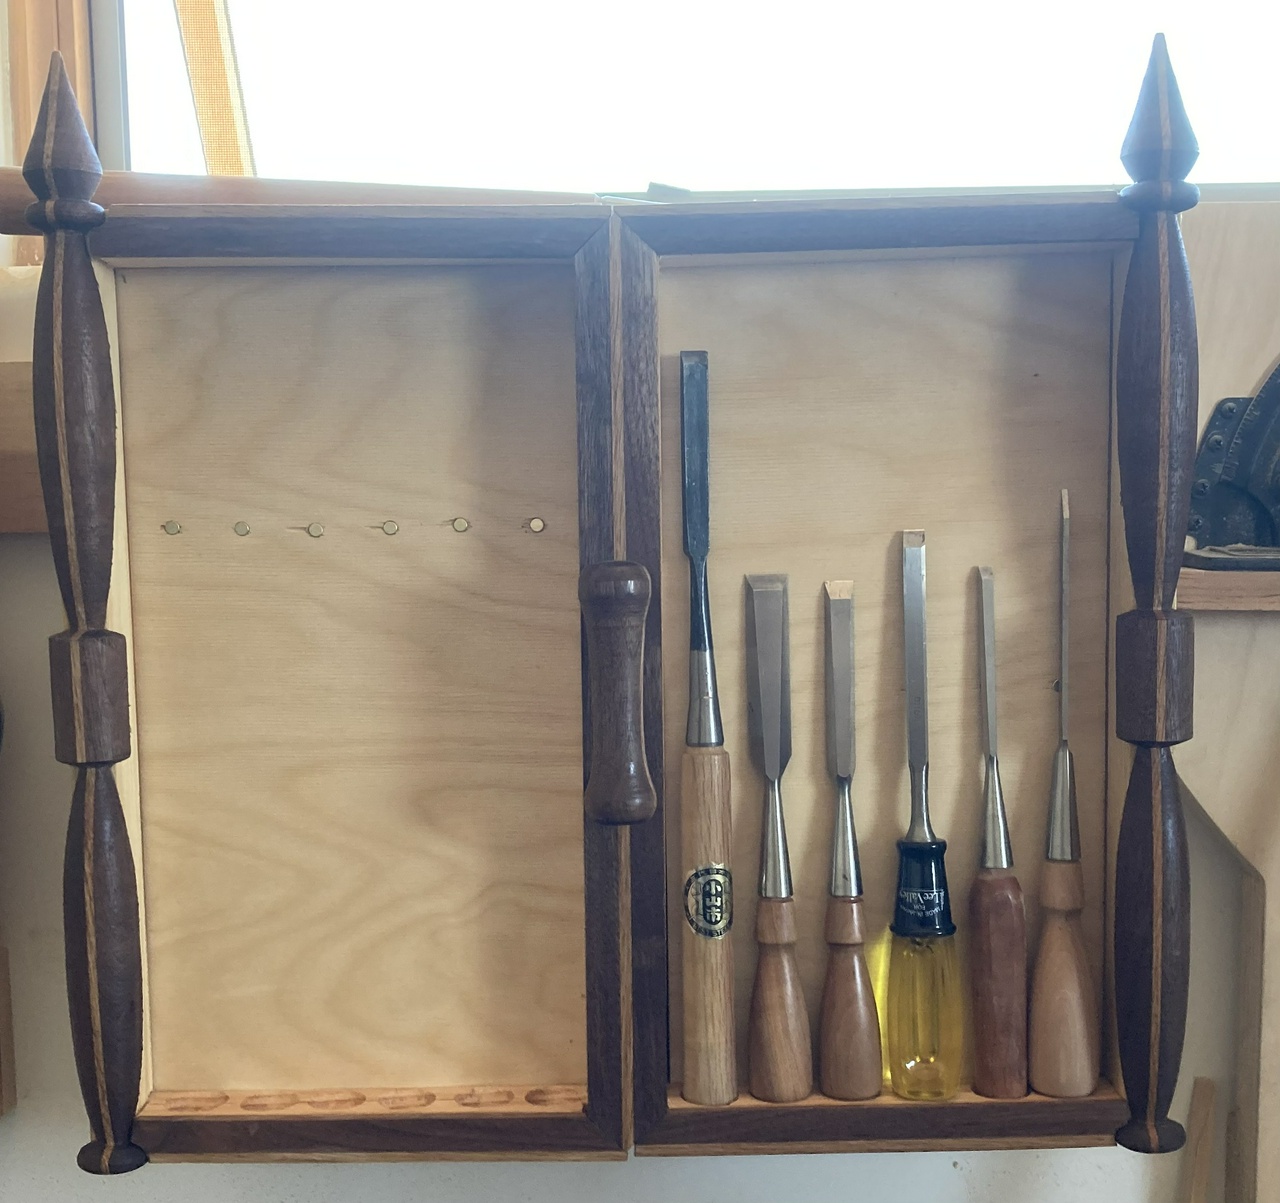
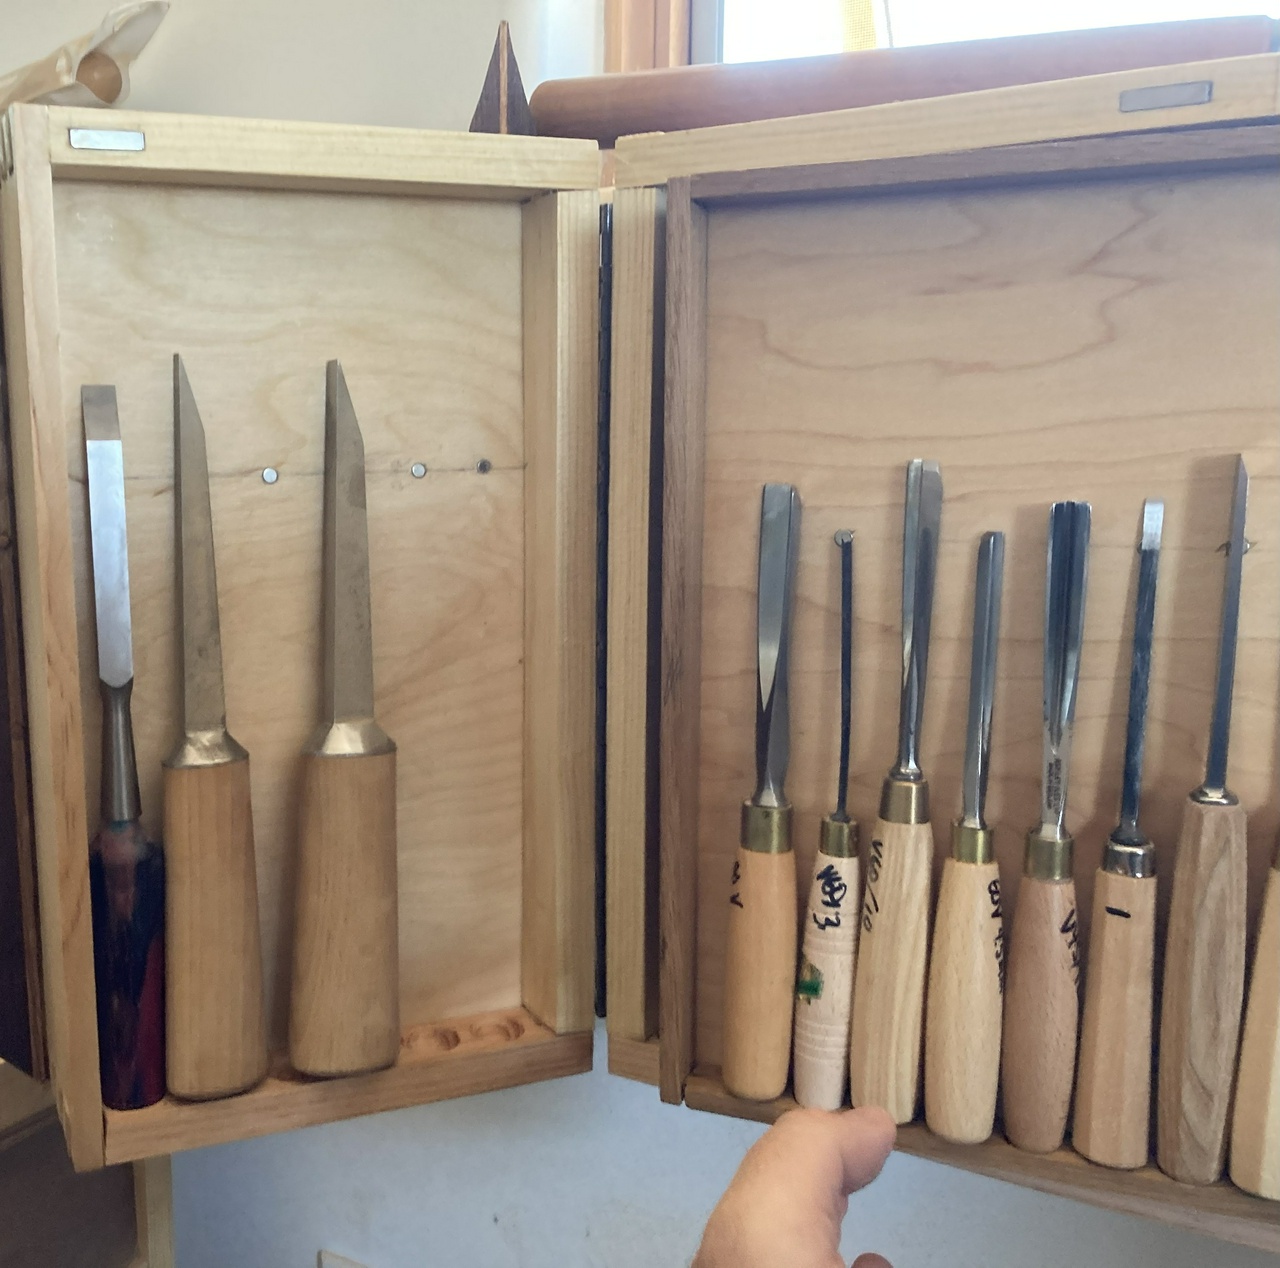
On the inside of the left door are my mortise chisels. Again, not frequently used, and probably these should move to the inside of the inner door.

Inside right door

On the inside of the right door, I have seldom-used chisels. These are spares, and again could move farther in.

Front doors of the chisel and gouge till

And finally the outsides of the doors hold the normal bench chisels which I use most often.

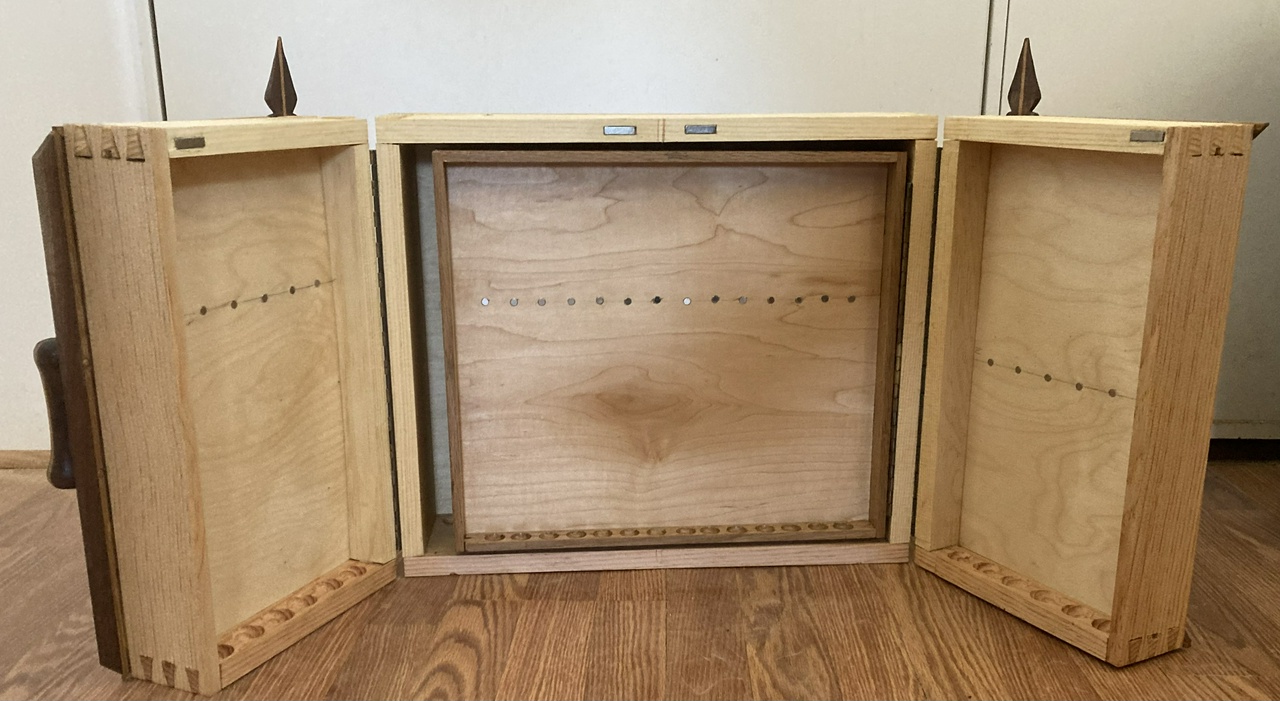
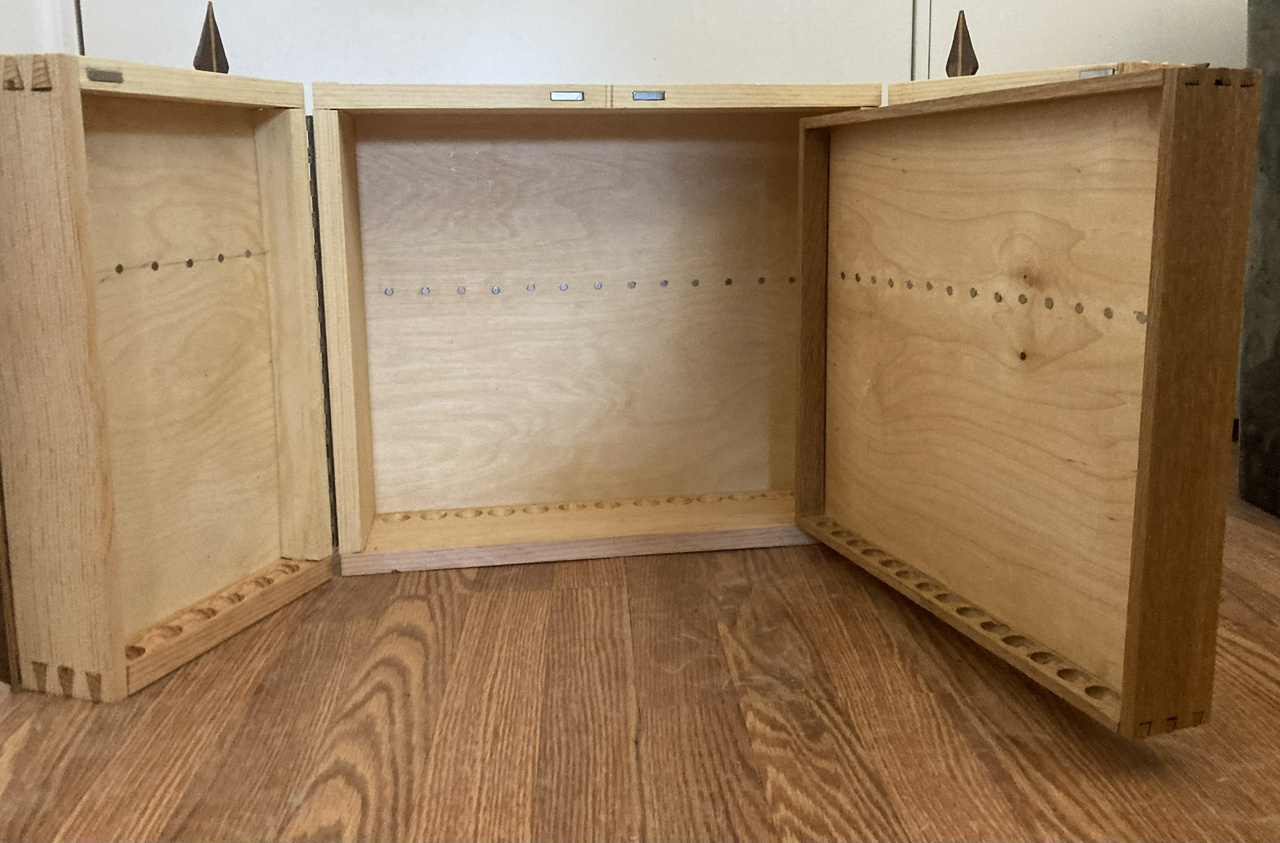
Inside of the empty till

Construction of the carcasse is pine with Baltic birch panels.

Inside of the empty till with the inner door open

The inner door is white oak, also with a Baltic birch panel.

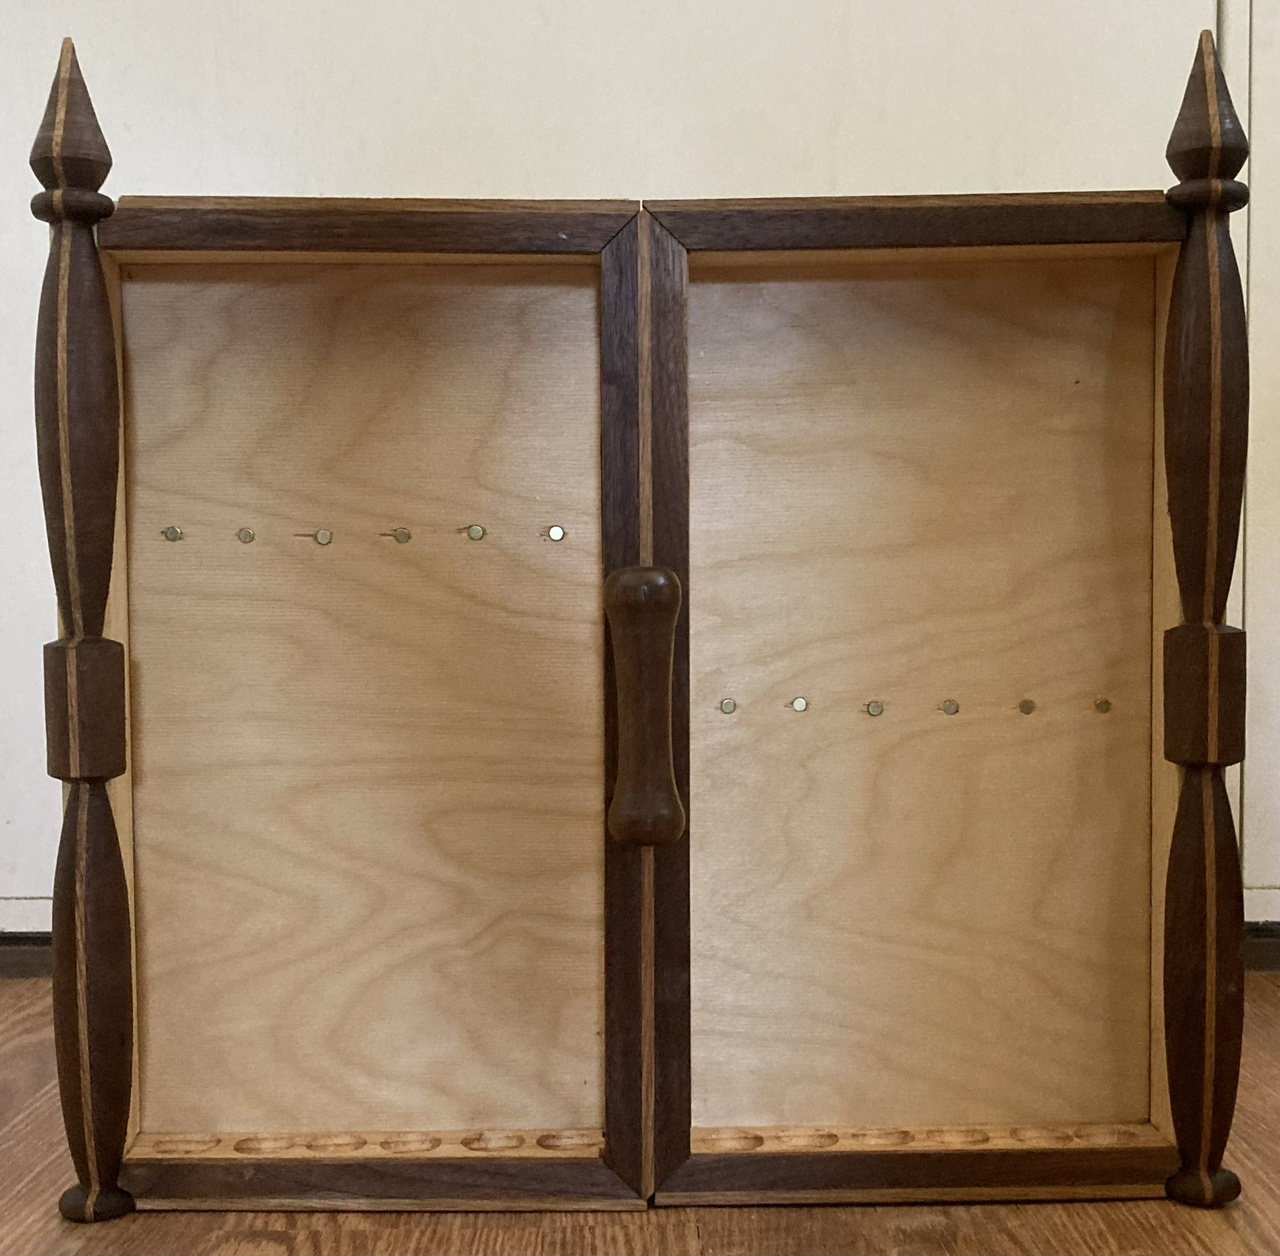
View of the outer doors

The outer doors have decorative bits made from walnut and oak, partly to make the till a little prettier, but also so I could practice turning the decorative turnings and mitering the flat bits. Shop furniture is a great way to practice my skills.

The carcasse was built first, then sawed open to remove the doors. Then I drilled holes for the piano hinge for the inner door. I then sawed the two doors apart and aligned and mounted the piano hinges for the inner door, then the outer doors. I applied the trim, cleat on the back, and then coated everything with a coat of tung oil.

#woodworking #projects

Discuss... Reply to this in the fediverse: @davepolaschek@writing.exchange