davepolaschek

swap

Originally written Mar 22, 2021

straightedge in the box, squares on the insert, out of the box

squares in the open box

closed box

handwritten notes that were included in the box

For the surprise swap in 2021, I made a set of squares for BigShooter. A try square, a miter square, a straightedge, and a box to hold them.

The try square was first. Brass bar (inch wide stock, draw filed to clean it up) and African mahogany (aka khaya). Glued together with fish glue and screwed together with brass screws, and with brass trim which is glued on and held with a couple brass brads. Same setup for the miter square. Both required a little fine-tuning with a plane after the holes were drilled and I checked to see how close I had gotten. The straightedge was a simple piece of mahogany with a brass strip glued along one edge, and with inch marks in the wood. They're all finished with tung oil and paste wax.

The brass trim was all ⅜×3/16” square tubing, with one of the wider sides filed away using a bastard file to make a U-shaped piece. The screws are put about halfway in, then sawed off and filed flush. I also used a 7 or 9 sweep gouge to carve flutes in the sides of the mahogany so it felt nice in the hand.

I built a box to hold the tools using some butternut and Baltic birch ply, with a poplar-edged insert. The box was built to fit into a medium USPS flat rate box. I used some ipe trim inside the top lid to dress it up a little and cover up the gap where the box went a little out of square when I glued it up. Oops! The box also got some walnut feet (which made it slightly too big for the box until I planed them smaller) and brass hardware, and was finished with tung oil and shellac.

I included some piñon coffee and chocolate with New Mexico chile as an added treat. Here are some additional photos from the build.

drilling holes in the miter square

verifying the angle of the miter square

planing the edge of the miter square to get the angle exactly 45°


#woodworking #project #swap

Discuss... Reply to this in the fediverse: @davepolaschek@writing.exchange

Originally written Jul 24, 2020

For the 2020 Barbecue Swap that I ran, I decided to make a kit of bbq tools, along with a small briefcase to hold them. Given that I'm still settling into my shop, I figured this would give me the ability to switch between the different components as I needed to find tools, rearrange my bench, or other distractions. I'll try to break this into three sections, the briefcase, the tools, and the shakers.

The briefcase

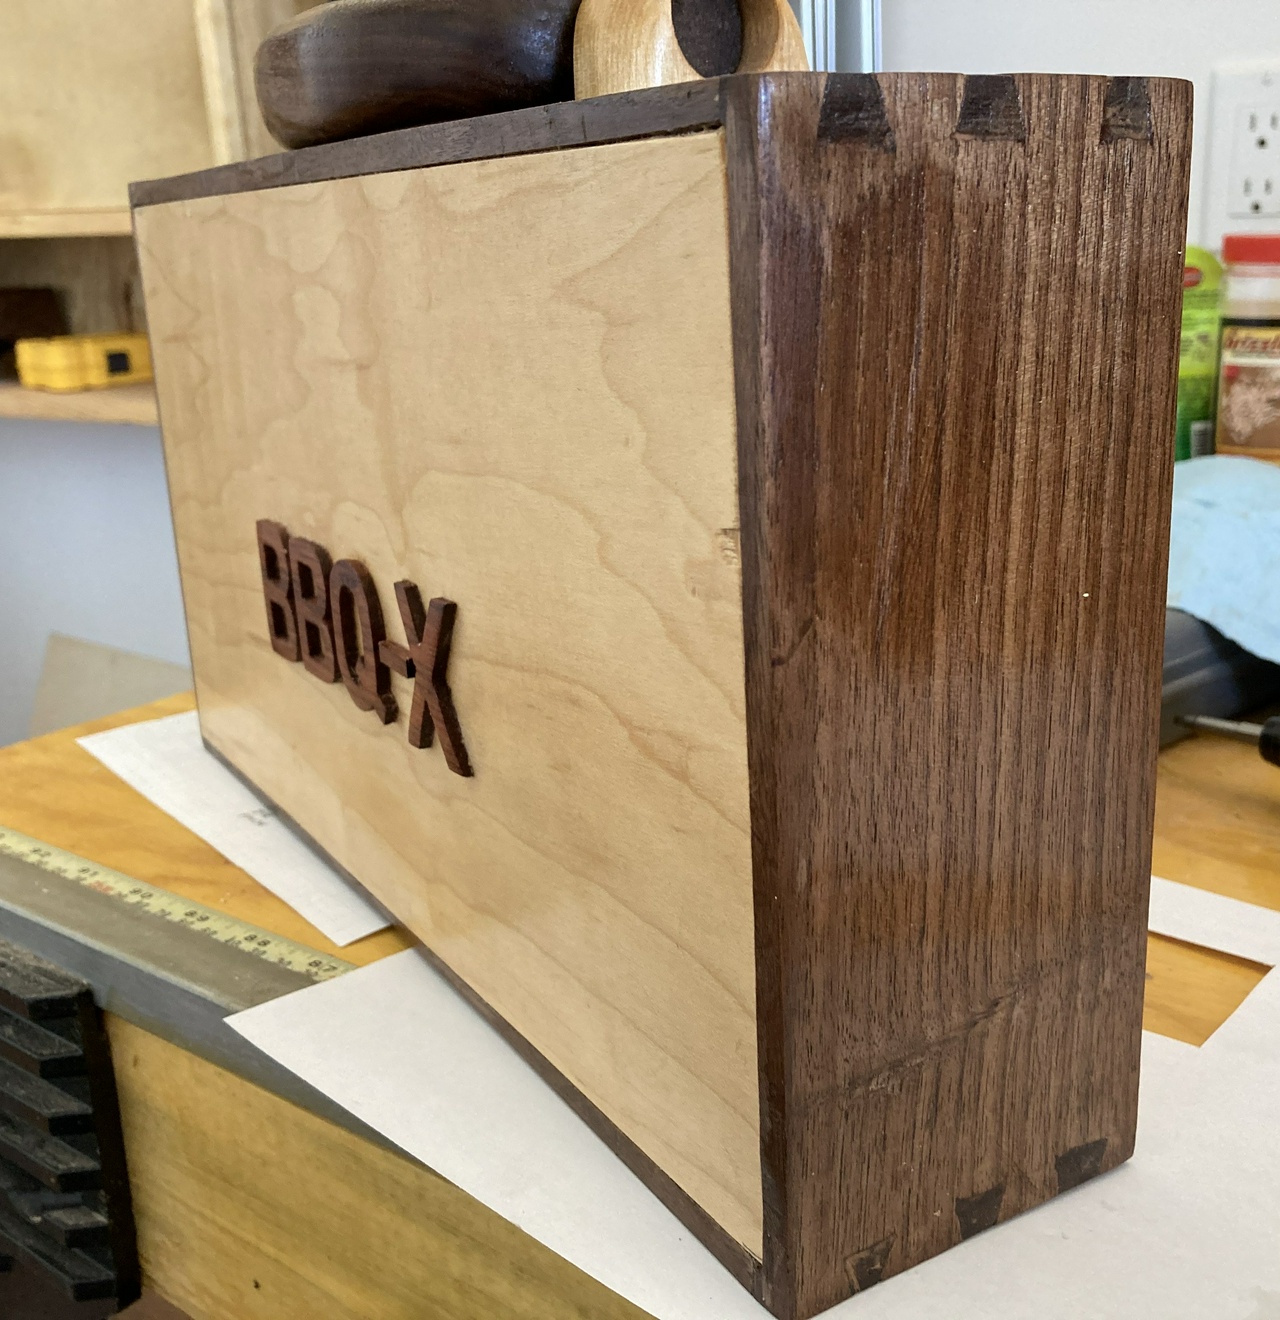
oblique view of the briefcase, showing the letters on the front and the dovetails on the sides of the case

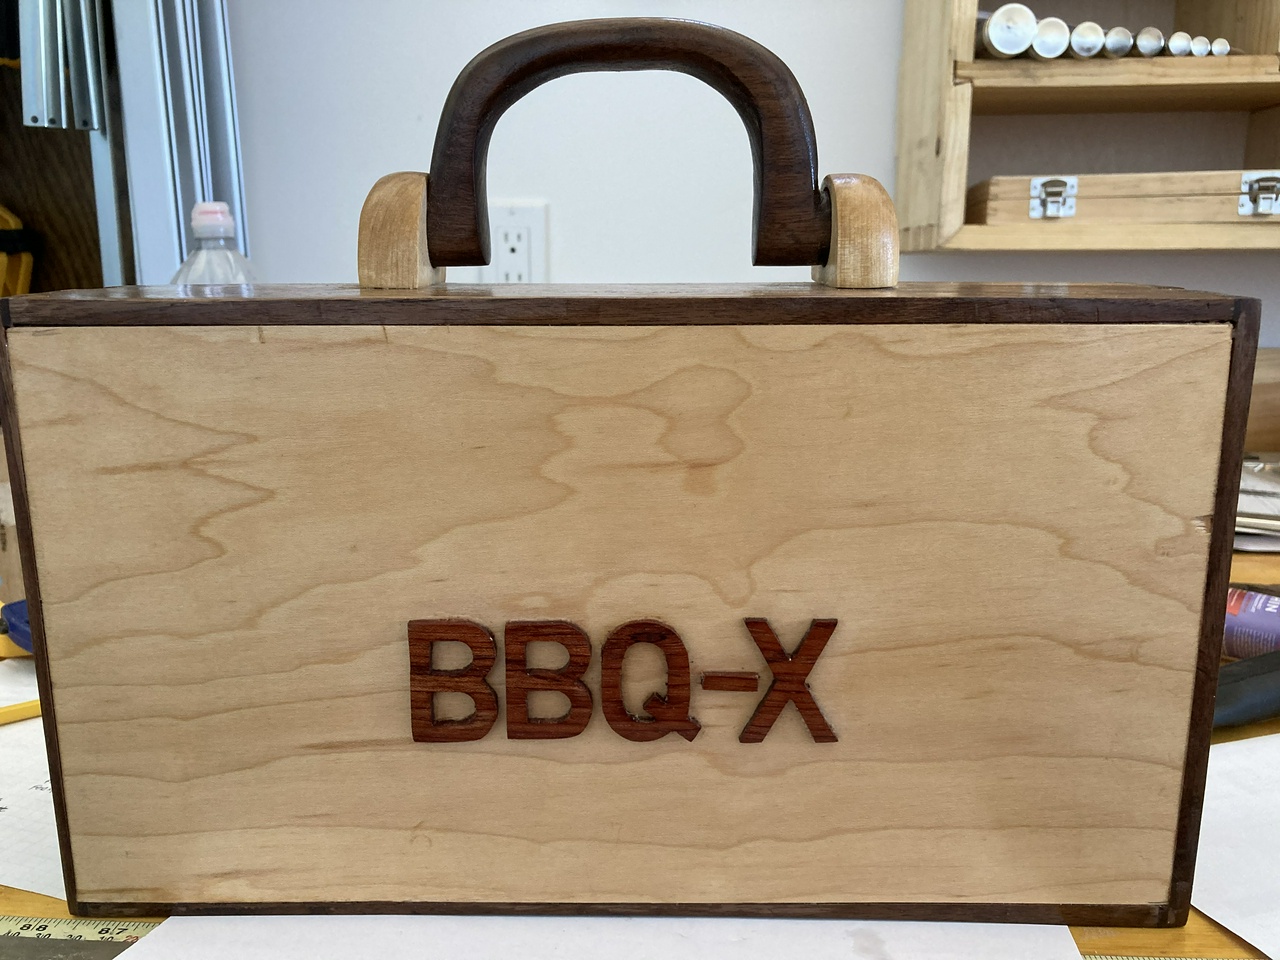
front view of the briefcase, clearly showing the BBQ-X front panel

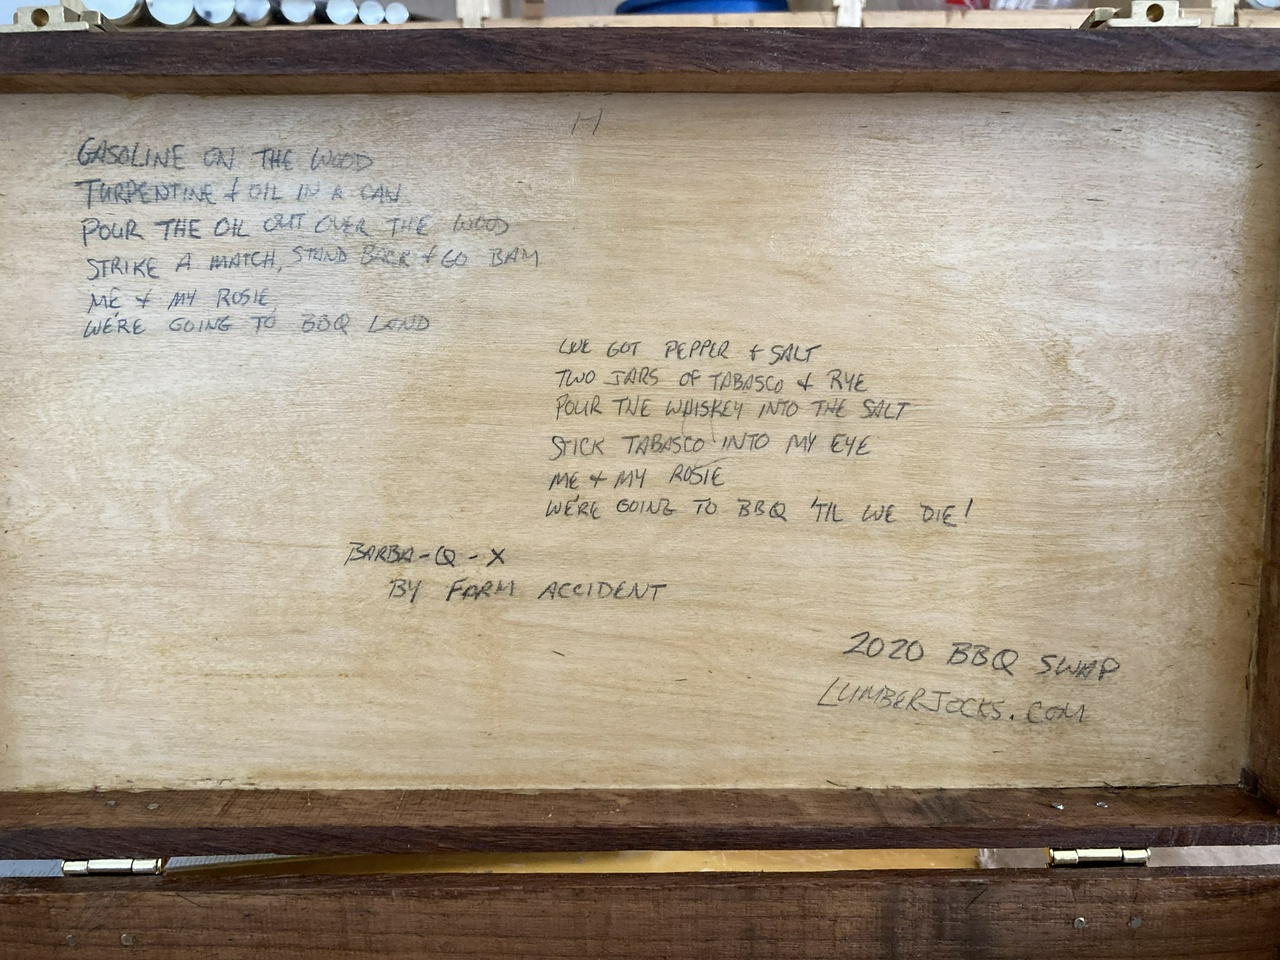
inside of the briefcase, showing the hand-written lyrics to Barba-Q-X by Farm Accident

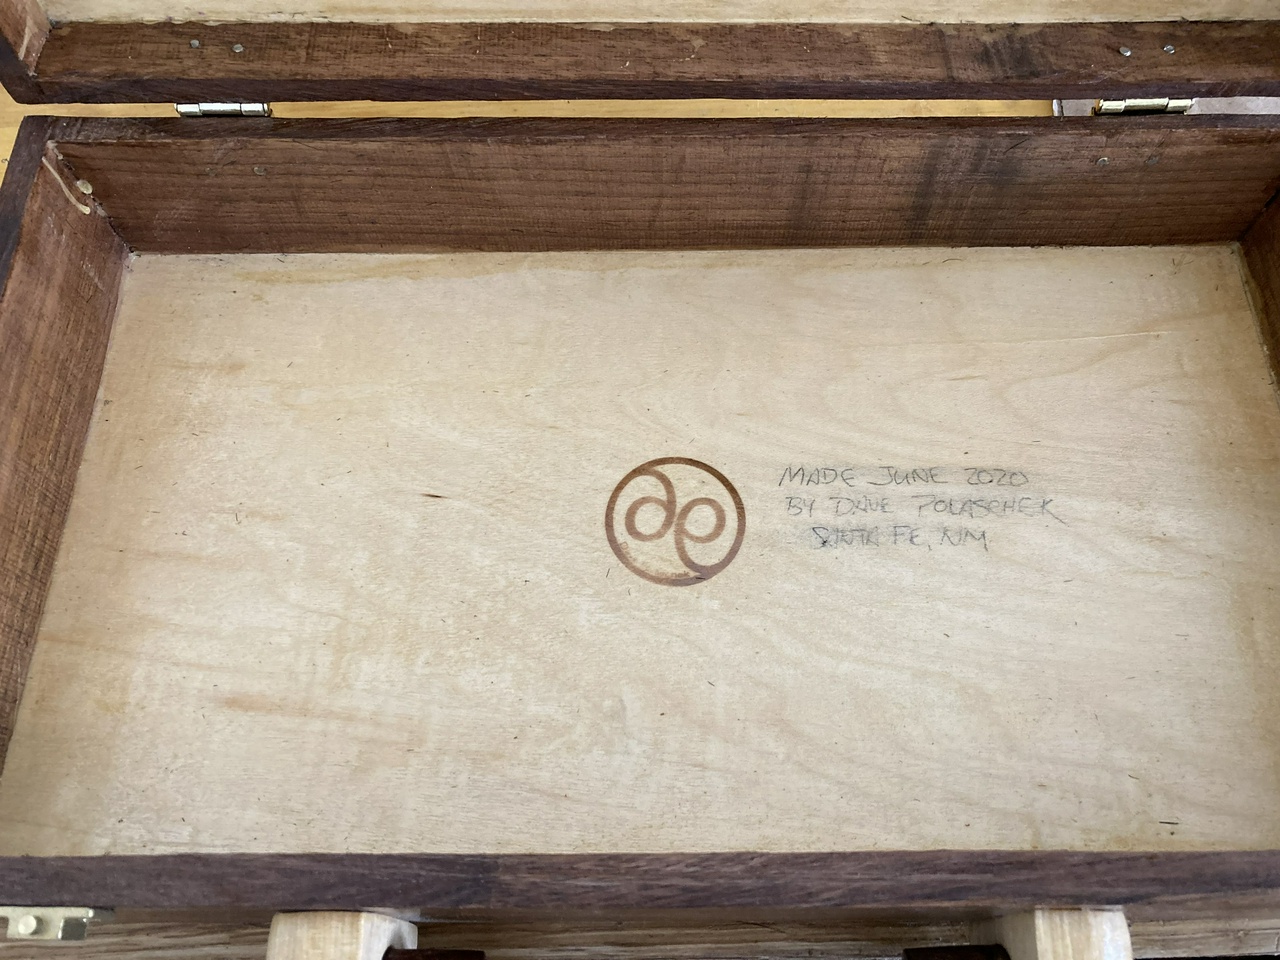
inside of the briefcase, showing my makers mark and the date the case was made

I wanted to make sure the briefcase fit into a USPS medium flat rate box so I looked that up and figured my briefcase had to be about 13-¾ inches long at longest, about 8 inches wide, and a little more than 3 inches thick. I cut a piece of walnut I had down into two book-matched pieces that were 22 long and 3¼ wide by about ⅜ thick. I roughly smoothed the outside of the pieces, but left the rough, inner, book-matched surfaces alone for now. Those would become the outside of the box, and I've found that it's easiest to smooth them after I've assembled the box, especially when working with thin stock.

I cut grooves near the edges of the wood, which would be the grooves that held the top and bottom of the case. Did ¼” grooves, about an eighth from the edge of the board.

Then I dovetailed the ends, paying some attention to where I would want to cut the box open, and trying to lay the tails out so I would be sawing a tail in half when I cut the box open. And rather than assemble the top and bottom of the box immediately, I planed off the spare eighth turning the groove in the boards into rabbets.

I also sanded and finished the front panel of the case at this point so when I put the handle on it, I wouldn't have to try and sand around that.

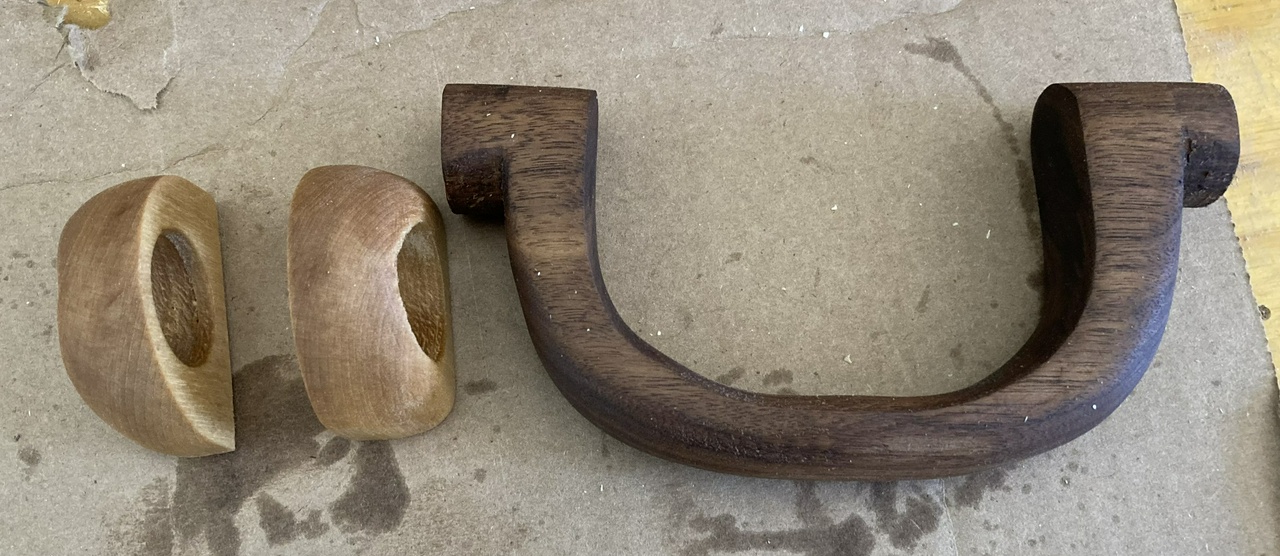
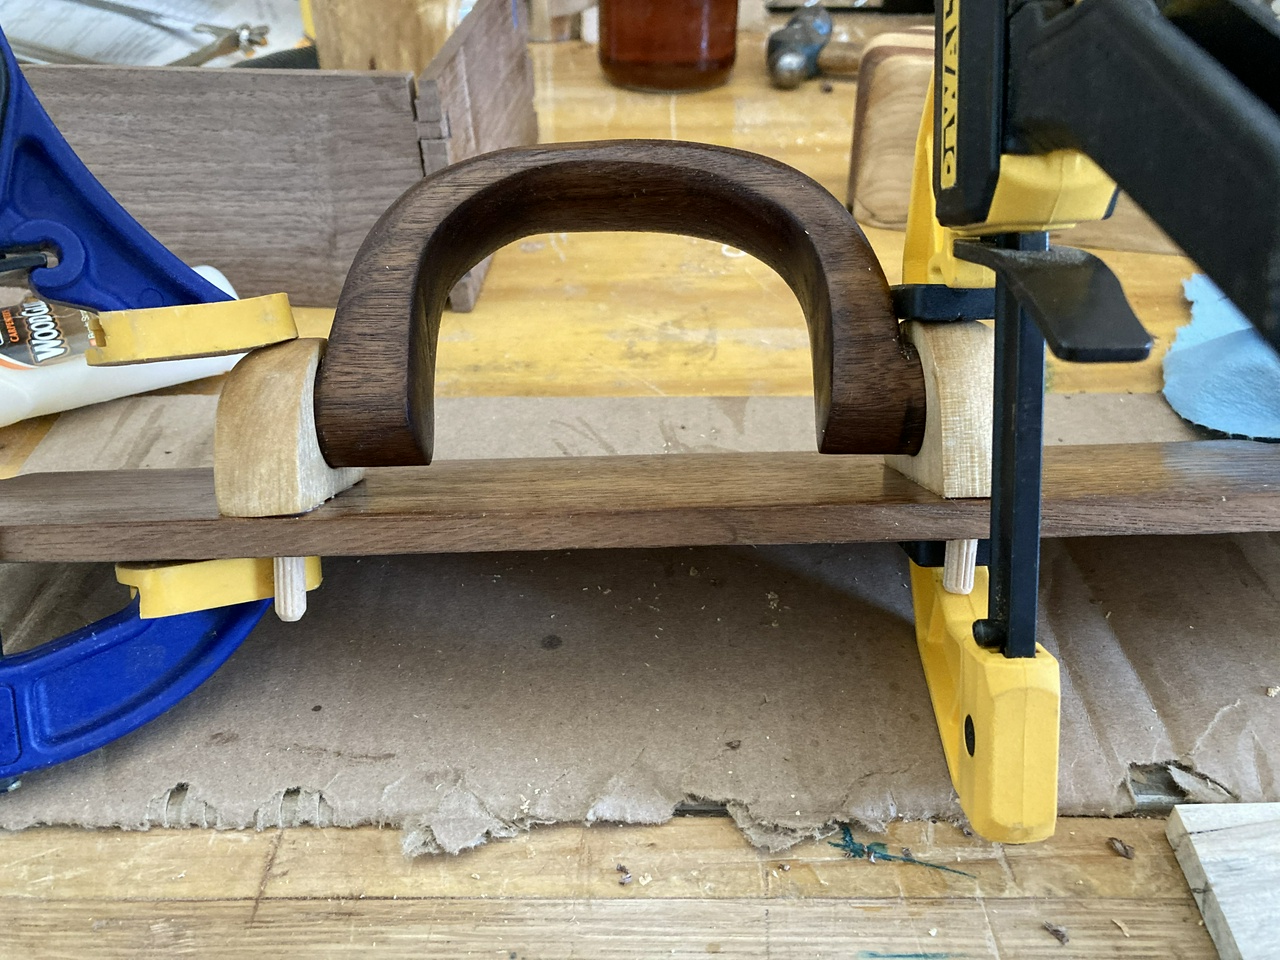
The handle was a piece of 4/4 walnut, hand-carved to a handle shape. I then made octagons on the end of it, guesstimated they were going to end up about an inch in size, and drilled a one inch hole in a piece of birch. I then cut it in two, and hand-shaped it to make brackets to hold the handle, and then turned down the ends of the handle to match the holes using my hollow auger. I also drilled a couple holes to align the handle brackets while I could still get inside the box to clean up the holes.

Handle and brackets for the handle

Attaching the handle to the front panel of the briefcase

I glued up the dovetails, and just set the top and bottom of the box in place for now to help keep things square. And then I took the case to the belt-sander to finish sanding the sides.

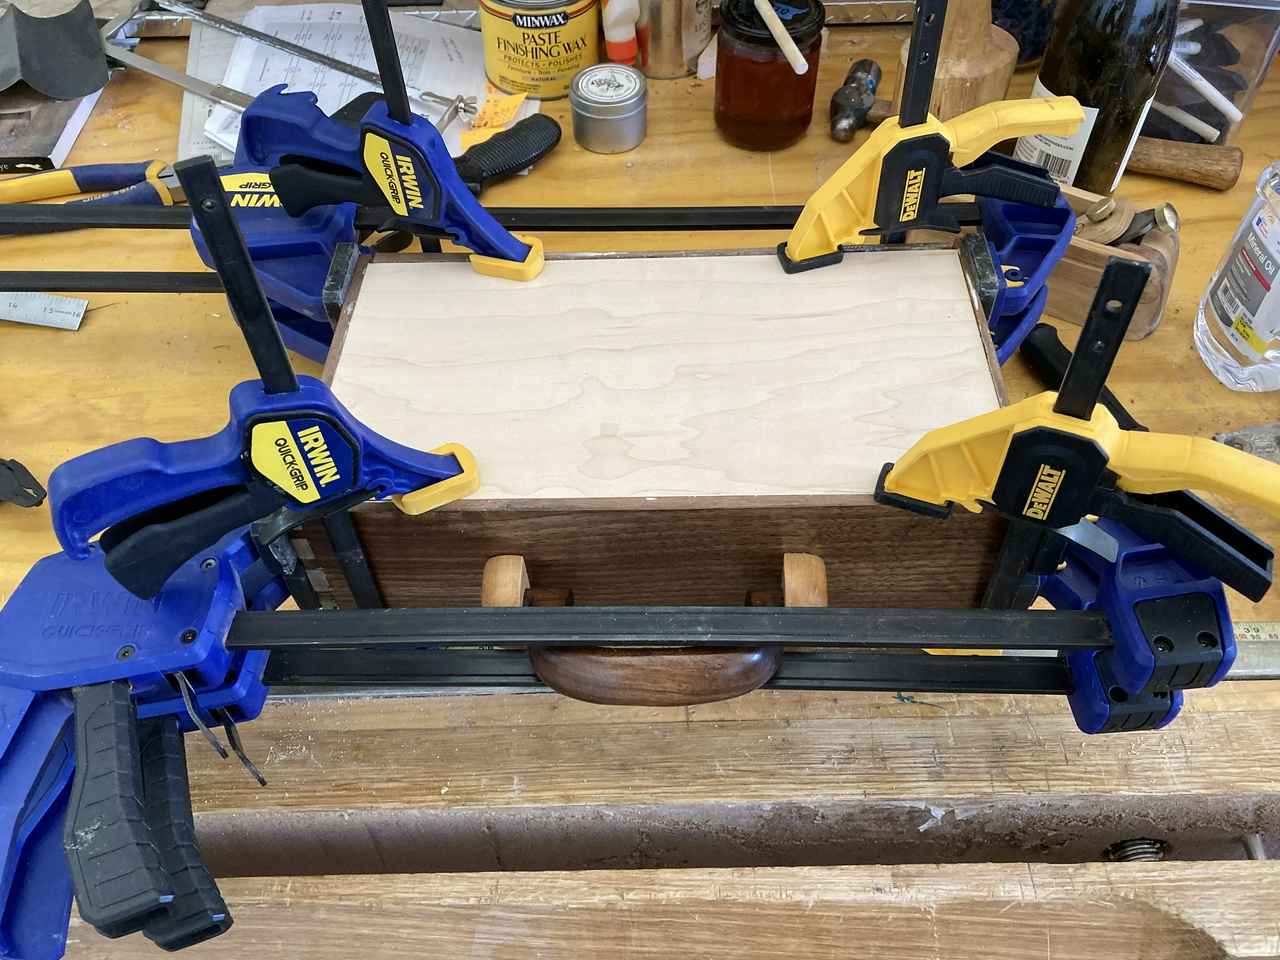
That done, I finished the exterior of the case. This included cutting the BBQ-X letters from some thick (1/8” or 3/32”) bubinga veneer, hand sanding them, and gluing them to the lid. I oiled the box, handle, brackets, lid and bottom, and then glued on the letters, and glued the top and bottom into their rabbets, and glued on the handle. Clamping everything took a little improvisation.

clamping the edges of the box

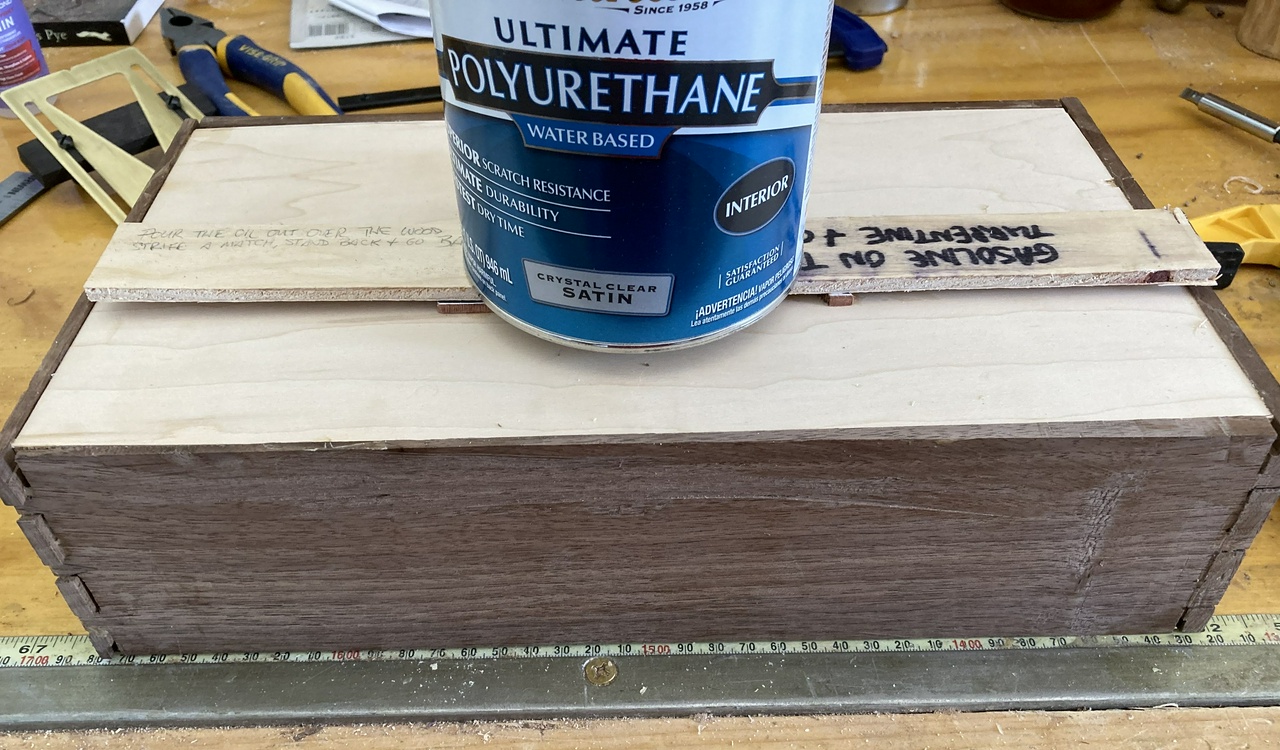
clamping the letters to the front of the box with a can of polyurethane as a weight

The name comes from a song by the band Farm Accident, who were friends of mine who played in Minneapolis back in the 1980s. If you look at the third picture, you can see the lyrics to the song, which I wrote on the inside of the box.

The box assembled, I hit it with four or five coats of super-blonde shellac, padding it on. Then I cut the box open, put on the hinges and latches, and called it done.

Whew!

The Tools

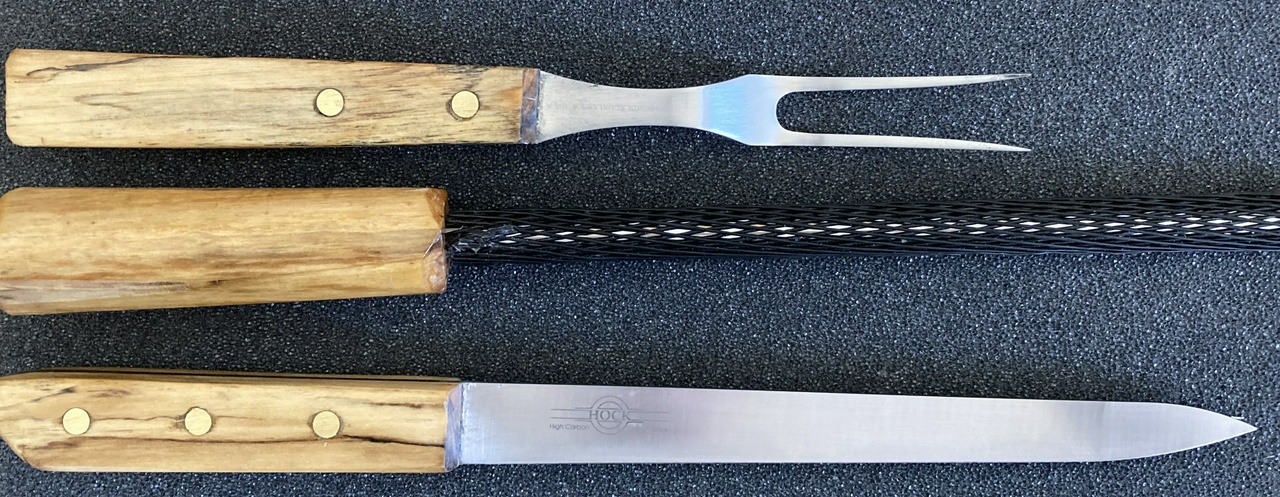
The bbq tools, a fork, steel and carving knife with stabilized birch handles

The tools were made with stabilized birch for the handles. The birch came from Timber Bay Resort in Babbitt, MN. There had been a big wind-storm just before we went up there in 2018, and I scavenged a bunch of birch, brought it home, sliced it up, and stabilized it.

The knife and steel are from Hock Tools. Ron Hock is a great guy, and when I asked him about a barbecue fork, he said he didn't make them, but suggested the steel (which I had forgotten they made) and pointed out that he sold aprons which were certainly bbq related. Nice job up-selling me, Ron! The fork ended up being from eBay. I bought one that had a rough-looking handle, but was made in US steel, peeled the old wooden handle off, and put on a new handle. Nothing too fancy with the tools, but I left them slightly oversized so Grant could reshape them if he liked.

The Shakers

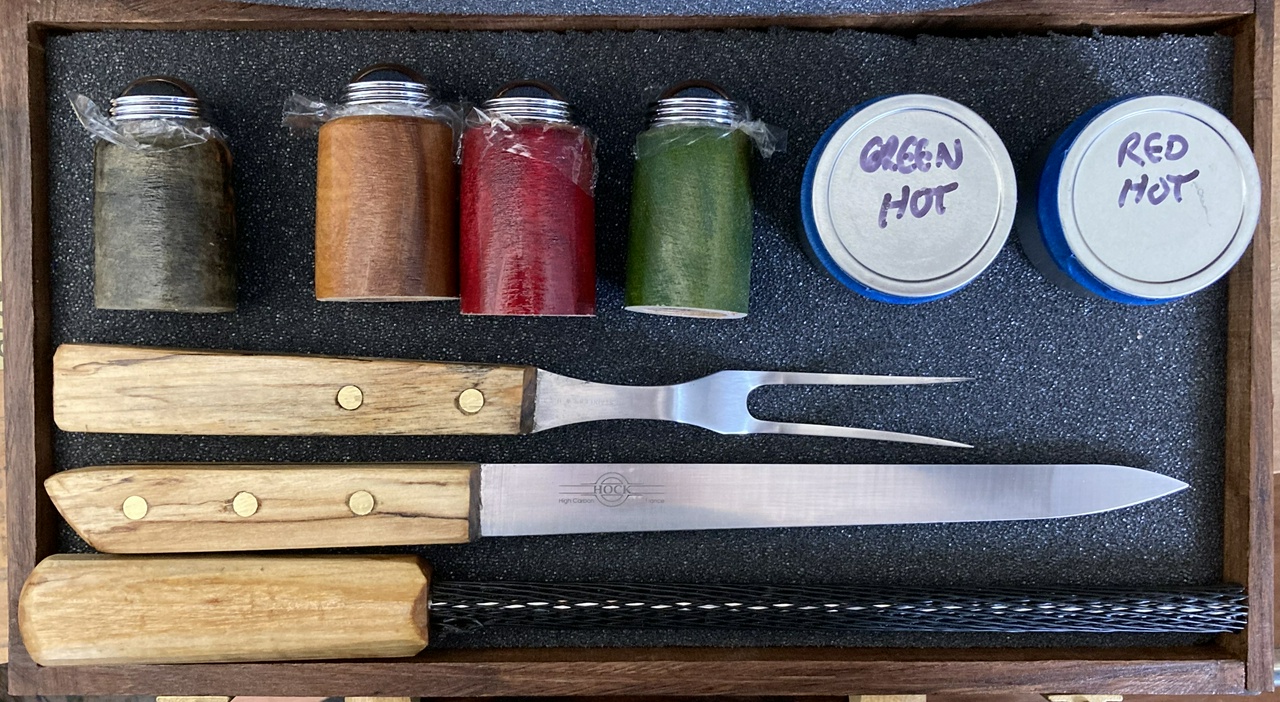
shakers, spare chile, and tools arranged in the case

And then the shakers. After thinking about turning them, and cutting my own threads for lids, I decided that was too much to bite off this year, and I bought some shaker inserts from Lee Valley. They're about 15/16 in diameter, and slightly tapered, so I drilled holes in some pieces of birch. I had initially planned to have the grain in the birch running up and down on the finished shaker, but my 15/16ths auger bit has a bad lead screw, and drilling into end-grain in the stabilized birch proved to be too tough, so I oriented the grain cross-wise, which made drilling much easier.

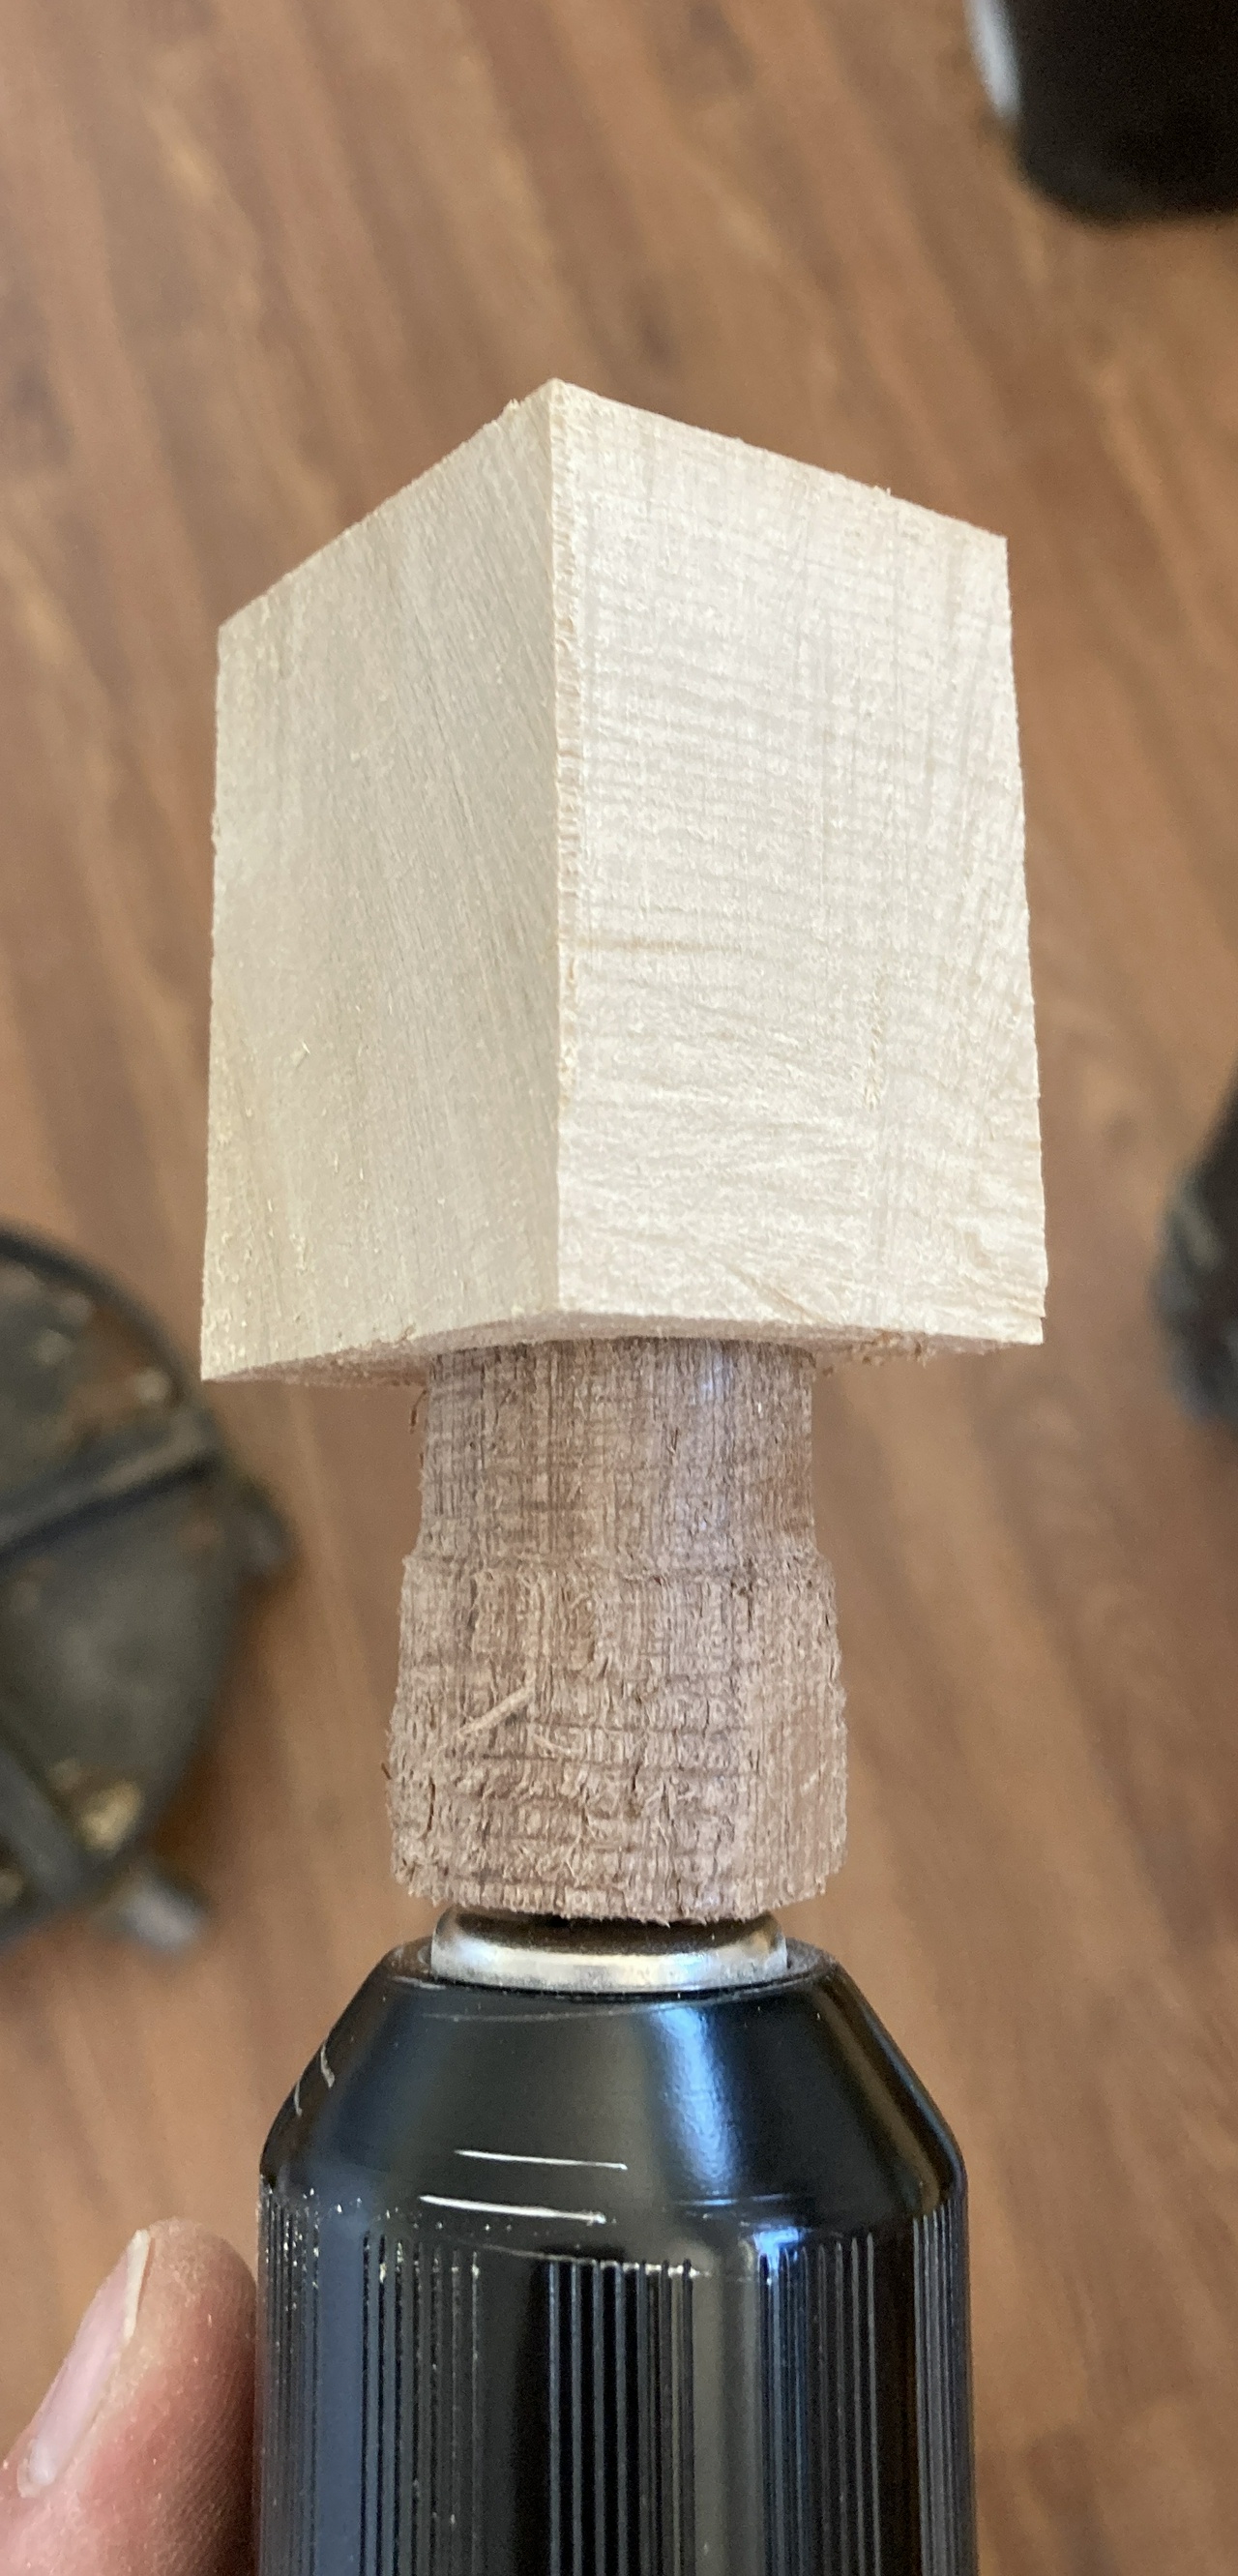
With the holes drilled, I started figuring how to shape the outsides. I had planned to use a spokeshave to turn the birch from squares to octagons, and then to round, but that was when the grain was running the other way. I tried using the shave cross-grain and broke one of the shaker bodies. After some thought, I took one of my walnut offcuts, put a deck screw into it, shaped it roughly round by spinning it against my (running) belt-sander, and decided that would work well enough on the birch.

a block of wood on the end of a drill which is about to serve as a mini lathe

I also experimented with dyeing the stabilized birch, and decided that for the red and green, I was best using non-stabilized birch, especially after I cracked one of the pieces while rounding it. Learning as I go!

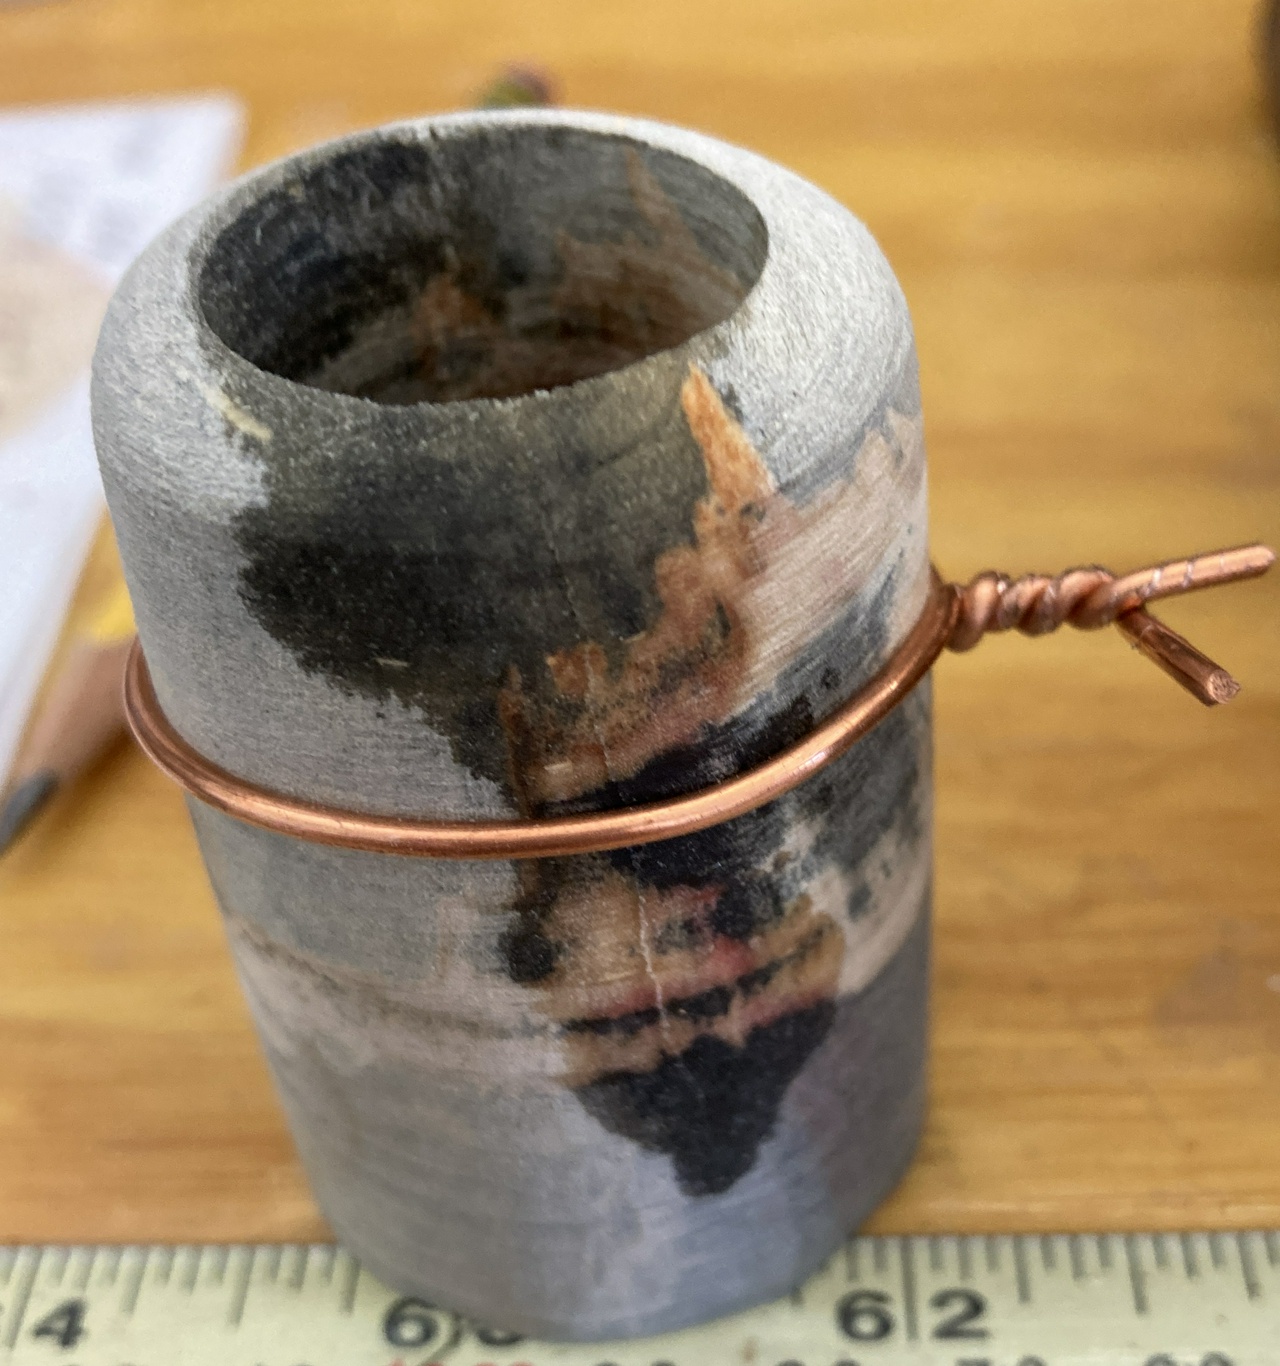
cracked and mended shaker with a piece of 12 gauge copper wire holding it together while the glue dried

With the four shaker bodies dyed and finished (I used shellac, tinting it with TransTint dyes), I took a tapered reamer to get the holes to the final size, then put a tiny bit of CA glue on the insert, and pressed them into the bodies. I ran a little extra CA in from the bottom to make sure everything held. Note that the inserts say “DO NOT USE EPOXY” and they mean it. The acrylic that's used in the inserts kinda dissolves if you try to epoxy it in place. CA glue is the right glue for this job!

I packed the knife, fork, steel, and four shakers into the case with foam inserts, then packed the case into the flat rate box with a Hock apron, another cow-spotted apron my sweetie found, and tossed in a couple tins of extra chile from New Mexico and the box was full, and ready to be on its way.

And then, of course, I realized I'd forgotten to include the note in the box, so I had to open it up again. At least I remembered to take pictures of the complete stuff for this writeup while I had the box open. ;–)


#woodworking #projects #swap

Discuss... Reply to this in the fediverse: @davepolaschek@writing.exchange

Originally written Mar 27, 2020

The completed plane with carved wedge, viewed from the right The left side of the completed plane

The spring swap this year was a surprise swap, so we could make anything we wanted. Since my shop was being built, and would not be complete until reveal week on the swap, I spend a while thinking about what I was going to build for the swap. I decided I'd make a skew rabbet plane. I have an old one which I use, but it's hard to find a nice old plane, and I felt I had okay chances of being able to make a nice-looking plane that was functional.

My "user" skew-rabbet plane, which shows the signs of lots of years of use

So I started trying things. I had a bunch of pallets from the hardware store, and used some of the lumber from them to experiment on. The first try had some issues. I couldn't drill the holes for the mortise as precisely as I needed with a bit and brace and without much better workholding than I could achieve on the tailgate of my pickup using a pallet as a workbench, and with only a half-dozen three foot long bar clamps.

Misaligned holes for the blade

The second try didn't go a lot better. The mortise was maybe a little less raggedy, but I had geometry problems with the multiple angles for the skew and the bedding angle and the different sized escapements needed on the two sides. I'm glad I was practicing on pallet wood while working out the details, since it was pretty clear I still had to so some more thinking.

Attempting to saw the compound angle for the mouth / escapement of the plane

My third try, I decided I'd make it a composite plane. I could then cut the mortise with a hand-saw and get good angles, and drill the sides separately, and most of the complicated geometric issues could be simplified. So I started by gluing a piece of poplar to a piece of ipe that I was planning to use for the sole. I went with the poplar because I still wasn't sure this plan was going to work, and I should have used something a little more stable.

T-board forming the core of the plane

It was about this point that I found that I was sending the plane to Brian in Spain, so I decided I'd keep my schedule as tight as possible so that he wouldn't be waiting on international delivery while everyone else was revealing the goodies they'd received in the swap.

Since clamping (and really any other operation) on this T-shaped piece of wood was difficult, I used a few drywall screws to screw some pallet wood to the sides of the poplar. That turned out to be the real trick, and I started making good progress. I got the mortise and the bed for the blade cut, and was feeling pretty good. The picture below shows the cutting, which was made easier by clamping the piece so I was cutting more or less straight down.

Cutting the mouth of the plane on my fancy workbench

Since I don't have a forge for heat-treating, this was when I roughed out the blade, too. It's a rabbet plane blade from Lie-Nielsen, and while it was a little expensive, there's no way I could've succeeded without it. Then I sent it off to Dave Kelley in AZ for heat-treating, as he volunteered to help out. Thanks, Dave!

This was also the point that I realized I'd made an error in my geometry, and had cut a left-handed plane body. On a skew-rabbet plane, you want the forward point of the blade on the inside edge of the rabbet, since that will tend to pull the plane tightly into the rabbet you're cutting. I decided that I was far enough along that I didn't want to change things to make it a right-handed plane. I've used both left and right-handed, and I can usually manage, even with a plane that goes the wrong way – it's only been a problem when I'm also fighting the grain, and that's why I have both left and right-handed skew rabbets in my collection.

Once I'd gotten the core of the plane cut, I removed the pallet wood sides, and started working on the nice cherry sides that were going to make the final plane. I laid out and drilled holes for the escapement (pictured below), cut a wedge from alder, then drilled in some indexing holes I could use when gluing all the pieces up (also below) so I could keep things from creeping while I was clamping all the pieces together.

Drilling holes for the escapement of the plane Drilling alignment holes for the dowels that would align all the pieces

Now that I had an idea of how all the pieces would go together, it was time to get the wedge cut and tweaked for thickness. It's not rocket surgery, but it's a lot easier to do when you can take the sides off the plane and look at the angles and draw directly onto the wedge with a pencil so you get things right. With that done, it was time for the glue-up.

Once the plane was glued together, I had a few days to wait for the blades (I made two, in case I screwed one up) to get back from AZ. I rough-carved the escapement at this point, but I needed a blade to know exactly how tall the escapement needed to go to make room for the blade.

Left view of the plane Right view of the plane

I then cleaned up the blade (removing scale from the heat treat, mostly), and put the final edge on the blade to match the actual glued-up plane body. Once that was done, I could fettle the plane, flattening the bed for the blade with floats, opening the mouth up enough to handle the blade thickness, carving the end of the wedge to help steer shavings out the escapement (they curl because of the skew, and I'm still not enough of a pro to know just how tightly they'll curl), and using my belt-sander to bring the plane down to final thickness (you want the plane to be just a hair thinner than the width of the blade so the blade edge protrudes just a bit). With no shop, the belt-sander just got wheeled out into the driveway, and I let the New Mexico winds blow the dust to Texas.

With the thickness right, it was mostly finishing work. Cut the chamfers on the edges of the plane so it feels nice in the hand, carve a little detail in the wedge because I knew Brian would appreciate that, and hit the various pieces with some linseed oil and paste wax.

And here's the note that went in the box:

pages 1 and 2 of the handwritten note, text reads: Brian, Happy swap! Enclosed find a rabbet plane made from ipe sole, poplar core, cherry sides and an alder wedge. I gave it a 45° bedding angle with a 30° skew. It should work reasonably well in most woods. The blade is O-1 steel. I got help from Dave Kelley on the heat treating. I have sharpened the blade, and it should be ready to go unless the post damaged it. Also included is a spokeshave with a Hock Tools O-1 blade. It is also made from ipe. You may want to touch up the blade, but it should also be ready to go. If you want a wider mouth, put a washer under each end of the blade. Hope you enjoy them. Finish on both is linseed oil, followed by wax. A little wax on the sole if they drag should make them good as new again. pages 3 and 4 of the note, which reads: I think that is about it. Hope you get years of use out of them. Oh! One last thing, the rabbet plane is technically a left-handed one. I cut the skew the wrong way and didn't realize it until I went to grind the blade. Oops! I can manage to use it right-handed though. I think you will be able to make it work. -Dave Polaschek p.s. I have not completely tuned up the plane. The blade is not perfectly flat, but it seems to bed well enough. Drop me a message if you find it chattering or otherwise not performing.


Spokeshave showing escapement and date mark

This was a spokeshave I made as a bonus for the 2020 surprise swap. I started with a Hock Tools blade, and these instructions for making a spokeshave. Plus a piece of ipe I had on hand. It went to Brian Johns, and I hope he's happy with it!

Spokeshave showing blade and sole

#project #swap #woodworking #toolmaking

Discuss... Reply to this in the fediverse: @davepolaschek@writing.exchange

Jun 27, 2021

Built for the 2021 plane swap on that woodworking site I don't participate in any more, this was a fun project for a lot of different reasons. The main disappointment is that it was for a swap, so after it was built, I sent it away. But then someone else got to enjoy it, so there's that.
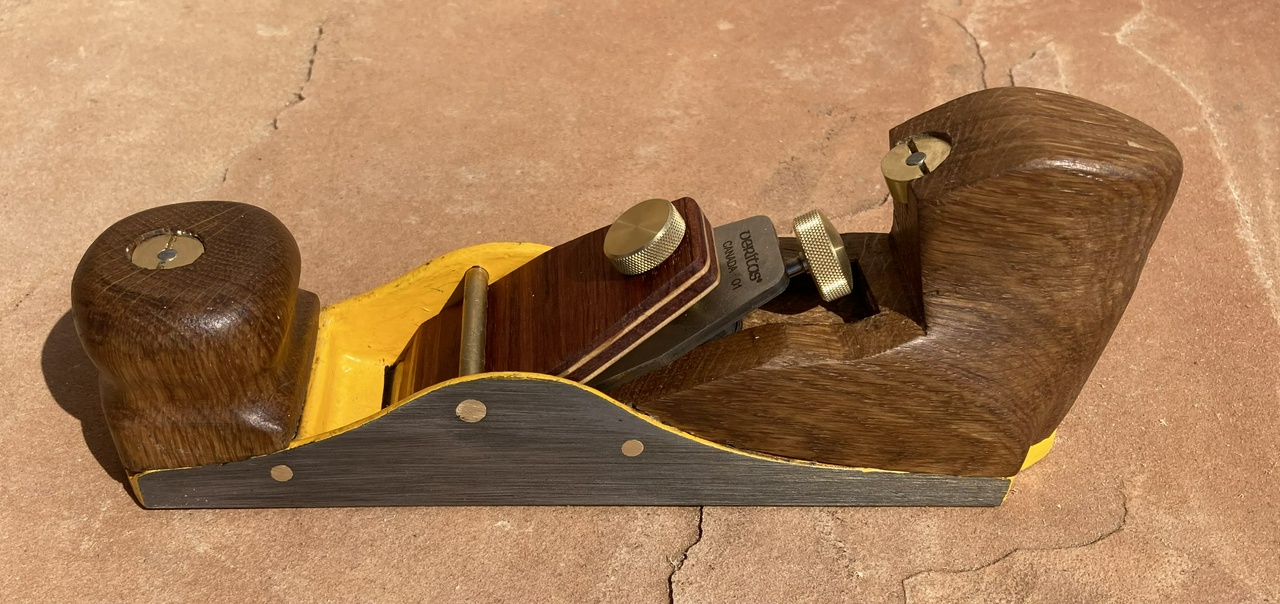
A low-angle infill plane with yellow-painted metal bits and white oak furniture, viewed from the left side

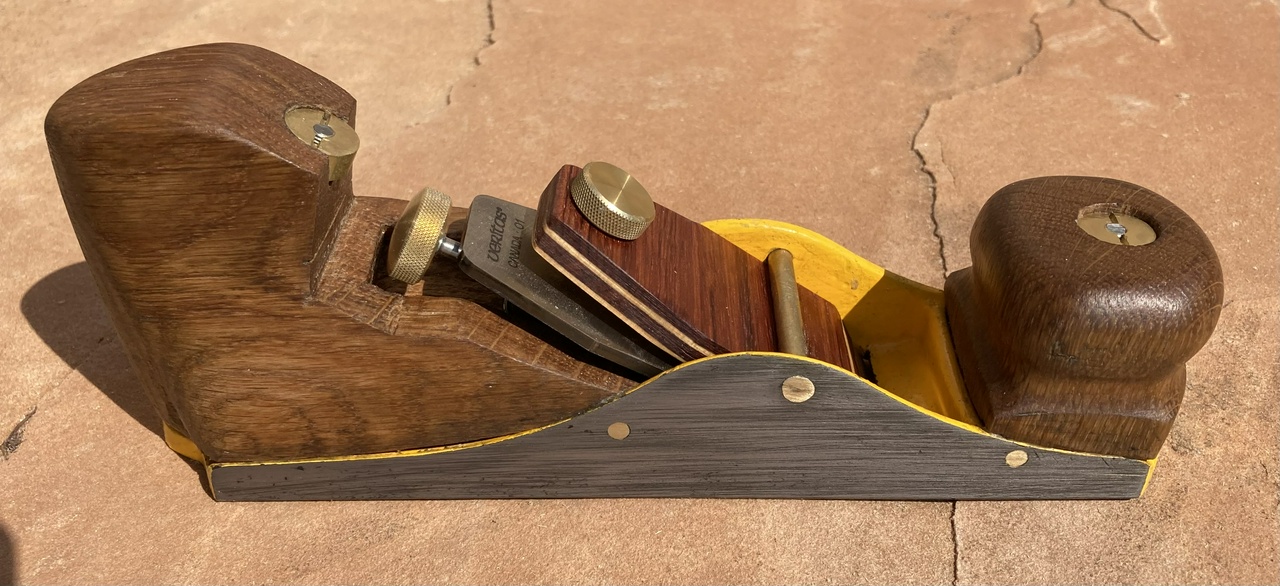
A low-angle infill plane with yellow-painted metal bits and white oak furniture, viewed from the right side

For the plane swap this year, I wanted to build something a little different. I have a stash of Stanley Global Plane #3s that I bought cheap on eBay from a seller in Canada when the exchange rate between the dollar and the loonie got fairly lopsided, so I decided to infill one.

But just a normal infill plane didn't seem challenging enough. Let's make a low-angle bevel-up plane from it. That should be a good challenge!

So I started out by removing the plane hardware and trying some things. One of my very first discoveries was that I would need to modify both the mouth and the bedding for the blade to achieve what I wanted.
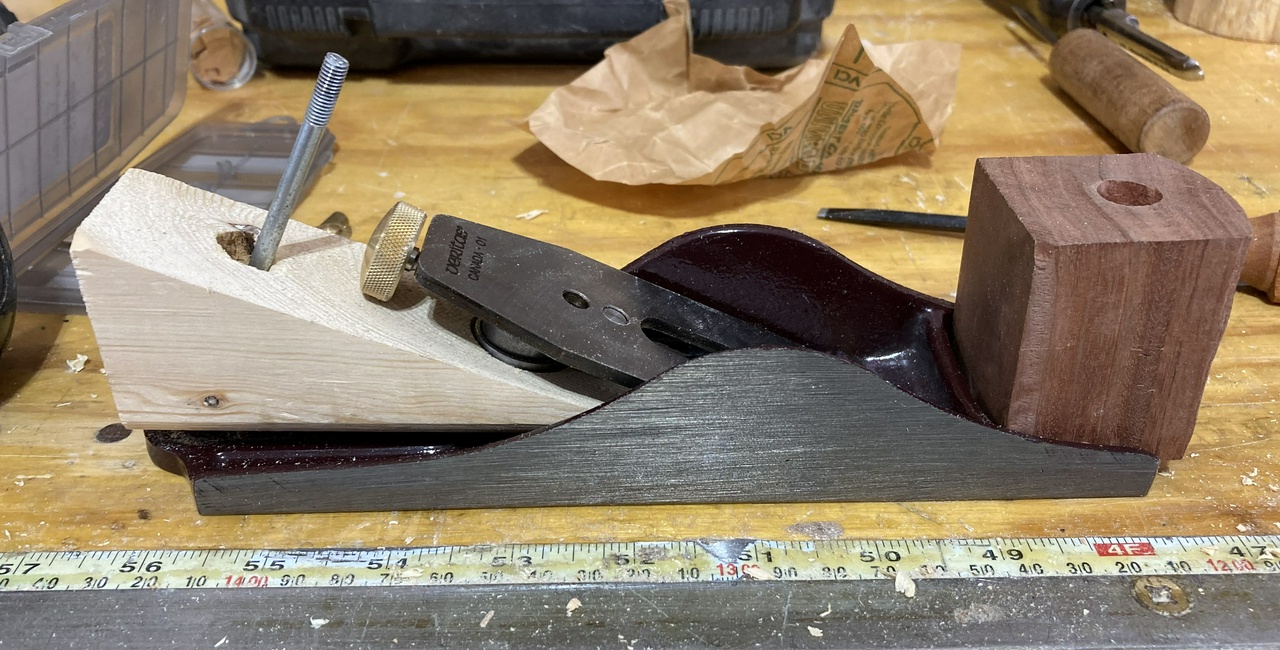
First attempt at infilling the plane, with red eucalyptus knob, and a spruce rear infill while I tested some ideas

But I had a Veritas plane kit on hand, and I was pretty sure it worked with most of the smaller Veritas blades, so I ordered a spare blade for their bevel-up smoother that matched the size of the #3. I also initially planned to do the infill with some eucalyptus I got from AZWoody, but that plan fell by the wayside… Mostly because the eucalyptus from Arizona is brittle and hard to work, but also because I discovered I had a very nice bit of white oak in the shop. I bought a 6 foot long 10 inch wide 12/4 board a while back, and there was a knot near one end. The remaining bit on that end of the board looked like it would make a great infill for the plane.
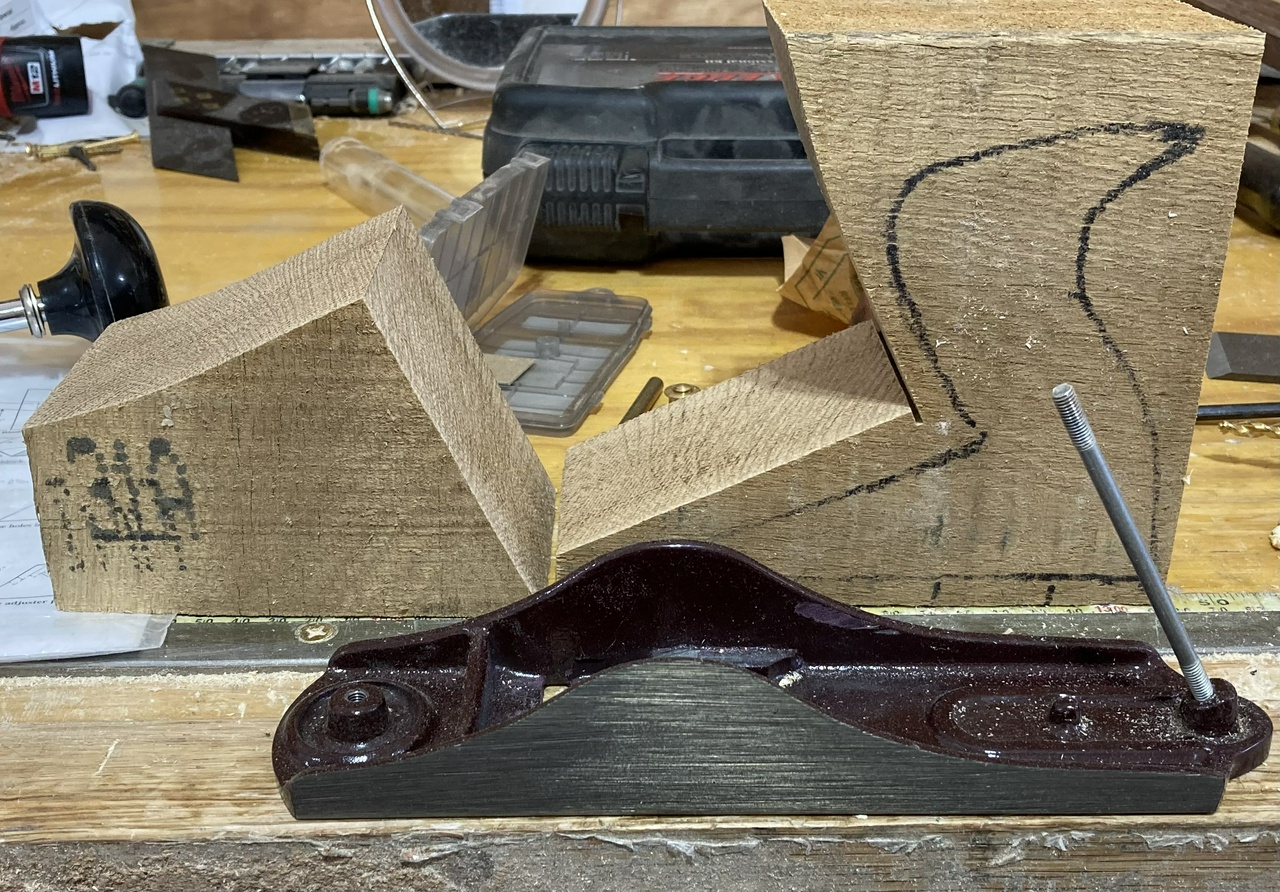
White oak furniture for the plane - perhaps that will work

I set aside my pieces of oak and went to work with a chunk of spruce from a tubafor as my prototype, and made some templates from MDF so I could try things out as I experimented.
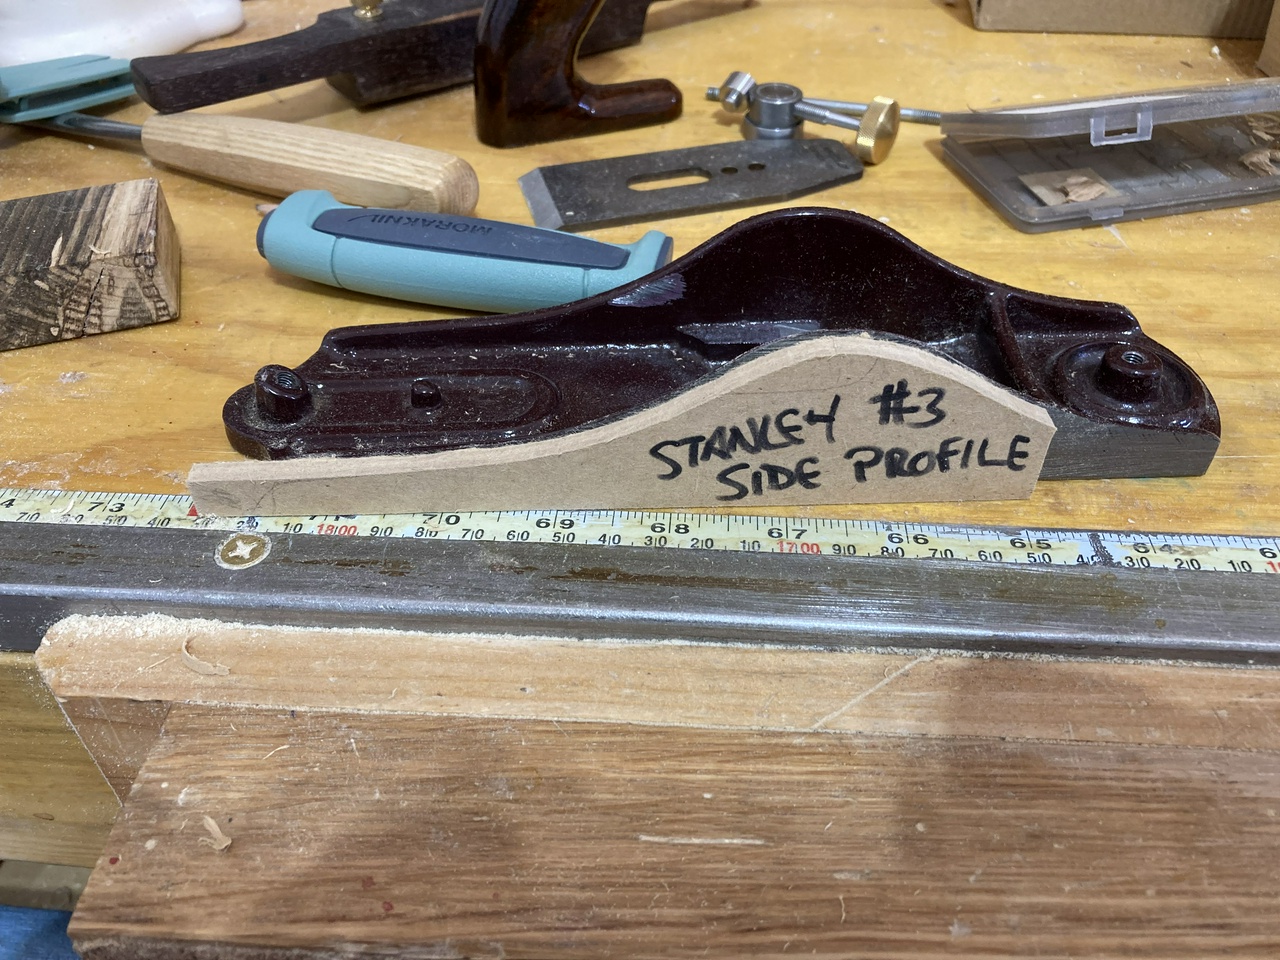
The plane with an MDF template next to it, matching the side profile

First thing I discovered was that the blade would be unsupported without the factory frog in place, so I cut a piece of brass to fill the area immediately behind the mouth with metal, giving me solid support for the blade where it would need it the most. I epoxied this into the plane body and set to work with a file making a smooth transition for the blade or infill to rest upon.
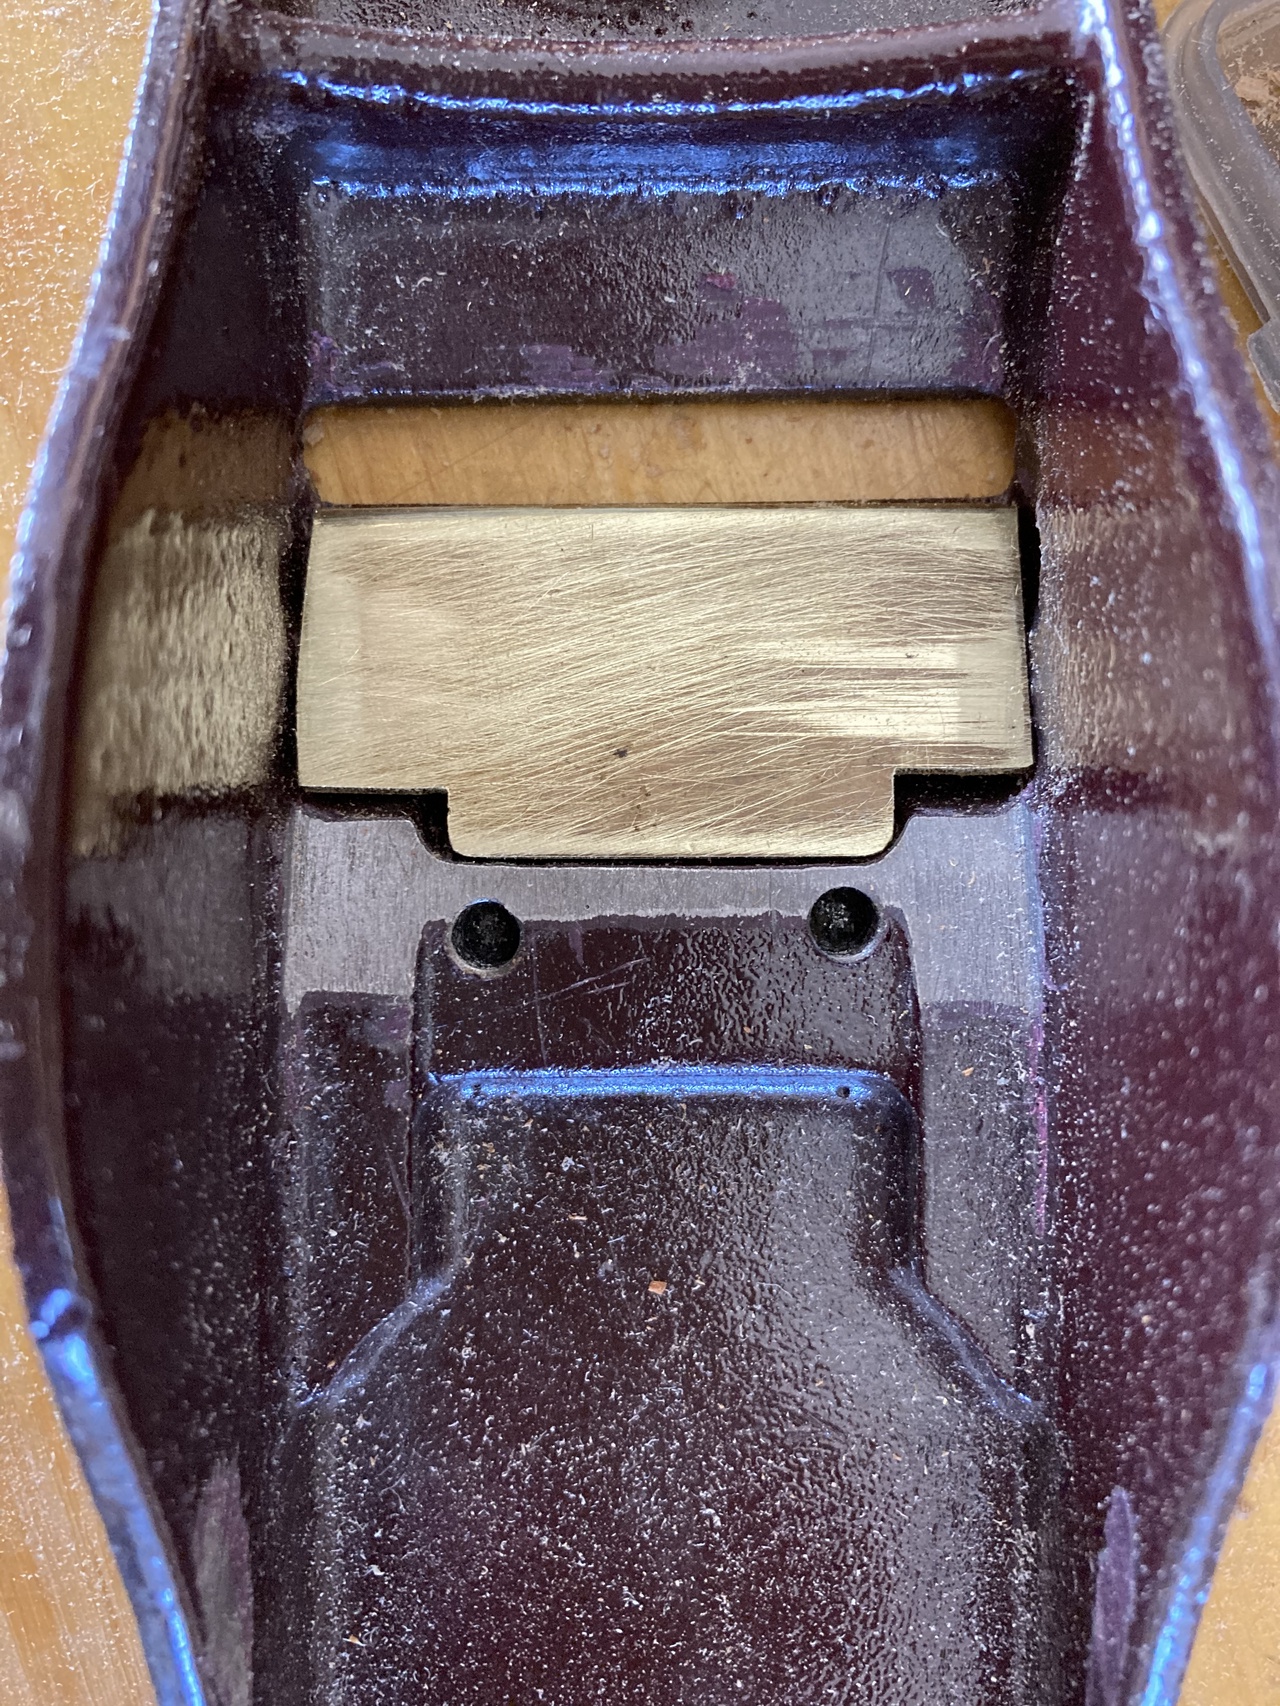
The brass support ramp, epoxied into the plane body behind the mouth

I also decided that I wanted to dress the plane up from the stock purple that Stanley chose. I had some Chromium Yellow (aka CAT Yellow) lettering enamel laying about, and decided that would look pretty good. It's not a sansoo-level paint job, but I think I did okay. I think there were four coats in most places.
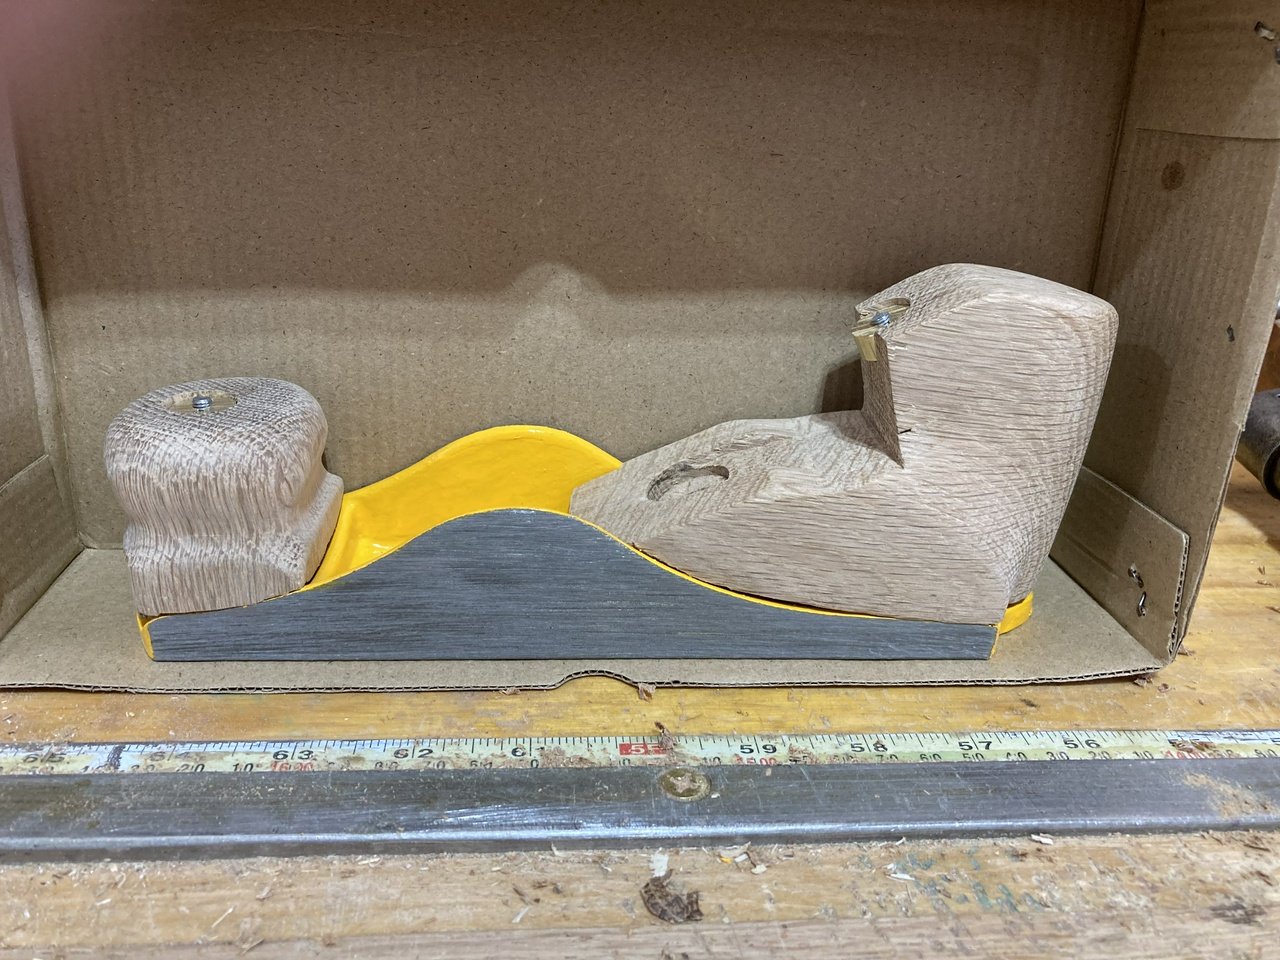
Plane with oak furniture and the yellow paint covering up the factory purple paint job

I was also working out the geometry of the plane, and knew that I wanted to use the original bolts to help hold the infill pieces in place. I wouldn't be able to do a tote like I had initially planned, but I got something that felt okay in my hand, which used the original bolts.
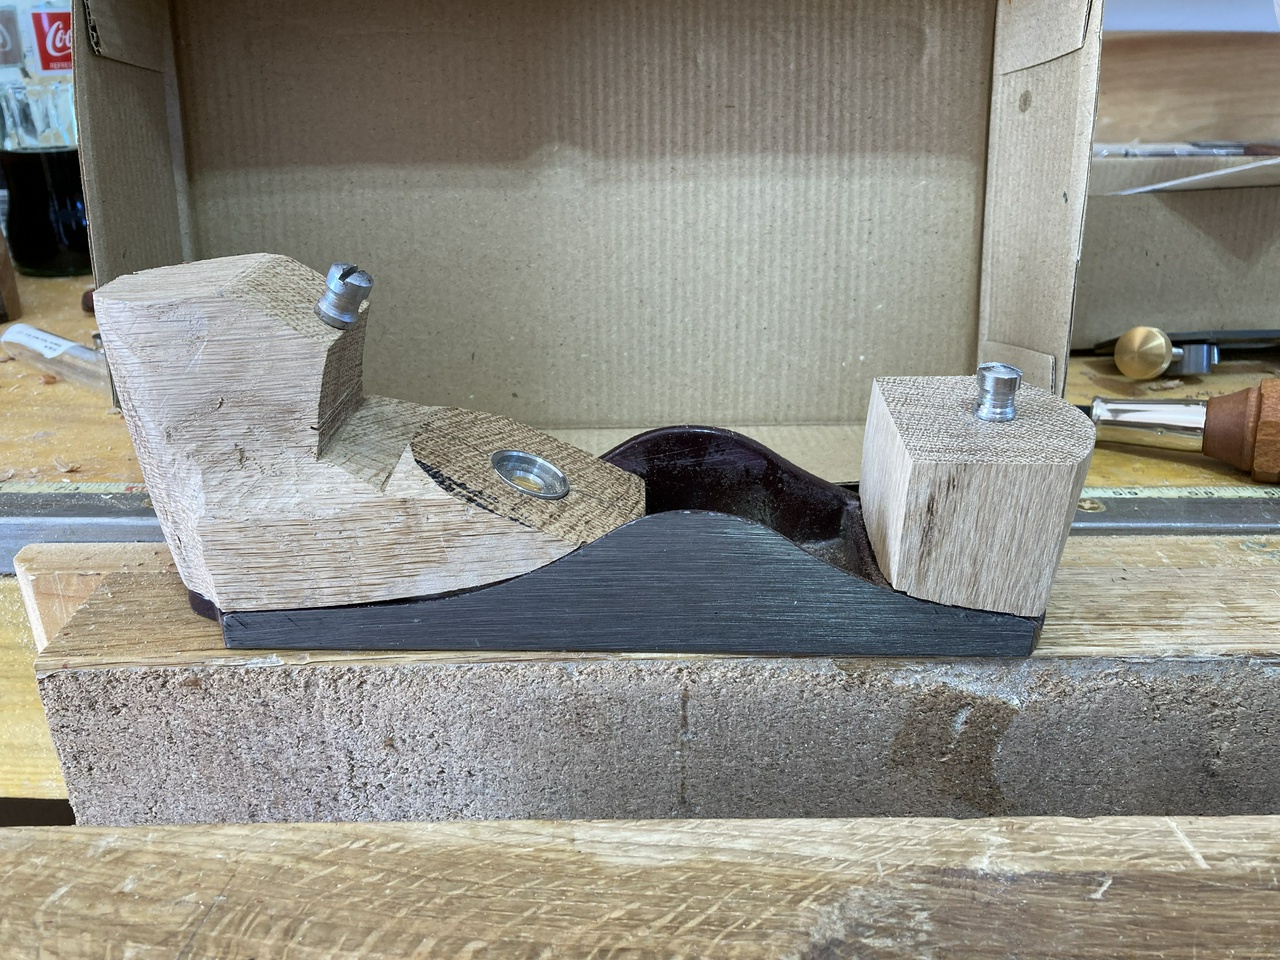
The roughed-out oak furniture in the plane

But the nuts that came with the plane wouldn't do, so I found a piece of ⅝” brass rod, and fashioned some new nuts for the plane. Rather than turn them into hex nuts or something that was a lot of work, I decided to make them split-nuts so I could use a driver I already had (and that just requires sawing a slot).
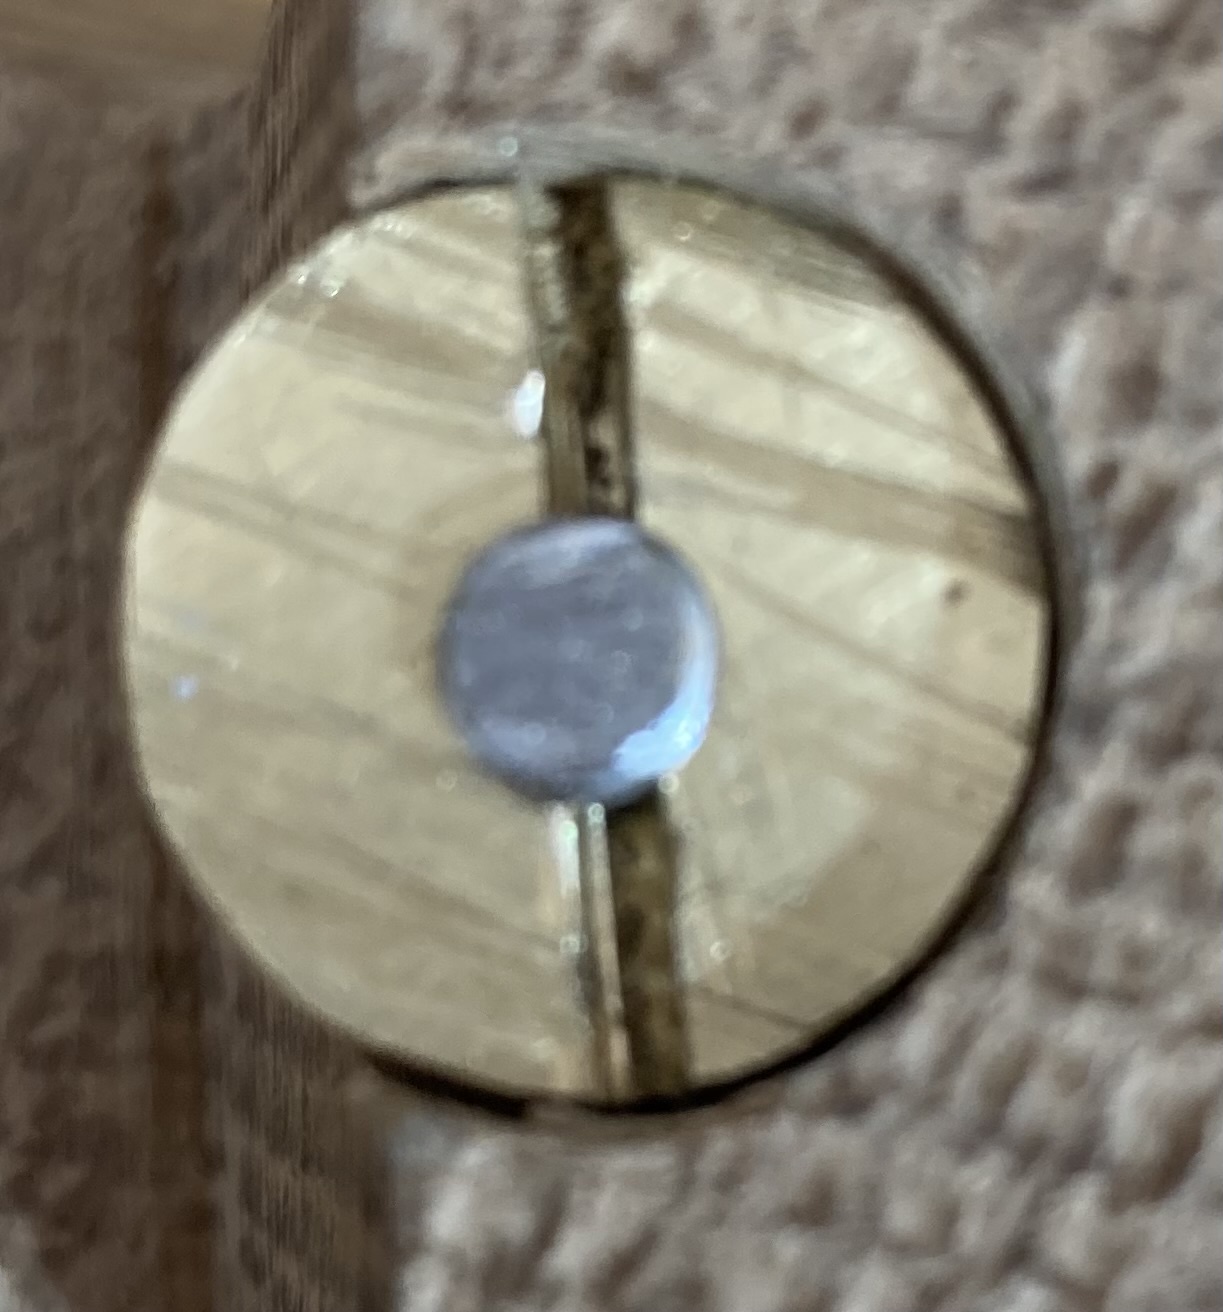
Brass round nut with a slot, similar to the split-nuts used on saws

The bolts in this Stanley plane were 12-32. I don't have a tap and die for that, but I do have a set for 10-32, so I left the bottom ends stock, and reduced the upper ends of the bolts to 10-32 so I could tap the nuts to match. It's pretty easy to reduce the diameter of a bolt a little while not changing the thread.

As I worked, I ended up cutting off the tip of the rear infill and making it a separate piece. This meant that I had better access to it to shape it to match the slope I needed to bed the plane but I had to file down the heads of the factory screws a bit. But things were taking shape!

I drilled the holes for the cross-pin. The stock one from the Veritas plane kit wouldn't work, because it was too short, but I have a bunch of ¼” brass rod on hand. Turns out it's actually 15/64, but drilling a ¼” hole still worked, I just needed to make sure I didn't widen the hole too much.

I also drilled holes for screw the infill into place. I used #8 brass wood screws, countersunk just enough that when I filed off the head of the screw down to the bottom of the slot, I would be down to the side of the plane. My post-drill was getting quite a workout, and I spent quite a bit of time filing the screws, and peening the cross-bar into place and filing the ends of that smooth.

My first attempt at assembling the plane didn't go so well. With the blade not fully bedded, the chatter when trying to plane was horrible. I almost gave up and moved on to plan B, but I figured I'd give it one last try and took things apart and cut deeper grooves for the adjuster to ride in, which also meant making a deeper space for the adjuster knob.

With those changes made the plane suddenly worked well! The chatter was gone, and it would take shavings. Not great shavings, and the blade was now about 1/32” too long, but making things shorter is easy! Off to the grinder to establish a new bevel on the blade.

With that done, everything went together well, and it was just a matter of finishing it up. Well, almost. The metal plane wedge that I had initially planned to ship was no longer thick enough to hold the (now lower) plane blade securely. And making things thicker isn't as easy as making them thinner. So I got out some bubinga and ash veneer I had on hand and laminated up a new wedge for the plane. I alternated the grains, so the bubinga grain, which is visible, runs cross-wise in the plane body. It looks a little strange, but I like it.

Finish was three coats of linseed oil on all the wooden bits. I let each coat cure for a full day, while I worked on the bonus projects for the swap, and then once the oil had dried, I coated all the exposed metal (and the wood) with paste wax. It looks and feels pretty good, I think.


I also included a spokeshave as a bonus. The spokeshave was made from granadillo. I used a Hock Spokeshave Kit, which unfortunately had come without the mounting bolts and thumbscrews. Oh well, the threads in the blade are 10-32, which Ron verified when I emailed to let him know about the missing thumbscrews and bolts, so I just headed to the hardware store. Got a few 3” long 10-32 bolts, and I reused the thumbscrews from one of my own spokeshaves, since I didn't have great luck making my own thumbscrews from brass. I'll fix them up one of these days…

Anyway, I started cutting away some of the waste with the bandsaw, then went to work with rasps, files, hand-saws, gouges and chisels. I also drilled the holes for the mounting with the post drill. Then after setting the blade and making sure it worked correctly, I hacksawed the bolts to length and filed the ends smooth so they won't be an injury risk.

granadillo spokeshave after roughly shaping the handles and making the relief-cuts in the sole, showing the sapwood present in the piece

Having a well-appointed shop made this go a lot quicker than last year's spokeshave which was built before my shop was done.

granadillo spokeshave

The piece of granadillo I was using had a bit of sapwood on it, too. I had meant to place this on the back of the shave, but I got myself turned around, and it ended up on the sole of the spokeshave. Hopefully it won't wear too fast.

granadillo spokeshave


I also built a box to hold everything. It's fairly simple construction. A piece of red oak resawed in half to make the top and bottom, and a piece of walnut that was resawed in half to make the sides of the box. The bottom is simply rabbeted into the dovetailed sides, and the top got some bubinga veneer and oak sides so it would fit over the bottom of the box.

To build it, I cut the rabbets on the edge of the walnut, then dovetailed the walnut together. Then I trimmed the bottom piece of red oak to fit into the rabbets. Glued everything together and took it to the belt sander to clean up the outside edges of everything. I had one gap in the bottom which I filled with sawdust from the sanding and CA glue.
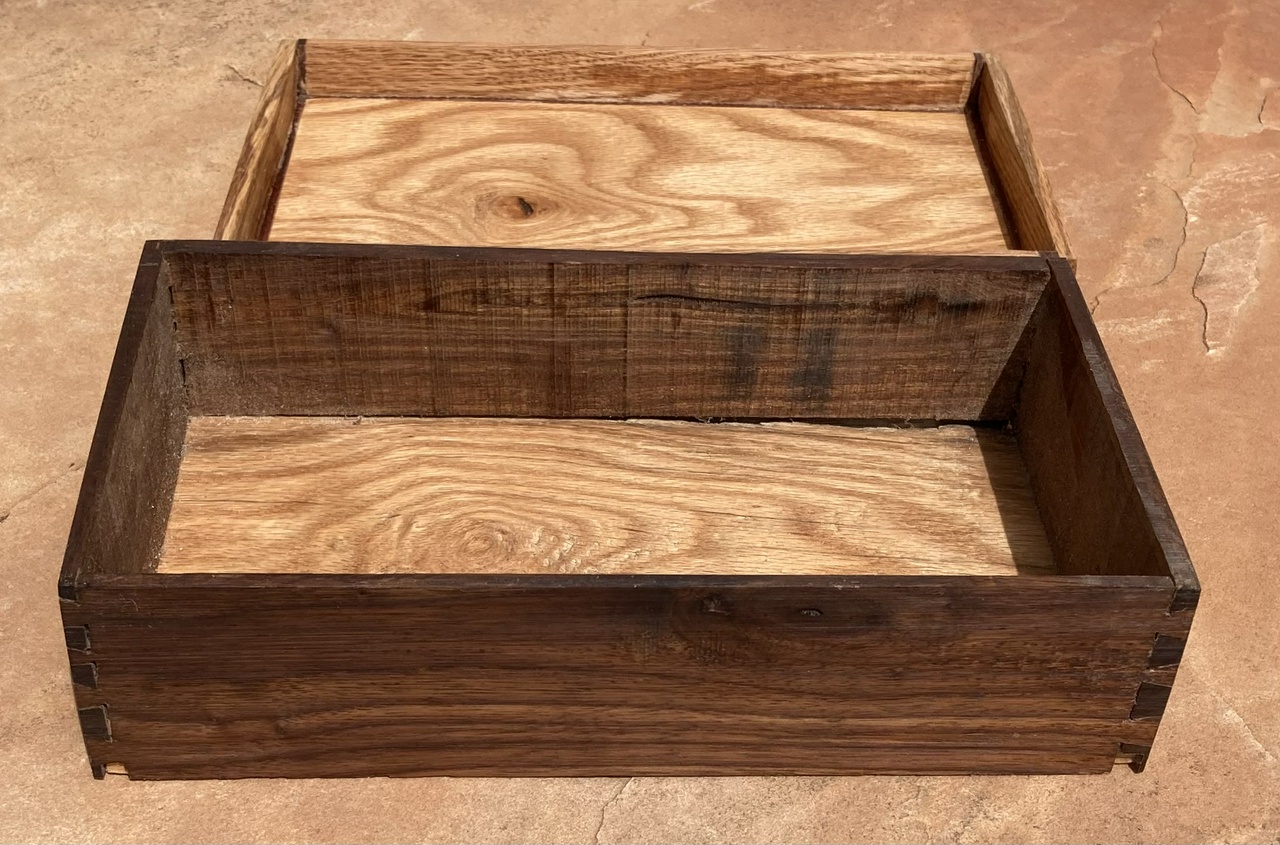
Box of walnut and red oak, open, showing the roughly-finished inside

For the lid, I glued strips of the 1/8” thick bubinga veneer to the edges of the top, then resawed a scrap of white oak to make the sides of the lid and glued those to the bubinga. Headed to the belt-sander again and made everything smooth. Again, there were a few small gaps between the oak and bubinga, so I filled those with the sanding dust and some more CA glue.
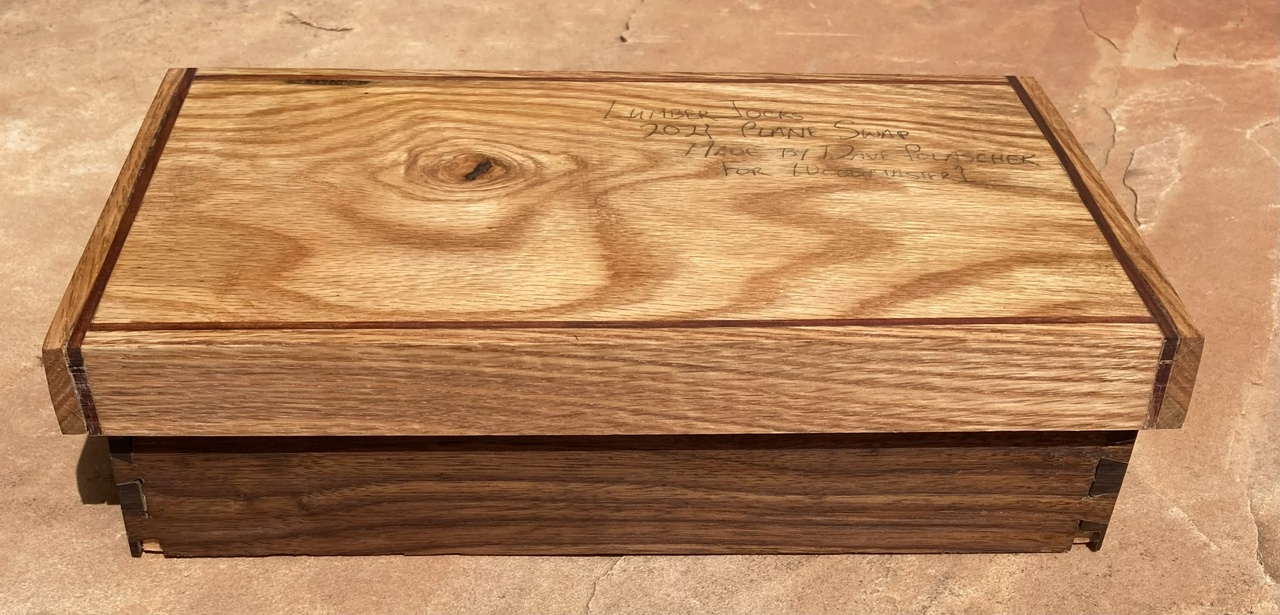
Box, closed, showing the top and the bubinga and oak edges on the lid

Wrote on the lid of the box with a pencil, then gave it three coats of shellac. It offered another layer of protection to the plane and the spokeshave in case the post office was less than gentle in the delivery.
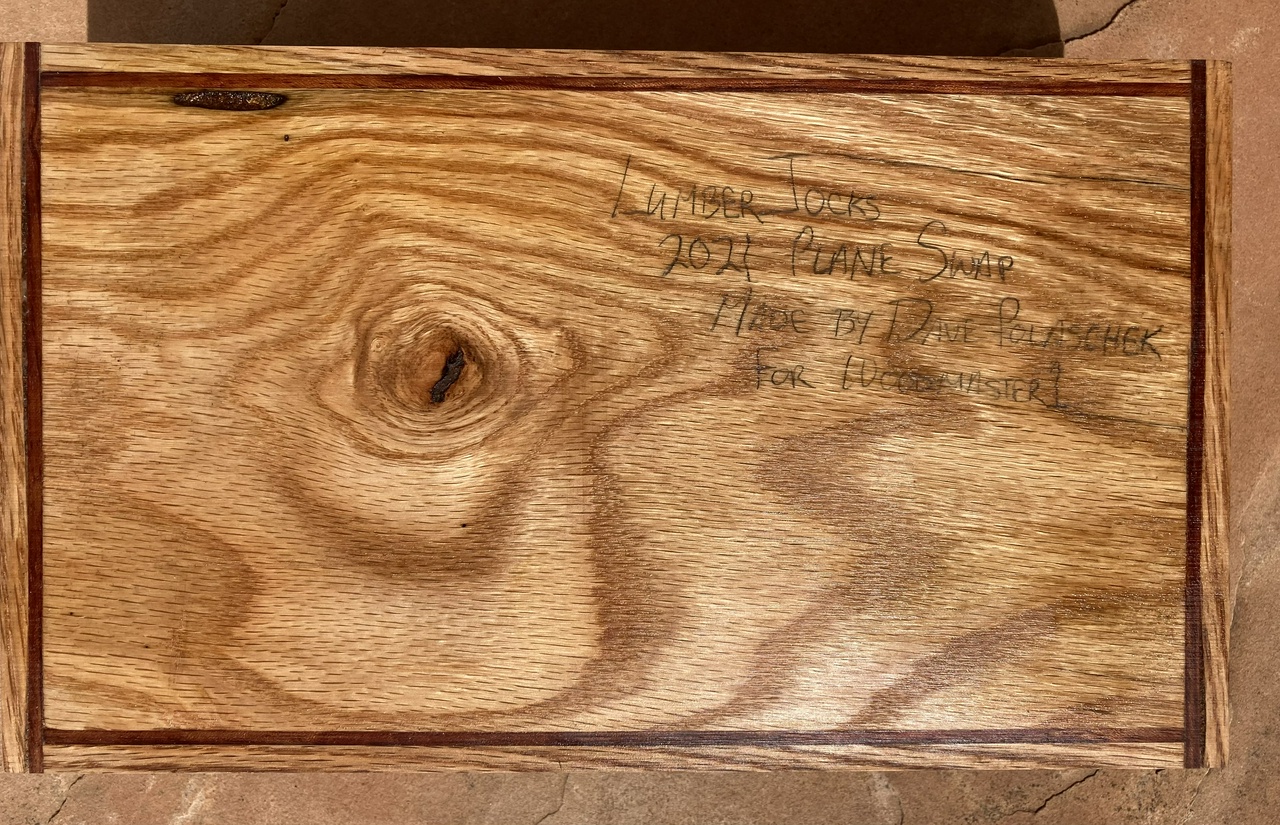
Box, closed, showing the top with the note saying "Lumberjocks 2021 Plane Swap, Made by Dave Polaschek for Woodmaster1" in pencil

#woodworking #planemaking #toolmaking #plane #box #spokeshave #swap #project

Discuss... Reply to this in the fediverse: @davepolaschek@writing.exchange