davepolaschek

shopFurniture

I’ve been needing a single place to store my files, rasps, and floats for a while now. They were stored in two older tills, one of which had been repurposed from a saw till, and another which used to be something else that I don’t remember. Plus I had a number of files laying loose on various flat surfaces around the shop.

File, rasp, and float till, filled.

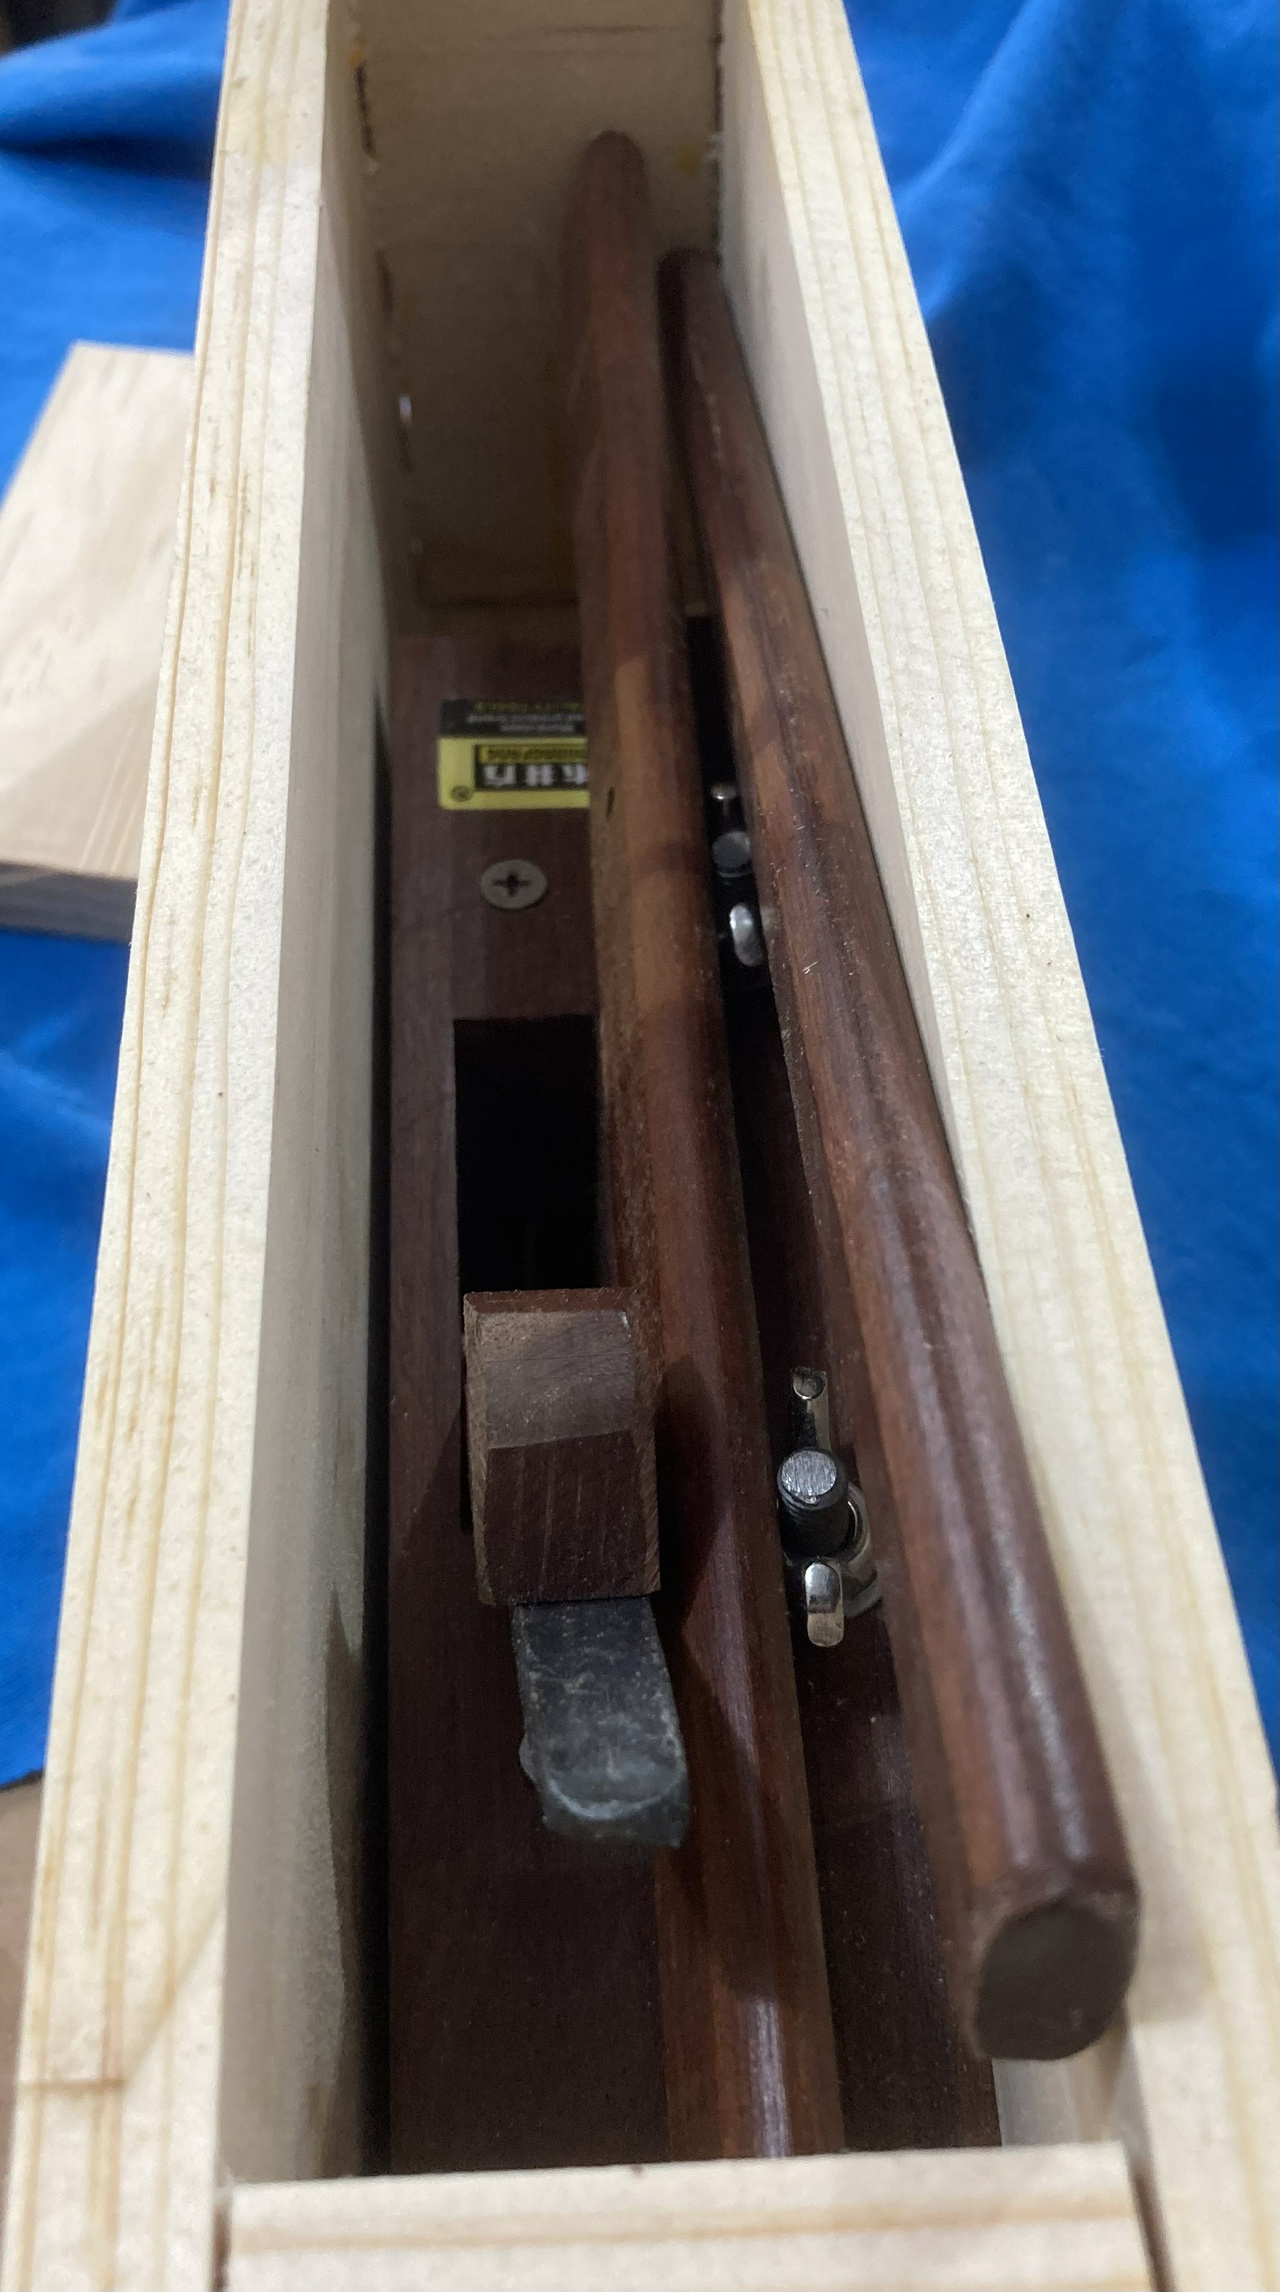
I started by building three racks to hold the files of various lengths. The largest holds 12 files, the middle holds 15, and the shortest rack can hold 20 files, though only the shortest in length will fit.

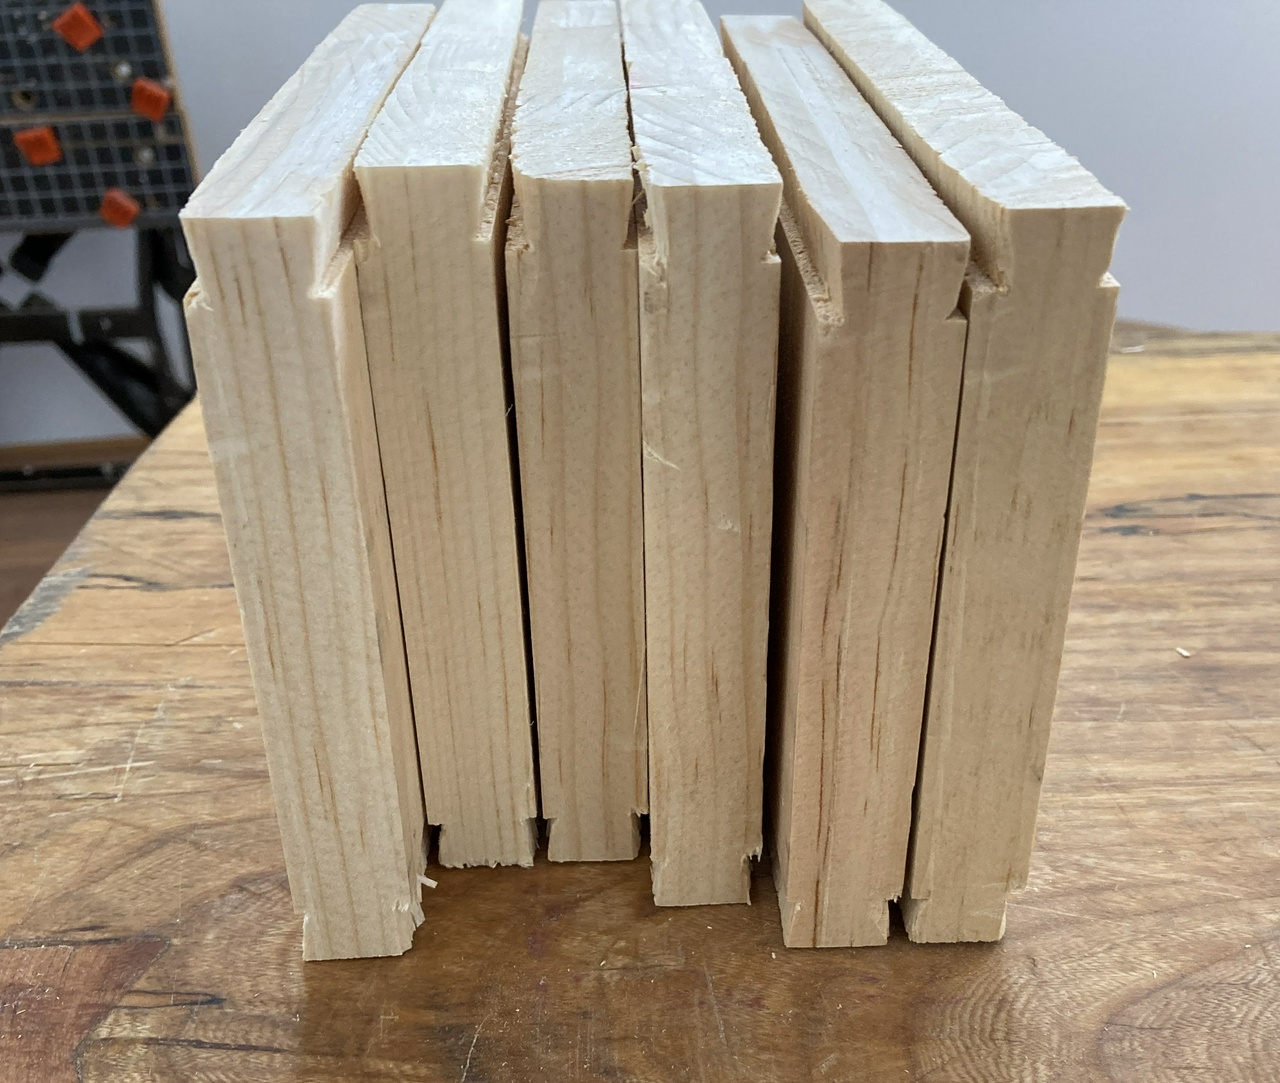
The racks are made of ⅜ inch thick oak, either 1 or 2 inches wide. Each rack has a bottom piece with indentations drilled in it, and a cross piece with magnets embedded to hold the files in place. They all pivot on the dowels that mount them (though this isn’t an especially useful feature) so they can be tipped forward or backward to access the files without knocking the ones in the rows in front. The racks were treated with iron acetate to ebonite them, though the solution was a couple weeks old, which is, I suspect, why I got a dark brown rather than a black finish.

Empty file till

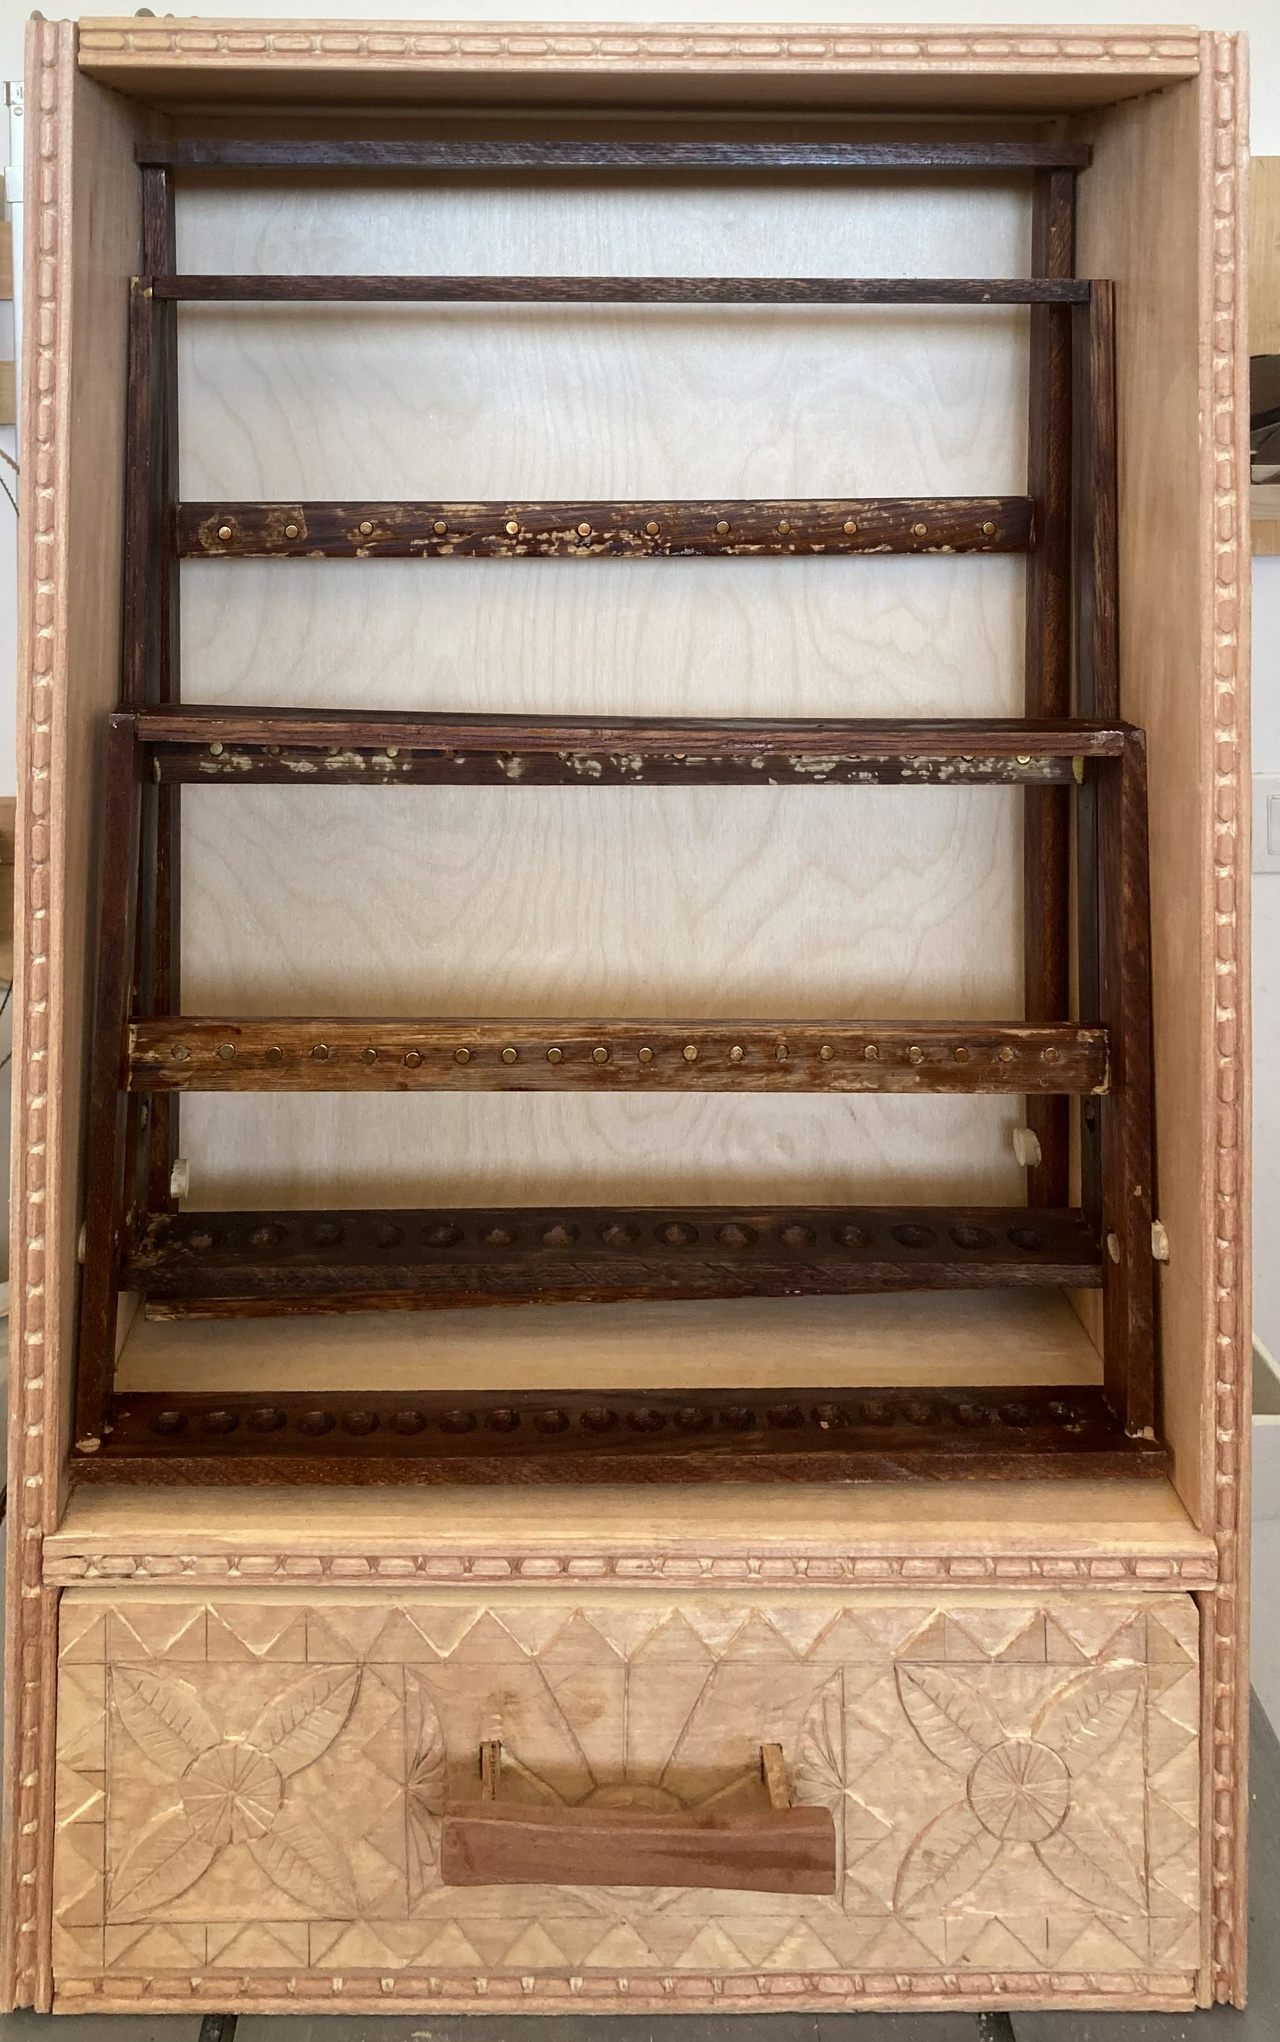
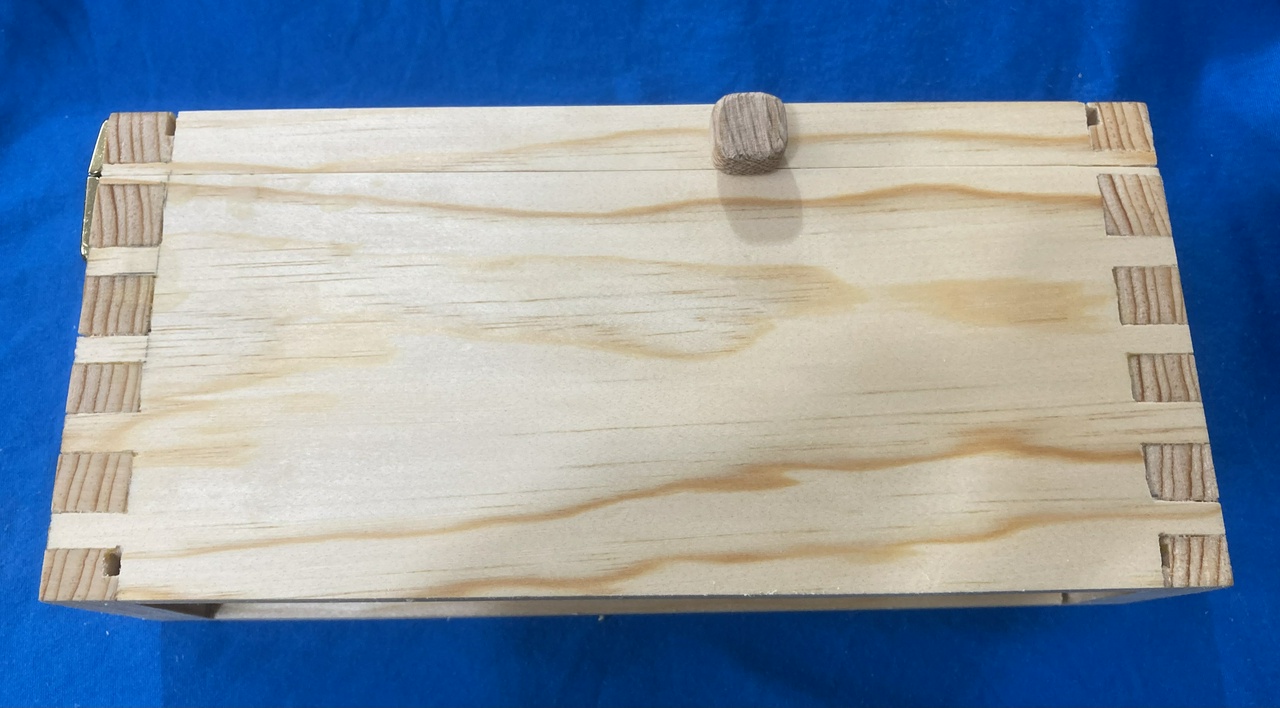
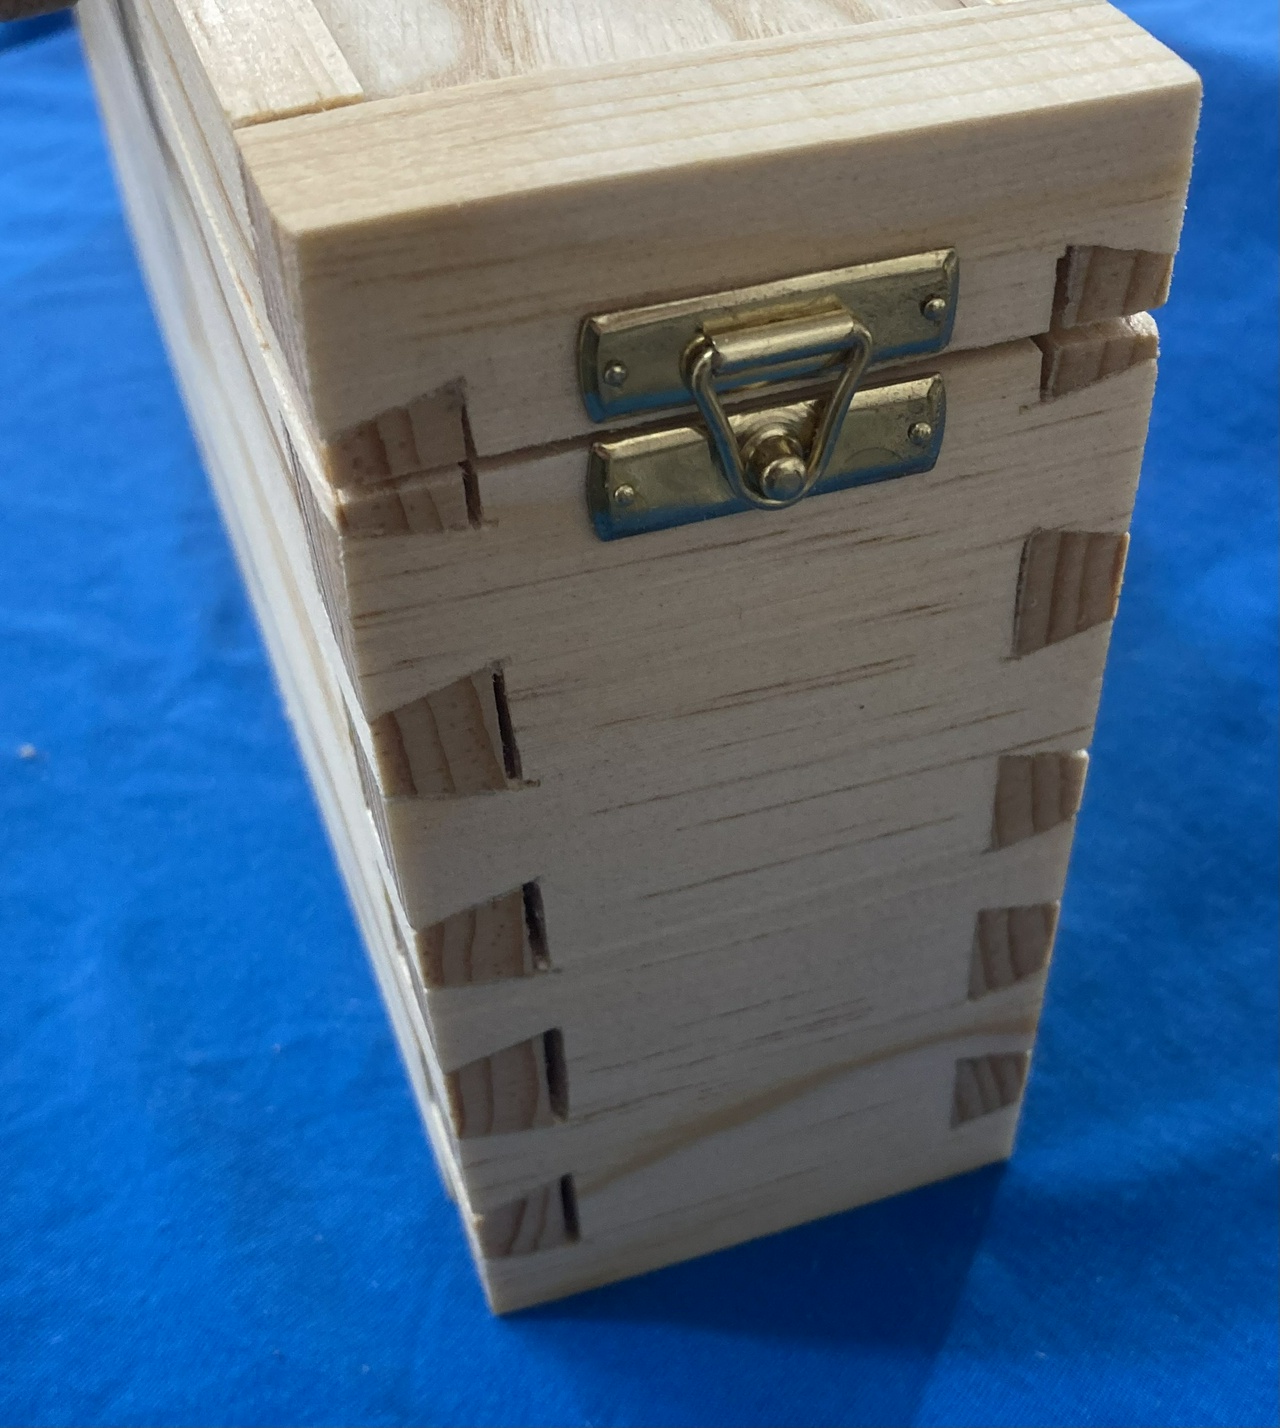
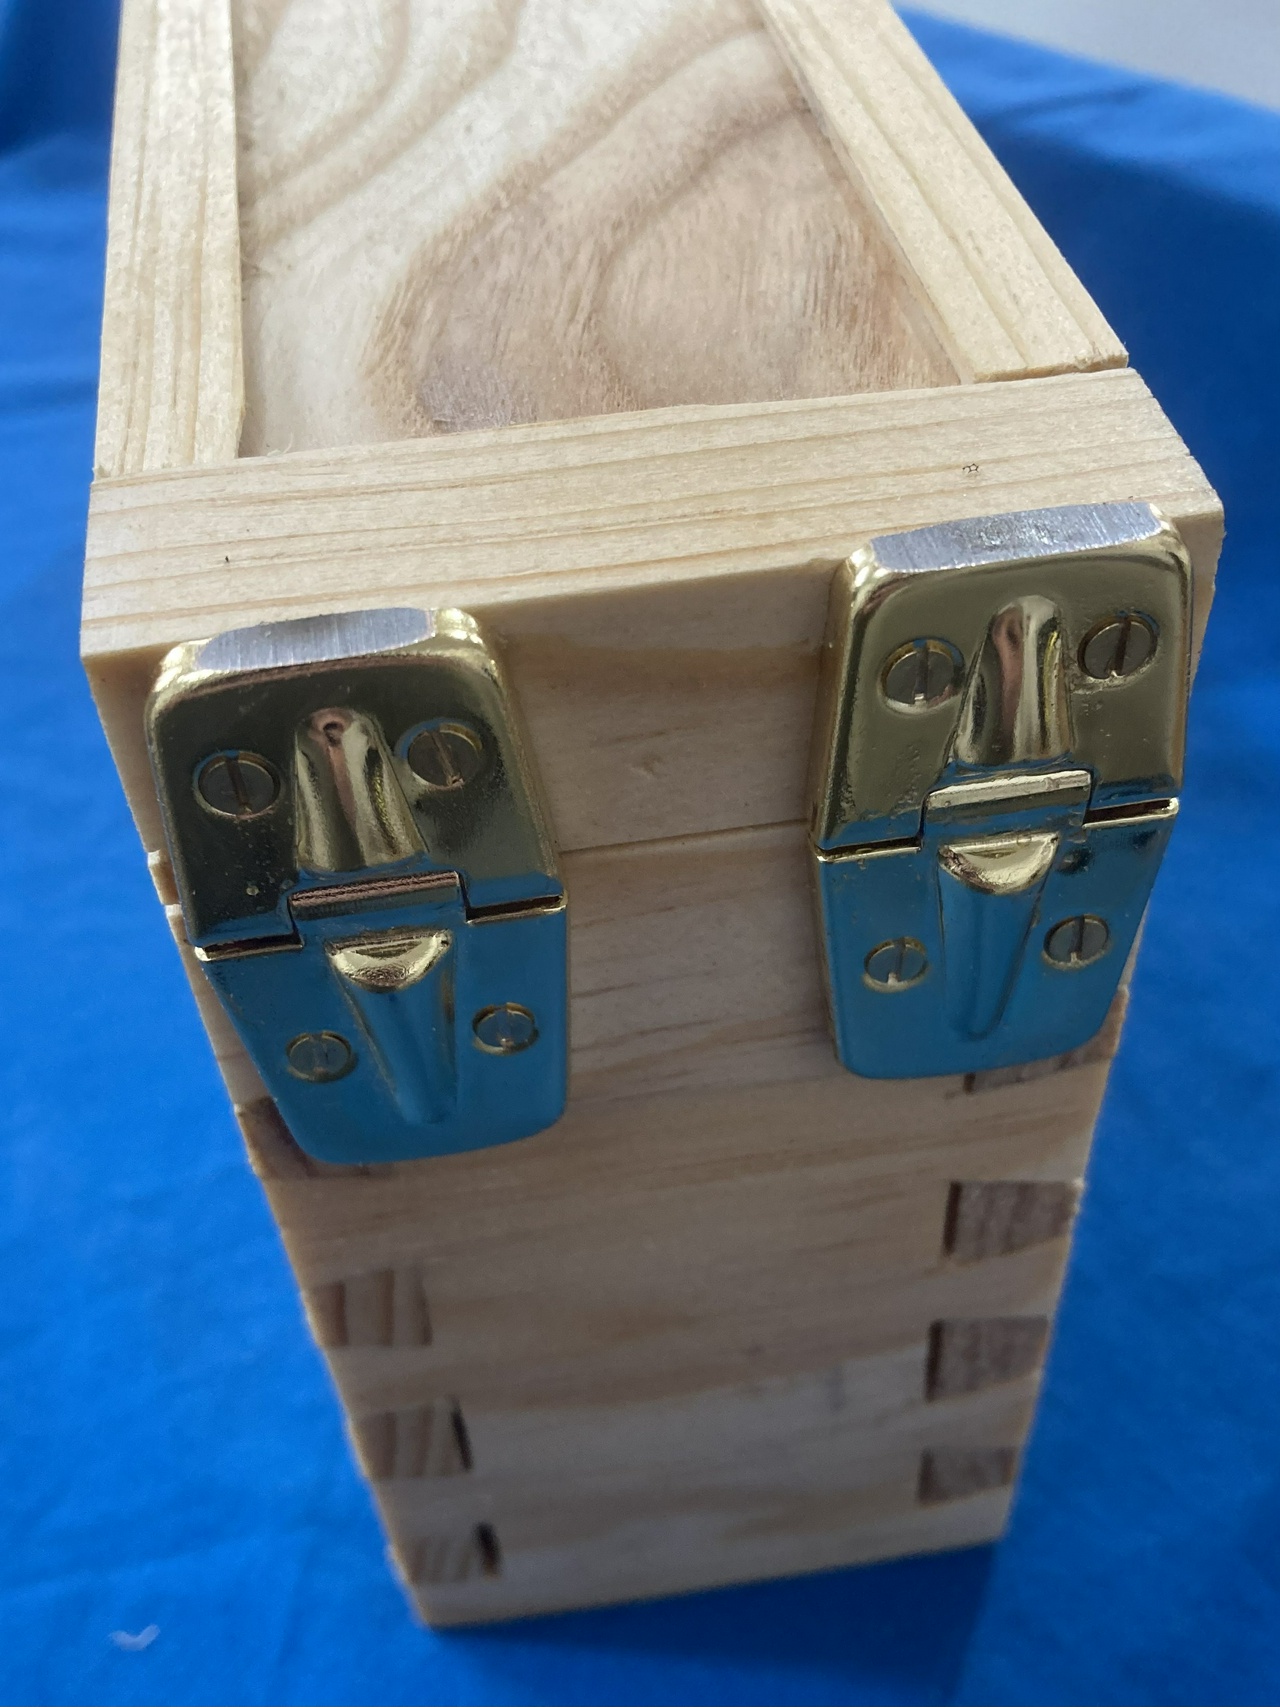
The carcasse is built of ¾ inch thick pine, and dovetailed together, with the shelf above the drawer resting in a pair of ¼ inch deep dadoes. The drawer is also dovetailed, with half-blind dovetails holding the drawer front in place. This is the first time I’ve built half-blind dovetails, so it was good practice. The drawer-front is also carved with a design I made up over a few days of carving.

Carved pine drawer front

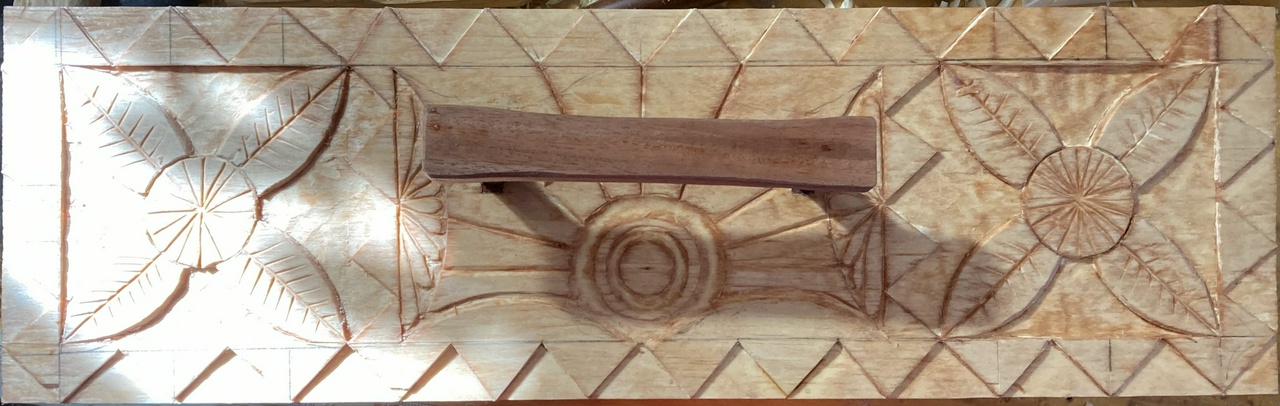
The pine is all finished with a coat of kakishibu. It’ll get a few coats of tung oil once it has had a little time to darken, unless I decide it needs a second coat of kakishibu first.

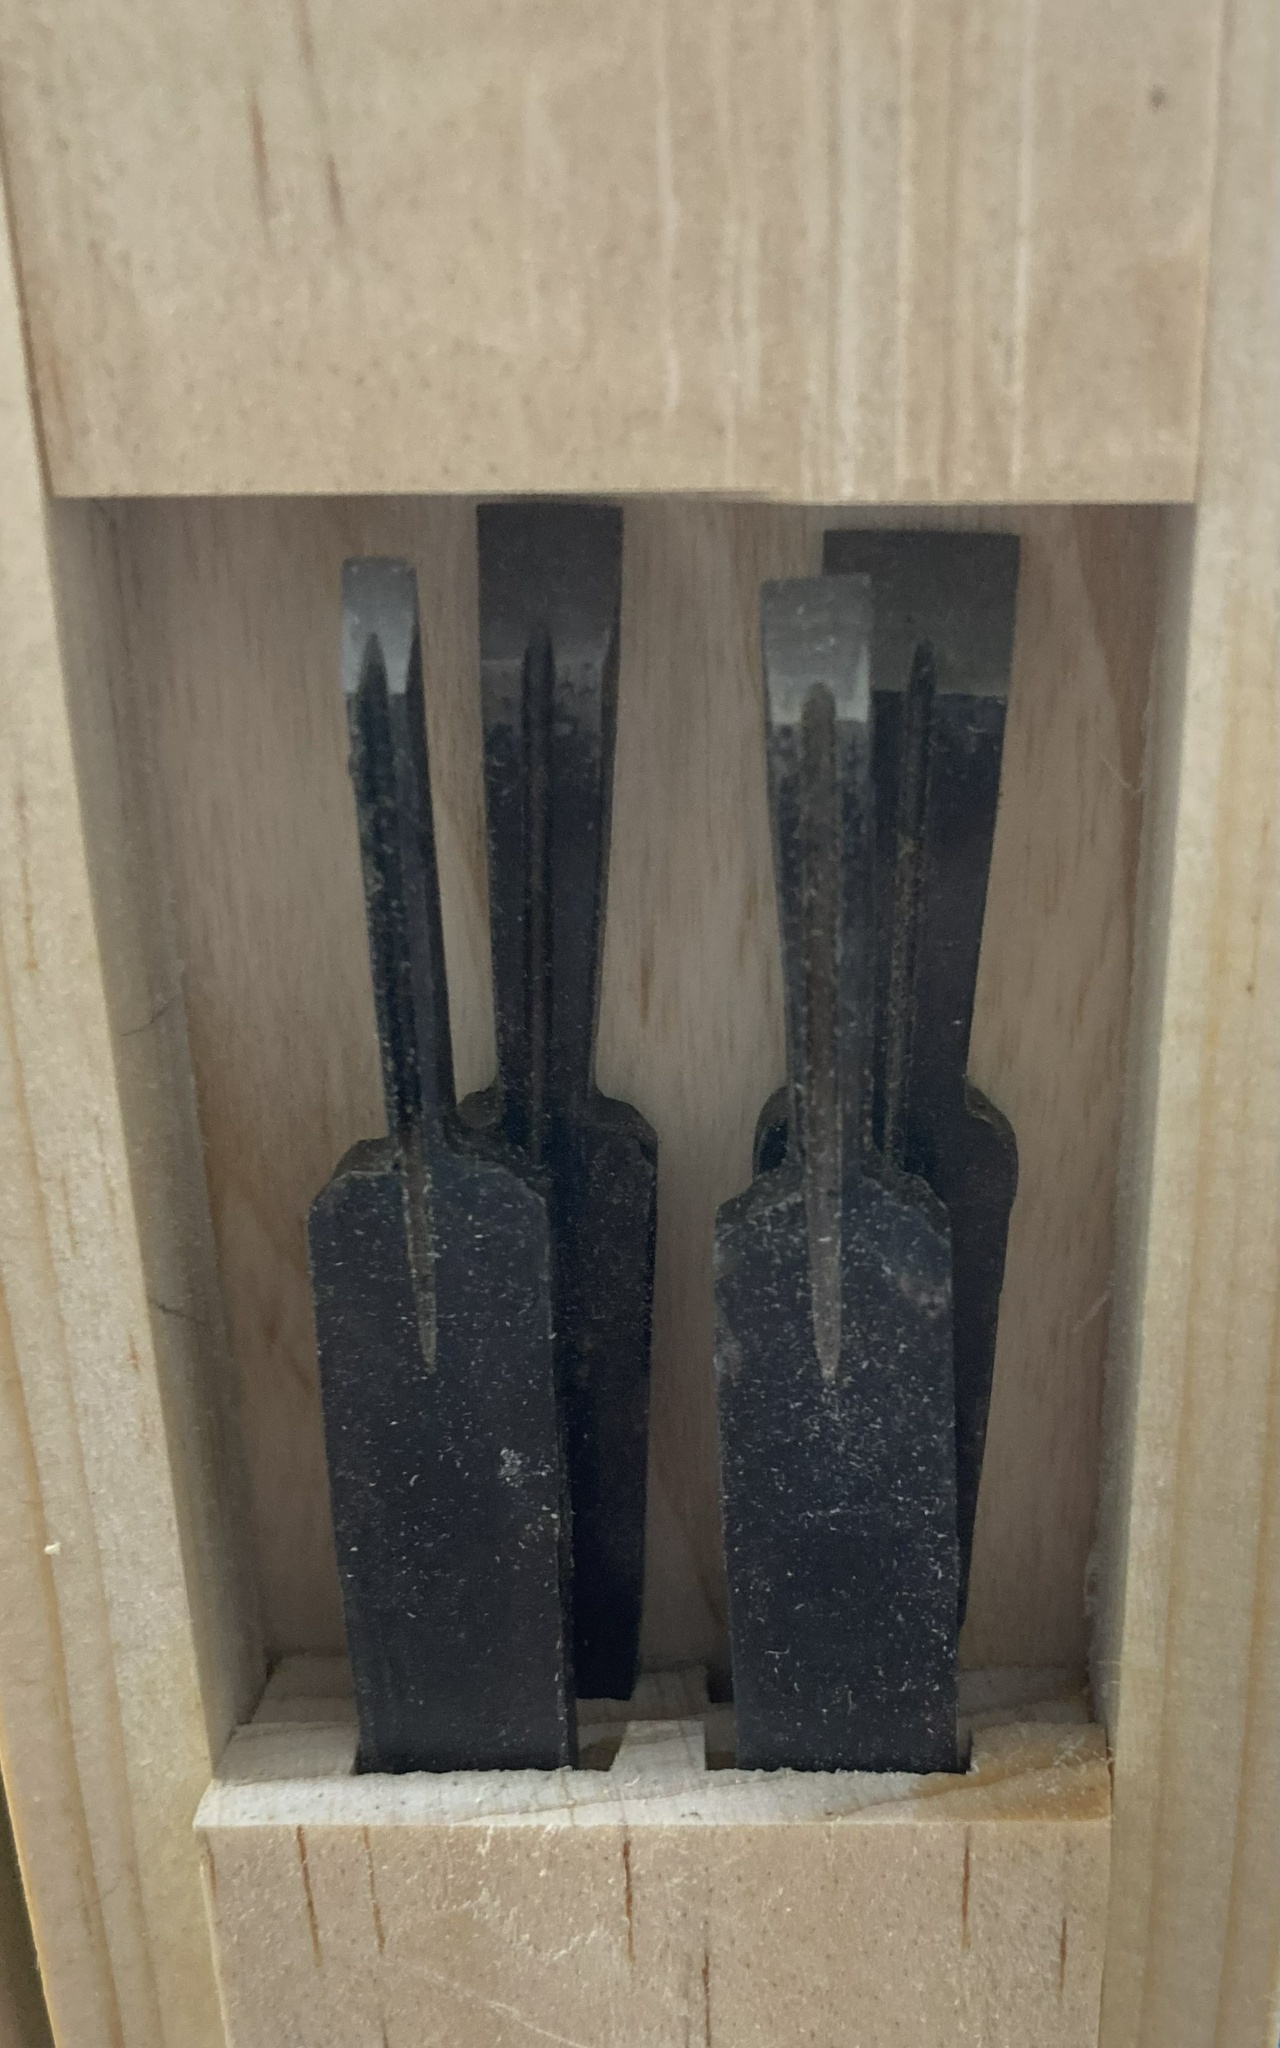
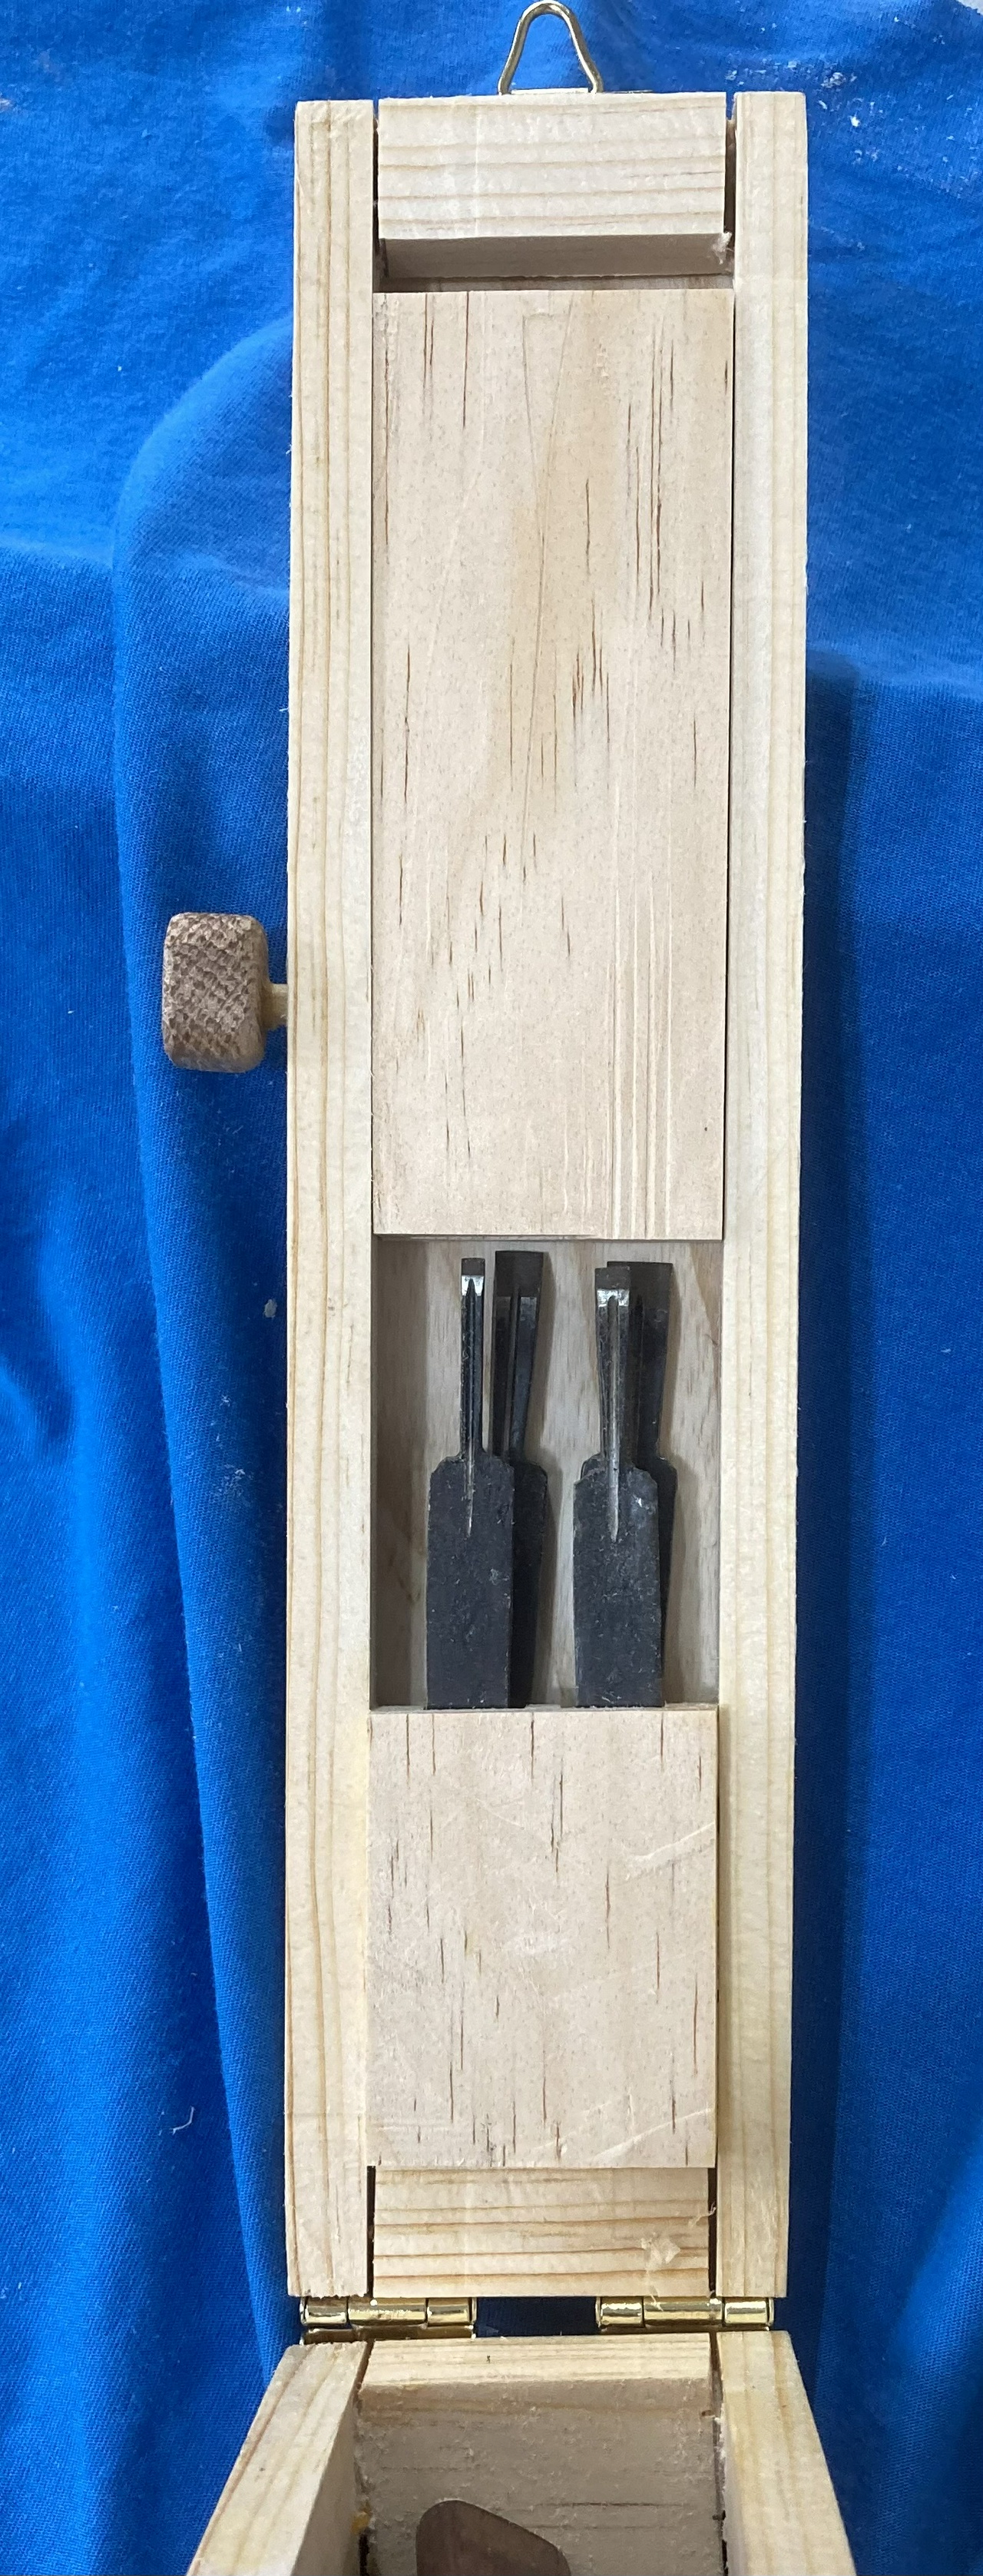
The drawer hold spare file handles, file cards, and needle files. A couple weeks of construction, the added carving on the front of the till makes it feel a little special and I also got to practice barrel and bead moulding which came out nice.

#woodworking #project #woodCarving #shopFurniture

Discuss... Reply to this in the fediverse: @davepolaschek@writing.exchange

Rack holding a number of spokeshaves

I collected all (?) my spokeshaves yesterday and built a rack to hold them. Cut a piece of ¾x⅜ maple into two pieces, then turned it to make ⅜ inch dowels on the lathe. Glued them into a board and stuck a cleat on the back. Nice quick project. I should probably put some oil on it one of these days, but… mañana.

From the top, here’s a quick description of each, how it’s set up, and what I use it for:

  1. Veritas, set up for general purpose, fairly thin, general use;
  2. Lie Nielsen Boggs with curved base, set up a little thick for concave curves;
  3. Veritas low angle, set thin for end grain;
  4. Home-made low angle spokeshave set up thicker for quick stock removal;
  5. HNT Gordon small, general use, but thin for tricky grain or finishing;
  6. HNT Gordon large, as the small, tricky grain;
  7. Millers Falls cigar shave, not yet tuned, but I hope to get it tuned up and usable, since the round blade is nice for tight concaves;
  8. Kunz travisher, curved base side to side, which is set to hollow chair seats and smooth out adze marks;
  9. Kunz adjustable mouth spokeshave, set relatively thin, generally for use against the grain and sharpened to behave almost like a scraper;
  10. and finally the Stanley spokeshave, which was the first I bought, and showed me all the ways a shave could be wrong.

A shave set for “general use” is usually set for a thinner cut on one side, and a thicker cut on the other, so depending on where on the blade I’m hitting the wood, I can control the depth of the cut. Some are thicker left and others are thicker right, and I have to give each a try to find what’s best for a given job. The two low angle spokeshaves and the two HNT Gordon shaves are generally for end grain or reversing grain.

In all, I probably have twice as many shaves as I really need, but half of them were packed away in a box I didn’t unpack until earlier this week (since we moved almost 4 years ago). So I bought a few more while I was not unpacking that box. The HNT Gordons are completely unnecessary, but they’re pretty and feel nice in the hand (they’re made from gidgee wood), so they have rapidly become favorites.

#woodworking #project #shopFurniture

Discuss... Reply to this in the fediverse: @davepolaschek@writing.exchange

closed box, from front

I recently acquired a set of the large (12 inch or 300mm) cole jaws for a Nova chuck, and as I do with new tools, I built a storage box for the jaws and chuck, as well as the associated accessories.

closed box, corner view

The box is dovetailed pine construction with quarter inch plywood top and bottom and holds the jaws on the chuck, and has places to hold the jaw extensions which I bought with the jaws (allowing it to hold a bowl up to 15 inches in diameter.

open box, showing cole jaws and accessories

The lid is hinged with a piano hinge, and has a small latch to hold it shut, and the box is finished with French Toast milk paint and a coat of tung oil.

open box, showing accessories and cutout for chuck

#woodworking #project #storage #shopFurniture

Discuss... Reply to this in the fediverse: @davepolaschek@writing.exchange

Periodically, I’ll make a piece and decide I want to fiddle with milk paint a bit, working with colors and how they change between wet, dry, and then oiled, which is close to the final color the piece will be (I typically add either a finishing cream or shellac over the oil).

I started by painting some drawer boxes with persimmon milk paint, and the carcasse that will hold them with a wash of black iron milk paint.

drawer boxes with persimmon milk paint

carcasse with wash of black iron milk paint

I then put two thin wash coats of persimmon over the black on the carcasse.

carcasse with persimmon washes over black wash

Then I put tung oil on everything.

carcasse and drawer box with tung oil over the milk paint

I’m very happy with the way the grain of the wood is still pretty obvious in both cases. I was worried even a single coat of full strength paint would hide the grain more than I wanted, but I forgot how adding oil afterwards (and rubbing off the excess oil) makes the milk paint more translucent.

After assembly, this is what it looks like. Note that I forgot to paint the end of the runners that keep the drawers from tipping forward, so I’ll do that next time I get a little milk paint mixed up. I also had to trim the pieces that sit between the drawers, which left them paint-free, so I “finished” them with a Sharpie.

assembled box of drawers

#woodworking #finishing #milkpaint #project #shopFurniture

Discuss... Reply to this in the fediverse: @davepolaschek@writing.exchange

Over the past couple days, I continued to tackle the entropy that is my benchtop. I made these two small and quick storage solutions to try and keep things organized.

First is a caddy to hold my twist drill bits. I use these a lot, and all of the commercial solutions I’ve seen figure you only have one drill bit of each size, which isn’t the reality in my shop. For the smallest size (1/32 inch), I have 15 bits, which leads me to believe I’m on my second dozen, and have broken 9 or so. These bits are pretty fragile, and when drilling pilot holes for small screws in wood, I will sometimes break them.

drill bit caddy made of canarywood

So I found a piece of canarywood on the shelf and drilled some holes in it. The front row is by 64ths, from 2-16, and the back is 17/64, then the 32nds to 3/8, plus ½. Fairly quick build, as it was just drilling a bunch of holes, but also much-needed.


Next is a small caddy to hold my nut-drivers and a handle I made to use them by hand, rather than with my 1/4” drive cordless drill (though I use that pretty often, too).

nut driver caddy

The caddy is rock maple. Again, mostly just a bunch of holes, but the spacing was tricky and carving out the recess for the handle took most of a morning using gouges.

caddy, top view, showing recess for the handle

Both of these will probably spend most of their time on the top of my bench, but they’ll keep the tools from getting lost in the clutter. And they were nice projects to tackle while I was waiting on parts for another #project.

caddy, top view, handle in place

#woodworking #project #shopFurniture

Discuss... Reply to this in the fediverse: @davepolaschek@writing.exchange

closed box

As part of the ongoing battle against entropy in my shop, I built a small box to hold my coarse and fine sharpening hones, and my sharp skate, though I have the older model with wheels, which is perfect for me, since I prefer the side-sharpening method with most blades. The friable hones are my go-to sharpening system, as I don’t need to fuss with water or oil, and can just sharpen whatever’s dull quickly and get back to work.

The box is simple dovetailed pine, with a scrap plywood bottom and a nice piece of quarter-sawn sycamore, resawed down to ¼ inch thick as the lid. I chamfered the edges of the box at a 30 degree angle to give it a little different look, cut out a curved shape to give it some feet, and used the table saw to cut dados ⅜ inch deep (i.e. halfway through the board) on the inside and out in order to make a lid that would piston fit. The top and bottom float in ¼ inch deep dados on the inside of the box.

open box, showing hones and sharp skate

Once it was all together, I gave the pine a few coats of Real Milk Paint Terra Cotta and then hit everything with a coat of tung oil. On the inside of the box, I glued a couple thin pieces of poplar to hold the stones securely in place so they wouldn’t slide front to back as I’m sharpening. I’ll contact-cement some non-skid to the box feet if it slides around on the bench, but I suspect I won’t need to do that.

Next time I feel the need for a quick project, I’ll probably make a similar box for my set of 3 Japanese water stones, but I’m thinking that will have an epoxy finish inside so I can use it as a pond for the stones, too.

#woodworking #project #shopFurniture

Discuss... Reply to this in the fediverse: @davepolaschek@writing.exchange

plane till with hand planes in it

For the past few months, I’ve had a half-dozen hand planes sitting on my workbench. They’re the ones that are regular “users” and I never quite seem to get around to putting them away, at least partly because they don’t have a regular home in my larger plane till.

The planes are a transitional jack plane, a few smoothers, three block planes, and a shoulder plane. There’s also a small, Stanley #1 sized plane I got in the most recent plane swap. This ended up taking quite a bit of space on my bench.

I started yesterday by figuring out how much room I needed for the large transitional plane, then having enough room for the smaller planes on some shelves. Next was dovetailing together the carcasse, then cutting dadoes for the first divider.

Next up was cutting sloped ends on the board that would hold the transitional jack in place. I laid the board against the case and set a bevel gauge to the angle I needed. Set the table saw blade to that and nibbled away until the board fit into the case. I ended up “wasting” about a half inch of board, but it was a lot quicker than doing trig and making a mistake.

One divider dadoed in place, angled board fitting into the case to hold the transitional plane

With that in place, I called it a night.

This morning, I realized that I wanted the transitional plane to sit entirely within the case, in case I later decided to add a door to keep the dust out, so I changed the angles on the end of the board and shortened it a bit more so it only used about ¾ of the depth of the case. I also made a sloped piece to sit on the bottom of case for the toe of the transitional plane to sit on.

With that done, I cut the dadoes for the shelves on the right, spacing them more or less equally within the available space. I had a little math problem with the dadoes in the right side of the case because I measured from the end of the board, which came up a little short of the end of the case. Oops. One of the shelves is noticeably sloped due to this.

case with dividers dadoed in place and everything test fit

I measured some boards for the back of the case, and got them ready, then with all the lumber done, I decided I wasn’t going to put a door on the case immediately, but I would decorate the front of the case with my trim router after it was assembled. I had thought about carving decorations onto the front of the boards, but I couldn’t come up with any design I really liked.

Finally, just before lunch today, I glued everything up, glued and nailed on the backboards, and screwed on a cleat and a spacer so I could hang the case on the wall.

After lunch, I trimmed a little extra length off one of the back boards and off the cleat, and used my trim router to “fancy up” the front of the case. The case is done, except for a coat of oil, which I’ll put on after I clear a few other projects from the shop. I may end up deciding to put a door on the case yet, too.

finished case with planes in it, hanging on the wall


Update June 15, 2023

I added a door to the till today. It’s constructed from some pallet wood and a bit of plywood. Half-lapped corners with miters, and a floating panel. Should help keep the dust out, and give me a place to hang my spokeshaves, too.

Door on user planes till

#woodworking #project #shopFurniture

Discuss... Reply to this in the fediverse: @davepolaschek@writing.exchange

Originally written May 9, 2017

Completed shop stool

Back in February, I bought a large slab of spalted elm I'm using to build a new workbench. A piece from the end of the slab was big enough for a stool, so I decided to build a tall and sturdy shop stool for myself.

Slab of elm. This will become a seat

Two corners cut off the slab

I cut two corners off a rectangular piece, then shaped the legs from red oak using a jig and a jack plane. Took another piece of red oak and spoke-shaved it down to make a stretcher, and built another jig to drill the angled holes in the legs for the stretcher. Then made the final stretcher from a scrap of white oak, and built yet another jig for the hole in the back leg, as that's at a different angle than the first two legs.

Red oak stretcher

Some holes and some glue, a little clean-up with a card scraper on the legs.

Legs in the stool, stretcher between the legs, clamped with brightly colored vet-wrap

Carved the seat using spokeshaves and trial and error. Finish it all with three coats of BLO and I have a completed stool.

Stool with a flat seat - carving of the seat is next

The design is loosely based on a stool made by Chris Schwarz.

#project #woodworking #shopFurniture

Discuss... Reply to this in the fediverse: @davepolaschek@writing.exchange

I have a Mujingfang Plough Plane I bought a few years ago, but it was only recently that I found the blades other than the ⅛ inch blade which I had left in it when we moved to NM (three and a half years ago). Having all the pieces in one place again, I decided it was time to build a storage box for it. This is the result.

Open and empty storage box

The box is just about the minimum size to store the plane, fence, and blades securely. I'm getting enough storage boxes in my shop that I'm going to need to build more shelves. Plus I've discovered that the arms for the plane are tapered enough that I can slide them into the plane body as far as they go, and they'll stay securely without having the factory screws in place to hold them. This avoids one of my bigger objections to this sort of plane, which is that they take up a lot of room when not in use.

Open storage box, showing the plane, fence and arms in the box

As you can see from the picture, with the arms and fence removed, the plane doesn't take up much space at all. And if I do have problems with the arms not staying wedged in place, I can always replace the factory screws with wooden pegs to hold the arms in place.

Four of the plane blades in their storage space

The plane came with five blades, but I figure I only need storage slots for four of them, as I can leave one in the plane.

Blades with retaining block and peg holding them in place in the lid of the box

To keep the blades from flopping around in the box (and to keep from needlessly making the box an inch taller to fit them upright), I placed a retaining block in the lid of the box. It's made from pine, so having the blades bump into it is unlikely to dull the blades much. And it's held in place with a wooden peg. If I think of a better solution, I figure I can replace it fairly easily.

Side view of the closed box, showing the wooden peg

When everything is closed up, the wooden peg does protrude a bit, but only a little, and I can make the knob on it even smaller if I decide I need to. Or I can recess the knob into the side of the lid, so it takes up much less space. But none of that is a project for today.

View of the "front" of the box, showing the latch

The box uses some cheap brass hardware I had on hand. The latch and hinges mostly work fine, but the hinges stuck up about 3/64 inch above the top of the box when I aligned them properly with the lid. So I took a little off with the belt sander. They don't look great now, but they still function fine.

"Back" of the box, showing the hinges with some of the brass plating sanded off

The box is mostly pine. The ends are ¾ inch thick, and the sides are ½ inch thick (it didn't seem worth it to make the ends any thinner given how small they are). The bottom is a piece of aromatic cedar I scavenged from an old cedar chest I got from my mom. Between her cats and her basement which had flooded multiple times, it wasn't worth trying to repair, but I did get a few boards of cedar from it. This was an offcut that had screw-holes spaced just about the right distance apart so I could cut them off and make the box bottom. The top of the box is a piece of thick ash veneer (⅛ inch thick) which I bought to use as splines in boxes with mitered corners, but it's plenty sturdy for this lid.

I think that's about it. Thanks for looking!

#woodworking #storage #shopFurniture

Discuss... Reply to this in the fediverse: @davepolaschek@writing.exchange

April 28, 2020

I looked at my braces as I was unpacking, and discovered I have four, plus a couple eggbeaters, plus another brace I've bid on on eBay… It's time to build a till. Also, I'll have a place to keep my bits if I do that.

So the first step was to get out the graph paper and sketch out what I think I'll need. I figure I'll eventually have braces of 6-14 inch sweeps, probably doubling up on 8 and 10 since they're more common. So I sketched a till that could hold those plus a couple eggbeater drills.

Boring Tools Till Plan

This is a first for me. Most of the time I just start building and then realize afterwards that I've underbuilt, so it feels kinda weird making a plan, but I think I'll survive. Also, the Bad Axe magnet is handy for holding my plan to the whiteboard so I don't lose it in a pile of sawdust.

Given that, I decided I'd use pine I have on hand for building my bookcases. I've got a lot of S4S 1×8s, so I started with those. That should give me enough depth that I can put doors on the till and still get a 14 in there. Plus it means my existing boxes of bits can fit in the cubbyholes at the bottom.

I started by cutting boards to length. All of my lumber on hand is cut to 4 foot lengths, so it worked out pretty well. The 38 inch long pieces had an offcut that gave me two pieces that were not quite 5 inches long, so I was efficient in my lumber use.

I've also got a new ECE dovetail plane so I've decided I'll put the shelves into the case with sliding dovetails and put the uprights between shelves with sliding dovetails as well.

As for the dovetail plane, it's pretty slick. It took me a while to get the fence set correctly for a half-inch deep sliding dovetail, but once I did, I spent more time grabbing a new board and whacking the holdfasts to hold it down than I did planing. There's a little spelching on the pine, but I lightened up the cut a little and that took care of the worst of it. The plane was usable out of the box, but would have benefited from a few minutes honing the blade, especially since I was working on pine.

Boards for the till, cut to length

Short uprights for the till, with sliding dovetail pins cut on the ends of them

I put the dovetails on the ends if the boards and called it a day. Tomorrow I'll start joinery on the carcass, and hopefully get the dovetails cut in the four exterior joints and maybe get started on the sliding dovetails for the shelves. We'll see how it goes!


Contents #woodworking #build #storage #shopFurniture #plan

Discuss... Reply to this in the fediverse: @davepolaschek@writing.exchange