davepolaschek

project

Periodically, I’ll make a piece and decide I want to fiddle with milk paint a bit, working with colors and how they change between wet, dry, and then oiled, which is close to the final color the piece will be (I typically add either a finishing cream or shellac over the oil).

I started by painting some drawer boxes with persimmon milk paint, and the carcasse that will hold them with a wash of black iron milk paint.

drawer boxes with persimmon milk paint

carcasse with wash of black iron milk paint

I then put two thin wash coats of persimmon over the black on the carcasse.

carcasse with persimmon washes over black wash

Then I put tung oil on everything.

carcasse and drawer box with tung oil over the milk paint

I’m very happy with the way the grain of the wood is still pretty obvious in both cases. I was worried even a single coat of full strength paint would hide the grain more than I wanted, but I forgot how adding oil afterwards (and rubbing off the excess oil) makes the milk paint more translucent.

After assembly, this is what it looks like. Note that I forgot to paint the end of the runners that keep the drawers from tipping forward, so I’ll do that next time I get a little milk paint mixed up. I also had to trim the pieces that sit between the drawers, which left them paint-free, so I “finished” them with a Sharpie.

assembled box of drawers

#woodworking #finishing #milkpaint #project #shopFurniture

Discuss... Reply to this in the fediverse: @davepolaschek@writing.exchange

Four pictures of the same bedan so it can be seen from all sides.

Originally written 16. January, 2022

A friend is building a lathe from scraps and I wanted to make sure he has something to work with when he gets it working, so I made a bedan for him.

The handle is a sandwich of cherry and sycamore. I had enough of this sandwich for four handles for lathe tools. The ferrule is a piece of .50 BMG cartridge I had laying around. And the tool itself is a 10mm square HSS rod I got from China.

The picture above is just the one bedan, but four views of it, so you can see all four sides at once.

Steps to build this:

  1. Set up the blank between centers and turn a tenon as large as possible on one end.
  2. Put that tenon in a chuck and turn the opposite end to fit the ferrule.
  3. Back off the tailstock and put the ferrule on.
  4. Put a drill chuck in the tail-stock and drill a ⅛ inch pilot hole, making sure the chuck is holding the handle straight.
  5. Drill a half-inch hole about ¾ the depth of the ferrule.
  6. Drill a ⅜ inch hole to a total depth of two inches.
  7. Put a live center into the hole and finish turning the handle.
  8. Trim the ferrule and wood with a hacksaw, remembering to back off the live center so you don't saw the point of it off.
  9. Bring the live center back in, and finish the handle (I used a BLO and shellac friction finish), then part it off from the tenon.
  10. Grind about 1.5 inches of the piece of HSS to a round ⅜ inch in diameter.
  11. Grind the corners down on the piece of HSS for another half to ¾ inch The tang of the bedan, ground roughly round
  12. Put the piece of HSS into the handle, first by hand, and then pounding it in until it's home.
  13. Mix up some epoxy (about 7.5ml, or ¼ oz) and pour that in around the HSS, getting it slightly domed in the ferrule. You'll probably need to pour a little, then wait for it to run in, then pour a little more.
  14. Clean up any spilled epoxy.
  15. Let the epoxy cure overnight.
  16. Finish up the handle with some paste wax.
  17. Grind the end of the bedan to 45 degrees and sharpen it up

A bedan tip, showing the 45 degree bevel from the side.

The tip of a bedan, showing some discoloration from grinding it aggressively.


That's it. Took me about three days elapsed time, but only a few hours of work. I was working on other projects at the same time.

I made a second one for another friend, using 1 inch diameter brass for the ferrule. I think this is a better fit for ⅜ and ½ inch bedans (9 and 12mm).

a bedan, held in a vise, showing the epoxy poured into the ferrule

#project #woodworking #woodturning #tools

Discuss... Reply to this in the fediverse: @davepolaschek@writing.exchange

Originally written Aug 8, 2017

Finished workbench, sitting upright on a pair of sawhorses

It all started back in February, when I went down to Minnesota Milling to get a slab of elm. I picked out one that had been outside and was “nicely spalted” and had it squared up, then headed home. I planned to make a low roman workbench, as Chris Schwarz talked about. There's a video here from the Mortise & Tenon guys explaining.

"My" piece of elm, where it had been carefully stored, in the middle of a pile of other wood

February, March, April, May… I spent a lot of time repairing cracks in the elm as it dried out, putting in a dozen bow ties and filling many cracks with sawdust (usually elm, but sometimes whatever was on hand) and super-glue. I also tried epoxy (didn't like the texture) and a mix of wood glue and sawdust (that wasn't as nice for sanding). I also spent a lot of time planing the bench flat with a jack plane, usually taking much smaller cuts than I should have, but I was learning as I went. I'm much better with a plane now.

Elm slab, resting against the wall as it dried

a cherry butterfly being clamped into the face of the wood, to stop a crack from spreading

In May, I started to make better progress. I cut the ash legs to size, and cut 1.5” tenons on them. Started drilling 1.5” holes in the bench-top for the legs, and after I had finished five holes, broke my drill bit, snapped the power-cord on my electric drill, and tore up the bench a bit. Not sure exactly what happened, but the bit bound into the wood, snapping the drill out of my hands, and somehow it kept running, wrapping the cord around the now-spinning drill. I bored the last two (and a half) holes 1” with a bit and brace and cleaned up the messy one with a knife and chisel.

Slab of elm with a few holes drilled in it, and eight legs with tenons on them leaning against the bench, with a pair of sawhorses

Holes bored, I needed to reduce the tenons on two of the legs so they'd fit the smaller holes. That was okay, as my tenon-cutting technique (using the now-defunct electric drill) had been a little sloppy. I picked the two smallest tenons and reduced them from roughly 1.3” to 1” using a spokeshave and rasp. Took me an afternoon, but I now had eight legs that all fit pretty well in their respective holes. I numbered the legs and holes at this point so I wouldn't get confused at some point in the future. I also marked orientation so I'd have the grain running the same way as the bench-top (roughly) so staking the legs would be less likely to split either the leg or the top.

Bench, resting upside-down on a pair of sawhorses, with seven of the eight legs fitted in place

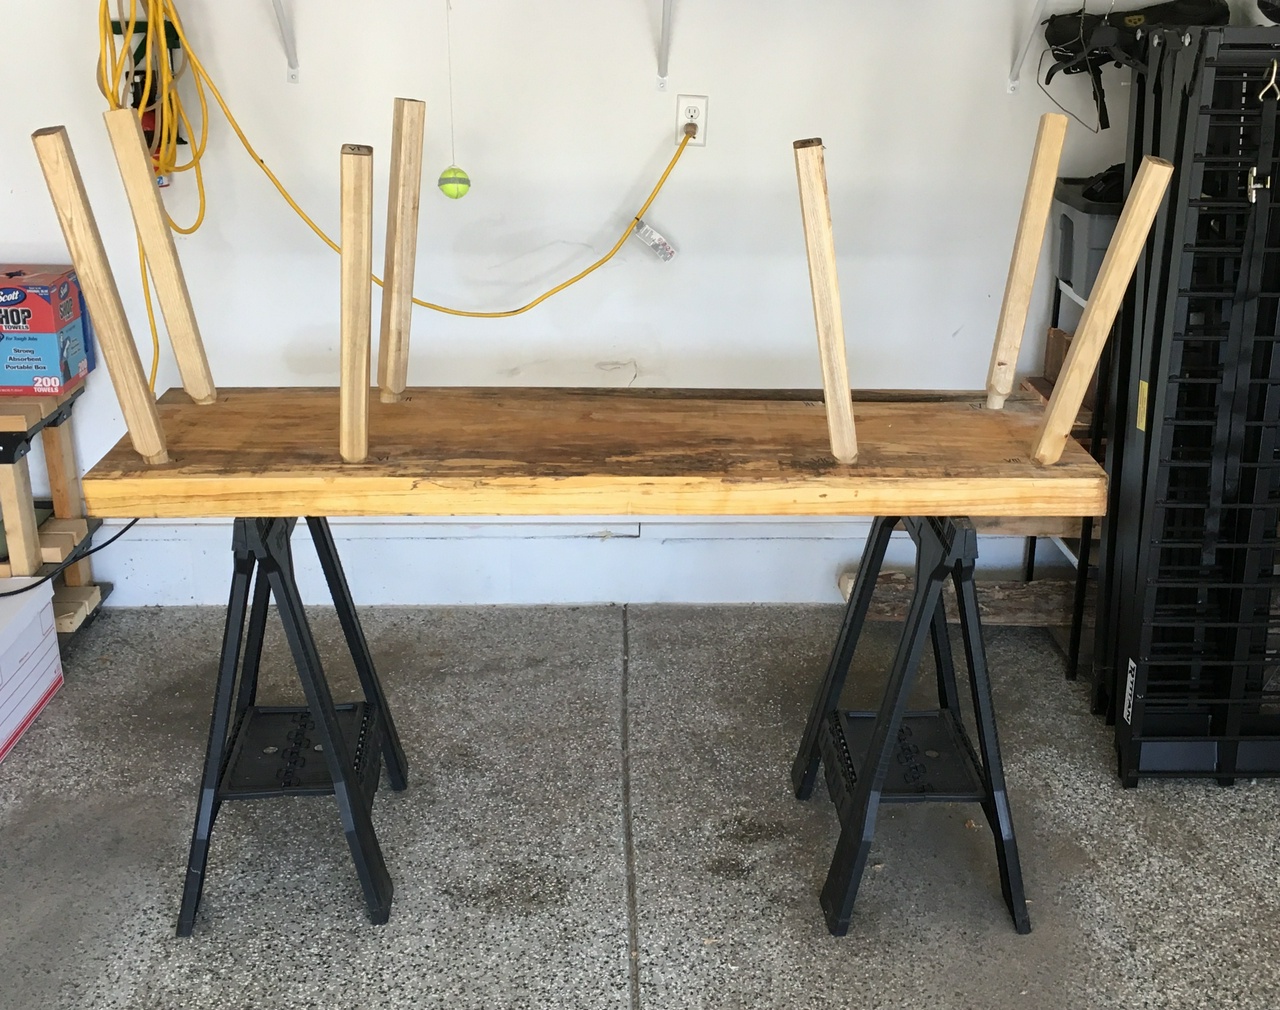
Everything marked, I pulled the legs out one by one and sawed a kerf in them with a backsaw. That gave me a 2” deep kerf in a 3” tenon. Once they were all cut, I made some wedges using a scrap of red oak I had on hand, hit the legs with glue, pounded each one into the bench, and then flipped the whole assembly to put in the wedges. On the first wedge, I discovered that the red oak I'd used wasn't the best idea, as it broke off partway into the leg. I dug into my parts bin and grabbed a dozen walnut wedges I'd made back when I was putting together my shop stool and used those. Glue the wedge, hold the leg securely, drive the wedge into the leg, repeat.

sawing a kerf in the tenon on one of the legs using a backsaw

A leg, with a walnut wedge holding it in place, sawn flush with the bench-top

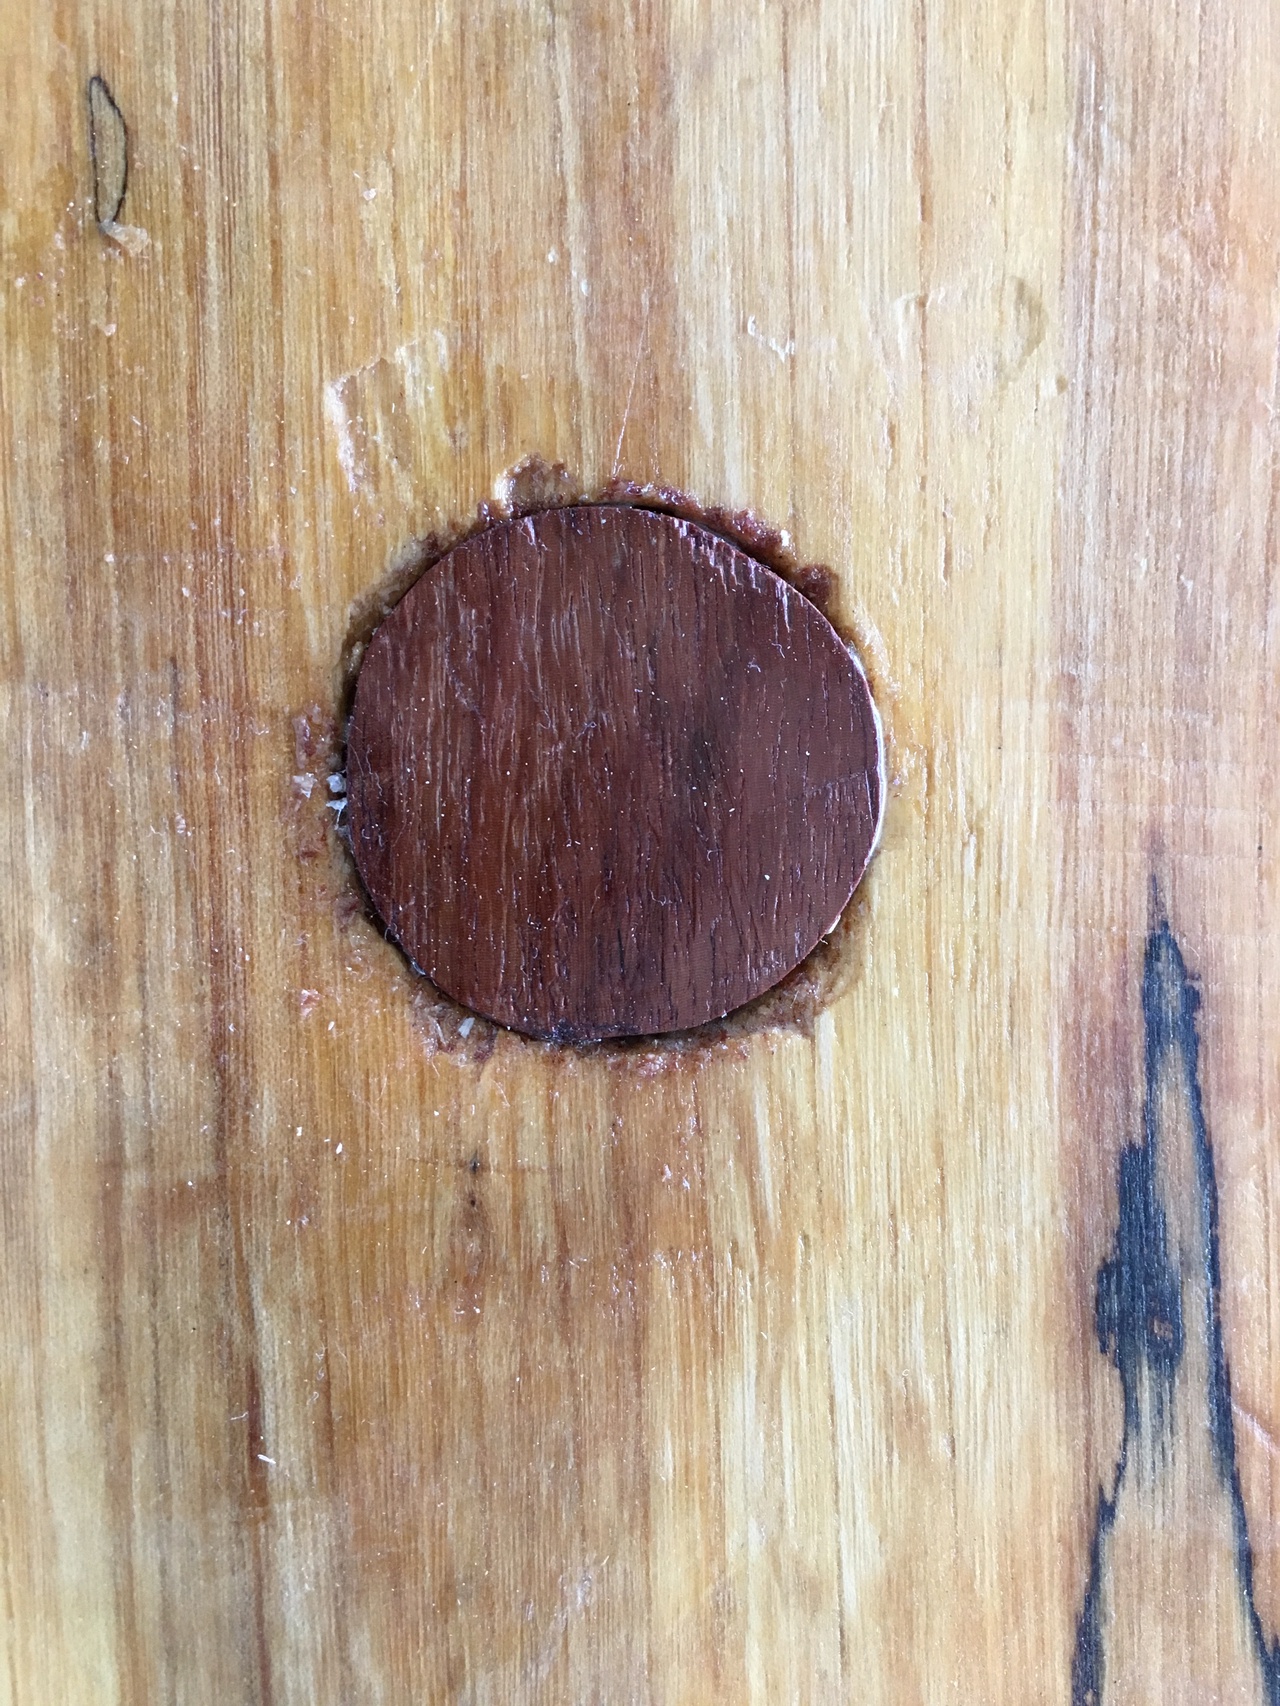
Some of the legs didn't reach the bench top at this point, but I wasn't too worried. The whole 3” tenon was in the bench, but because of the angles (which weren't all the same), some of the legs ended a little short of the top. After everything dried, I sawed off the protruding bits, then went back to filling in the holes with sawdust (this time using a mix of oak and macacauba left over from building the planes for the tool swap) and super glue. In one case, I actually used a macacauba coin to fill the last 1/8” of the hole in the bench-top.

Hole for the leg in the bench-top, filled with wood shavings

Hole, with a coin of darker color wood inserted

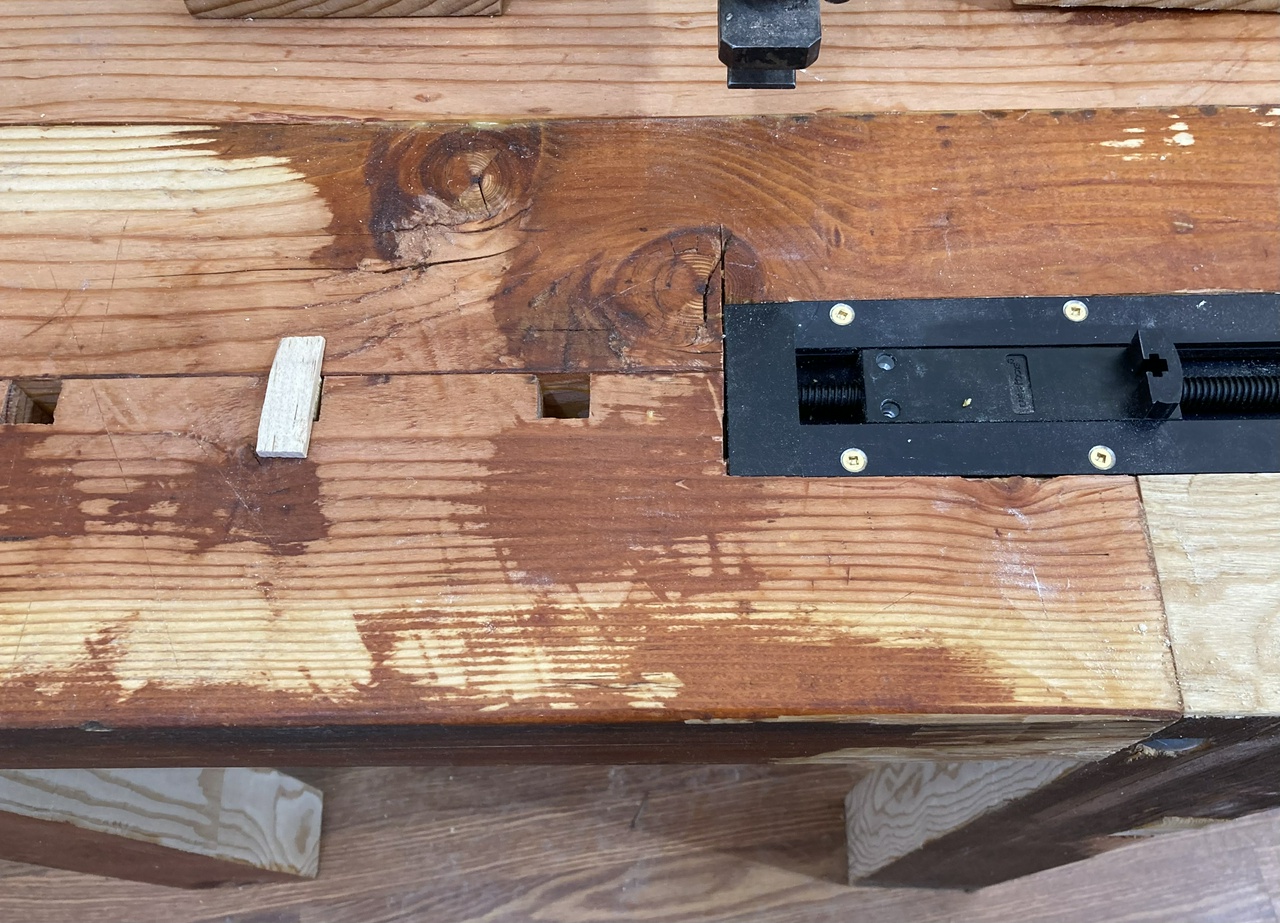
Bench almost done, it was time for some holes. I had three holdfasts made by a co-worker back in March, and they had 5/8” shafts. I have a nice 5/8” wood owl bit, but a hole drilled with that was too tight for the holdfast. I left that first test-hole as-is, and will make a bench-dog / planing-stop to fit it. I drilled other holes with a cheap Chinese 11/16” auger bit, and the holdfasts work great in those.

Holdfasts and bench dogs resting on the bench

The last thing was making a few bench dogs. I took a piece of ash that had initially been slated to be a cane, but the grain in it wasn't cooperating with me. But I managed to cut a couple 1” x 5/8” x 6” pieces out of it and then turned them down using a tapered tenon cutter (by hand) to make 3” long 5/8” diameter tenons on them, with a couple inches of conical section leading to a rectangular top. They seem to work pretty well, and I'll make a few more from oak or ash or whatever's handy as I need more bench dogs and put more holes in the benchtop.

Elm bench, with three holdfasts, a different piece of wood, and a mallet, top view

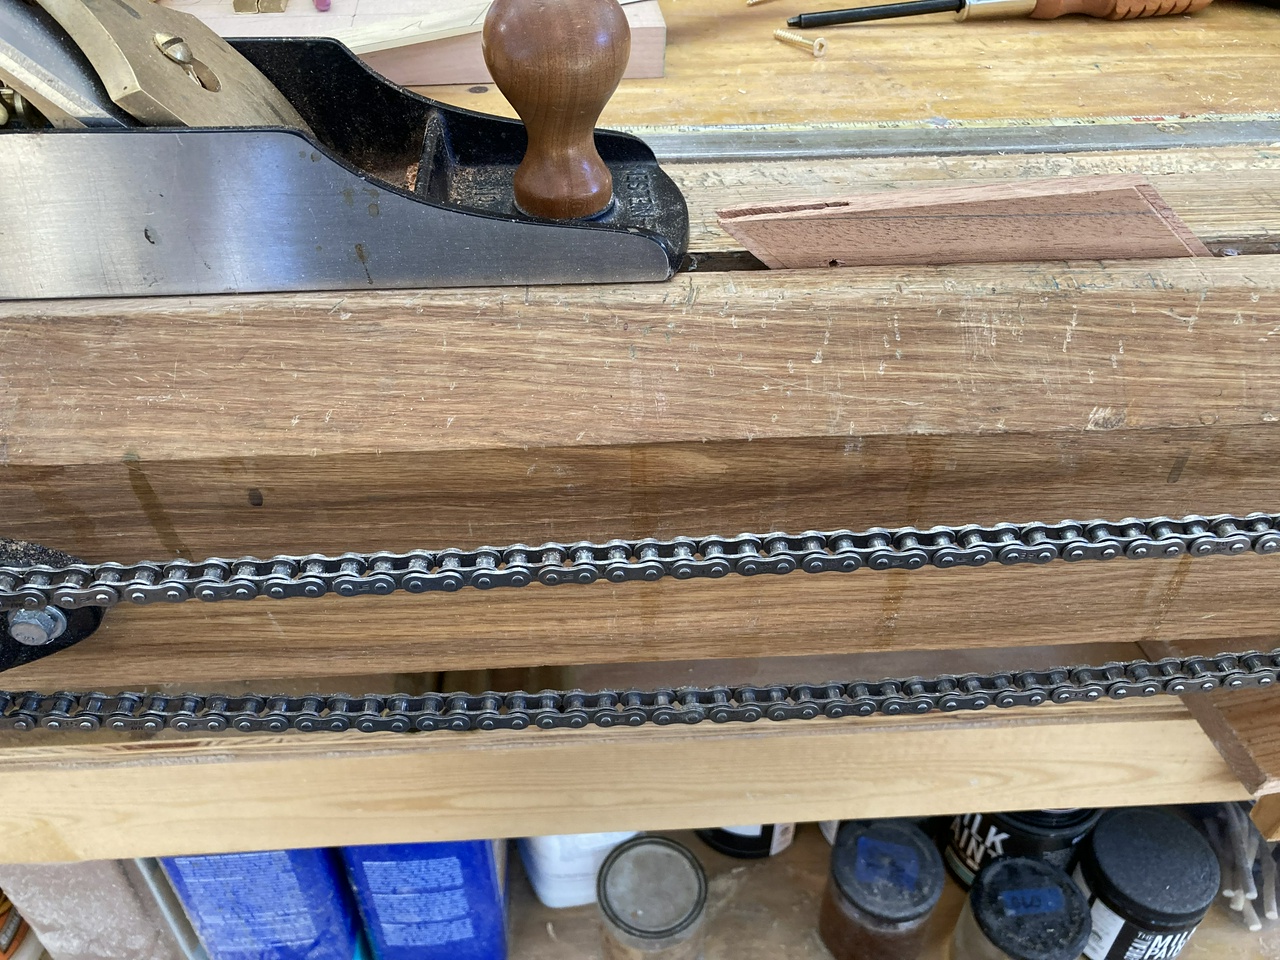
The bench has been working really well so far. With a couple holdfasts, I can position small boards for ripping or resawing. If the board moves around on me, I sit on the bench and throw a thigh over the board and now everything's held very solidly. I haven't done any planing on the bench yet, but that'll be soon, and I expect it'll work well once I put in a few more holes for work-holding.

Elm bench, with three holdfasts, a piece of wood, and a small saw

There were also a number of offcuts I used for other things, including my shop stool, a bowl, and some spoons.

elm bowl

Pair of elm spoons


When the bench was a year old, a friend asked for my thoughts on the bench. Here's my reply.

For height, about knee high. Width should be narrow enough that you can put one leg on each side of it while sitting on a board on the bench. Length should be 1.5-2m. For thickness, 7-10cm is a pretty good minimum, as that will give enough thickness that a holdfast will hold properly. The eight legs are staked in with 2.5 or 3.75cm round tenons. The legs were 5cm square ash stock planed to octagons.

Can I do everything on it? No. It would be hard to cut dovetails on it. Or do assembly. But I cut and plane wood to size on mine all the time, both standing and sitting. It's very handy for that, and on a nice day I move it outside so I have less mess in the shop to clean up afterwards. I move to a higher bench for cutting dovetails or assembling pieces. I'm very glad I built it and I use it a lot. I still use a high workbench too, though.


I also made a pen from one of the offcuts from the bench in February of 2023. I'm still getting use from that slab I bought six years ago.

pen made from an offcut of the spalted elm bench

#woodworking #project

Discuss... Reply to this in the fediverse: @davepolaschek@writing.exchange

Originally written Dec 18, 2021

miter box bench side view

oblique left view of the bench

I bought a miter box from another woodworker a while back, and needed a place to set it up, since my main workbench is a bit… chaotic most of the time. I also had scored four 92 inch long 4×6s from a neighbor, who had planned to use them as the corners of a pergola he never got started on.

First step was cutting down the 4×6s to 30-ish inch lengths and taking off the rounded corners, giving me nine 4×5s. Then I started building.

I started by cutting a recess for the Veritas small inset vise into the top of the bench, and cutting a line of ¾” square dog holes along the edge of the “front” board of the bench. With those two boards glued together, I attached a couple legs.

close-up of the inset vise

I also glued up the back of the bench, three 4×5s and a couple legs.

The bench in two pieces

My joinery wasn't great, but I had a couple ½×10” carriage bolts, so I put one of those through each of the front legs and tightened them down. Much more sturdy! For the back legs, they got three 4” long deck screws each.

Gluing the two halves of the bench together

That done, I glued the two assemblies together, aiming to get the top of the bench as flat as possible. Then I braced the legs with a tubafor, mortised into the legs (with more deck screws).

Bracing the legs with two-by-fours

A little flattening of the top, then leveling of the legs later, plus a few coats of BLO, and it was time to wrap things up.

The miter box sits on two ¾” thick scraps of pine left over from my bookcases. This makes the deck at the same height as my main workbench, so I can use that to support a long end of a board.

miter box installed on the bench

I also made a deck for my Stanley 77 dowel maker so I can mount it on the front of the bench when I need to make dowels.

Definitely not the prettiest construction, but I find myself using the small vise very often when working small parts. I've got two pine-scrap dogs to go with it that are enough for now.

Stanley 77 dowel maker held in the inset vise


Update February 9, 2023

I'm still using the bench on a regular basis. The only thing I've changed about it is that I painted a bunch of it with leftover paint from other projects, and I added a Veritas Universal Vise to the left front corner of the bench to hold things I want to carve.


Update March 12, 2024

Miter box bench with carving vise and small inset vise holding a board I made grooves in with a Luban 043.

This is a recent photo of the bench in use. The green carving vise is to the left, and in front is a board which will be one of the long sides of the box that’s going to hold my pen-making supplies after I put in some grooves with the Luban 043, which is sitting on top of the pine board.


#project #woodworking #HandyTools

Discuss... Reply to this in the fediverse: @davepolaschek@writing.exchange

Originally written Mar 3, 2021

No poop on the loop sign with dogipot bag dispenser

We live on a street that's called a “loop” and which actually is a loop. It's one mile around, and a lot of people walk their dogs. Beginning some time last fall, either someone new moved into the neighborhood and never learned to pick up their dog poop, or one of the existing residents stopped picking up, but there's been a lot of poop both in the ditches and on the street.

So back in January, after I went into our ditch to pick up some recycling that had blown out of a neighbor's bin, and stepped in some (fresh, not frozen) dog poop, and then tracked it into the house, I decided it was time to take action. Rather than standing in the ditch with a sand wedge and “blasting out of the bunker” every time someone walked past with a dog, I decided that maybe a nudge would suffice. So I bought a Dogipot Bag Dispenser and got permission from the neighborhood HOA to put that and a sign on the corner of out lot, near an intersection on one end of the loop.

I also had bought Chris Pye's Lettercarving in Wood: A Practical Course and got busy learning. Mostly I needed to learn to carve Os that looked good.

First was finding a piece of wood. I had a fairly clear piece of alder, and from carving my previous sign I knew that alder worked pretty well for me.

Next was carving the letters. I did the smaller script letters with a V tool, just tracing along pencil lines, but the larger letters were incised with gouges at a 45 degree angle. I ended up using 3, 4, 5, 6, 7, and 9 sweeps to get the Os looking the way I wanted. Probably could do it with fewer tools, but that would've taken more time for learning…

Then I painted the letters with Real Milk Paint Aqua paint, which looks like a nice turquoise, which fits, since we're in New Mexico. I think there were four coats altogether.

Poop on the Loop, Please pick it up sign

Then I carved the circle and slash with a #7/14 gouge.

Circle and slash carved over the letters

I used some 1Shot Bright Red lettering enamel to paint that.

The circle and slash are now red

Then I put three coats of Cabot Satin Spar Polyurethane on the sign, hoping to lock everything in.

Sign with polyurethane on it, which brightened up the colors a lot

Today, the post went in the ground, and the sign and dog-poop-bag-dispenser got attached to the post. Done!

Irish wolfhound checking out the new box

I've already gotten compliments on it from a couple neighbors. Hopefully it'll encourage folks to pick up after their pooches, but time will tell.


After almost two years, we've had almost zero poop left in our ditch, in spite of other neighbors on the opposite side of the loop have many problems.

The one thing I would change is that rather than using polyurethane, which is already peeling and looking bad after just two years, I should've finished the sign with tung oil, which is easy to renew. As it is, I may have to strip the paint off in order to remove the rest of the polyurethane.


#project #woodworking #LetterCarving

Discuss... Reply to this in the fediverse: @davepolaschek@writing.exchange

Originally written Mar 22, 2021

straightedge in the box, squares on the insert, out of the box

squares in the open box

closed box

handwritten notes that were included in the box

For the surprise swap in 2021, I made a set of squares for BigShooter. A try square, a miter square, a straightedge, and a box to hold them.

The try square was first. Brass bar (inch wide stock, draw filed to clean it up) and African mahogany (aka khaya). Glued together with fish glue and screwed together with brass screws, and with brass trim which is glued on and held with a couple brass brads. Same setup for the miter square. Both required a little fine-tuning with a plane after the holes were drilled and I checked to see how close I had gotten. The straightedge was a simple piece of mahogany with a brass strip glued along one edge, and with inch marks in the wood. They're all finished with tung oil and paste wax.

The brass trim was all ⅜×3/16” square tubing, with one of the wider sides filed away using a bastard file to make a U-shaped piece. The screws are put about halfway in, then sawed off and filed flush. I also used a 7 or 9 sweep gouge to carve flutes in the sides of the mahogany so it felt nice in the hand.

I built a box to hold the tools using some butternut and Baltic birch ply, with a poplar-edged insert. The box was built to fit into a medium USPS flat rate box. I used some ipe trim inside the top lid to dress it up a little and cover up the gap where the box went a little out of square when I glued it up. Oops! The box also got some walnut feet (which made it slightly too big for the box until I planed them smaller) and brass hardware, and was finished with tung oil and shellac.

I included some piñon coffee and chocolate with New Mexico chile as an added treat. Here are some additional photos from the build.

drilling holes in the miter square

verifying the angle of the miter square

planing the edge of the miter square to get the angle exactly 45°


#woodworking #project #swap

Discuss... Reply to this in the fediverse: @davepolaschek@writing.exchange

Over the past couple days, I continued to tackle the entropy that is my benchtop. I made these two small and quick storage solutions to try and keep things organized.

First is a caddy to hold my twist drill bits. I use these a lot, and all of the commercial solutions I’ve seen figure you only have one drill bit of each size, which isn’t the reality in my shop. For the smallest size (1/32 inch), I have 15 bits, which leads me to believe I’m on my second dozen, and have broken 9 or so. These bits are pretty fragile, and when drilling pilot holes for small screws in wood, I will sometimes break them.

drill bit caddy made of canarywood

So I found a piece of canarywood on the shelf and drilled some holes in it. The front row is by 64ths, from 2-16, and the back is 17/64, then the 32nds to 3/8, plus ½. Fairly quick build, as it was just drilling a bunch of holes, but also much-needed.


Next is a small caddy to hold my nut-drivers and a handle I made to use them by hand, rather than with my 1/4” drive cordless drill (though I use that pretty often, too).

nut driver caddy

The caddy is rock maple. Again, mostly just a bunch of holes, but the spacing was tricky and carving out the recess for the handle took most of a morning using gouges.

caddy, top view, showing recess for the handle

Both of these will probably spend most of their time on the top of my bench, but they’ll keep the tools from getting lost in the clutter. And they were nice projects to tackle while I was waiting on parts for another #project.

caddy, top view, handle in place

#woodworking #project #shopFurniture

Discuss... Reply to this in the fediverse: @davepolaschek@writing.exchange

Update:

After using this a few times, I made some updates (in mid-July 2023) and they’re detailed at the end.

clamping a small piece of wood, similar in thickness to a piece of leather

clamping a ¾ inch piece of wood

A couple evenings back, I was watching some YouTube in the evening and saw a one-day build by Adam Savage of a stitching pony. I’ve been wanting a stitching pony for a while for when I make a sheath for a knife I’ve made, but watching his build, he was talking about using it for holding metal for filing and a bunch of other uses. That gave me the push I needed in order to build one for myself.

screen grab of Adam Savage demonstrating his stitching pony

I started by cutting the arms from a piece of pine I had on hand. Rather than using plywood so the arms would be sprung, I decided I was going to use a couple pieces of hinge. It won’t spring open like his does, but I think it’ll still work pretty well, and if I make one of something nicer than pine, I can get fancier.

stitching pony with the lever removed and laid flat - the hinges are visible

With the arms built, I found an inch square piece of ash, and drilled a half dozen holes in it. Rather than having a spinning piece of wood to adjust the range of the clamp, I figured multiple holes which I can slot a bolt or a dowel through would be easier. Since drilling round holes is easier than chopping square mortises, I made the hole in the arm with that adjuster a ⅞ inch round hole, and turned the end of the lever arm round on the lathe.

round hole in one of the arms, with the round end of the level arm and adjustment holes visible

I left the other end square, and cut a slot into it to hold the cam on the lever arm. The cam was a circle drawn using a pop can, then made bigger on one side and smaller on the other. And then once I assembled everything the first time and realized that the handle restricted me to only a half-turn, I adjusted the curve so it would have the full ¾ inch of travel I needed based on the holes I had drilled. To match the square end, I had to chop a square 1 inch mortise in the other arm.

square hole on the other arm, with lever arm and cam

With it working, I added a cleat to the foot of the pony so I can hang it on the cleats on my wall. It’ll get a coat of oil after I contact-cement some leather pads to the jaws tomorrow. With the holes in the lever arm spaced ¾ inch apart, and with six of them, I can clamp anything from paper thin up to 4½ inches thick, though thicker things will have the jaws at an inconvenient angle, so I probably won’t ever use it for anything thicker than an inch or so. But I could make hinged jaws too…

pony hanging from a cleat on the wall

And that’s it.

Update July 17, 2023:

After using the pony some, I made a few minor modifications to make it work better. First, I rounded the bottoms and sides of the jaws, so the thread wouldn’t hang up on them as I was working.

Rounded stitching pony jaws

And second, I shortened the arm in the cam clamp. I can’t see ever needing those last two or three adjustment slots, and if I do, I can always make a longer arm again.

Shortened clamp arm

I’ll work with those changes for a few more projects, and if they’re good, the pony will get a coat of two of oil.

#woodworking #project #clamp #HandyTools

Discuss... Reply to this in the fediverse: @davepolaschek@writing.exchange

closed box

As part of the ongoing battle against entropy in my shop, I built a small box to hold my coarse and fine sharpening hones, and my sharp skate, though I have the older model with wheels, which is perfect for me, since I prefer the side-sharpening method with most blades. The friable hones are my go-to sharpening system, as I don’t need to fuss with water or oil, and can just sharpen whatever’s dull quickly and get back to work.

The box is simple dovetailed pine, with a scrap plywood bottom and a nice piece of quarter-sawn sycamore, resawed down to ¼ inch thick as the lid. I chamfered the edges of the box at a 30 degree angle to give it a little different look, cut out a curved shape to give it some feet, and used the table saw to cut dados ⅜ inch deep (i.e. halfway through the board) on the inside and out in order to make a lid that would piston fit. The top and bottom float in ¼ inch deep dados on the inside of the box.

open box, showing hones and sharp skate

Once it was all together, I gave the pine a few coats of Real Milk Paint Terra Cotta and then hit everything with a coat of tung oil. On the inside of the box, I glued a couple thin pieces of poplar to hold the stones securely in place so they wouldn’t slide front to back as I’m sharpening. I’ll contact-cement some non-skid to the box feet if it slides around on the bench, but I suspect I won’t need to do that.

Next time I feel the need for a quick project, I’ll probably make a similar box for my set of 3 Japanese water stones, but I’m thinking that will have an epoxy finish inside so I can use it as a pond for the stones, too.

#woodworking #project #shopFurniture

Discuss... Reply to this in the fediverse: @davepolaschek@writing.exchange

plane till with hand planes in it

For the past few months, I’ve had a half-dozen hand planes sitting on my workbench. They’re the ones that are regular “users” and I never quite seem to get around to putting them away, at least partly because they don’t have a regular home in my larger plane till.

The planes are a transitional jack plane, a few smoothers, three block planes, and a shoulder plane. There’s also a small, Stanley #1 sized plane I got in the most recent plane swap. This ended up taking quite a bit of space on my bench.

I started yesterday by figuring out how much room I needed for the large transitional plane, then having enough room for the smaller planes on some shelves. Next was dovetailing together the carcasse, then cutting dadoes for the first divider.

Next up was cutting sloped ends on the board that would hold the transitional jack in place. I laid the board against the case and set a bevel gauge to the angle I needed. Set the table saw blade to that and nibbled away until the board fit into the case. I ended up “wasting” about a half inch of board, but it was a lot quicker than doing trig and making a mistake.

One divider dadoed in place, angled board fitting into the case to hold the transitional plane

With that in place, I called it a night.

This morning, I realized that I wanted the transitional plane to sit entirely within the case, in case I later decided to add a door to keep the dust out, so I changed the angles on the end of the board and shortened it a bit more so it only used about ¾ of the depth of the case. I also made a sloped piece to sit on the bottom of case for the toe of the transitional plane to sit on.

With that done, I cut the dadoes for the shelves on the right, spacing them more or less equally within the available space. I had a little math problem with the dadoes in the right side of the case because I measured from the end of the board, which came up a little short of the end of the case. Oops. One of the shelves is noticeably sloped due to this.

case with dividers dadoed in place and everything test fit

I measured some boards for the back of the case, and got them ready, then with all the lumber done, I decided I wasn’t going to put a door on the case immediately, but I would decorate the front of the case with my trim router after it was assembled. I had thought about carving decorations onto the front of the boards, but I couldn’t come up with any design I really liked.

Finally, just before lunch today, I glued everything up, glued and nailed on the backboards, and screwed on a cleat and a spacer so I could hang the case on the wall.

After lunch, I trimmed a little extra length off one of the back boards and off the cleat, and used my trim router to “fancy up” the front of the case. The case is done, except for a coat of oil, which I’ll put on after I clear a few other projects from the shop. I may end up deciding to put a door on the case yet, too.

finished case with planes in it, hanging on the wall


Update June 15, 2023

I added a door to the till today. It’s constructed from some pallet wood and a bit of plywood. Half-lapped corners with miters, and a floating panel. Should help keep the dust out, and give me a place to hang my spokeshaves, too.

Door on user planes till

#woodworking #project #shopFurniture

Discuss... Reply to this in the fediverse: @davepolaschek@writing.exchange