davepolaschek

stabilizing

Over Memorial Day weekend (of 2019), I stabilized some more wood. I had some eucalyptus from Arizona that a co-worker wanted stabilized. I forgot to take pictures of it before giving it to him, but with a wood as hard as that eucalyptus is, most of what you accomplish by stabilizing it with cactus juice is filling voids. But it's also brittle, and we were hoping it would be more workable after stabilizing. I'll update when I hear more about that.

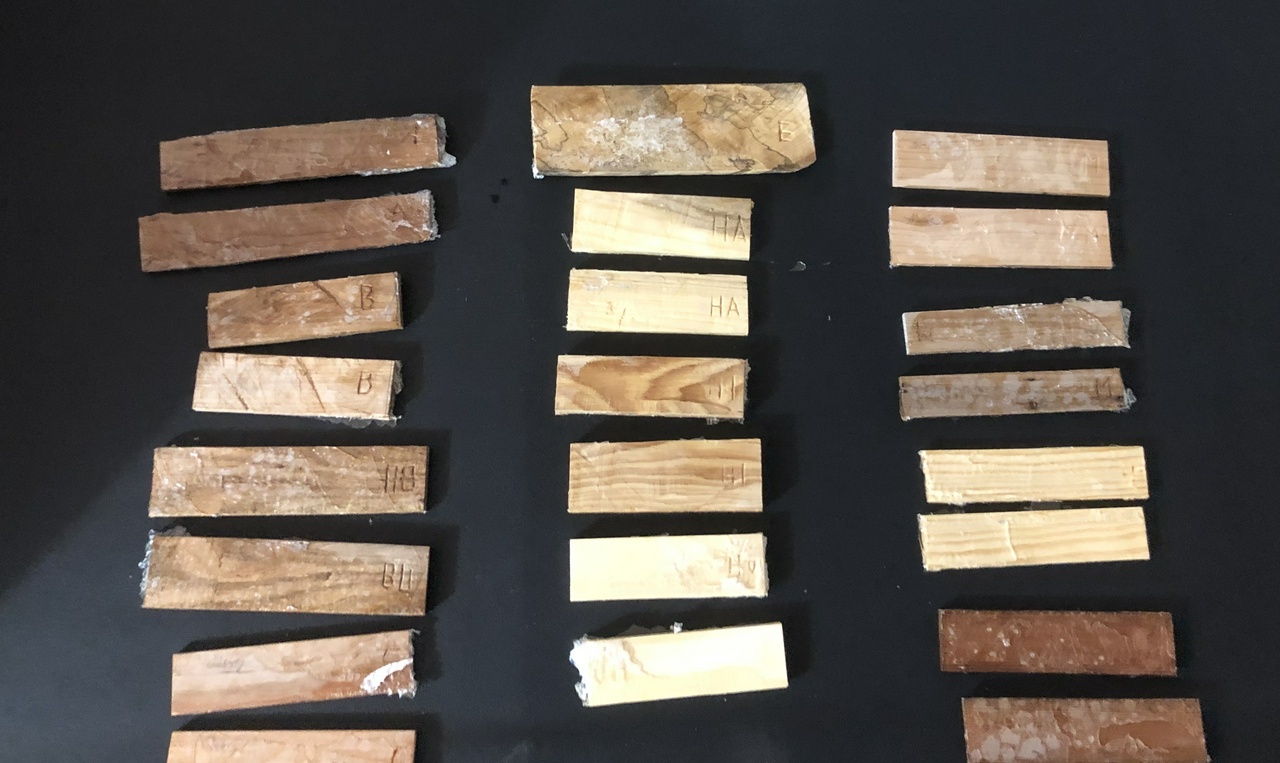
I also did some spalted birch, which was about as light as balsa after it was completely dried. As you would expect, it soaked up a lot of cactus juice, but it's nice and solid and pretty workable now.

Spalted birch, stabilized

Spalted birch, stabilized

Spalted birch, stabilized

Spalted birch, stabilized

Spalted birch, stabilized

Spalted birch, stabilized

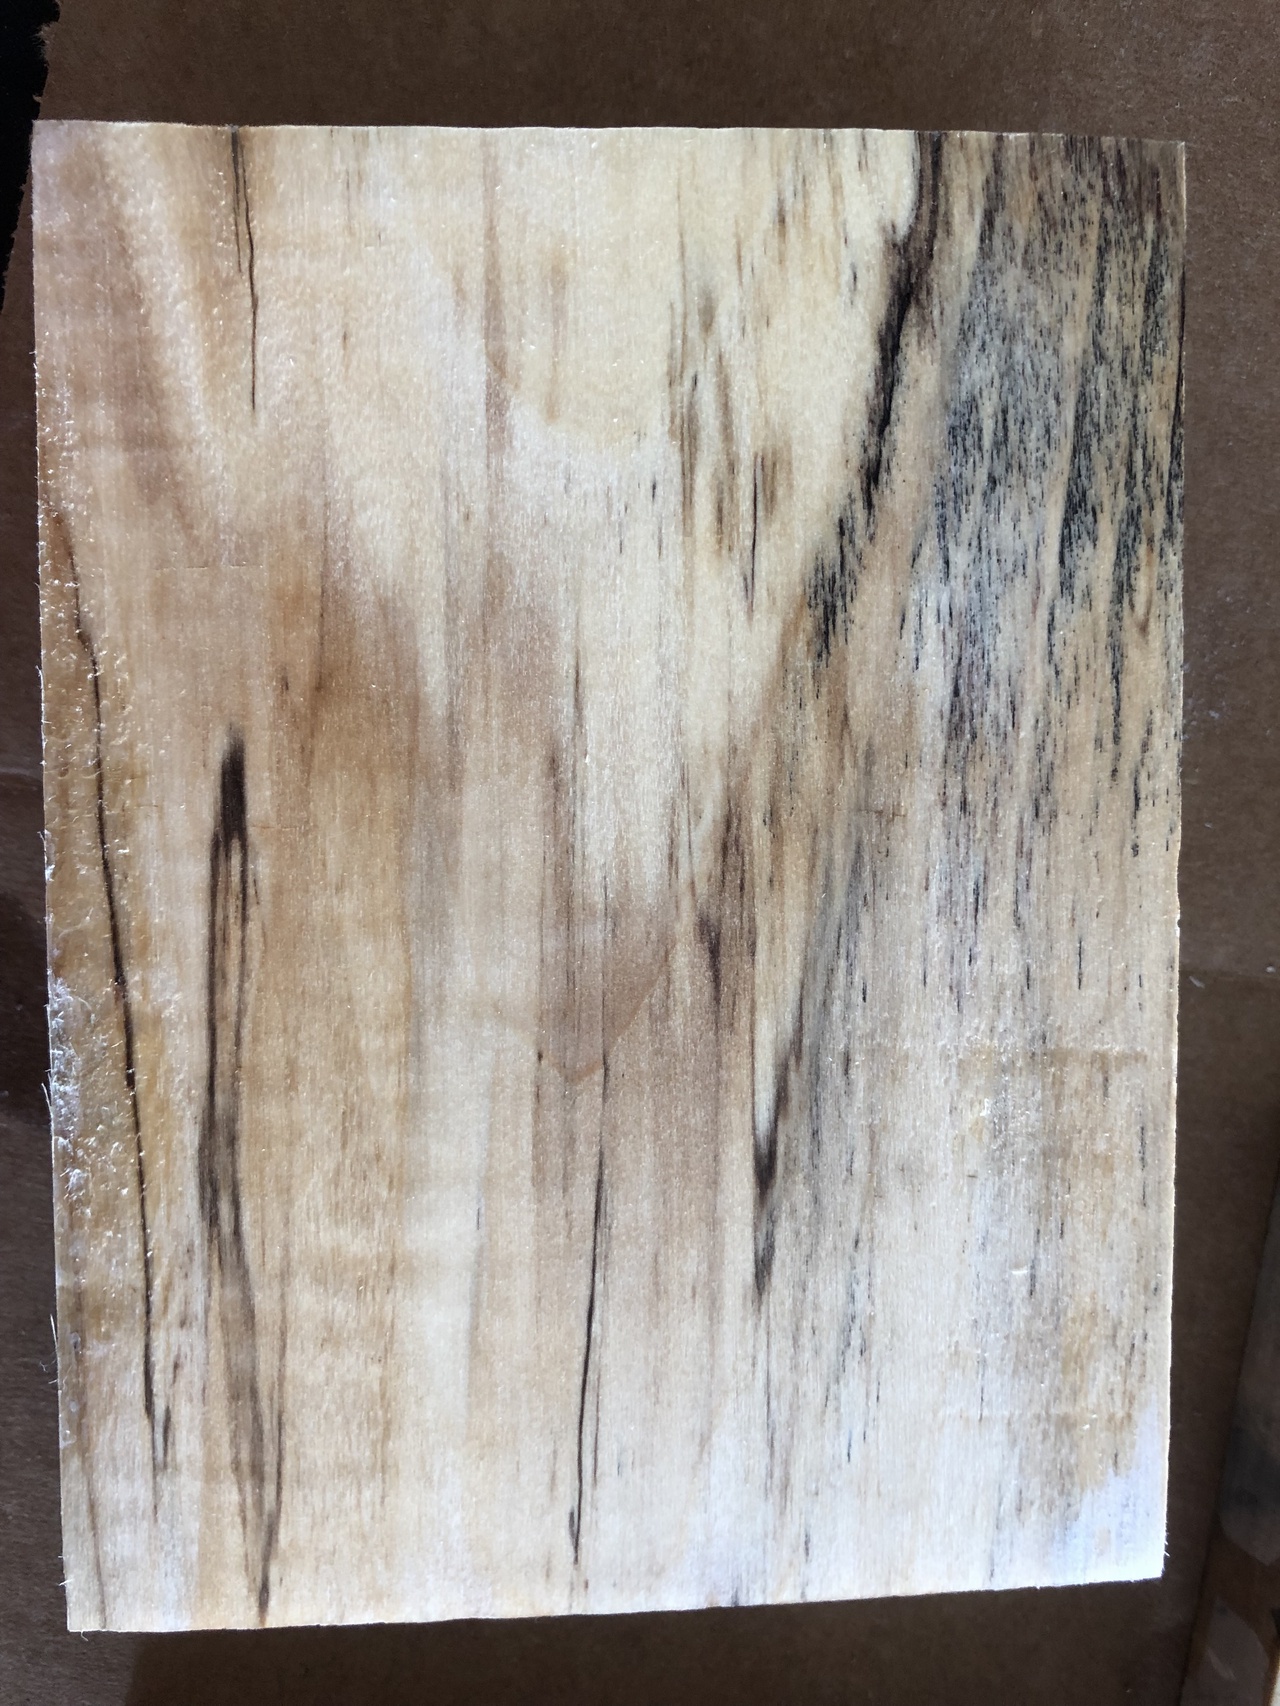
None of those pieces are quite big enough for a saw handle, unless I do the stubby handles that fit the Veritas backsaws. I might just. They are mostly under an inch thick, and about 4×6 inches (25×100x150mm).

There were also two tiny pieces of birch from a log I carved on a bit during last summer's vacation up north. These might make knife scales. The two tiny birch pieces are maybe 3/8×1-1/4×4 inches – 10×30x100mm.

Smaller pieces of stabilized spalted birch

And finally, there are three pieces of maple. One was spalted, and the other two were still pretty sound. I stuck them all in some blue-dyed cactus juice for about three hours, baked them, then stabilized them in the vacuum pot with the second batch of birch and clear juice. I think they're pretty, but I need to remember to start with bigger pieces. At least one of them will probably make a through-tang knife handle, though.

The rightmost maple piece is about 1-¼ inch square by 5 long. 30×30x125 mm. The others are wider but thinner. Maybe 1-3/4×3/4×5 inches, or 45×20x120mm.

blue-dyed stabilized maple

And that's the end of the experiments from 2018 and 2019. I haven't set up my stabilizing rig again yet since we moved to New Mexico in August of 2019, but I'm hoping to do that over the winter (of 2022-2023), and have some more fun with stabilizing wood soon.


Contents

#woodworking #stabilizing

Discuss... Reply to this in the fediverse: @davepolaschek@writing.exchange

I did some more experimenting the weekend of January 20, 2019.

First up was some spalted elm for the surprise swap. I think I've got some stuff I can use!

Spalted elm, stabilized

Next some rotted oak. We were interested to see just how spongy the wood could be and still be worth stabilizing. I'm not sure it's worth it, but I'm glad I tried it.

Rotted oak, after stabilizing

Then some spalted sweetgum. This shows a lot of promise, and I'm going to need to get a bunch more of it, I think.

Spalted sweet-gum, stabilized

And then the dyed wood. They are, top to bottom, left column: spalted oak, mahogany (2x), spalted elm (2x), spalted sweet gum and spalted maple; then right column: rock maple, spalted sweet gum, and apple.

Collection of dyed wood

I think I've got a couple in there that might be worth selling. I'm going to talk to a few other folks, and work on securing a bunch more of the spalted sweetgum, since I really like the way that came out. I also found it interesting that the mahogany looks lighter after stabilizing it with black dyed cactus juice. I've got some furniture that's made from pore-filled mahogany, and this kind of has that look to it. And the apple (I used sap wood, rather than heart wood) was just kind of blah. I wasn't sure what I was expecting, but now I know.

And here are a few shots of individual pieces of wood. First, un-dyed spalted elm, blue-dyed spalted sweet gum, red and black dyed maple, and blue and black oak.

Wood described in the previous paragraph

The other side of the blue-dyed sweet-gum:

Reverse of blue-dyed sweet-gum

Follow-up: the spalted elm ended up making a hand-plane which got sent to another woodworker in a swap.

Spalted-elm-sided plane with khaya and citrus core

Spalted-elm-sided plane with khaya and citrus core

Spalted-elm-sided plane with ipe sole


Contents

#woodworking #stabilizing

Discuss... Reply to this in the fediverse: @davepolaschek@writing.exchange

Having somewhat successfully stabilized a couple batches of wood, I figured it was time to add dyeing to the list.

I started with two tubs of cactus juice, dyed blue and red, and set pieces of wood in them for fifteen minutes or so. No vacuum, just open air. The dye was TransTint dyes in Bright Red, Blue and Black. Sorry I didn't make a note of how much dye I used, but I just eye-balled it, trying to get a fairly dark tint in the Cactus Juice.

The woods were some spalted maple, some rock maple, some hickory, and some white oak.

Red-dyed oak in blue dye, blue-dyed maple in red dye

The fifteen minutes was a guess. It turned out to be about right for the spalted maple, but nowhere near long enough for the oak or rock maple, and a little too short for the hickory. So I learned that!

Then after baking the wood to cure the first bit of resin and letting it cool, I put it in a batch of black-dyed cactus juice and ran the vacuum for three hours. I started getting the smoke again and shut it down at that point. Curtis says that's just oil mist, caused by a vacuum leak somewhere in my system, but whether it's mist or smoke, I don't want it all over my garage. I really wish Curtis sold complete systems. I would have happily paid twice as much for a vacuum pump in order to not have to waste time trouble-shooting a vacuum leak.

Anyway, after three hours under vacuum, I shut it down and let the wood soak for another 16 hours or so. Again, not long enough. I only got good penetration of the black in the spalted wood.

Dyed wood sliced in half to see penetration of the dye

But the spalted wood did come out very pretty. And now I know more than I used to.

Oak sliced in half, showing minimal penetration, and spalted maple with the best of the colors

Next up will be finding and fixing that vacuum leak so I can pull vacuum for longer without filling my garage with oil mist. But I've ordered some elm burl and spalted box elder that should also make pretty blanks.

Followup: The red, blue and black blank ended up getting used on a knife by my friends Craig and Jeff.

Damascus knife with a handle made from one of the blanks I made

Damascus knife with a handle made from one of the blanks I made


Contents

#woodworking #stabilizing

Discuss... Reply to this in the fediverse: @davepolaschek@writing.exchange

I stabilized another batch of wood Christmas weekend of 2018. It included: butternut, salt cedar, cherry, citrus, spalted elm, eucalyptus, hackberry, ipe, African mahogany, hard maple, spalted maple, white oak, pear, and walnut.

List of the woods in the second batch, as in the text above

I made a list, so I wouldn't forget. Especially before sanding off the excess cactus juice, it can be hard to tell what's what.

And here they are:

Butternut, salt cedar, cherry, citrus, spalted elm, eucalyptus, hackberry, ipe

ipe, khaya, hard maple, spalted maple, white oak, pear, and walnut

Butternut through ipe in the first photo, and ipe through walnut in the second. No huge surprises. Ipe remains hard and hard to work when stabilized. The eucalyptus I got from AZWoody is very pretty, as is the spalted maple I got from HokieKen. Butternut remains a favorite. Mahogany (khaya) and pear will both probably find their way into future projects.

Next up, dyeing and pore-filling. Oak and khaya are both interesting to me, especially if I get cool colors. And the citrus isn't quite as yellow as I'd hoped, but I'll keep playing with that.


Contents

#woodworking #stabilizing

Discuss... Reply to this in the fediverse: @davepolaschek@writing.exchange

One of the things I was trying to find out about wood stabilizing when I embarked on this adventure was whether it would be possible to work the resulting pieces of wood with hand tools. I'm not completely sure of the answer yet, but I have a few observations. But I'm getting ahead of myself.

All the various pieces of wood, unwrapped and planed or sanded

The first thing you notice when unwrapping the wood from the foil is that there's excess plastic everywhere. It sticks to the foil, it sticks the foil to the wood, and it crinkles and flakes off and will be all over your shop. It's pretty easy to remove from the wood using a knife, but less so with a plane. I tried both a jack plane and a block plane, and both had trouble getting a “bite” through the plastic on the surface.

Maybe it's just that my planes aren't super sharp at the moment, but I found it a lot easier to get down to wood using a knife or sanding block. And it was a lot easier to work with wood that had been relatively smooth to begin with. Next time, I'll plane everything before stabilizing it, rather than going straight from the saw to the resin.

Here are a series of images of each wood. In some cases, I've included a before picture, but not always. I tried to get down to bare wood, which goes pretty slowly with a plane, and pretty quickly with a sanding block with 60 grit paper.

Apple:

Stabilized apple wood

Birch:

Stabilized birch wood

Butternut:

Stabilized butternut wood

Cherry:

Stabilized cherry wood

Spalted Elm:

Stabilized spalted elm

Hackberry:

Stabilized hackberry wood

Hickory:

Stabilized hickory wood

Holly:

Stabilized holly wood

Hard Maple:

Stabilized hard maple

Soft maple:

Stabilized soft maple

Pine:

Stabilized pine wood

Redwood:

Stabilized Redwood

The first thing that struck me is that every wood carved like the finest walnut and as though my tools were razor sharp. It's a little unnatural, but then I guess that's the point of stabilizing wood, isn't it? It almost entirely eliminates the difference in hardness between early wood and late wood in pine and redwood. The soft maple and spalted elm were firmed right up. And the elm, which was cut at a 45°︎ angle, such that I was working in end-grain, carved as easily as anything else.

With a plane, the elm showed little tiny tear-out when I was planing it the wrong direction, so it's not as though the wood has completely turned to plastic. There is still some effect from the grain, but it's been minimized. With sharp tools, it's hard to go wrong. But getting a shaving started with the plane is nearly impossible until you've cleared the surface of any excess resin. That's easier with sandpaper. If you do try to plane off the excess resin, be prepared for a bunch of white dust and plastic chips all over everything (you can see them on the block plane in the “birch” photo above). But you'll have a dust if you sand too. For the hand-tool woodworker, stabilized wood is just going to be a little messier.

Color-wise,it was kind of a mixed bag. Hard maple and holly both darkened up quite a bit. Birch went from fairly pale to looking like decades-old birch overnight. Butternut, cherry and hackberry hardly seemed to change color at all. Hickory also darkened up significantly, and was a pain to work, which isn't much change really. Softwoods went from uneven and requiring razor-sharp tools to easy and pleasant to work.

So what do I think? I'll almost certainly stabilize more wood. Especially for punky or spalted stuff, stabilizing makes it work like “normal” wood. And I suspected it would make softwoods easier to work, and that's definitely the case. I'll probably have more after I've had a chance to experiment more.


Contents

#woodworking #stabilizing

Discuss... Reply to this in the fediverse: @davepolaschek@writing.exchange

When the wood came out of the resin. I used blue gloves, and wrapped the pieces in aluminum foil, with at least one layer of foil between each piece. I did the little packets of wood “flat” so they would heat more quickly.

Wood wrapped in foil

For the 24 pieces of wood, I ended up with five packets, which I piled into the toaster oven. I tried to make sure air would be able to circulate between them and turned on the convection fan in the oven.

Wood packets stacked in the oven, which is preheating

Curtis says in a hurry, you can check the wood after an hour or two, but I'm not in a huge hurry. Half-cured wood will be junk, as you can't re-bake it to finish curing it if you pull it out too early and let it cool, so I plan to give it at least 3-4 hours, which will mean resetting the oven in a couple hours.

As I was wrapping up the wood, the thing I noticed (sorry, no pictures – didn't want to risk getting resin on my phone) was how some of the wood got a lot darker (pine, butternut, redwood, maple, birch), while other looked almost untouched (holly, hickory, hackberry and the elm, which really surprised me). The real test is how it looks and works once it's cured, but I can't help speculating about how things are going to come out as I sit here waiting for the heat to do its thing.


Contents

#woodworking #stabilizing

Discuss... Reply to this in the fediverse: @davepolaschek@writing.exchange

I've got some spalted elm left over from building my low bench plus some soft maple and other woods that are a little soft and punky. But they're very pretty, so I decided I'd give wood stabilizing a try.

I ordered a vacuum chamber and pump on eBay, plus a gallon of Cactus Juice from Turntex. Once everything arrived, I assembled the hose and tested the vacuum chamber. The pump pulled a vacuum quickly, and the chamber held it reasonably well, so I was good to go on that front.

I cut up a bunch of knife-scale-sized pieces of wood. Made two each of:

  • apple
  • birch
  • butternut
  • cherry
  • elm
  • hackberry
  • hickory
  • holly
  • soft maple
  • hard maple
  • pine
  • redwood

I set all the wood in my shop toaster oven and was going to set it for 12 hours at 220F, but the timer on that only goes to 2 hours. So I ended up using the toaster oven in the kitchen, which has a 10 hour timer. Didn't leave a bad smell or anything, and my toast tasted fine this morning, but I'll probably be upgrading the toaster oven in the shop soon.

After getting the wood dry, I put it into a two gallon ziploc bag to cool. According to Curtis' instructions drying the wood first is important, and then cooling it before putting it in the Cactus Juice is critical so you don't prematurely cure the juice.

Once it had cooled, I put the wood into the vacuum chamber and put a chunk of ¼” steel plate on top of it. That wasn't quite heavy enough to keep the wood from floating, so I threw some lead into a spare plastic tub and put that on top of the plate to weight it down.

Wood in the pot with steel plate

Then I poured in about a half-gallon of juice, which gave me about a half-inch over the top of the wood (probably should've used a little more), put the lid on the chamber and started to pull vacuum. It got to -27 inches pretty quickly (15-20 minutes), but then there was a continual small stream of bubbles from the wood, so I left it chugging.

Wood bubbling in the Cactus Juice

After 2.5 hours, the bubbles had finally stopped, so I released the vacuum and left the wood to soak while I wrote this. It's supposed to soak for 2-3 times as long as it took to get the bubbles to stop, so I'll just leave it overnight.

The next entry will covert wrapping the wood (to keep it from sticking together) and baked the wood to set the resin.


When I first wrote this, there were a number of questions people asked. Here are answers to some of them.

  • Regarding vacuum chambers – many of the cheapest vacuum chambers are not rated for stabilizing wood. This is because the resin will attack many of the cheaper plastics. According to Curtis at TurnTex, PVC is ok for the lid.
  • The wood needs to be dry before you stabilize it. Curtis recommends baking it for 24 hours at 220F, then sealing it in a plastic bag while still hot to prevent it from picking up moisture from the air. The timer on my toaster oven only goes to 10 hours, and I haven't had a problem with 10 hours at 220F, as long as I haven't tried very large pieces of wood (such as bowl blanks).
  • Stabilized wood has a few benefits. The open pores in the wood have been filled with the acrylic resin, which is then set by heat. This means that the wood will be heavier and harder. In the case of ring-porous woods, the variation in hardness between early-wood and late-wood will be lessened by the stabilization, making the wood more uniform and easier to carve. Finally, the wood will move much less due to moisture changes.
  • Yes, you can dye the wood while stabilizing it. I'll be adding a section on that later. Without dye, the stabilizing resin will darken the wood somewhat, similar to coating it in tung oil or light shellac.

Contents

#woodworking #stabilizing

Discuss... Reply to this in the fediverse: @davepolaschek@writing.exchange