On Friday, we went to the local farmers market for the first time since my back surgery. I brought the cane I made for myself in 2016 before getting my knees replaced, since the parking lot where the market is held is uneven and I didn’t want to trip and fall.
One of the guys who’s there every week noticed my cane, and asked me where I had found it, since he’s also a large gentleman, and has had real problems finding a cane that’s rated for his weight. I told him that I had made it for myself as my first woodworking project, and my guesstimate was that it might support a 500 pound person, so I probably had a decent safety margin at 280.
“Could you make one for me?” “Sure, though I’m not sure when it’ll be done.” “No hurry.”
But the farmers market is done for the year on the first Friday of October, so that’s my deadline.
So here we go.
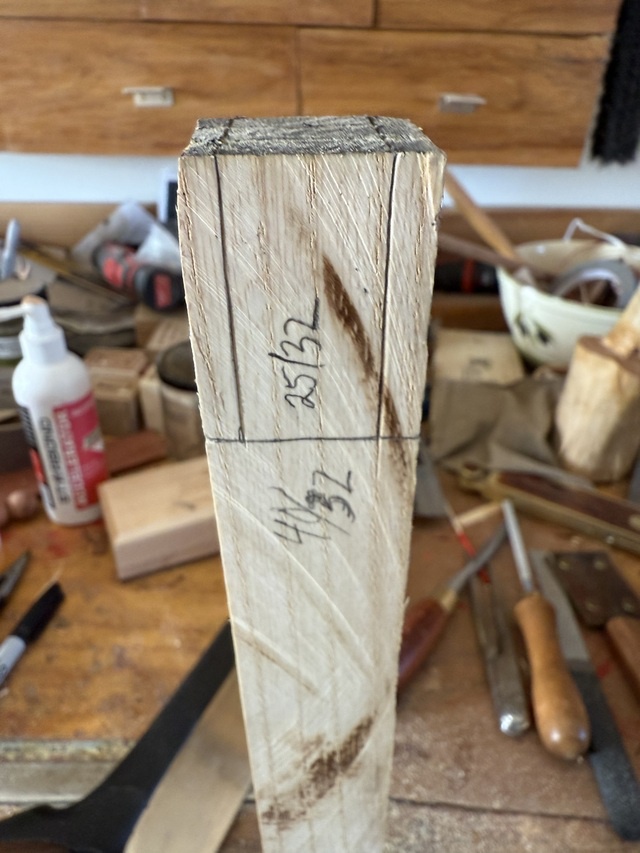
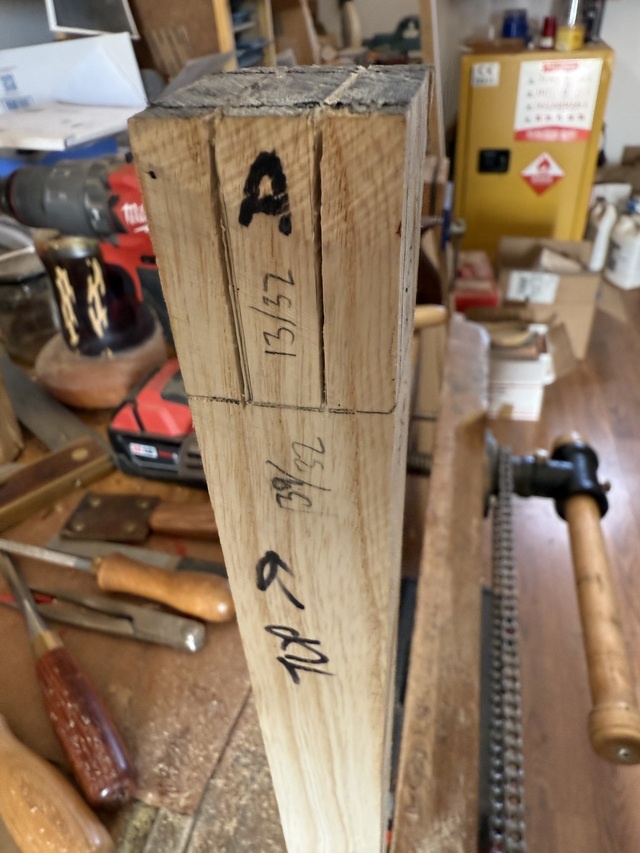
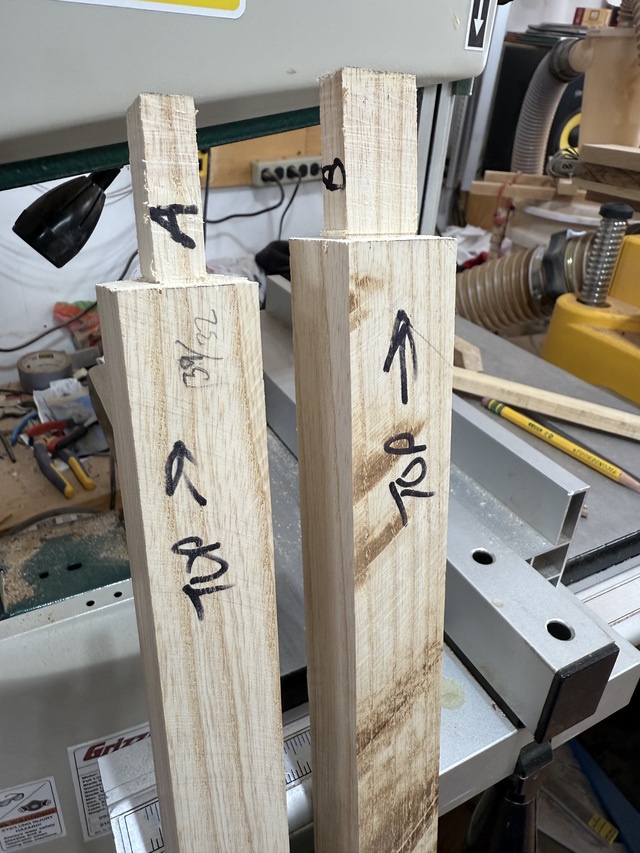
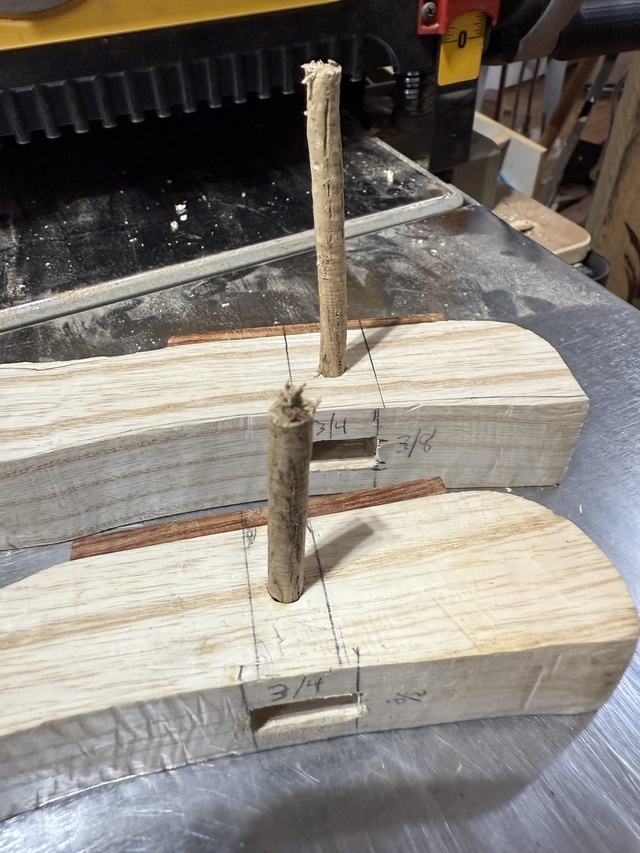
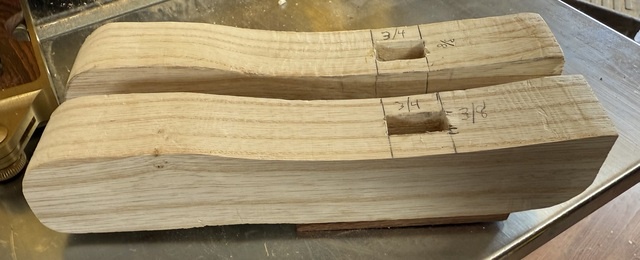
Yesterday I started the build. Found a 1½ inch square ash offcut (from chair legs for my even-slower moving Jimmy Possum chair) with straight grain. Measured it, and it’s just long enough to make two cane handles, so I cut it in half, and started shaping it with my bandsaw, a coarse (12 inch 6 grain) rasp, and a spokeshave.
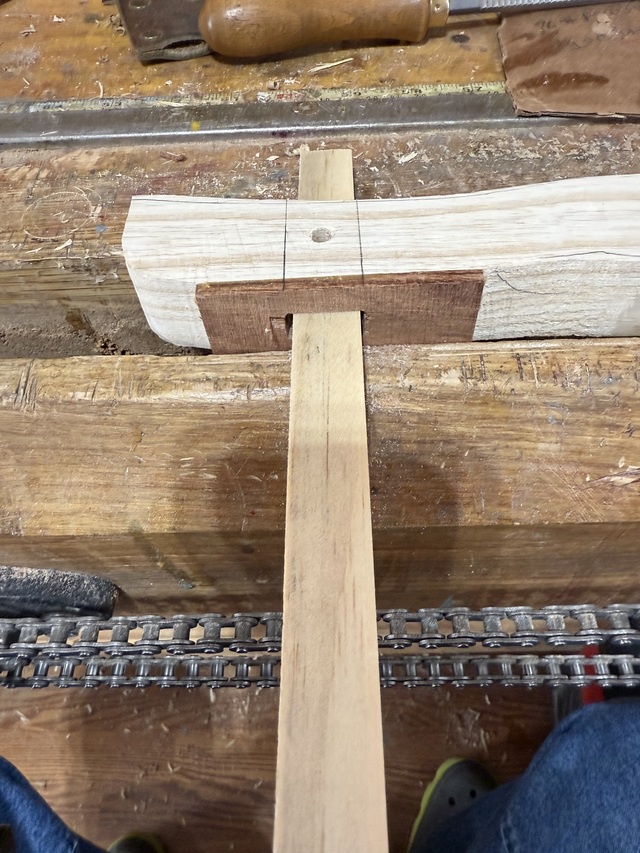
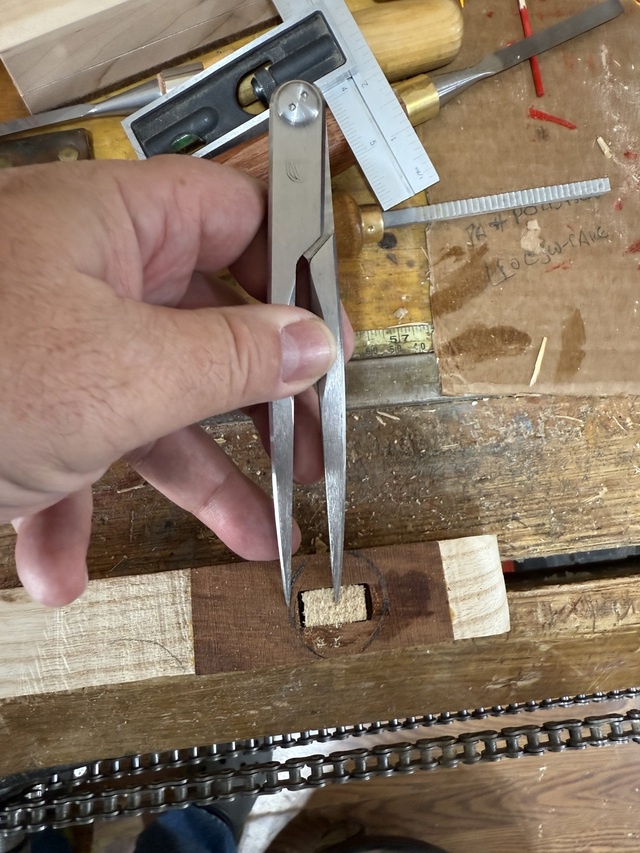
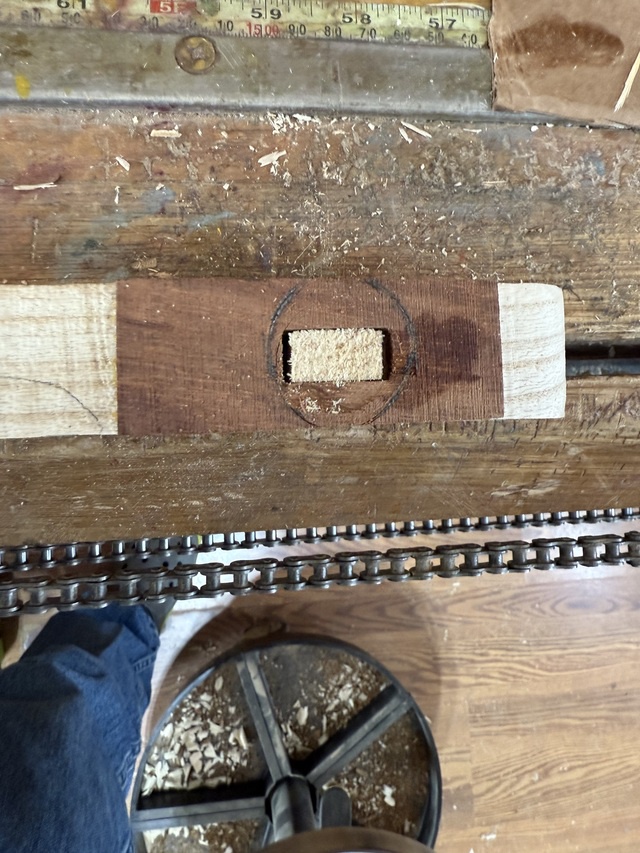
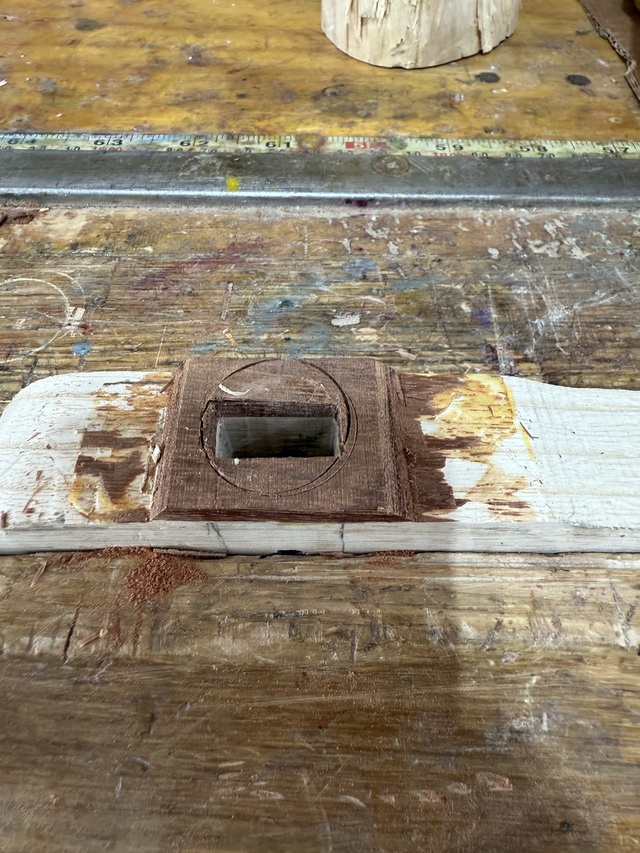
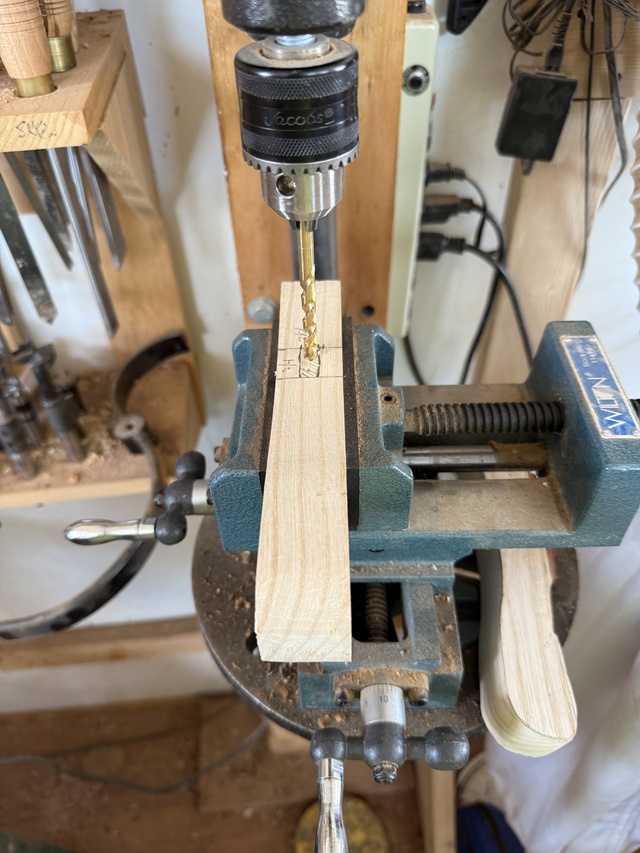
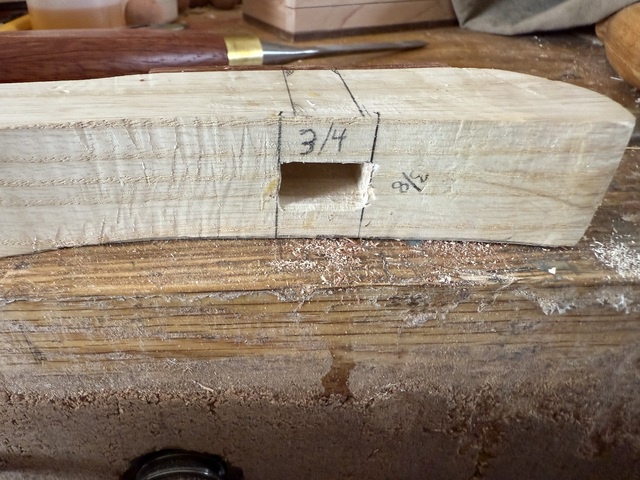
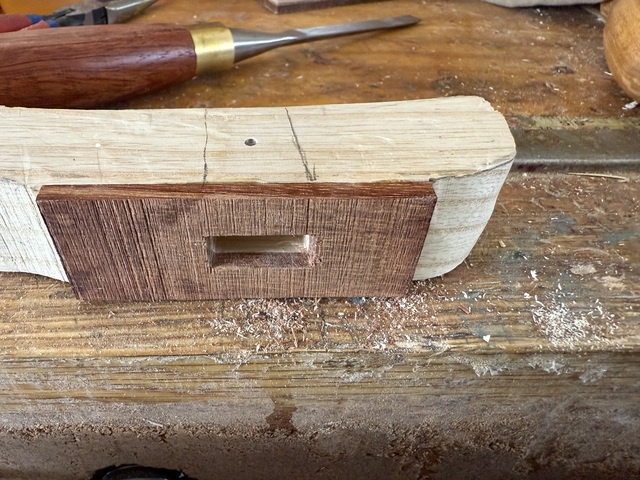
Once I had most of the shaping done around the top and bottom, I glued a small scrap of granadillo onto the bottom of the handle, where the shaft of the cane will be mortised in, and then marked it for drilling the mortise. The flat piece of granadillo will rest on the bed of my post drill, giving me a flat surface to index on, and the flat sides of the handle will let me clamp it securely in place. It also will make a dark band just below the handle, which ought to look nice.
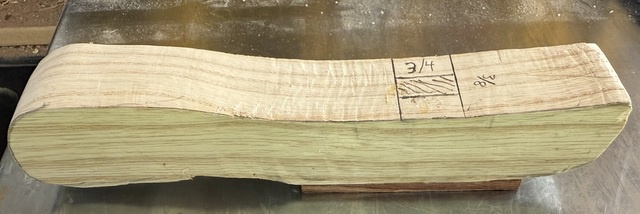
I then repeated all these steps with a second handle. Tomorrow I’ll drill and chop the mortise while I still have flat surfaces to work with. I’ll also try to grab one of my neighbors to help hold my slab of ash so I can rip a 1⅜ inch piece off the side of it with the table saw, and make two cane shafts from that, since I’m limited to lifting no more than 10 pounds until my spine heals more.
Discuss...
Reply to this in the fediverse: @davepolaschek@writing.exchange