Earlier in 2025, I read an article about the MomBoard and thought that was a pretty damned good idea. So I started putting pieces together.
The hardware
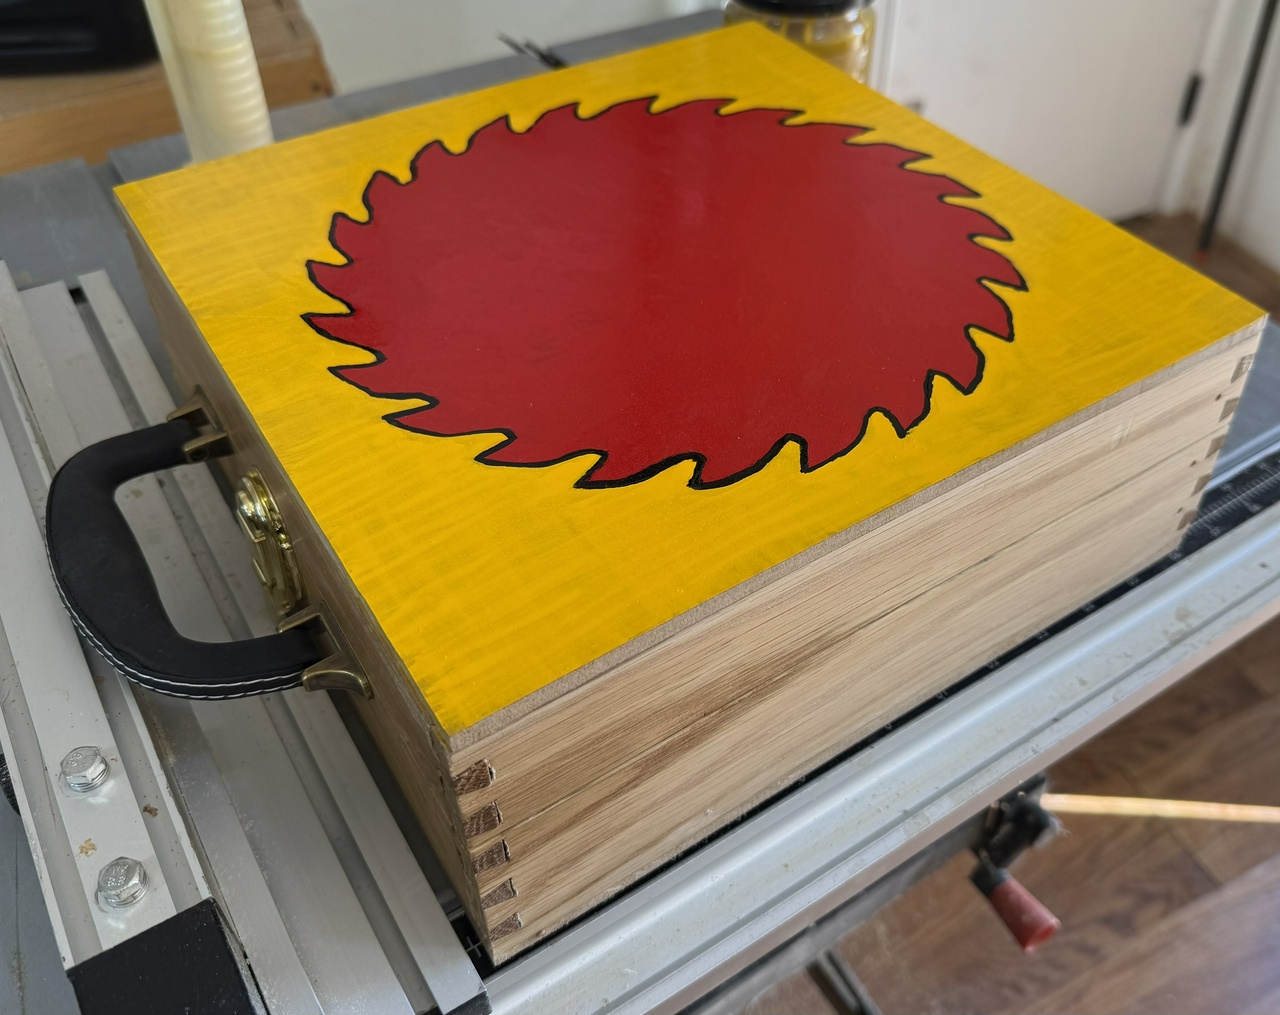
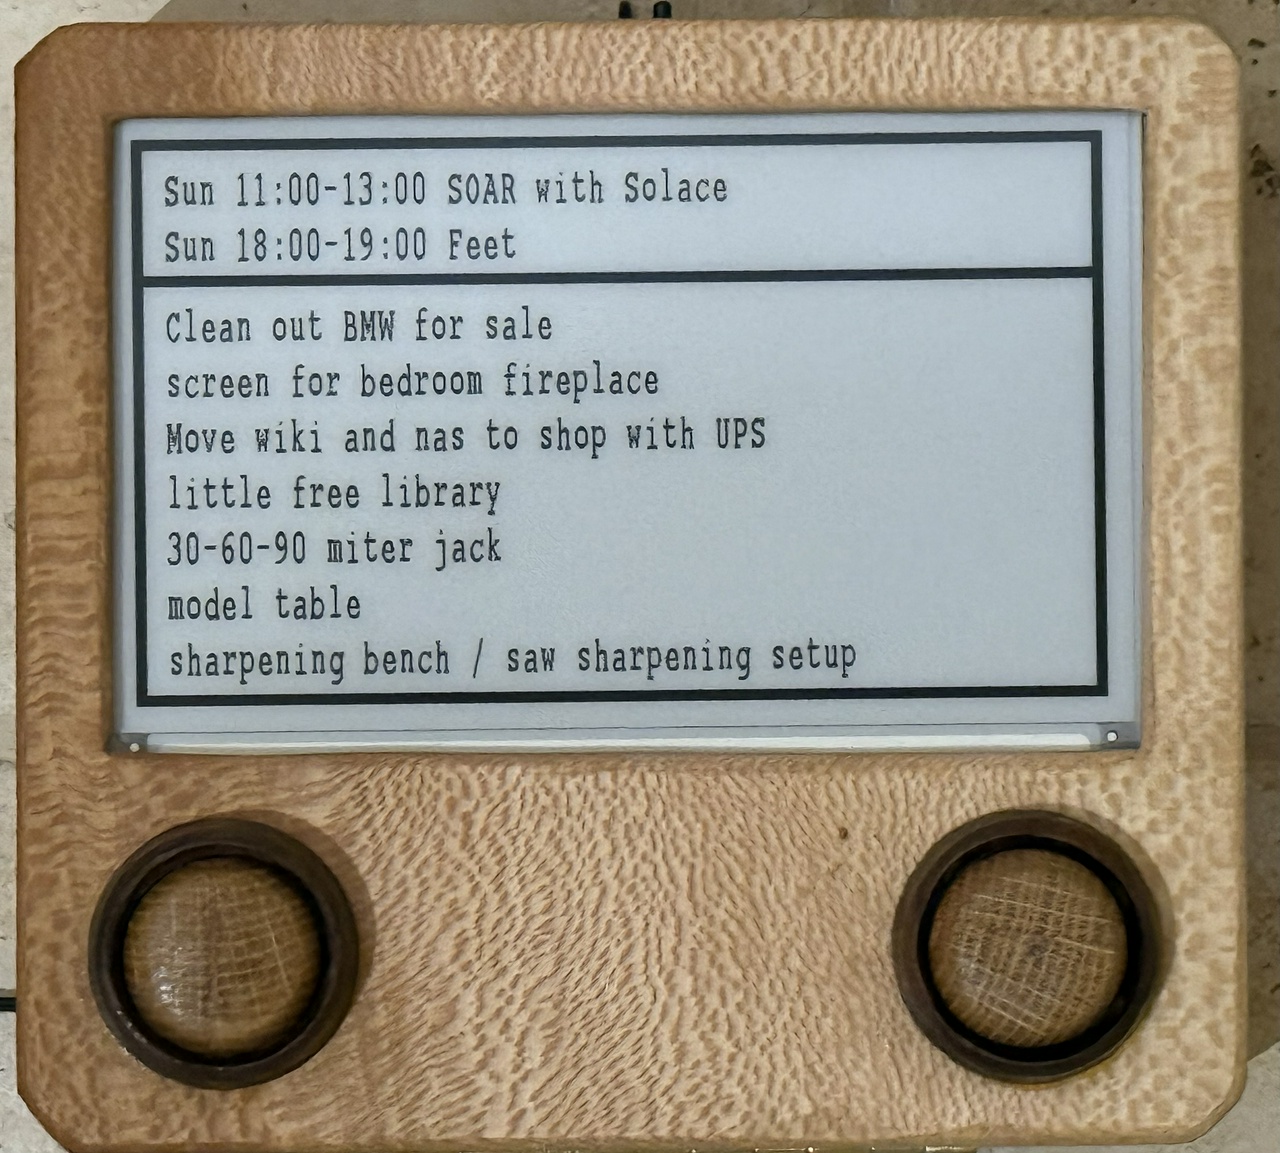
I grabbed an old Raspberry Pi 3b, which I had originally gotten as a Pi-Hole back when I was living in Minnesota. I built a wooden box to hold it, plus an eInk display I picked up and a cheap USB-powered fan which turns out to be unneeded.
The software
Software-wise, I installed vdirsyncer and khal and configured them so I could fetch my calendar events from iCloud (you need to make an application-specific password to get that to work). Note that I would not do this again, as vdirsyncer is no longer supported and pimsync isn't quite ready for primetime. Also, both that and khal are python applications, which leads rapidly to dependency hell.
I wrote some PHP code to massage the text around to make it look like I wanted, and then I modified WaveShare's sample code to put those massaged lines of text on the screen (I scaled up their 20-point courier font to a 36/40 point font so I could read the text from a little farther away, too).
Note that the khal configuration got tweaked, adding agenda_day_format = [newline] in order to disable the day headers, and then I tweaked the event_format (or was it agenda_event_format?) so it would display the date on each event. I wish there was an easier way to go back to the default configuration so I could diff the configs.
I also needed to make a shell script to call everything. As it's going to be called by systemd (unless it's not), the script needs to make sure it's got the correct working directory. I also did set -e to make sure that the script exits if some command within it errors.
Finally, after running things for a while, the epd code that displays things started crashing. Turns out the problem was curly-quotes in both my Todo.txt as well as in some calendar entries. So I run everything through iconv(1) before handing it off to the epd app to display.
Systemd?
After fiddling with systemd for a few days, and determining that vdirsyncer and khal both need to be run as me (as I installed them within my user, rather than system-wide, because python dependencies suck). It's possible to do that with systemd, but it's a lot more pain than I'm after, so I dumped that approach.
rc.local
Simpler is better. I put a call to my do-cal.sh script in rc.local. Initially that had problems due to running as root, rather than me, so vdirsyncer wasn't picking up where my calendar lives. So I added the following line to rc.local:
/bin/su -c "/home/davep/shop-calendar/do-cal.sh" - davep
That did the trick, running my script as me, and everything seemed to work just fine. After a few mornings of manually shutting down the pi after the update was done, I put the sudo shutdown now back into my shell script, but after a sleep 300 so that I have a couple minutes to get into the pi should something go wrong.
As for controlling when the pi boots up to update, I'm using a cheap lamp-timer from the hardware store. It powers the pi up early in the morning, and then shuts off the power after about a half-hour (the smallest on-time possible with this timer).
Getting the time synced
I also discovered that I need to wait for the Pi’s clock to be set correctly, so I had to add code to the script to loop until /run/systemd/timesync/synchronized exists. But I also ordered a RTC shield from MicroCenter so that the pi doesn't have to ask someone else for the time.
Looking back
As for the fan, after getting everything up and running, I determined that the steady-state CPU temperature with the box closed up and the fan running was about 35°︎C, and with the fan disabled about 51°︎C, which is still well within the safe operating range. I’ve left the fan in the box, as I may need it after a couple years worth of dust accumulates. I may add a display of the CPU temperature taken mid-script to the output.
Hat-tip to SystemSix
John Calhoun also did SystemSix which I read about before starting this, but couldn’t remember until after I was mostly done. But John’s art may well have been the bit that planted the seed that became my project.
#tech #calendar #piProjects
Discuss...
Reply to this in the fediverse: @davepolaschek@writing.exchange