davepolaschek

project

Originally written Dec 26, 2017

My house in Minneapolis had piano windows (which were apparently a sign of bourgeois striving ) in the dining room which looked out over the back yard. The house had been built in 1929, and had good bones but it wasn't in the best shape when I bought it. When I had the stucco replaced on the house in the summer of 2017, I had the exterior windows on the piano windows replaced as well, and figured I should replace the interior windows. With winter arriving, it was time to get them done. I started by pulling all the hardware from the windows and stripping the many layers of old paint from them.

Windows with the majority of the old paint stripped

They were in pretty rough shape, but I didn't think I had the skills to recreate them from scratch yet. So out came the glass, and I stripped them a few more times to get as much of the paint, plus various patches done by previous owners of the house off.

Completely stripped windows with the glass removed

The windows were rotted in spots, and some of the muntins broke when I pulled the glass, so I glued them back in and cleaned things up with scrapers and knives to get the windows as bare as possible.

Detail of the muntins with most of the old paint, glazing and putty removed

Then it was time to stabilize the rotting wood. My hardware store guy recommended Minwax Wood Hardener. Since he had been glazing and repairing windows for nearly fifty years, I figured I'd listen to him. It took a few applications, but basically you slop on the wood hardener, letting it soak into the rotted wood, and then let it dry. Sand off any excess or rough spots. Repeat until you've got solid wood and hardener composite. I think it took three applications to get them solid enough that I felt comfortable calling it good.

Windows after application of wood hardener

A coat of primer and two coats of paint later, and it was time to take the windows to the hardware store for glazing. Then I needed to strip the dozen or so coats of paint from the hinges and latches. The hinges were cheap plated steel under all the paint and thin brass plating, so I ended up buying new hinges, but the latches were more sturdy construction. I may brown them with Birchwood Casey Plum Brown come warm weather, but for now everything is back together and the windows are keeping the cold at bay.

One completed window

Completed window, swung open so the outside side is visible

Not so much a wood-working project as a restoration, but it was a good learning experience. I had dozens of hours spent with these windows through the year, and there are two more similar windows (but in even rougher shape) left in my house. I might rebuild those from scratch, as I think I'm close to knowing enough to build and assemble all the pieces from scratch now.

Both completed windows

#woodworking #restoration #project

Discuss... Reply to this in the fediverse: @davepolaschek@writing.exchange

Originally written August 20, 2021

I blogged the construction of these over many of the months I spent building them, so if you want excruciating detail on the construction, the previous entries in this series is place to look.

Short version, each shelf is a separate box. Should I ever need to move again, I can fill each box with packing paper, then screw a front onto the box, and it's ready to move. Some of the largest cases will be heavy for one guy to move, but I can pick up every one of them myself if I have to. And should I decide to rearrange them, I can do that without taking all the books out of the cases.

They're built of ¾ pine. Mitered through-dovetails on the corners, with the back rabbetted in, and in most cases made of two boards ship-lapped so they can move with the changing humidity. The backs are glued top and bottom, and nailed on the sides, again so they have an opportunity to move without tearing themselves apart.

I count 70 boxes. Took me over a year, but there were plenty of distractions along the way. When all is going well, I can complete about three or four boxes in a week, including finishing, which is two or three coats of shellac.

The bedroom bookcases - the tallest stack is 9 cases high

The hallway cases, plus a stack behind the door between the bedroom and the hallway

The art-book cases, a single stack of four cases in the living room

Thanks for looking!


Jefferson Bookcases Contents #woodworking #bookcases #project

Discuss... Reply to this in the fediverse: @davepolaschek@writing.exchange

Jun 27, 2021

Built for the 2021 plane swap on that woodworking site I don't participate in any more, this was a fun project for a lot of different reasons. The main disappointment is that it was for a swap, so after it was built, I sent it away. But then someone else got to enjoy it, so there's that.

A low-angle infill plane with yellow-painted metal bits and white oak furniture, viewed from the left side

A low-angle infill plane with yellow-painted metal bits and white oak furniture, viewed from the right side

For the plane swap this year, I wanted to build something a little different. I have a stash of Stanley Global Plane #3s that I bought cheap on eBay from a seller in Canada when the exchange rate between the dollar and the loonie got fairly lopsided, so I decided to infill one.

But just a normal infill plane didn't seem challenging enough. Let's make a low-angle bevel-up plane from it. That should be a good challenge!

So I started out by removing the plane hardware and trying some things. One of my very first discoveries was that I would need to modify both the mouth and the bedding for the blade to achieve what I wanted.

First attempt at infilling the plane, with red eucalyptus knob, and a spruce rear infill while I tested some ideas

But I had a Veritas plane kit on hand, and I was pretty sure it worked with most of the smaller Veritas blades, so I ordered a spare blade for their bevel-up smoother that matched the size of the #3. I also initially planned to do the infill with some eucalyptus I got from AZWoody, but that plan fell by the wayside… Mostly because the eucalyptus from Arizona is brittle and hard to work, but also because I discovered I had a very nice bit of white oak in the shop. I bought a 6 foot long 10 inch wide 12/4 board a while back, and there was a knot near one end. The remaining bit on that end of the board looked like it would make a great infill for the plane.

White oak furniture for the plane - perhaps that will work

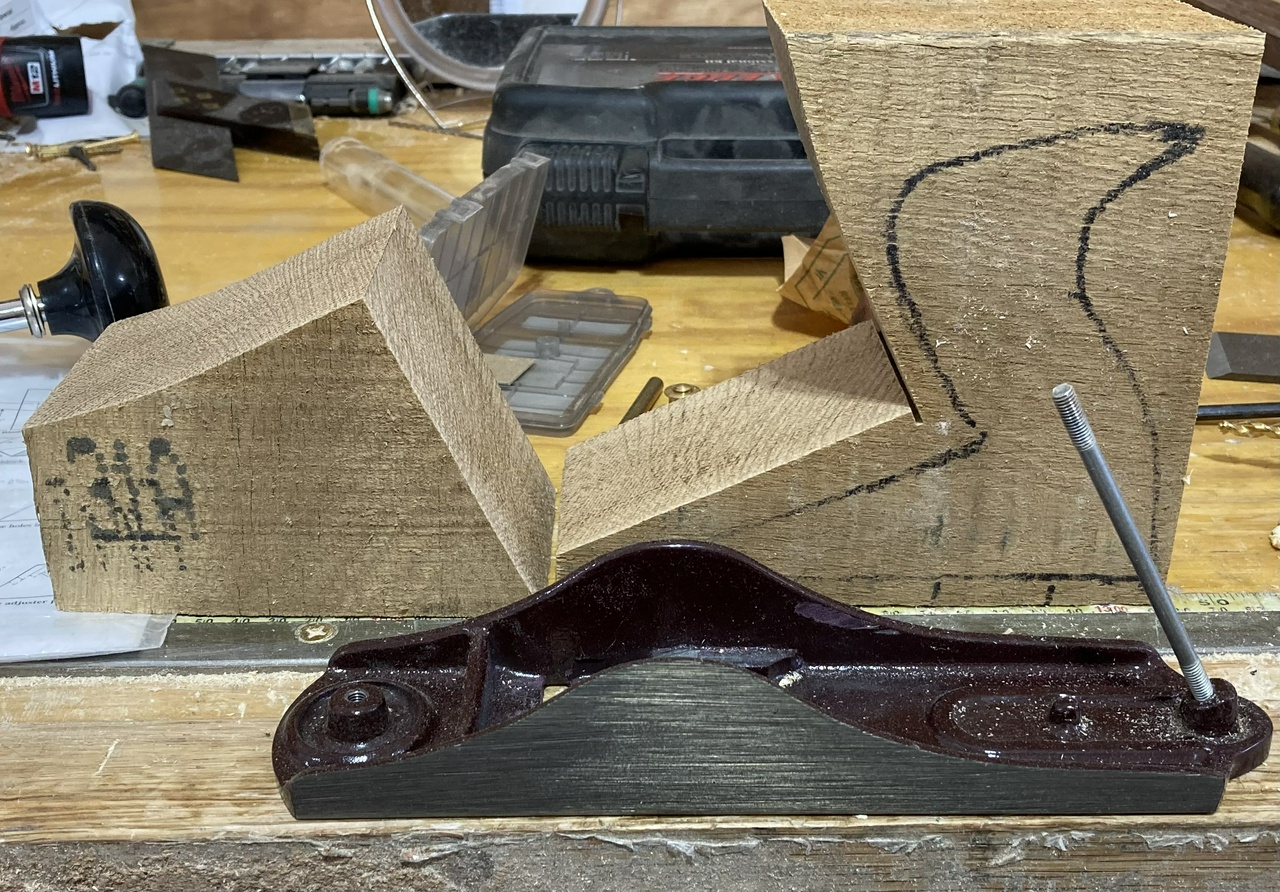
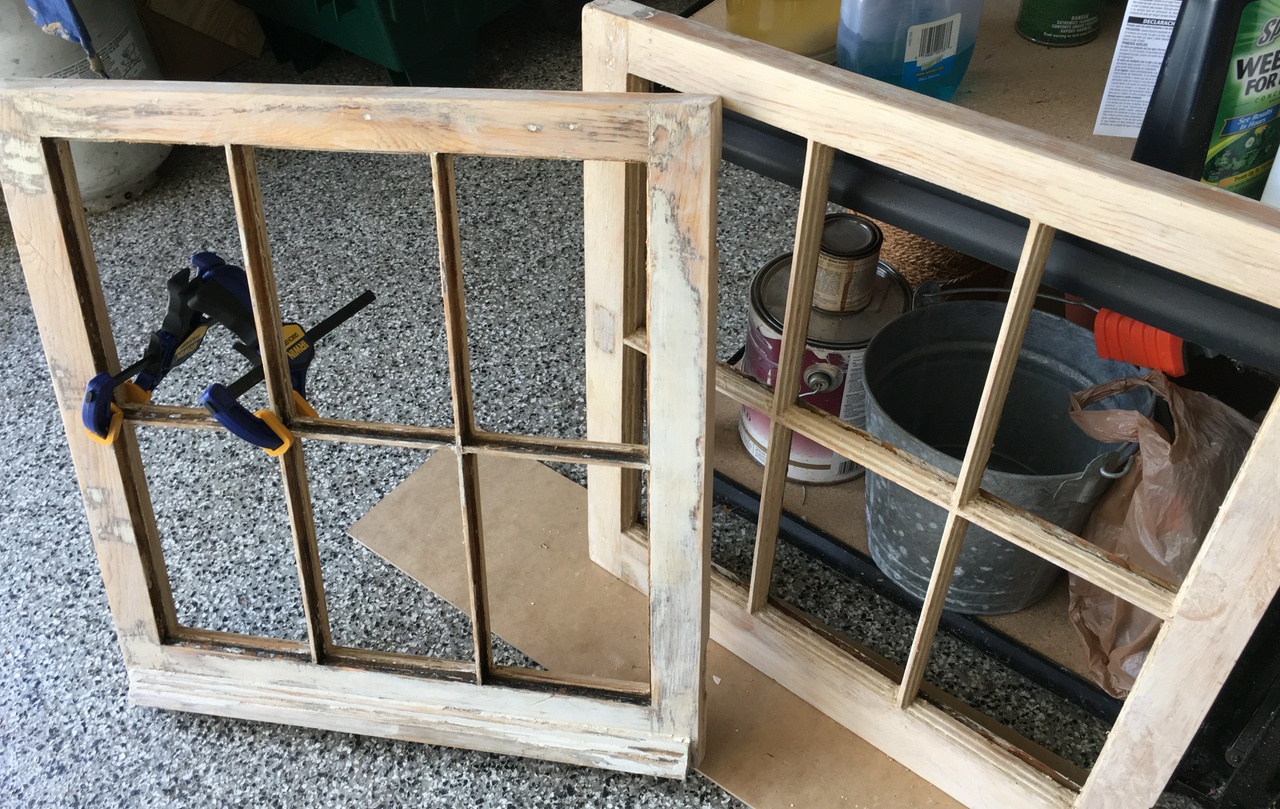
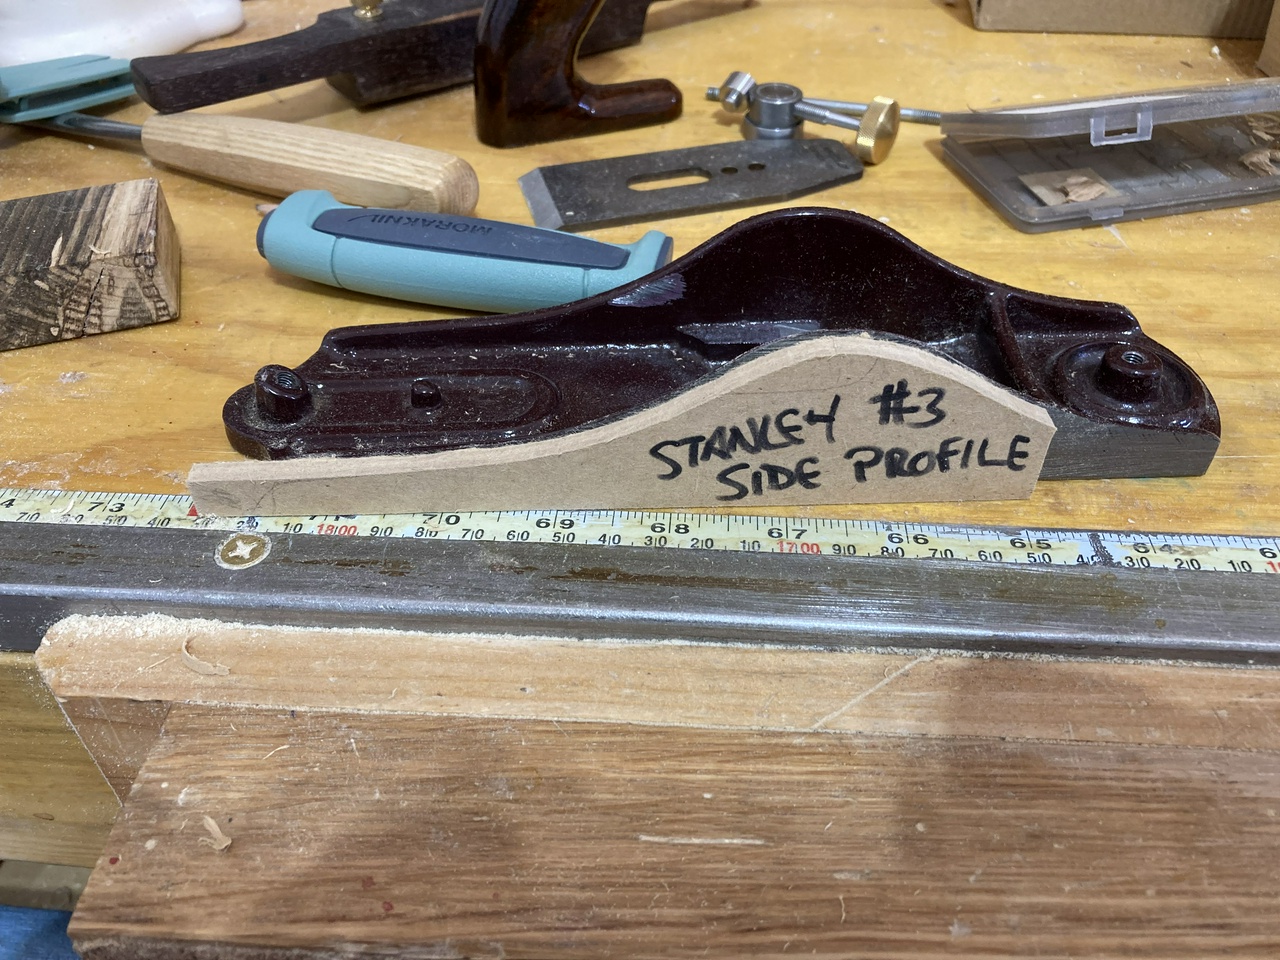
I set aside my pieces of oak and went to work with a chunk of spruce from a tubafor as my prototype, and made some templates from MDF so I could try things out as I experimented.

The plane with an MDF template next to it, matching the side profile

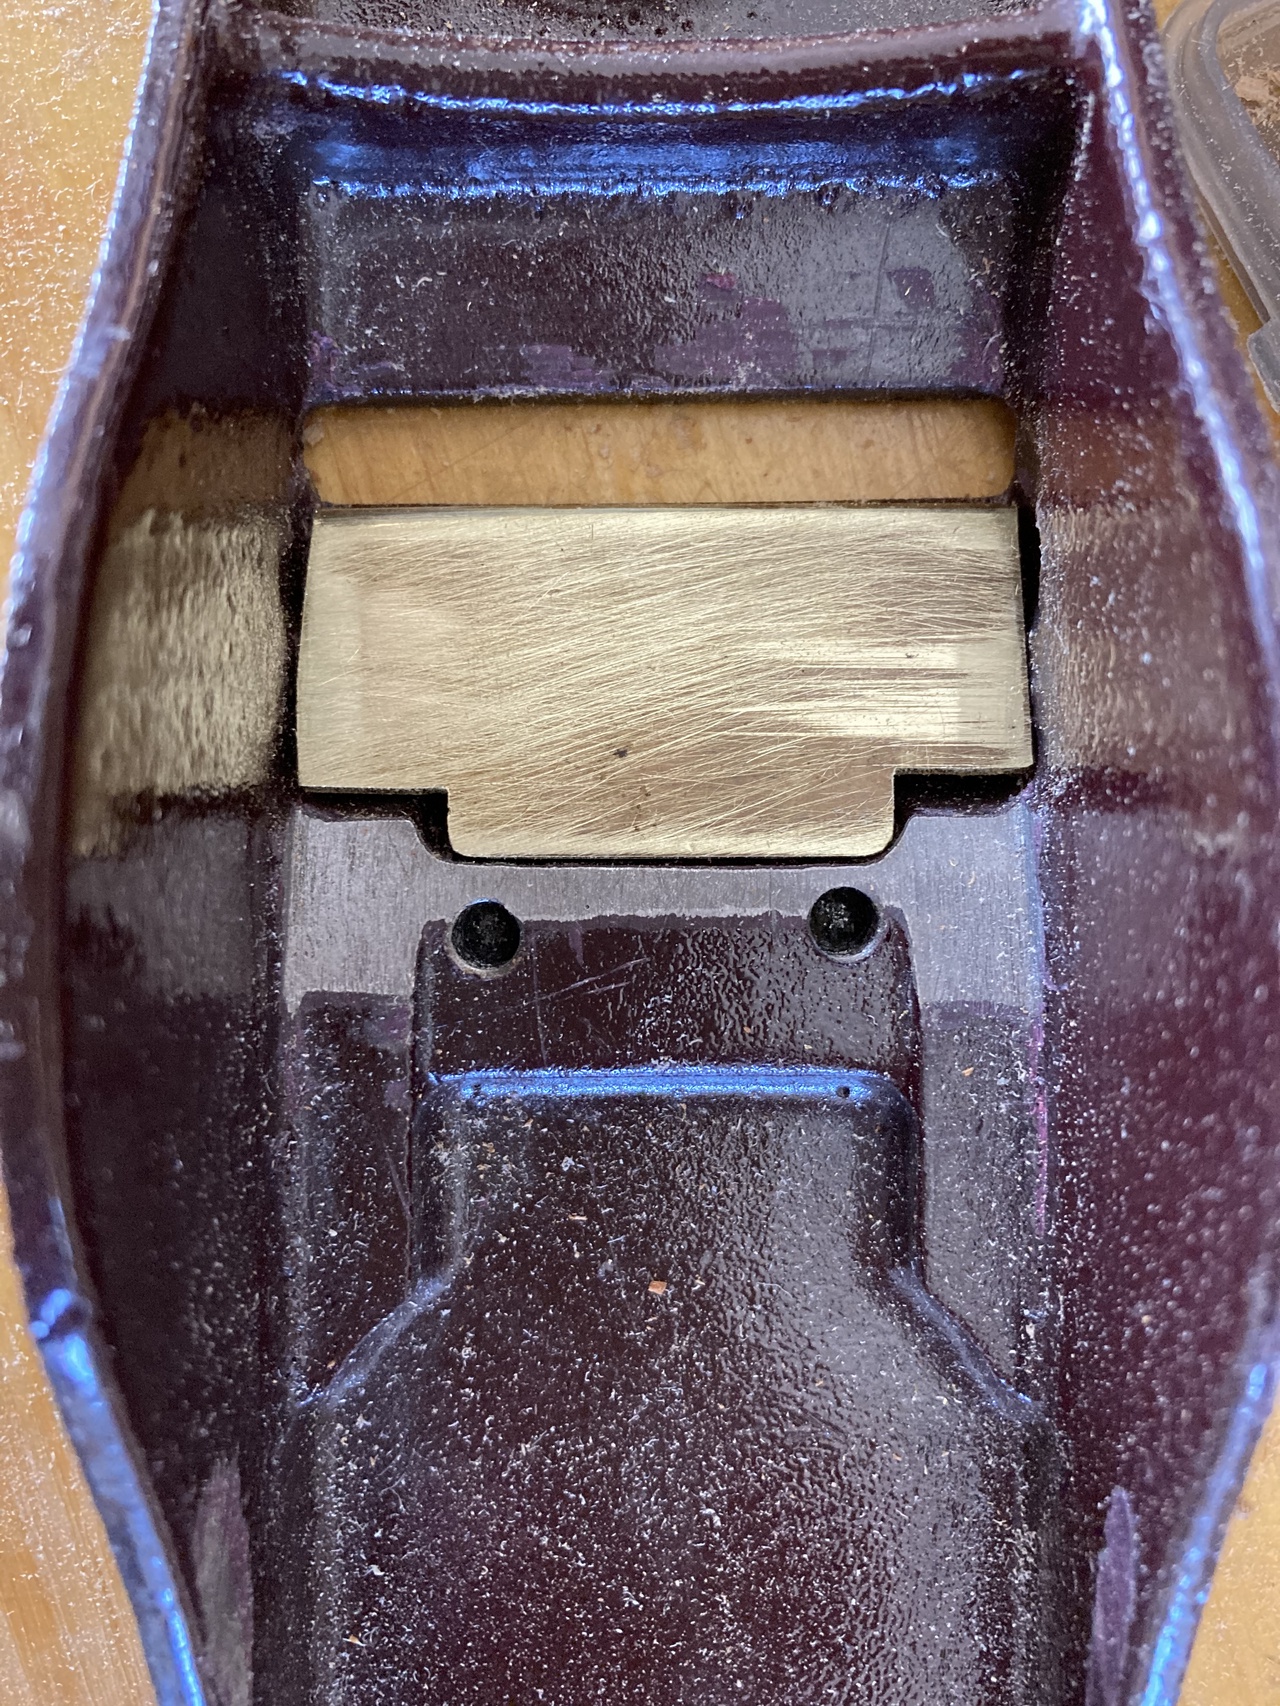
First thing I discovered was that the blade would be unsupported without the factory frog in place, so I cut a piece of brass to fill the area immediately behind the mouth with metal, giving me solid support for the blade where it would need it the most. I epoxied this into the plane body and set to work with a file making a smooth transition for the blade or infill to rest upon.

The brass support ramp, epoxied into the plane body behind the mouth

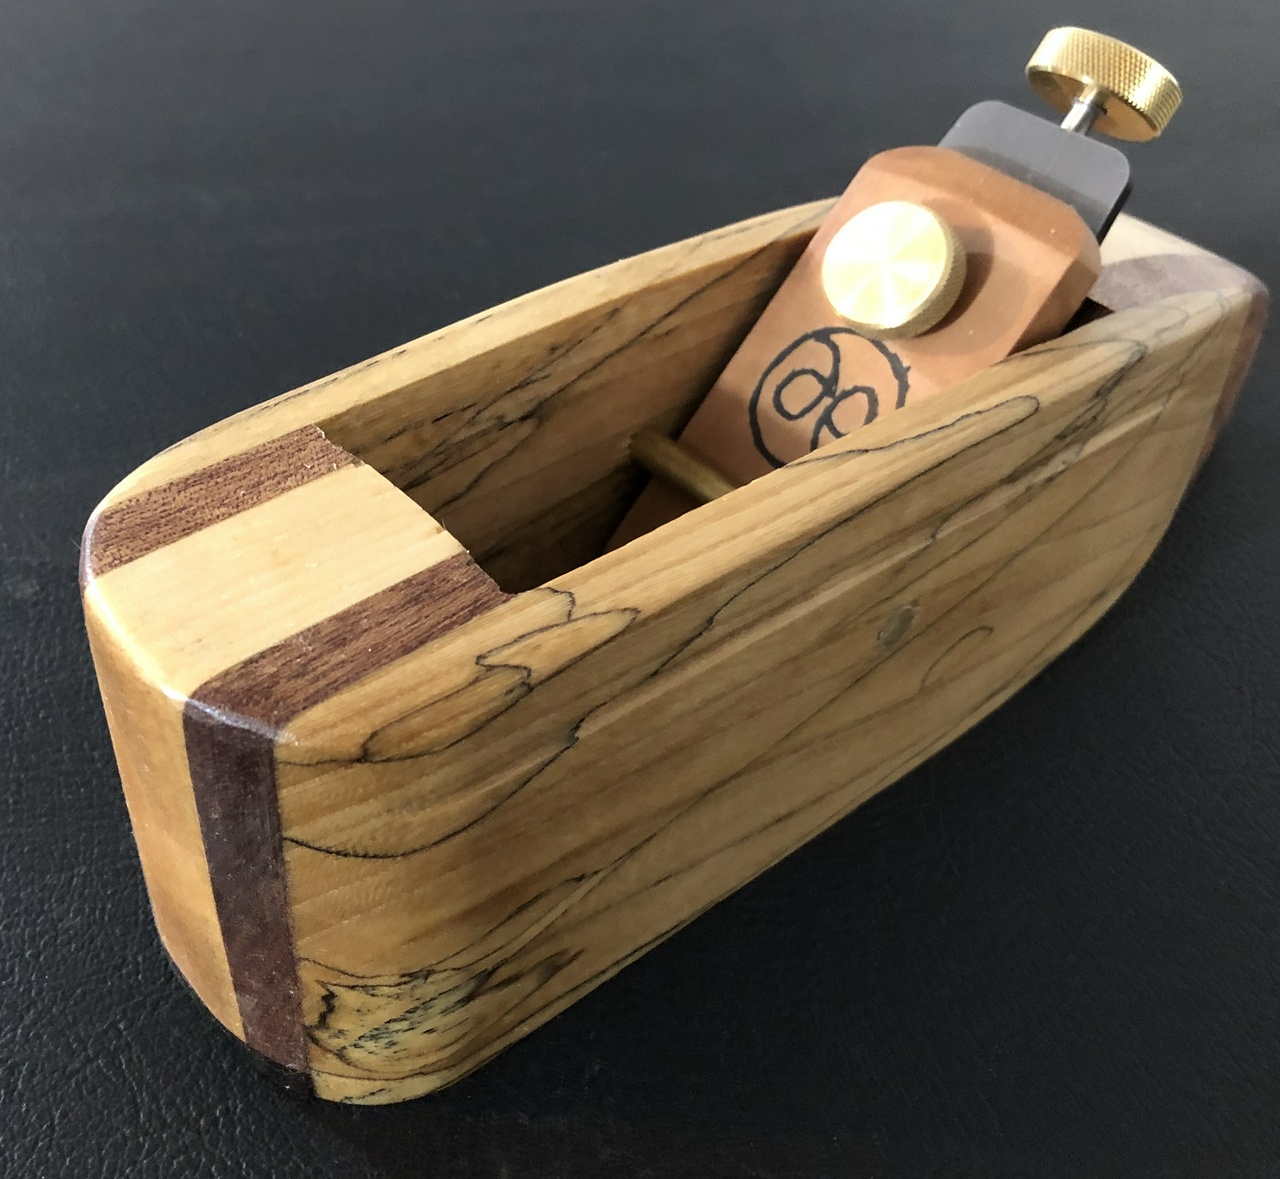
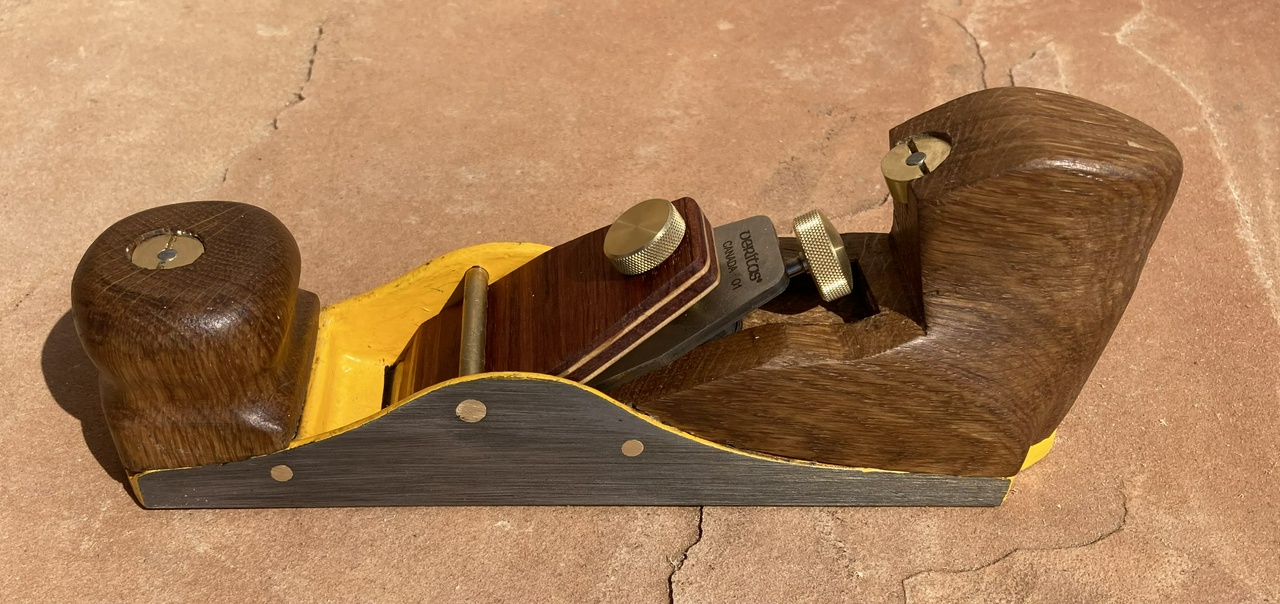
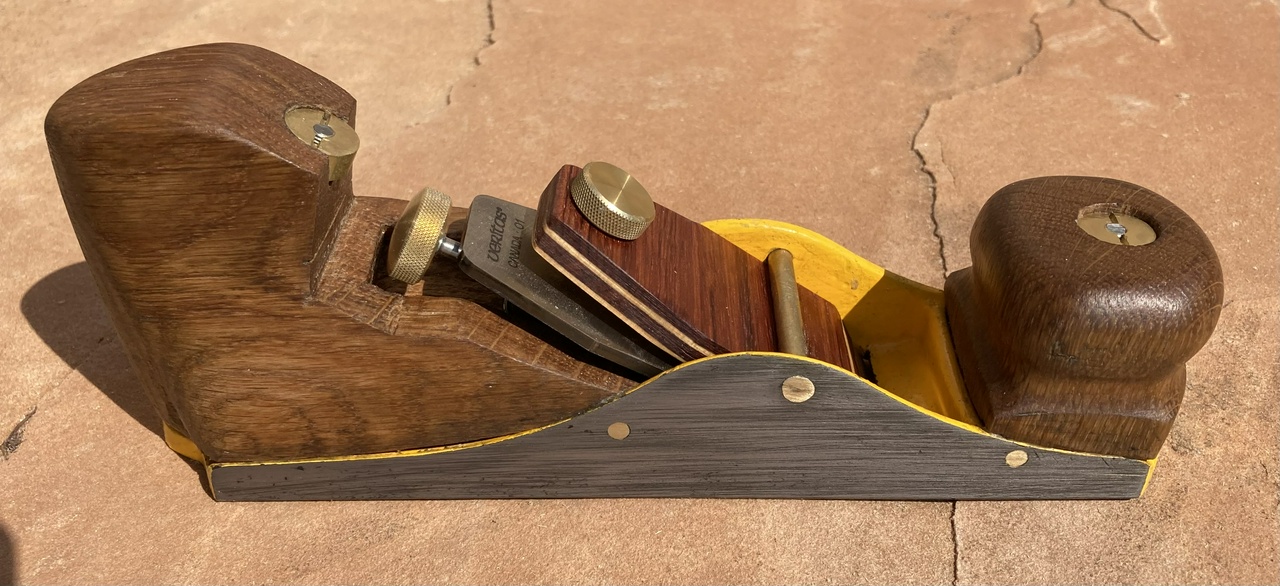
I also decided that I wanted to dress the plane up from the stock purple that Stanley chose. I had some Chromium Yellow (aka CAT Yellow) lettering enamel laying about, and decided that would look pretty good. It's not a sansoo-level paint job, but I think I did okay. I think there were four coats in most places.

Plane with oak furniture and the yellow paint covering up the factory purple paint job

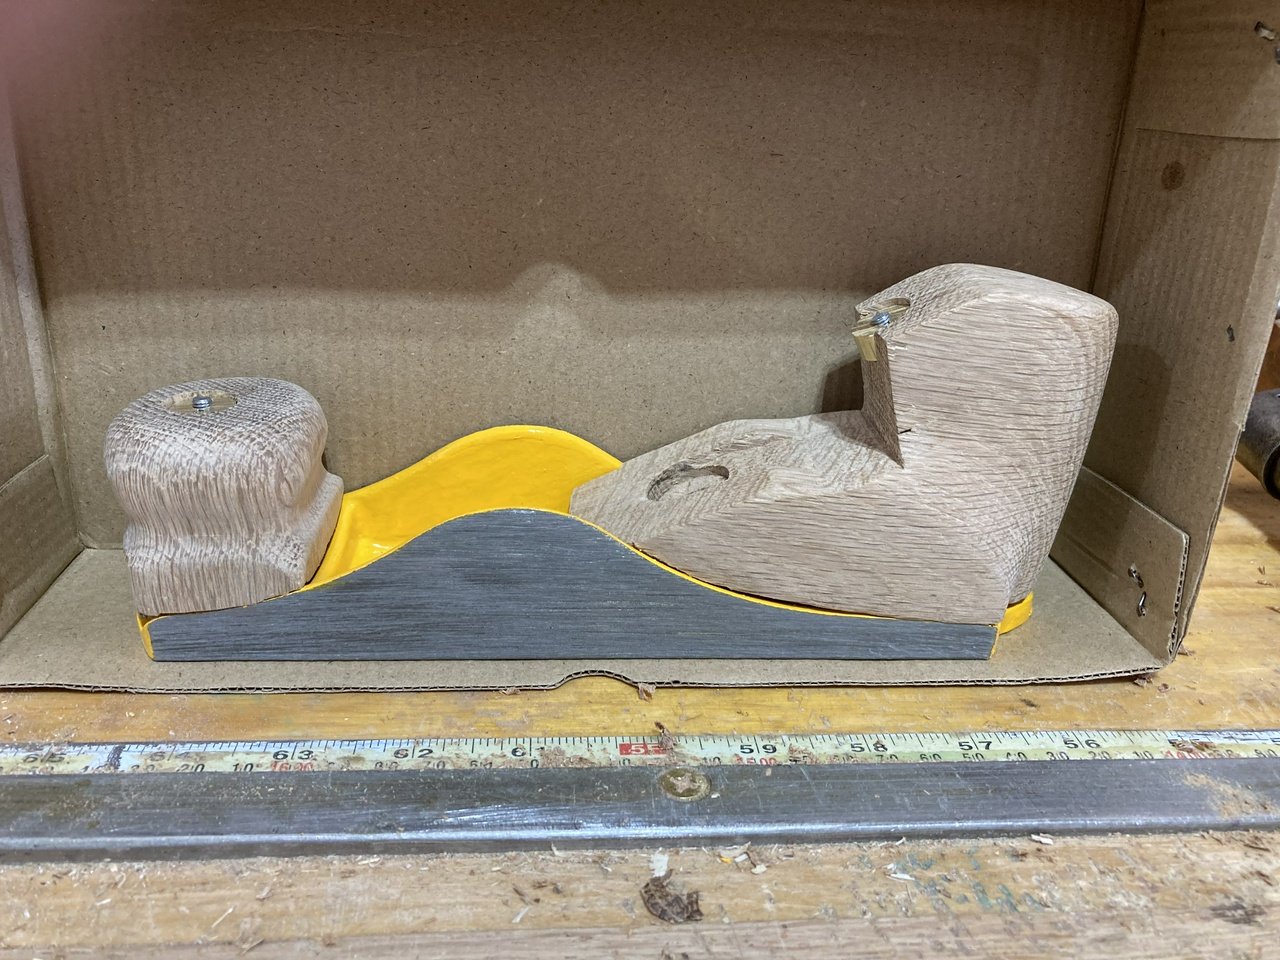
I was also working out the geometry of the plane, and knew that I wanted to use the original bolts to help hold the infill pieces in place. I wouldn't be able to do a tote like I had initially planned, but I got something that felt okay in my hand, which used the original bolts.

The roughed-out oak furniture in the plane

But the nuts that came with the plane wouldn't do, so I found a piece of ⅝” brass rod, and fashioned some new nuts for the plane. Rather than turn them into hex nuts or something that was a lot of work, I decided to make them split-nuts so I could use a driver I already had (and that just requires sawing a slot).

Brass round nut with a slot, similar to the split-nuts used on saws

The bolts in this Stanley plane were 12-32. I don't have a tap and die for that, but I do have a set for 10-32, so I left the bottom ends stock, and reduced the upper ends of the bolts to 10-32 so I could tap the nuts to match. It's pretty easy to reduce the diameter of a bolt a little while not changing the thread.

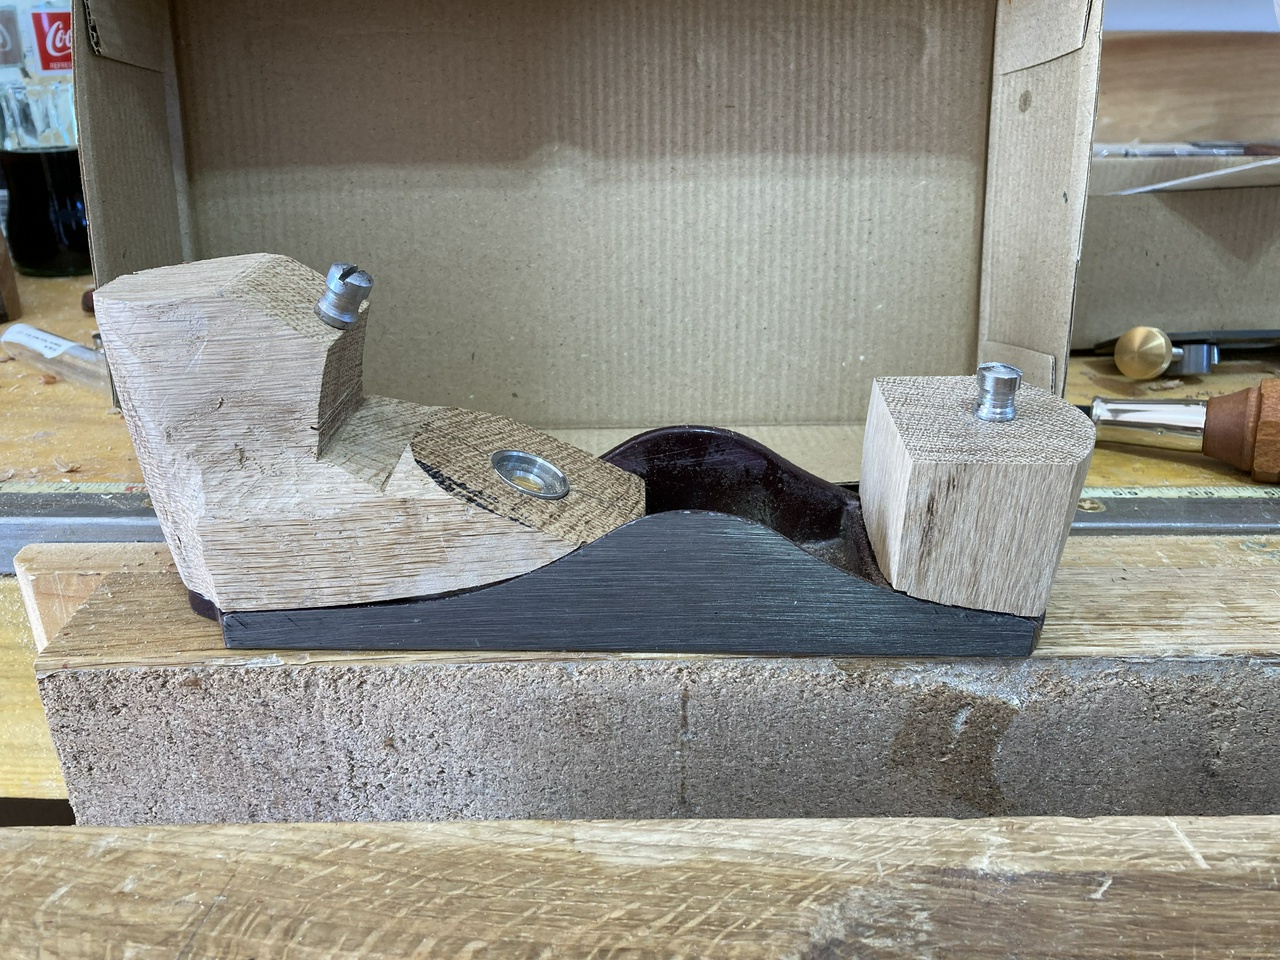
As I worked, I ended up cutting off the tip of the rear infill and making it a separate piece. This meant that I had better access to it to shape it to match the slope I needed to bed the plane but I had to file down the heads of the factory screws a bit. But things were taking shape!

I drilled the holes for the cross-pin. The stock one from the Veritas plane kit wouldn't work, because it was too short, but I have a bunch of ¼” brass rod on hand. Turns out it's actually 15/64, but drilling a ¼” hole still worked, I just needed to make sure I didn't widen the hole too much.

I also drilled holes for screw the infill into place. I used #8 brass wood screws, countersunk just enough that when I filed off the head of the screw down to the bottom of the slot, I would be down to the side of the plane. My post-drill was getting quite a workout, and I spent quite a bit of time filing the screws, and peening the cross-bar into place and filing the ends of that smooth.

My first attempt at assembling the plane didn't go so well. With the blade not fully bedded, the chatter when trying to plane was horrible. I almost gave up and moved on to plan B, but I figured I'd give it one last try and took things apart and cut deeper grooves for the adjuster to ride in, which also meant making a deeper space for the adjuster knob.

With those changes made the plane suddenly worked well! The chatter was gone, and it would take shavings. Not great shavings, and the blade was now about 1/32” too long, but making things shorter is easy! Off to the grinder to establish a new bevel on the blade.

With that done, everything went together well, and it was just a matter of finishing it up. Well, almost. The metal plane wedge that I had initially planned to ship was no longer thick enough to hold the (now lower) plane blade securely. And making things thicker isn't as easy as making them thinner. So I got out some bubinga and ash veneer I had on hand and laminated up a new wedge for the plane. I alternated the grains, so the bubinga grain, which is visible, runs cross-wise in the plane body. It looks a little strange, but I like it.

Finish was three coats of linseed oil on all the wooden bits. I let each coat cure for a full day, while I worked on the bonus projects for the swap, and then once the oil had dried, I coated all the exposed metal (and the wood) with paste wax. It looks and feels pretty good, I think.


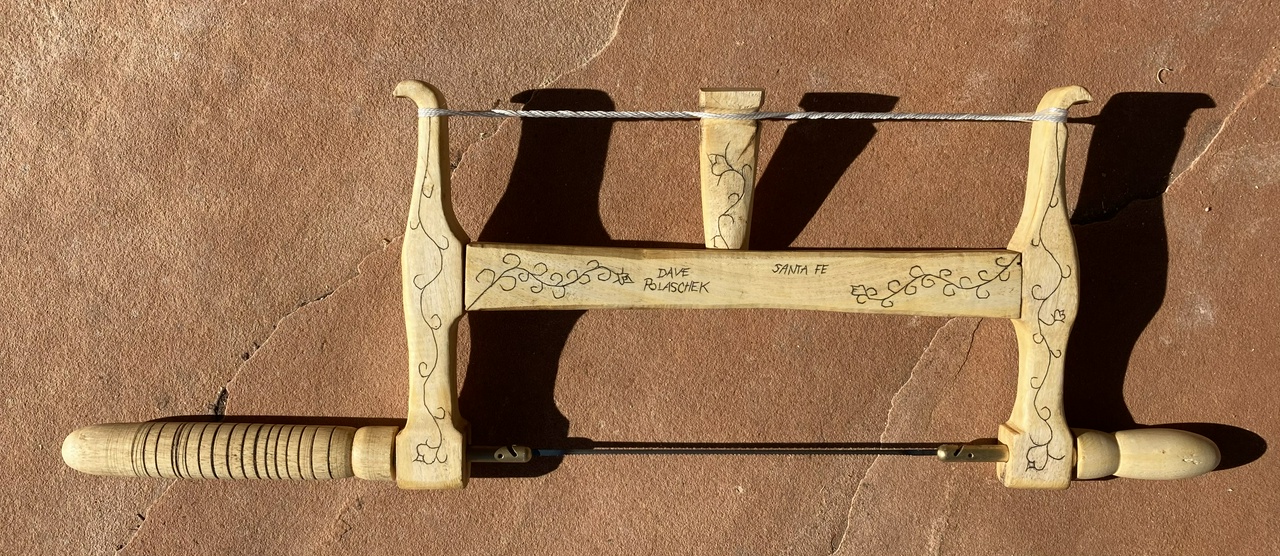
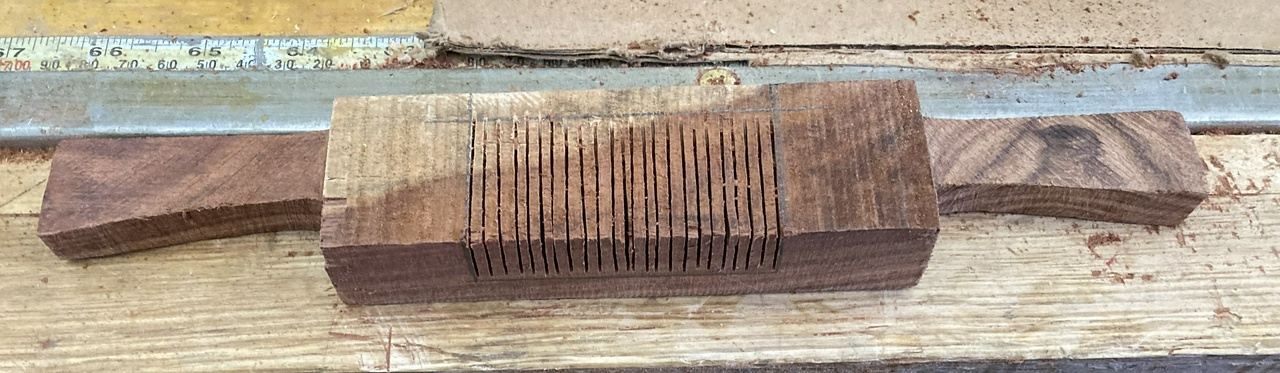
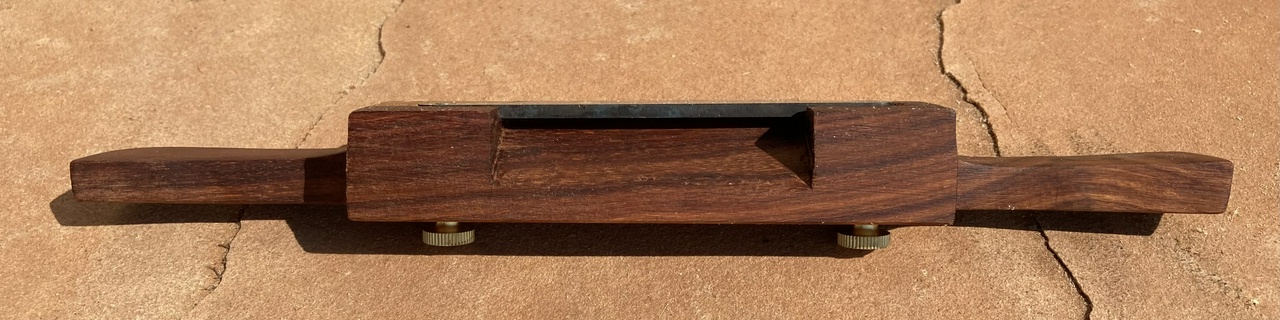
I also included a spokeshave as a bonus. The spokeshave was made from granadillo. I used a Hock Spokeshave Kit, which unfortunately had come without the mounting bolts and thumbscrews. Oh well, the threads in the blade are 10-32, which Ron verified when I emailed to let him know about the missing thumbscrews and bolts, so I just headed to the hardware store. Got a few 3” long 10-32 bolts, and I reused the thumbscrews from one of my own spokeshaves, since I didn't have great luck making my own thumbscrews from brass. I'll fix them up one of these days…

Anyway, I started cutting away some of the waste with the bandsaw, then went to work with rasps, files, hand-saws, gouges and chisels. I also drilled the holes for the mounting with the post drill. Then after setting the blade and making sure it worked correctly, I hacksawed the bolts to length and filed the ends smooth so they won't be an injury risk.

granadillo spokeshave after roughly shaping the handles and making the relief-cuts in the sole, showing the sapwood present in the piece

Having a well-appointed shop made this go a lot quicker than last year's spokeshave which was built before my shop was done.

granadillo spokeshave

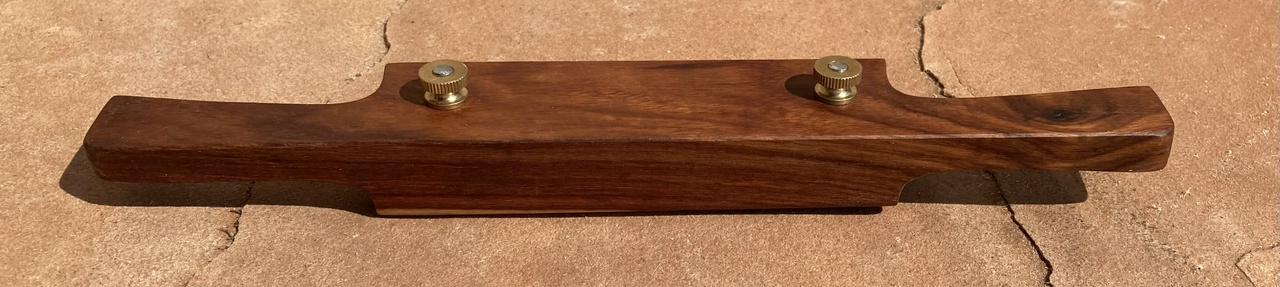
The piece of granadillo I was using had a bit of sapwood on it, too. I had meant to place this on the back of the shave, but I got myself turned around, and it ended up on the sole of the spokeshave. Hopefully it won't wear too fast.

granadillo spokeshave


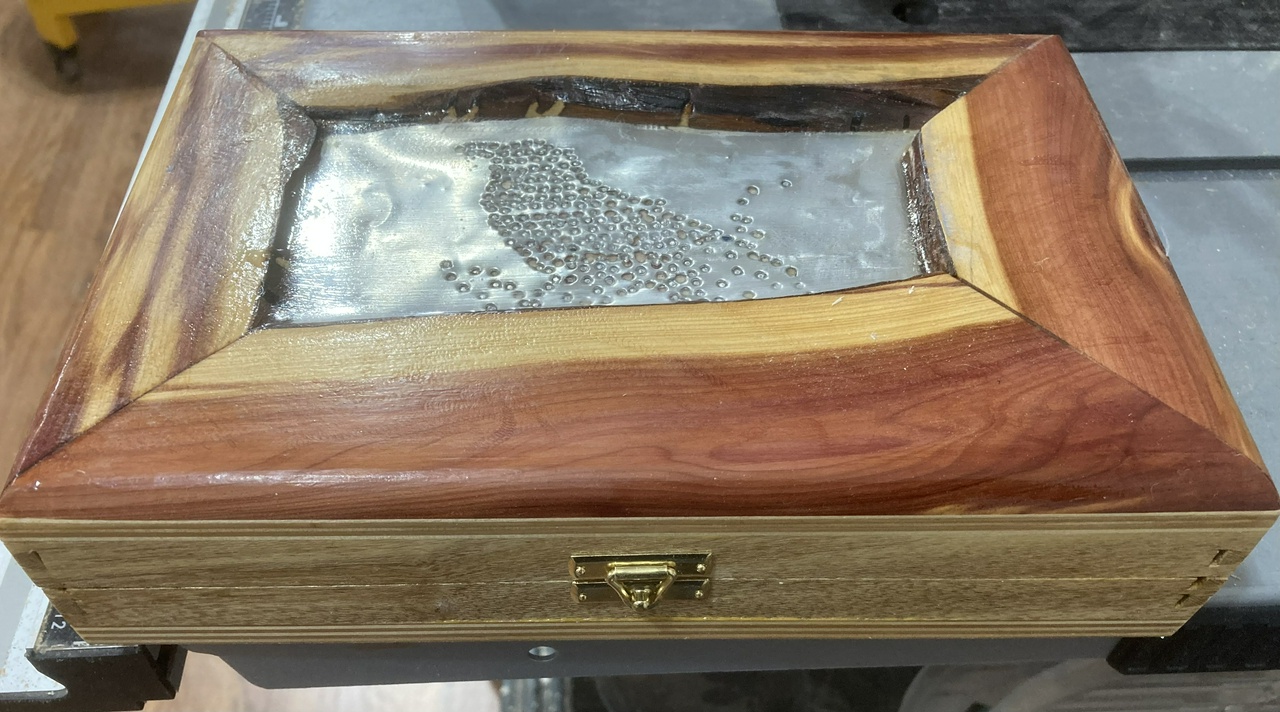
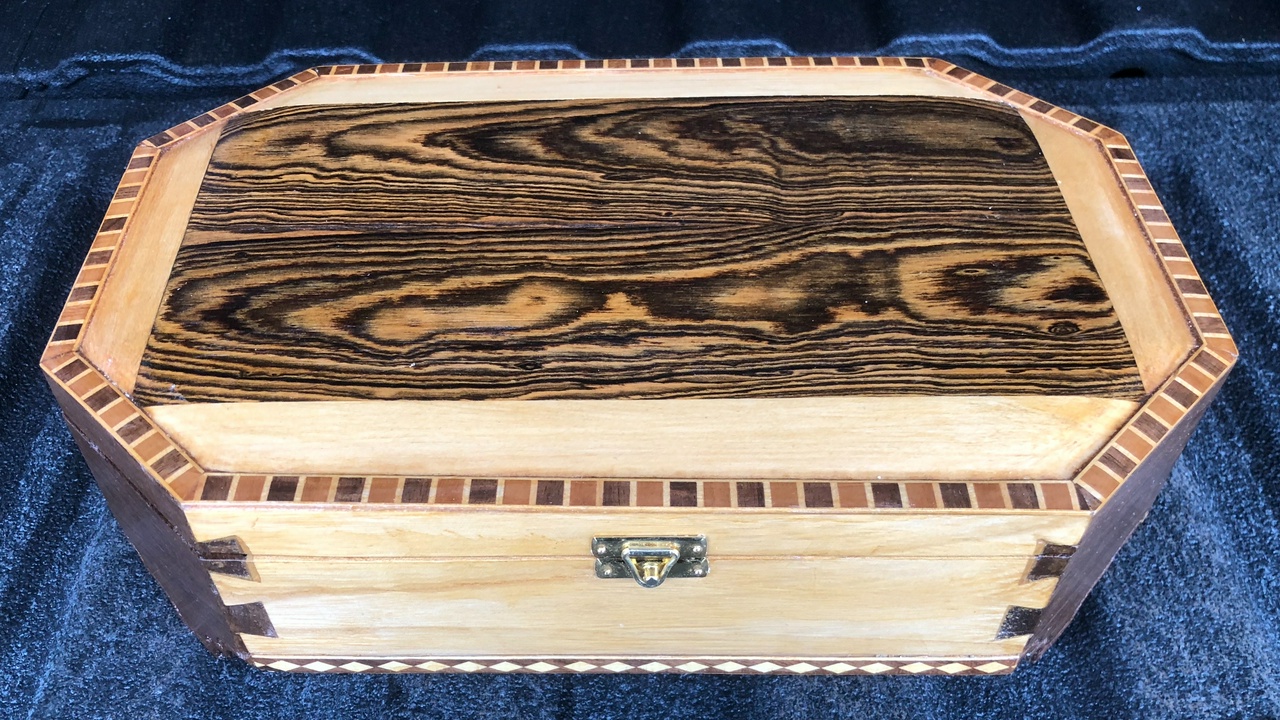
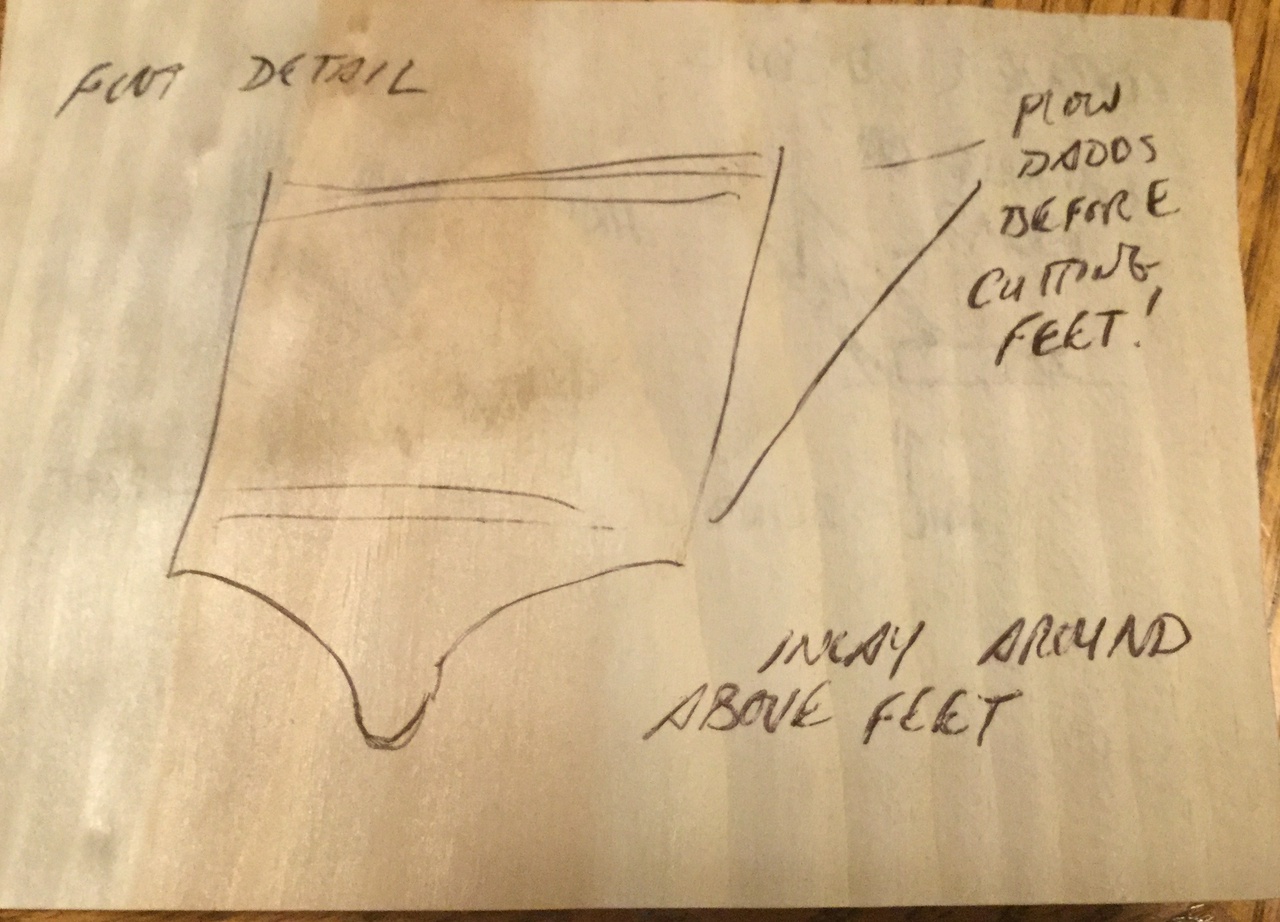
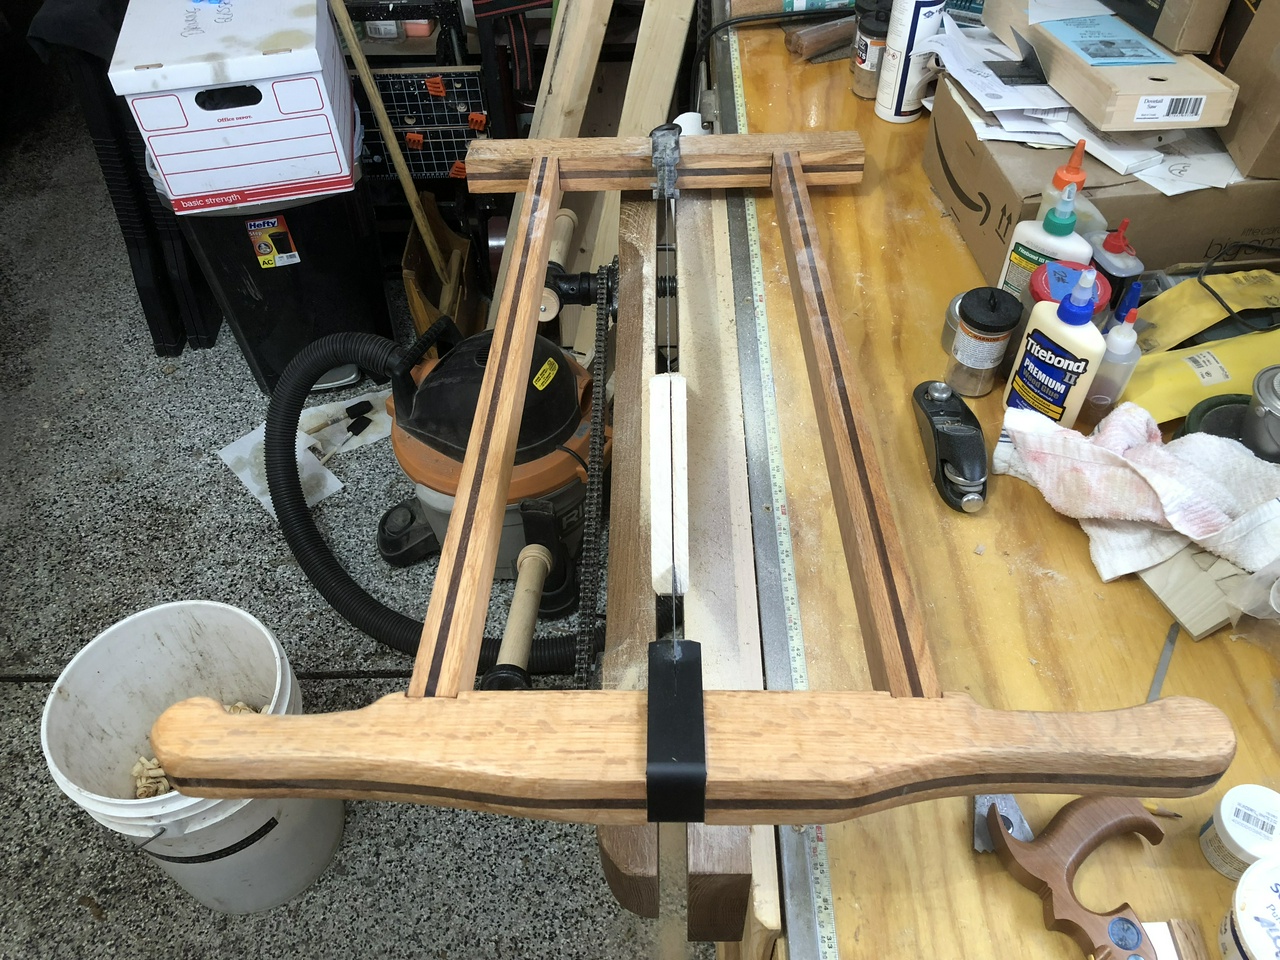
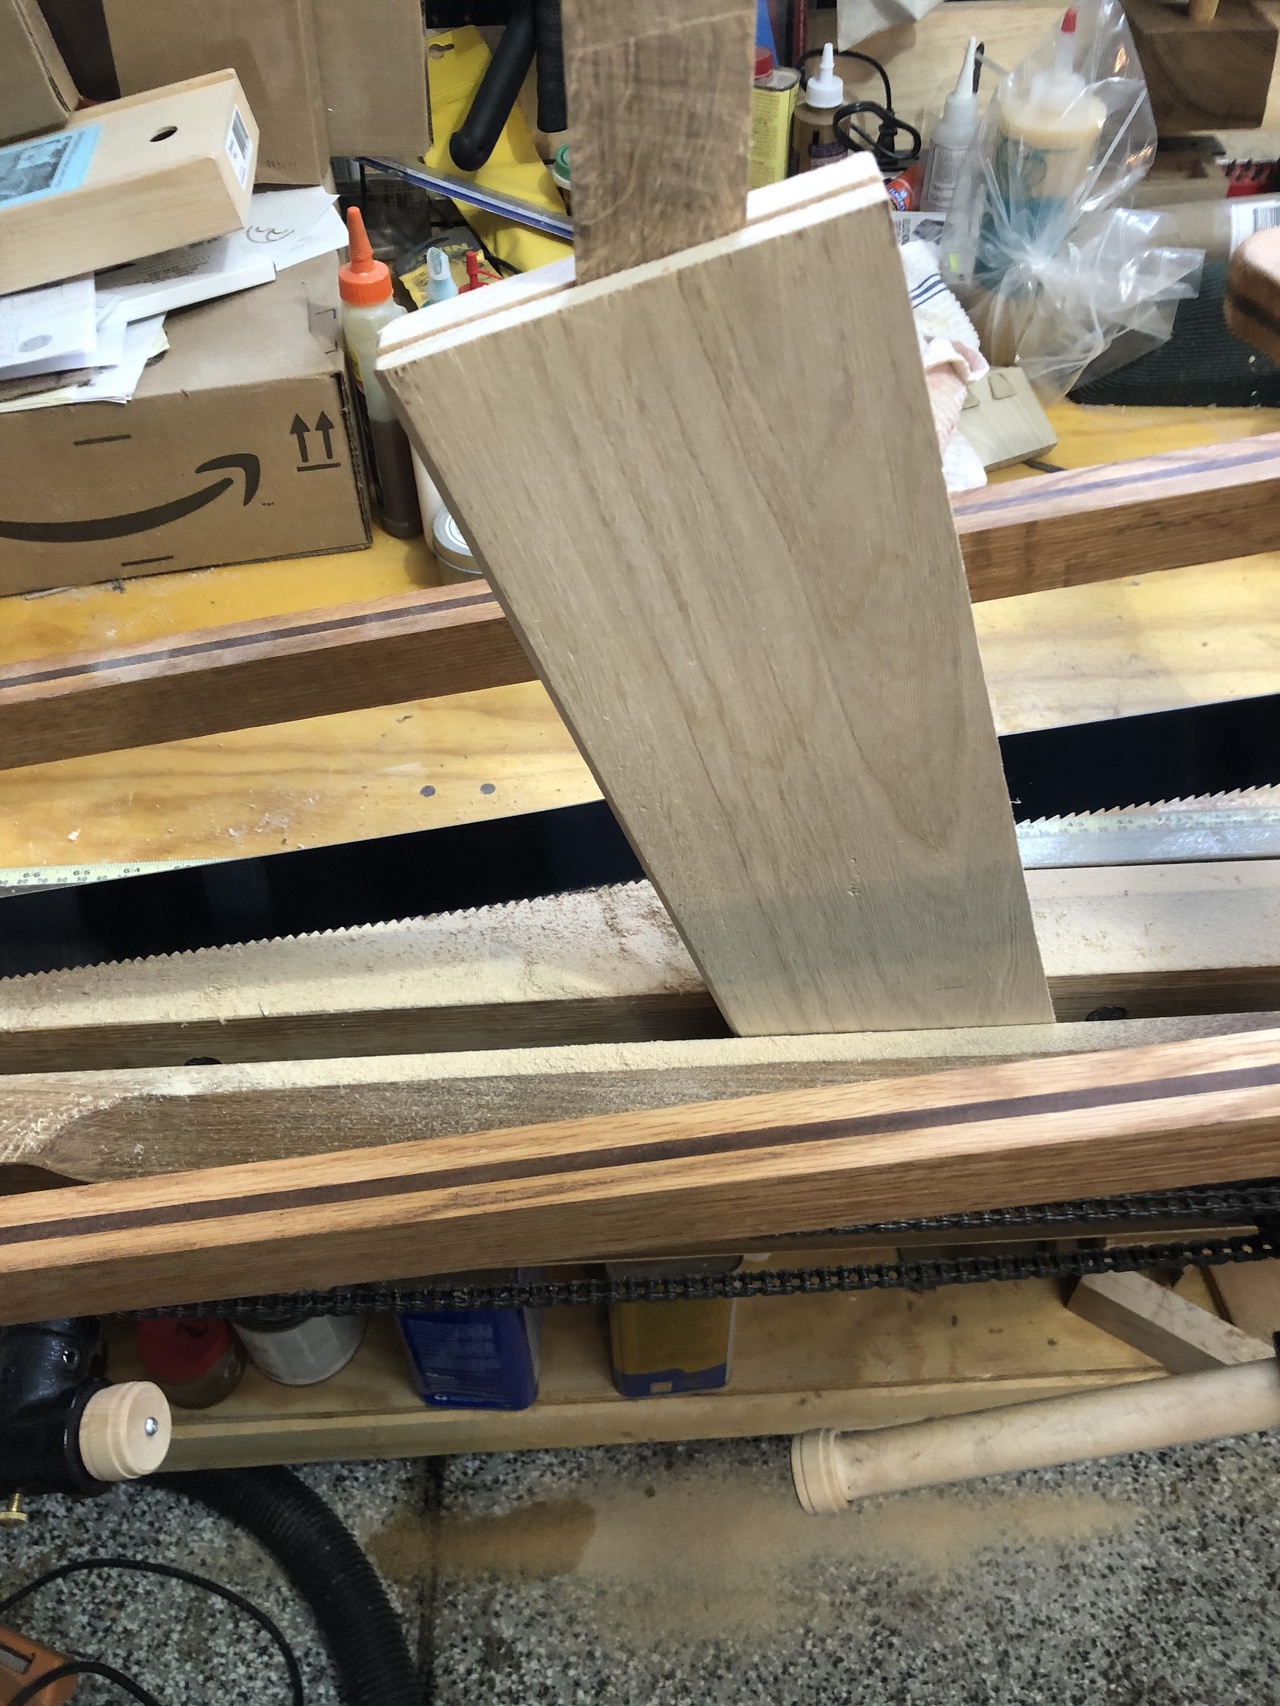
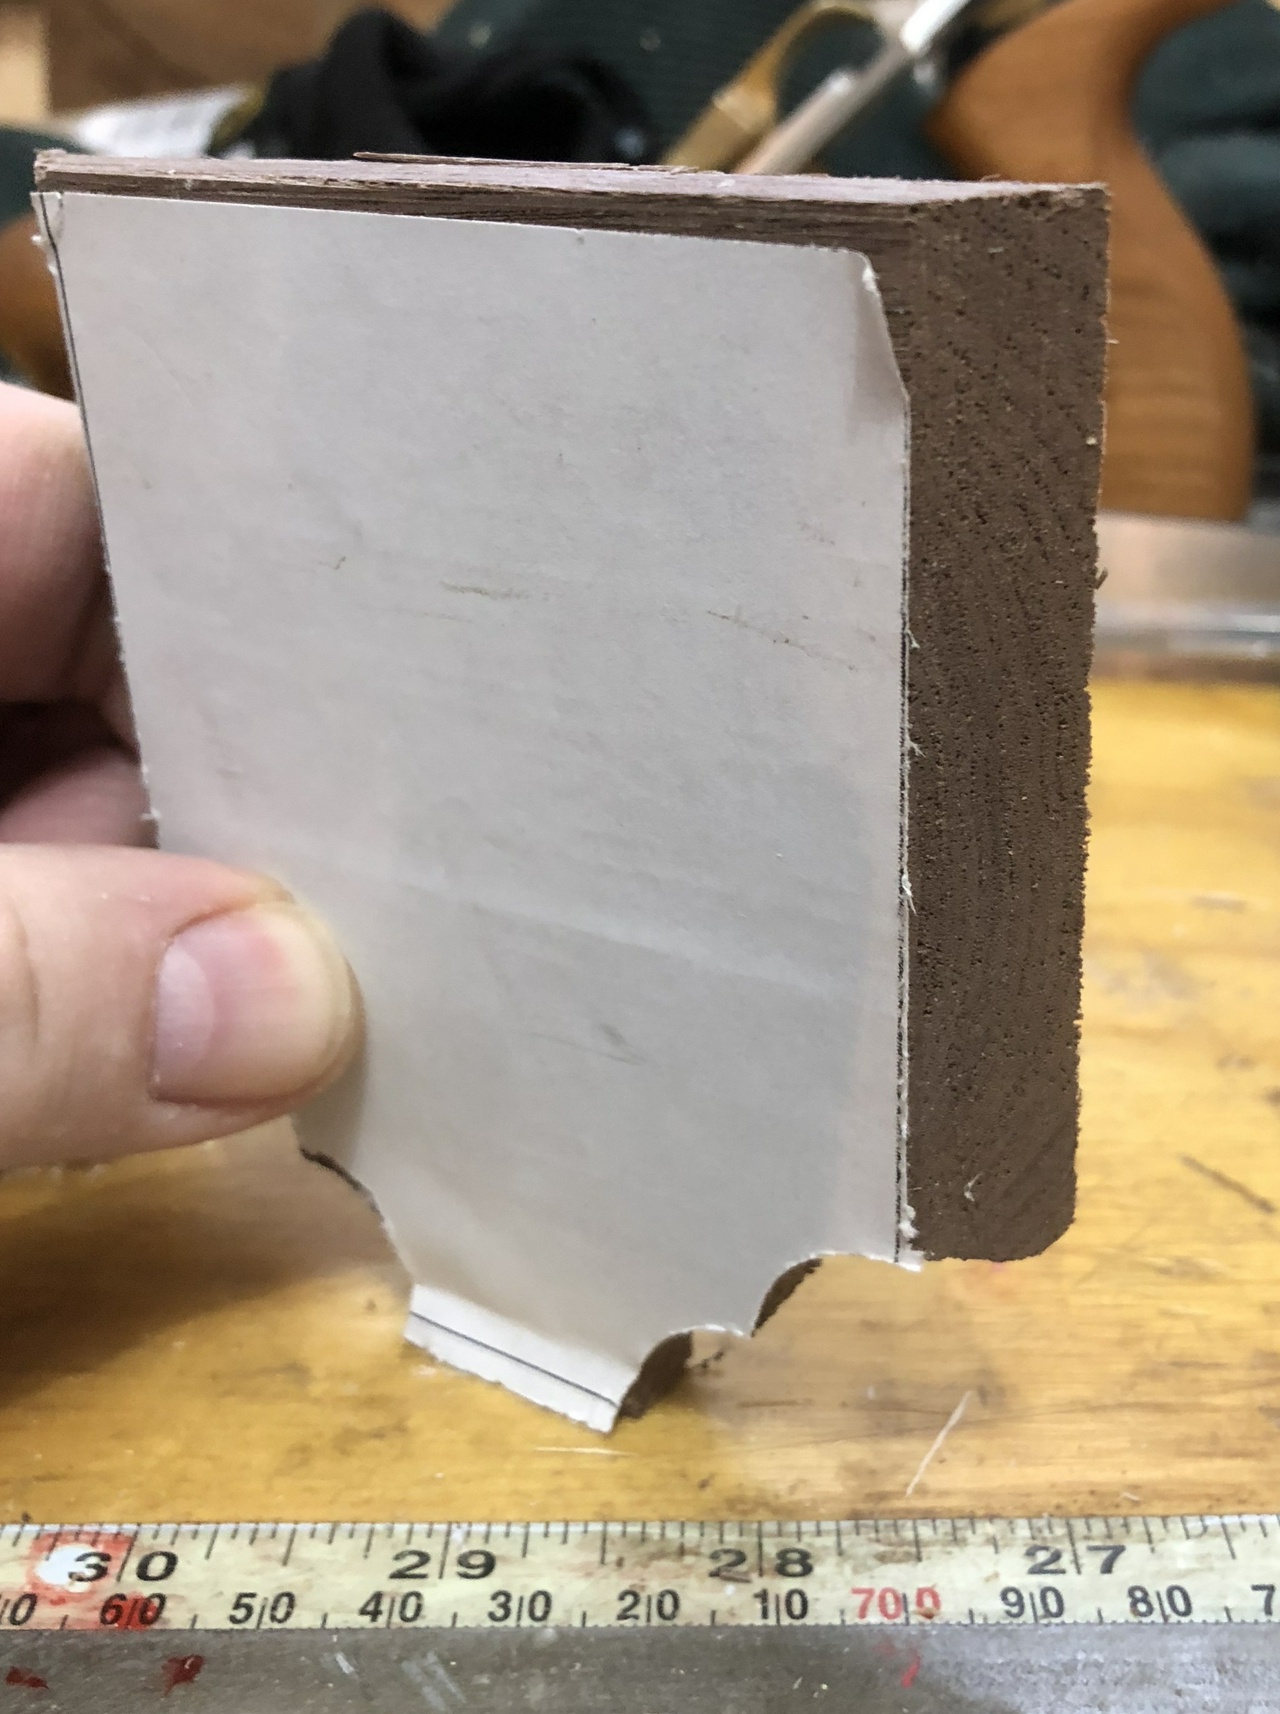
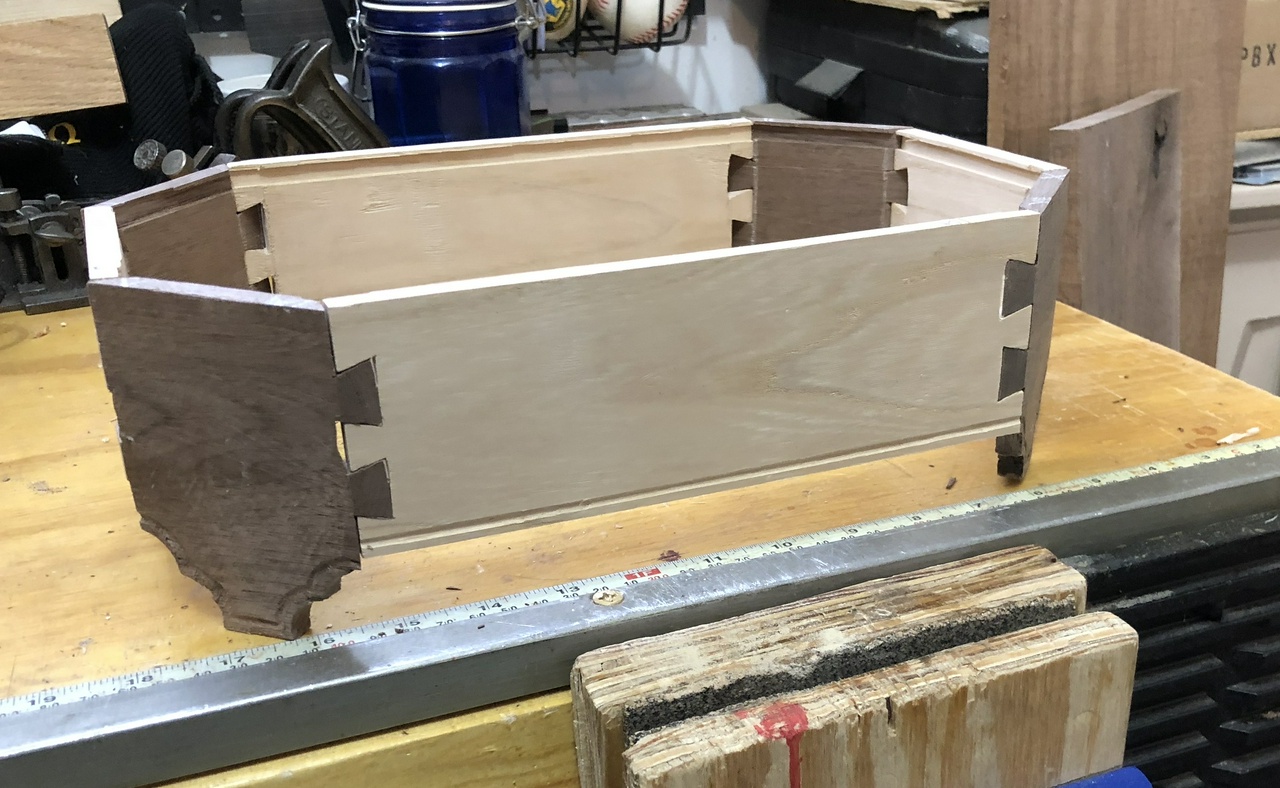
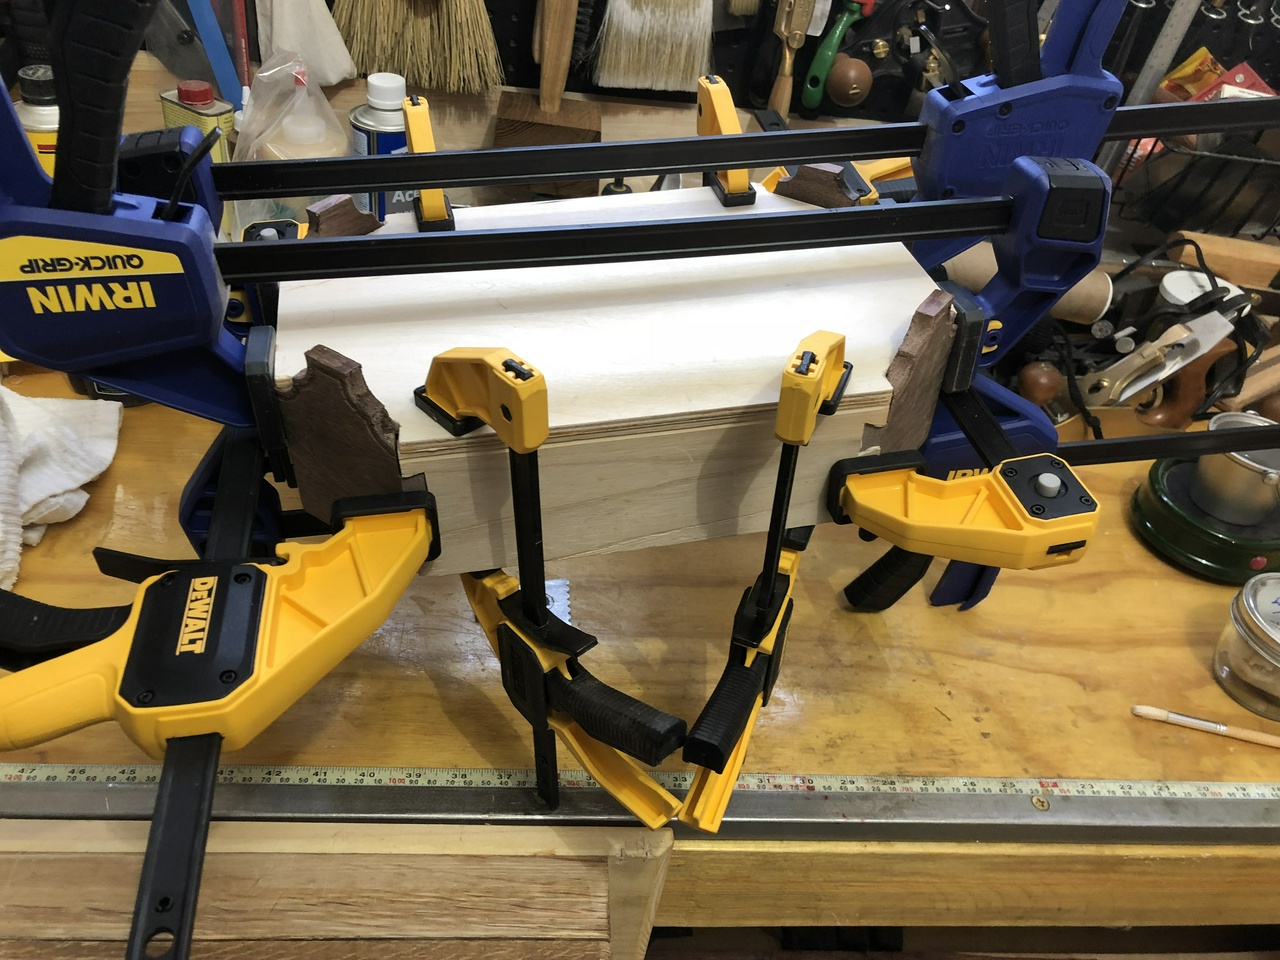
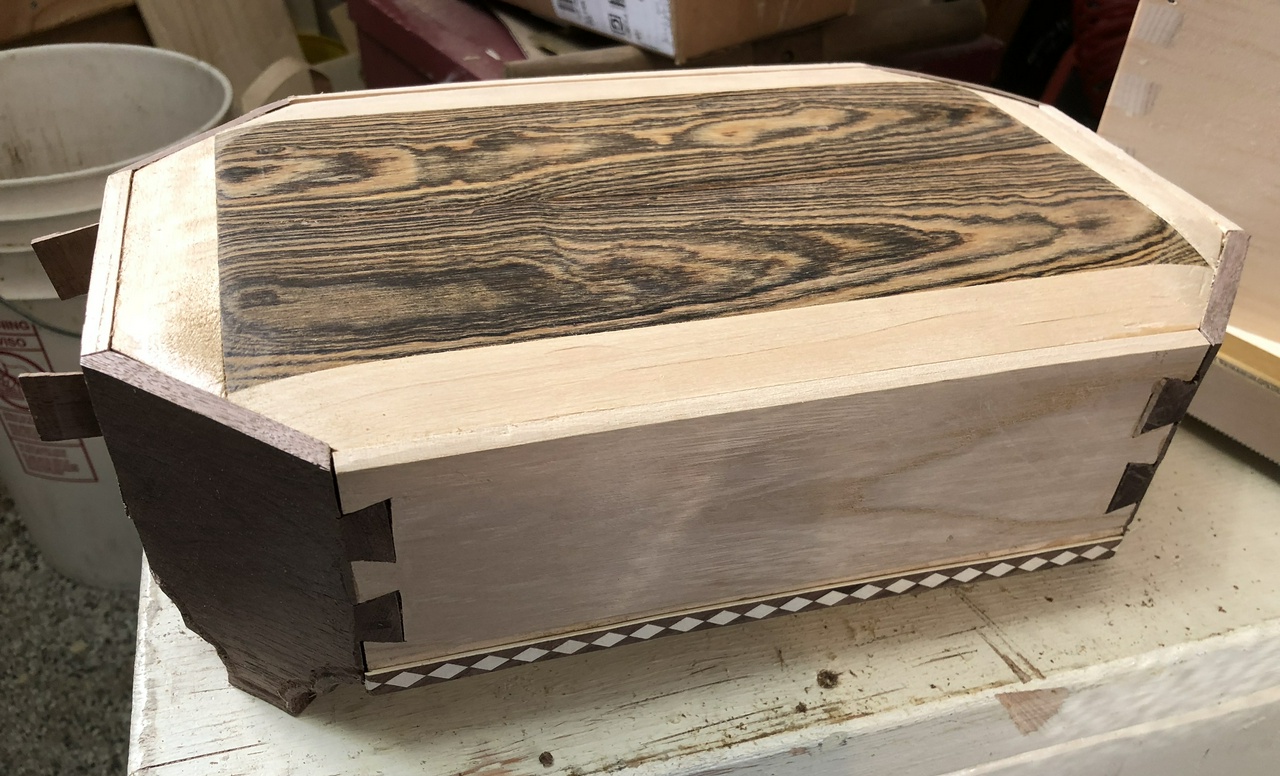
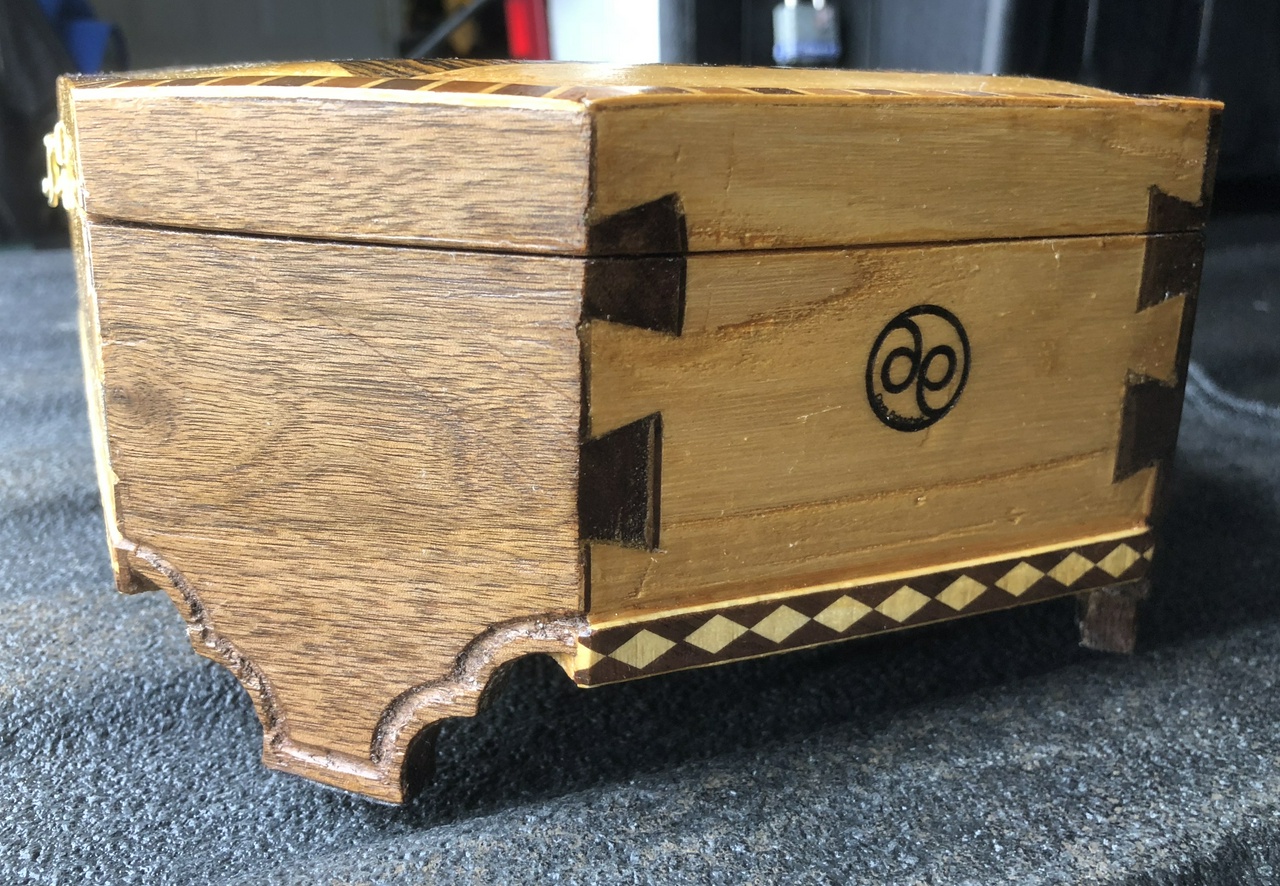
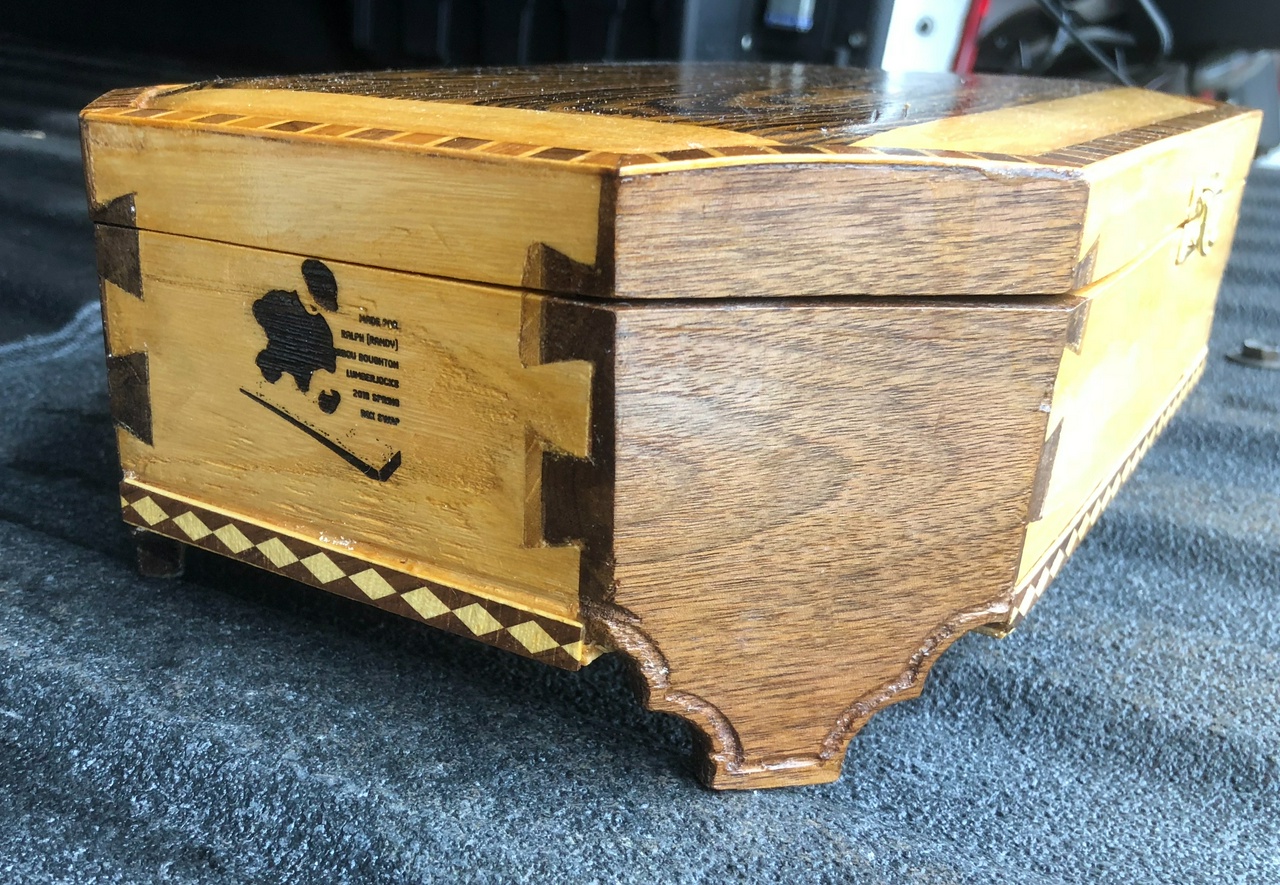
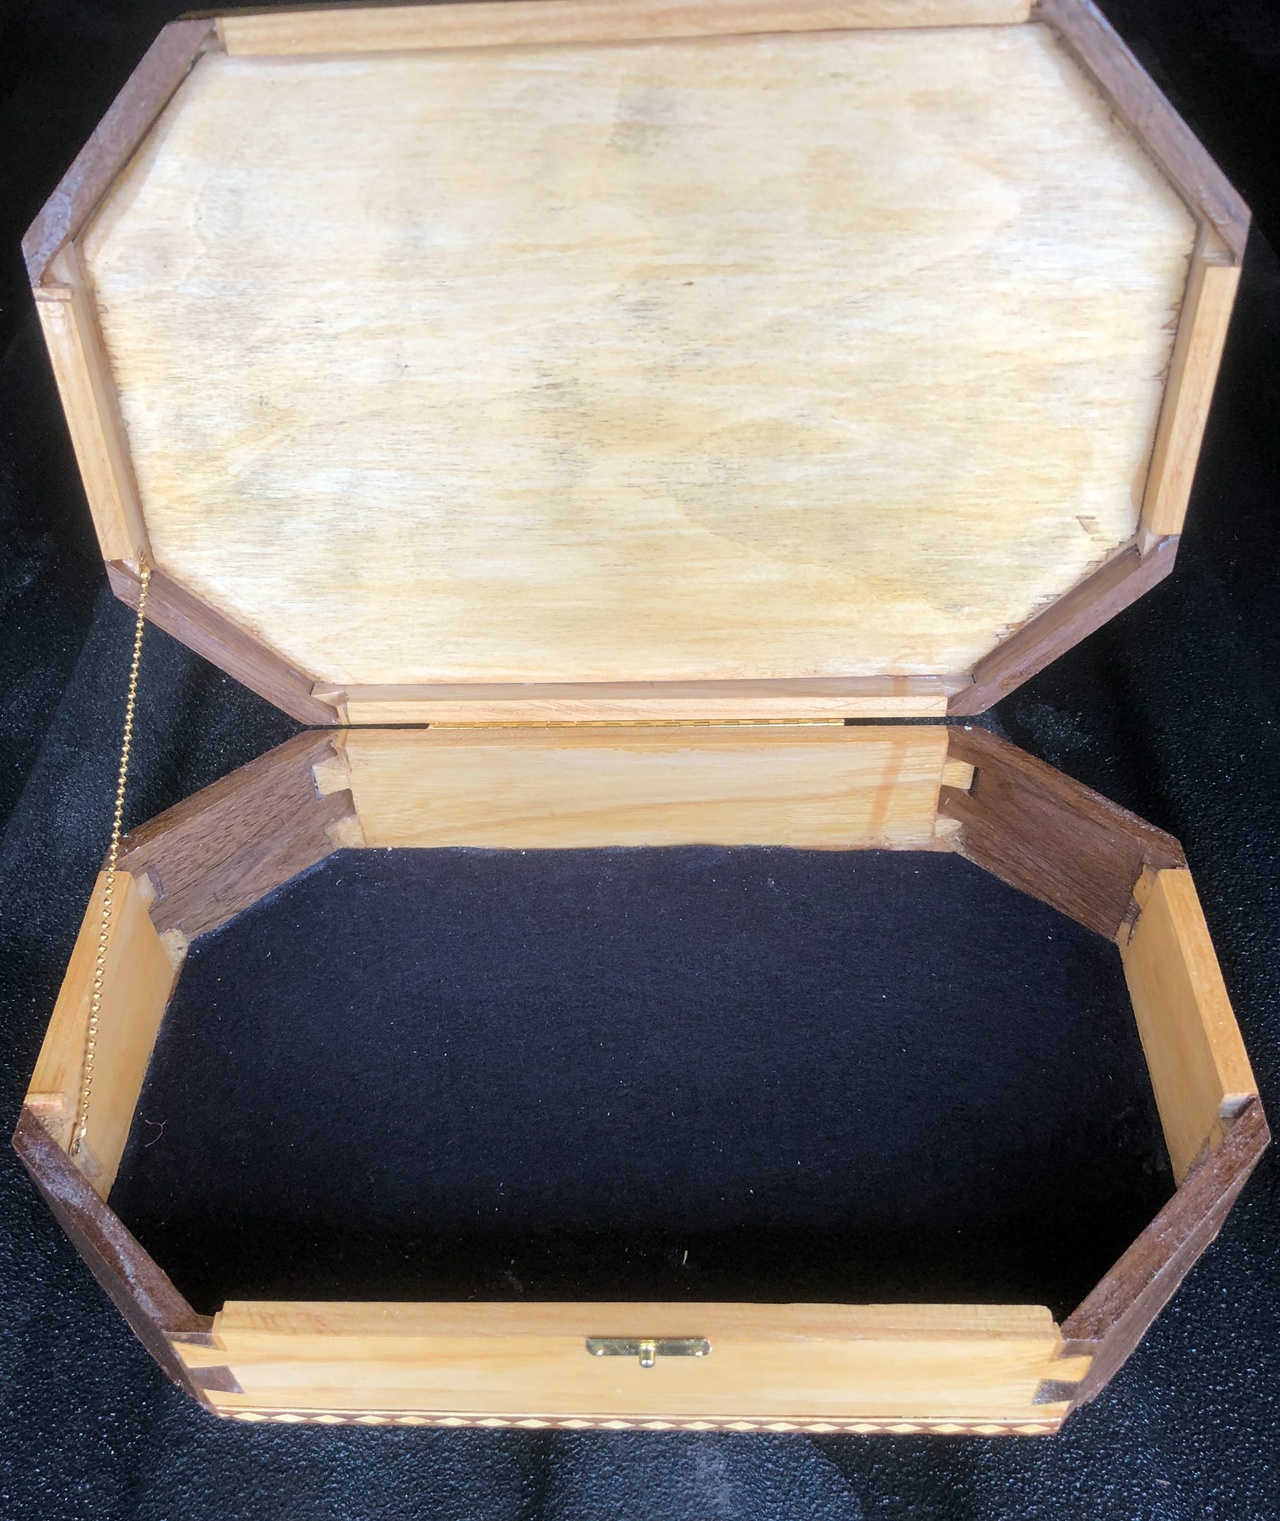
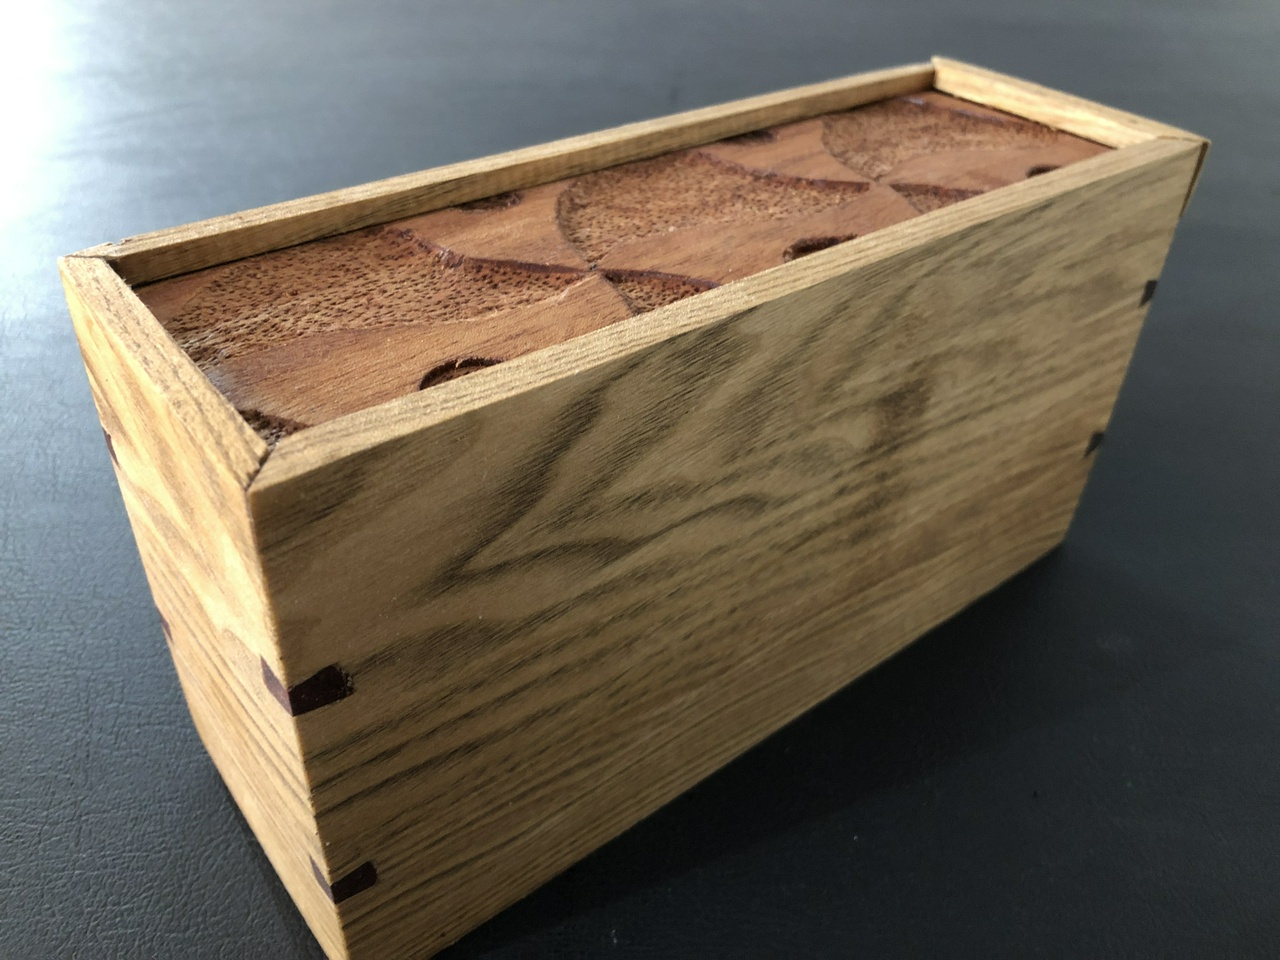
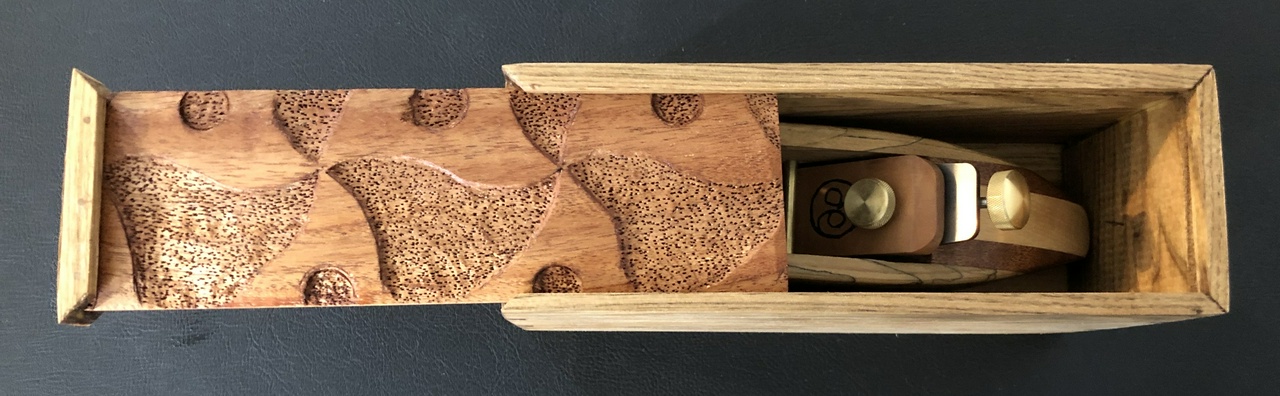
I also built a box to hold everything. It's fairly simple construction. A piece of red oak resawed in half to make the top and bottom, and a piece of walnut that was resawed in half to make the sides of the box. The bottom is simply rabbeted into the dovetailed sides, and the top got some bubinga veneer and oak sides so it would fit over the bottom of the box.

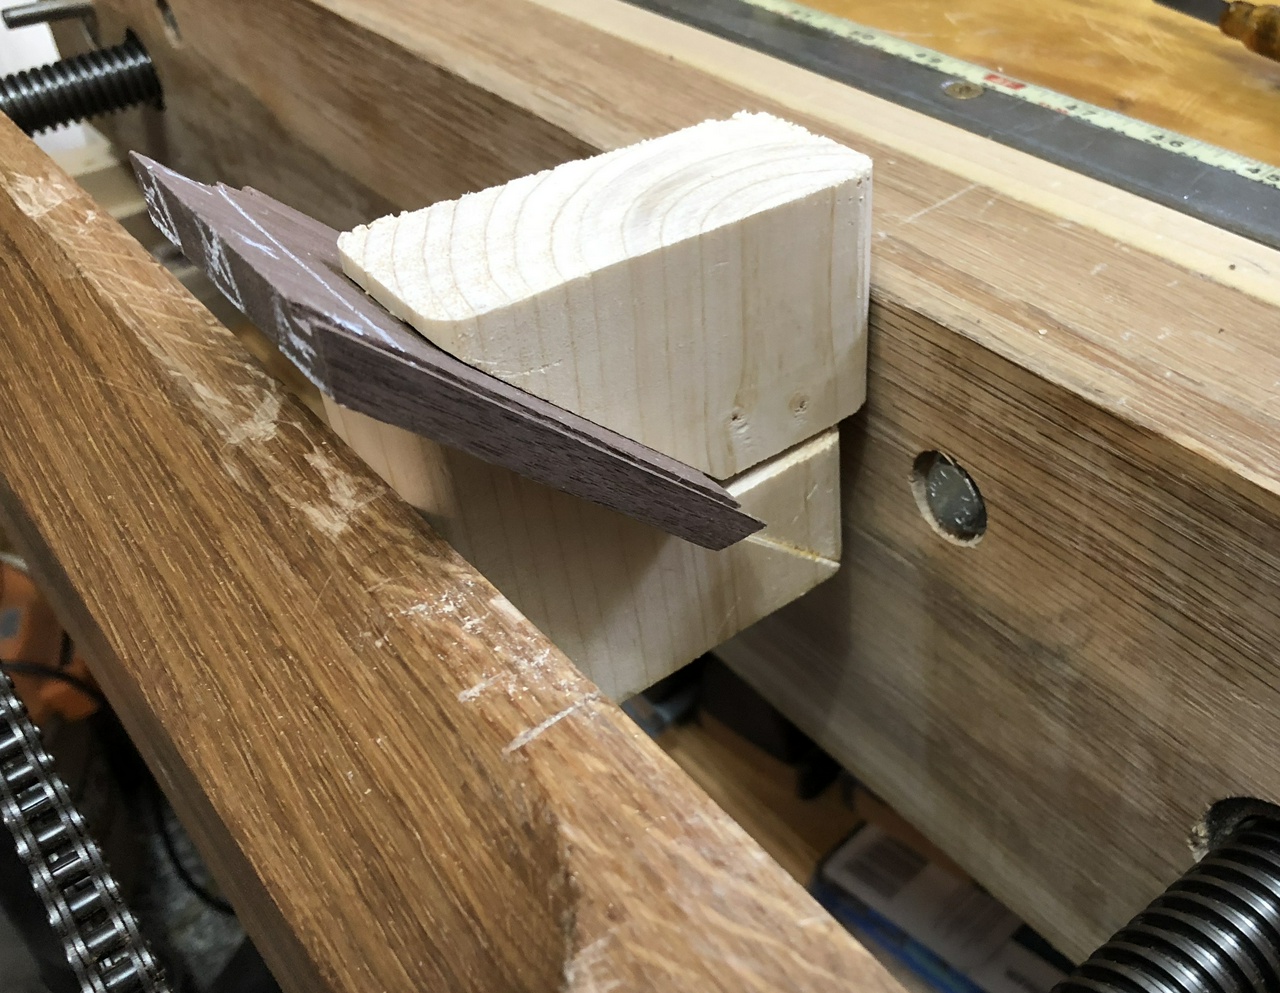
To build it, I cut the rabbets on the edge of the walnut, then dovetailed the walnut together. Then I trimmed the bottom piece of red oak to fit into the rabbets. Glued everything together and took it to the belt sander to clean up the outside edges of everything. I had one gap in the bottom which I filled with sawdust from the sanding and CA glue.

Box of walnut and red oak, open, showing the roughly-finished inside

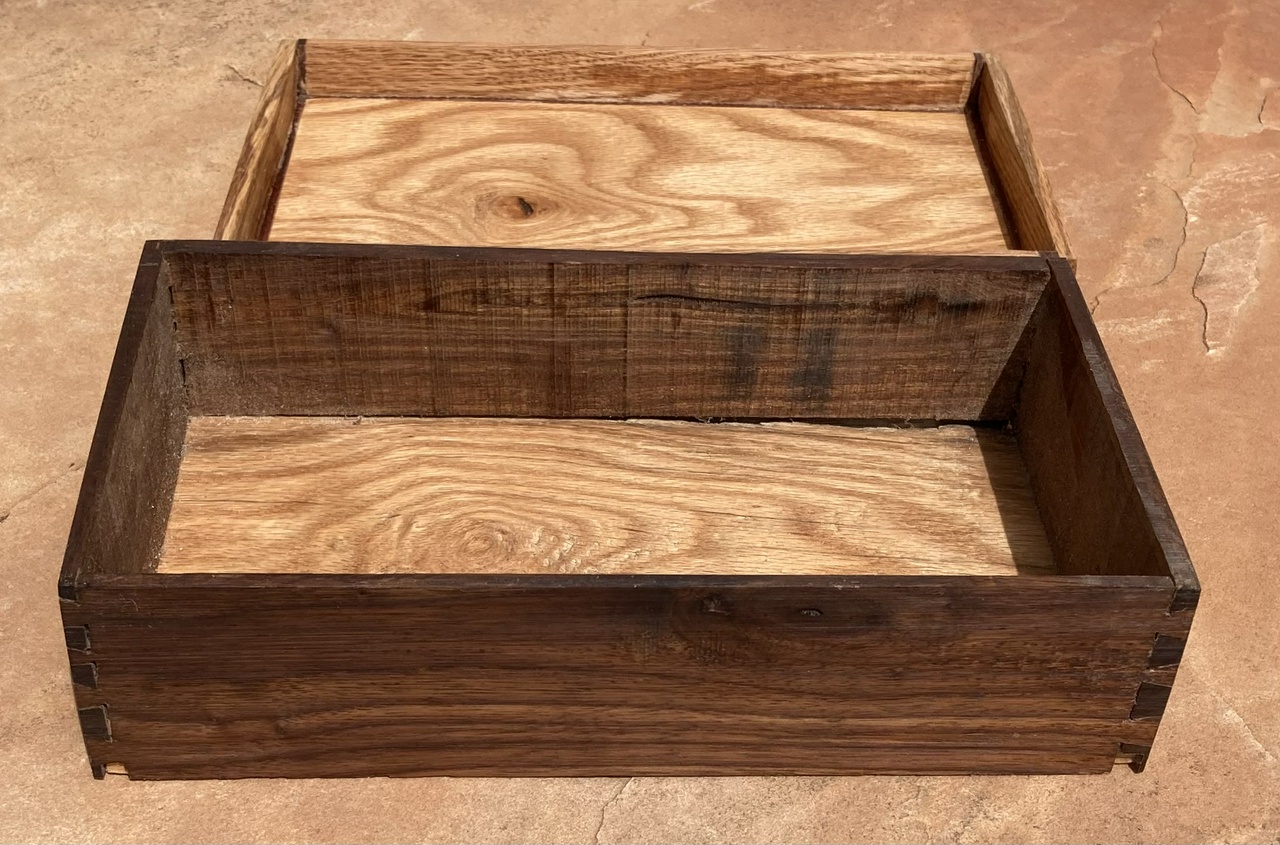
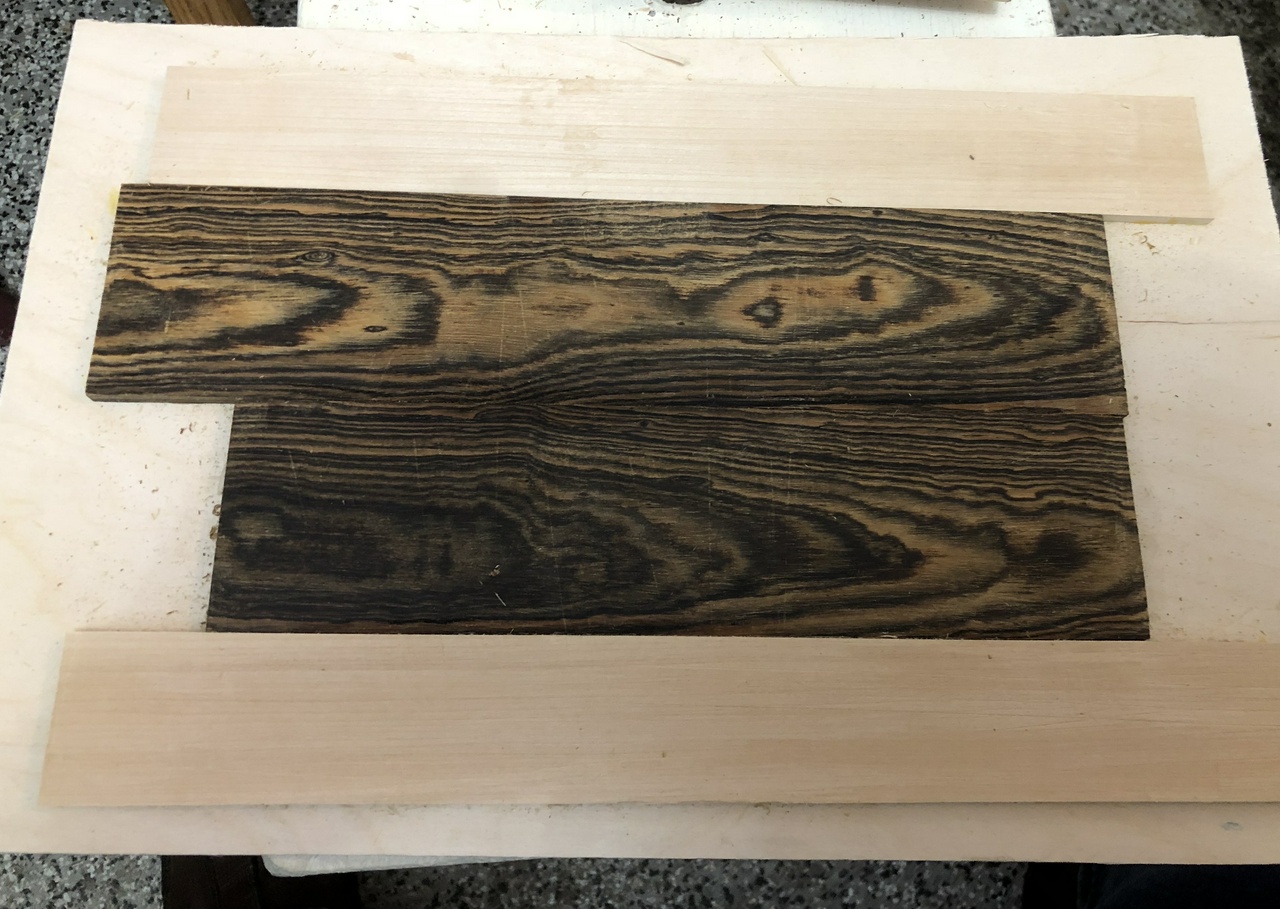
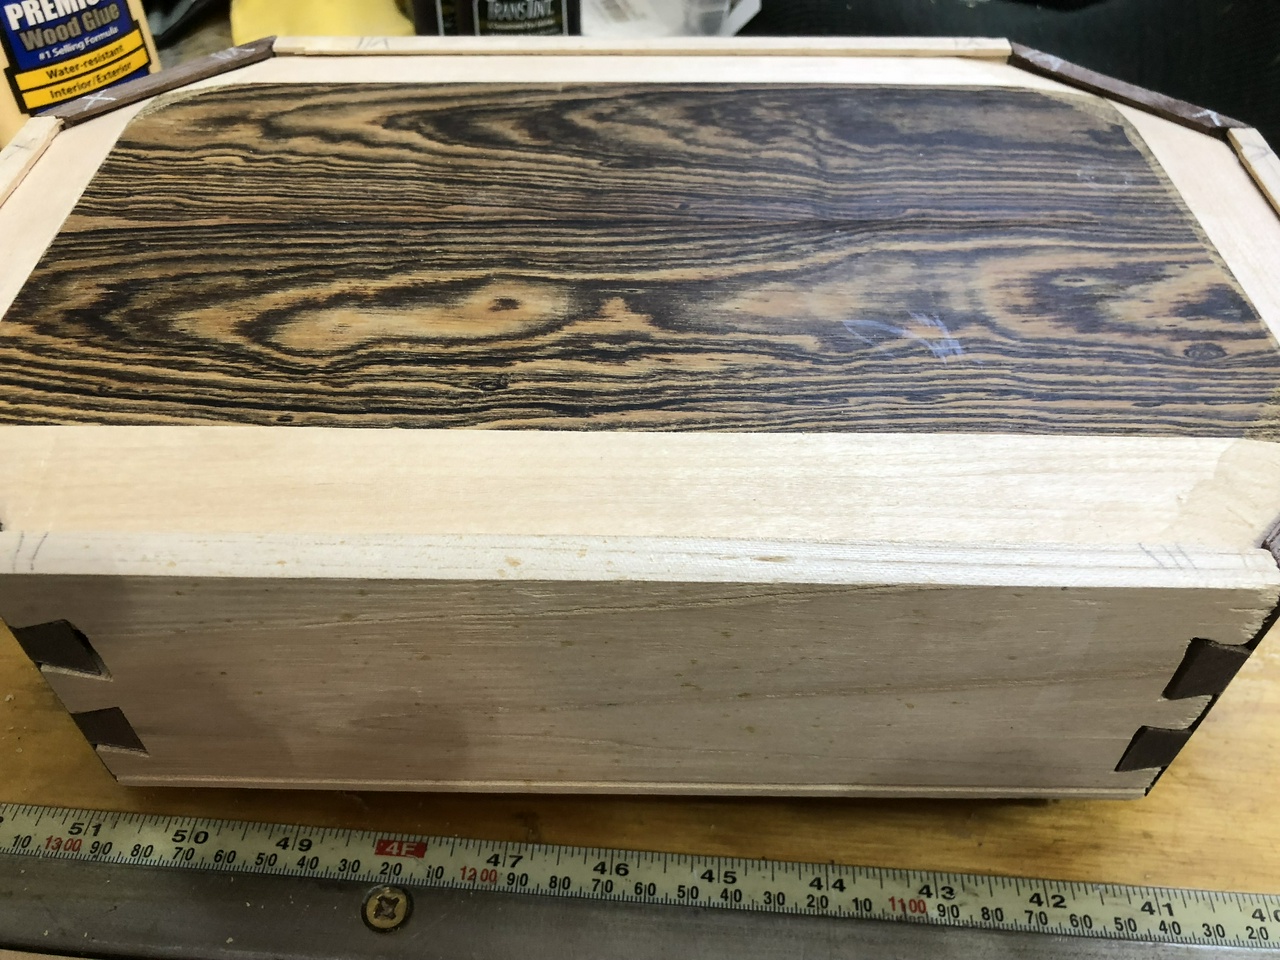
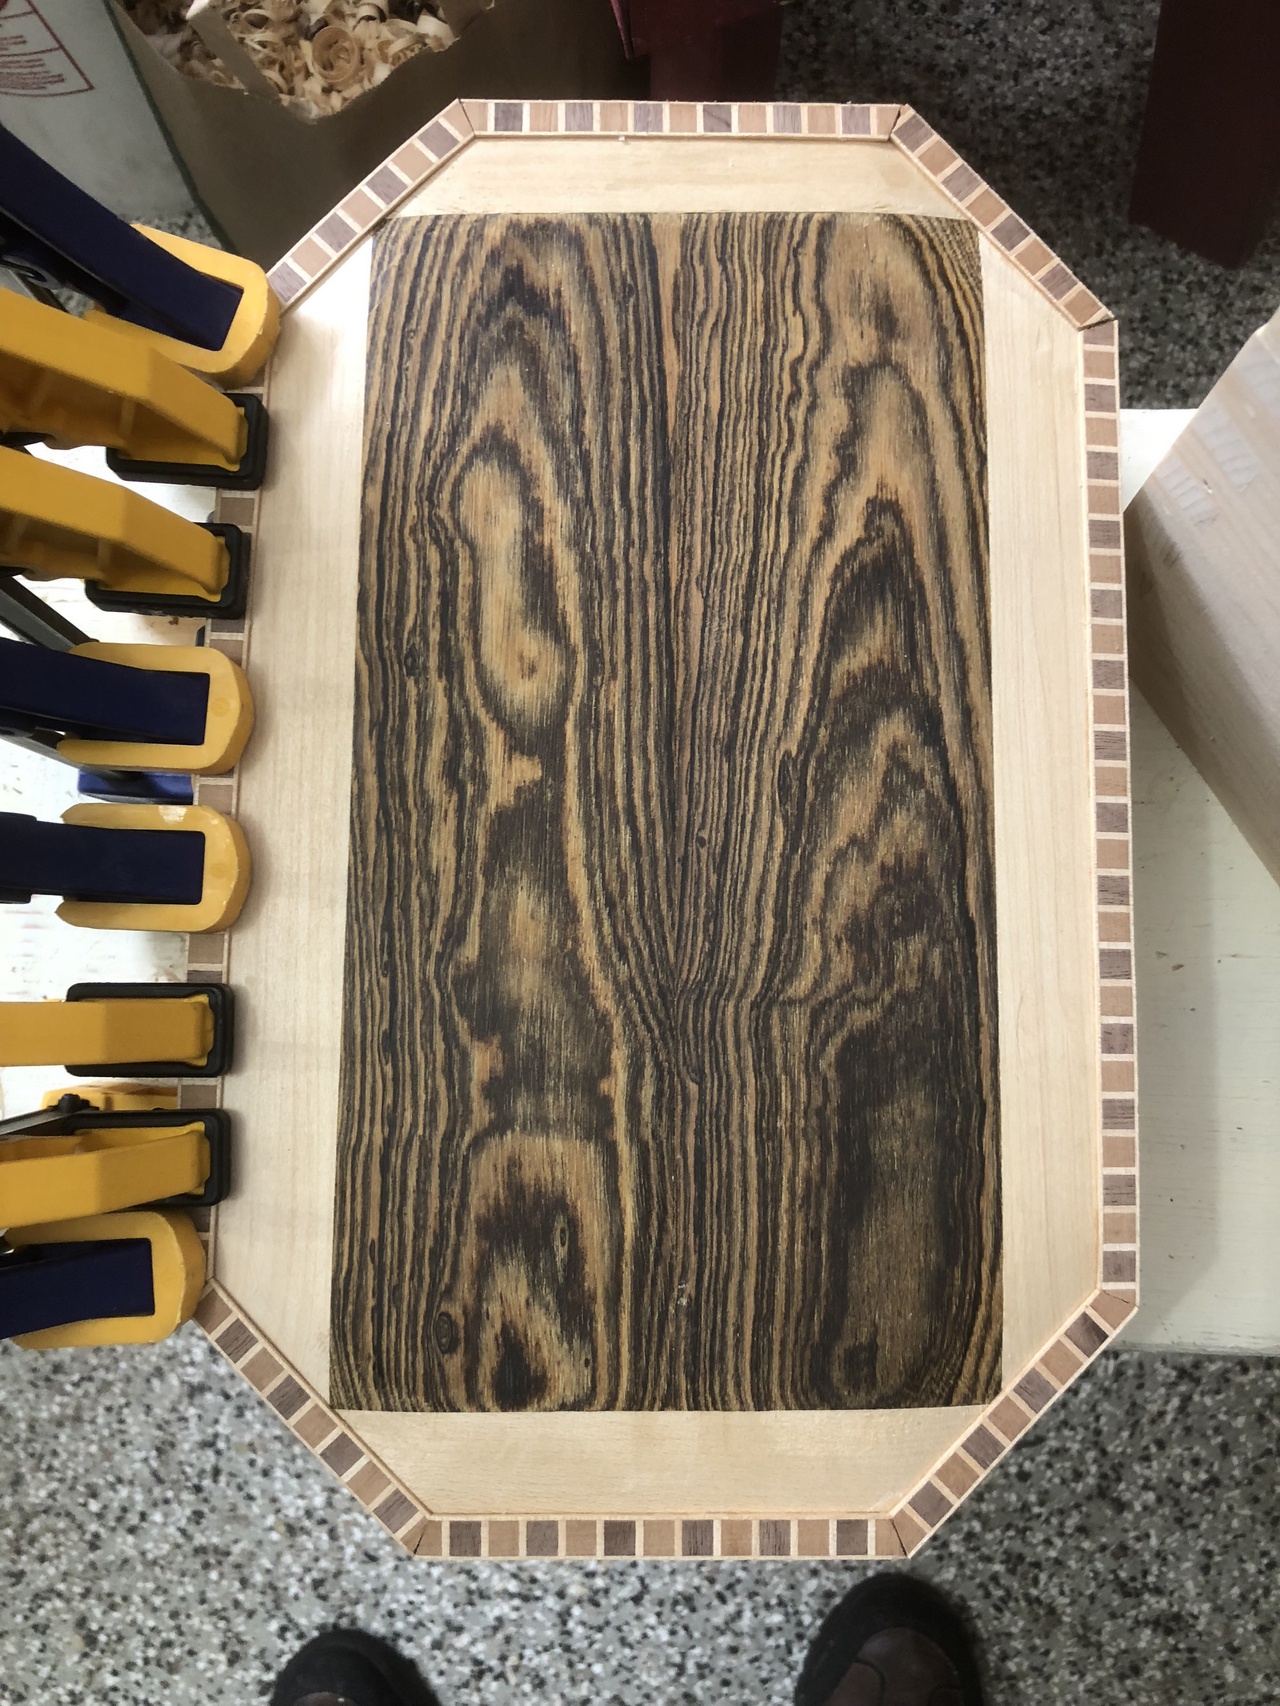
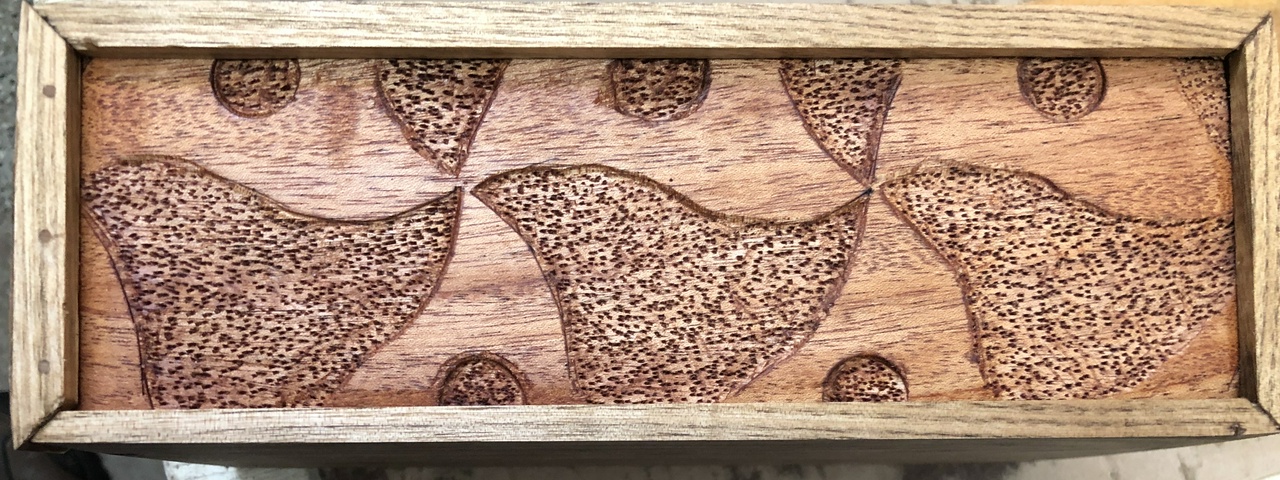
For the lid, I glued strips of the 1/8” thick bubinga veneer to the edges of the top, then resawed a scrap of white oak to make the sides of the lid and glued those to the bubinga. Headed to the belt-sander again and made everything smooth. Again, there were a few small gaps between the oak and bubinga, so I filled those with the sanding dust and some more CA glue.

Box, closed, showing the top and the bubinga and oak edges on the lid

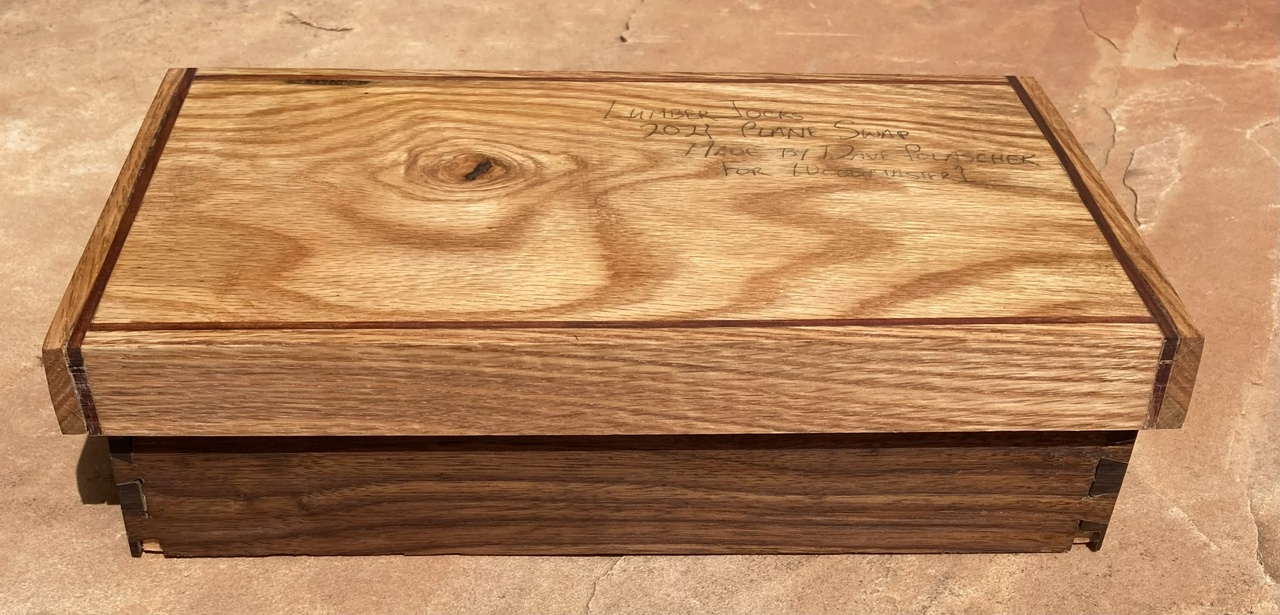
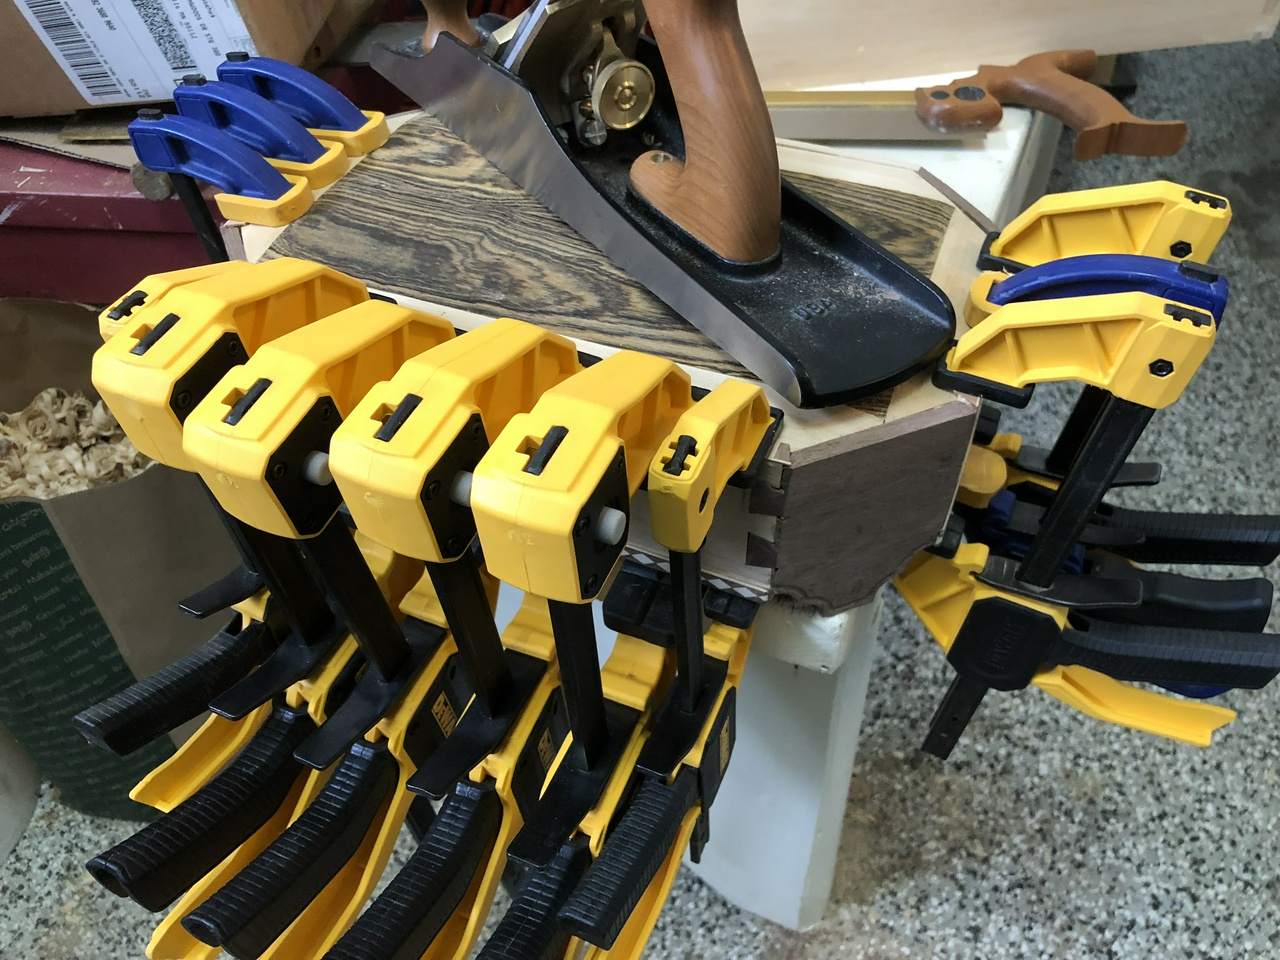
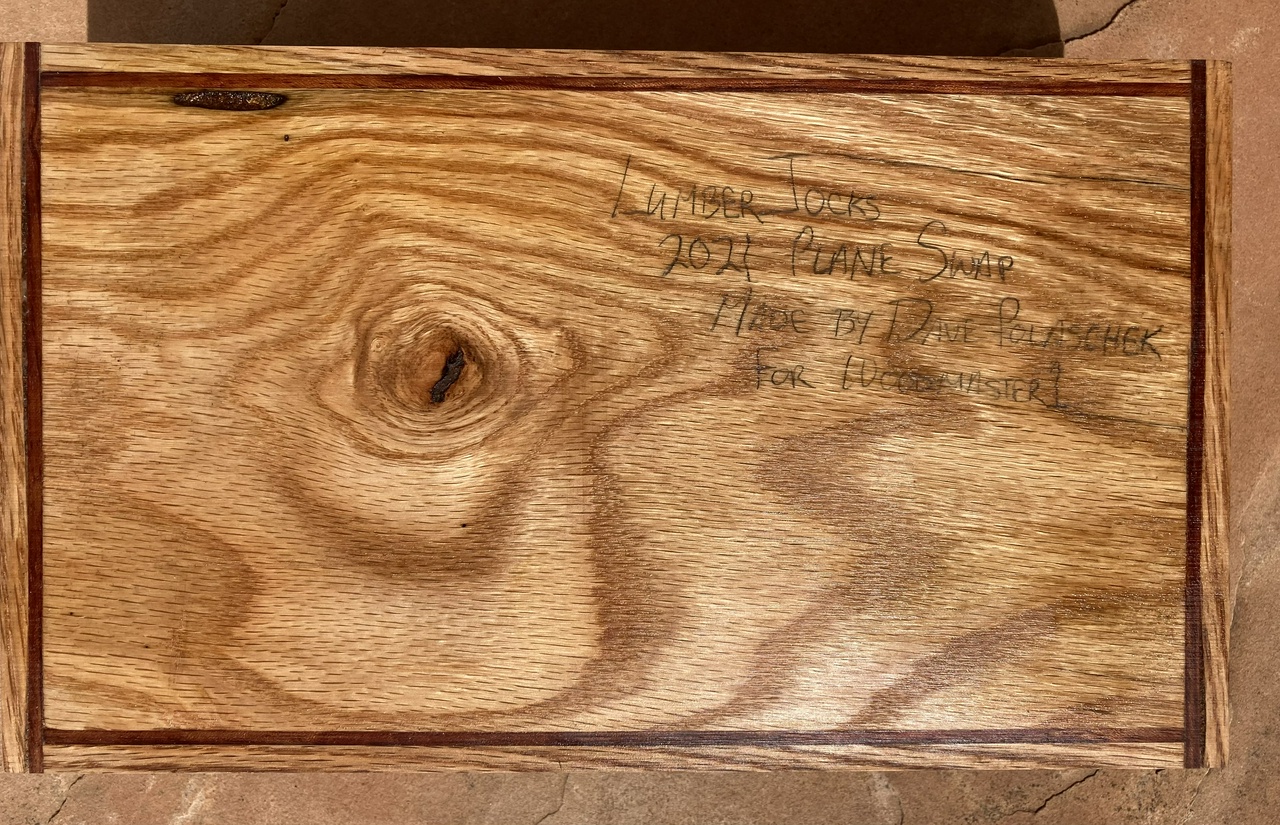
Wrote on the lid of the box with a pencil, then gave it three coats of shellac. It offered another layer of protection to the plane and the spokeshave in case the post office was less than gentle in the delivery.

Box, closed, showing the top with the note saying "Lumberjocks 2021 Plane Swap, Made by Dave Polaschek for Woodmaster1" in pencil

#woodworking #planemaking #toolmaking #plane #box #spokeshave #swap #project

Discuss... Reply to this in the fediverse: @davepolaschek@writing.exchange

This is a project I built in December of 2020. It's one of my most-used saws in the shop.

Front of bow saw, assembled Reverse of bow saw, assembled

#woodworking #contents #buildBlog #project

Discuss... Reply to this in the fediverse: @davepolaschek@writing.exchange

This is a smoothing plane I made for the 2019 Spring Surprise Swap. My recipient was Jerry, aka Turns4Wood The plane body is a sandwich of birch, African mahogany, and elm with an ipe sole. The elm was spalted and has been stabilized. The wedge is pear. The blade is at 45°︎ so it's fairly general purpose.

1935 Auburn Speedster

The looks of the plane are roughly based on a 1935 Auburn Speedster. I think that's a pretty good looking car, and kept it in mind while I was shaping the plane body. I think I did ok, and definitely a lot better than my first try, which looks more like a VW Beetle.

The plane uses the Veritas small plane kit with an O-1 blade.

Rough shaping was done with a bandsaw, then a belt-sander, and finally hand-sanding using the sanding blocks I got in one of my first swaps. Thanks again for those, Pooh!

The wedge is a piece of stabilized pear. I got the pear from HokieKen, and it was pretty soggy, so I wasn't sure if it would stabilize well, but I dried it in the oven without it cracking, and after it was stabilized, I carved in my mark. Until now I had burned the mark using a small laser engraver, but that died so I carved it by hand, and then filled the carved lines with black wood filler. I need some more practice carving.

I sanded up to 240 grit. Finish is two coats of linseed oil, followed by three coats of blonde shellac.

Right rear view of the swooshy smoothing plane

Left rear view of the swooshy smoothing plane

Sole of the plane

Front right view of the plane

Left side view of the plane

Front left top view of the plane

I sent the plane to Jerry in a hand-made wooden box. The box is butternut sides, a pine bottom, and an African mahogany top.

side view of the box

I carved the lid based on a pattern from the Alhambra in Granada, Spain.

top view of the box, showing my interpretation of the carved pattern

I got the details on how to construct the pattern using a compass and straightedge from the book Islamic Geometric Patterns.

The pattern for the lid of the box

The splines in the corners are some eucalyptus from Arizona I got from HokieKen, who got it from AZDave, who got it from AZWoody (part of the fun of swaps is the bonus items included and I try to pass on wood I've received in previous swaps). I thought it would offer a nice contrast to the butternut.

Open box, showing the plane inside it

I realized after I shipped it that I don't even know the dimensions of the box. It's big enough to hold the plane, plus about 1/8 inch on the sides. The sliding lid has a 3/32 inch deep groove carved in it that makes room for the adjuster on the plane when it's as high as it can go, so the plane is very securely cradled within the box.

#woodworking #HandPlane #toolmaking #project

Discuss... Reply to this in the fediverse: @davepolaschek@writing.exchange

Apple wood bottle opener laying on a blue iPad case, showing a couple lines of spalting

After yesterday’s mimosa bottle opener and getting a late start this morning due to the fog, I decided I’d make another bottle opener. This one uses a piece of apple wood from a crab-apple tree that had been in my front yard in Minneapolis. I made it a bit longer and stouter than the previous one, and it feels better in big hands like mine. Plus it’s pretty wood with just enough spalting to add some visual interest.

Apple wood bottle opener on a blue iPad case

#woodworking #woodturning #project

Discuss... Reply to this in the fediverse: @davepolaschek@writing.exchange

bottle opener, laying flat on a blue iPad case

A while back (maybe back in the summer), I ordered a few Niles Bottle Opener Kits from Penn State. This morning, after doing a glue-up on another project, and not being willing to call it a day in the shop yet, I dug one of them out and grabbed a chunk of mimosa that a buddy had sent me, and got to work.

bottle opener, standing upright on a wooden table

This is the result. For my first try with this kit, I think it came out ok. I know of a few things I’ll do better next time around, but it’s a spindle-oriented turning, and I’m getting pretty good with my skew, so any deficiencies are more a matter of not spending the time to figure out a good design than any problems in implementation.

bottle opener, standing upright on a wooden table, reverse view

Anyway, it was a fun project. Turned it, sanded from 60 up to 400 grit, used Ack’s Sanding Paste to partially finish, epoxied the opener into the wood with some five-minute epoxy, cut off the stub-tenon, sanded the end of the handle smooth by hand, and then buffed it all with the Beall Wood Buffing System to make it all pretty. About 75 minutes elapsed for a fun little project.

#woodworking #woodturning #project

Discuss... Reply to this in the fediverse: @davepolaschek@writing.exchange

This is the story of the pair of knives I made to send to MaFe, with the plan that he would pick one of the knives for himself, and then send me a sheath for the other knife in return. As I wasn't sure of the size of his hands, I made the knives similar in size, sized more for my large hands than his, but figuring he could always remove some of the bark to make a smaller handle, which he did.

Knife blanks and brass bolsters

Two knives with partially completed stacks of birch bark

The knives start, as in the pictures above, stacking birch bark on the tang of the knife, plus a brass bolster I set on the tang. The knife blank comes from Morakniv and I like their 106 and 120 blanks. The birch bark comes from Russia, and there are a number of vendors on eBay who sell stacks of birch bark. I've found that the Russian vendors tend to have the best price (even including shipping) for prepared bark. Buying birch bark stacks from the US, I end up with a lot more waste, because the bark hasn't been scraped as well.

SPRAD comes from Mads reading my description, and noticing that the blades came from Sweden, me, from Poland, the birch-bark from Russia, and the knives moved from America to Denmark. Truly international!

Shop-made tool to compress birch bark as it is stacked

Using the shop-made tool to push down a layer of birch-bark

I punch the holes in the bark using a leather punch, making a line of one, two, or three holes, depending on which portion of the tang the piece of bark is going on. I also use a shop made tool to compress the bark as I work, making sure the layers are stacked as tightly as I can. I also thread the tail end of the tang at this point. Due to the square tang, what I usually do is thread it first with a 10-32 die, then thread it again with an 8-32. I want about a quarter inch of threads to work with. I'm sure there are metric sizes that will work well, but having the pair of dies with the same threads means I can do this as a two-step process, rather than having to anneal the last bit of tang so I could thread it in one step.

Shop-made vise to compress the layers of birch-bark

Once I have nearly enough layers on, I compress the handle further using a shop-made vise, and I put the handles into the toaster oven at 225F (105C) for a few hours. This will soften the pitch in the bark, and will somewhat “weld” the handle together. This step isn't absolutely necessary, but I've found that I get a better handle by doing it. I can also tighten the vise down a little more after the handle has been baked, further compressing the bark.

Some will put the handles into boiling water at this point, but I think that's hard on the steel. Others will compress the bark in a stack, boil it, and then drill a hole for the tang of the knife. But as with most woodworking, there's more than one way to do it.

Pommel of knife, showing washers and nut on the tang of the knife blank

After the handles have been baked, I'll add a few more layers of bark, then cap that off with a few washers, then an 8-32 nut. I try not to crank this down too tightly, and if there's room, I'll add more layers of bark to fill the space so the end of the tang barely protrudes from the nut as in the picture above. I've also used a piece of brass for a bolster, but the stack of washers is quick and easy, and looks good to my eye.

Birch bark knife handles, roughly squared

That will leave me with the very rough handle. I will rough that in using the bandsaw (very messy) or a carving knife (less messy, but slower)

Birch bark knife, showing how the bolster serves as a guide for squaring the birch-bark

Knife with handle tapered on the blade end

Then I move to the belt sander. Make sure to wear a dust mask at this point, as the birch bark may contain fungi or other things that will be bad for your lungs. I work to a square first, then add a taper as in the picture above. The rectangular bolster serves as a reference for me at this point.

Birch bark knife handle tapered on both ends

Then I octagonalize the handle, maintaining the taper. This is when I will sand down the nut and washers if I want to make them look less like they came from a hardware store. My “look” is still evolving, and I'm not sure what I like best. Then work to round the handle last. This is a fairly slow process, with lots of pauses to check my work along the way. In the case of these knives, Mads had said he preferred an octagonal handle, so I stopped without making his handle round.

Mostly-completed knives, one round, and one octagonal

And that gets us to picture 1 which is the pair of knives that I sent from America to Denmark to put the AD on the knives. There, Mads shaped the handle on his knife to suit his hands, and then made sheaths for both knives and sent my knife back to me.

Knife with sheath, and packaging material from Mads

I received the knife before we moved to Santa Fe, but after most of out stuff had been taken by the movers, so the knife became part of my “truck kit” of woodworking tools, which I used to make small repairs around the house before selling it.

Truck kit of woodworking tools

The most notable was the back entrance of the house, where the threshold had a spot worn in it from years of people going in and out of the door, which I patched one afternoon with the truck kit of tools and a scrap of wood.

Patch on the threshold of the rear door of my house in Minneapolis, post-repair

Patch on the threshold of the rear door of my house in Minneapolis, after painting

#woodworking #toolmaking #project

Discuss... Reply to this in the fediverse: @davepolaschek@writing.exchange

Closed Beercase

Open Beercase, showing inserts

Open Beercase, showing beer

For this year's BeerBBQ swap I decided to make a briefcase for holding beer or BBQ fixings or whatever. But since I had already done a BBQ Briefcase back in 2020, I wanted to make this one more beer specific, as well as upping my game a bit.

I started with some butternut I had on hand, resawing it to about 3/8 thick. When I did that, I discovered that it had some bug tracks inside, so I filled those with turquoise powder and epoxy.

Butternut with turquoise and epoxy fill

I also had some sapele from another project that I had resawed to a quarter-inch thick, and that looked like it would make a pretty top and bottom for the case.

I had a chunk of yellowheart remaining in Earl's Shorts (thanks again, Earl!) that looked like it would make a good handle, so I cut out a rough handle-shape, then turned nice smooth ends on it, and smoothed out the handle.

Yellowheart handle mounted on the lathe

Yellowheart handle spinning on the lathe

I found a scrap of granadillo I had leftover from a spokeshave a couple years back, and drilled a couple holes in that. It took two or three tries before I got a clean hole without splitting the wood with my bit, but I eventually got there by clamping the wood in the vise while drilling it.

Drilling a large hole in a piece of granadillo

With the hole drilled, I shaped the wood on the bandsaw, then the belt-sander, and then finally resawed it in half to make a matching pair of hinges for the handle.

Granadillo handle mount

Yellowheart handle and mounts

With the handle done, I dovetailed the case together and put in the top and bottom, then sawed it open.

Completed case, sawed open and held together with blue tape

Hinges and latches were next.

Installed hinges on the case

Drilling holes for the latch

Then the handle, screwing the hinges into the case from the inside.

Handle, attached to the case

With everything together, it was time to start finishing. I decided to use Tried and True Varnish Oil on this, since I had plenty of time. I ended up putting on eight coats, with each coat going on, let it soak in for a half-hour, wipe off the excess, let it cure overnight, then burnish it with 0000 steel wool before putting on the next coat. It's pretty easy, but not the most exciting finishing regimen.

The inside of the case got a couple coats of BLO. I thought about using tung oil for better waterproofing, but adding another three or four days of watching oil dry didn't seem all that exciting to me for some reason. Plus I hurt my back and was out of the shop for a while, so I wrapped it up and shipped early.

Before shipping I cut some closed-cell foam I had on hand to fit four 12-oz beer cans and two 16-oz tallboys. To make sure I got things right, I made wooden templates I'll be able to reuse down the road.

With the foam cut, I also found a cold-pack that would fit inside the case to help keep the beer cold. No point in carrying warm beer around, now is there?

Next time, maybe I'll get a handcuff with a chain to further secure the beercase to the wearer. Some things just need high security.

#woodworking #project

Discuss... Reply to this in the fediverse: @davepolaschek@writing.exchange