davepolaschek

project

Originally written Mar 27, 2020

The completed plane with carved wedge, viewed from the right The left side of the completed plane

The spring swap this year was a surprise swap, so we could make anything we wanted. Since my shop was being built, and would not be complete until reveal week on the swap, I spend a while thinking about what I was going to build for the swap. I decided I'd make a skew rabbet plane. I have an old one which I use, but it's hard to find a nice old plane, and I felt I had okay chances of being able to make a nice-looking plane that was functional.

My "user" skew-rabbet plane, which shows the signs of lots of years of use

So I started trying things. I had a bunch of pallets from the hardware store, and used some of the lumber from them to experiment on. The first try had some issues. I couldn't drill the holes for the mortise as precisely as I needed with a bit and brace and without much better workholding than I could achieve on the tailgate of my pickup using a pallet as a workbench, and with only a half-dozen three foot long bar clamps.

Misaligned holes for the blade

The second try didn't go a lot better. The mortise was maybe a little less raggedy, but I had geometry problems with the multiple angles for the skew and the bedding angle and the different sized escapements needed on the two sides. I'm glad I was practicing on pallet wood while working out the details, since it was pretty clear I still had to so some more thinking.

Attempting to saw the compound angle for the mouth / escapement of the plane

My third try, I decided I'd make it a composite plane. I could then cut the mortise with a hand-saw and get good angles, and drill the sides separately, and most of the complicated geometric issues could be simplified. So I started by gluing a piece of poplar to a piece of ipe that I was planning to use for the sole. I went with the poplar because I still wasn't sure this plan was going to work, and I should have used something a little more stable.

T-board forming the core of the plane

It was about this point that I found that I was sending the plane to Brian in Spain, so I decided I'd keep my schedule as tight as possible so that he wouldn't be waiting on international delivery while everyone else was revealing the goodies they'd received in the swap.

Since clamping (and really any other operation) on this T-shaped piece of wood was difficult, I used a few drywall screws to screw some pallet wood to the sides of the poplar. That turned out to be the real trick, and I started making good progress. I got the mortise and the bed for the blade cut, and was feeling pretty good. The picture below shows the cutting, which was made easier by clamping the piece so I was cutting more or less straight down.

Cutting the mouth of the plane on my fancy workbench

Since I don't have a forge for heat-treating, this was when I roughed out the blade, too. It's a rabbet plane blade from Lie-Nielsen, and while it was a little expensive, there's no way I could've succeeded without it. Then I sent it off to Dave Kelley in AZ for heat-treating, as he volunteered to help out. Thanks, Dave!

This was also the point that I realized I'd made an error in my geometry, and had cut a left-handed plane body. On a skew-rabbet plane, you want the forward point of the blade on the inside edge of the rabbet, since that will tend to pull the plane tightly into the rabbet you're cutting. I decided that I was far enough along that I didn't want to change things to make it a right-handed plane. I've used both left and right-handed, and I can usually manage, even with a plane that goes the wrong way – it's only been a problem when I'm also fighting the grain, and that's why I have both left and right-handed skew rabbets in my collection.

Once I'd gotten the core of the plane cut, I removed the pallet wood sides, and started working on the nice cherry sides that were going to make the final plane. I laid out and drilled holes for the escapement (pictured below), cut a wedge from alder, then drilled in some indexing holes I could use when gluing all the pieces up (also below) so I could keep things from creeping while I was clamping all the pieces together.

Drilling holes for the escapement of the plane Drilling alignment holes for the dowels that would align all the pieces

Now that I had an idea of how all the pieces would go together, it was time to get the wedge cut and tweaked for thickness. It's not rocket surgery, but it's a lot easier to do when you can take the sides off the plane and look at the angles and draw directly onto the wedge with a pencil so you get things right. With that done, it was time for the glue-up.

Once the plane was glued together, I had a few days to wait for the blades (I made two, in case I screwed one up) to get back from AZ. I rough-carved the escapement at this point, but I needed a blade to know exactly how tall the escapement needed to go to make room for the blade.

Left view of the plane Right view of the plane

I then cleaned up the blade (removing scale from the heat treat, mostly), and put the final edge on the blade to match the actual glued-up plane body. Once that was done, I could fettle the plane, flattening the bed for the blade with floats, opening the mouth up enough to handle the blade thickness, carving the end of the wedge to help steer shavings out the escapement (they curl because of the skew, and I'm still not enough of a pro to know just how tightly they'll curl), and using my belt-sander to bring the plane down to final thickness (you want the plane to be just a hair thinner than the width of the blade so the blade edge protrudes just a bit). With no shop, the belt-sander just got wheeled out into the driveway, and I let the New Mexico winds blow the dust to Texas.

With the thickness right, it was mostly finishing work. Cut the chamfers on the edges of the plane so it feels nice in the hand, carve a little detail in the wedge because I knew Brian would appreciate that, and hit the various pieces with some linseed oil and paste wax.

And here's the note that went in the box:

pages 1 and 2 of the handwritten note, text reads: Brian, Happy swap! Enclosed find a rabbet plane made from ipe sole, poplar core, cherry sides and an alder wedge. I gave it a 45° bedding angle with a 30° skew. It should work reasonably well in most woods. The blade is O-1 steel. I got help from Dave Kelley on the heat treating. I have sharpened the blade, and it should be ready to go unless the post damaged it. Also included is a spokeshave with a Hock Tools O-1 blade. It is also made from ipe. You may want to touch up the blade, but it should also be ready to go. If you want a wider mouth, put a washer under each end of the blade. Hope you enjoy them. Finish on both is linseed oil, followed by wax. A little wax on the sole if they drag should make them good as new again. pages 3 and 4 of the note, which reads: I think that is about it. Hope you get years of use out of them. Oh! One last thing, the rabbet plane is technically a left-handed one. I cut the skew the wrong way and didn't realize it until I went to grind the blade. Oops! I can manage to use it right-handed though. I think you will be able to make it work. -Dave Polaschek p.s. I have not completely tuned up the plane. The blade is not perfectly flat, but it seems to bed well enough. Drop me a message if you find it chattering or otherwise not performing.


Spokeshave showing escapement and date mark

This was a spokeshave I made as a bonus for the 2020 surprise swap. I started with a Hock Tools blade, and these instructions for making a spokeshave. Plus a piece of ipe I had on hand. It went to Brian Johns, and I hope he's happy with it!

Spokeshave showing blade and sole

#project #swap #woodworking #toolmaking

Discuss... Reply to this in the fediverse: @davepolaschek@writing.exchange

Originally written Apr 2, 2019

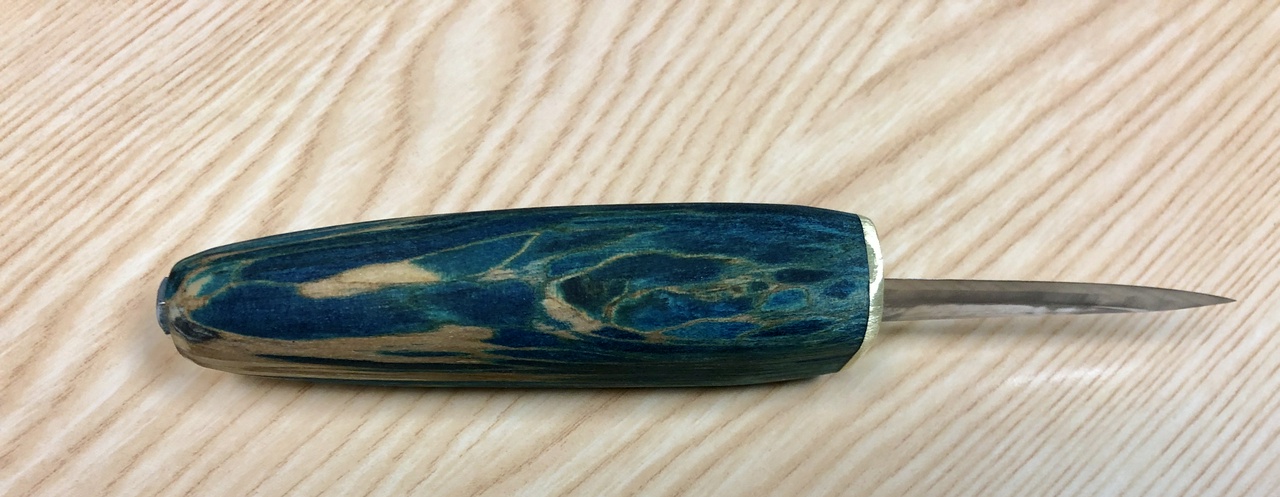
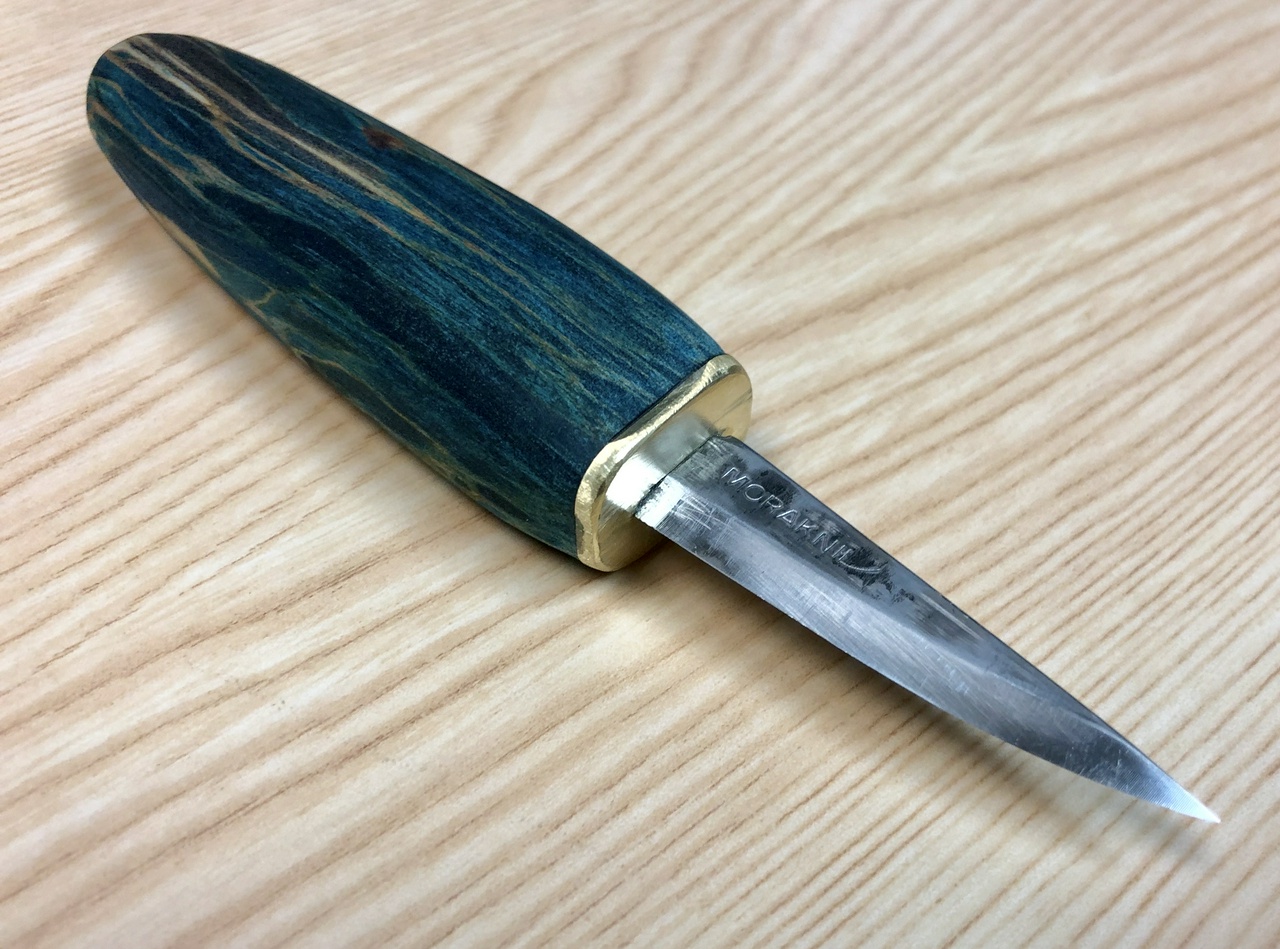
Another through-tang carving knife using a Morakniv 120 blade blank. Stabilized sweet gum from a friend's place in St. Louis, with blue and black dye. Also brass bolster from a batch made for me by a friend with a mill.

Right side view of the knife Spine view of the knife Left view of the knife Blade view of the knife View showing the guard / bolster of the knife View showing the pommel of the knife

Learned a few more things not to do while putting this one together, but it came out pretty well. Think I'll hit it with a thin coat or two of shellac before I call it completely done.

Brass guards and end mill bits

#woodworking #project

Discuss... Reply to this in the fediverse: @davepolaschek@writing.exchange

Originally written Jun 21, 2018, modeled on my shop dustpan

oblique view of wooden dustpan

I've got a friend who's opening a new shop soon. She cuts hair, and I thought that a dustpan on a stick would make a nice shop-warming present.

wooden dustpan sitting in front of a stucco wall

Hand-resawn poplar sides and back, dovetailed together. Mahogany? plywood top and bottom, a doug fir piece of molding on the back to tip the front down so it rests securely on the floor, an ash front strip and handle, and cherry “hubcaps” on the ends of the pivot.

front view of the wooden dustpan

Finished with a coat of BLO, three coats of platina shellac, and a coat or two of orange shellac.

glue-up view of the wooden dustpan, with the bottom partially installed so that the sides stay the correct distance apart

#woodworking #project

Discuss... Reply to this in the fediverse: @davepolaschek@writing.exchange

Originally written May 9, 2017

Completed shop stool

Back in February, I bought a large slab of spalted elm I'm using to build a new workbench. A piece from the end of the slab was big enough for a stool, so I decided to build a tall and sturdy shop stool for myself.

Slab of elm. This will become a seat

Two corners cut off the slab

I cut two corners off a rectangular piece, then shaped the legs from red oak using a jig and a jack plane. Took another piece of red oak and spoke-shaved it down to make a stretcher, and built another jig to drill the angled holes in the legs for the stretcher. Then made the final stretcher from a scrap of white oak, and built yet another jig for the hole in the back leg, as that's at a different angle than the first two legs.

Red oak stretcher

Some holes and some glue, a little clean-up with a card scraper on the legs.

Legs in the stool, stretcher between the legs, clamped with brightly colored vet-wrap

Carved the seat using spokeshaves and trial and error. Finish it all with three coats of BLO and I have a completed stool.

Stool with a flat seat - carving of the seat is next

The design is loosely based on a stool made by Chris Schwarz.

#project #woodworking #shopFurniture

Discuss... Reply to this in the fediverse: @davepolaschek@writing.exchange

Originally written Jul 4, 2017

Five board bench in its original leftover house-paint finish

Lately all of my woodworking projects seem to take a long time to wrap up. Last Saturday, I noticed Dave Rutan's five board bench post, and said to myself, “Hey, I could make one of those pretty quickly!”

I set up my 7” miter saw, dug out an 8' 2×12 and an 8' 2×4 and got to work. First two cuts (with a hand saw) were the legs. 20” seemed about the right length. Then a 48” seat left me with an 8” long scrap. The 2×4 got one end chopped off at 45 degrees on the miter saw, then cut to 48” on the long side, and another 48” long chunk of 2×4, which left me with a 6” long piece of scrap.

With my five boards cut, and the miter saw already set to 45 degrees, I cut the wedges out of the bottom of the legs. I made the straight bit 3” wide, with a 6” wide cutout in the middle. I didn't worry about the depth of the cut, figuring that this is a quick and dirty bench. I also cut the notches in the tops of the legs to put in the 2×4s down the sides of the bench. Again, I didn't worry about the depth of the cut, figuring that it wouldn't be too big. I did cut off the notches with a hand-saw so I didn't have too many stray cuts.

Assembled five-board bench

Two cordless drills, one with a drill bit for pilot holes, and the other with a Torx bit, plus a couple dozen deck screws left over from another project and I was into the assembly. The legs and sides went together first. Drill, screw, check for square. Two screws at each corner and things seemed square enough. Drop the seat on top and screw in one corner. Check for square, adjust a little, and drive in the screw diagonally opposite the first one, and things should be good. Four more screws and the seat is on.

end view of the five board bench

Then I sat on the seat, and took a 6tpi rasp to edges, corners and such, rounding things off to make it less likely someone would get a splinter. As I worked, I noticed that there was a little wobble in the bench, so I grabbed the 8” chunk of 2×12, and cut it in half diagonally, then put that between the leg and the seat with four screws holding everything in place. Went to the opposite corner of the bench and did the same with the 2×4 scrap I had (the other half of the 2×12 had a knot that looked like it might be weak, so I tossed it).

bottom view of the five-board bench, showing the handles

Everything together and smoothed, I cut two handles in the top. Two sets of five holes made with a 1” spade bit, then a little rasp work to clean them up, and I had handles (or flatulence slots). Used the bench that afternoon at a neighborhood picnic. It's nice to do a project that's usable in a single day!

Sunday I primed the bench. Monday I painted the underside and today I painted the top.

Five board bench sitting on our portal with a rostra hanging near it

Updated Oct 7, 2020: Here's the bench after we moved to Santa Fe and repainted it with a sea-green enamel rather than leftover house paint. It sits next to our front door, and many of our neighbors have commented how nice it is.

#woodworking #project

Discuss... Reply to this in the fediverse: @davepolaschek@writing.exchange

Originally written Oct 29, 2017

Completed dustpan, sitting on a bench

I've been needing a dust pan for my shop for a while. I have a cheap one, but in order to sweep up, I end up having to bend down, and with my bad back, that's no fun. So when I saw the one in Popular Woodworking by The Schwarz, I added that to my to-do list.

Sides of the dustpan, held in a vise with the rasp and spokeshave that shaped the curved bits

I cut a couple pieces of elm for the sides. They've been rattling around my shop for a while, and I wasn't sure what to do with them. A piece of scrap hemlock served as the back. The handle is the leftover legs from a failed shop stool rounded off with a 1” circular plane (aka dowel maker) and then tapered down to 9/16”. I wedged the two pieces of handle together, then drilled 11/16” holes in the elm sides, figuring that the tapered bit would fit in there pretty well.

Fitting the handle pivot to the width of the dustpan

A piece of 3/16” plywood made the top and the bottom of the dust pan. The sides sit in rabbets on the back, as I'm no good at dovetails. The back sits about a half-inch below the bottom, tipping the pan down so the front edge is flat on the floor, and I tapered the front end of the bottom by planing it a bit. The bottom isn't held in especially well, but the back of it sits in a groove in the back. If it fails, it should be easy to make another and replace it. The front edge is a little fragile, and I expect it'll wear out over time, requiring me to plane it down every once in a while. Maybe I'll make a metal edge at some point.

Fixing the handle to the pivot

I made a couple “nuts” out of walnut I had laying around to dress up the ends of the pivot in the pan. Glued them on and then finished the dustpan with a couple coats of BLO. I'll probably wax it at some point.

Gluing the dustpan together

Update: Jan 26, 2023: This dustpan still gets used almost ever day I'm in the shop. The only complaint I have with it is that the handle should be about six inches longer so I don't have to bend at all to use it, but otherwise it's a champ!

The dustpan, minus the top

I also made a second version of this as a gift for a friend.

#woodworking #project

Discuss... Reply to this in the fediverse: @davepolaschek@writing.exchange

two turned shaving brushes flanking three bottle stopper / pourers

I took some time off from bigger projects in the shop lately to play with my lathe.

Pictured above, from left to right:

  • A eucalyptus and ash shaving brush. The brush is silvertip badger, and is pretty nice. The eucalyptus was cut and the kerfs replaced with pieces of ash microlumber the same size as the kerf of my table saw, and then I turned the resulting piece to make a Celtic knot. This was the second shaving brush I made in the past week.

  • A russian olive bottle stopper / pourer. This was the third of three bottle stoppers I made. I had a little fun with the shape, trying to enhance the look of the grain of the wood.

  • A maple and pernambuco bottle stopper / pourer. My second of the three, and first attempt at a two ring celtic knot. The pernambuco tends to chip out if I’m not super-careful in my turning. Lesson learned…

  • A maple bottle stopper / pourer. This was my first attempt, and I was mostly concerned with getting the hole for the stopper the right depth. I decorated the maple a bit with a Henry Taylor Decorating Elf which uses a spiral bit to make different patterns depending the angle you hold it in relation to the moving wood on the lathe. I also used some markers to add black and red rings.

  • A mimosa shaving brush. My first attempt, and I didn’t get too fancy, just letting the wood do the talking. I think it came out pretty well. Mixing the very small amount of epoxy needed (about 7.5ml total) to glue in the metal cap and the knot of the brush is tricky, but I did discover that if I wax the wood really well first, it’s easier to clean any slop off afterwards.

#woodturning #woodworking #project

Discuss... Reply to this in the fediverse: @davepolaschek@writing.exchange

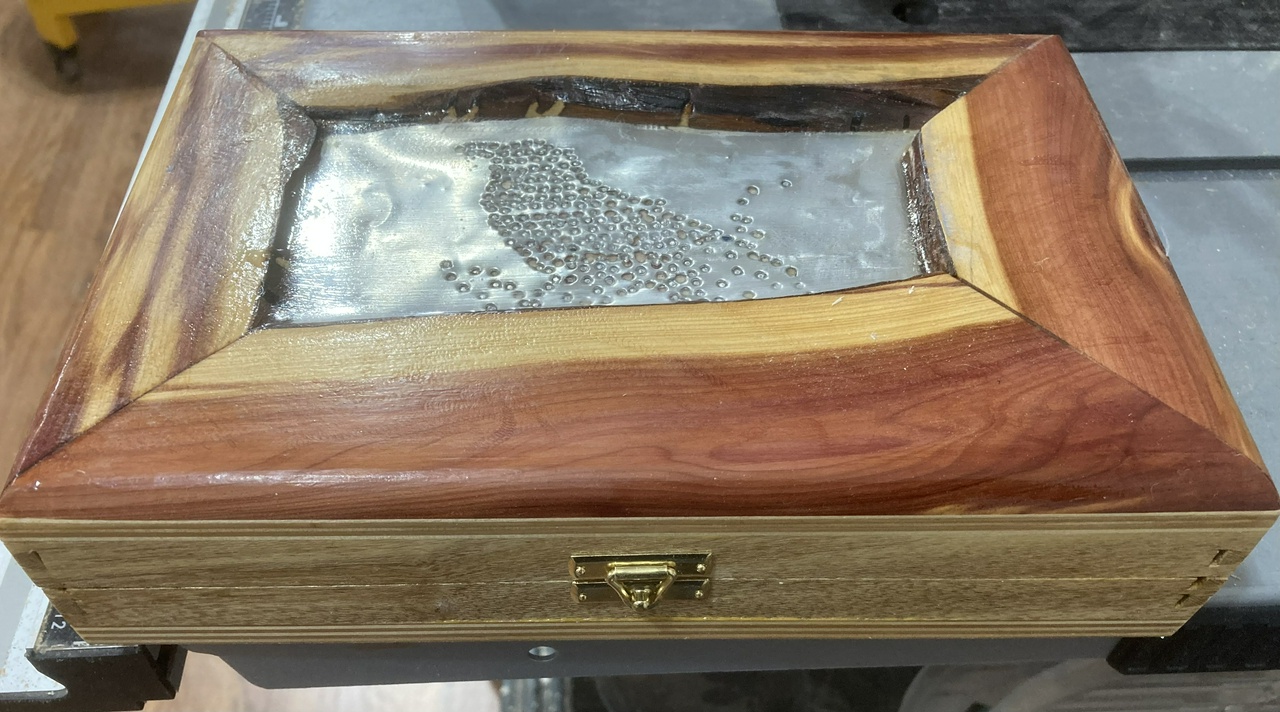
I wanted to experiment with punched metal. Well, I clearly need more practice, but it’s promising, and I think this one came out good enough to send off to a friend.

oblique downward view of the box, showing the top and front

I started with a photo of a raven that I printed onto a piece of paper, then taped it onto a cut-open and flattened-out Coke can. Then I punched where the dark was in the image, putting the punches closer together in the darker areas and farther apart in the lighter areas.

raven sitting on a juniper branch, head slightly raised

The biggest problem is that I couldn’t keep consistent in how hard I was punching the metal, so about half of my strikes tore through it, rather than leaving a dimple. But when I started, I thought maybe I wanted to punch through the metal, so I learned something there. I also was using a 1/32 inch nail set, which ends up being pretty big. I may have to grind my own punch for this. Or make a few.

interior view of the box - quite plain

The box is dovetailed salt cedar sides, a 9mm plywood bottom, and a 6mm plywood top with juniper put on top of it to hold down the metal. After gluing that up, I poured about 50ml of epoxy over the metal to protect it. A pop can might be thinner than is ideal for is sort of thing, as pieces of metal broke loose as I was trying to glue it down. More learning, there.

top view of the box, showing the metal with no reflections

The box is finished with a few coats of shellac. Super blonde, I believe. I like the way the salt cedar grain darkens when finished, and the juniper really popped when the shellac hit it. It’ll fade some over time, but the contrast between the red heartwood and blonde sapwood will remain. It’s going to a friend, and hopefully he’ll like it.

#woodworking #project

Discuss... Reply to this in the fediverse: @davepolaschek@writing.exchange

This is a manually-built list of woodworking projects I've documented over the years. There may be more if you search for the #project tag, although there may be a few more in here, too. I'm still trying to get myself organizized.

#contents

Discuss... Reply to this in the fediverse: @davepolaschek@writing.exchange

Originally written May 3, 2018

Finished Octagonal dovetailed box

I wanted the box I built for the box swap in 2018 to be different. I looked through nine-hundred-some box projects on Lumberjocks and saw that octagon boxes, while not common, weren't entirely rare either. But none that I saw were dovetailed. What the heck, I had just learned to cut dovetails this year, so how hard could it be?

I started with some sketches. As you'll see, the design diverged a little from the sketches, but some things stuck all the way through.

Corner detail sketch for box, showing half-blind dovetails and feet on the corner pieces

Overall dimension sketches and preliminary sizes for octagonal box

Foot / corner detail sketch with ideas for decorating the corners

I started out with experiments in cutting 135 degree dovetails and built a jig to help me get them right.

I also started resawing the wood I was going to need to build the box. I had some ash that had nice grain, plus some walnut that would look good for the corners. I also had a piece of bocote that I planned to use for the lid. First step, resawing the ash.

Resawing the ash boards with a big frame saw

Using a wedge to hold the board open while resawing it

Once that was done, I made a template for the corner / feet and printed out a half-dozen copies of it. I would only need four, but I figured a spare or two might prove handy along the way.

Corner template glued onto a piece of walnut and the wood cut to match

I glued the templates onto the walnut and cut out the corners. Took them to the miter jack to put 45 degree ends on them. Then basing the height of the sides on those templates, I cut the sides, using the usable lengths of ash I had (my resawing wandered a little, as it usually does, so I had about half the length of the boards that was actually usable).

Then I cut the pins in the walnut. Not everything went perfectly, but I figured the worst case was that I'd cut the ends off and try again.

Cutting the pins with the walnut held in the 45 degree jig so I could be sawing level

With all the dovetails cut, I tried my first test-fit. It wasn't great and the dovetails were gappy in spots, but the box felt pretty solid, so I'd done well enough.

The box test-fit together

Now it was time to get started on the top. I glued up the bocote with some basswood on a piece of ¼” birch plywood. I had originally planned to use some holly around the bocote, but the pieces I had weren't large enough to work with the box-sides I'd cut, so I had to switch to something larger. I lined up the bocote to make the grain pretty to my eyes, then put the basswood around it. I forgot to take a picture of trimming it square and then putting on the end pieces. Oops.

The pieces which will become the lid of the box

Next up was the bottom. I cut the angled cut-outs for the corners with a coping saw, leaving the flats plenty long, then trimmed them to size with the plane. I've found this helps me sneak up on a good fit slowly. I just wish I'd been able to think of a way to do that for the corners too, since they ended up with gaps between them and the corners when I test-fit everything. Oops.

With the top and bottom cut, it was time for the initial assembly.

Test-fit of the box with the lid and bottom in

Clamping the bottom onto the box

I glued everything together and crossed my fingers. Since I could see that the top wasn't a great fit, and I'd have the edges of the plywood exposed, I got online at inlaybanding.com and ordered some banding. I figured that could cover the edge of the plywood nicely, and also could dress up the top of the box.

While I waited for the banding to arrive, I planed the top down, essentially freeing the top from the dado (or turning it into a rabbet). But as the top was glued in, it held, and I wanted a level surface to attach the banding to.

Assembled box with banding covering the plywood edges of the bottom of the box

I glued the banding to the edge of the plywood, but the banding I'd picked was ⅜” so it extended beyond the ¼” plywood and almost covered the groove I had put in the ash sides.

I also realized that I needed a way to cut the miters for the top. I built a guillotine for cutting the banding using some scraps and a utility knife blade.

Clamping the banding to the lid to cover gaps

Clamping the last of the banding to the lid, seven of the eight sides are visible

With the banding on, it was time to fill the gaps. I used sawdust (mostly ash) to pack the gaps, and then wet it with CA glue. I've found this a pretty good trick for filling small gaps. I also dripped CA glue into the tiny gaps in the banding and then went over it lightly with a sanding block while the glue was still wet, pushing dust into the gaps. That filled the gaps in the banding reasonably well, too.

I put five coats (two of platina, then three of orange) shellac on the outside of the box at this point. I wanted to get to the final color before cutting open the box, and it was a lot easier to pad on the shellac with the box intact.

Next up was sawing off the lid. I had never done this before, and we were getting close to the end of the swap, so a mistake at this point would have been catastrophic. I carefully applied blue tape to the box where I wanted to cut, and then started sawing. It all went well, but I was sweating up a storm in the 45 degree shop that day.

Sawing the lid off the box with a backsaw - blue tape marks the line to saw to

With the lid off, all that was left was applying the hinge and latch, putting a couple coats of shellac on the inside, and then gluing in the felt bottom with contact cement (handy tip: do one half of it first, then once that's in straight, do the second half). I had done it!

Detail of one end of the box, showing my maker's mark

Detail of the other end of the box, showing the dedication

View of the interior of the box, showing the black felt lining the bottom

#project #woodworking

Discuss... Reply to this in the fediverse: @davepolaschek@writing.exchange