davepolaschek

woodworking

This is the story of the pair of knives I made to send to MaFe, with the plan that he would pick one of the knives for himself, and then send me a sheath for the other knife in return. As I wasn't sure of the size of his hands, I made the knives similar in size, sized more for my large hands than his, but figuring he could always remove some of the bark to make a smaller handle, which he did.

Knife blanks and brass bolsters

Two knives with partially completed stacks of birch bark

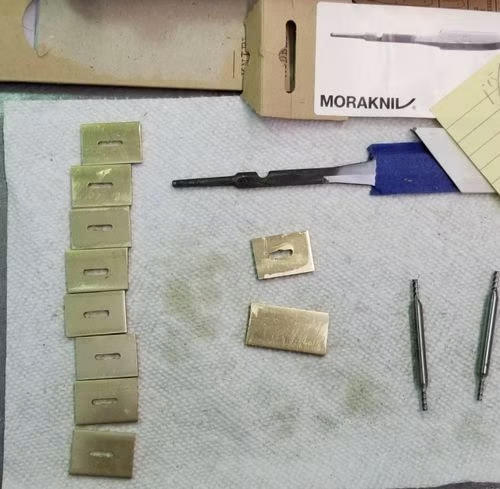
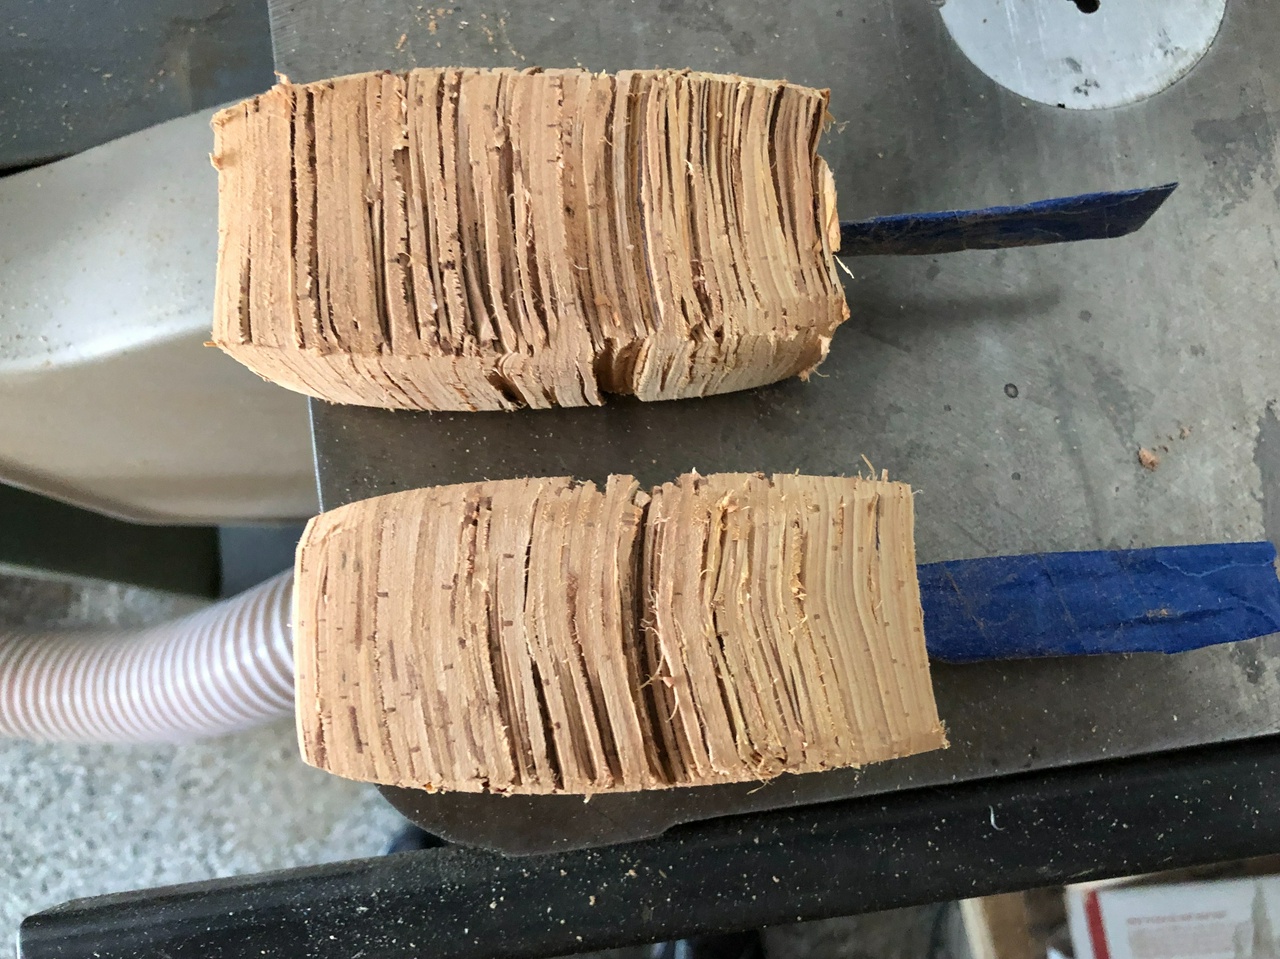
The knives start, as in the pictures above, stacking birch bark on the tang of the knife, plus a brass bolster I set on the tang. The knife blank comes from Morakniv and I like their 106 and 120 blanks. The birch bark comes from Russia, and there are a number of vendors on eBay who sell stacks of birch bark. I've found that the Russian vendors tend to have the best price (even including shipping) for prepared bark. Buying birch bark stacks from the US, I end up with a lot more waste, because the bark hasn't been scraped as well.

SPRAD comes from Mads reading my description, and noticing that the blades came from Sweden, me, from Poland, the birch-bark from Russia, and the knives moved from America to Denmark. Truly international!

Shop-made tool to compress birch bark as it is stacked

Using the shop-made tool to push down a layer of birch-bark

I punch the holes in the bark using a leather punch, making a line of one, two, or three holes, depending on which portion of the tang the piece of bark is going on. I also use a shop made tool to compress the bark as I work, making sure the layers are stacked as tightly as I can. I also thread the tail end of the tang at this point. Due to the square tang, what I usually do is thread it first with a 10-32 die, then thread it again with an 8-32. I want about a quarter inch of threads to work with. I'm sure there are metric sizes that will work well, but having the pair of dies with the same threads means I can do this as a two-step process, rather than having to anneal the last bit of tang so I could thread it in one step.

Shop-made vise to compress the layers of birch-bark

Once I have nearly enough layers on, I compress the handle further using a shop-made vise, and I put the handles into the toaster oven at 225F (105C) for a few hours. This will soften the pitch in the bark, and will somewhat “weld” the handle together. This step isn't absolutely necessary, but I've found that I get a better handle by doing it. I can also tighten the vise down a little more after the handle has been baked, further compressing the bark.

Some will put the handles into boiling water at this point, but I think that's hard on the steel. Others will compress the bark in a stack, boil it, and then drill a hole for the tang of the knife. But as with most woodworking, there's more than one way to do it.

Pommel of knife, showing washers and nut on the tang of the knife blank

After the handles have been baked, I'll add a few more layers of bark, then cap that off with a few washers, then an 8-32 nut. I try not to crank this down too tightly, and if there's room, I'll add more layers of bark to fill the space so the end of the tang barely protrudes from the nut as in the picture above. I've also used a piece of brass for a bolster, but the stack of washers is quick and easy, and looks good to my eye.

Birch bark knife handles, roughly squared

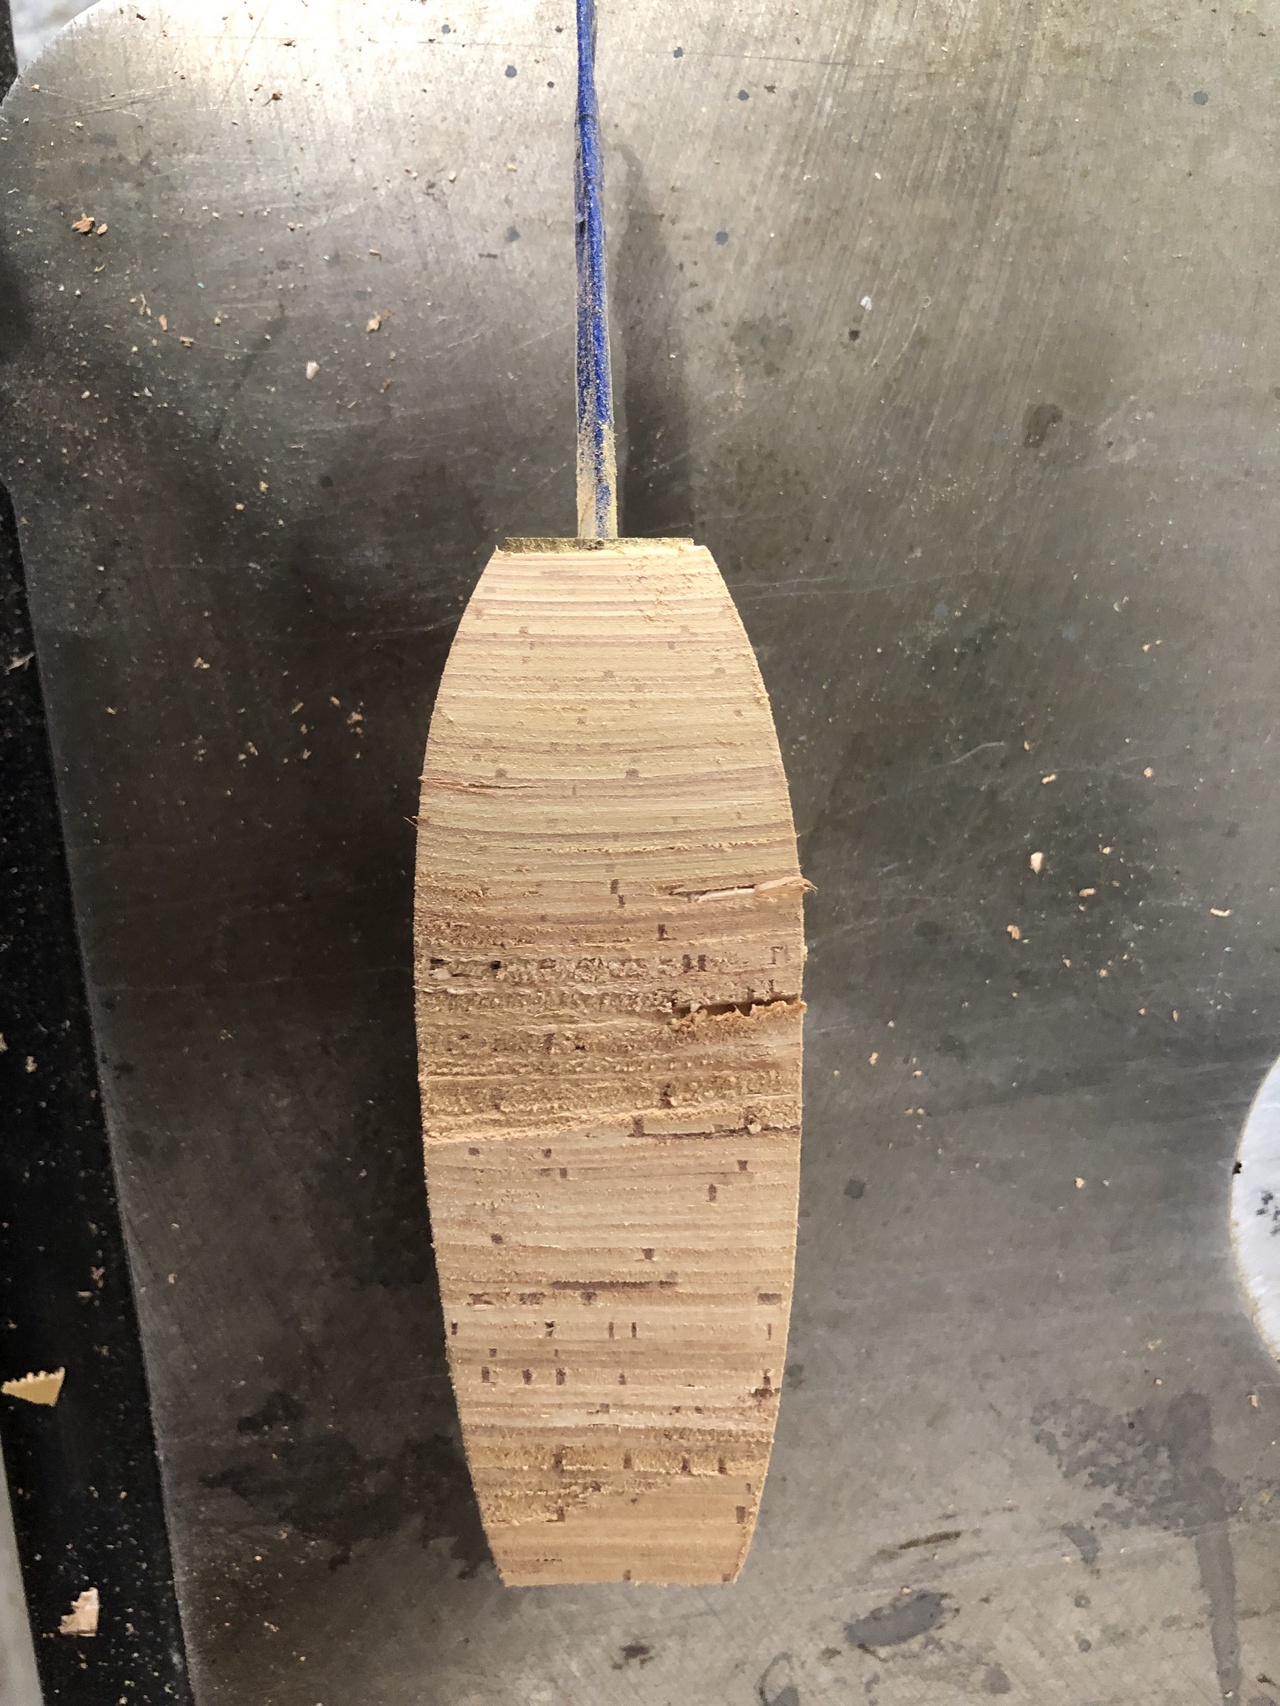
That will leave me with the very rough handle. I will rough that in using the bandsaw (very messy) or a carving knife (less messy, but slower)

Birch bark knife, showing how the bolster serves as a guide for squaring the birch-bark

Knife with handle tapered on the blade end

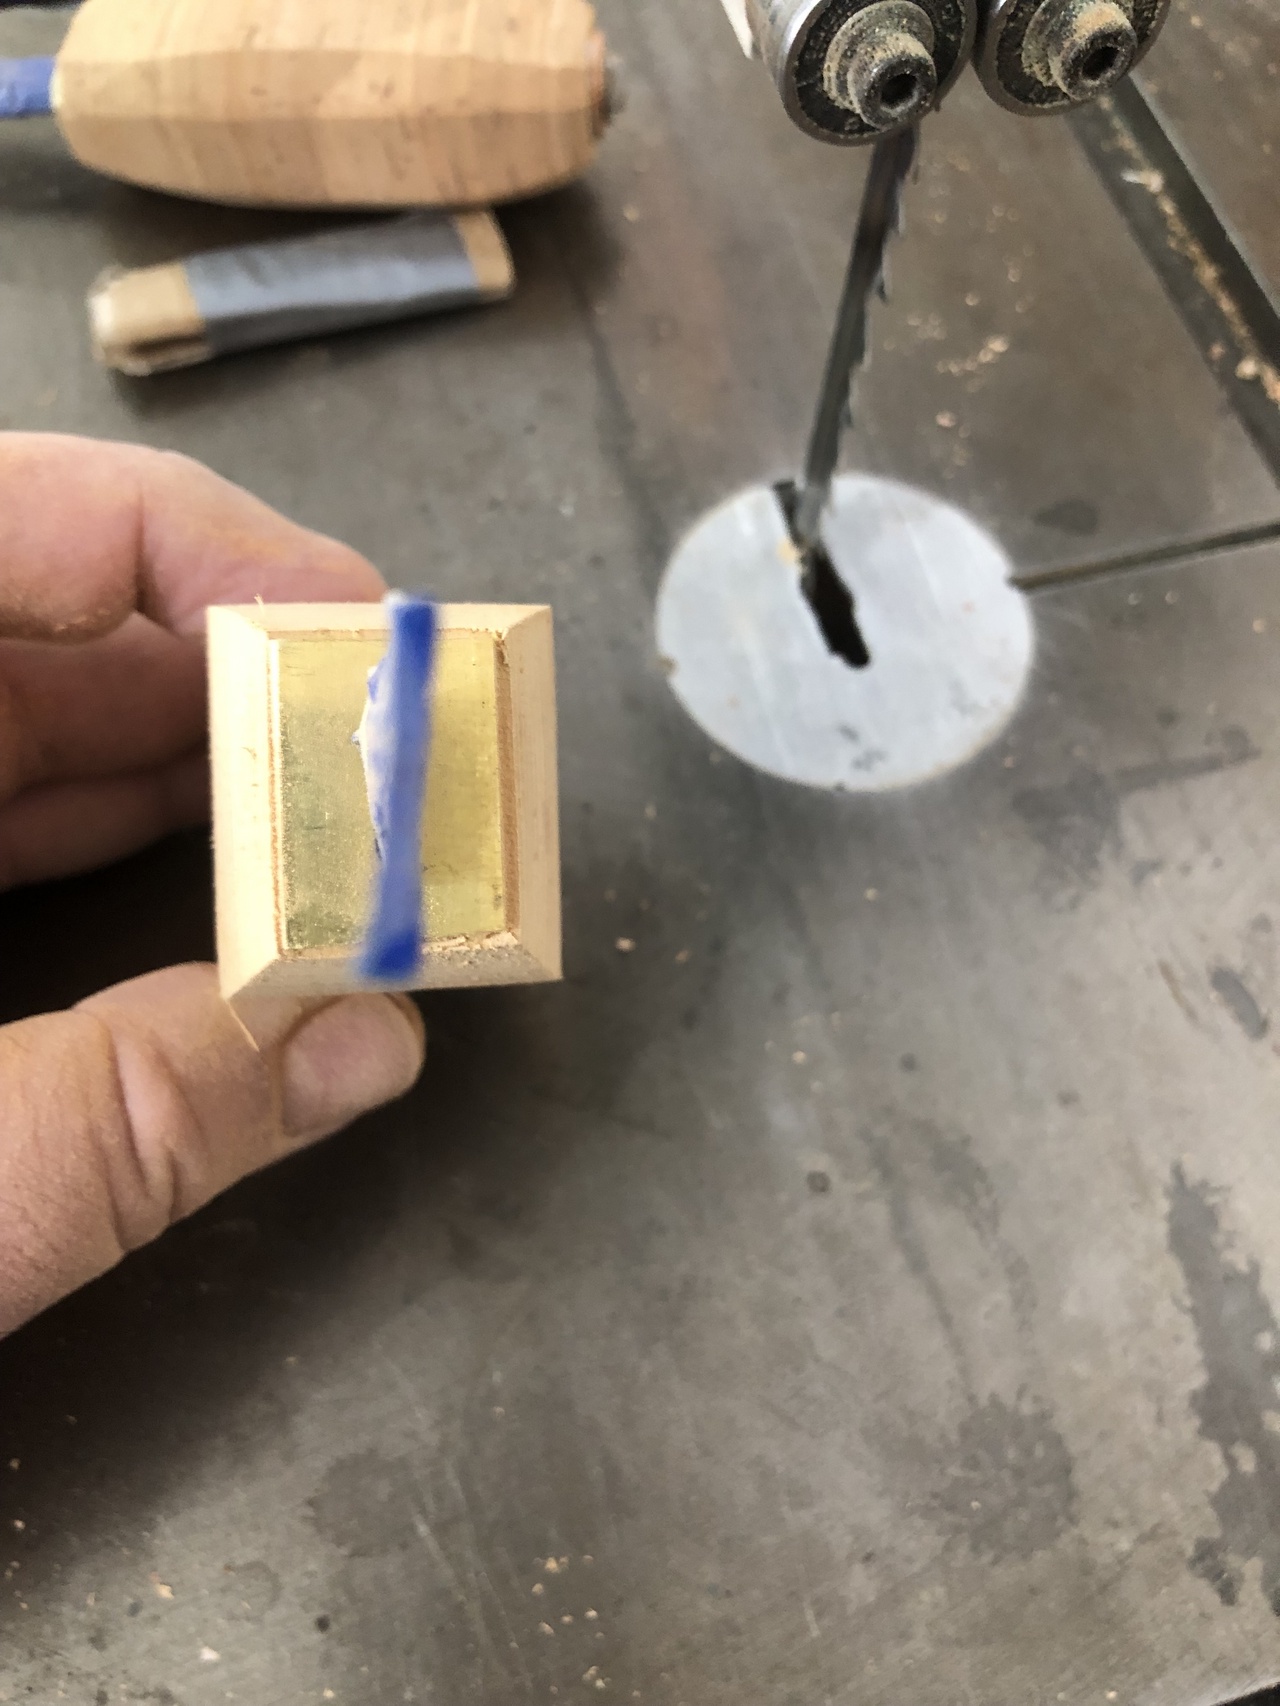
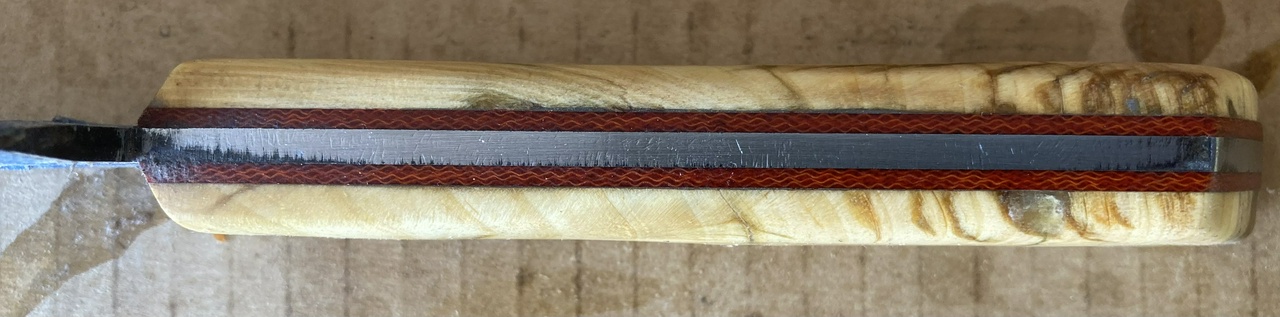
Then I move to the belt sander. Make sure to wear a dust mask at this point, as the birch bark may contain fungi or other things that will be bad for your lungs. I work to a square first, then add a taper as in the picture above. The rectangular bolster serves as a reference for me at this point.

Birch bark knife handle tapered on both ends

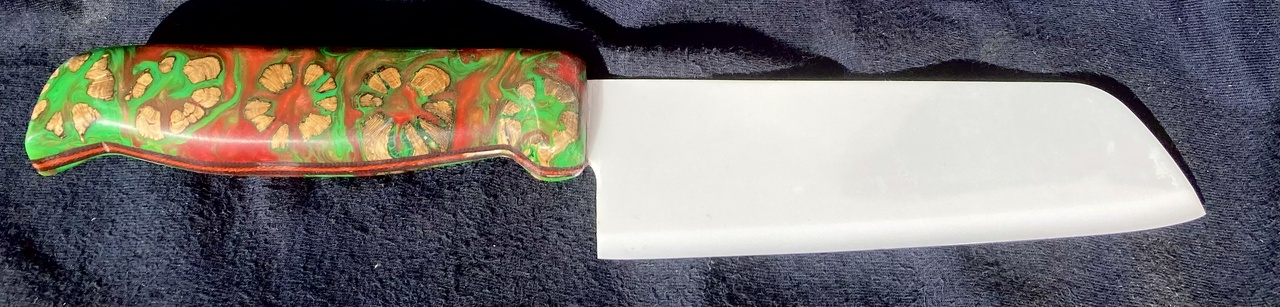
Then I octagonalize the handle, maintaining the taper. This is when I will sand down the nut and washers if I want to make them look less like they came from a hardware store. My “look” is still evolving, and I'm not sure what I like best. Then work to round the handle last. This is a fairly slow process, with lots of pauses to check my work along the way. In the case of these knives, Mads had said he preferred an octagonal handle, so I stopped without making his handle round.

Mostly-completed knives, one round, and one octagonal

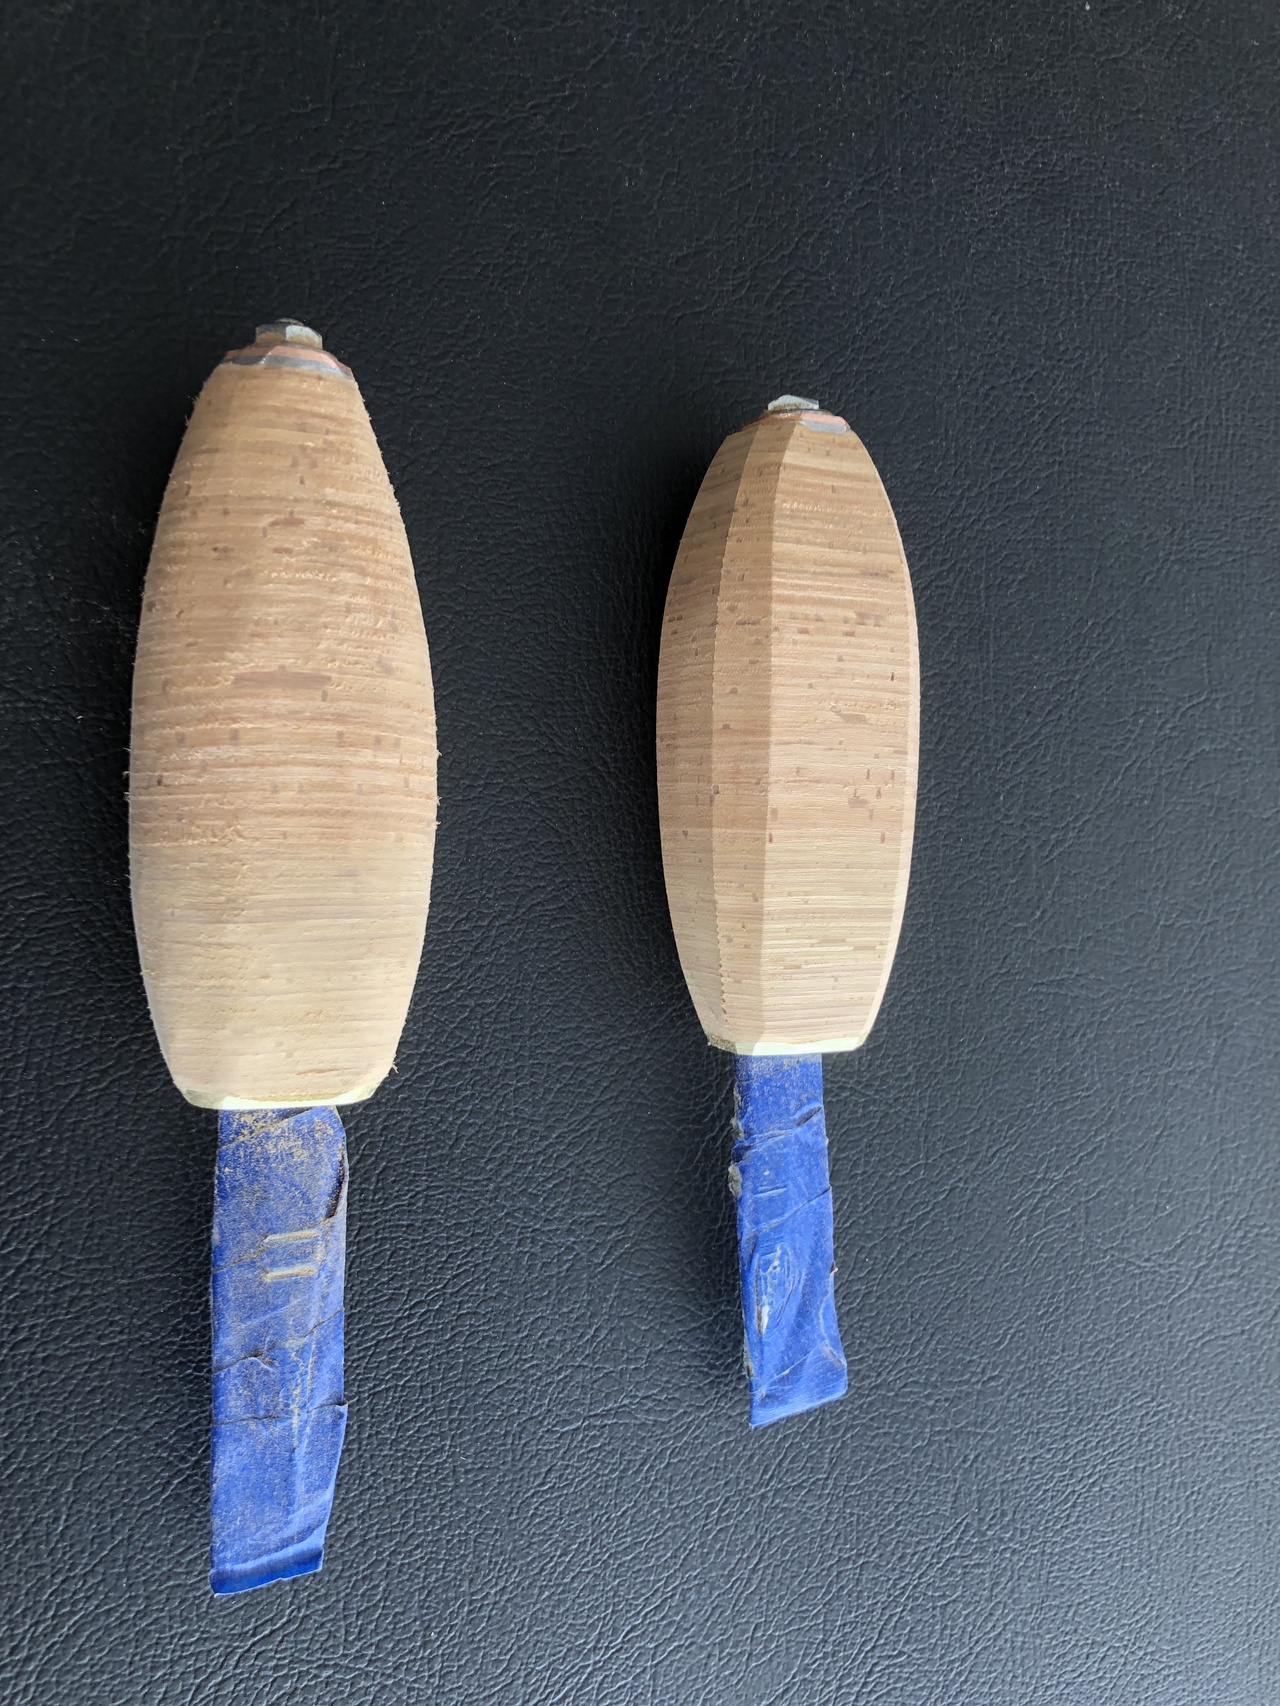
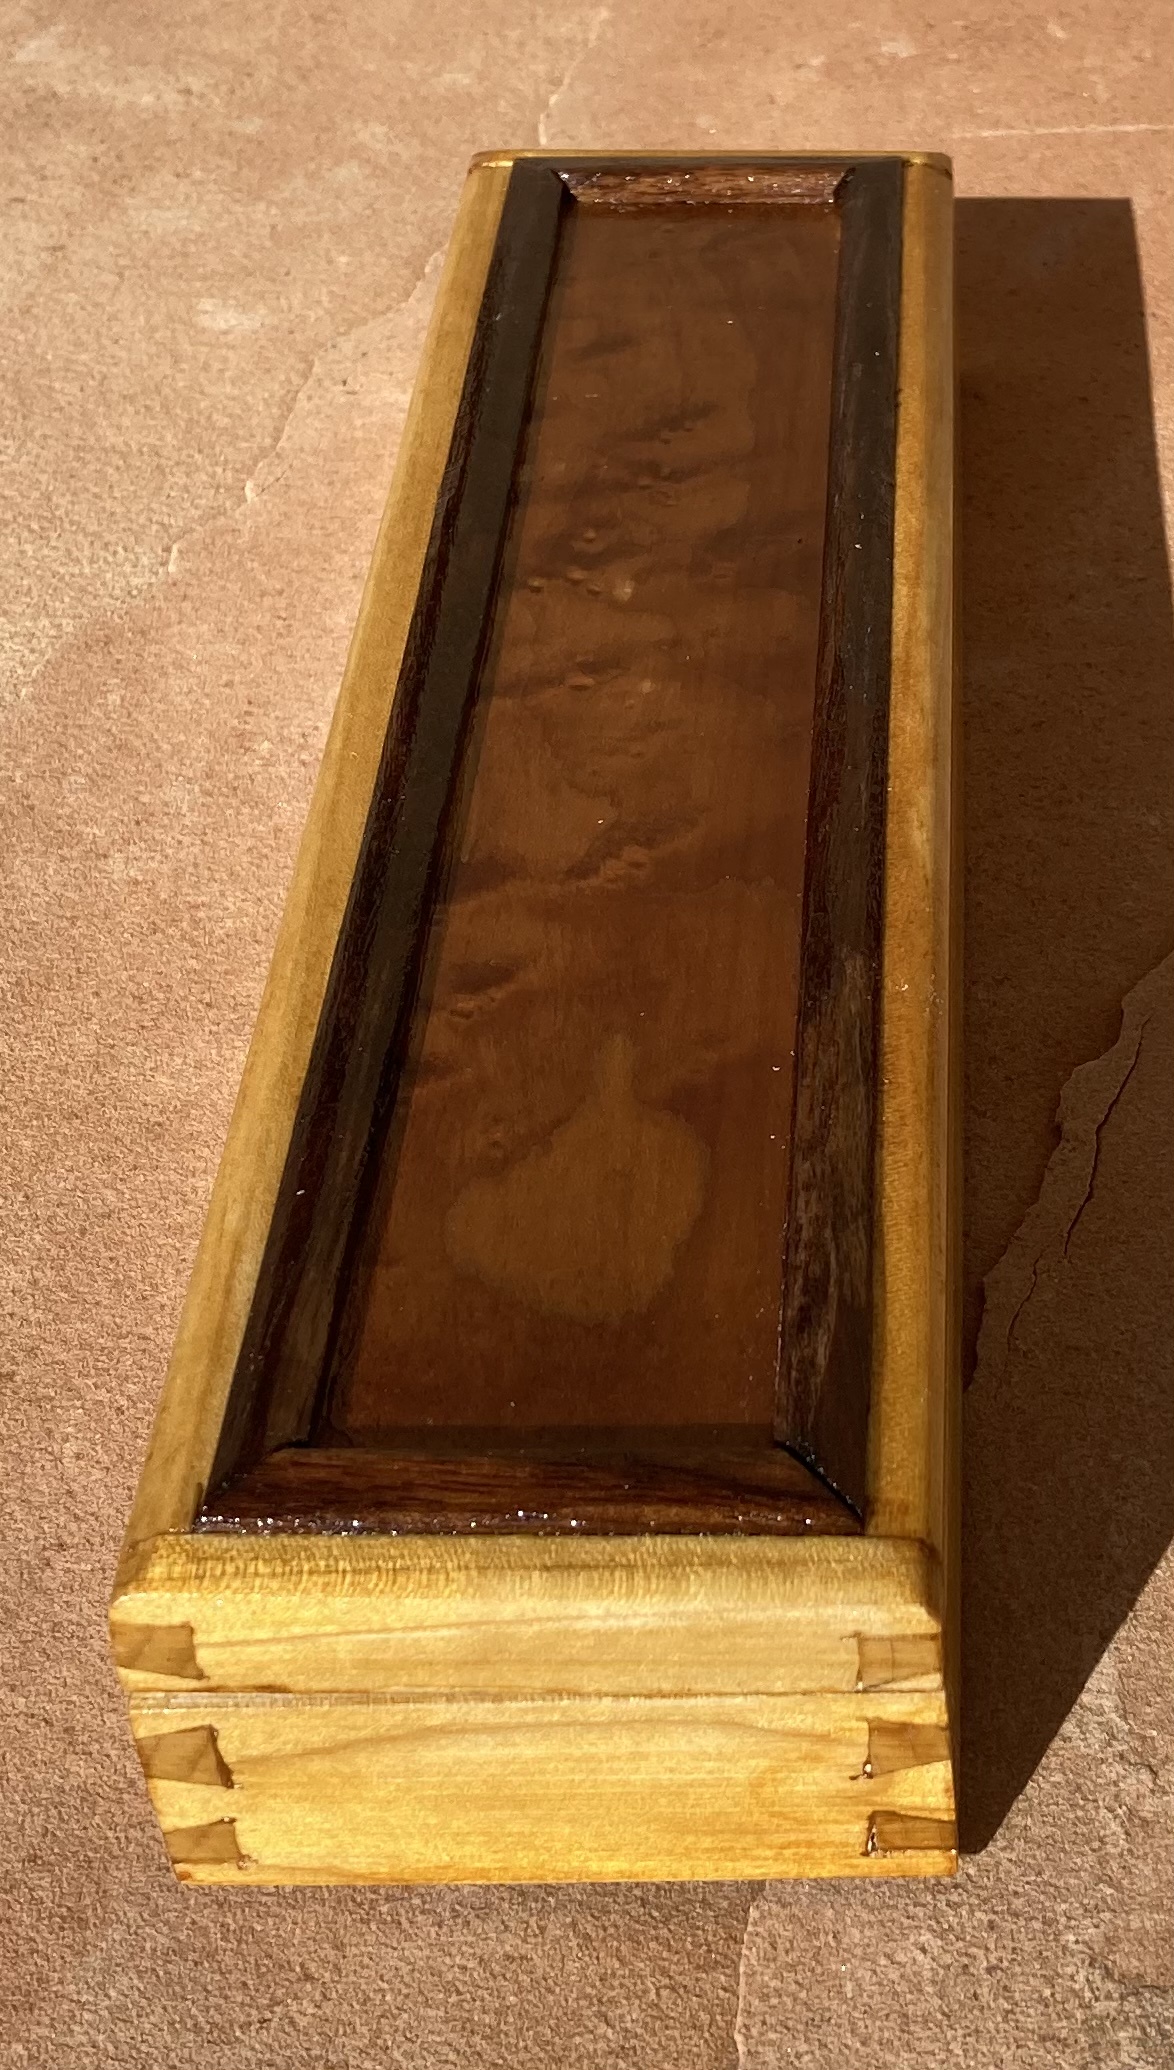
And that gets us to picture 1 which is the pair of knives that I sent from America to Denmark to put the AD on the knives. There, Mads shaped the handle on his knife to suit his hands, and then made sheaths for both knives and sent my knife back to me.

Knife with sheath, and packaging material from Mads

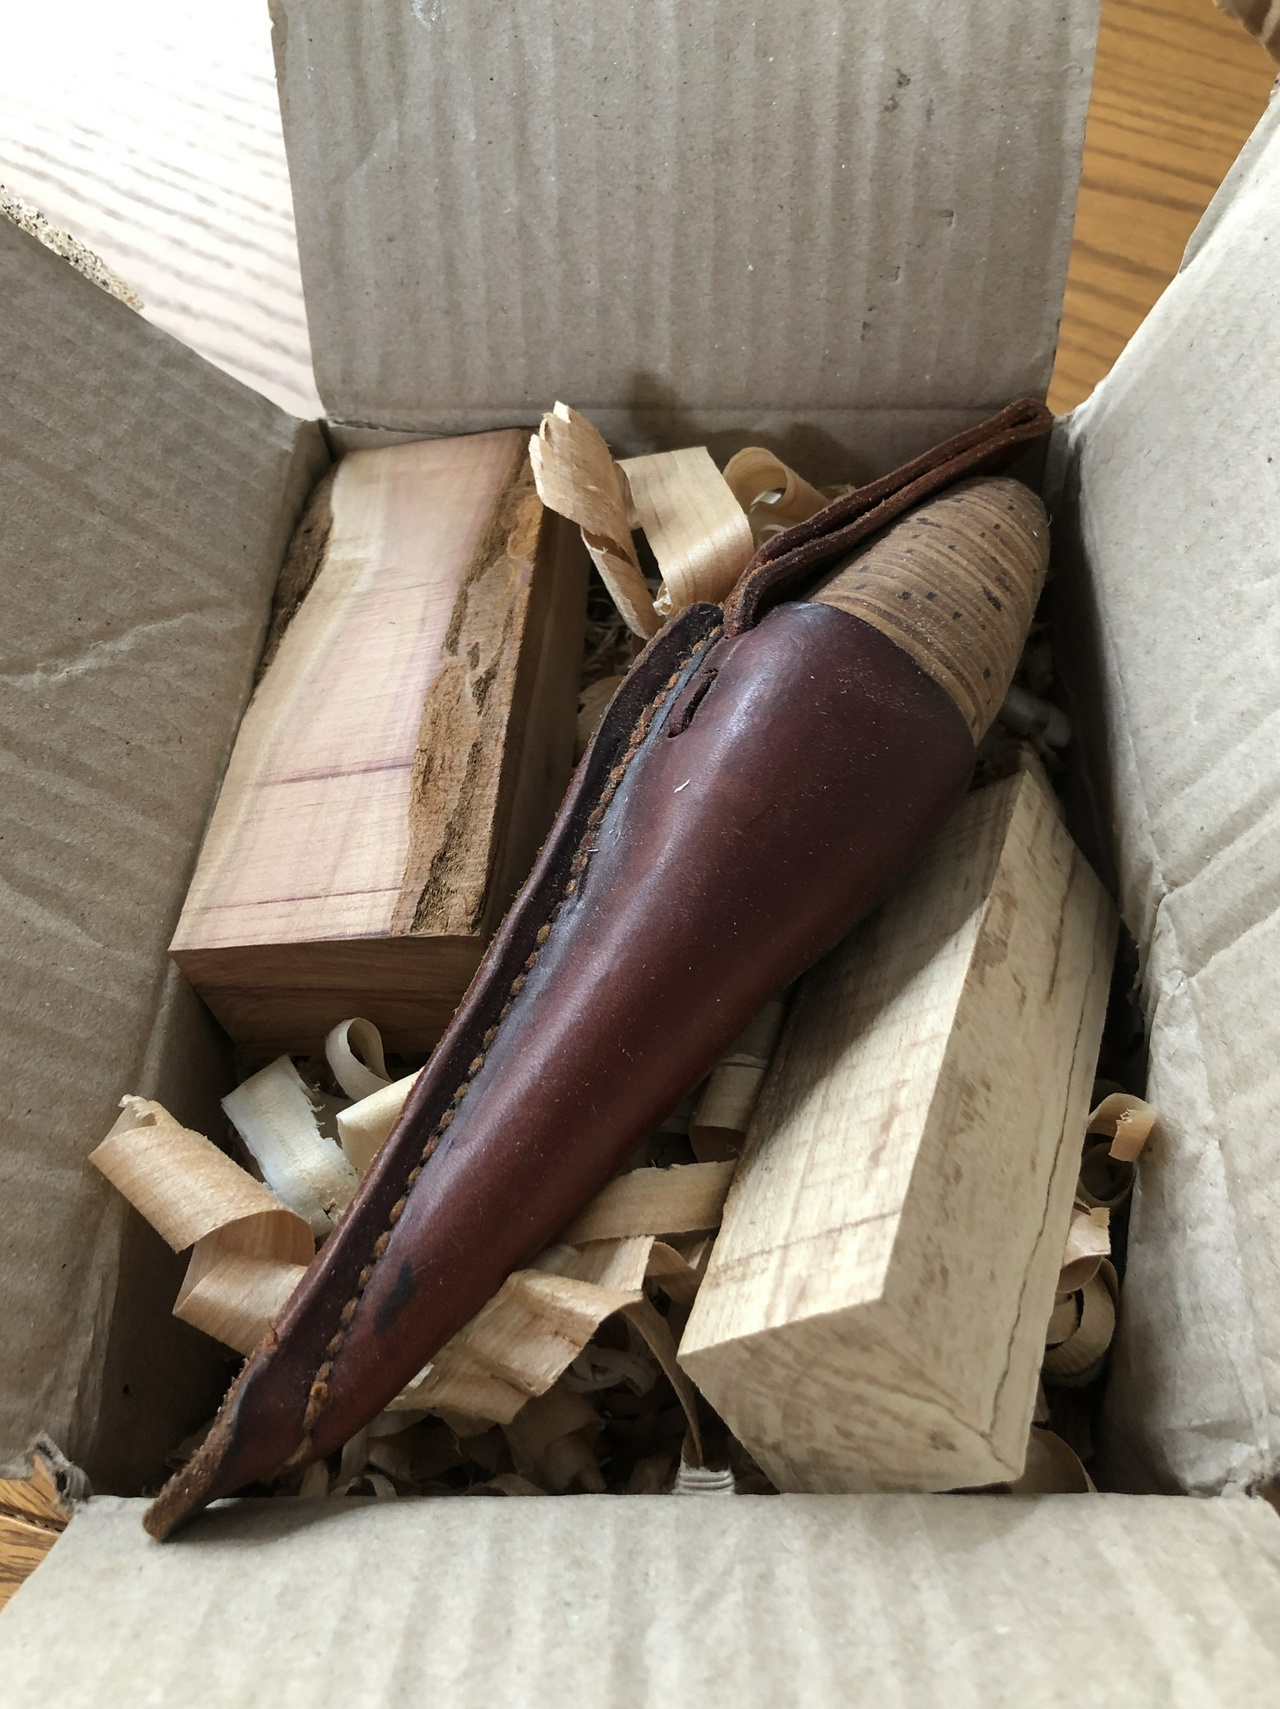
I received the knife before we moved to Santa Fe, but after most of out stuff had been taken by the movers, so the knife became part of my “truck kit” of woodworking tools, which I used to make small repairs around the house before selling it.

Truck kit of woodworking tools

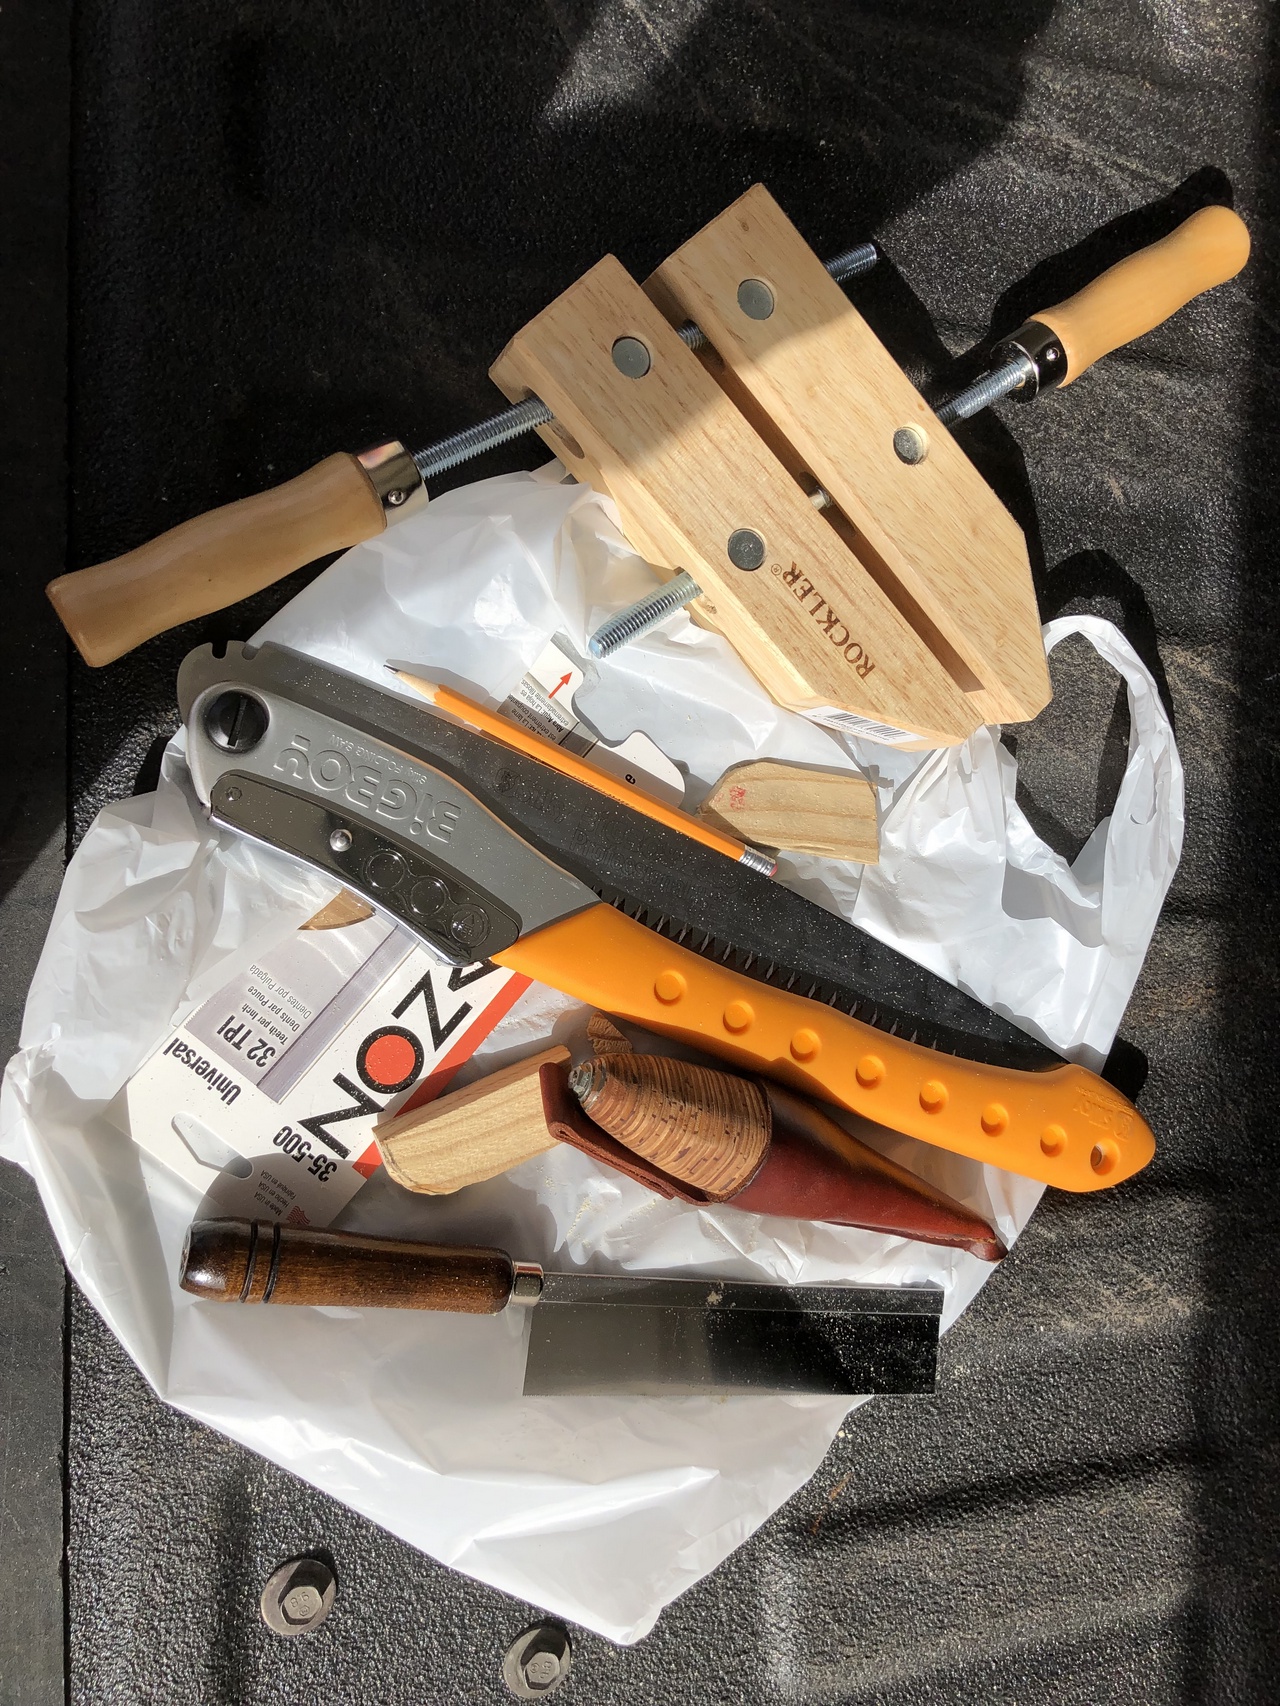
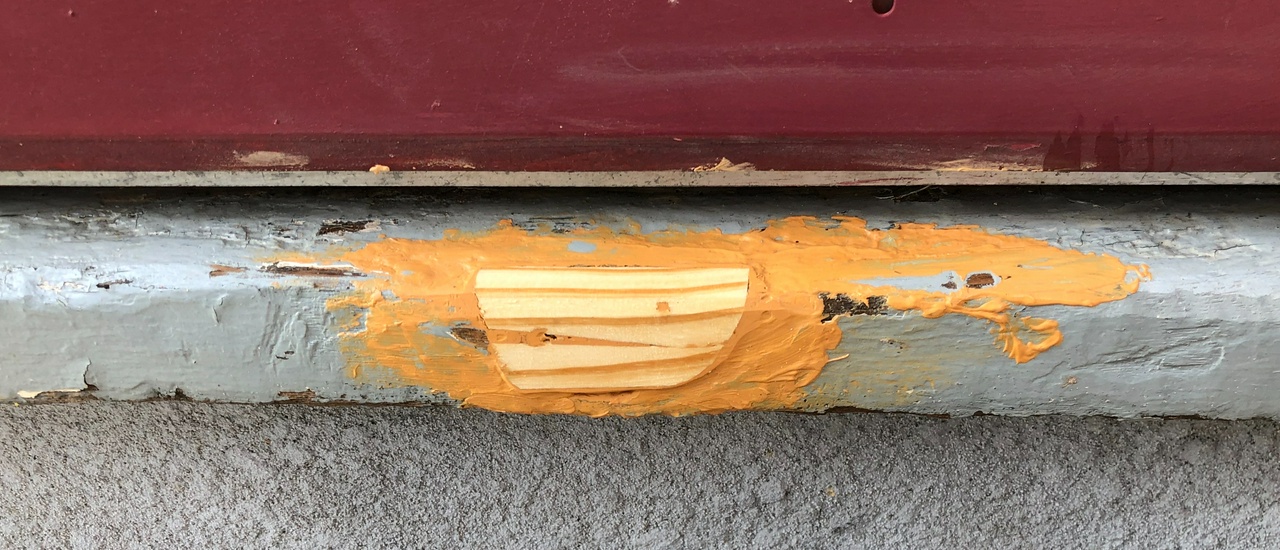
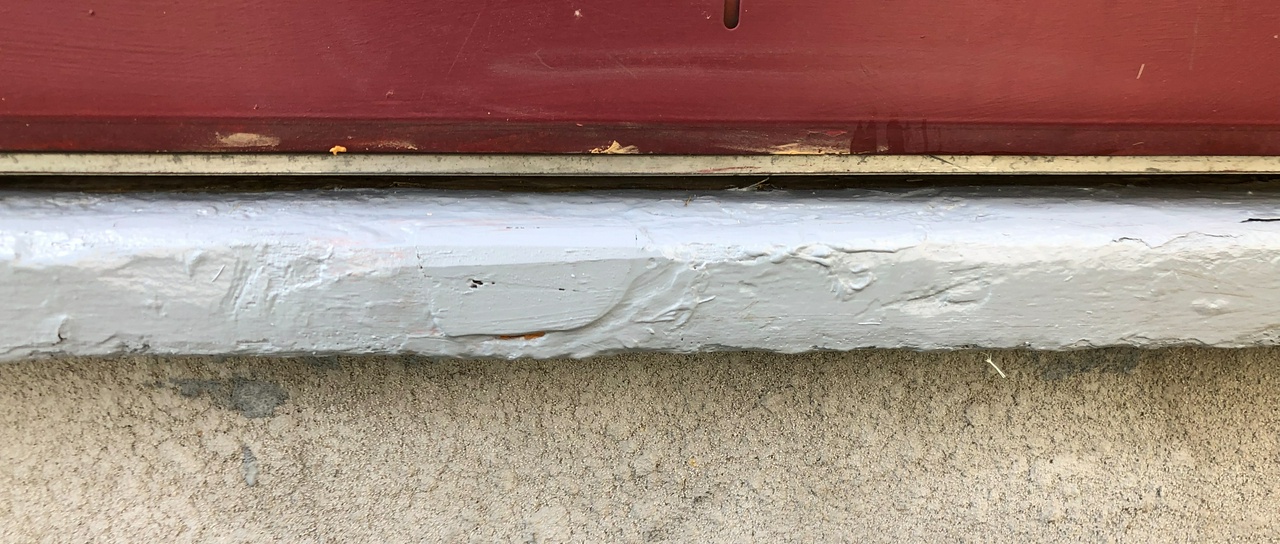
The most notable was the back entrance of the house, where the threshold had a spot worn in it from years of people going in and out of the door, which I patched one afternoon with the truck kit of tools and a scrap of wood.

Patch on the threshold of the rear door of my house in Minneapolis, post-repair

Patch on the threshold of the rear door of my house in Minneapolis, after painting

#woodworking #toolmaking #project

Discuss... Reply to this in the fediverse: @davepolaschek@writing.exchange

Pencil Stand on a blue background

I bought an iPad with an Apple Pencil 2 quite a while back, and I’ve just been storing the pencil on my nightstand. That frustrated me fairly often because the magnets in the pencil would hook onto other things I had set on the nightstand. Keys, nail clipper, that sort of thing.

Pencil Stand holding Apple Pencil 2

This morning, I was in the shop, and I had four pieces of sycamore that I had cut off another board in order to make it round. I realized that if I stacked them up and drilled a hole of the right size, I could solve my problems with the pencil.

Pencil Stand on my nightstand, holding Apple Pencil 2

So I glued the four cutoff corners into a stack, drilled a hole (11/32” at the bottom & ⅜” at the top, then I used a 17mm countersink bit to widen it out), used the belt sander and a spokeshave to make the curves more attractive to my eye, then hand sanded it up to 400 and took it to the Beall Wood Buffing System to put a quick finish on it. I think it came out pretty good, and my sweetie thinks it’s pretty too.

#woodworking

Discuss... Reply to this in the fediverse: @davepolaschek@writing.exchange

Closed Beercase

Open Beercase, showing inserts

Open Beercase, showing beer

For this year's BeerBBQ swap I decided to make a briefcase for holding beer or BBQ fixings or whatever. But since I had already done a BBQ Briefcase back in 2020, I wanted to make this one more beer specific, as well as upping my game a bit.

I started with some butternut I had on hand, resawing it to about 3/8 thick. When I did that, I discovered that it had some bug tracks inside, so I filled those with turquoise powder and epoxy.

Butternut with turquoise and epoxy fill

I also had some sapele from another project that I had resawed to a quarter-inch thick, and that looked like it would make a pretty top and bottom for the case.

I had a chunk of yellowheart remaining in Earl's Shorts (thanks again, Earl!) that looked like it would make a good handle, so I cut out a rough handle-shape, then turned nice smooth ends on it, and smoothed out the handle.

Yellowheart handle mounted on the lathe

Yellowheart handle spinning on the lathe

I found a scrap of granadillo I had leftover from a spokeshave a couple years back, and drilled a couple holes in that. It took two or three tries before I got a clean hole without splitting the wood with my bit, but I eventually got there by clamping the wood in the vise while drilling it.

Drilling a large hole in a piece of granadillo

With the hole drilled, I shaped the wood on the bandsaw, then the belt-sander, and then finally resawed it in half to make a matching pair of hinges for the handle.

Granadillo handle mount

Yellowheart handle and mounts

With the handle done, I dovetailed the case together and put in the top and bottom, then sawed it open.

Completed case, sawed open and held together with blue tape

Hinges and latches were next.

Installed hinges on the case

Drilling holes for the latch

Then the handle, screwing the hinges into the case from the inside.

Handle, attached to the case

With everything together, it was time to start finishing. I decided to use Tried and True Varnish Oil on this, since I had plenty of time. I ended up putting on eight coats, with each coat going on, let it soak in for a half-hour, wipe off the excess, let it cure overnight, then burnish it with 0000 steel wool before putting on the next coat. It's pretty easy, but not the most exciting finishing regimen.

The inside of the case got a couple coats of BLO. I thought about using tung oil for better waterproofing, but adding another three or four days of watching oil dry didn't seem all that exciting to me for some reason. Plus I hurt my back and was out of the shop for a while, so I wrapped it up and shipped early.

Before shipping I cut some closed-cell foam I had on hand to fit four 12-oz beer cans and two 16-oz tallboys. To make sure I got things right, I made wooden templates I'll be able to reuse down the road.

With the foam cut, I also found a cold-pack that would fit inside the case to help keep the beer cold. No point in carrying warm beer around, now is there?

Next time, maybe I'll get a handcuff with a chain to further secure the beercase to the wearer. Some things just need high security.

#woodworking #project

Discuss... Reply to this in the fediverse: @davepolaschek@writing.exchange

Knife presentation box, closed, end view

To go with the knife I made recently I made a box to go with it.

Knife presentation box, closed, side view

The box is poplar, with torrefied curly maple top and bottom, and a bit of walnut trim to cover the imperfect joints.

Knife presentation box, open, with knife

The knife sits on a removable piece of pine, and is held down by a bit of closed-cell foam. The box is a close enough fit that the knife can’t move much, but with the removable bits, it will be able to be reused for another gift.

Knife box, insert, knife, and foam.

The finish is a coat of tung oil, followed by four of five coats of shellac, with one of the coats on the poplar being garnet shellac to offset the slight greenish tinge of the poplar.

#woodworking

Discuss... Reply to this in the fediverse: @davepolaschek@writing.exchange

white santoku with cholla, red and green handle

Another knife that came out of the shop during the recent flurry of knife-making. This one has a handle of cholla with red and green resin which was poured by a friend of mine in Texas in exchange for me sending him a box of cholla canes. Seems like a good trade to me.

white santoku with cholla, red and green handle

The blade is a 6 inch white ceramic santoku which used to be sold by WoodCraft, but was discontinued a few years back (before we moved to New Mexico, so three or four years ago). When I saw the bright colors of the handle, I remembered I had the white blade and thought it would be a good-looking combination. There are also layers or red and brown micarta between the scales and the knife tang to build up the thickness a little. It feels pretty good in the hand to me.

white santoku with cholla, red and green handle

The handle was rough-cut on the bandsaw, then shaped with rasps and files. It was hand sanded with 80, 120, 180, 220, and 400 grit sandpaper, and a coat of tung oil applied before buffing it with the Beall Wood Buffing system. I’m pretty pleased with this one, and think I’ll be giving it to a friend as an early Christmas present.

#woodworking #KnifeMaking #project

Discuss... Reply to this in the fediverse: @davepolaschek@writing.exchange

knife presentation boxes, closed

On Lumberjocks, we periodically do swaps, in which each person in the swap makes an item and sends it to another person. Everybody makes one, sends ones, and receives one. It’s a lot of fun, and I always try to do something a little beyond what I’ve done in the past.

This swap was a knife swap, and I wanted to make a folding knife. I got the mechanism from Santa Fe Stoneworks and dug out some stabilized birch I have left from Minnesota. It originally came from some wind-downed trees at Timber Bay Lodge, where we stayed on vacation back when we lived in Minnesota.

folding knife handle

folding knife with blue tape on blade

folding knife with blue tape on blade, reverse side

The folding knife came out ok, but there was a small chip in the birch on one side which I felt bad about. It still looks good, but it’s not great. I decided since I had a little more of the birch left, I would make a pair of cooking knives to make up for the blemished pocket knife.

I used blades from Hock Tools, specifically their paring knife and 5 inch chef knife. The paring knife got the more sedate grain from a straighter piece of wood, and as the wood was thinner than idea for knife scales, I sandwiched in some brown micarta.

paring knife handle and tang

paring knife with blue tape on blade

paring knife handle close-up

I think the paring knife came out relatively well.

The chef knife got red (aka “fire”) micarta and some birch with some fairly crazy grain. It was from a crotch in the tree, and most of the grain ran the wrong direction for the strongest knife scales, but it looked pretty great visually, and the micarta and the metal tang of the knife would provide plenty of strength.

chef knife handle and tang

chef knife with blue tape on blade

chef knife handle close-up

The chef knife came out pretty good, too. There’s a couple cracks in the handle that opened up when I was epoxying them to the micarta, but I filled them with sawdust and CA glue.

Finally, I made a couple boxes to hold the knives. By this time I knew who I was sending the knives to, and my guess was that the guy would get the folding knife, and his wife would get the cooking knives, so I wanted a separate box for each.

The cooking knives went into a box made of ash and walnut, with the walnut inlaid into the ash. I thought it looked pretty neat, and it’s a technique I’ll try again (probably to better result). I also made an insert to hold the knives securely in the box and to carry the care directions.

cooking knives in box

The pocket knife went into a foam insert inside a hinged box made of white oak and sapele, along with the description of the blade.

folding knife in box

#woodworking #knife #project

Discuss... Reply to this in the fediverse: @davepolaschek@writing.exchange

I made a pin vise, useful for both hand drilling holes with small drill bits, as well as holding small parts while working on them.

pin vise

The chuck is a small chuck bought off eBay that will hold a bit up to ¼ inch in diameter, and down to the smallest drill bit I have (a 1/32 inch bit).

jaws of the pin vise

The handle is ziricote, a Central American hardwood that has interesting “spiderweb” grain patterns and a piece of 1 inch brass tubing as a ferrule, epoxied onto the handle. Finish is a coat of tung oil and a few coats of shellac.

pin vise

It will likely be a gift for a friend, and I’ll make another for myself using some domestic hardwood.

#woodworking #tools #woodturning

Discuss... Reply to this in the fediverse: @davepolaschek@writing.exchange

Oblique view of the box

In my ongoing quest to organize and clean up my shop, I made a box to hold my cordless circular saw and spare blades for it from some pine and plywood. The box was built in two parts, as I didn’t have any pine boards tall enough to make the entire box in one piece and then cut it apart, so the dovetails on the corners look a little strange. The pine is, again, leftovers from my bookcases. The plywood top and bottom are from a neighbor’s garage sale last year, and were free.

view of the open box with saw and blades

I put an insert in the bottom to separate the saw from the spare blades. Nothing fancy, it’s just glued into a pair of dados.

front view of the closed box

One the bottom was complete, I built the top slightly larger than the same size, then trimmed it to match the bottom. Then glued and screwed on the top and bottom, added a piano hinge and a couple latches, and it’s done. The only snag was that the only screws I had for the piano hinge were ¾ inch long, and the wood I was putting them into was only ½ inch thick, so I cut them flush with a flush-cutting hacksaw and then filed them smooth. And ordered some #6x½ screws.

rear oblique view of the box

#woodworking #storage #box

Discuss... Reply to this in the fediverse: @davepolaschek@writing.exchange

Closed buffing wheel storage box

In the ongoing process of cleaning up the top of my workbench, I needed to turn a couple handles on my lathe. And when I went to do so, I discovered that the buffing wheels I had bought a month or two back were still on the lathe, with no safe place to store them. So! Time to build another box!

Overhead view of box with buffing wheel system installed

I started with four oak boards that I scavenged from my sweetie’s old desk-topper. It was a large, solid lumber project made for her by her dad, and when we moved across the country, she didn’t want to move it, but we didn’t want to waste it either, so I broke it down into boards. These four boards were the doors on it, and had breadboard ends joined to the centers of the panels by dominos. I thought I would be able to avoid exposing them, but on one side I did expose the dominos. Oops!

oblique view of the storage box with buffing wheel system installed

Construction is pretty simple. The ends of the box are pine with a rabbet cut on all four edges. The oak panels are glued into those rabbets, with simple butt joints between the oak panels. Then the box was cut in half, an insert was installed to hold the shaft for the buffing wheels, and a couple small pockets were made to hold the sticks of buffing compound. Everything was finished with a coat of tung oil and a piano hinge and latch were installed. Done in a couple hours on two subsequent days.

#woodworking #storage #box

Discuss... Reply to this in the fediverse: @davepolaschek@writing.exchange

closed storage box

After making my the sheath for my knife I realized I needed better storage for my leather-working tools than a plastic bag. So I dig through the scraps and found some nice sapele that was leftover from an earlier project.

I had resawed a board of 5/4 sapele into two ⅜ inch thick pieces, and had a piece that was about ¼ inch thick remaining. But my technique wasn’t great, and the kerf had wandered a bit, so by the time I was done smoothing the boards, I was down to 3/32 of thickness left. That’s pretty thin for a box, but with the liberal use of some other scraps as glue blocks, I managed to make it work.

unfinished interior of the box bottom

With the bottom built, I went searching for a top. I had two book-matched boards of elm that had been resawed to ¼ inch thick, so I glued them together, then cut it down in size until it matched the size of the bottom. With some more glue blocks, I managed to make a top that fit.

top and bottom of the leather-working tools box

I added some inserts to hold things in place, and coated it all with a coat of tung oil, and here we are. One more set of tools now have a home so they can all stay together, and not clutter the top of my workbench.

filled bottom of the leather-working tools storage box

#woodworking #box #storage

Discuss... Reply to this in the fediverse: @davepolaschek@writing.exchange