davepolaschek

tools

A friend wanted the dimensions of handscrews of various sizes. I took measurements of the four I have, and photos to show what the dimensions measure.

The dimensions are the following measurements:

Handscrew with labels for dimensions

And the four handscrews are shown together:

Picture of four handscrews

Beginning in the top left, an unknown Chinese handscrew, all measurements in inches.

Tall: 1¾ Thick: 1⅝ Long: 10 Jaw: 5 Screw: 9½

Top Right, a large Miro Moose handscrew

Tall: 2¼ Thick: 2⅛ Long: 14 Jaw: 7 Screw: 14½

Lower Left, a medium Rockler handscrew

Tall: 1¾ Thick: 1½ Long: 8 Jaw: 4 Screw: 8

Lower right, my smallest Miro Moose

Tall: 1⅜ Thick: 1¼ Long: 6 Jaw: 3 Screw: 5½

The free jaw measurement is, in every case, half of the total jaw length. The height and width of the jaw are nearly equal, but the measurement I have labeled “Tall” is always slightly larger than the jaw width (or thickness). And the free length of the screw is typically about the same as the total length of the jaw.

The Miro Moose clamps are a brand of Dubuque Clamps, and are made in Iowa.

#woodworking #tools

Discuss... Reply to this in the fediverse: @davepolaschek@writing.exchange

Four pictures of the same bedan so it can be seen from all sides.

Originally written 16. January, 2022

A friend is building a lathe from scraps and I wanted to make sure he has something to work with when he gets it working, so I made a bedan for him.

The handle is a sandwich of cherry and sycamore. I had enough of this sandwich for four handles for lathe tools. The ferrule is a piece of .50 BMG cartridge I had laying around. And the tool itself is a 10mm square HSS rod I got from China.

The picture above is just the one bedan, but four views of it, so you can see all four sides at once.

Steps to build this:

  1. Set up the blank between centers and turn a tenon as large as possible on one end.
  2. Put that tenon in a chuck and turn the opposite end to fit the ferrule.
  3. Back off the tailstock and put the ferrule on.
  4. Put a drill chuck in the tail-stock and drill a ⅛ inch pilot hole, making sure the chuck is holding the handle straight.
  5. Drill a half-inch hole about ¾ the depth of the ferrule.
  6. Drill a ⅜ inch hole to a total depth of two inches.
  7. Put a live center into the hole and finish turning the handle.
  8. Trim the ferrule and wood with a hacksaw, remembering to back off the live center so you don't saw the point of it off.
  9. Bring the live center back in, and finish the handle (I used a BLO and shellac friction finish), then part it off from the tenon.
  10. Grind about 1.5 inches of the piece of HSS to a round ⅜ inch in diameter.
  11. Grind the corners down on the piece of HSS for another half to ¾ inch The tang of the bedan, ground roughly round
  12. Put the piece of HSS into the handle, first by hand, and then pounding it in until it's home.
  13. Mix up some epoxy (about 7.5ml, or ¼ oz) and pour that in around the HSS, getting it slightly domed in the ferrule. You'll probably need to pour a little, then wait for it to run in, then pour a little more.
  14. Clean up any spilled epoxy.
  15. Let the epoxy cure overnight.
  16. Finish up the handle with some paste wax.
  17. Grind the end of the bedan to 45 degrees and sharpen it up

A bedan tip, showing the 45 degree bevel from the side.

The tip of a bedan, showing some discoloration from grinding it aggressively.


That's it. Took me about three days elapsed time, but only a few hours of work. I was working on other projects at the same time.

I made a second one for another friend, using 1 inch diameter brass for the ferrule. I think this is a better fit for ⅜ and ½ inch bedans (9 and 12mm).

a bedan, held in a vise, showing the epoxy poured into the ferrule

#project #woodworking #woodturning #tools

Discuss... Reply to this in the fediverse: @davepolaschek@writing.exchange

Originally written May 9, 2021
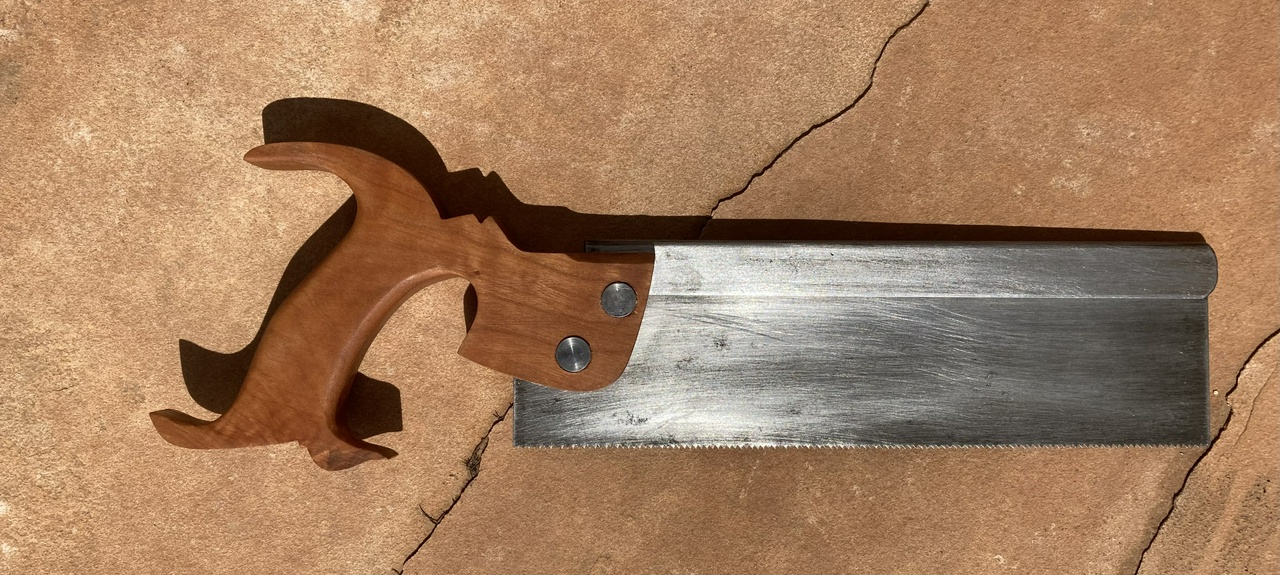
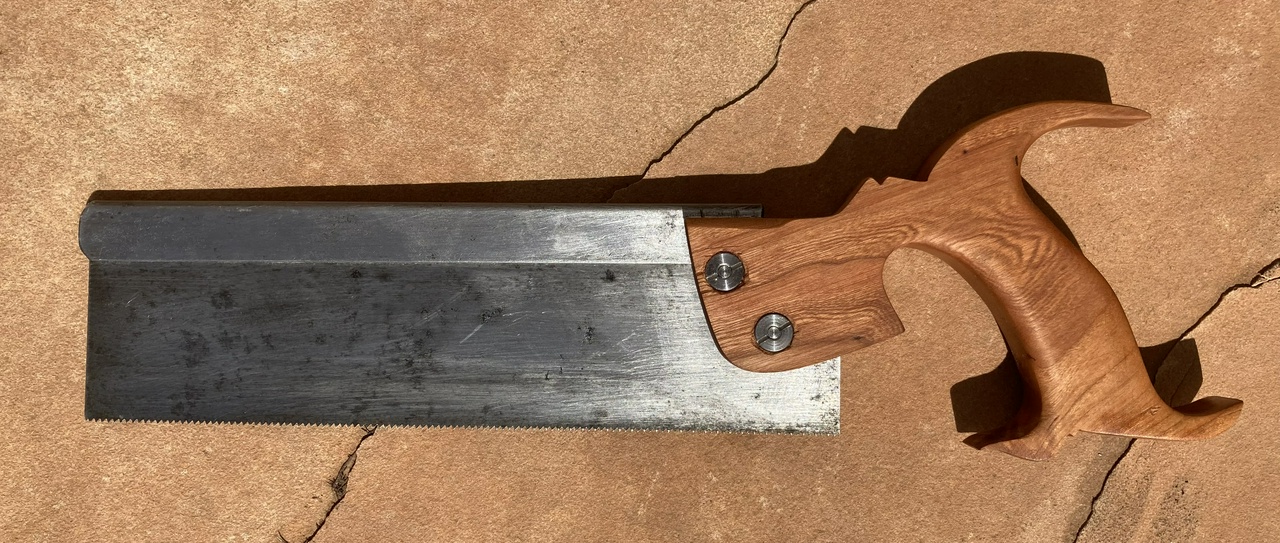
Finished dovetail saw with cherry handle, right side

Finished dovetail saw with cherry handle, left side

I bought a beat up dovetail saw on eBay. Put a fairly minimal bid on it (it was $25 with free shipping) and won. It's shown below. My goal was to have a saw I could practice sharpening and other saw maintenance tasks on, and not feel too bad if I screwed it up.
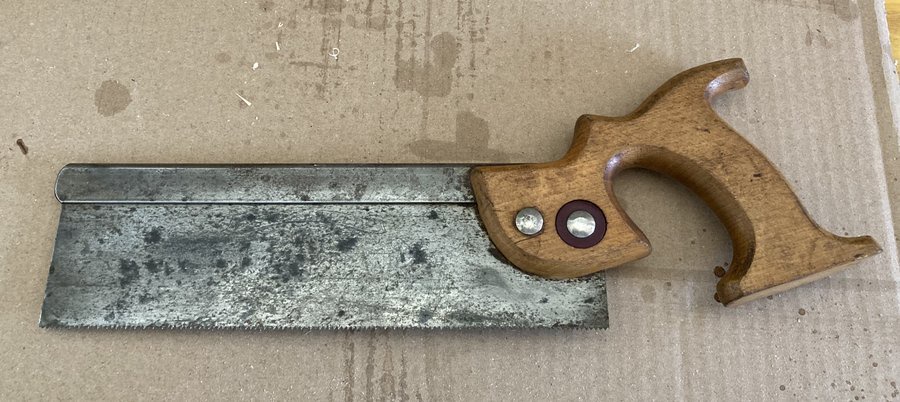
Saw, as bought

When it arrived, almost a year ago, the handle was even worse than it had looked in the photos, and was just too small for my hands, so I set the saw aside for a while and got on with other projects. Recently, I got “stuck” during my build for the plane swap and needed to work on something else while I thought about how to get past the problem I had created for myself.

I sat down and tried to unscrew the saw nuts on the saw I'd bought. Turned out they were rivets. I ended up destroying the handle I order to get it off, and the holes in the plate were pretty nasty looking. I filed the holes flat (they looked like they'd been punched through the metal, rather than drilled) and started shaping a new handle.
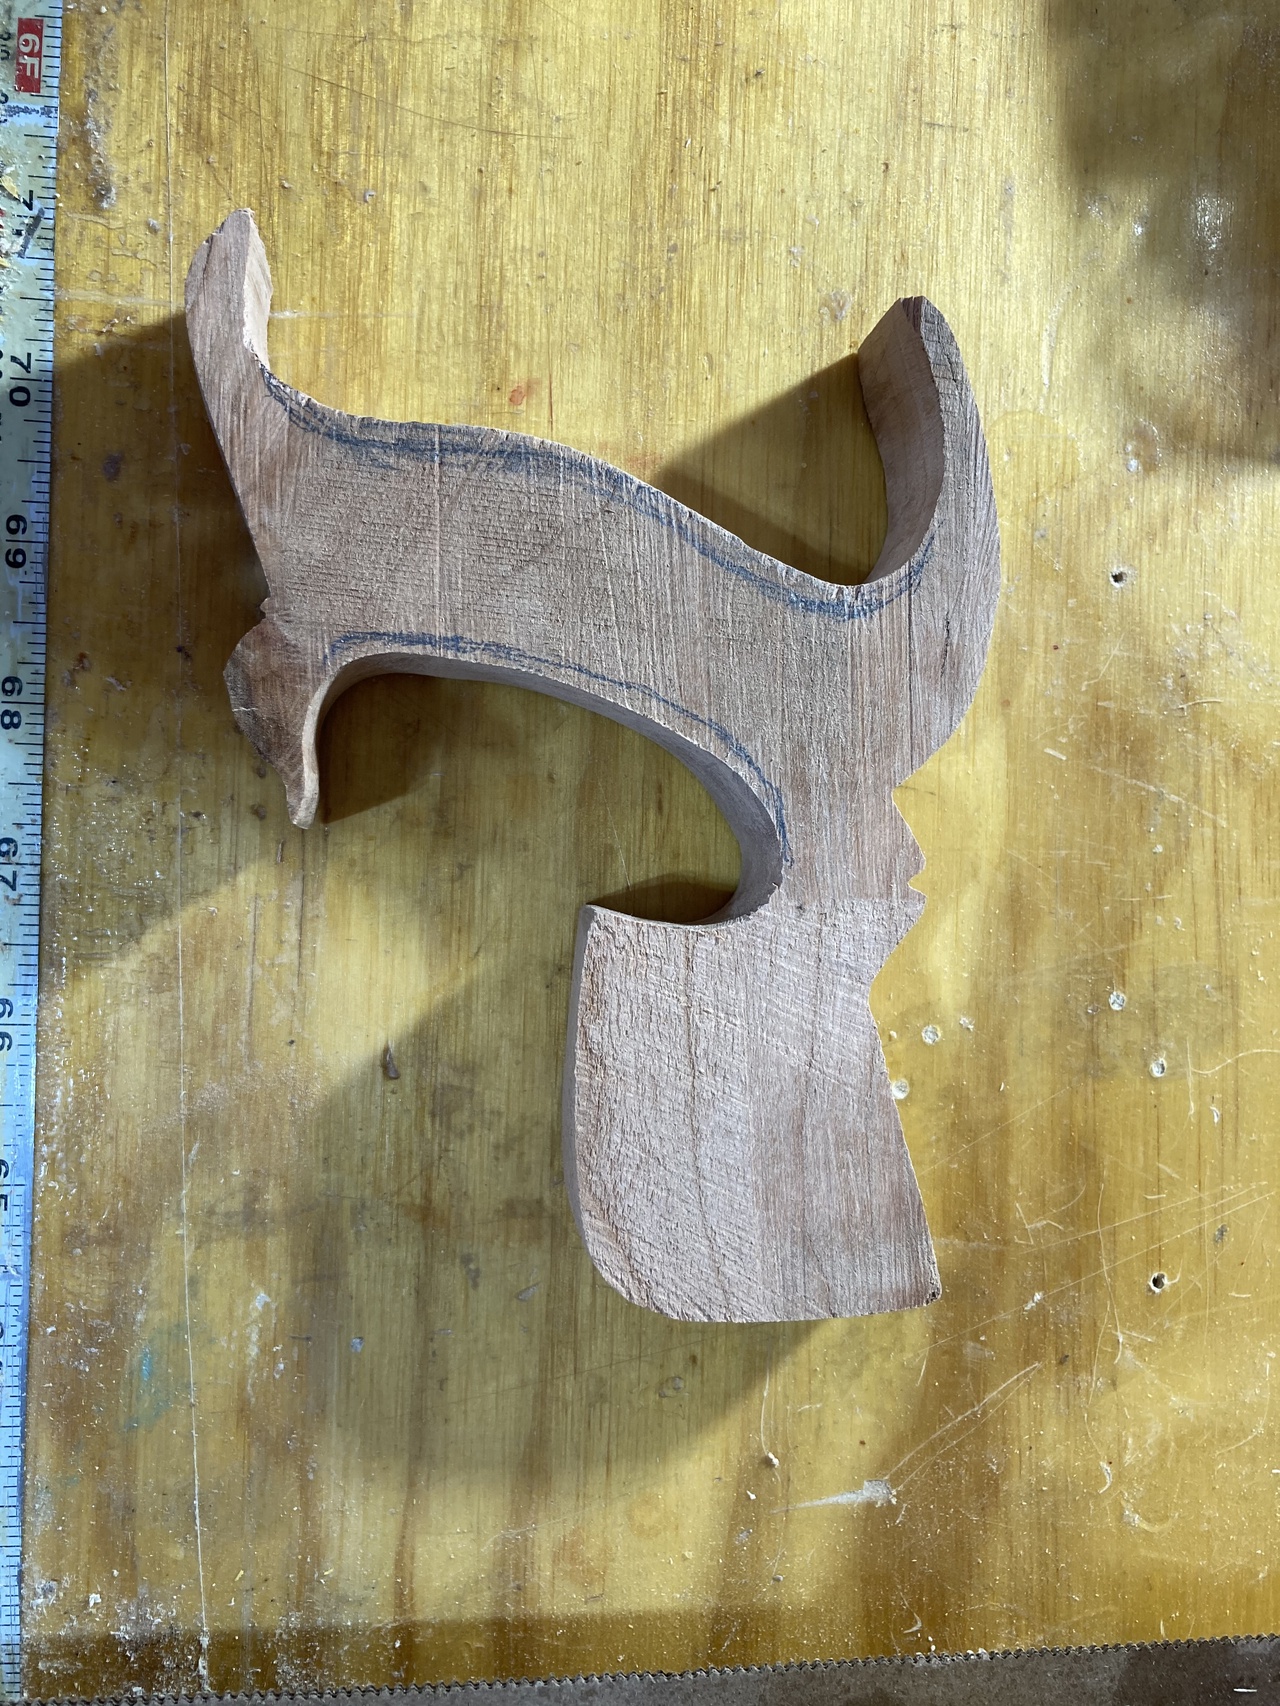
Rough-cut saw handle with the layout lines still visible

I traced the handle on a Bad Axe saw I bought, which fits me pretty well, onto a piece of 5/4 curly cherry I had. There was a knot in it, but I put that in the section that would end up “inside” the handle.

Then I did some shaping with files and such while I waited for new steel saw nuts to arrive in the mail, and then again while I waited for a 3/16 carbide drill bit to arrive after I'd mistakenly ordered a 3/32 bit.
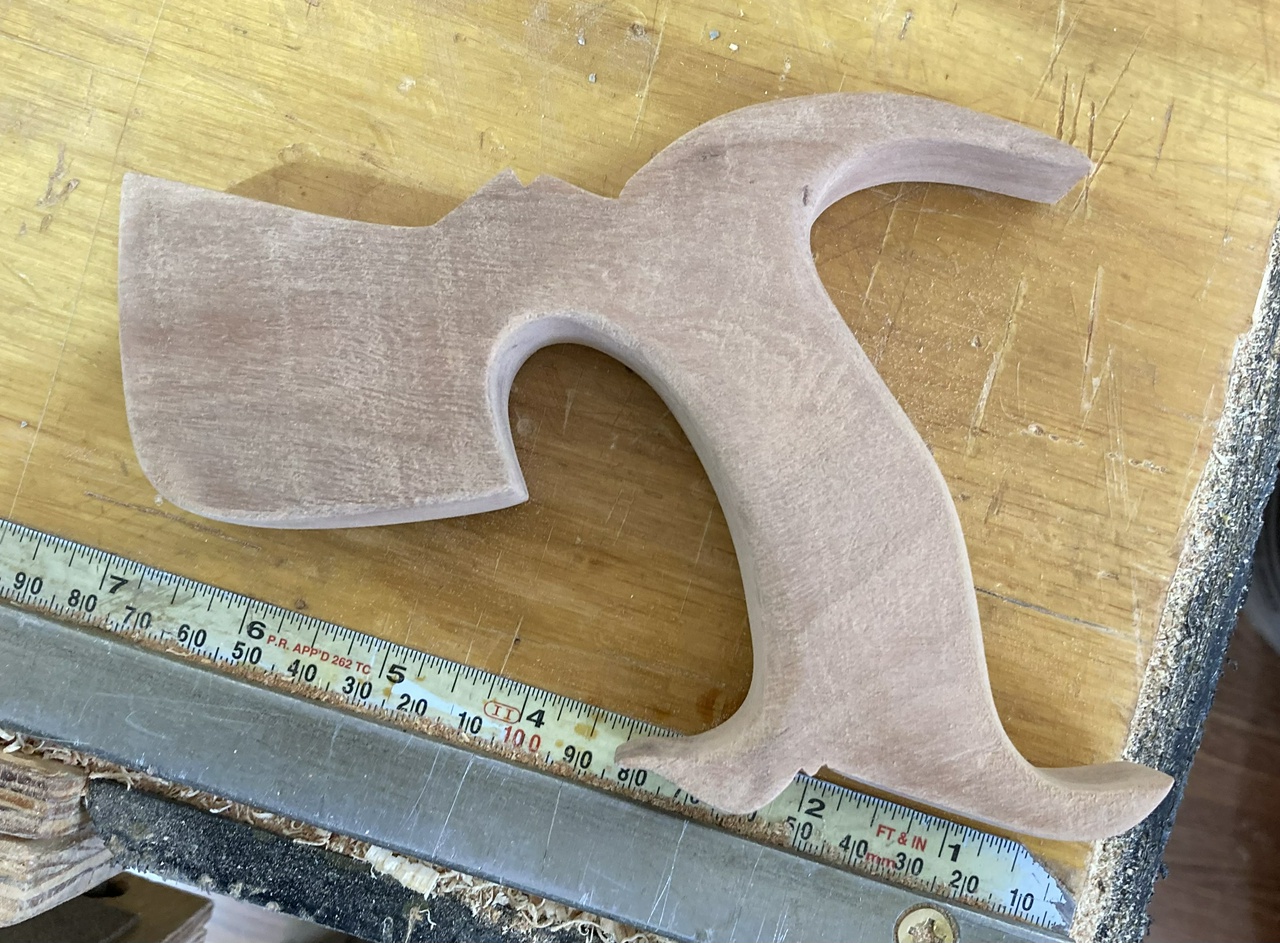
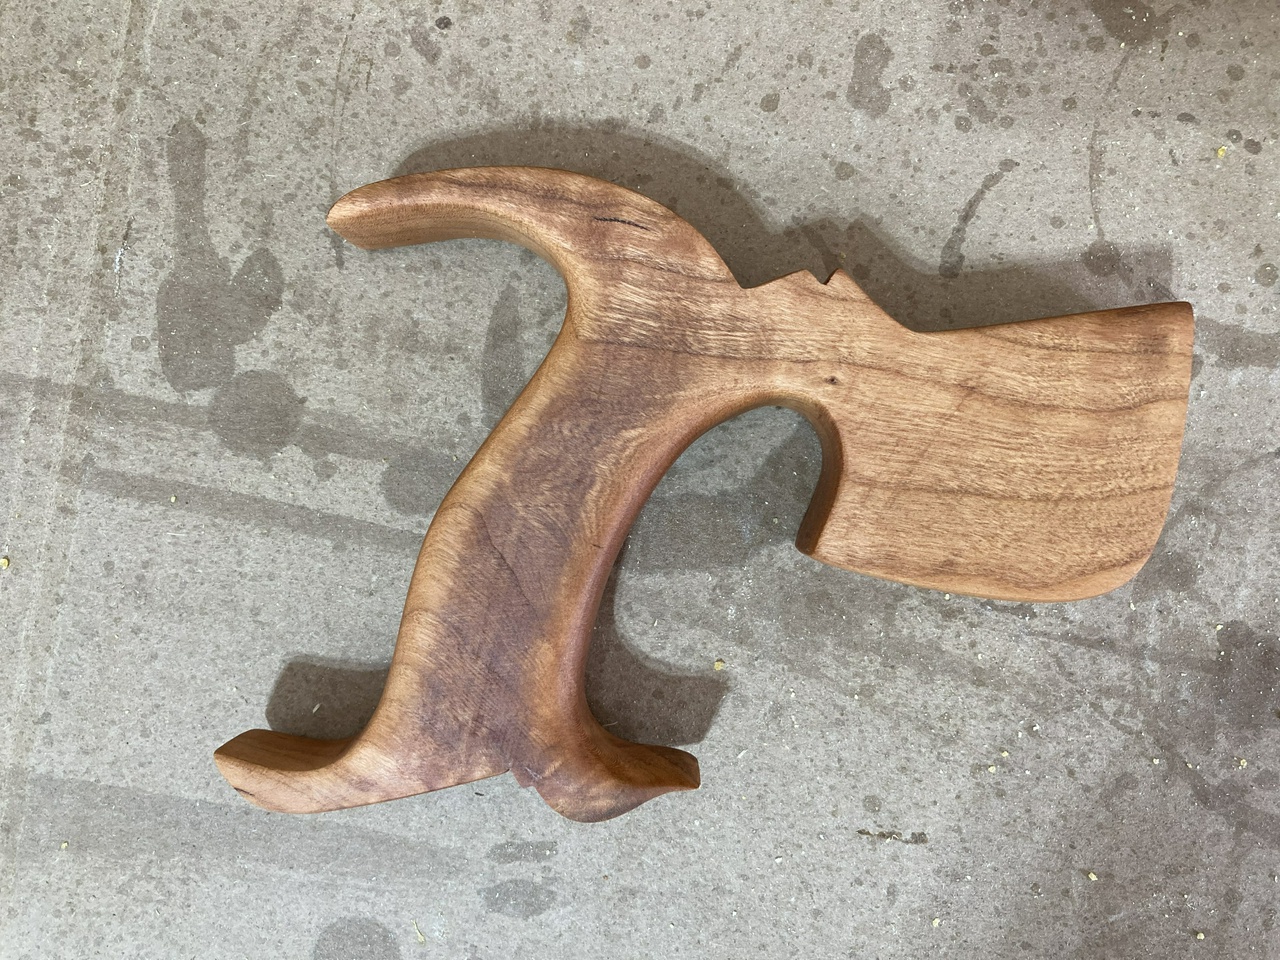
Saw handle partially shaped

Saw handle more shaped, with a coat of oil on it, right view

Saw handle more shaped, with a coat of oil on it, left view

I also pulled the back off the saw plate and cleaned up both the back and the plate. There was a fairly generic “Warranted Superior, Sheffield” etch that was almost gone (or had been etched lightly to begin with). I sanded it away, rather than trying to preserve it. I'm pretty sure this was a post-WWII saw, and nothing special, given the red plastic washer in place of a medallion and the riveted saw nuts.

I got the handle mostly shaped by the time the new saw nuts and drill bit arrived, so I was excited to get things put together. But I'd finished the handle at about an inch thick, which fits my big hands pretty well, but didn't fit the ⅞” long saw nuts I'd bought. D'Ohh!

So I took the handle to the belt sander and thinned it up a little. Which turned out to be good, since when I sawed the slot in it, I'd gotten it a little bit off, and it was off-center and aimed the blade a little to the right. Sanding the handle down let me fix that.
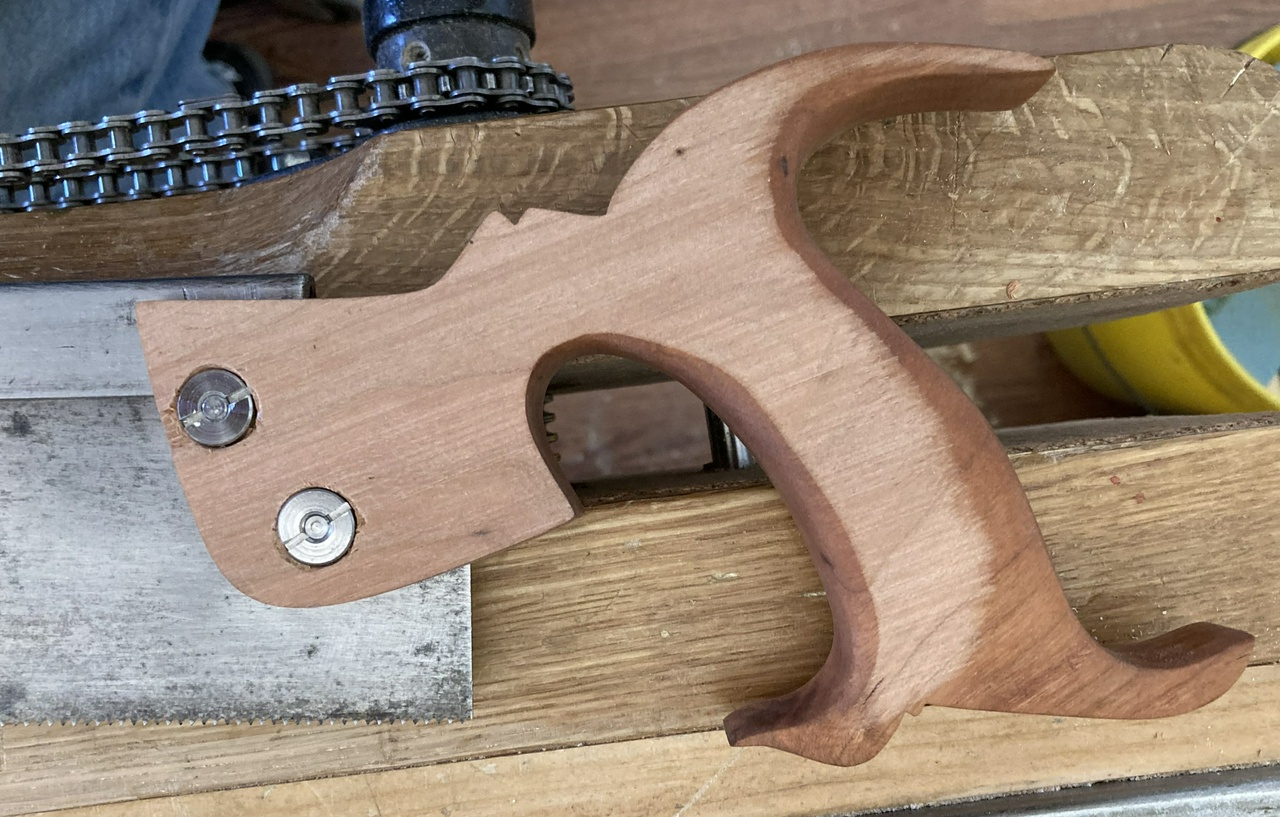
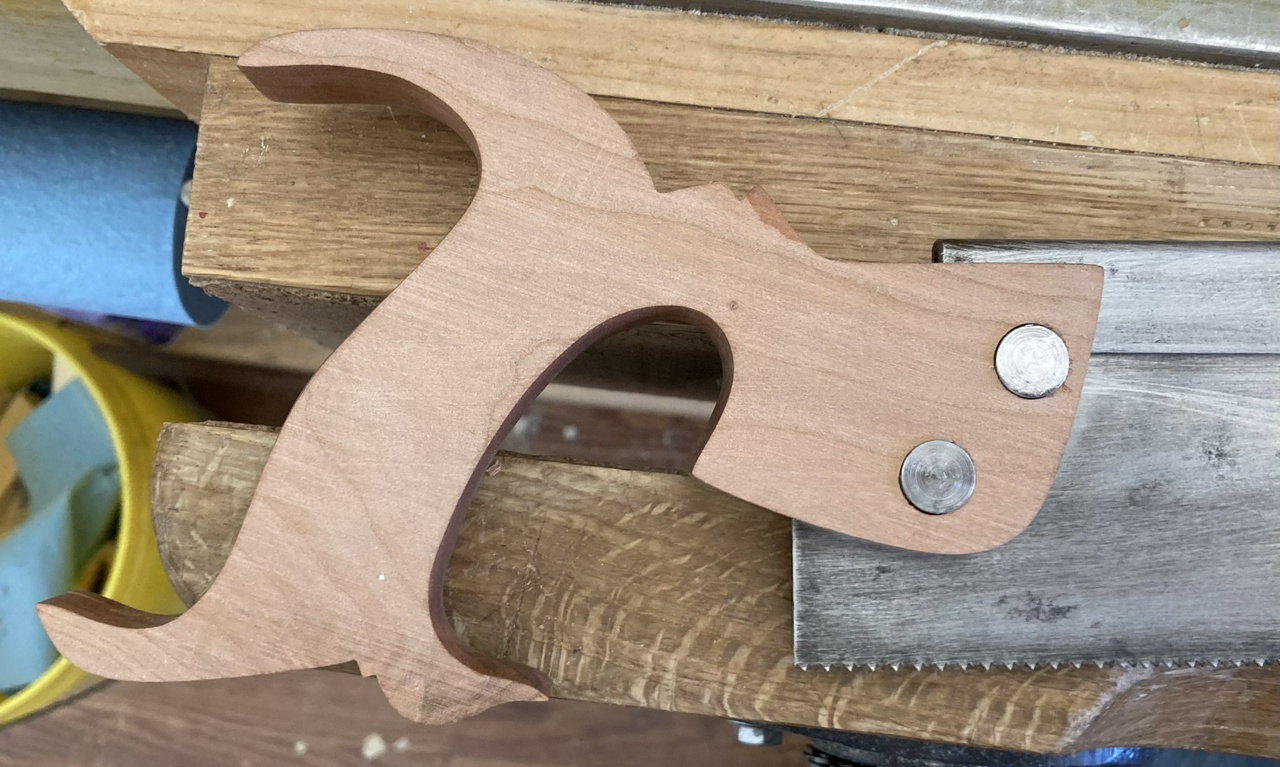
Saw handle, after sanding it thinner, left view

Saw handle, after sanding it thinner, right view, which is now completely flat again

Then I had to reshape and re-oil the handle, but I did that with it on the saw. That let me test it as I went, making sure that it pointed straight and felt right. Last step was cutting chamfers at the top of the handle where the back went into the wood.

A couple coats of BLO later, and the saw is in use in my collection. And I learned quite a bit along the way, and have a saw I can practice sharpening on without worrying about destroying an expensive saw.


Handy Tools #woodworking #saw #handyTools #tools

Discuss... Reply to this in the fediverse: @davepolaschek@writing.exchange

Originally written August 20, 2017

Back when I got my Roubo Frame saw kit from Bad Axe Toolworks, I also got the kerfing plane kit. I finally got around to finishing that this morning, and have put it to use.

With the kit you get a saw plate and a cherry board. Step one is cutting a hand-hold in the board. A couple different spade bits, some connect-the-dots with a coping saw, and some smoothing with rasps and files and I had that done.

hand-hold cut, but not smoothed

hand-hold smoothed

Next was cutting a rabbet for the fence. Two saw cuts, and a little cleanup with a rabbet plane, and that was done.

Since I'm mostly after ¼ to ⅜ thick stock at the moment, I decided to make my fixed fence with a ⅜” kerf. So I clamped a couple ⅜×3/16 brass bars to the fence, and sawed right next to them with my pull saw. As it's just barely long enough, I had to start the kerf on one end, other, and then bring down the middle until it was level.

Cutting one part of the kerf for the blade

Cutting the kerf for the blade from the other side

Drill a few holes, and put in the saw plate with the provided saw nuts (much easier said than done), and I had a completed kerfing plane, as shown in the first picture. The final picture shows a ½” deep kerf I cut in a poplar board to test things out. Looks pretty good!


Contents #woodworking #handyTools #tools

Discuss... Reply to this in the fediverse: @davepolaschek@writing.exchange

Dovetail marker with katalox and elm, front view

Dovetail marker with katalox and elm, bottom view

When I got to the point where my next big project was my brace till, I needed to cut the dovetails for the corners of the carcass, and couldn't find my dovetail marker. Rather than completely wing it, I grabbed a scrap a katalox and set up my shooting board at 14 degrees (which is darned close to 1:4), and then found a piece of elm to put that katalox into. A couple cuts with the saw, a little trimming with a knife, and a dowel later, I had the marker mostly done. Glued it up, then did a little practice carving to label it so I won't get confused later. A coat of oil, and it's ready to go.

Dovetail marker of katalox and elm, top view

Looks like I need to practice carving serifs some more, but otherwise I'm happy with it.


Contents #woodworking #tools

Discuss... Reply to this in the fediverse: @davepolaschek@writing.exchange

Moving to Santa Fe, I've discovered that a lot of the handles on my wooden-handled tools have loosened up as the wood has dried out. Or in the case of things with ferrules, the ferrules will fall off because the wood shrunk.

There's a simple fix for the latter problem. I just punch a dimple in the ferrule using my Starrett automatic center punch and all is well.

Dimple in the ferrule of a rasp


Contents

#woodworking #tools

Discuss... Reply to this in the fediverse: @davepolaschek@writing.exchange

Back in February 2022, Tony, the Gr8Hunter sent me a Keystone Iron City hand-cranked grinder he had scored in Pennsylvania. It was pretty rusty (but just surface rust – no pitting I could see) and would barely turn, so I completely disassembled it, soaked everything in Evaporust, chased the threads on all the nuts and bolts with taps and dies, applied a coat of linseed oil to the wooden handle, then reassembled everything, oiled the moving parts, and gave it a test drive. It worked great, but there was a deep (maybe 1/16 inch) groove worn in the wheel from something, so I trued that up and took out the gouge. Now I've got a nice grinder I can use for things I don't want to grind on the 3600 rpm electric grinders. As another one of my buddies says, Don't work faster than you can think!

I thought about repainting it, but it works fine, and I think I'd rather be using it than fussing with repainting it.

Side view of Keystone Iron City grinder

Hand cranked grinder thumbnail


Contents

#woodworking #tools

Discuss... Reply to this in the fediverse: @davepolaschek@writing.exchange

Building drawer boxes, I'm working on small dovetails on relatively thin stock. I don't need a big square for marking lines, and given how cluttered my bench is at the moment, a small square seemed like a good thing to have.

I took a scrap of sycamore and planed it so the sides were flat and parallel.

Then I cut a slightly oversized dado in one of the pieces, glued a cross piece in, pegged it with a piece of bamboo skewer, and made sure it was actually square.

Small marking square

Marking a line on a scrap of plywood to test that the square is square

Flipping the square over and comparing to the line to verify that the square is square

Looks close enough for my needs. I'll clean it up and give it a coat of oil at some point, but for now, I'm back to marking and cutting dovetails.

With some shaping to make it more comfortable in the hand, and a couple coats of oil, it's looking pretty good to me.

Marking square, after finishing

After a year of use, this little tool is still always within reach. I did shorten the upright on it so I could mark dovetails on some box sides that were only about 2 inches wide, which meant only about 1½ inches stuck out of the vise when I was marking them. So now it's a much shorter T than previously, but it's still long enough to mark a pair of ¾ boards when I'm marking and gang-cutting tails.


Contents

#woodworking #tools

Discuss... Reply to this in the fediverse: @davepolaschek@writing.exchange

Not all of my handy tools are commercial tools. Looking back, about half are shop-made tools to help me get something done. This is one of those.

I've been wanting to film videos in the shop (not too much, but people seem to like them…) but never had enough hands. I took two pieces of scrap pine, and a couple wood screws, and made this. It did the job pretty well.

Phone holder from the front

Phone holder from the side

I just clamp it in one of my vises, or screw it to the bench, adjust the aim, then snap my camera into the case and film. Easy-peasy!


Contents

#woodworking #tools

Discuss... Reply to this in the fediverse: @davepolaschek@writing.exchange

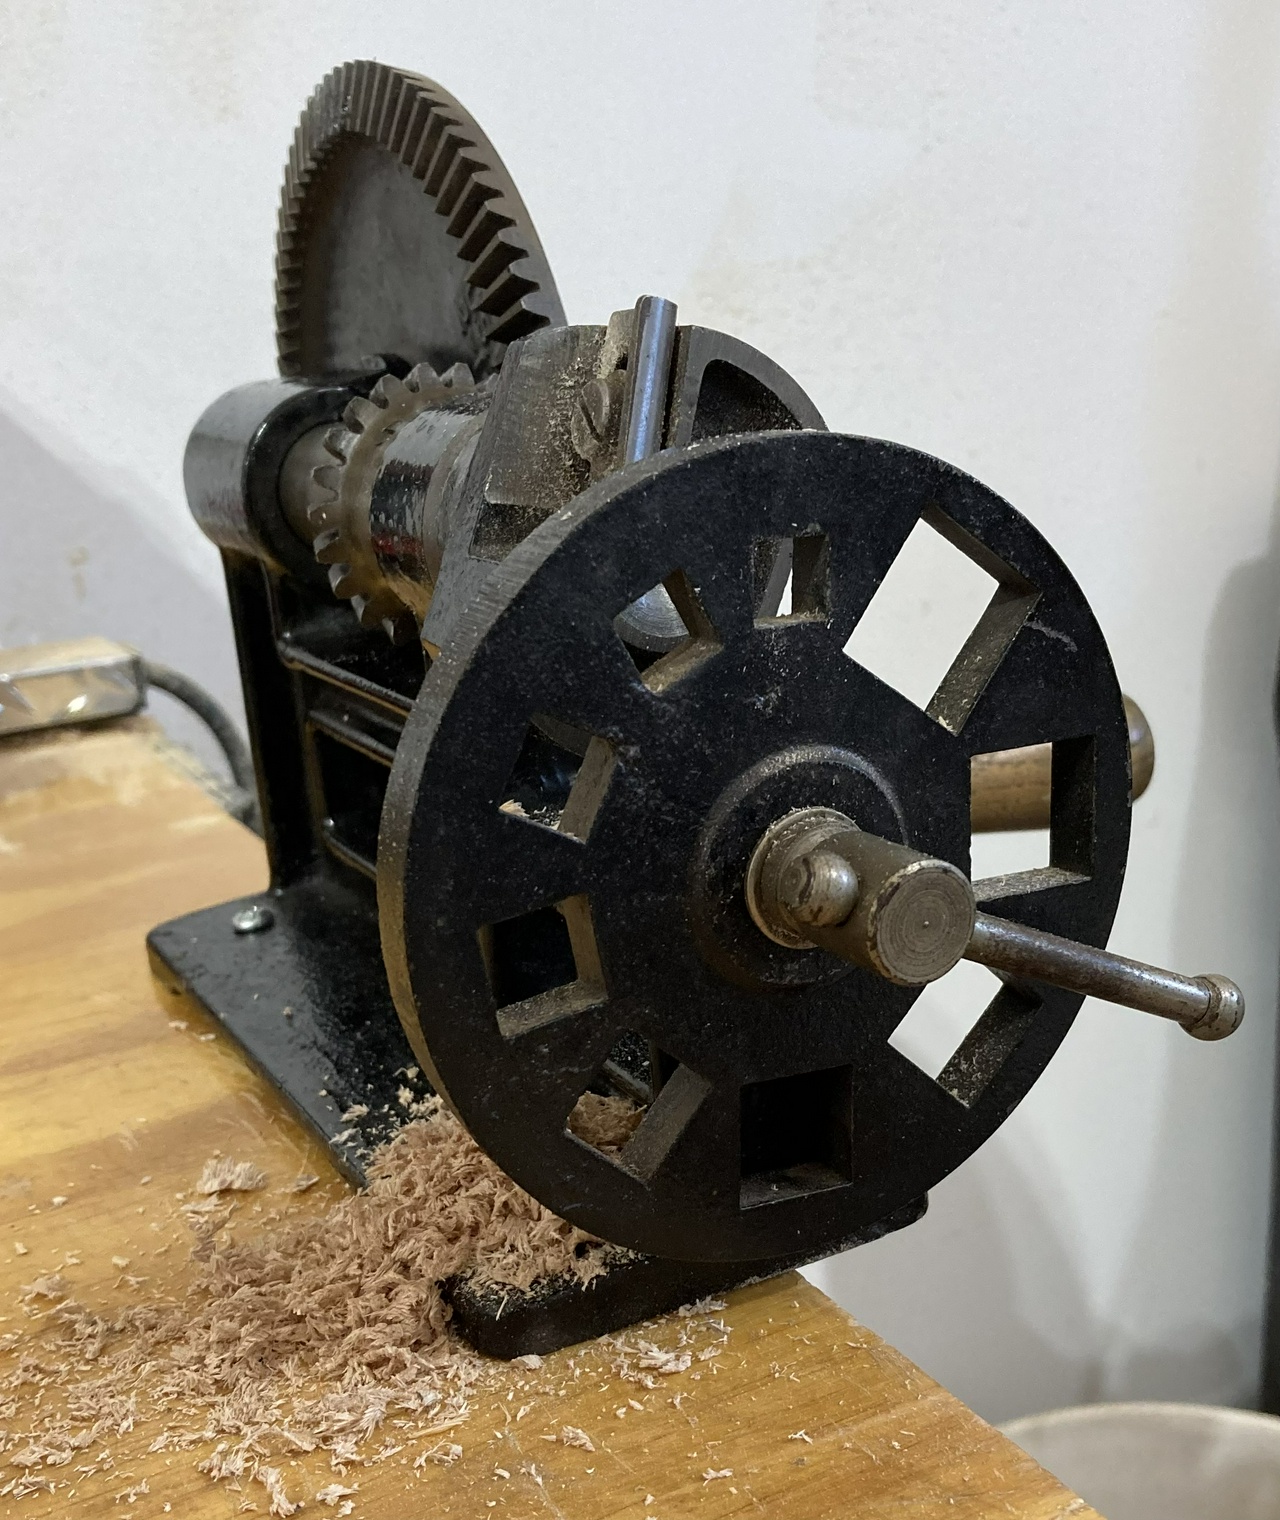
A while ago I got a dowel maker. Got it up and running, and made a video of making a ¼ inch beech dowel.

Stanley #77 Dowel Maker

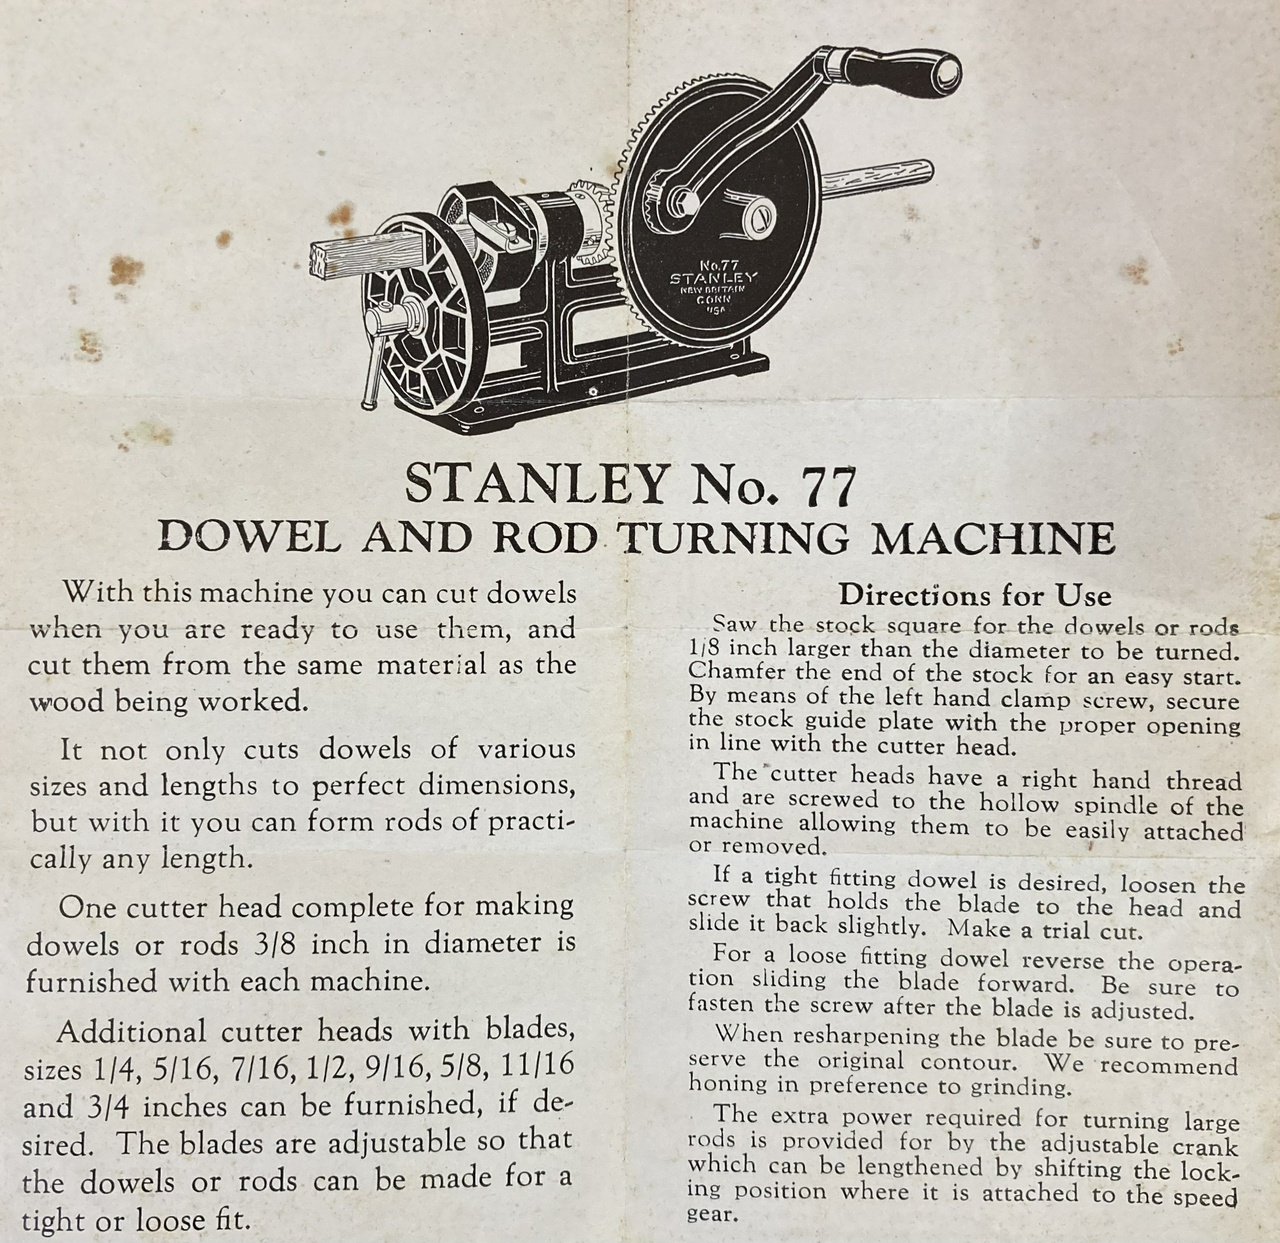
And here's a photo of the instruction sheet.

Stanley #77 Dowel Maker Instruction Sheet


Stanley No. 77

DOWEL AND ROD TURNING MACHINE

With this machine you can cut dowels when you are ready to use them, and cut them from the same material as the wood being worked.

It not only cuts dowels of various sizes and lengths to perfect dimensions, but with it you can form rods of practically any length.

One cutter head complete for making dowels or rods ⅜ inch in diameter is furnished with each machine.

Additional cutter heads with blades, sizes ¼, 5/16, 7/16, ½, 9/16, 5/8, 11/16 and ¾ inches can be furnished, if desired. The blades are adjustable so that the dowels or rods can be made for a tight or loose fit.

Directions for Use

Saw the stock square for the dowels or rods 1/8 inch larger than the diameter to be turned. Chamfer the end of the stock for an easy start. By means of the left hand clamp screw, secure the stock guide plate with the proper opening in line with the cutter head.

The cutter heads have a right hand thread and are screwed to the hollow spindle of the machine, allowing them to be easily attached or removed.

If a tight fitting dowel is desired, loosen the screw that holds the blade to the head and slide it back slightly. Make a trial cut.

For a loose fitting dowel reverse the operation, sliding the blade forward. Be sure to fasten the screw after the blade is adjusted.

When resharpening the blade be sure to preserve the original contour. We recommend honing in preference to grinding.

The extra power required for turning large rods is provided for by the adjustable crank which can be lengthened by shifting the locking position where it is attached to the speed gear.
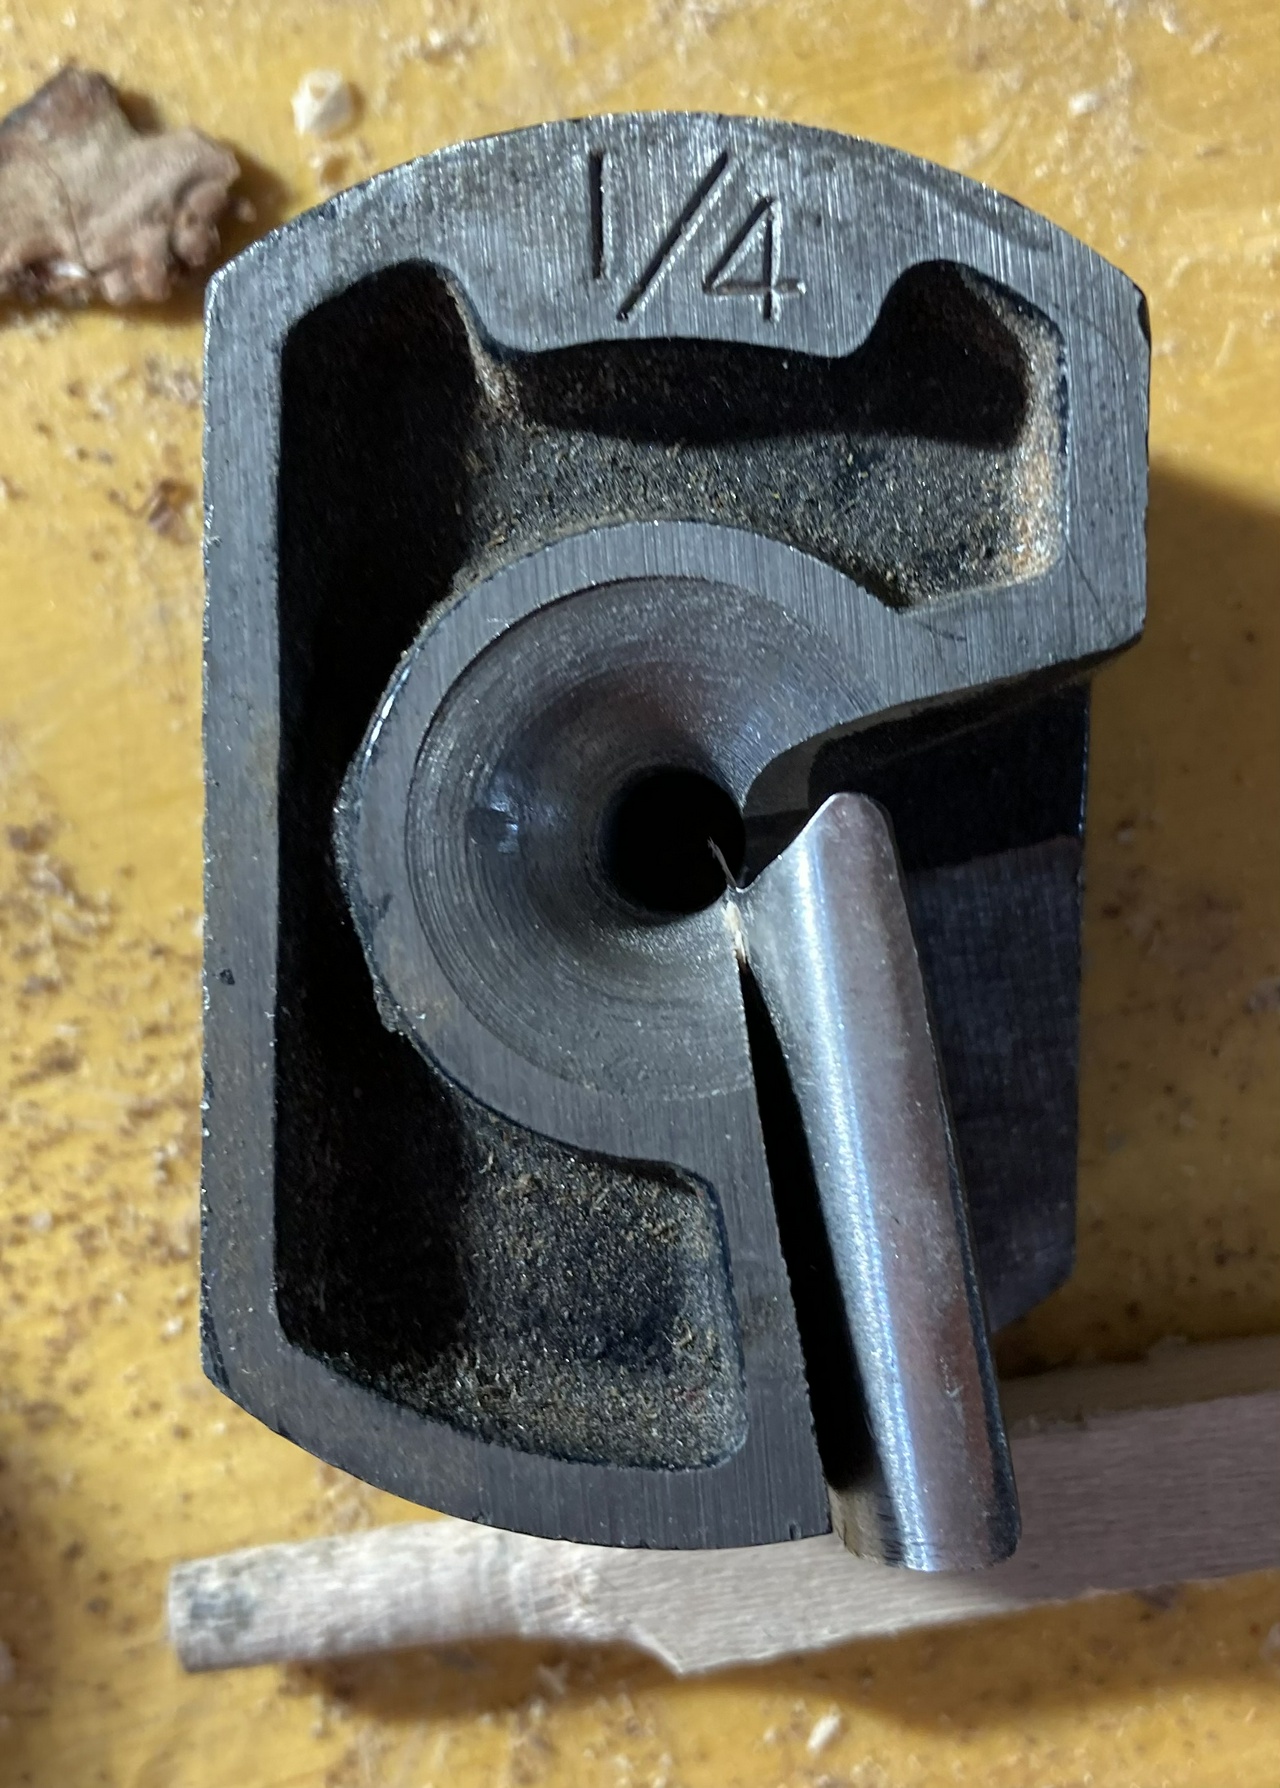

I have cutters for the even sixteenths, which I think should cover my needs pretty well. Anything larger than that, I can make on the lathe. And if I should need one of the odd sixteenths, I can chuck a dowel of the next larger size in a drill and sand it down until it fits.

I also had a buddy ask how I have the cutters set up. Here are a couple pictures.

Top view of the cutting head for a Stanley 77

The left half of the blade is exposed over the edge of the cutter body. The right half isn't. Note that on mine, the blade can pivot a little, and it's very sensitive to pivoting, but it looks like years of sharpening has also made the edge of the blade kinda curved.

Front view of the cutting head for a Stanley 77

This one also shows just how little of the blade is protruding beyond the body of the cutter. I can back it off a hair and get an even better finish, but I suspect the real trick is that the blade is skewed a bit from a straight peeling cut, and that improves the finish, just as it would when using a skew on the lathe.

Set up like this, the dowels end up being about 1/128 inch oversized, but a quick wipe down the length of the dowel with some 60 grit sandpaper makes them fit the holes drilled by my auger bits perfectly. I would rather have the dowels slightly tight than too loose, since it's much easier to make them looser than tighter.

I also bought three brand new blades, and as the blades are identical across all the cutting heads, that should be a lifetime supply for me.


Contents

#woodworking #tools

Discuss... Reply to this in the fediverse: @davepolaschek@writing.exchange