davepolaschek

Wood. Food. More.

closed storage box

After making my the sheath for my knife I realized I needed better storage for my leather-working tools than a plastic bag. So I dig through the scraps and found some nice sapele that was leftover from an earlier project.

I had resawed a board of 5/4 sapele into two ⅜ inch thick pieces, and had a piece that was about ¼ inch thick remaining. But my technique wasn’t great, and the kerf had wandered a bit, so by the time I was done smoothing the boards, I was down to 3/32 of thickness left. That’s pretty thin for a box, but with the liberal use of some other scraps as glue blocks, I managed to make it work.

unfinished interior of the box bottom

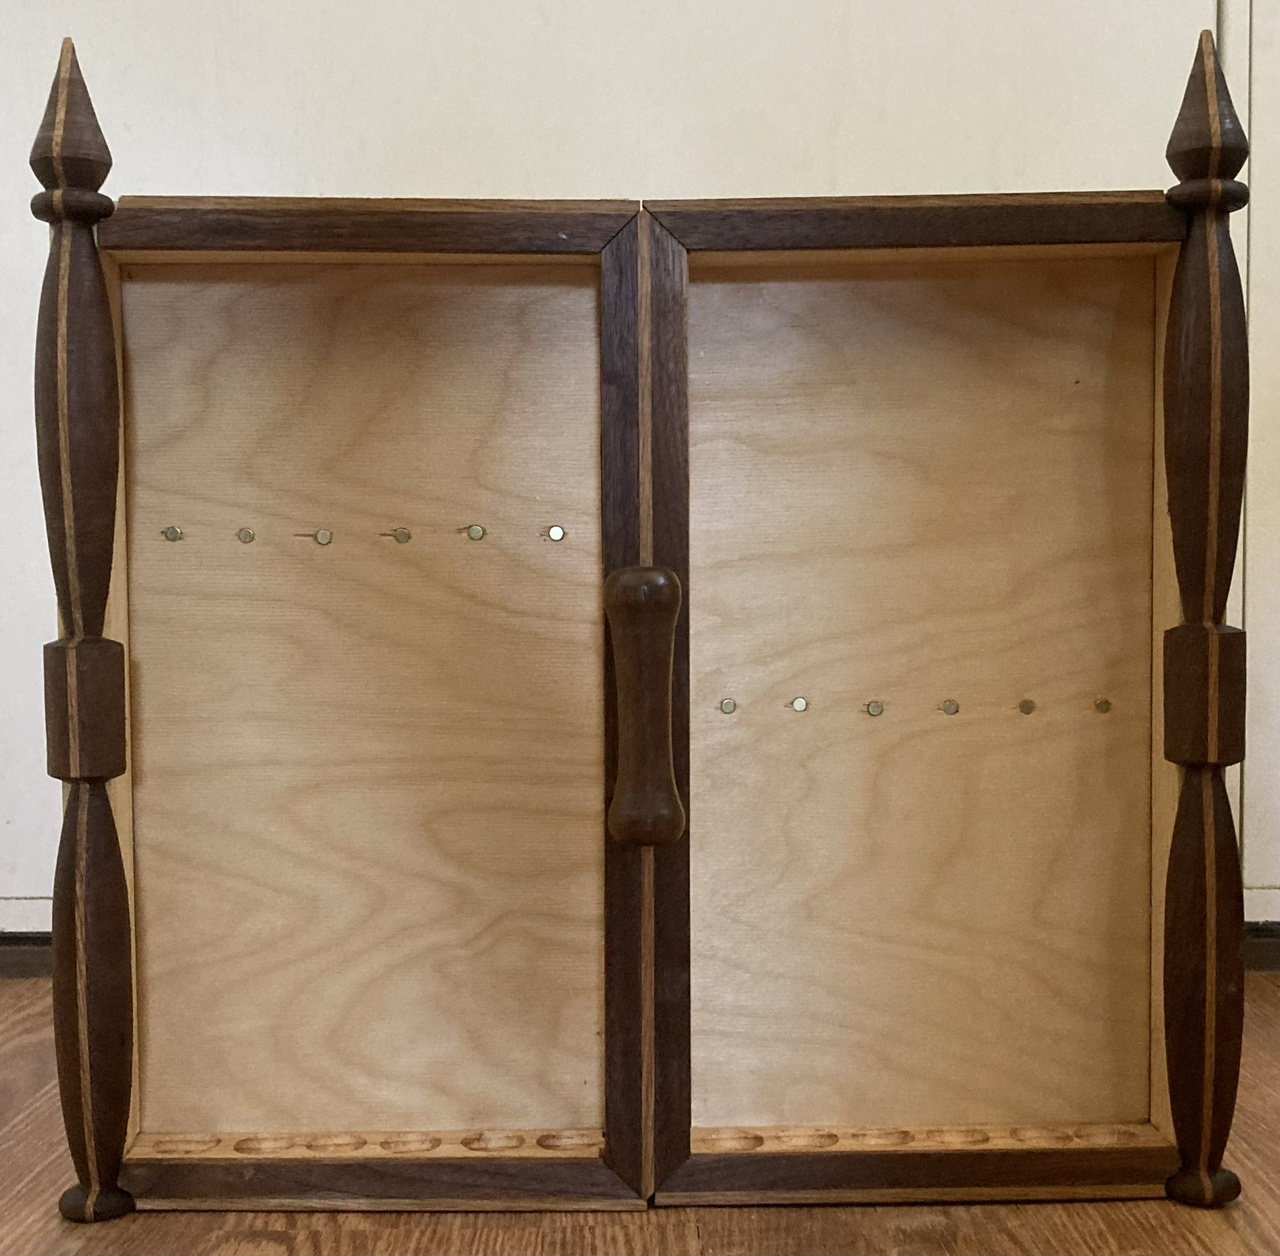
With the bottom built, I went searching for a top. I had two book-matched boards of elm that had been resawed to ¼ inch thick, so I glued them together, then cut it down in size until it matched the size of the bottom. With some more glue blocks, I managed to make a top that fit.

top and bottom of the leather-working tools box

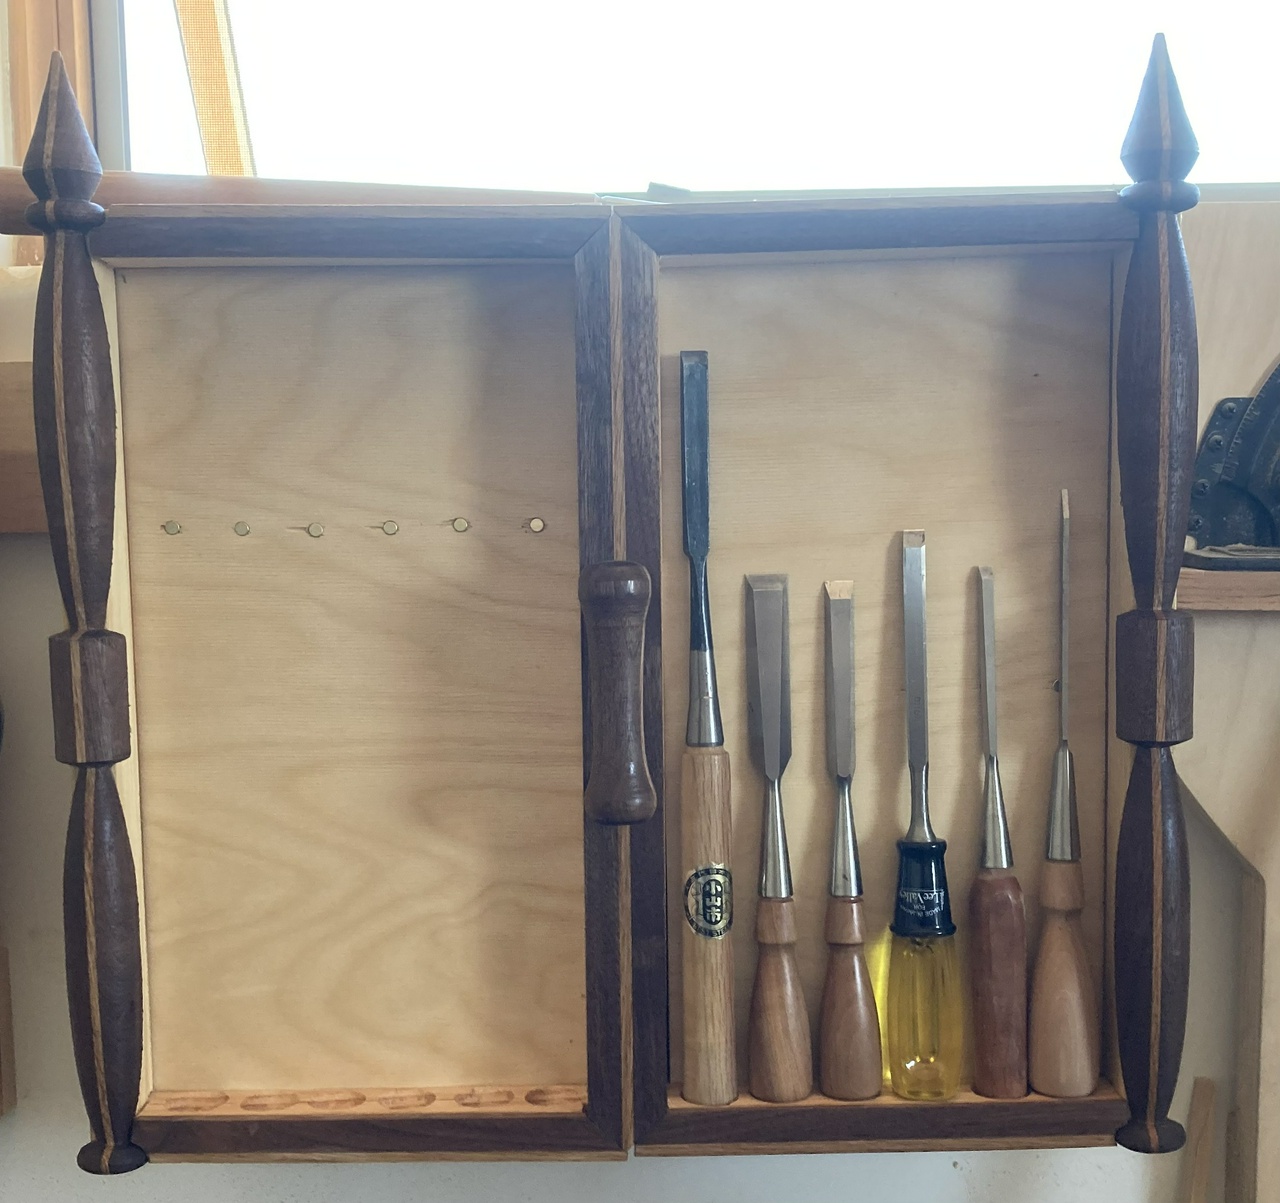
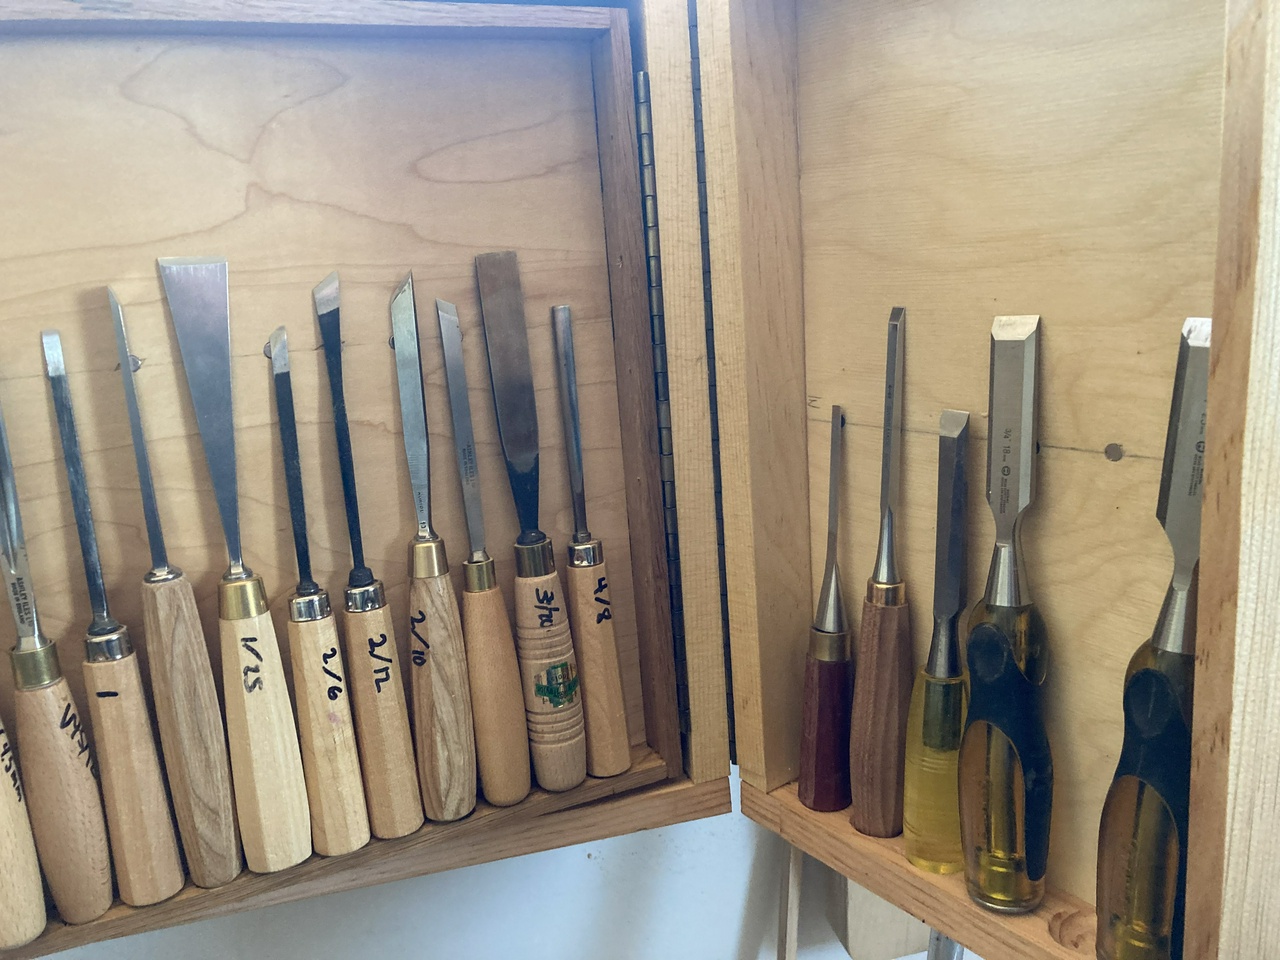
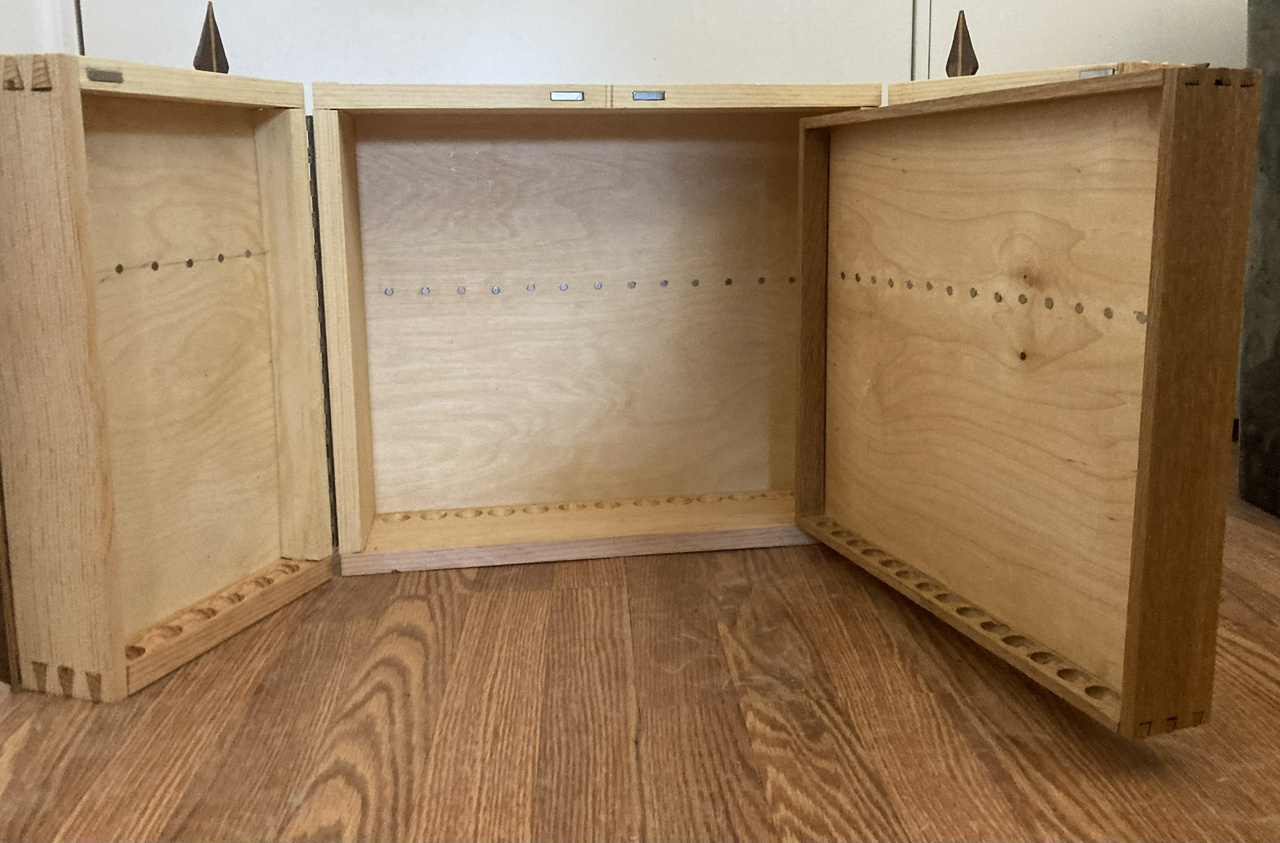
I added some inserts to hold things in place, and coated it all with a coat of tung oil, and here we are. One more set of tools now have a home so they can all stay together, and not clutter the top of my workbench.

filled bottom of the leather-working tools storage box

#woodworking #box #storage

Discuss... Reply to this in the fediverse: @davepolaschek@writing.exchange

carving knife with red sheath

I made a carving knife for myself recently. The handle is apple from a tree growing in my front yard in Minneapolis, with red Micarta, ash, and a brass pin to hold everything together.

The blade is a Morakniv 120 LC laminated carbon steel blade with the tang running full length through the handle.

The ash veneer matches the thickness of the tang, which makes construction easier. The pieces of apple I had were thin enough that I though some extra thickness from the Micarta would feel good and would also offer some contrast.

Once I had chosen red Micarta, I decided the sheath needed to match, so I ordered some red dye. The sheath is constructed in the traditional Scandinavian manner taught to me by my friend MaFe, with a wooden insert cemented into the leather to protect the leather from being cut if you insert the blade carelessly.

I’m happy with the knife and it will probably become my primary carving knife for a while.

#woodworking #knife #project

Discuss... Reply to this in the fediverse: @davepolaschek@writing.exchange

This is a small box of birch, pine and apple. The size is 4x2⅜x2½ inches or 100x60x63mm.

I made the box to use up some small scraps, and to practice “working small.” The size was determined by the size of the scraps and “by eye” as I fine-tuned the dimensions.

top of box

The sides of the box are quarter-inch (6mm) birch, dovetailed together. The bottom is ⅜ inch (9mm) pine, rabbetted into the sides (to reduce the apparent thickness), and the top is a ⅛ inch thick piece of apple from a crab-apple tree that grew in my yard in Minneapolis.

front of box

The insert is 1/16 inch maple veneer, simply cut to size and glued to the insides of the sides so the top slides onto the insert.

back of box

Finish is a coat, inside and out, of tung oil, followed by a bunch (8-12) coats of platina shellac, followed by a few coats of violin varnish on the top.

I love the way the top turned out, and am glad I didn’t just throw away that small scrap.

#woodworking

Discuss... Reply to this in the fediverse: @davepolaschek@writing.exchange

Saw till with saws

Been organizing my shop, and I no longer needed my old chisel till so I knocked out the existing rack within it, added a bar at the bottom and a board at the top, et voilá.

Detail of the scraps I used to hold the rod which holds the saw handles

Some day I’ll clean up those square corners and get a coat of oil on the new parts, but for now, my dovetail saws are off the bench.

#woodworking #project #shopFurniture

Discuss... Reply to this in the fediverse: @davepolaschek@writing.exchange

Completed chisel and gouge till

Over the past few weeks I built a till to hold all of my chisels and gouges, and here it is. It had a total of five rows of tools, and each tool sits in a one inch diameter hollow, with the sharp end of the tool held to the panel behind it by a 3mm x 6mm rare earth magnet.

Innermost storage of the chisel and gouge till

The back row (farthest inside) holds my bent gouges and spoon gouges. They’re not used very often, so hiding them deep inside is fine. Opposite them are straight gouges in higher curvatures. I use them pretty often, so this isn’t ideal, but I’ll get things sorted better over time.

Outside of the inner door of storage

On the outside of the inner door of the storage are the straight gouges and lesser curves. Also the V gouges are here, as I use them fairly often.

Inside left door

On the inside of the left door are my mortise chisels. Again, not frequently used, and probably these should move to the inside of the inner door.

Inside right door

On the inside of the right door, I have seldom-used chisels. These are spares, and again could move farther in.

Front doors of the chisel and gouge till

And finally the outsides of the doors hold the normal bench chisels which I use most often.

Inside of the empty till

Construction of the carcasse is pine with Baltic birch panels.

Inside of the empty till with the inner door open

The inner door is white oak, also with a Baltic birch panel.

View of the outer doors

The outer doors have decorative bits made from walnut and oak, partly to make the till a little prettier, but also so I could practice turning the decorative turnings and mitering the flat bits. Shop furniture is a great way to practice my skills.

The carcasse was built first, then sawed open to remove the doors. Then I drilled holes for the piano hinge for the inner door. I then sawed the two doors apart and aligned and mounted the piano hinges for the inner door, then the outer doors. I applied the trim, cleat on the back, and then coated everything with a coat of tung oil.

#woodworking #projects

Discuss... Reply to this in the fediverse: @davepolaschek@writing.exchange

This is a small box I made to resemble a Dutch Tool Chest. It was designed to hold a smoothing plane I had refurbished and was sending to another guy on Lumberjocks as part of our Hand Planes of Your Dreams Secret Santa exchange for 2022.

Nothing too special about the box. It’s a dovetailed box with a slanted top. The top has two small strap hinges and a black latch. It’s hard to find black iron screws in the small sizes.

The box is about 4 x 6 x 9 inches. The box is made of ½ inch pine, with some ¼ inch sapele for the lid. The battens on the lid are ash, and the skirt on the bottom of the box is white oak.

The box was painted with three colors of Real Milk Paint. Black Iron first (three coats if I remember right), followed by two coats of Terra Cotta, and finishing with a coat of Persimmon. Then I brushed the paint with a brass brush, selectively removing some of the paint and letting the colors underneath show through.

Once I had that done, I coated it with a few (four or five, maybe?) coats of tung oil. This should waterproof it and lock in the paint.

Overall, it was a fun project, and I learned about distressing milk paint to get an aged look. I need to work on burnishing a piece next to apply more lessons from The Belligerent Finisher but it’s fun trying out new techniques.

#woodworking #milkpaint #finishing #project

Discuss... Reply to this in the fediverse: @davepolaschek@writing.exchange

Peach-raspberry crumble, fresh from the oven

Side view of peach-raspberry crumble, cooling on top of the stove, with a mixture of juice and butter bubbling along the side of the baking dish.

Our neighbors had a bumper crop of peaches this year, so we got a couple dozen fresh peaches yesterday. We figured putting them in a crumble with some raspberries we already had in the house would be a good use.

Peach raspberry crumble, not yet baked.

Ingredients

  • A dozen fresh peaches
  • A pint of fresh raspberries
  • 1 Tbsp flour
  • A couple tablespoons of sugar
  • 150g all-purpose flour
  • 100g butter
  • 85g sugar

Peach raspberry crumble, in an 8x8 pan, without the crumble.

Directions

  • Peel the peaches and cut into wedges
  • Toss with a couple tablespoons of sugar and a tablespoon of flour and dump into a glass 8x8 baking pan
  • Put a pint of raspberries over the peaches
  • In a medium bowl, cut the butter into the flour.
  • When the butter/flour mixture looks like bread crumbs, toss the sugar over it.
  • Sprinkle the crumble mixture over the fruit
  • Bake for 35-40 minutes in a 400F oven,
  • Cool for a little bit before eating. Don’t burn your mouth!

A dozen peaches, peeled and cut into wedges, sitting in a stainless bowl.

#recipe

Discuss... Reply to this in the fediverse: @davepolaschek@writing.exchange

More a method than a recipe, these are my rough guidelines for ham salad.

Ingredients

  • Ham – two thin slices, or one thick slice, chopped
  • One hard-boiled egg, chopped
  • 1 Tbsp mayo (yes, you can use Miracle Whip®, but it’s better with mayo)
  • 1 tsp yellow mustard

Optional Ingredients

Add up to three of the following

  • 4″ stalk of celery – chopped
  • quarter-pickle “spear” – chopped
  • three or four pickle slices – chopped
  • three or four olives, without pit, and optionally with pimento – chopped
  • one ring pineapple – chopped
  • small chunk green pepper – chopped
  • roasted green chile – chopped
  • tablespoon grated parmesan cheese
  • one slice american cheese – chopped
  • small chunk (tablespoon or so) cheddar cheese – chopped
  • one carrot – chopped finely

Directions

  • Chop the ingredients, if you haven’t already
  • Drain the vegetable matter – you don’t want things soggy
  • Put the chopped things in a bowl big enough to hold everything and then some
  • Squirt in the mayo, and mix (go ahead and use your hand if you want)
  • Add salt and pepper to taste
  • If making a sandwich, smear it on the bread
  • If you don’t have bread, add about ½ cup cooked and cooled macaroni

You can double, triple or whatever multiple you’d like with this, but I find that I most often make about 2 servings, use half the result on bread for lunch, and the other half with a little pasta for dinner, and I’ve managed to clean up a lot of little odds and ends from the kitchen, while still having a tasty meal or two.

If you don’t have any ham, use two or three eggs and call it egg salad.

#recipe

Discuss... Reply to this in the fediverse: @davepolaschek@writing.exchange

rhubarb peach cobbler

I needed to rewrite this recipe for my own sanity. The one online at the Food Network has all the ingredients in one list, which is handy for shopping, but worthless for trying to make sure you haven’t forgotten something as you’re baking.

Ingredients (crust)

  • 2C all-purpose flour
  • 2Tbsp sugar
  • Zest from one lime
  • 1tsp salt
  • 4½oz butter (1 stick plus one Tbsp)
  • 1½oz lard (3Tbsp)
  • 1½oz ice water, in a spray bottle

Directions (crust)

  1. Place the dry ingredients in a large mixing bowl and mix them with a fork.
  2. Add butter and lard and cut into the flour mixture.
  3. Spritz mixture with ice water and mix with a fork just until it comes together.
  4. Place into gallon zip-top bag, roll flat, and place in fridge while you work on the filling.

Ingredients (filling)

  • 1# rhubarb, chopped into 1cm pieces
  • 1# peaches, cored, and sliced into 1cm slices, then chopped into 1cm pieces
  • 2Tbsp corn starch
  • Juice from one lime
  • 1C sugar

Directions (filling)

  1. Chop rhubarb and place in large mixing bowl.
  2. Cut peaches in half, removing pit, them slicing into 1cm slices, and chopping into 1cm cubes.
  3. Add sugar, corn starch and lime juice to bowl, and mix things with a fork so all the fruit is coated.

Directions

  1. Place a piece of aluminum foil on the bottom rack of the oven to catch any spills.
  2. Preheat oven to 375F.
  3. Grease a 9x9 inch glass baking dish with lard or butter.
  4. Take about ⅓ of the crust mixture out of the zip-top bag and crumble into the bottom of the baking dish.
  5. Dump the filling in on top of the crumbled crust
  6. Roll the remainder of the crust out inside the zip-top bag so it’s about the same size as the baking dish, then carefully slice open the bag along the seams and place the top crust on top of the fruit, pushing it down into the edges of the baking dish. If it didn’t break up like mine always does, slice it a few times so steam and juice can escape.
  7. Bake for an hour. Or 90 minutes if you used frozen fruit.
  8. Before removing from oven, broil (at the hottest setting) for a couple minutes to brown the top if needed.
  9. Let cool for 15-30 minutes before serving and enjoying. It’s hard to taste the deliciousness with a burned tongue.

#recipe

Discuss... Reply to this in the fediverse: @davepolaschek@writing.exchange

One pot, and you can throw everything in early and just let it fill the house with yummy smells if you’re pressed for time.

Serves:4-6

Prep Time: 15 minutes

Cook time: 3-7 hours

Ingredients:

  • 1 lb boneless chicken thighs
  • 1-2C barbecue sauce
  • 1 15oz can cream corn
  • 1 C frozen sweet corn
  • 2C frozen roasted sweet potatoes
  • [optional] Small can Hatch Green Chiles,
  • 1 batch Corn Muffins with Chicos batter
  • 1 C water
  • salt and pepper

Directions:

  • Cut chicken into bit sized pieces and throw into the crock pot.
  • Season with salt and pepper.
  • Top with corn, cream corn, sweet potatoes, optional chiles, and bbq sauce.
  • Pour 1C water over everything.
  • If making this in one shot, pour in the muffin batter over the top of everything.
  • Turn crock pot on “high” and cook for a cuppa-tree (2-3) hours, or “low” for approximately 6 hours.
  • Spoon muffin batter over top of boiling liquid, making dumplings, if you didn’t put the batter in earlier. Continue to cook on low for another hour or so.
  • Serve and enjoy!

#recipe

Discuss... Reply to this in the fediverse: @davepolaschek@writing.exchange

Enter your email to subscribe to updates.