davepolaschek

Woodworking

This is a moulding for the edge of a piece of wood that livens it up, and is fairly quick and easy to do. Working in pine, I can create a linear foot of beading in about ten minutes, including time for stropping my gouge.

For reference, here’s what I’m referring to as barrel moulding.

Barrel moulding

The barrels in this case are three times as long as they are wide. Beaded moulding is typically the same length as width, and bead and barrel moulding alternates the two, but the technique is the same for all of them.

First you need to make a bead on the edge of a board. I generally do three beads, and then cut the interruptions in the middle one to make barrels, which I think looks pretty good. I make these using a Lie-Nielsen #66 beading tool with an appropriate blade, which in my case is a double reed profile, set up so one of the reeds is right on the edge of a ¾ inch board. I repeat the profile going both directions on the board to make a total of three reeds, with one in the center of the board. Note that multiple manufacturers make beading tools, but you can also make a scratch stock that will do the job.

Beaded boards

With the beads or reeds on the edge of the board, mark off the length of your barrels. As I said earlier, I like a 3:1 ratio if I’m going to make them uniform length, but other ratios work. Just set up your dividers and make marks a consistent distance apart down the length of the board.

With your marks made, you’ll need a #11 gouge the same width as the beads or reeds you’ve made in the board. This is also known as a veiner and has a u-shaped profile. My ¼ inch veiner that I use for making these beads has been modified with rounded wings or edges so that it doesn’t cut as far into the wood as it would with square edges.

Modified veiner

I start with the gouge almost flat on the bead, with the cutting edge about a sixteenth of an inch (or a millimeter) back from the mark for the edge of a barrel.

Veiner at the beginning of a cut

Then I rock the gouge forward and into the wood, ending with it fully vertical.

Veiner partway through a cut

Repeat this down the board, and you’ll have something that looks like the following.

Cuts completed in one direction

Now go back and do the same in the other direction. As you rotate the gouge up, you’ll get a small amount of wood pushing to the sides. If it’s too much, start a little closer together for the two cuts. After you’ve gone both directions, use a #1s or #2 gouge (also known as a skew) to clean out the waste.

Here’s a photo showing all the stages from start to finish of making the barrels.

Steps of cutting barrels

From left to right, that shows: cut one direction; cut both directions; cleaned out the corners with a #2 (skew) gouge; cut the second time from the left and right; and finally, cleaned out the second time.

I find that I have to go along the length of the board twice. If I try to do it all in one pass, the edges will be rougher because I was taking “too big a bite” at once.

Once I’ve been up and down the length of the board twice and cleaned out the waste with a skew, I use a chip brush I chopped shorter so the bristles are fairly stiff. This one has also been used for applying kakishibu, which further stiffens the bristles and gives them a reddish tint.

Shortened chip brush for cleaning beads

Once all the waste is brushed out, you’re ready to finish. Thanks for looking!

#woodworking #techniques

Discuss... Reply to this in the fediverse: @davepolaschek@writing.exchange

A friend wanted the dimensions of handscrews of various sizes. I took measurements of the four I have, and photos to show what the dimensions measure.

The dimensions are the following measurements:

Handscrew with labels for dimensions

And the four handscrews are shown together:

Picture of four handscrews

Beginning in the top left, an unknown Chinese handscrew, all measurements in inches.

Tall: 1¾ Thick: 1⅝ Long: 10 Jaw: 5 Screw: 9½

Top Right, a large Miro Moose handscrew

Tall: 2¼ Thick: 2⅛ Long: 14 Jaw: 7 Screw: 14½

Lower Left, a medium Rockler handscrew

Tall: 1¾ Thick: 1½ Long: 8 Jaw: 4 Screw: 8

Lower right, my smallest Miro Moose

Tall: 1⅜ Thick: 1¼ Long: 6 Jaw: 3 Screw: 5½

The free jaw measurement is, in every case, half of the total jaw length. The height and width of the jaw are nearly equal, but the measurement I have labeled “Tall” is always slightly larger than the jaw width (or thickness). And the free length of the screw is typically about the same as the total length of the jaw.

The Miro Moose clamps are a brand of Dubuque Clamps, and are made in Iowa.

#woodworking #tools

Discuss... Reply to this in the fediverse: @davepolaschek@writing.exchange

I’ve been needing a strop that I can use to touch up my gouges for a while, and have been mostly getting by with a flat strop. Last week, I grabbed a piece of ash from the scrap pile, and shaped it with the bandsaw, gouges, and spokeshaves. Yesterday I formed a piece of leather to it (but forgot about the clamps marking the leather). Today I contact-cemented the leather in place. It works pretty well for sweeps up to a seven.

concave face of the strop

flat fed of the strop

curved edge of the strop

end-view of the strop profile

I’ll probably wet the leather again and see if I can get the clamp impressions out of the leather, but it’s working well enough that I may not bother.

#HandyTools #woodworking #leatherworking

Discuss... Reply to this in the fediverse: @davepolaschek@writing.exchange

A while ago I read about kakishibu, a traditional Japanese finish mostly used on softwoods.

Since the one English-language book on kakishibu is out of print, and the author doesn't have any more copies, I decided to order a bit of the fermented persimmon juice and see what I could see.

I had a small box I had built to hold some clamps. The box was made with poplar sides and a birch top, and the poplar had an unappealing shade of green that I wanted to modify. I left the bottom of the box untreated, so I could look back to compare that with the sides that I treated.

untreated poplar bottom of the box, showing the greenish cast of the poplar

Immediately after painting the box with a layer of the kakishibu, I noticed two things. One was that the reddish tint did a great job of modifying the greenish cast. I like it! The other thing is that, being water-based, it raised the grain of the box.

box immediately after treatment with kakishibu

So I sanded the box lightly with 400 grit sandpaper, then applied another coat of the kakishibu, and set the box outside in the New Mexico sun for a couple mornings while I worked on other things in the shop.

box after two mornings of sunshine

That was quite a difference! They say that kakishibu will continue to darken for a month, but after just two mornings (about 6 hours) it looks a lot more appealing than the plain poplar (scroll back to that first image...)

box after four mornings of sunshine

And after two more mornings of sunshine, the color of the box has darkened a bit more, but it seems to be slowing down. I'll keep an eye on it for a couple more weeks, and maybe add another photo, but I'm sold on kakishibu, at least for covering up the green that poplar shows. And it looks pretty good on the birch top of the box, as well.

#woodworking #finishing #techniques

Discuss... Reply to this in the fediverse: @davepolaschek@writing.exchange

Originally written 1. September, 2018

apple tankard, with copper wire wraps and elm handle, glistening with its epoxy finish

apple tankard, with copper wire wraps and elm handle, glistening with its epoxy finish

For the beer swap this year, I had decided to build a tankard. I'd seen tankards in Woodworking in Estonia and thought “how hard could it be?” That usually leads to an interesting build.

A page from Woodworking in Estonia showing some tankards

I had a chunk of crab apple from a tree from my yard. It came down four years ago in 2014, and a friend had slabbed it and had been air-drying it. It was ready to go.

A piece of apple wood, with a saw taking a small board off

The first few cuts were a little ragged, but I soon found my rhythm, and cut off a dozen nice and fairly even pieces of apple wood. The grain in them looked pretty.

A piece of apple wood, now smaller, with a number of small boards next to it

Two book-matched pieces of apple with interesting grain

Not wanting to waste the apple, I also started building a pine prototype. I had picked up a 1¼” by ¼” piece of pine, and that seemed like a good way to figure out exactly what I was going to do.

I started by tapering the pieces of pine. I looked at a stein in my cupboard, and for a 1 liter stein, it looked about an inch narrower at the top than the bottom. I figured that was a little more slant than I wanted to work with, so I decided that ten sides (a dozen pieces of apple, minus a screw-up or two), tapered by a quarter inch would give me two and a half inches, divided by 3 would mean the top would be about about ¾” smaller in diameter than the bottom, which seemed pretty good. And since I'd decided on 10 sides, that meant 72 degree angles on the sides of the staves, so I set up a protractor. I did the tapering in both dimensions freehand with a block plane, but checked my work frequently as I went to make sure I was getting things right.

A piece of pine board, with an out-of-focus protractor showing the edge at 72 degrees

planing the edge of a small pine board with a block plane

Once I got all the sides tapered, I cut out a circular piece of cherry from a 4/4 scrap I had laying around, then resawed it into two ⅜” round pieces. Taping the sides together with gaffer tape, I tested the fit and saw that I was close.

Ten pine boards almost completely encircling the round piece of cherry

I cut a groove on the inside of the bottom of each of the staves for the bottom to ride in, then slowly took wood off the round bottom until everything fit pretty well.

A view of the pieces completely encircling the round piece of cherry with only small gaps at the corners

I also put holes in one of the staves to push dowels through to hold a handle on. I was thinking that maybe I would carve round tenons onto the end of the handle, but it turned out to be much easier to clamp the stave and handle together then drill holes in both and push in a dowel, so I did that.

I cut a couple handles from a scrap of elm I had, and shaped one with rasps, and the other with spokeshaves and knives. I would have rather made the handle entirely with edge tools, but the one finished with the rasps looked nicer, so that was the one for the swap-tankard.

a roughly-shaped handle for a tankard, made from elm

With the help of a few hose-clamps and gaffer tape, I tested everything one last time to see how I was doing. It didn't look half bad.

the pine, prototype tankard, held together with gaffer tape and hose clamps

I used 14 gauge copper wire from the hardware store to wrap the tankard, and it was just strong enough to pull the staves reasonably tight before it snapped. I used a chain-saw file to make a small groove for the wire to ride in so it would be less likely to slip up the side of the tankard (remember the taper) while I was assembling things. I didn't need that in the pine, since the wire could compress its own groove in that, but in the apple, I figured it would make life easier.

pine tankard, held together with copper wire

That was enough experimentation, and it was time to get started on the apple tankard for the swap. I went through the same steps, tapering the sides, cutting grooves on the inside, fitting it to the bottom, and realized that I would also need to plane the sides to a more consistent thickness. That hadn't been an issue with the factory-made pine, but with my hand-cut apple staves, the varying thickness would lead to an uneven looking tankard.

the staves for the apple tankard in the order I would assemble them

apple tankard, showing the uneven thicknesses of the staves

thinning a stave using a block-plane

I also needed to round the inside of the staves before assembling them to make a nice-feeling top on the tankard.

rounding the end of a stave with a rasp

All that done, it was time for a test-assembly.

apple staves surrounding a round cherry bottom, showing a few small gaps

the apple tankard, test-assembled with gaffer tape and hose clamps

Things were looking good. The last step was putting a coat of epoxy on the inside of the staves and bottom so I wouldn't have to worry about getting a nice finish there after things were assembled. I also had glued the dowels into the stave that I picked as the “handle stave” and cut that flush, so the epoxy would help seal up any gaps around those dowels.

pine and apple staves, laid out for finishing the insides with epoxy

It took three coats of epoxy to seal up the insides of the apple. There were just enough punky bits that it wouldn't have held liquid very well without the epoxy, so I was really glad I'd done that before assembly, especially when the first coat almost entirely soaked into the wood.

Once I had the insides coated, it was time for assembly. I hoped I would be able to get almost watertight without massive amounts of epoxy, but the fit around the bottom wasn't great, and it took some sawdust and CA glue filler, plus another three coats of epoxy to seal up the bottom completely.

pine and apple tankards, assembled and held together with hose clamps and gaffer tape - the insides of the staves now appear finished

apple tankard with epoxied handles next to it

With all the pieces together and a few coats of epoxy on the outside (I had initially thought of a varnish finish, but decided the epoxy looked pretty good), it was time to wrap it up. I shaped the outside of the top of the tankard with rasps and sandpaper, applied another two coats of epoxy, sanded lightly with some wet-dry 200 grit paper and put on a final coat and hoped no bugs would land in the wet epoxy (the brand I used has 30-minute open time, but isn't gnat-safe until about 90 minutes – it's fully cured after 36 hours).

I think the finished tankard came out looking okay.

I wrote up the traditional note that accompanies a swap item and got it ready to ship off.

Note accompanying the apple tankard

#project #woodworking #tankard #stave

Discuss... Reply to this in the fediverse: @davepolaschek@writing.exchange

Rack holding a number of spokeshaves

I collected all (?) my spokeshaves yesterday and built a rack to hold them. Cut a piece of ¾x⅜ maple into two pieces, then turned it to make ⅜ inch dowels on the lathe. Glued them into a board and stuck a cleat on the back. Nice quick project. I should probably put some oil on it one of these days, but… mañana.

From the top, here’s a quick description of each, how it’s set up, and what I use it for:

  1. Veritas, set up for general purpose, fairly thin, general use;
  2. Lie Nielsen Boggs with curved base, set up a little thick for concave curves;
  3. Veritas low angle, set thin for end grain;
  4. Home-made low angle spokeshave set up thicker for quick stock removal;
  5. HNT Gordon small, general use, but thin for tricky grain or finishing;
  6. HNT Gordon large, as the small, tricky grain;
  7. Millers Falls cigar shave, not yet tuned, but I hope to get it tuned up and usable, since the round blade is nice for tight concaves;
  8. Kunz travisher, curved base side to side, which is set to hollow chair seats and smooth out adze marks;
  9. Kunz adjustable mouth spokeshave, set relatively thin, generally for use against the grain and sharpened to behave almost like a scraper;
  10. and finally the Stanley spokeshave, which was the first I bought, and showed me all the ways a shave could be wrong.

A shave set for “general use” is usually set for a thinner cut on one side, and a thicker cut on the other, so depending on where on the blade I’m hitting the wood, I can control the depth of the cut. Some are thicker left and others are thicker right, and I have to give each a try to find what’s best for a given job. The two low angle spokeshaves and the two HNT Gordon shaves are generally for end grain or reversing grain.

In all, I probably have twice as many shaves as I really need, but half of them were packed away in a box I didn’t unpack until earlier this week (since we moved almost 4 years ago). So I bought a few more while I was not unpacking that box. The HNT Gordons are completely unnecessary, but they’re pretty and feel nice in the hand (they’re made from gidgee wood), so they have rapidly become favorites.

#woodworking #project #shopFurniture

Discuss... Reply to this in the fediverse: @davepolaschek@writing.exchange

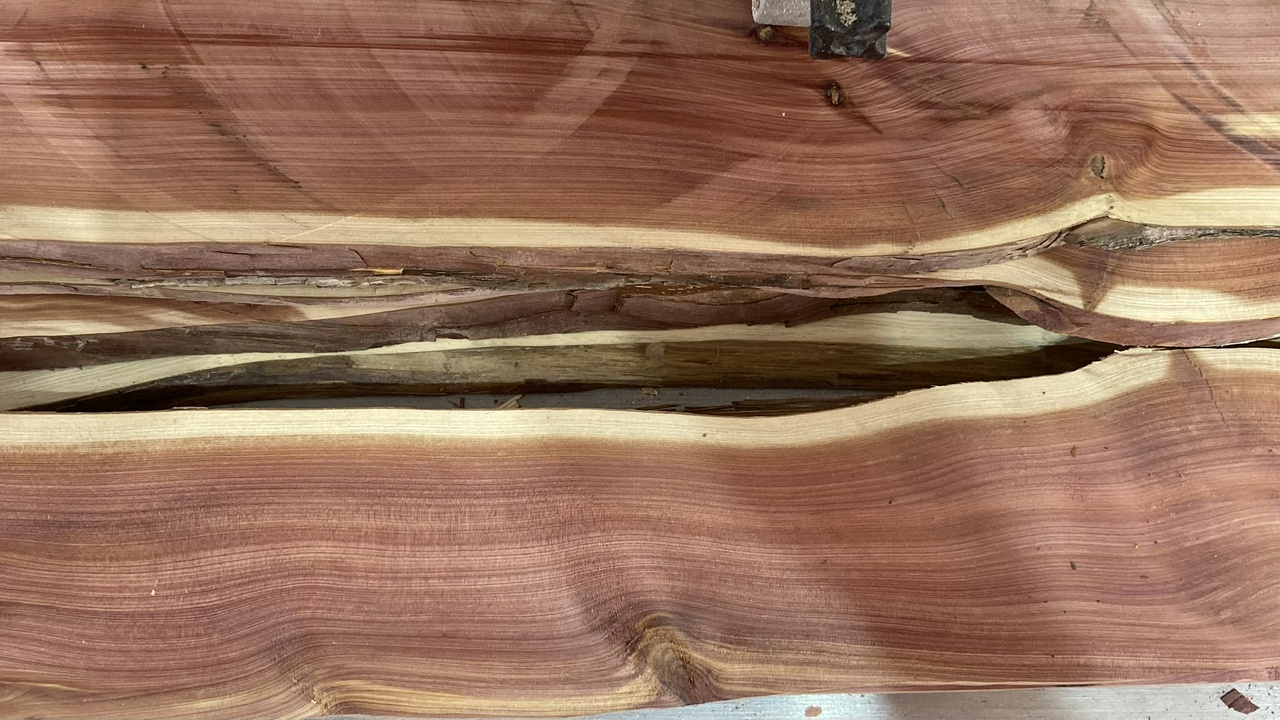
A friend who lives up by Taos gave me some juniper last year, and I’ve been slowly milling it into usable lumber (or microlumber). Here are some of the latest pieces, fresh off the saw.

freshly milled Rocky Mountain juniper

As an idea of how this will age, here’s a bowl that I turned from some similar juniper in December of 2021. Note how the reddish-brown heartwood has darkened, and the whitish sapwood has yellowed a bit. I suspect the stuff I’m currently milling will end up aging similarly.

lidded bowl turned from juniper in December 2021

I’m excited about getting the rest of this juniper milled. I’m aiming for pieces that will finish at least ¼ inch thick (6mm), but no more than ½ inch thick (12mm) so I get a goodly number of finished boards. Most of them will square up between 2 and 3 inches wide (50-75mm), and when I get to pieces smaller than an inch wide (25mm), I generally start milling them into pen blanks.

#woodworking #milling

Discuss... Reply to this in the fediverse: @davepolaschek@writing.exchange

closed box, from front

I recently acquired a set of the large (12 inch or 300mm) cole jaws for a Nova chuck, and as I do with new tools, I built a storage box for the jaws and chuck, as well as the associated accessories.

closed box, corner view

The box is dovetailed pine construction with quarter inch plywood top and bottom and holds the jaws on the chuck, and has places to hold the jaw extensions which I bought with the jaws (allowing it to hold a bowl up to 15 inches in diameter.

open box, showing cole jaws and accessories

The lid is hinged with a piano hinge, and has a small latch to hold it shut, and the box is finished with French Toast milk paint and a coat of tung oil.

open box, showing accessories and cutout for chuck

#woodworking #project #storage #shopFurniture

Discuss... Reply to this in the fediverse: @davepolaschek@writing.exchange

Periodically, I’ll make a piece and decide I want to fiddle with milk paint a bit, working with colors and how they change between wet, dry, and then oiled, which is close to the final color the piece will be (I typically add either a finishing cream or shellac over the oil).

I started by painting some drawer boxes with persimmon milk paint, and the carcasse that will hold them with a wash of black iron milk paint.

drawer boxes with persimmon milk paint

carcasse with wash of black iron milk paint

I then put two thin wash coats of persimmon over the black on the carcasse.

carcasse with persimmon washes over black wash

Then I put tung oil on everything.

carcasse and drawer box with tung oil over the milk paint

I’m very happy with the way the grain of the wood is still pretty obvious in both cases. I was worried even a single coat of full strength paint would hide the grain more than I wanted, but I forgot how adding oil afterwards (and rubbing off the excess oil) makes the milk paint more translucent.

After assembly, this is what it looks like. Note that I forgot to paint the end of the runners that keep the drawers from tipping forward, so I’ll do that next time I get a little milk paint mixed up. I also had to trim the pieces that sit between the drawers, which left them paint-free, so I “finished” them with a Sharpie.

assembled box of drawers

#woodworking #finishing #milkpaint #project #shopFurniture

Discuss... Reply to this in the fediverse: @davepolaschek@writing.exchange

I’ve had a couple people ask me my technique for filling the open grain of wood with a contrasting color, so here it is, with a few pictures. I also have a writeup on using shellac to fill grain or minor tear-out in a surface.

First, grain filling is usually only necessary when working with a wood with very open grain. Ash and oak are good examples. But sometimes you will want to fill the grain on a wood like mahogany or khaya. It’s the same technique in both cases.

First is to get the wood sanded smooth, and then to thoroughly wipe off the sanding dust. If you’re filling the grain of the wood with a contrasting color, having that grain partially filled with wood dust from the same wood will lessen the effect. That doesn’t mean that’s not an appropriate technique in some cases, it’s just not what I’m describing here.

an ash pen blank, turned and sanded to 400 grit

If you see that some of the pores still have dust in them, or perhaps even if you don’t, brushing (with the grain) can remove even more of the dust from the pores, leading to a better fill. Both a nylon brush and a wire brush will work, though the effect is different. Thanks to @bento@tinnies.club for suggesting using a brush, which I forgot to mention here on the first edit.

Next is to mix up the grain filler. I use either black or white Wunderfil by Rockler, and then add dyes to the white if I’m after a colored fill. I dilute the Wunderfil with water 50-50 so it’s fairly thin and will flow into the pores of the wood. Some wood fillers need to be diluted with oil, which isn’t as easy to use. Today I used blue milk paint mixed with white Wunderfil. I mixed up the milk paint normally, then mixed that with white Wunderfil with about equal parts of each. Then smear the grain-filler on the wood. I generally put on blue gloves and use my hand, but if you’re working on a flat surface, you can use a squeegee. The important thing is to go across the grain so the fill is pushed into the holes and not wiped back out.

first coat of blue grain fill applied to the pen blank

In many cases, after you give the fill a few minutes to dry, you’ll notice that the grain has opened back up, and can take more fill. If that’s the case, apply a second coat over the first. I almost always need a second coat, but it really depends on the wood and what kind of fill you’re using. Safer to apply a coat you don’t need than to leave some pores unfilled, though.

second coat of blue grain fill applied to the pen blank

With the second coat on, you want to wait for it to dry. A half hour is generally enough with Wunderfil, but more time won’t hurt. Once it’s dry, you sand back to bare wood, but be careful not to overdo it and sand away all your fill, too. I generally will sand with 400 grit sandpaper, but finer will work too.

pen blank sanded back to bare wood, leaving blue grain filler in the grain

At this point, you can begin finishing. I’m going to use a homemade friction-finish made from shellac and tung oil on this pen, so I’ll apply my first coat of tung oil and then wait overnight before moving on to the friction finish. This will give the fill and oil a chance to cure a bit, and makes it less likely the finishing process will pull the fill out of the pores.

pen blank with the first coat of oil applied over the grain filler

You can see how the oil brightened up the colors. If there are spots that aren’t filled completely, you might need to apply more fill at this point (and then sand it back again later), but I generally try to do any more filling before putting on the oil. Sanding back will be messier and the fill may not adhere very well to oiled wood.

Once the blank has had time to cure (at least overnight with tung oil), continue with your finishing regimen. For me, that’ll be two or three coats of an oil and shellac mix, applied at the lathe, and buffed with a cloth so the heat speeds the curing of the oil. That finish will get another day or so to cure before I handle the piece too much.

#woodworking #technique

Techniques

Discuss... Reply to this in the fediverse: @davepolaschek@writing.exchange