davepolaschek

storage

Dec 30, 2021

Took yesterday's drawer out of the clamps this morning and checked it for fit. As I expected, it was a bit tight, due to the bottom being a hair large.

Drawer in its future home, rubbing against the edge

So I scribbled on the sides with a pencil and hauled the belt-sander outside to clean things up. The belt started out as 60 grit, but I've been using it long enough that it's probably more like 120 now. Still plenty good for cleaning up drawer sides.

belt sander, outside, with the drawer box sitting on the table for the disc sander

After a few minutes, the sides were cleaned up, and the drawer fits much better. Maybe a hair loose, but plenty good for my purposes.

drawer in its future home, fitting slightly loose now

And it looks pretty good, too.

drawer side, with the dovetails sanded smooth


Contents #woodworking #storage #drawer

Discuss... Reply to this in the fediverse: @davepolaschek@writing.exchange

Dec 29, 2021

Another question I received was someone asking Why do you need so many drawers for your bits? Well, I have the following types of bits (and use them all for different tasks):

  • spoon
  • spade
  • hardwood auger
  • softwood auger (the lead screw is different for hardwood and softwood)
  • brad-point ship-augers (longer)
  • Forstner
  • plug-cutters
  • gimlets
  • cheap twist-bits for drilling metal

And that's not even counting the reamers, spoke-pointers, hollow augers, hole saws, or expansive bits. I have a lot of boring tools. ;–)


First a photo of how the till looked at this point.

The till, filled to overflowing with various bits and braces

That's yesterday's drawer-box in the lower right corner. I took it to the belt-sander to bring the dovetails down to level. I had cut them so the pins and tails protruded just a little, and it's a lot easier to fix that on the belt-sander than with a plane. Normally I cut dovetails so the flat surfaces are slightly proud of the end-grain, which is easier to plane flat. Maybe tomorrow's blog will cover that…

Todays update will fill in some blanks in yesterday's drawer construction. If I were a better person I'd go back and edit them into that blog.

As there are some variations in the carcasse, I'm measuring each drawer individually. No idea how many inches each is, but they should fit pretty good…

Marking the length of a drawer-board by placing it in the hole where it will live

Marking the width of a drawer front by placing it in front of the hole where it will live

So that's how I measure them. I also noticed that yesterday's drawer has the dovetails the wrong way around for greatest strength, so I switched things up today and cut the tails on the sides (which are the shorter boards).

And here's a picture of using the combination plane to make the grooves. I clamp the board to my new small bench (because there's room) with the edge just over the edge of the bench so the combination plane can index off the edge of the board.

A combination plane, planing a groove in a drawer side

And here's a completed board (either the left or the right of the drawer, don't remember which)

drawer-side with a groove planed in the bottom edge of it

To mark the size of the bottom, I set the (test-fit) drawer on the piece of ¼ inch plywood, with the outside of two edges on two edges of the plywood.

drawer-box sitting on a piece of plywood to mark the size of the bottom

Then I mark along the inside of the box for the other two sides of the drawer-bottom.

marking the inside edges of the remaining two sides of the bottom

Since I set the depth-stop of the combination plane to about half the thickness of the boards, this will work out to be about right.

And sure enough, it fits pretty well. The bottom was maybe tighter than ideal, but it's close enough that I won't worry about it unless I move the till to somewhere more humid. On future drawers, I'll plane a hair off the edges of the bottom to leave a little more slack.

drawer box glued up with clamps holding it together

It took about 90 minutes from cutting the first board to length to shutting off the lights with the next drawer-box in the clamps.


Contents #woodworking #storage #drawer #build

Discuss... Reply to this in the fediverse: @davepolaschek@writing.exchange

Dec 28, 2021

Nineteen months ago I said I needed to get started on the drawers for my brace till soon.

Till with braces filling the shelf above, and bits in most of the cubbie-holes which will be getting drawers

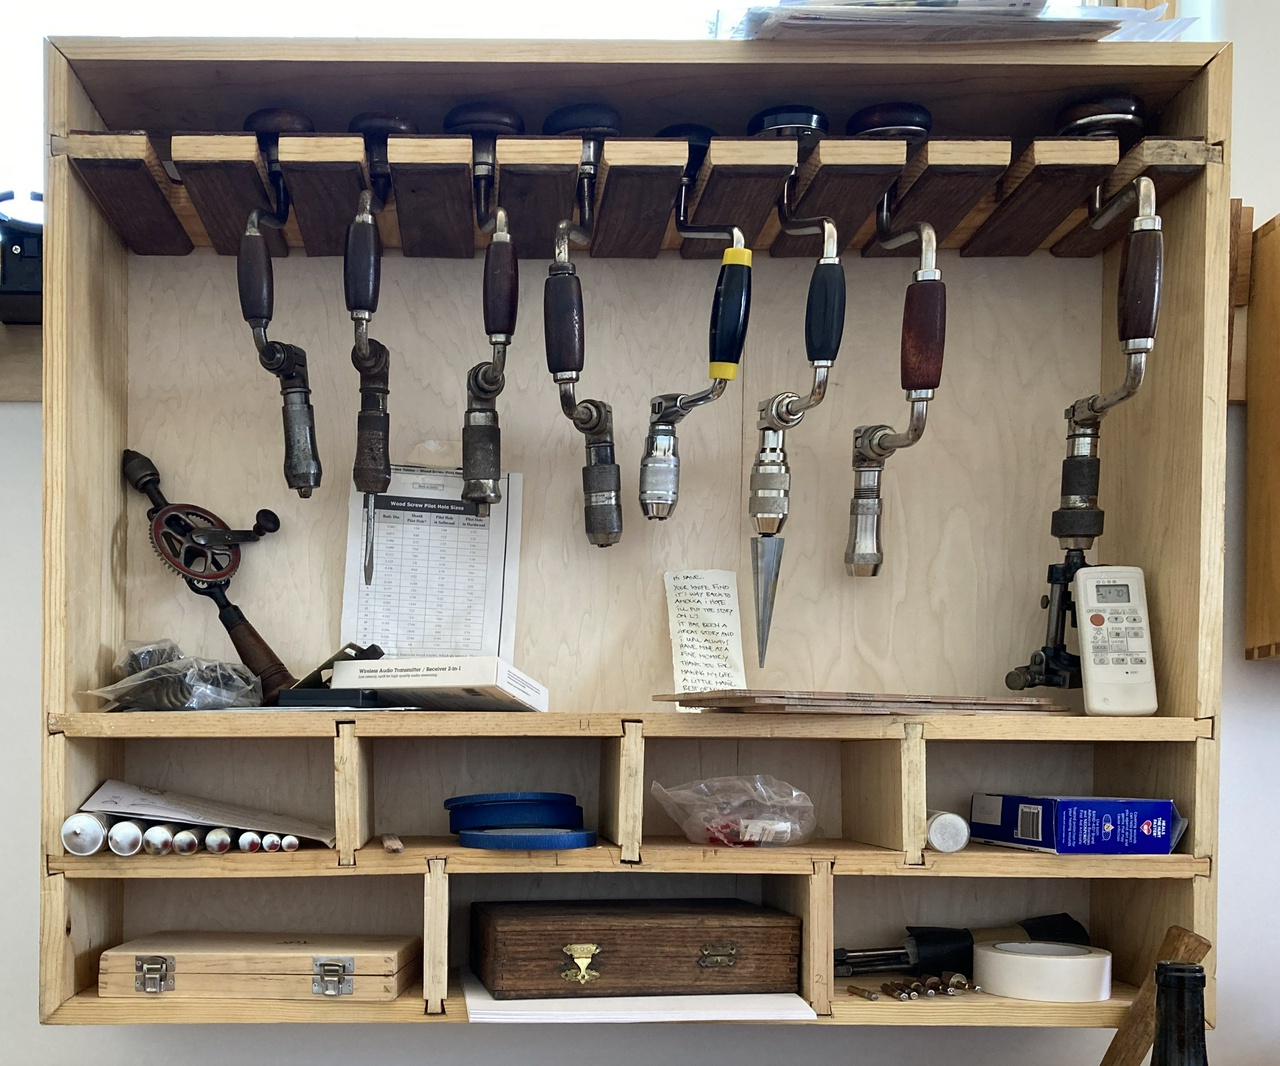
I guess it was finally soon!

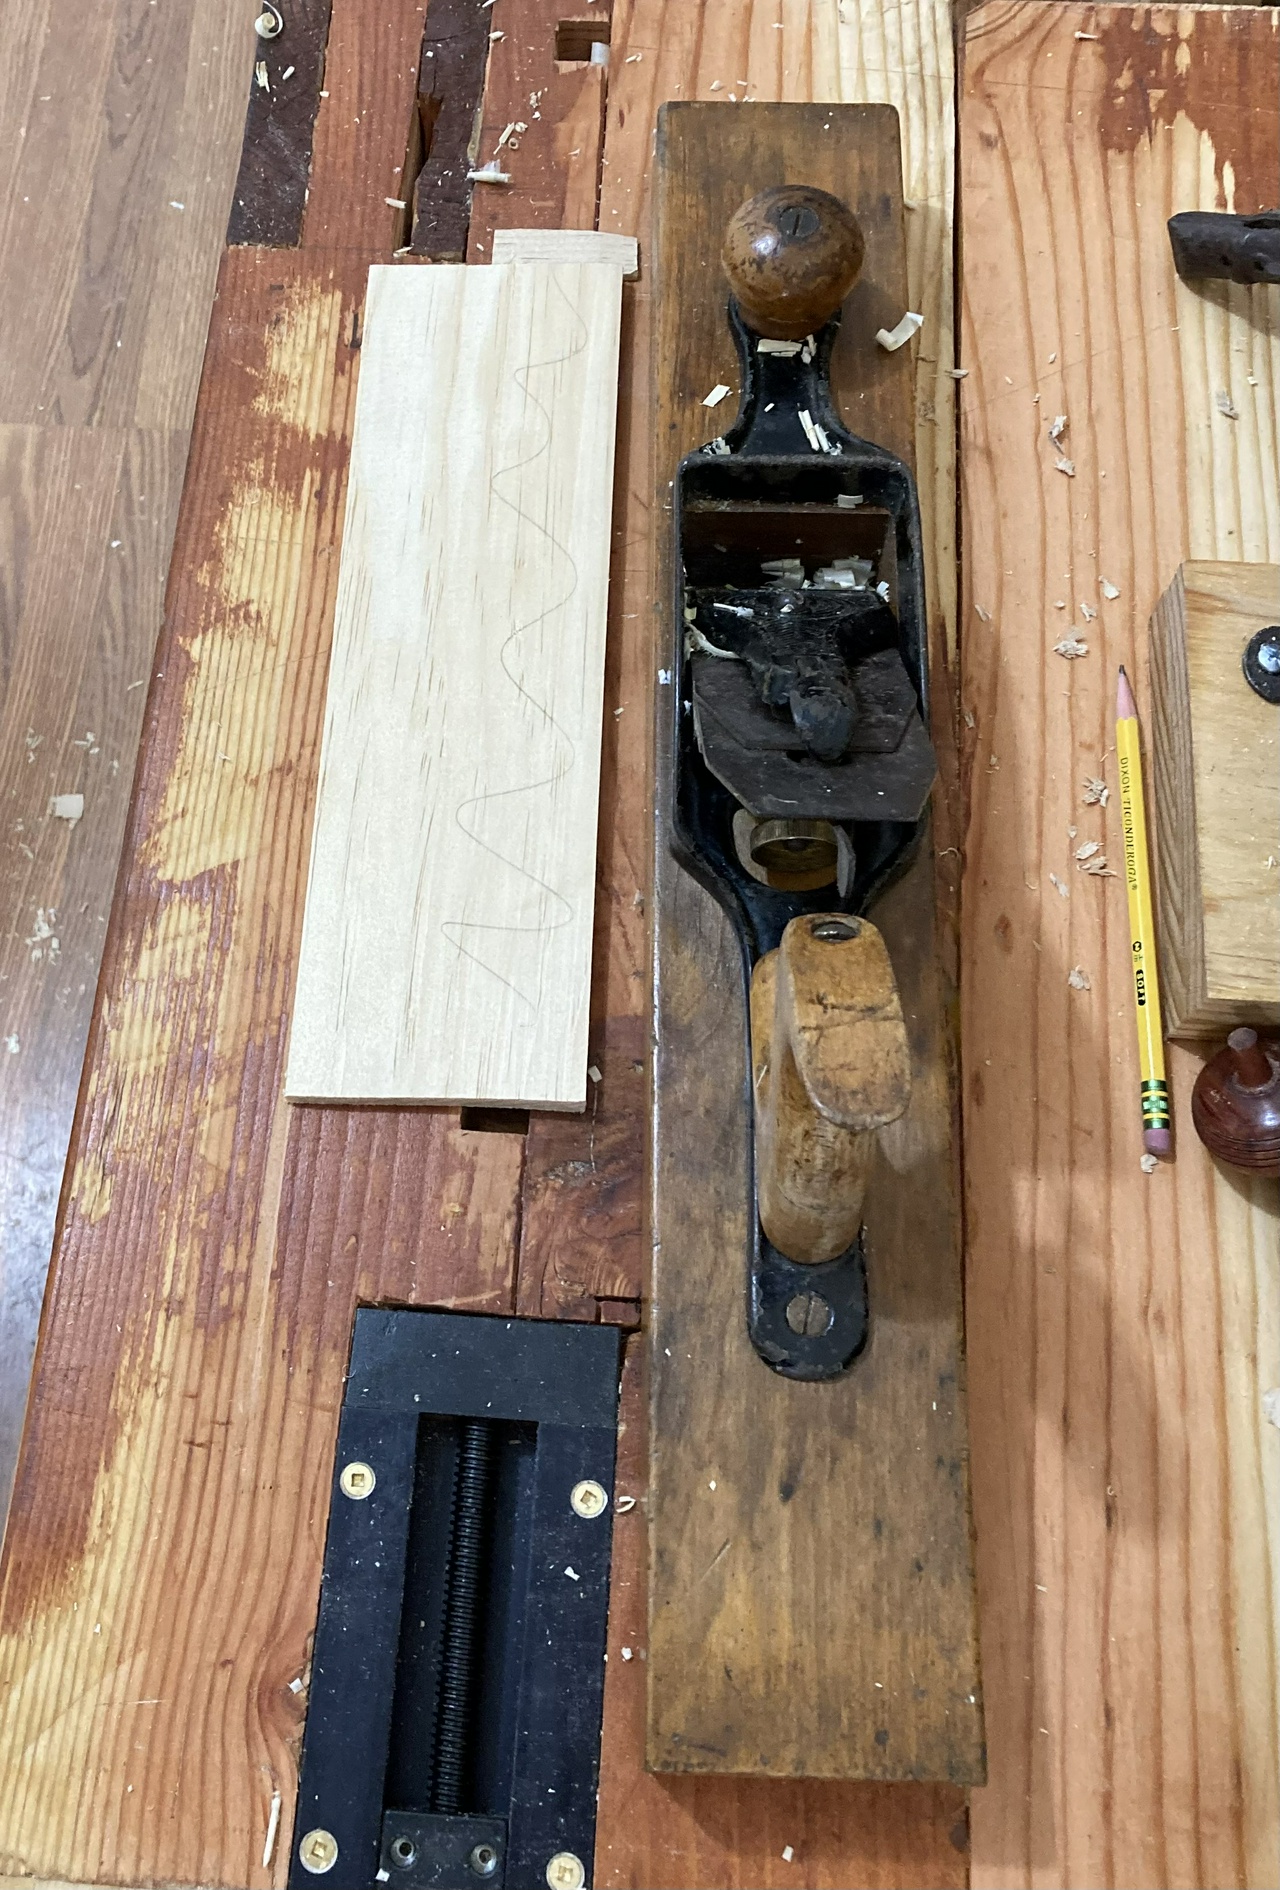
I had resawed a bunch of pine down to about ¼ inch. First up was cutting it to size and flattening it. When I'm flattening a board, I will often mark the high bits or areas that need work with a pencil, then plane away the pencil marks, and re-check the board.

thin pine board in inset vise, with a transitional plane next to it; there is also a pencil

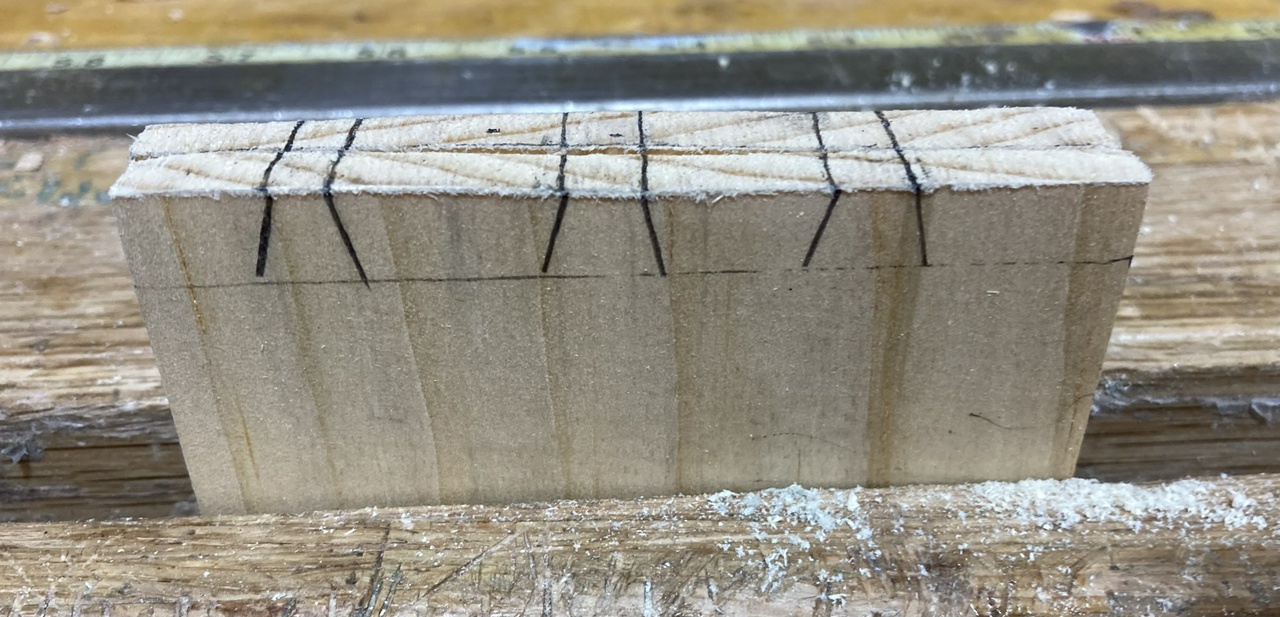
Then I laid out the tails on a pair of boards. I do tails-first because I can gang-saw two boards worth of tails at once. When working in thin boards like this, that helps give me more area as a flat reference surface, plus cuts the sawing in half for the tails.

two boards held in a face vise, with marks for three dovetails on the boards

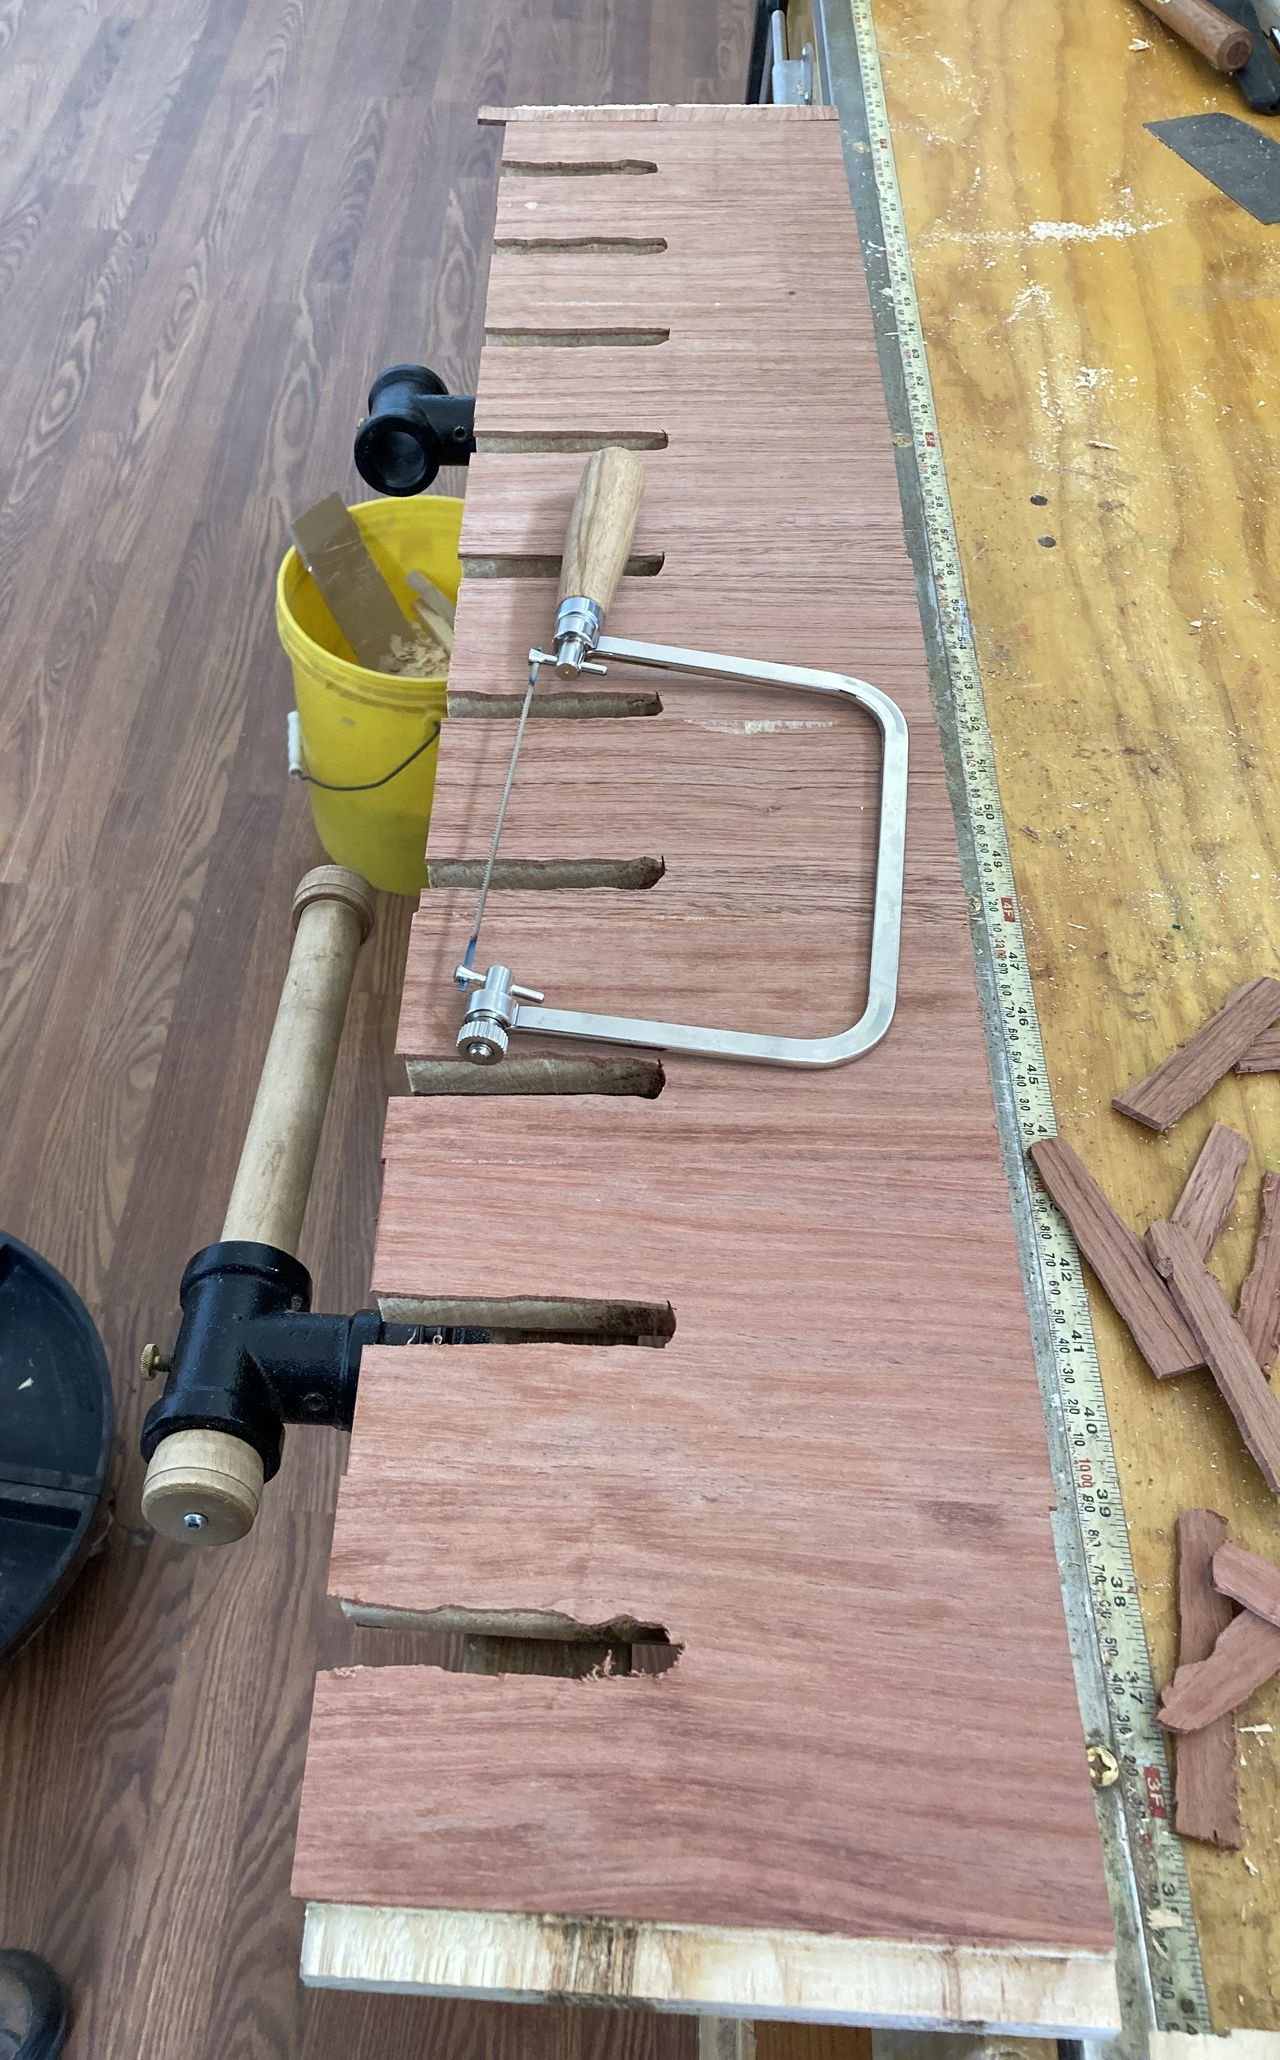
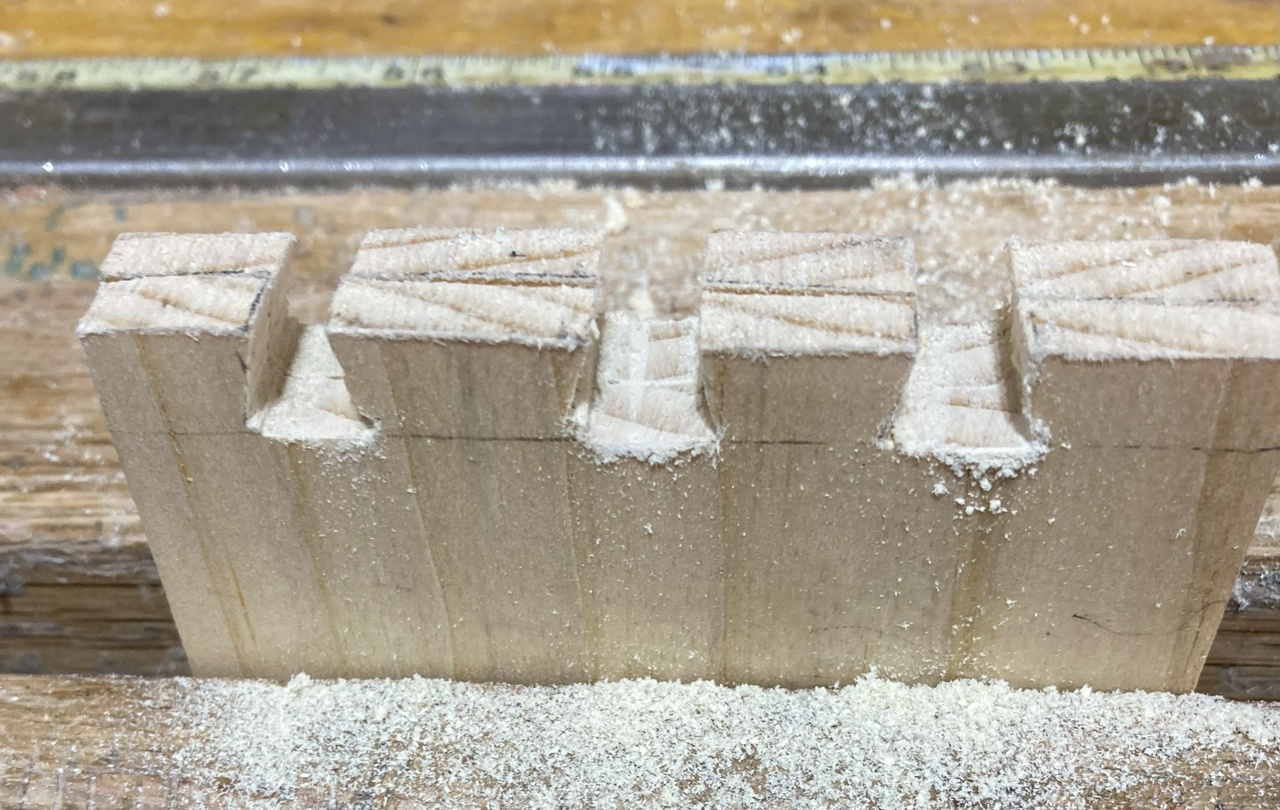
Cut the tails, sawing out the waste with a small bow-saw, then flattening the bottom of the tails with a rasp or float.

three dovetails cut in two boards held in a face vise, with sawdust near the boards

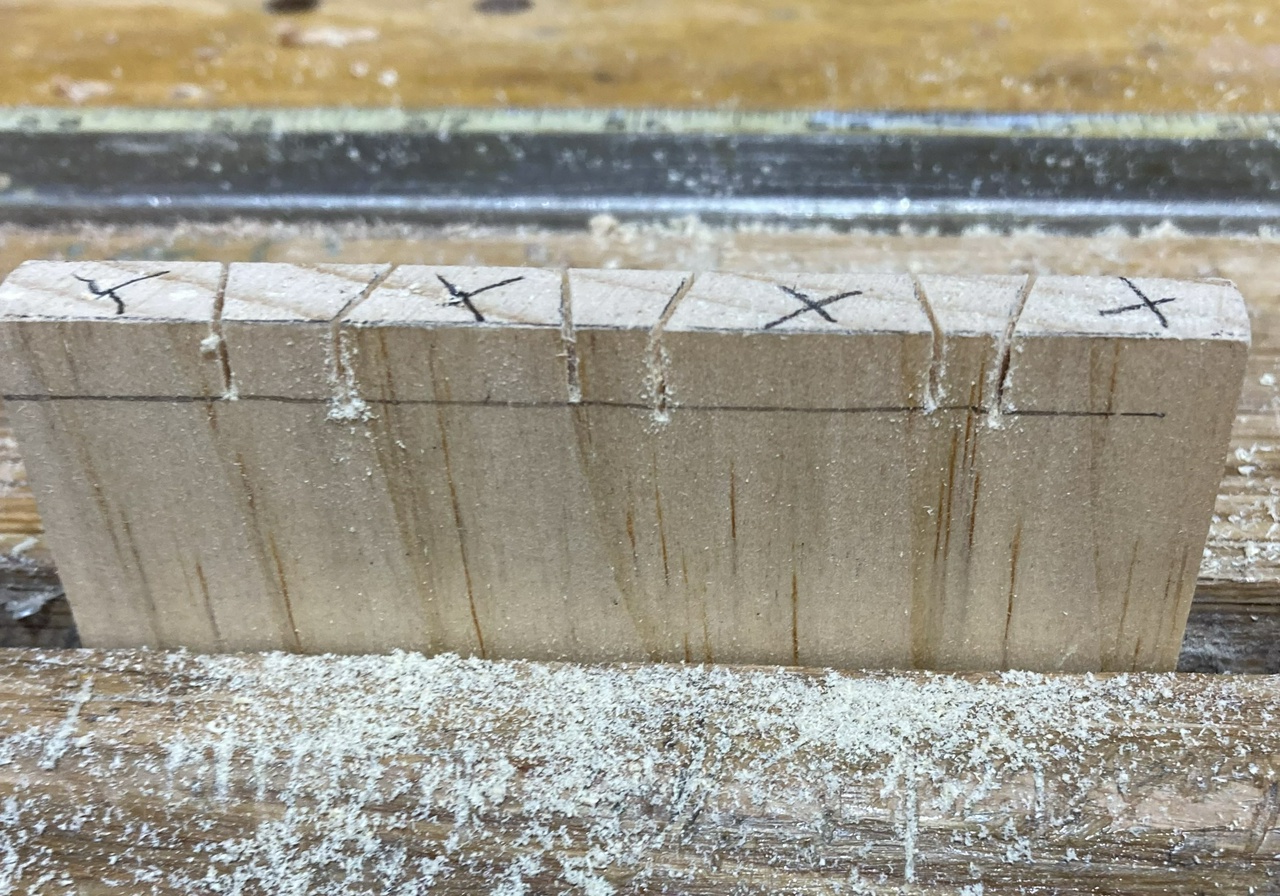
Laid out the pins on a single board. Note that I mark each of the tail boards first, then once the pin board fits, I mark the matching pin board. This has saved me from getting a joint backwards or mismatching the joints. If I were more uniform in sawing my dovetails, it might not matter as much, but there is enough variation where the boards will usually only fit one way.

Transferring from the tail board to a pin board. The tail board has a "1" visible inside one of the tails, which will be matched to the pin board once it has been sawed and fit

I also transfer the thickness of each end of the tail board to the proper end of the pin board that will fit with it. Since the boards are hand-resawn and hand-planed, they are seldom all the same thickness, and sometimes even vary in thickness from one end to the other.

Transferring the thickness of the tail board to the pin board

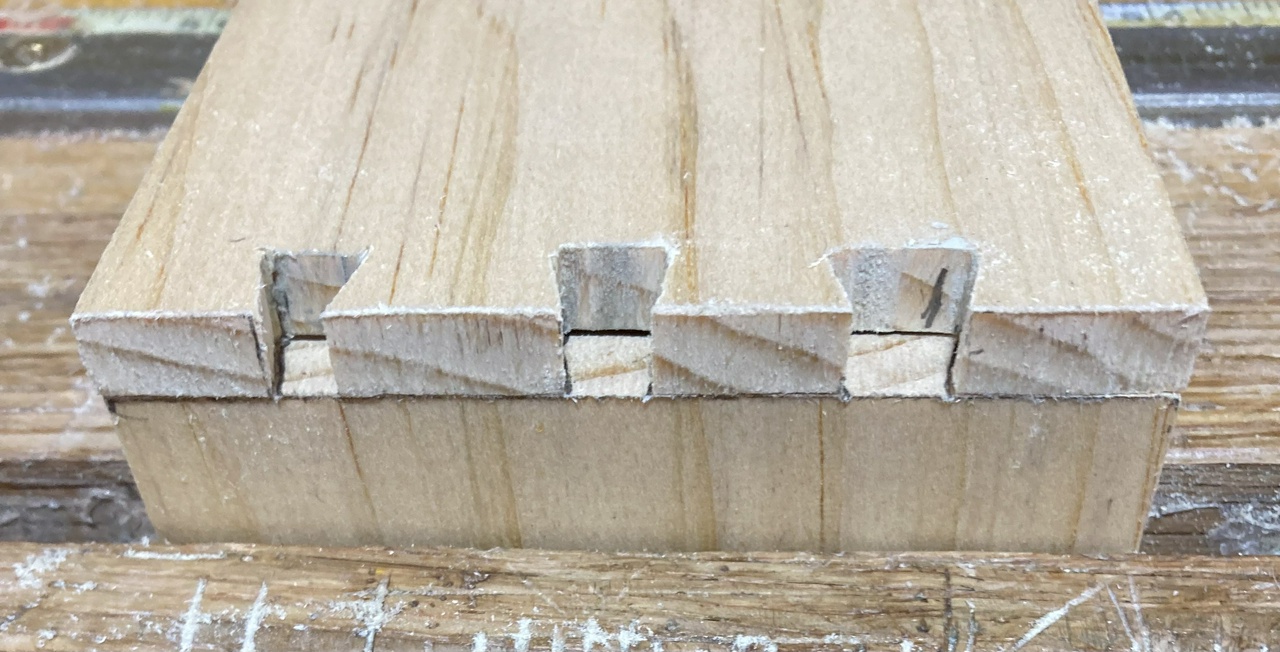
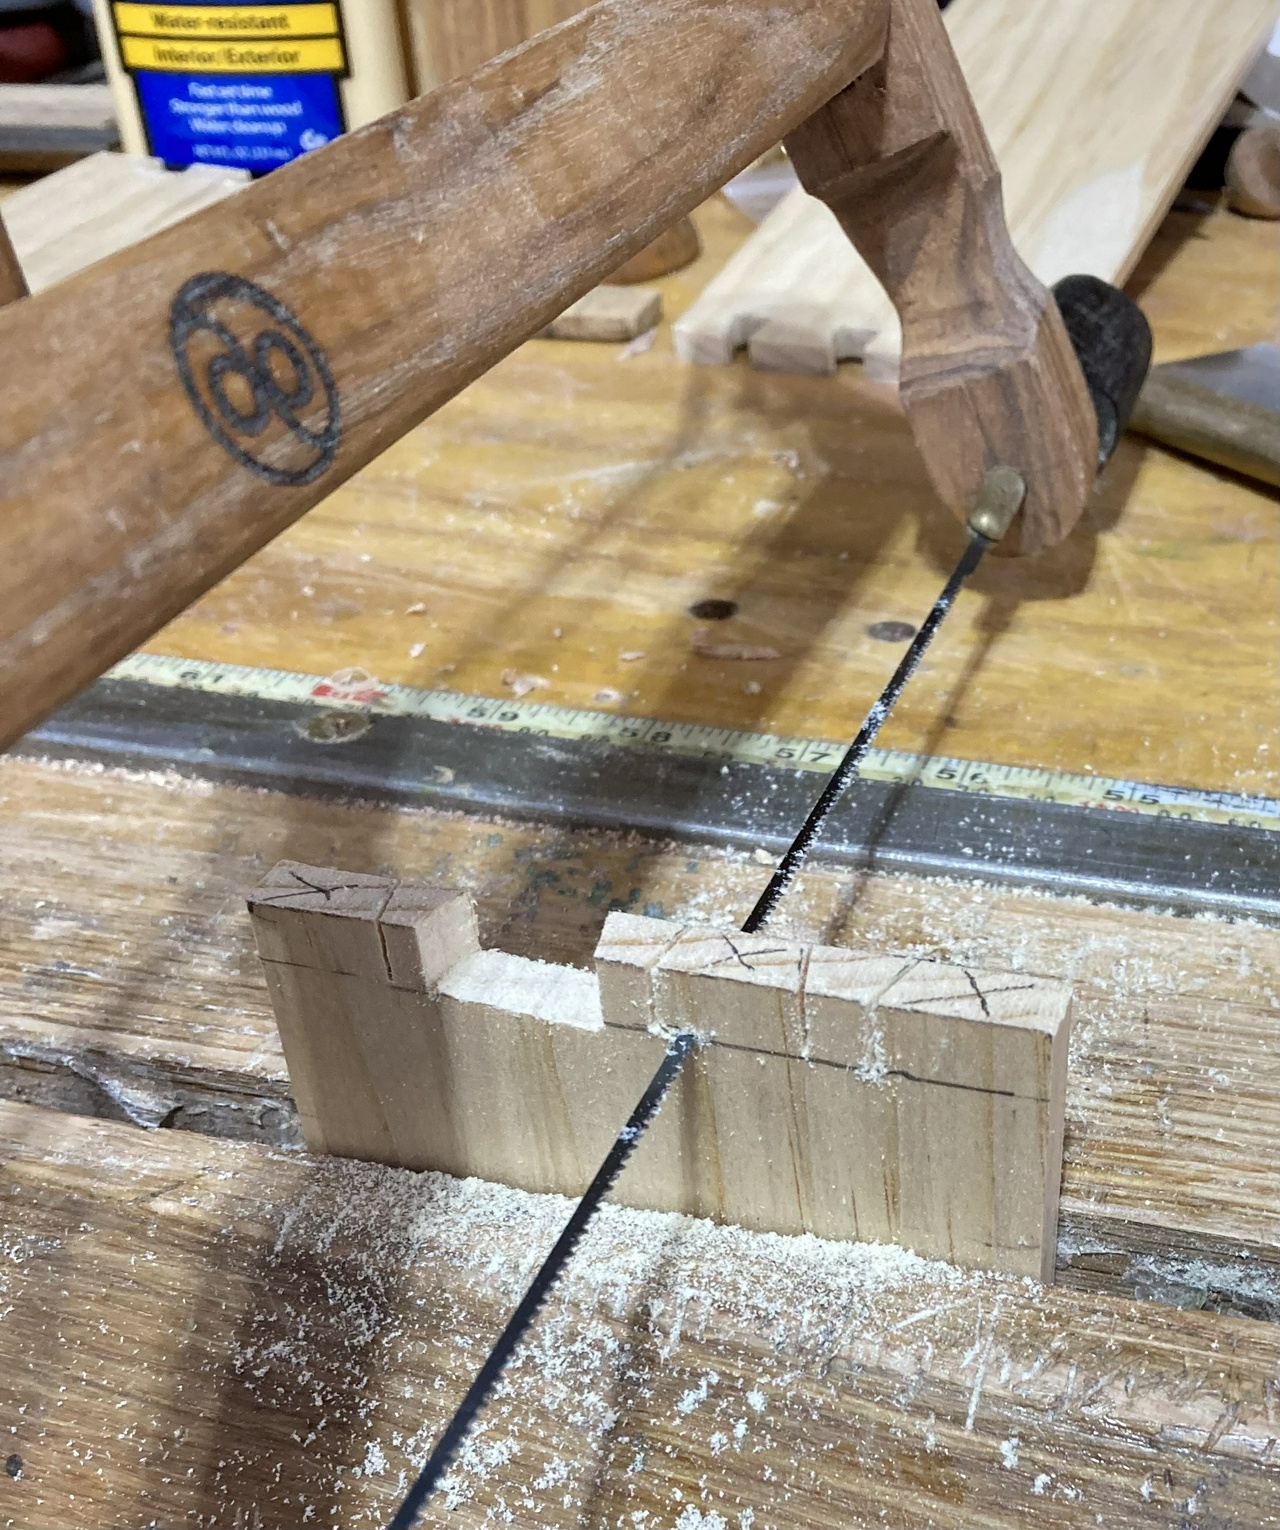
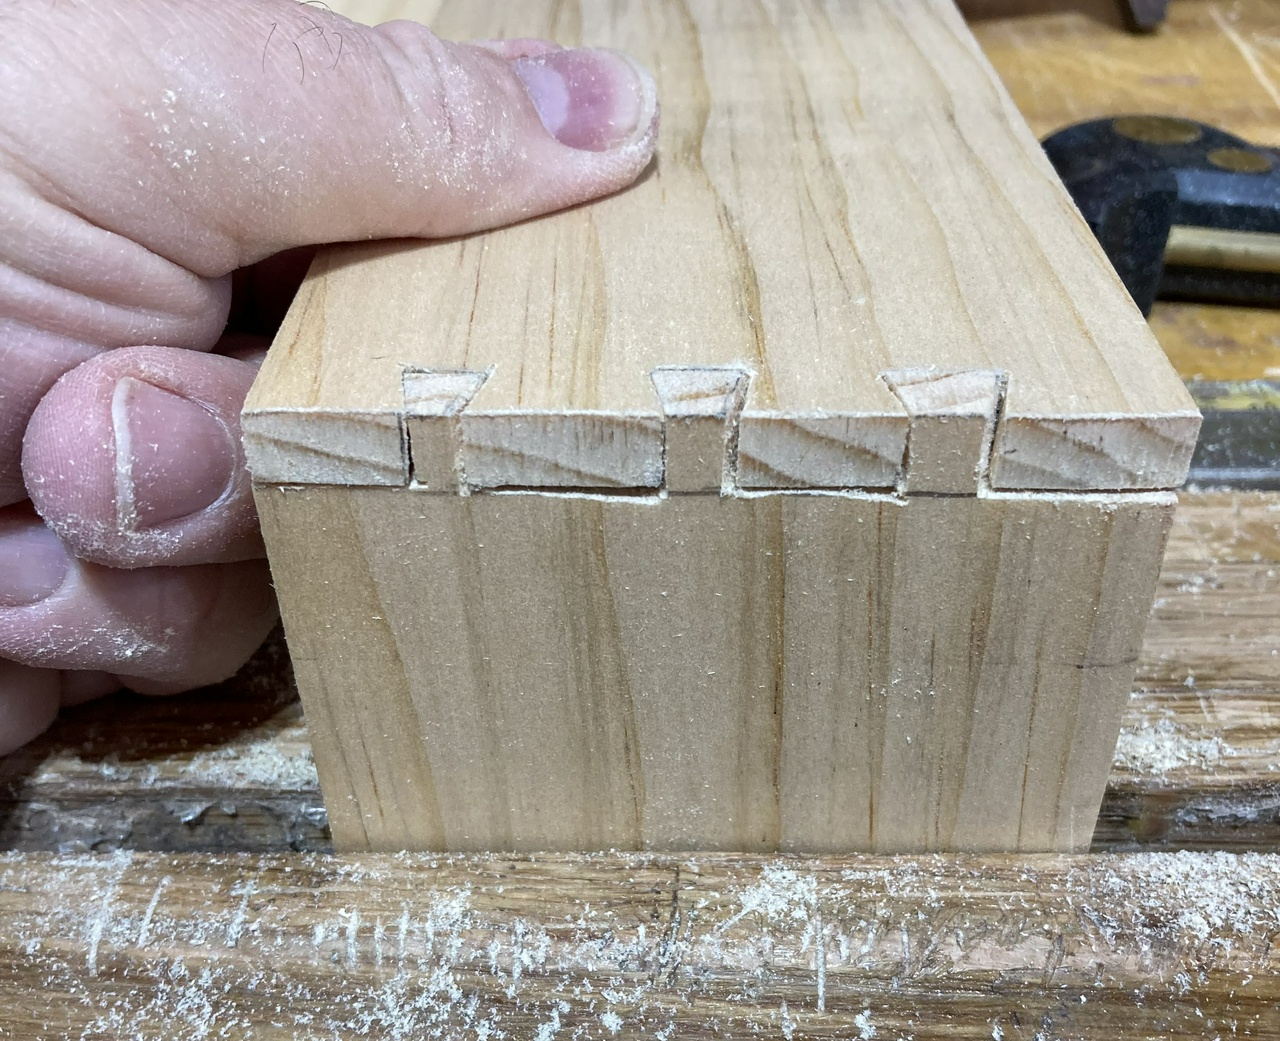
Cut the pins. And remember to mark the waste before cutting out the wrong bits.

Pin board with the waste marked with X

Then remove the waste with a bow saw.

Removing the waste with a bow-saw

And remove the waste from the ends using a backsaw, which makes it easier to get a flat cut.

Remove the waste from outside the pins using a back saw

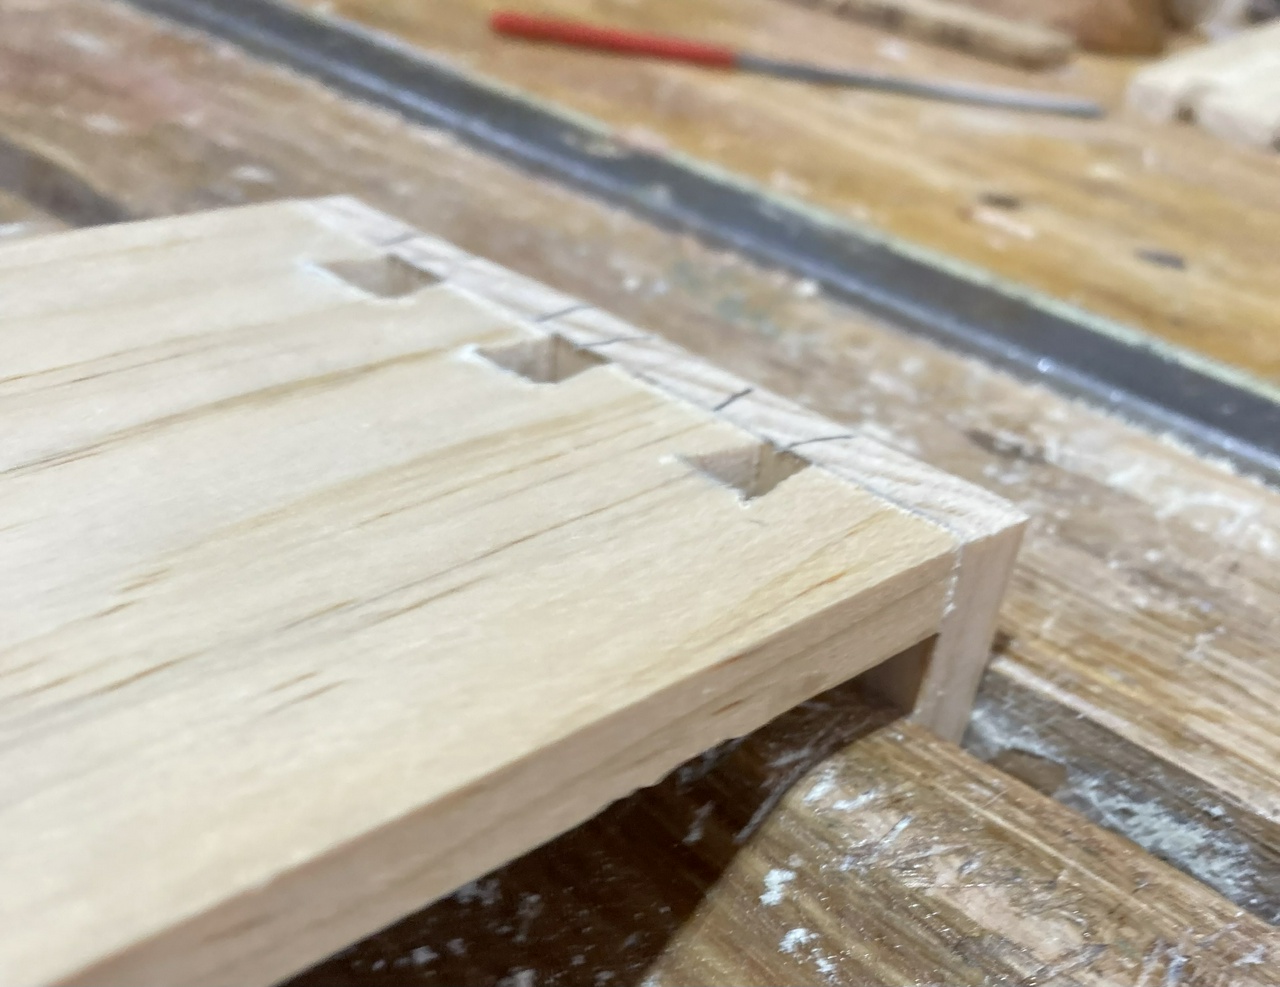
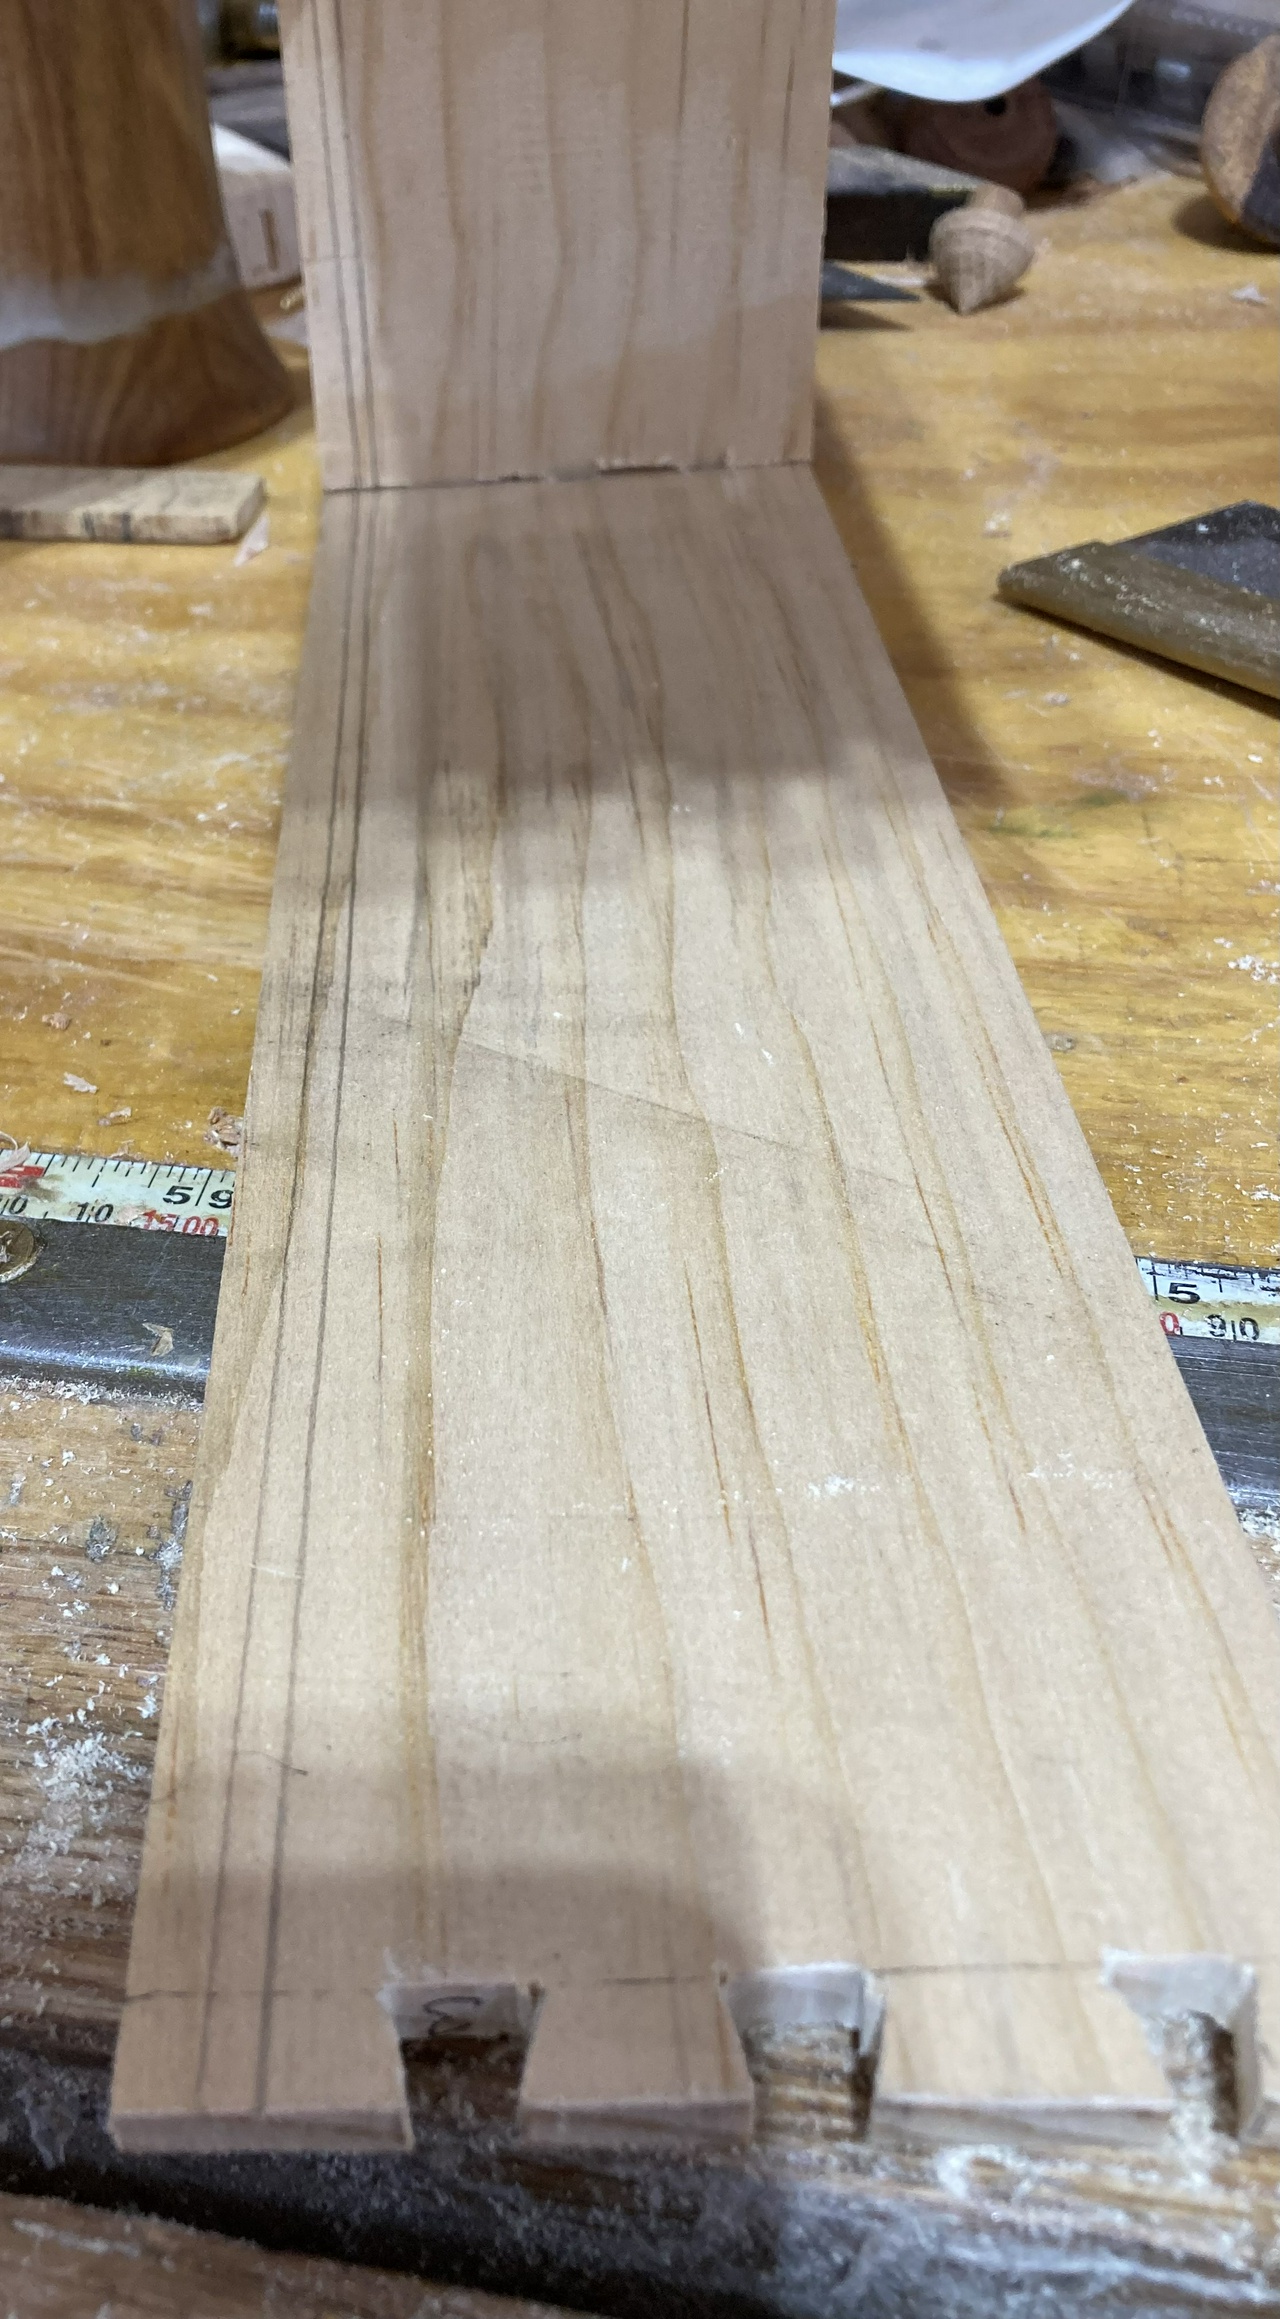
And then test-fit the corner.

The corner being test-fit. Looks close enough that it will glue up well

Then I marked where the grooves for the bottom will go before I got something worng. Having the grooves on the bottom of the drawer on one side, and on the top on the other doesn't make for a terribly useful drawer.

Marking the grooves where the bottom of the drawer will fit

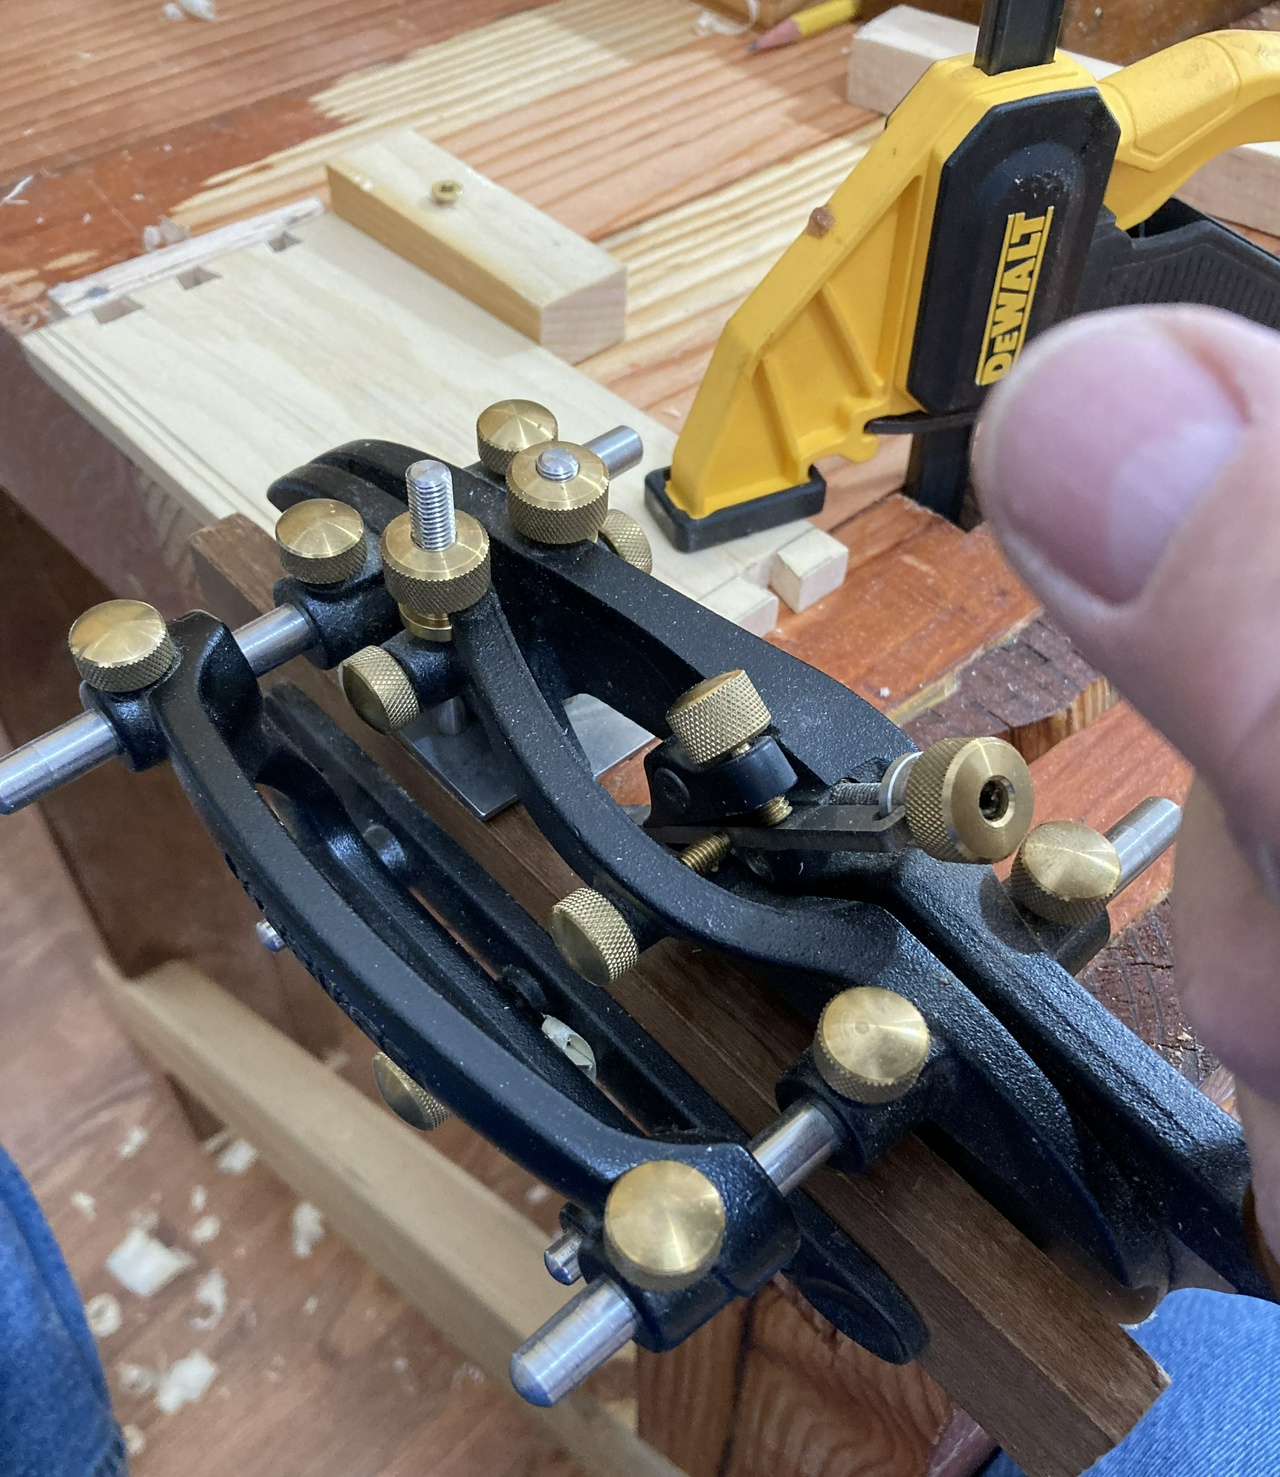
And got a little groovy.

Board held down to the work bench with two screws and a couple boards, in preparation for cutting the groove with a plough plane

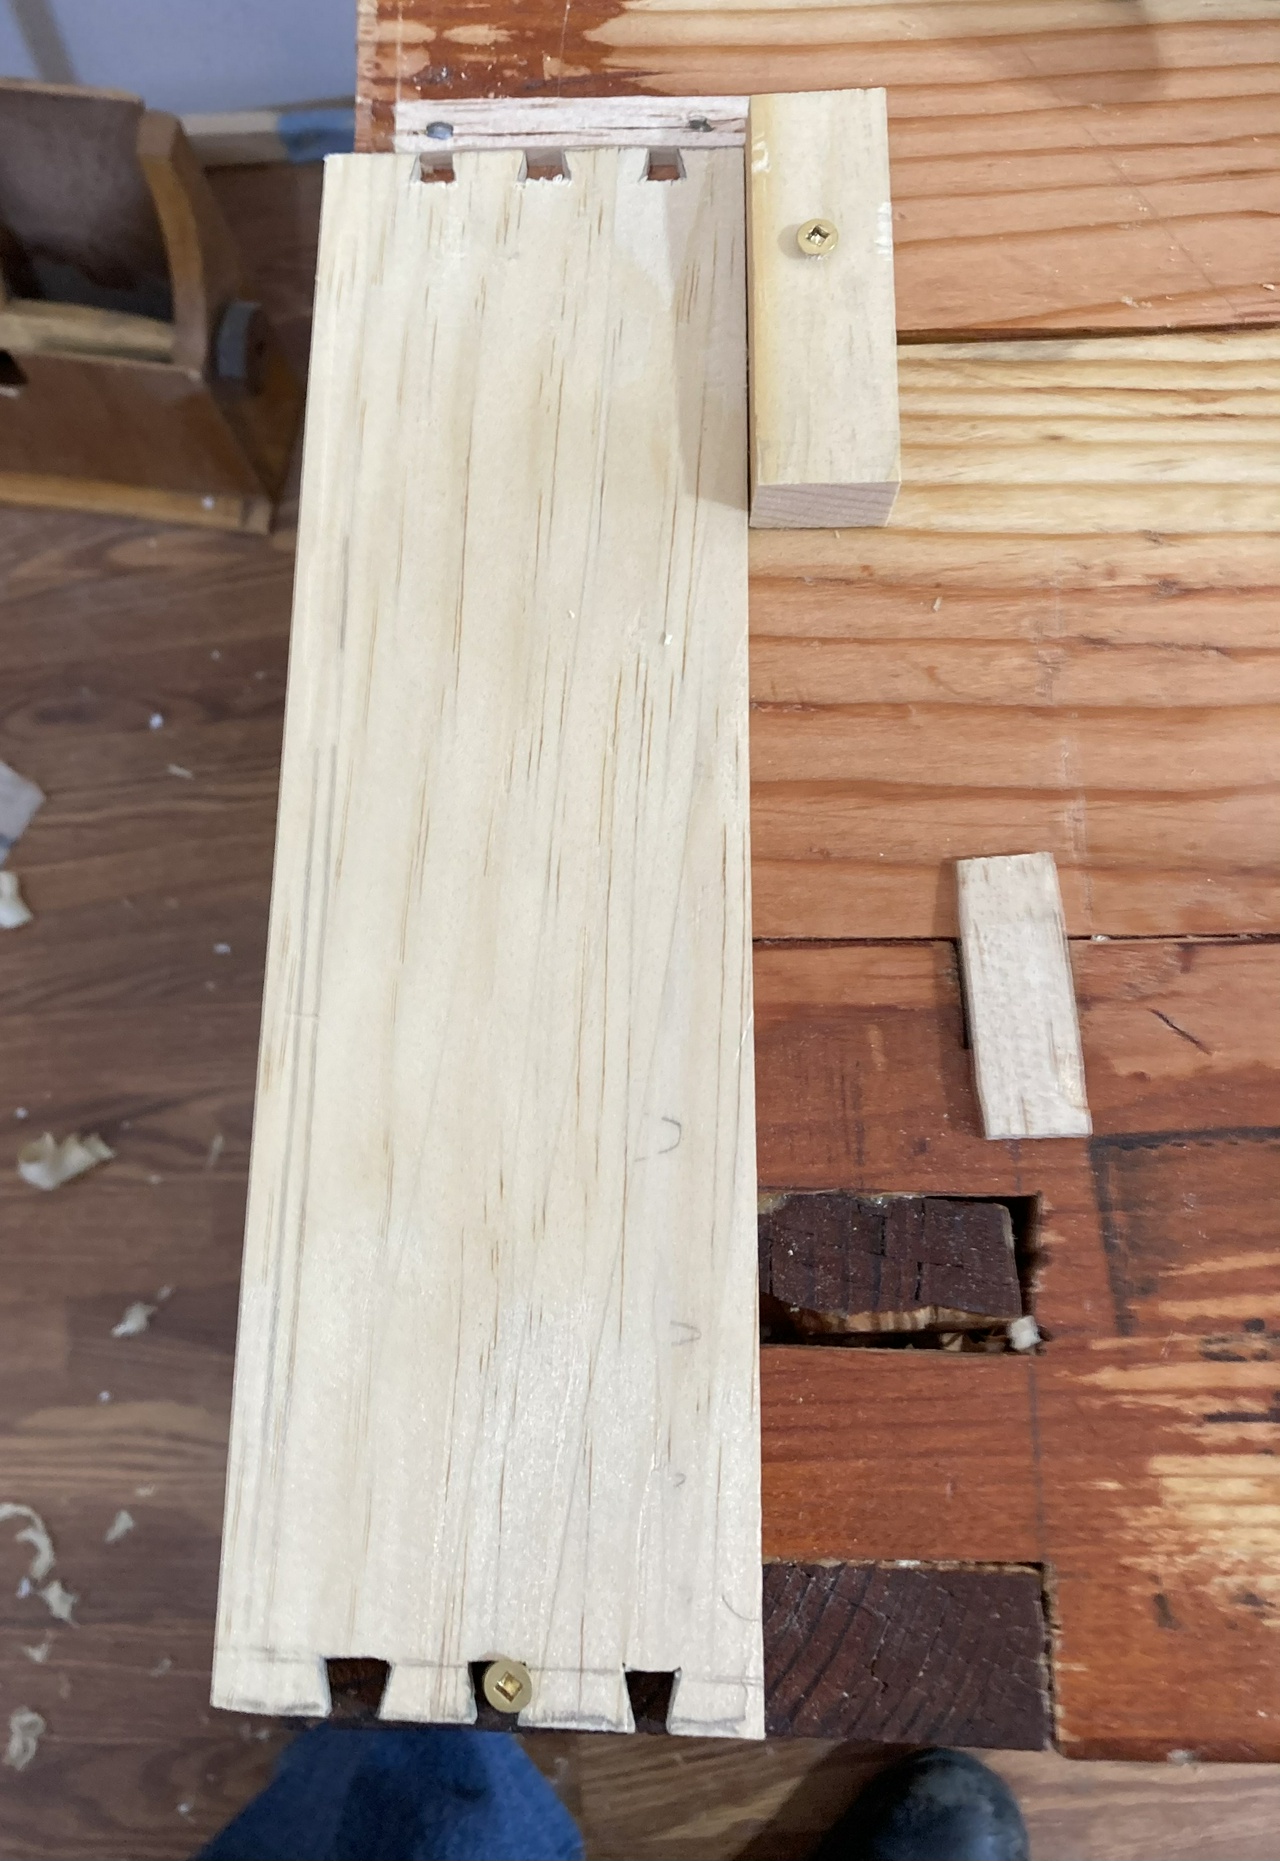
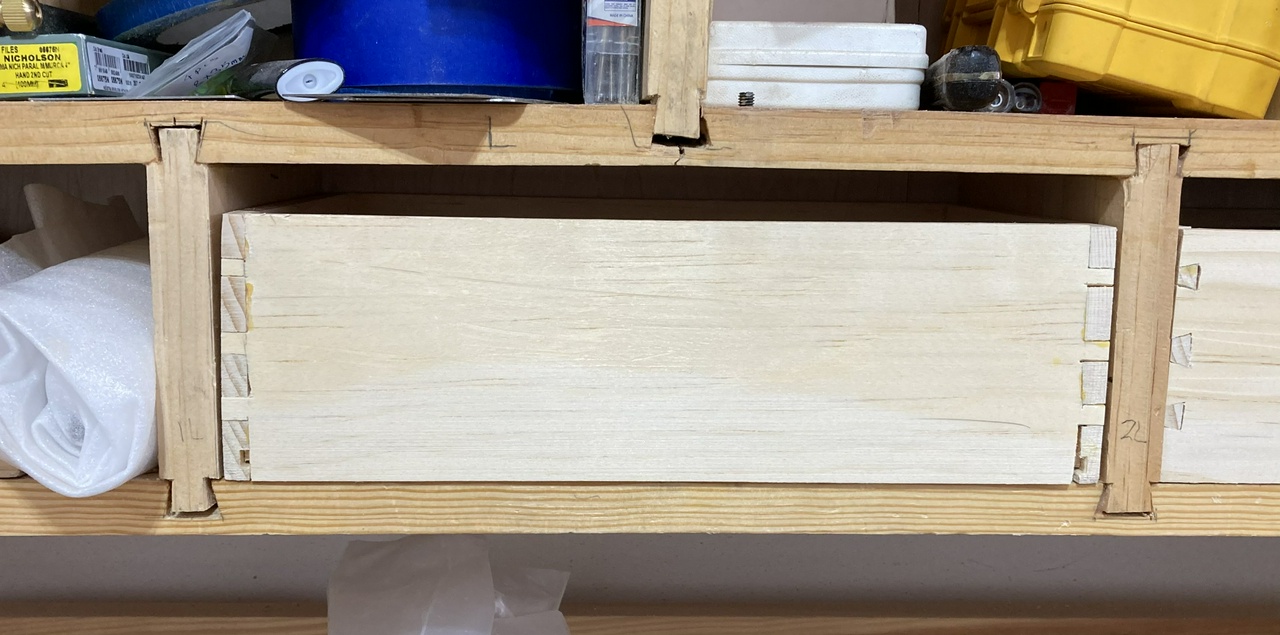
After cutting out a piece of ¼ inch plywood to fit in the bottom of the box, I test fit everything, and glued together the first box. This one will fit in the lower right drawer slot, and will contain my set of long brad-point auger bits (I think). The drawer fronts and handles go on after all seven boxes are done. I'll also put in runners on the sides of the cubbies to hold the drawers level. But next up, is building six more drawers and then fitting out something to hold the bits in place in each of them.

I'll try to remember to show the setup for the combination plane and how I mark the size of the drawer bottom when I'm doing one of the next drawers. I think I may also need to put some slips under the bottom in some of the drawers, as I can only cut about a ⅛ inch deep groove for the bottom, which may not hold great if I've got heavy stuff in the drawer.

Stay tuned!


Contents #woodworking #storage #drawer #build

Discuss... Reply to this in the fediverse: @davepolaschek@writing.exchange

May 21, 2020

First order of business today was putting the back on the carcass. This involved cutting plywood, so I got out the saw horses and circular saw. Three cuts to get the ¼” maple plywood to size (or between 1/16 and ⅛ oversized, I'm not accurate enough with a circular saw to cut any closer than that), then glue onto the carcass and screw the plywood in place.

Plywood screwed to the back of the till, with scrap-wood holding it to the horizontal pieces

I set some scrap wood on the ply to push it down onto the horizontals in the carcass while the glue set. They don't provide a lot of structural strength, but by gluing them to the back, they'll be supported by it a little. And then when I put on the cleat and spacers on the bottom, those will be screwed into two of the three horizontals, stiffening and strengthening the case even more. Will I need all that strength? Probably not, but I've never been disappointed overbuilding shop furniture, and when I've built it without thinking about future overloading, I've had problems, so best to overdo it now.

With the back on, it's time to trim the three oversized sides down to flush with the carcass. I use a jack plane for that, and set heavy, it didn't take many passes before the back was trimmed down and smoothed to match the sides.

Trimming the edge of the plywood with a jack plane

Trimming the edge of the plywood with a jack plane, top view

You get funny looking shavings trimming the edge of plywood this way, but it gets the job done quickly, and actually leaves a pretty good edge.

With the back trimmed to size, it was time to install the cleat. The cleat is behind the rack that holds the braces, and is glued to the back, and screwed into the vertical sides of the carcass and into the rack. The two spacers that are the same thickness as the cleat (so the case will hang level on the wall) are screwed into the sides and the shelf between the two rows of drawers.

Till hung on the French cleat on the wall, in front of a window in the shop

That done, it was time to hang the case on the wall and start filling it up. I still have one or two braces I haven't unpacked yet, plus a couple eggbeater drills to hang up. And I need to build the seven drawers to hold various bits. Spoon bits are in the upper left, with two sets of bits below, a modern Jennings pattern set, and an older Irwin pattern set. Plus there's at least one tool roll of bits somewhere, and miscellany like the hollow auger (in the 14” sweep brace on the right) and the tapered reamer in the 8” sweep to the left of it. I'll start pondering drawer materials tomorrow, I guess.

I also will need to get a coat of oil on the back, and a couple coats of shellac on everything, plus ponder the doors one of these days, but it's done enough for now, I think, and I can take my time building drawers.

Oh, I also widened the rightmost slot in the rack. My 14” sweep brace has a thicker handle than all the others, so it needs a wider slot. A planemaker's float and a cheap rasp did the job pretty quickly.


Contents #woodworking #storage

Discuss... Reply to this in the fediverse: @davepolaschek@writing.exchange

May 20, 2020

I finished test-fitting all the pieces of the brace till today. Turns out a dovetail plane is super handy for this part of the project. For the uprights that go between the sections in the bottom, I needed to take from one to three passes with the plane on each to make them fit. But that's nice and easy to do with the dovetail plane.

Test-assembled till carcasse

I then took everything apart again, and went to glue up the outside of the carcass. I did that, and put clamps on it to hold it together, but with all the sliding dovetail sockets cut in the sides, as soon as I pulled the joints tight, the sides bowed alarmingly. I quickly released the pressure and put the rest of the parts in. The uprights went in last and it took a little mallet work to get everything together a second time, but I did, and then put a couple clamps on to hold everything together. Worked better this time.

Till with a clamp pulling the side together

With the case completely together, I planed a 45 degree edge on a 1×3 for a cleat for the till, and pulled a couple 2'x4' pieces of ¼” maple plywood out to be the back of the case. I still haven't figured out exactly how I'm going to do the doors yet, but it looks like I need to widen the slots for the braces a little for the larger sweep braces, and once I do that, I'll figure out how much added room I'll need to fit them inside the case.

The piece of elm that I think will make nice drawer fronts won't work as-is. I either need to resaw it in half and make the upper drawer fronts book-match the lower drawer fronts (which would look nice, but be a lot of work, and leave me with thin fronts), or I need to find a bigger piece of wood, so I'm pondering that, too.


Contents #woodworking #storage #glueUp

Discuss... Reply to this in the fediverse: @davepolaschek@writing.exchange

May 19, 2020

Got some shop time again today, and I cut a new bottom piece for the carcass of my brace till, replacing the one I cut wrong when I shortened it.

Going back to the plan:

Plan for the boring tools till

The pieces I had as 39 inches are now 38.5 inches long. Otherwise, everything is the same. Oops. Scratch that, the 5” pieces are now 4.5 long. More bad math.

Anyway, with all the pieces cut and test-fit together, except for the two bottom uprights (I'll get to those as my first order of business tomorrow), I put a coat of linseed oil on all the pieces. I've found that one coat of oil before I glue up the carcass keeps me from worrying as much about getting full coverage with the finish I put on after everything is glued together. Less stress is good.

So here's almost all of the wood:

Cut pieces for the till

The rack that'll hold the braces has the walnut on the bottom of it, and the bubinga veneer on the top.it looks pretty darned nice. The rest of the pine has pencil marks and scuffs on it, and those probably will remain. It's shop furniture, and I don't want to worry about accidentally putting things together wrong when I start gluing things together tomorrow.

Next up, glue-up. That'll probably be two or three separate glue-ups, and while I'm waiting for glue to dry, I'll start selecting lumber for the drawers and doors. I think I have a nice piece of elm which might be all the drawer fronts, and I've got some poplar for drawer sides, but I'm not sure if I have quite enough. But I also still have a dozen boxes of wood to unpack.

Until next time!


Contents #woodworking #storage

Discuss... Reply to this in the fediverse: @davepolaschek@writing.exchange

May 15, 2020

Time to reinforce the other side of the rack that'll carry the braces. As you might remember, the grain in the pine board that makes up the core of the rack runs left to right, which means that the grooves cut to hold the braces weaken the board, leaving tongues which can easily snap off. I reinforced the bottom of these tongues with strips of walnut.

For a more finished look, I'm reinforcing the top with some ⅛” bubinga veneer, with the grain running front to back. Rather than attempt to cut this to size/shape for each four-inch-wide piece, I cut them all to rough length, then glued them on. It's ⅛ inch thick, so no special techniques were needed, just glue it on and clamp it with a long board running the whole length to distribute the force from the clamps.

Top of the brace shelf reinforced with bubinga veneer

Clamping the pieces of veneer to the shelf - many clamps were required

And now I'm cutting them to match the pine board with a coping saw.

Coping saw with cut slots in the veneer

I also trimmed the ends of the pieces with a spokeshave. The low angle makes this relatively easy. The only trick was remembering to skew the blade and to work from both ends to the middle. The spokeshave will ride along the wider pine board, making it pretty easy to stop when the boards are flush.

Trimming the end-grain of the veneer with a spokeshave

Next it was time to clean up the edges of the grooves. Knife and rasp took care of that.

Cleaning up the edges of the slots with a knife

Cleaning up the edges of the slots with a rasp

Next up is re-cutting the bottom board of the carcass because when I trimmed it shorter, I took from the wrong end, leaving the sockets for the sliding dovetails offset about ¾ inch from the board above it. Easier just to start over on that.


Contents #woodworking #storage #veneer

Discuss... Reply to this in the fediverse: @davepolaschek@writing.exchange

May 13, 2020

I started my shop time today cleaning up the walnut I glued to the pine rack for the braces. I used a spokeshave to get the lengths consistent and round over the ends, as well as to surface plane the walnut. If I skew it enough, nearly 45 degrees in some cases, I could plane even against the grain and get it fairly smooth.

Spokeshave resting on walnut-reinforced brace shelf

Skewing a spokeshave to flatten a surface

With those smoothed, I wanted to clean up a few spots of tear-out, plus remove the pencil lines that were still on the pine. I cut a card scraper to make a narrow tip, filed the edge square, and scraped things pretty.

Using aircraft shears to cut a narrower tip on a scraper

Filing the edge of the scraper square

Using the card-scraper to clean up the chamfered edge on the walnut reinforcement

I also used a knife and my new scraper to clean up the edges of the slots.

Cutting the edge of a slot with a knife

Cleaned-up slot

With that done, it was time to test fit things. All of my sliding dovetails were a little fat, so I tested each one, then adjusted it either with the dovetail plane or a chisel. The dovetail plane earned its keep here, since I still had the fence set to the right depth, so in most cases it was just a matter of making a pass or two and then everything fit.

The one down side of the dovetail plane is that it's apparently easy to rock it a little, leading to sliding dovetails that are thick in the middle and thinner on the ends. Nearly all of my dovetails were fat in the middle. Oops!

With the three horizontal pieces in, it was time to test the fit of the carcass. I popped one end of the top on, and it fit well. Then I looked at the other end, and the board was ½” too long.

Checking one end of the top board of the carcasse - it fits reasonably well

Checking the other end of the top board and discovering it's a half-inch too long

Crap.

I figured out what I did wrong. I had bad math at some point, and the inner shelves that are dovetailed into the sides are 38” long. The dovetails are a half inch on either end, so the outsides of the sides are 38 ½” apart (everything is ¾” thick). I cut the top and bottom to 39” initially, thinking I'd trim them back once I'd tested the sliding dovetails for the shelves, but then I cut the dovetails on the carcass because I was eager to try the mitered dovetail corners.

So now I'm cutting a half-inch off the end of the tail boards and re-cutting the dovetails. At least it's pine, and I've got a lot of scraps, so when I need small pieces to patch up the old dovetails, I can do so.

And that's today. I got one corner re-cut, and I'll finish the other tomorrow, then I can test the five uprights that divide the areas between the drawers. It looked to me like I managed to line everything up, but if I have to move a sliding dovetail socket a quarter inch or so to one side, I think I'll be able to do that without weakening things too much.

Plus my veneer gets here this evening, so I'll be able to finish the top shelf too. First time veneering! Wish me luck!


Contents #woodworking #storage #surfaceCleanup #testFitting

Discuss... Reply to this in the fediverse: @davepolaschek@writing.exchange

May 12, 2020

Spent the past few days with a mix of yard work and thinking about how to reinforce the rack that'll hold the braces. With the grain running across, the slots cut into it leave some very weak tongues, which will be almost certain to snap off over time. I've seen this happen with my chisel till, and I'm going to have to rebuild that at some point.

Slotted shelf to hold braces, held in a vise

So I thought a bit, and dug through my various piles of shorts. I found a chunk of walnut and decided that running pieces of that from front to back under the tongues would strengthen them in compression, and then I could put some veneer on top (running the same direction) to strengthen the rack in tension. Or looking at it another way, I'm making plywood, with a dang thick core.

Clamping three pieces of walnut onto the brace shelf to reinforce the weak grain

My first few test pieces went well yesterday, and I finished cutting them and gluing them up today. I'll give the glue time to dry overnight, and I can plane the ends smooth and chamfer the edges of the holes nicely tomorrow morning. And some 1/16” thick bubinga veneer I ordered should be here in tomorrow evening's mail, so I can glue that onto the top on Thursday.

Completed bottom-side reinforcement for the brace shelf

I also finished cutting all the sliding dovetail sockets today, and will do a test fitting of the carcass tomorrow. I may be able to glue up some sub-assemblies, but we'll have to see how the test fitting goes.


Contents #woodworking #storage #lamination #reinforcement

Discuss... Reply to this in the fediverse: @davepolaschek@writing.exchange

May 7, 2020

I started cutting sliding dovetail sockets in the horizontal bits today. More of the same, but I had a little blowout on the third socket I was cutting, so I glued that back together and decided to work on the part that will hold the braces.

I started by laying out marks 3½ inches apart, and drew marks four inches from the edge of the board (or 3½ from the other edge). Picked out the 12/16 bit, chucked it in my brace, and started drilling holes. I picked the ¾ inch bit because it had relatively sharp spurs (I think I touched them up before we moved), and it's big enough to fit the brace I was using into. The fat part of the handle is closer to an inch, but if I have to enlarge the holes a little bit later on, I'll deal with that then.

Board which will hold the braces, marked out

Drilling a hole using a bit and brace

With everything laid out and drilled, I took my square and drew lines more or less to the edge of each hole. If I was off a little, I didn't worry too much.

Marking the edges of the slot which I'll be cutting

I put the board in my face vise and started sawing. I was using my Veritas tenon saw, as it had enough reach to make the cuts without bottoming out the back. It's filed hybrid, and I'm cutting pine, so it made pretty short work of the cuts.

One cut slot, shown in detail

Once that was done, I took my knife and chamfered the edges of the slots, and used my spokeshave to chamfer the front edge of the board. Then it was time to sweep up for the day and go start cooking dinner. Hopefully tomorrow I can finish up the remaining two shelves and ponder putting the carcass together.

All of the slots cut in the board which will hold the braces

I also should think about some sort of reinforcement on the board that'll be carrying the braces. Three inches of pine between holes will probably mean that I'll snap something off eventually. Maybe I'll start tomorrow by digging through my scrap bucket and see what I have that I can glue under that board with the grain running front to back to strengthen things up. On second thought, I think I have some heavy veneer somewhere, so I may detour to unpack a few boxes and see if I can find that.


Contents #woodworking #storage

Discuss... Reply to this in the fediverse: @davepolaschek@writing.exchange