davepolaschek

Woodworking

Jun 27, 2021

Built for the 2021 plane swap on that woodworking site I don't participate in any more, this was a fun project for a lot of different reasons. The main disappointment is that it was for a swap, so after it was built, I sent it away. But then someone else got to enjoy it, so there's that.
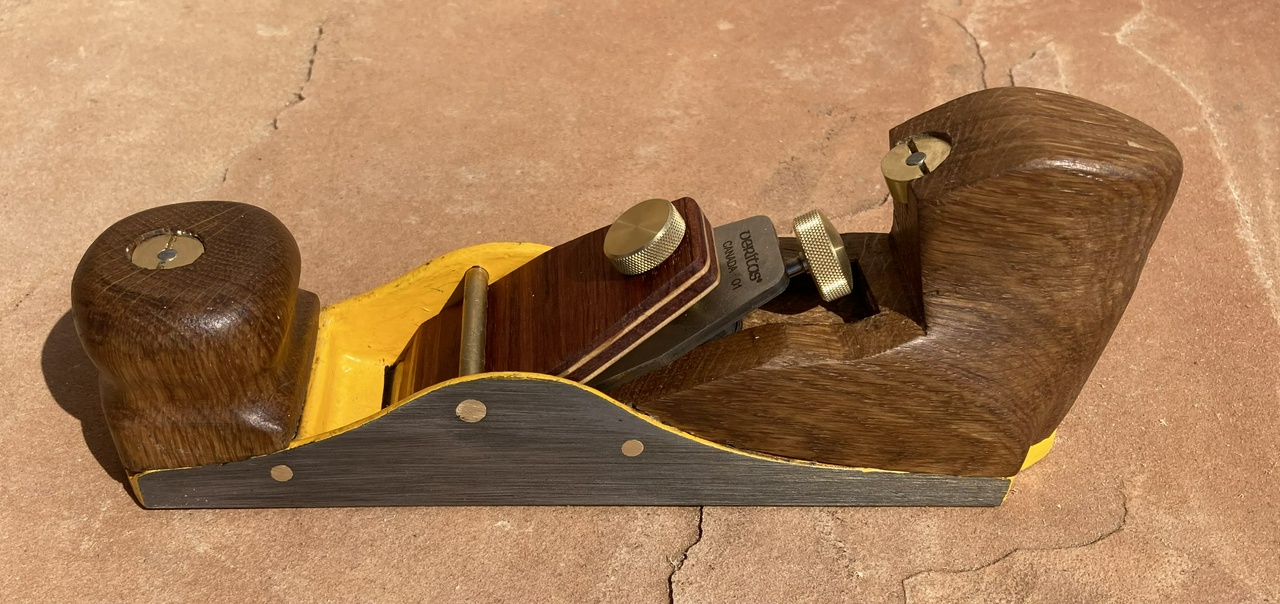
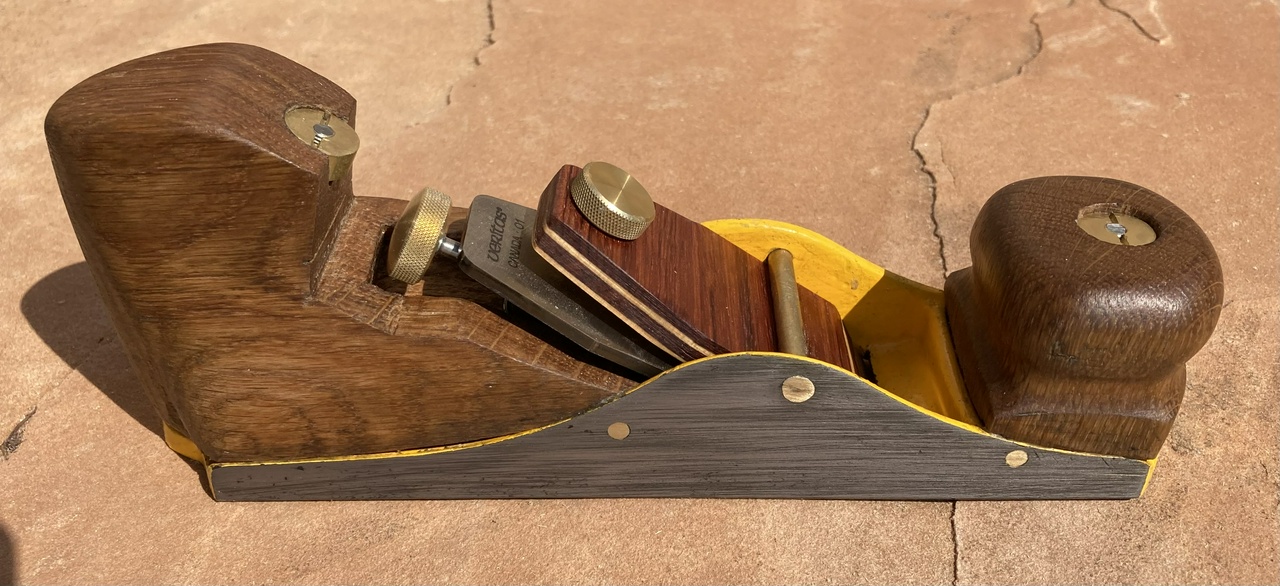
A low-angle infill plane with yellow-painted metal bits and white oak furniture, viewed from the left side

A low-angle infill plane with yellow-painted metal bits and white oak furniture, viewed from the right side

For the plane swap this year, I wanted to build something a little different. I have a stash of Stanley Global Plane #3s that I bought cheap on eBay from a seller in Canada when the exchange rate between the dollar and the loonie got fairly lopsided, so I decided to infill one.

But just a normal infill plane didn't seem challenging enough. Let's make a low-angle bevel-up plane from it. That should be a good challenge!

So I started out by removing the plane hardware and trying some things. One of my very first discoveries was that I would need to modify both the mouth and the bedding for the blade to achieve what I wanted.
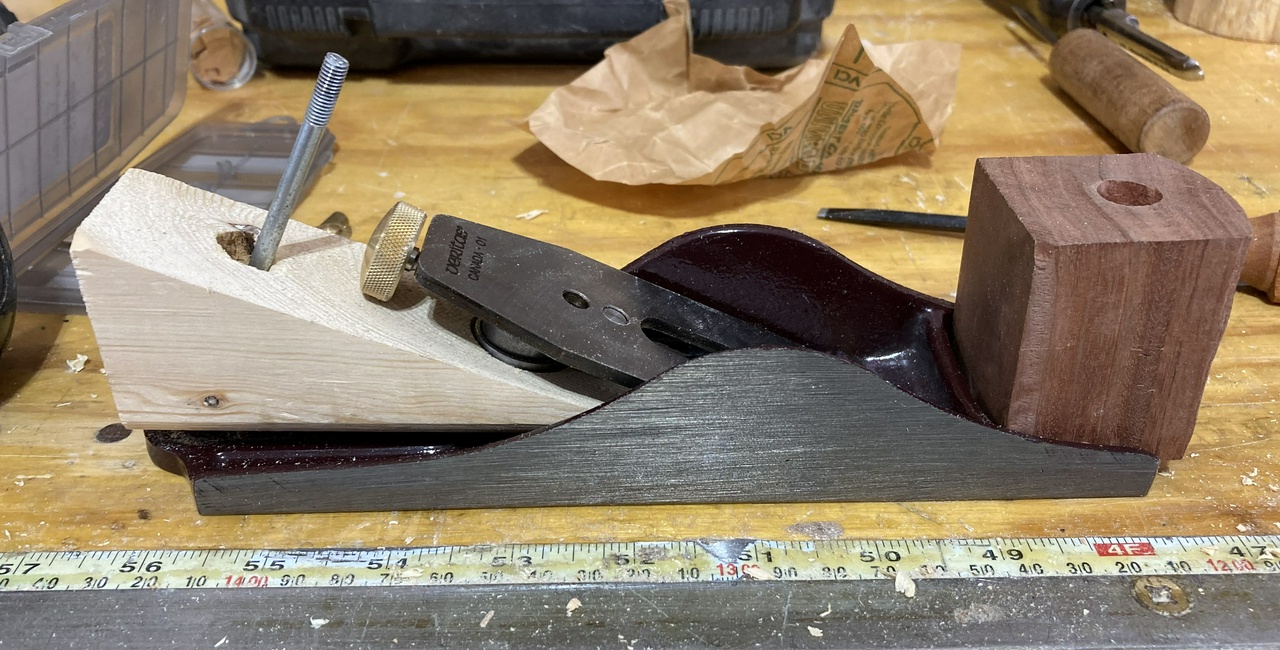
First attempt at infilling the plane, with red eucalyptus knob, and a spruce rear infill while I tested some ideas

But I had a Veritas plane kit on hand, and I was pretty sure it worked with most of the smaller Veritas blades, so I ordered a spare blade for their bevel-up smoother that matched the size of the #3. I also initially planned to do the infill with some eucalyptus I got from AZWoody, but that plan fell by the wayside… Mostly because the eucalyptus from Arizona is brittle and hard to work, but also because I discovered I had a very nice bit of white oak in the shop. I bought a 6 foot long 10 inch wide 12/4 board a while back, and there was a knot near one end. The remaining bit on that end of the board looked like it would make a great infill for the plane.
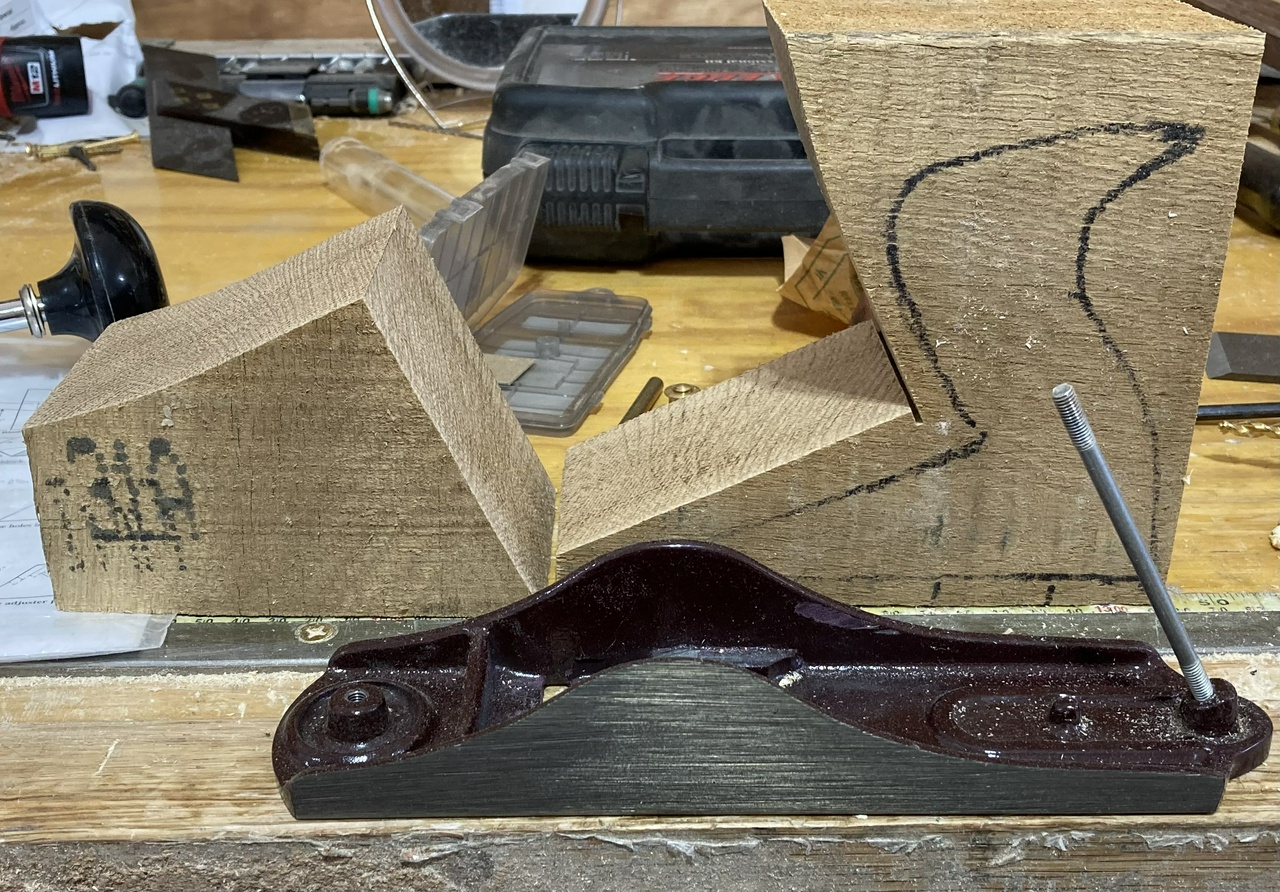
White oak furniture for the plane - perhaps that will work

I set aside my pieces of oak and went to work with a chunk of spruce from a tubafor as my prototype, and made some templates from MDF so I could try things out as I experimented.
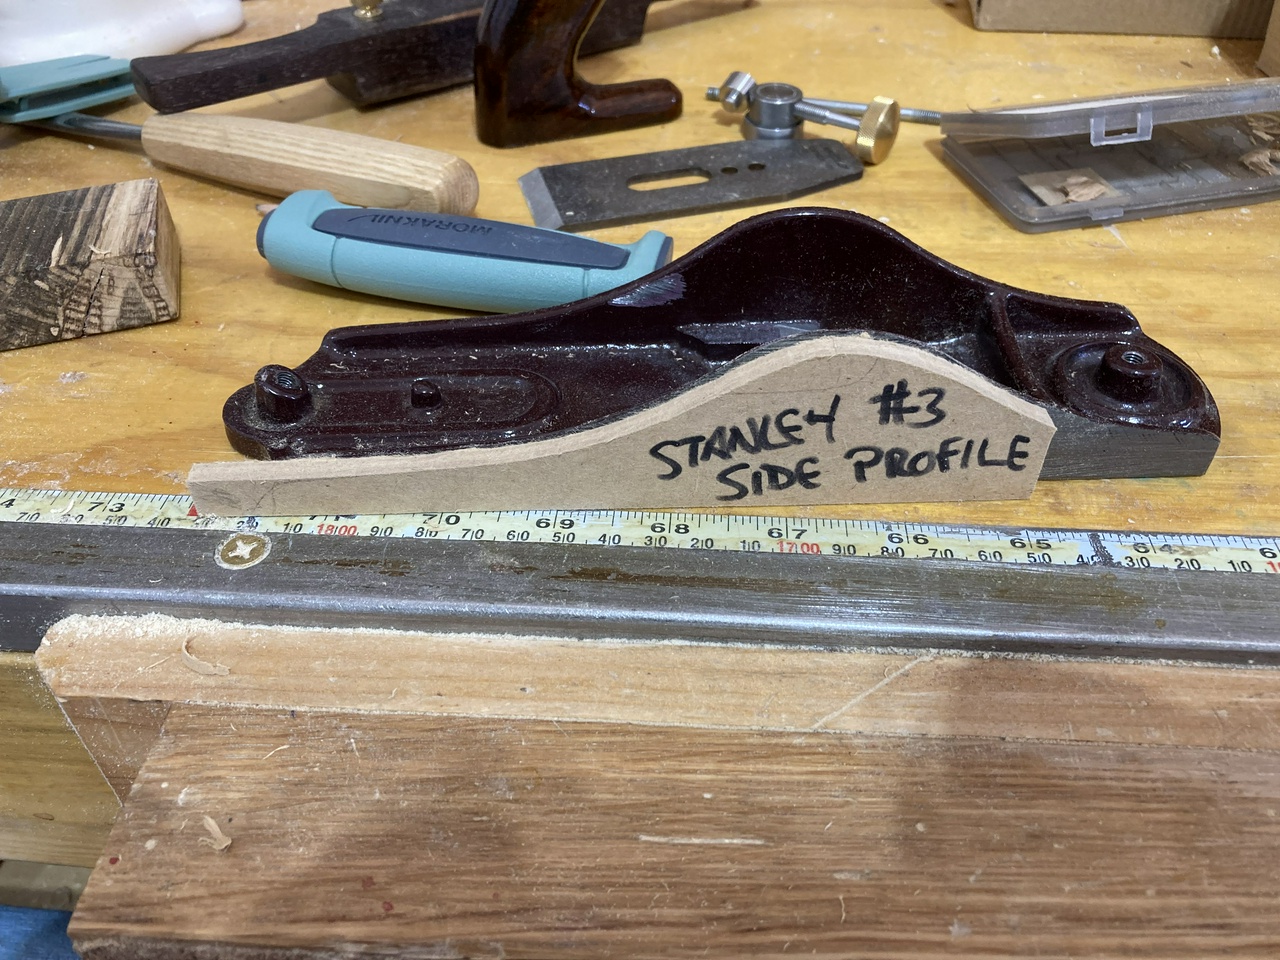
The plane with an MDF template next to it, matching the side profile

First thing I discovered was that the blade would be unsupported without the factory frog in place, so I cut a piece of brass to fill the area immediately behind the mouth with metal, giving me solid support for the blade where it would need it the most. I epoxied this into the plane body and set to work with a file making a smooth transition for the blade or infill to rest upon.
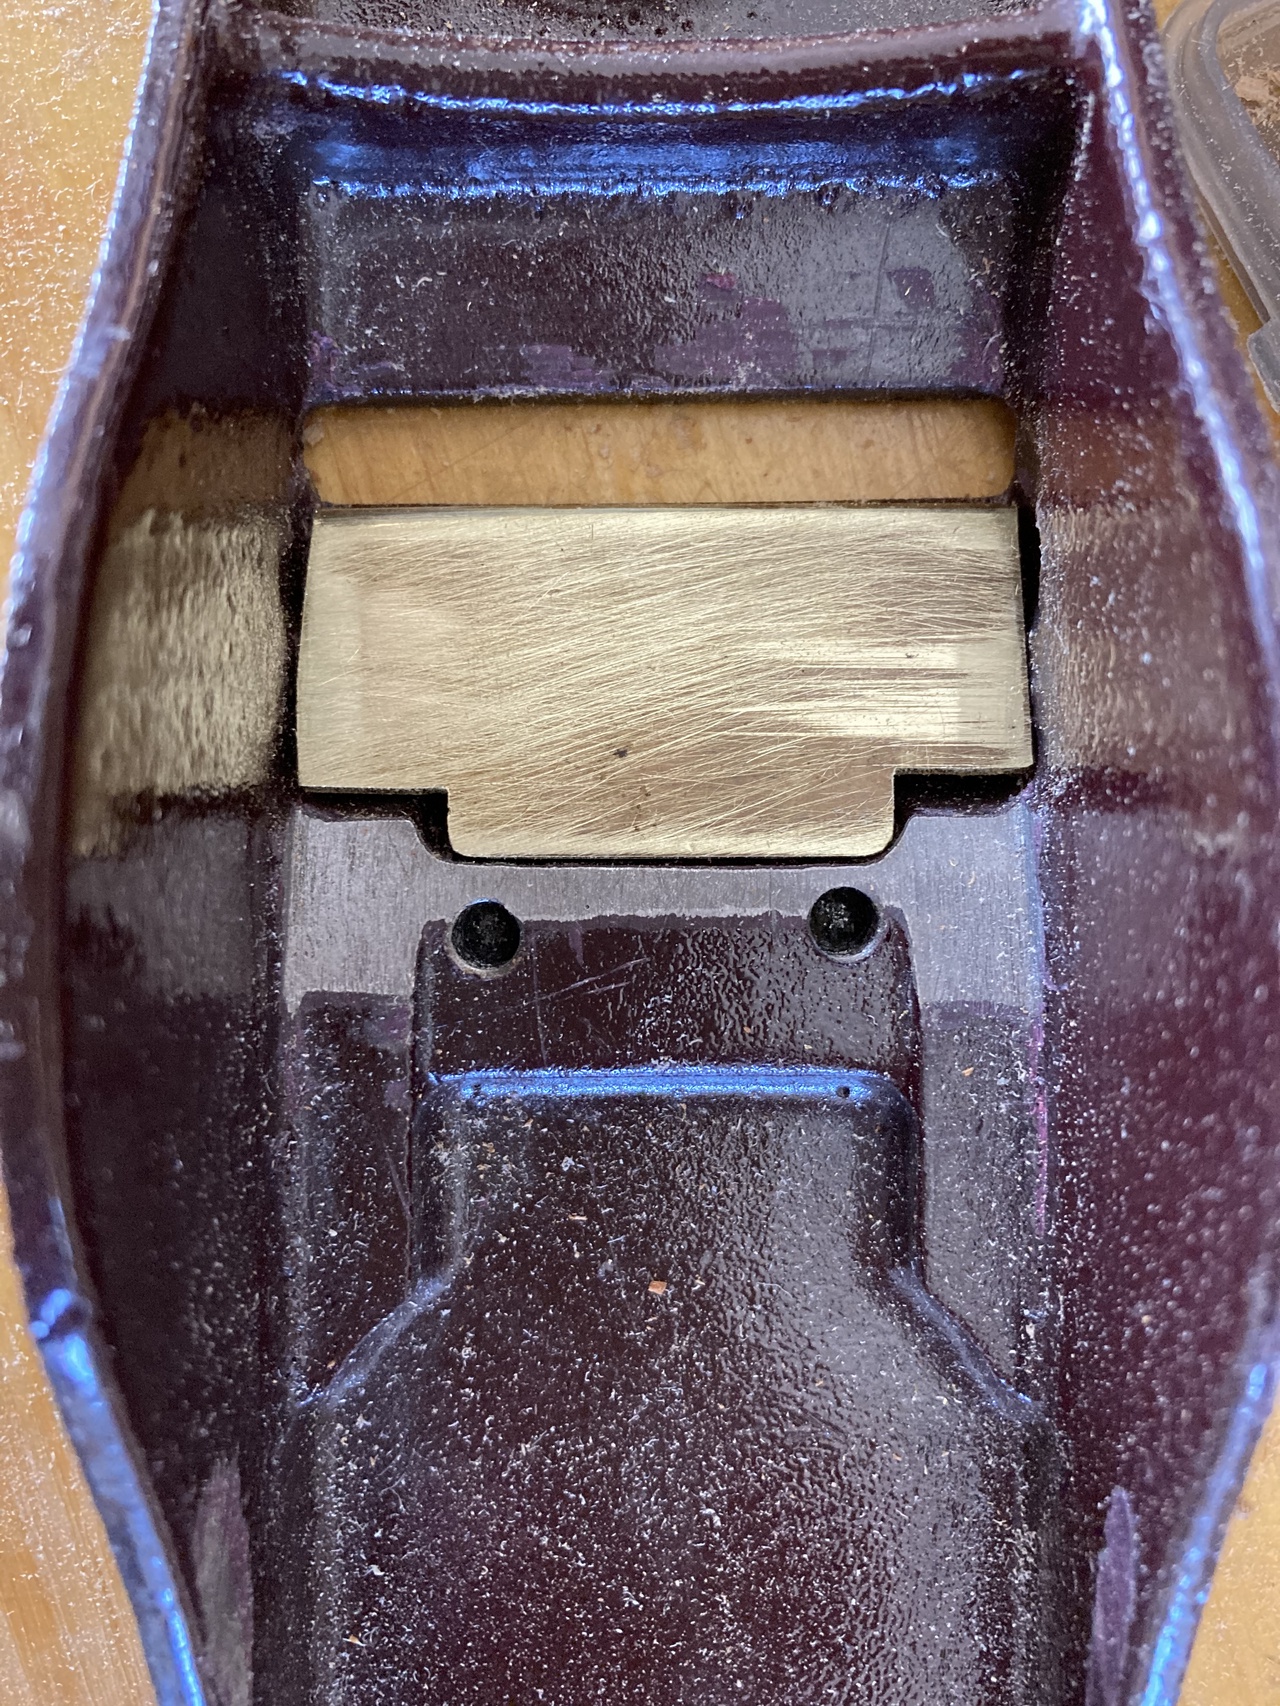
The brass support ramp, epoxied into the plane body behind the mouth

I also decided that I wanted to dress the plane up from the stock purple that Stanley chose. I had some Chromium Yellow (aka CAT Yellow) lettering enamel laying about, and decided that would look pretty good. It's not a sansoo-level paint job, but I think I did okay. I think there were four coats in most places.
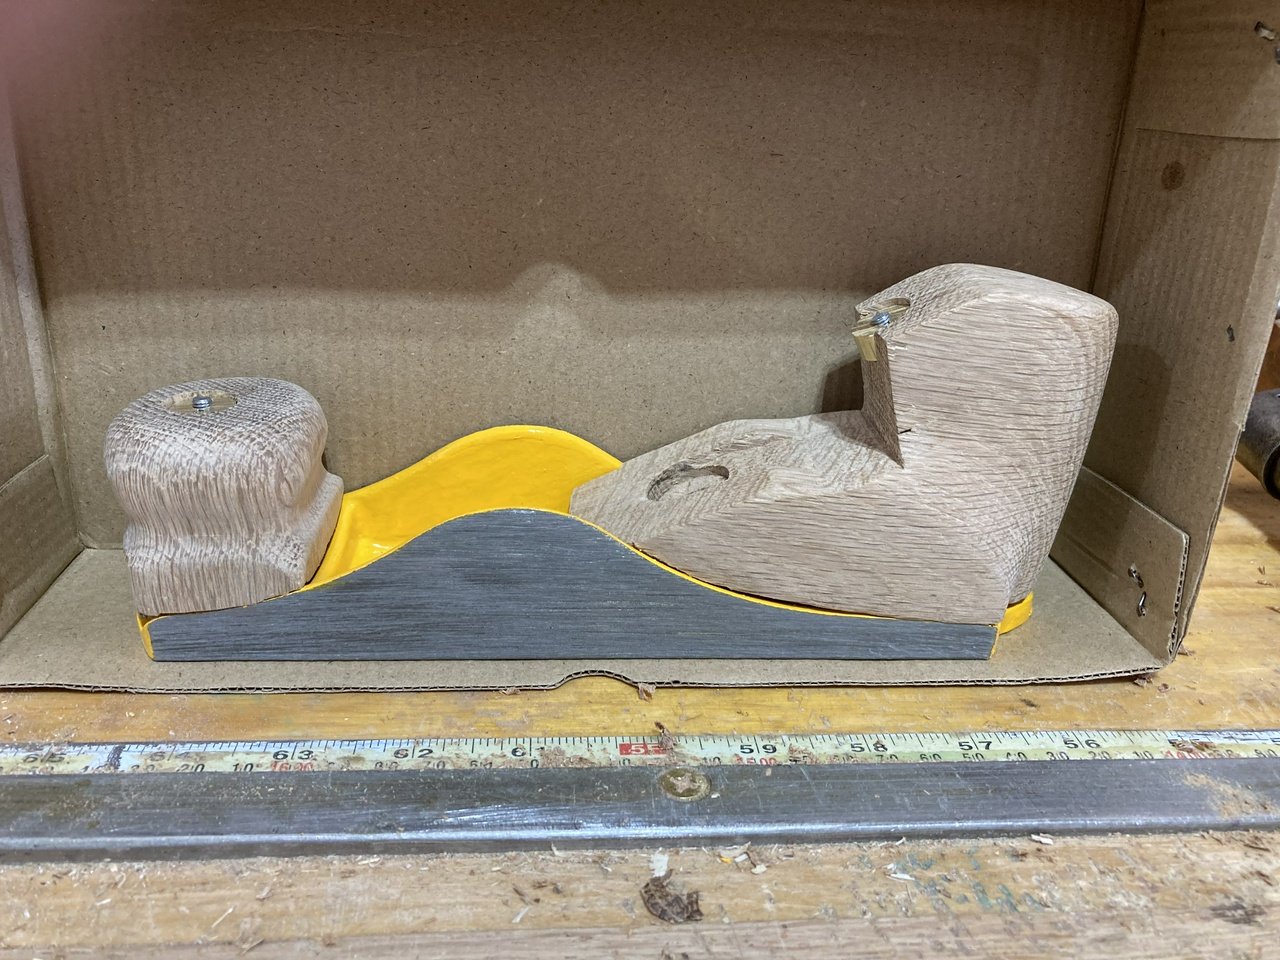
Plane with oak furniture and the yellow paint covering up the factory purple paint job

I was also working out the geometry of the plane, and knew that I wanted to use the original bolts to help hold the infill pieces in place. I wouldn't be able to do a tote like I had initially planned, but I got something that felt okay in my hand, which used the original bolts.
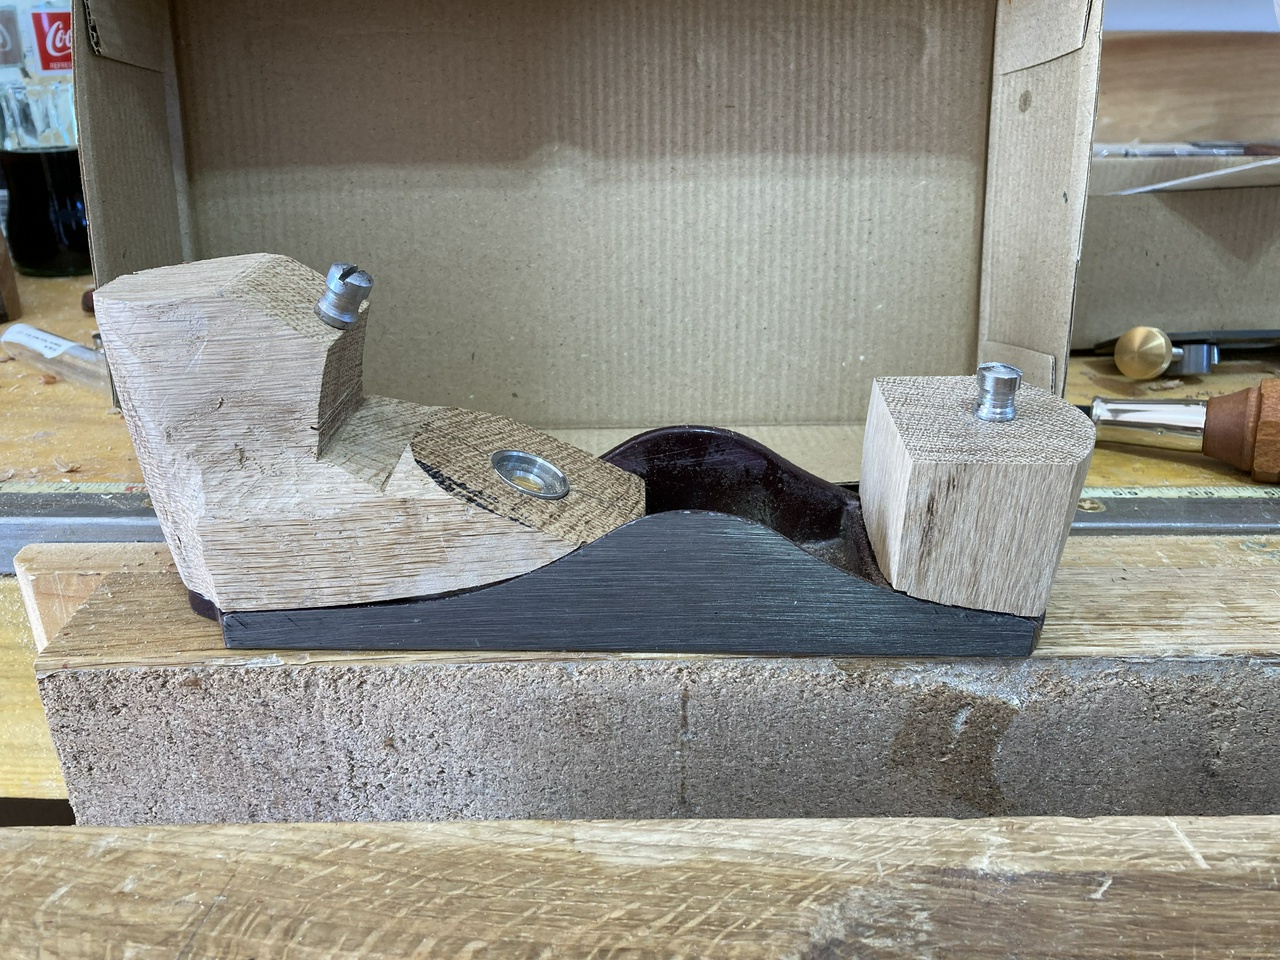
The roughed-out oak furniture in the plane

But the nuts that came with the plane wouldn't do, so I found a piece of ⅝” brass rod, and fashioned some new nuts for the plane. Rather than turn them into hex nuts or something that was a lot of work, I decided to make them split-nuts so I could use a driver I already had (and that just requires sawing a slot).
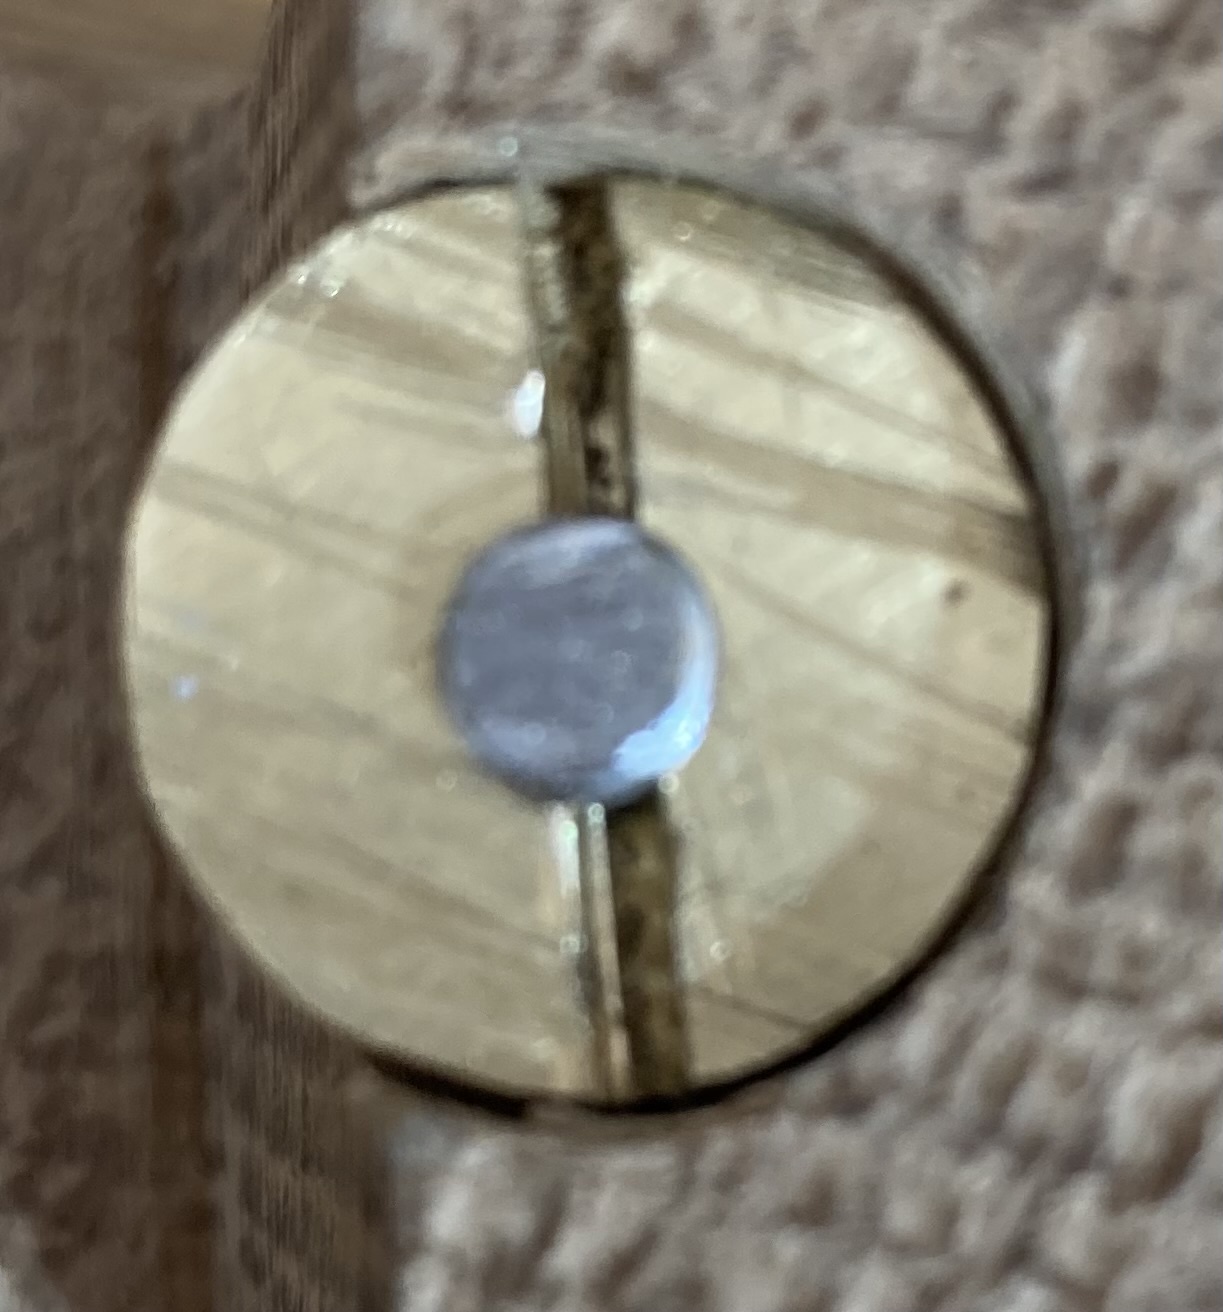
Brass round nut with a slot, similar to the split-nuts used on saws

The bolts in this Stanley plane were 12-32. I don't have a tap and die for that, but I do have a set for 10-32, so I left the bottom ends stock, and reduced the upper ends of the bolts to 10-32 so I could tap the nuts to match. It's pretty easy to reduce the diameter of a bolt a little while not changing the thread.

As I worked, I ended up cutting off the tip of the rear infill and making it a separate piece. This meant that I had better access to it to shape it to match the slope I needed to bed the plane but I had to file down the heads of the factory screws a bit. But things were taking shape!

I drilled the holes for the cross-pin. The stock one from the Veritas plane kit wouldn't work, because it was too short, but I have a bunch of ¼” brass rod on hand. Turns out it's actually 15/64, but drilling a ¼” hole still worked, I just needed to make sure I didn't widen the hole too much.

I also drilled holes for screw the infill into place. I used #8 brass wood screws, countersunk just enough that when I filed off the head of the screw down to the bottom of the slot, I would be down to the side of the plane. My post-drill was getting quite a workout, and I spent quite a bit of time filing the screws, and peening the cross-bar into place and filing the ends of that smooth.

My first attempt at assembling the plane didn't go so well. With the blade not fully bedded, the chatter when trying to plane was horrible. I almost gave up and moved on to plan B, but I figured I'd give it one last try and took things apart and cut deeper grooves for the adjuster to ride in, which also meant making a deeper space for the adjuster knob.

With those changes made the plane suddenly worked well! The chatter was gone, and it would take shavings. Not great shavings, and the blade was now about 1/32” too long, but making things shorter is easy! Off to the grinder to establish a new bevel on the blade.

With that done, everything went together well, and it was just a matter of finishing it up. Well, almost. The metal plane wedge that I had initially planned to ship was no longer thick enough to hold the (now lower) plane blade securely. And making things thicker isn't as easy as making them thinner. So I got out some bubinga and ash veneer I had on hand and laminated up a new wedge for the plane. I alternated the grains, so the bubinga grain, which is visible, runs cross-wise in the plane body. It looks a little strange, but I like it.

Finish was three coats of linseed oil on all the wooden bits. I let each coat cure for a full day, while I worked on the bonus projects for the swap, and then once the oil had dried, I coated all the exposed metal (and the wood) with paste wax. It looks and feels pretty good, I think.


I also included a spokeshave as a bonus. The spokeshave was made from granadillo. I used a Hock Spokeshave Kit, which unfortunately had come without the mounting bolts and thumbscrews. Oh well, the threads in the blade are 10-32, which Ron verified when I emailed to let him know about the missing thumbscrews and bolts, so I just headed to the hardware store. Got a few 3” long 10-32 bolts, and I reused the thumbscrews from one of my own spokeshaves, since I didn't have great luck making my own thumbscrews from brass. I'll fix them up one of these days…

Anyway, I started cutting away some of the waste with the bandsaw, then went to work with rasps, files, hand-saws, gouges and chisels. I also drilled the holes for the mounting with the post drill. Then after setting the blade and making sure it worked correctly, I hacksawed the bolts to length and filed the ends smooth so they won't be an injury risk.

granadillo spokeshave after roughly shaping the handles and making the relief-cuts in the sole, showing the sapwood present in the piece

Having a well-appointed shop made this go a lot quicker than last year's spokeshave which was built before my shop was done.

granadillo spokeshave

The piece of granadillo I was using had a bit of sapwood on it, too. I had meant to place this on the back of the shave, but I got myself turned around, and it ended up on the sole of the spokeshave. Hopefully it won't wear too fast.

granadillo spokeshave


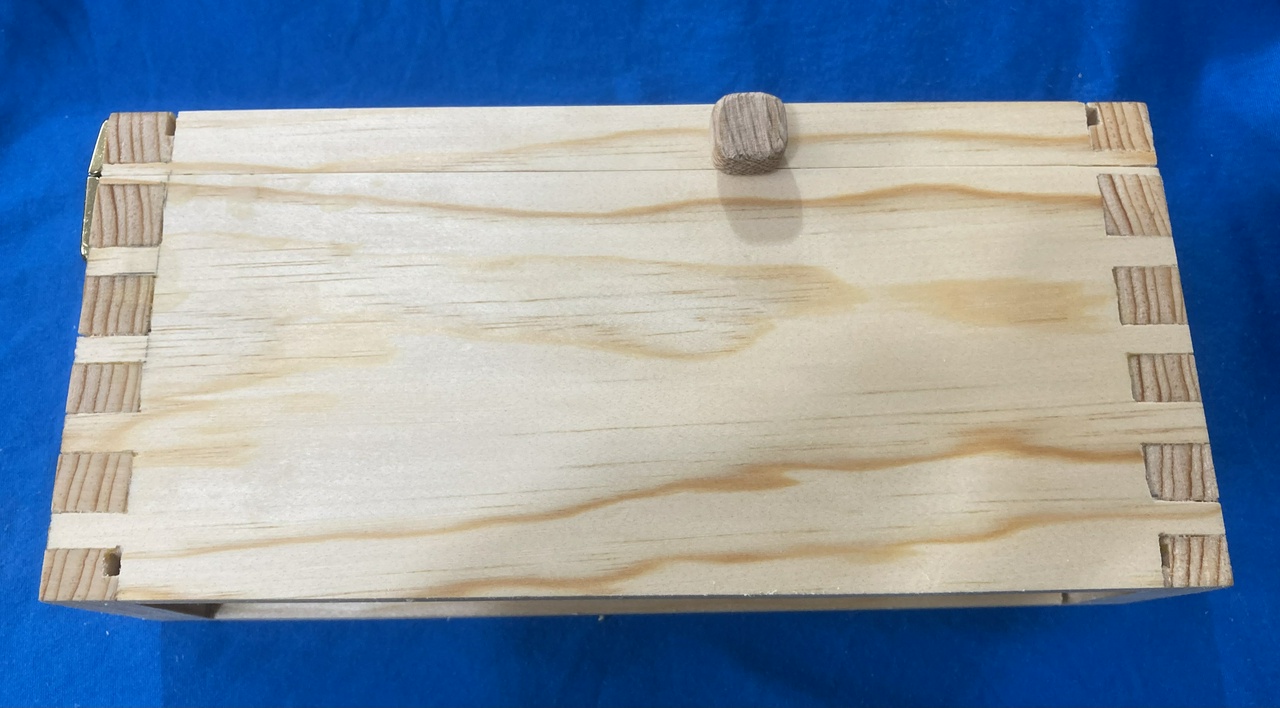
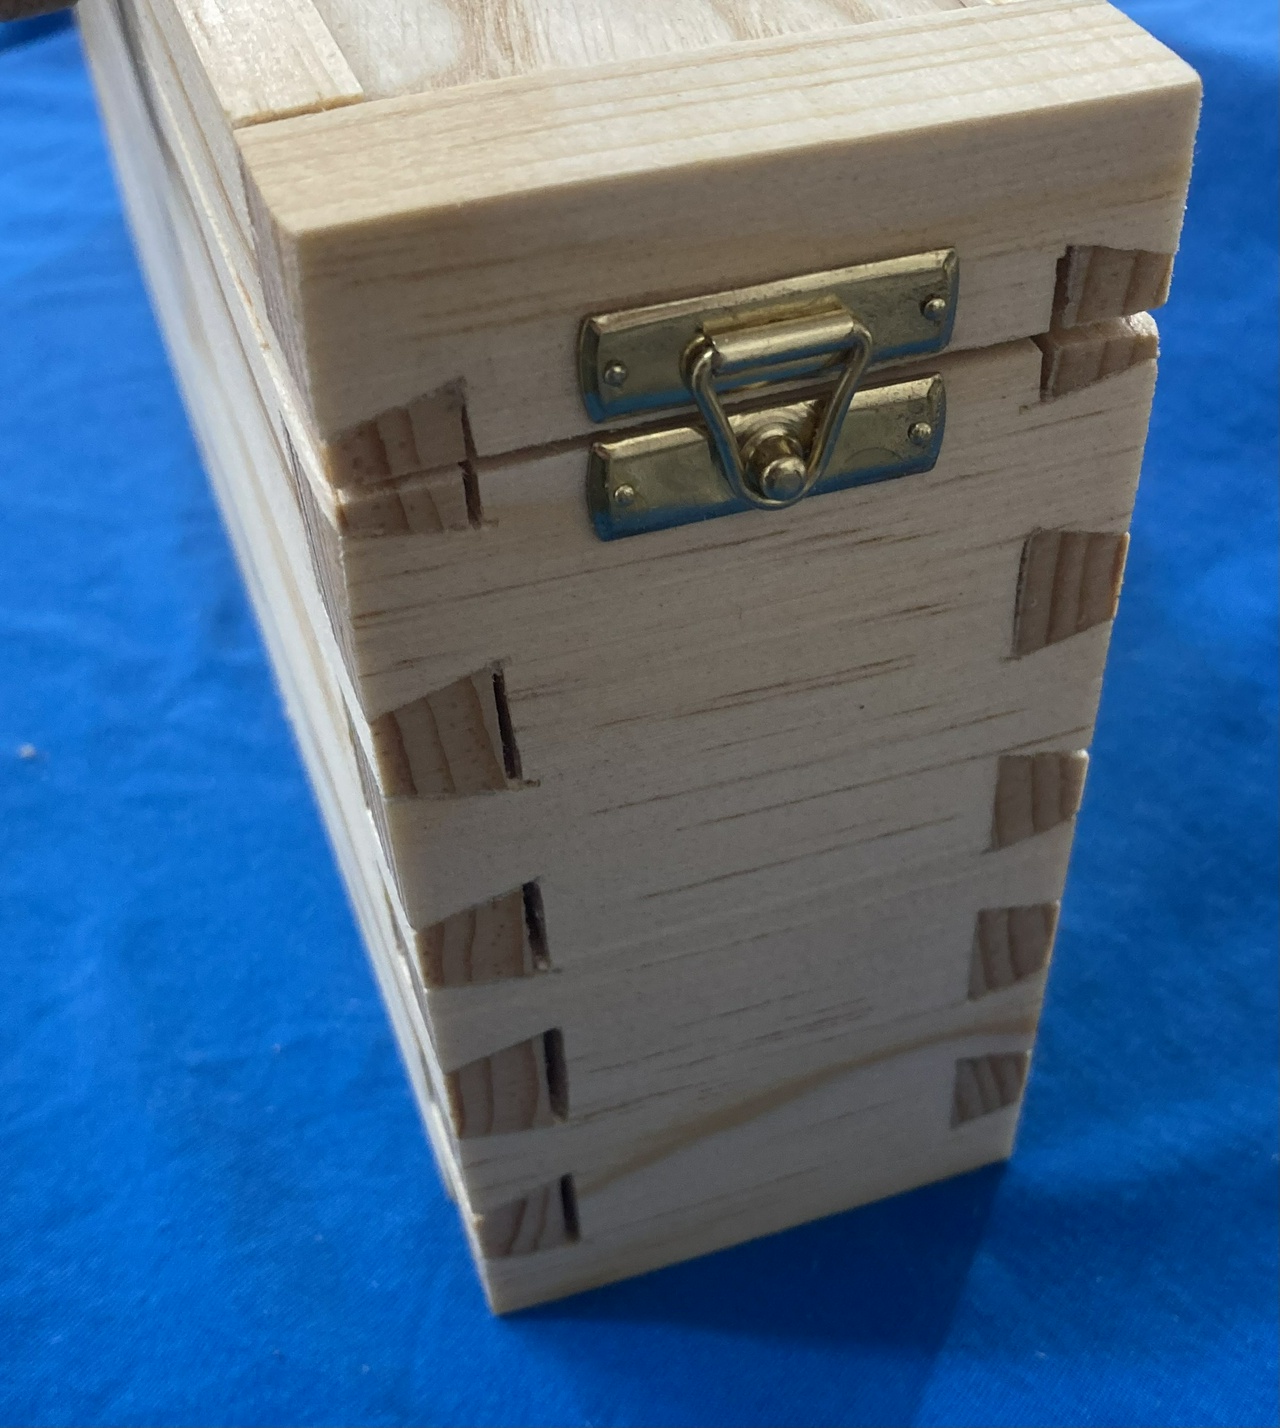
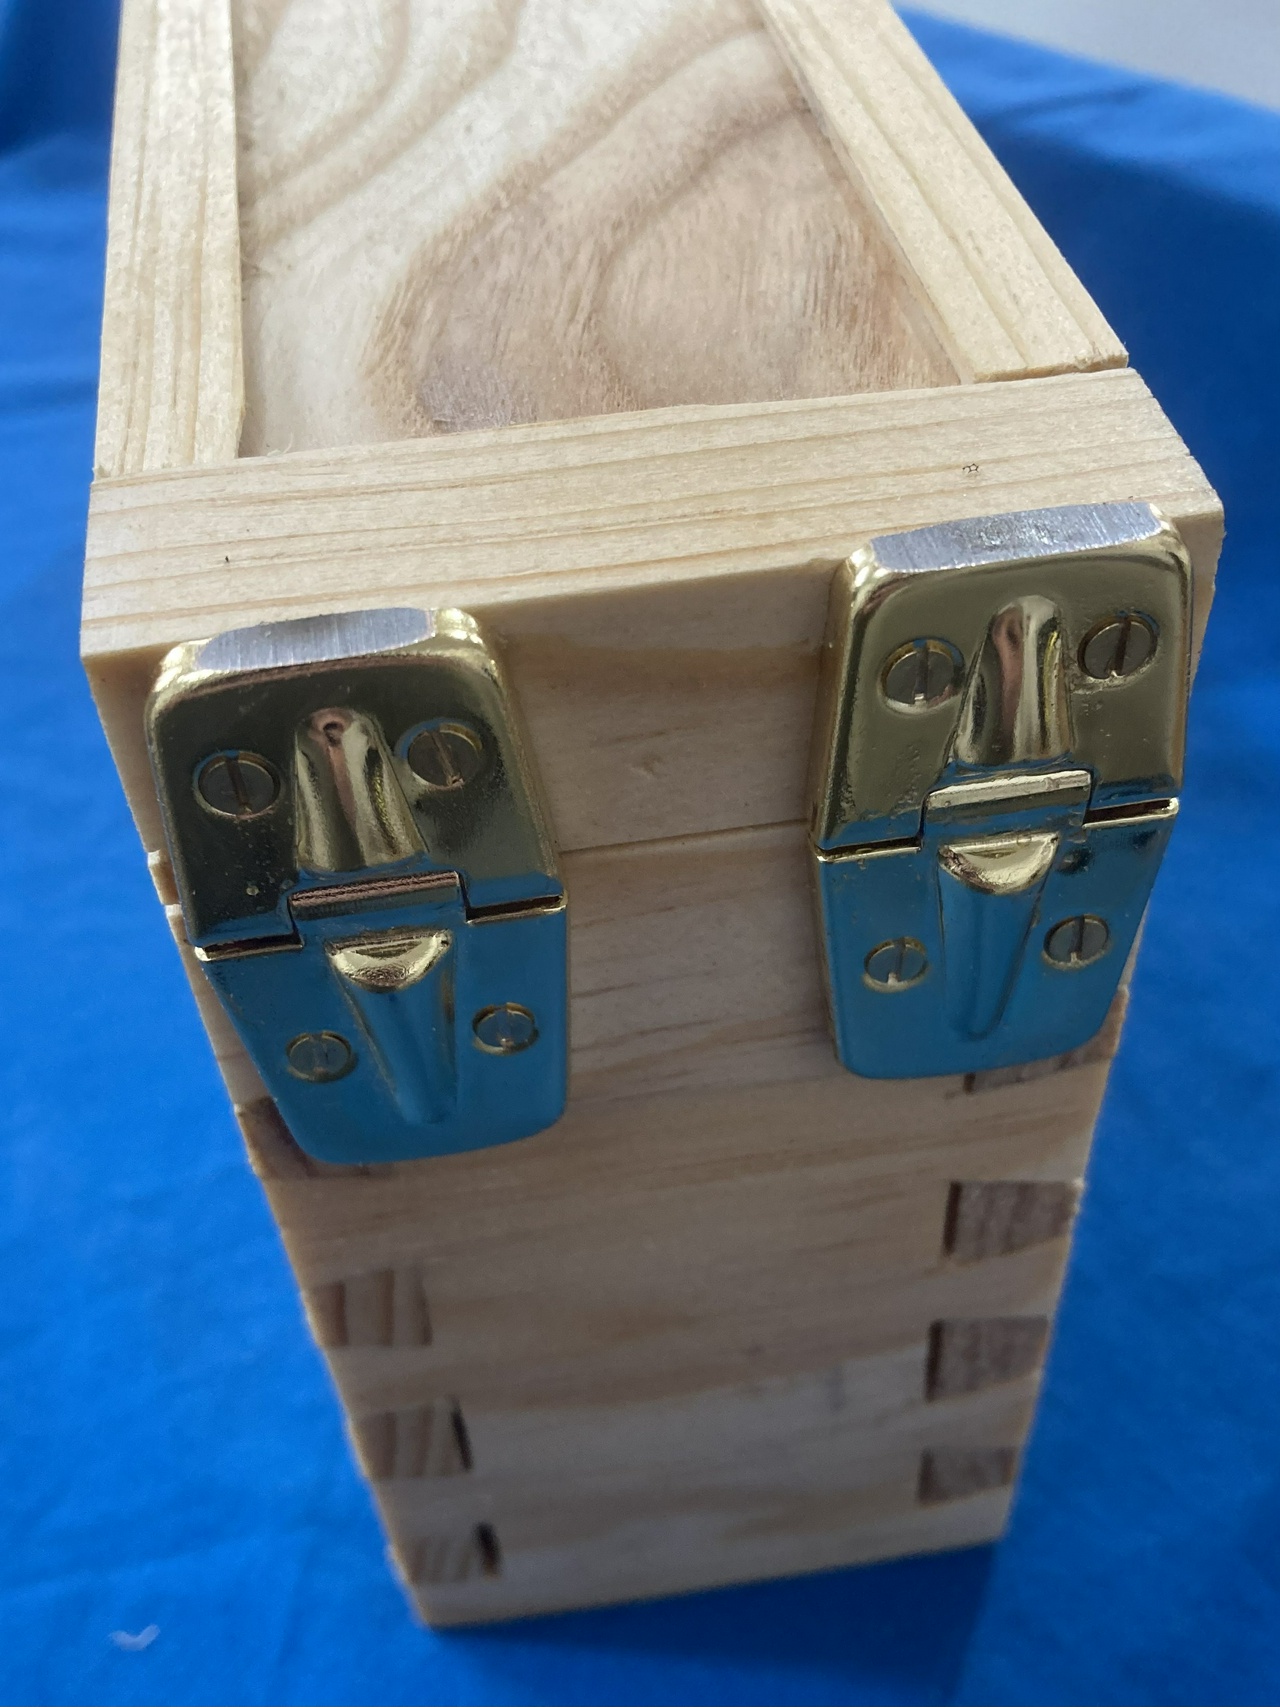
I also built a box to hold everything. It's fairly simple construction. A piece of red oak resawed in half to make the top and bottom, and a piece of walnut that was resawed in half to make the sides of the box. The bottom is simply rabbeted into the dovetailed sides, and the top got some bubinga veneer and oak sides so it would fit over the bottom of the box.

To build it, I cut the rabbets on the edge of the walnut, then dovetailed the walnut together. Then I trimmed the bottom piece of red oak to fit into the rabbets. Glued everything together and took it to the belt sander to clean up the outside edges of everything. I had one gap in the bottom which I filled with sawdust from the sanding and CA glue.
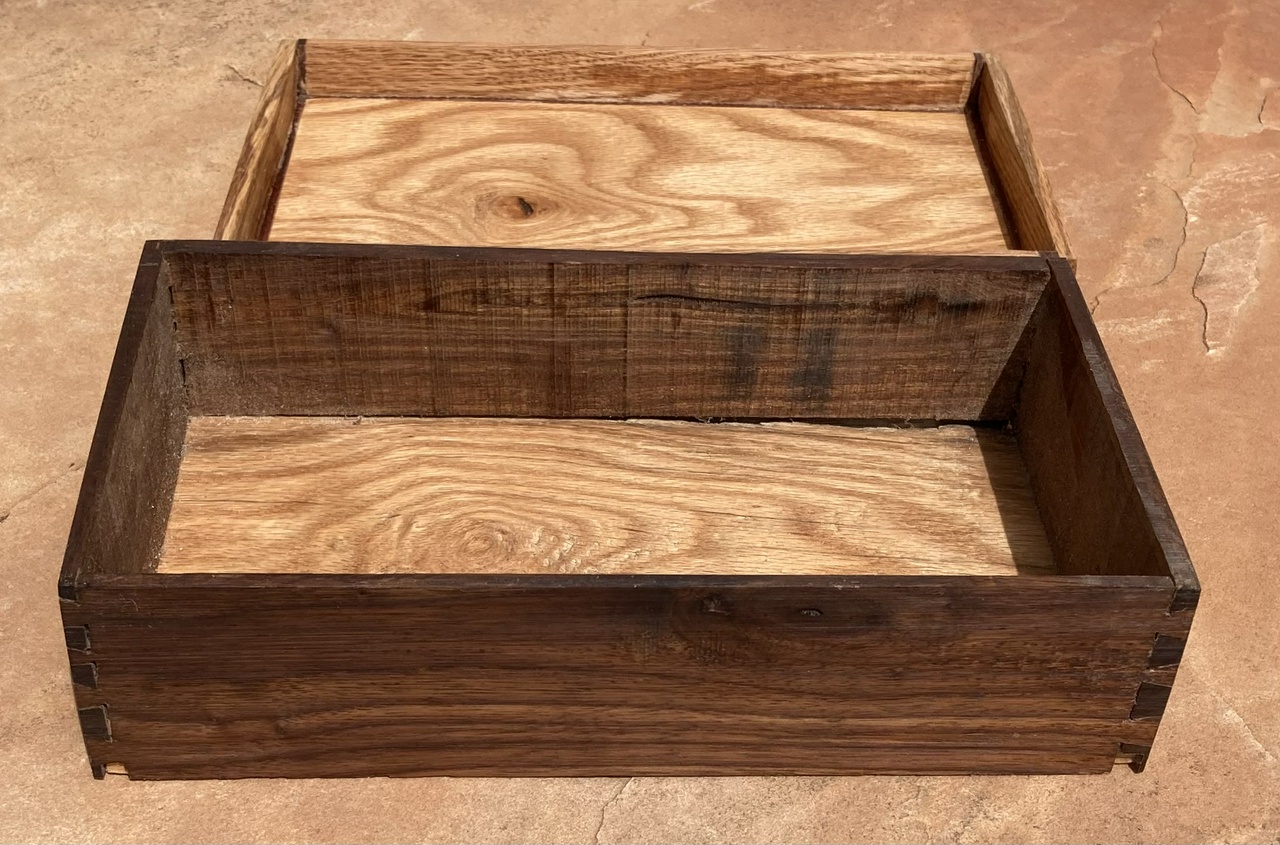
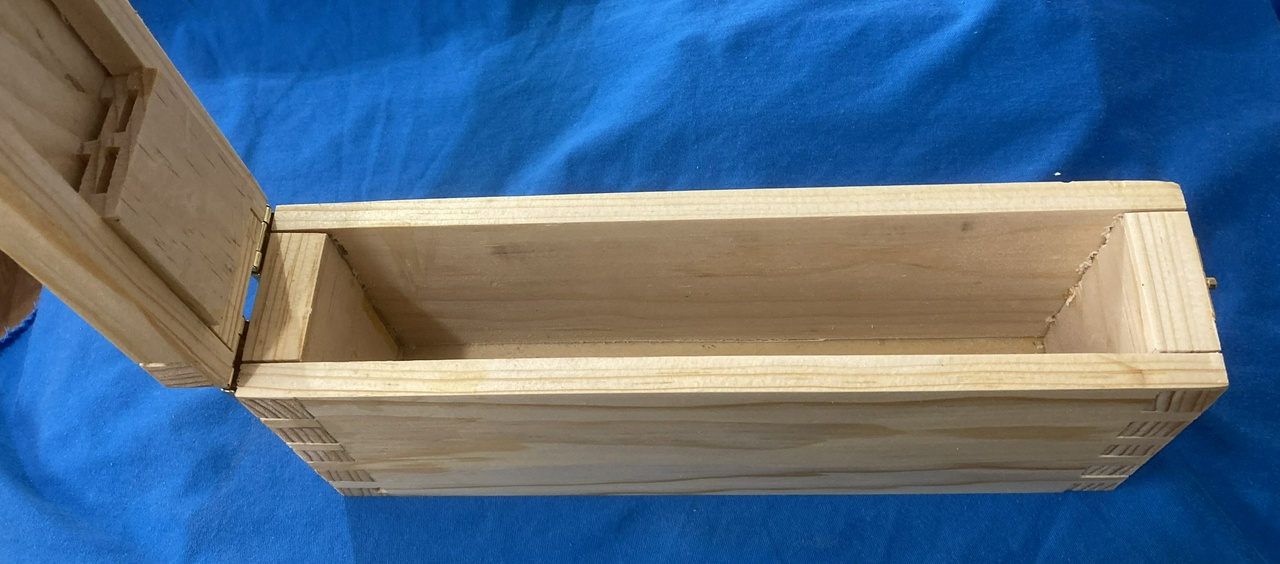
Box of walnut and red oak, open, showing the roughly-finished inside

For the lid, I glued strips of the 1/8” thick bubinga veneer to the edges of the top, then resawed a scrap of white oak to make the sides of the lid and glued those to the bubinga. Headed to the belt-sander again and made everything smooth. Again, there were a few small gaps between the oak and bubinga, so I filled those with the sanding dust and some more CA glue.
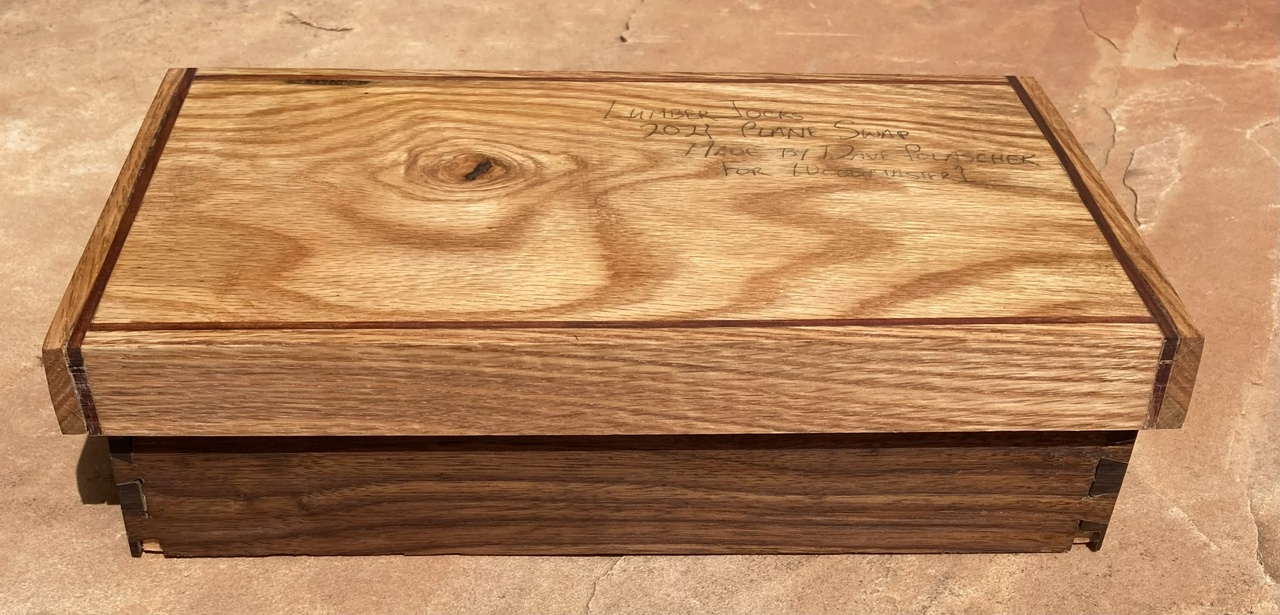
Box, closed, showing the top and the bubinga and oak edges on the lid

Wrote on the lid of the box with a pencil, then gave it three coats of shellac. It offered another layer of protection to the plane and the spokeshave in case the post office was less than gentle in the delivery.
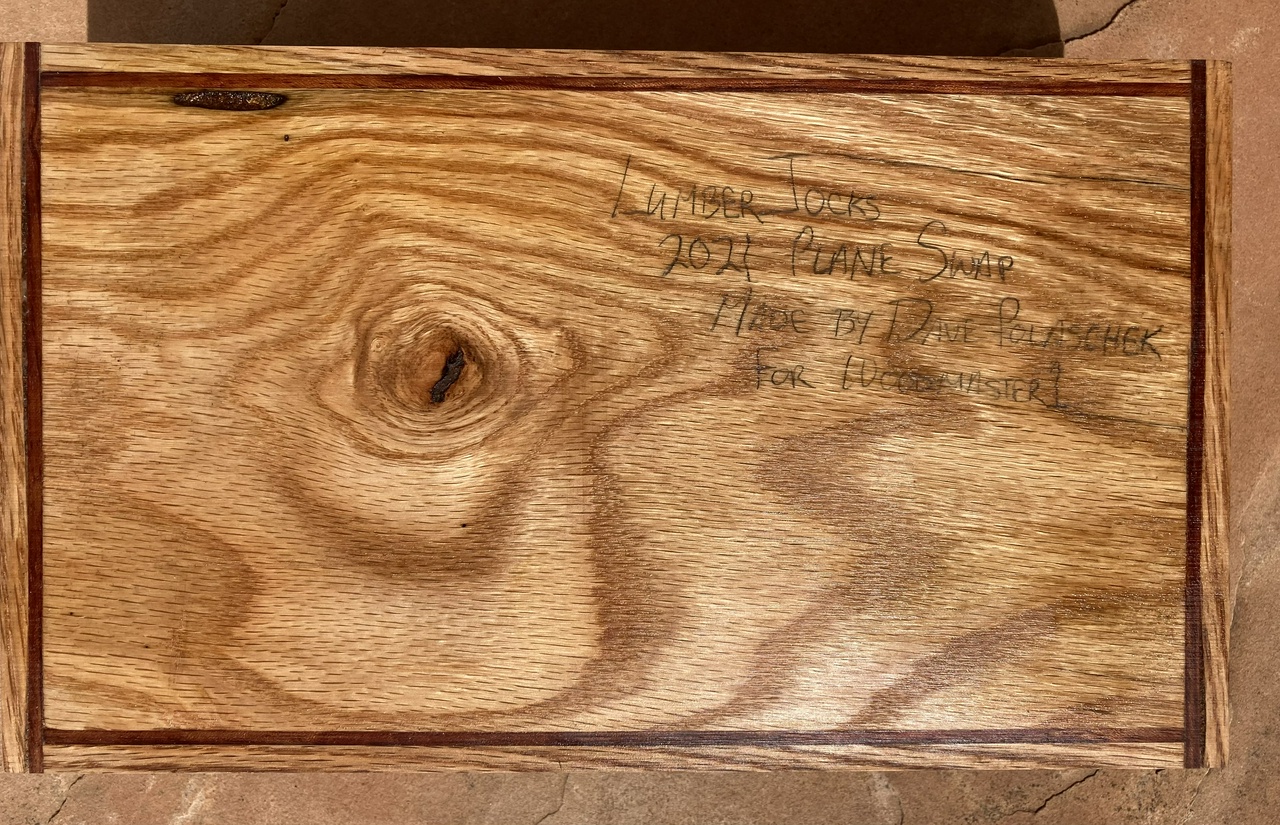
Box, closed, showing the top with the note saying "Lumberjocks 2021 Plane Swap, Made by Dave Polaschek for Woodmaster1" in pencil

#woodworking #planemaking #toolmaking #plane #box #spokeshave #swap #project

Discuss... Reply to this in the fediverse: @davepolaschek@writing.exchange

May 9, 2022

Getting a little more progress. I made hangers for my most commonly used hammers on the door of my till.

The two doors of the till, now with hammers mounted on the left door

Left to right, the ball-peen hammer I got from my dad, and which I use for nearly everything; the plane hammer I got from Kenny in the turning swap; the dead-blow I got from Kenny in the turning swap, which is proving very useful (autocorrupt wanted to “fix” that to useless -f'in Apple); and my dice mallet from Earl, which gets used pretty hard, and keeps on whacking.


Contents #woodworking #storage #hammers

Discuss... Reply to this in the fediverse: @davepolaschek@writing.exchange

Multiple projects going on in the shop today, so I didn't make a ton of progress on the till. I did get the doors planed (and sanded – pine is almost as fast to shape with 60 grit as with a plane) so they'll both close at once and then I installed the latches. I'll probably need to take a hair more off each of the doors – maybe a 64th or so from each, so that they'll still close once I put a coat of oil on the edges that meet in the middle.

Looking at the two doors from the top, they don't quite close

I put the latches on the top of the till because I can still reach them there just fine, and they'll hold better than latching the two doors to each other.

A few over the top of the till with both doors closed. A steppe landscape is visible out the window behind and above the till

Next up is outfitting the left door with hangers to hold whatever tools I decide need to live there, then it'll be about time to call the till done.


Contents #woodworking #storage #latches

Discuss... Reply to this in the fediverse: @davepolaschek@writing.exchange

May 3, 2022

Before I hung the second door, I spent a few days outfitting it with hangers for additional tools. I wanted to put a bunch of my marking and layout tools on the outside of the door, and a couple eggbeaters on the inside. (The first door will get the balance of the eggbeaters on the inside and more marking tools on the outside, as well)

So, here's a look.

Drills mounted on hangers on the inside of the door

Marking tools mounted on the outside of the door

Both doors visible, along with the drawers beneath them

The doors won't quite both close at the same time, because geometry, but I should be able to fix that fairly quickly with a block plane without having to remove either door. Plus, the left one will probably have to come off at some point so I can hang tools on it. Not going to worry about that today, though.


Contents #woodworking #storage #doors

Discuss... Reply to this in the fediverse: @davepolaschek@writing.exchange

Apr 28, 2022

Another short session in the shop today, but I got the edges of the doors planed flat with a block plane.

Block plane sitting on the edge of a door frame, held in the face vise. The dovetails to the left of the plane have been planed flat

Then I put on a coat of boiled linseed oil with a foam brush.

Foam brush sitting inside one of the doors

Wiped off the excess with a rag.

A rag, with some visible oil spots, sitting inside a door

And set the doors on a scrap of cardboard to dry.

The two doors, sitting on a cardboard box flattened on the shop floor


Contents #woodworking #storage #finishing #linseedOil

Discuss... Reply to this in the fediverse: @davepolaschek@writing.exchange

Apr 27, 2022

This evening I got a little time in the shop to glue up the doors of the brace till. Yesterday I had finished the joinery for the frames, and rough-cut the door panels.

This evening, I measured the door panels more carefully (since I had made the grooves about ⅜ inch deep in ¾ inch boards, I can set the frame on the panel, aligning two outside edges, then make a pencil line on the two opposite inside edges, and be pretty close to right). So I did that and cut the door panels with the circular saw.

Then I test-fit things. The grooves were really tight for the ¼ inch plywood, so with a block plane I took three passes angled along each face of each edge of the panel, raising it just a hair. Now the panels fit into the grooves, but they were about ⅛ inch too big, so I set up the table saw with the fence almost touching the blade and quickly turned a bit of the edges into sawdust. Could've done the same thing with a hand plane, but my low angle jack plane that I normally use for trimming the edges of plywood was not very sharp, so the tailed apprentice got the call.

With things fitting correctly now, I put glue on all the pins, set the door panels in place (no glue on them), and placed on the tail boards. Then on with the clamps and call it a night.

Two door frames with panels, glued and held together with clamps

Tomorrow I think I only have a few minutes in the shop, but that should be enough to plane the dovetails smooth (the pins are protruding just a hair) and put on a quick coat of BLO, and I can hang the doors on Friday. Fingers crossed!


Contents #woodworking #storage #doors

Discuss... Reply to this in the fediverse: @davepolaschek@writing.exchange

Apr 26, 2022

I finally got back to my brace till this morning.

Found a few pine 1×4s in the storage and ran down the edge of them with the combination plane to pretty them up a bit.

Then I cut them to length for the doors I'll need. I'm planning on building doors that are 3 inches deep, with a ¾ inch frame around the edge, using mitered dovetails for joinery, and a piece of ¼ inch Baltic birch plywood for the face.

Four boards for one door frame, with a combination plane set between them

Four boards for the other door frame, with a cordless drill and a couple turnscrews between them

With the frame pieces cut to length, I stopped and thought for a moment. I want the pins extending out through the tail boards which will be the sides, so I grabbed the left and right sides of the left door, put them outside to outside, and cut my first two sets of tails. I used the same layout as the plinths on my Jefferson bookcases, so I already had a story stick on hand.

With the dovetails laid out, I started cutting, and got through all four corners pretty quickly. I ended up having the left and right side of the right door upside down from what I had originally planned, but other than that, everything went well.

Two door frames, put together for a test fit, sitting on the floor

Next was cutting the groove for the door face. I wanted a quarter-inch groove, about a quarter inch from the front face of the door sides (in order to avoid splitting the groove across a pin and tail – putting it this way kept it entirely within the miter), so I set up the combination plane accordingly, and set the depth stop to a hair shy of ⅜ inch. I also rough-cut the door faces from the larger piece of plywood outside with the circular saw, and will trim them to exact size next time I get some time in the shop.


Contents #woodworking #storage #doorFrames #planning

Discuss... Reply to this in the fediverse: @davepolaschek@writing.exchange

Jan 22, 2022

Over the past few days I've finished gluing all the drawer fronts onto the drawer boxes.

Today, I went to put the drawer pulls on, and discovered that I only had 7 of the 10-pack of pulls I bought some time back in Minnesota. And it appears they've been discontinued, but I found three more (I only need two, but if I don't buy a spare, I'll end up needing one) online. Only $5 each, plus $10 shipping. Pretty sure that's more than I paid for the 10-pack originally.

Drawer fronts with drawer pulls installed


Contents #woodworking #storage #hardware #pulls

Discuss... Reply to this in the fediverse: @davepolaschek@writing.exchange

Small rack holding three nail sets

I was cleaning my shop this morning, and found my set of three nail sets. Rather than lose them again and have to use nails rather than the proper tool, I decided to give them a proper home.

rack for nail sets, viewed from the front

I found a couple small pieces of apple wood, and made one flat so it could be mounted on my boring tools till. I drilled three holes in the other piece, then roughly shaped it to something organic-looking.

rack viewed from above

I glued and screwed the two pieces together with a #2-⅜ screw, countersunk from behind, so the mounting piece would still sit flat, then finished it with the Beall Wood Buffer, and finally I glued and screwed the mounting piece to the till door. Done and done.

nail set rack, viewed from below

Little projects like this can be pretty satisfying. Two hours and change from idea to finished product, and my shop is (a little) better organized now.

#woodworking #shopStorage #quickie

Discuss... Reply to this in the fediverse: @davepolaschek@writing.exchange

Five of the drawer fronts on the cabinet, four are still being finished, with the jam jar and the squeeze bottle of shellac just visible at the bottom of the frame

Today's finishing started with the four drawer fronts I showed last time. I gave them all a half-dozen quick coats of shellac and oil, with some rottenstone to fill the grain a little quicker, then put them back so I could pull the other five drawer fronts to work on those. I don't think the first batch are done, but they're getting close. One more session should do the trick.

This next batch has the drawer with the crack and the bug tracks. That one got some CA glue drizzled into the crack from the back before I started, and also some CA on the front side. I don't want that crack to open up while I'm finishing the board, and I feel like I've solidified things a little.

The four drawer-fronts I'm currently finishing, with one showing a line where the crack needed fixing

My squeeze bottle of shellac was getting a little low too, so it was time to mix up a new batch. 2 ounces of shellac flakes in the 14 or 15 fluid ounce salsa jar leads to a mix that's just a little bit over a one pound cut. Dissolves fairly quickly with the magnetic stirrer mixing it up. It'll be ready for use tomorrow morning when I'm back in the shop for sure.

A magnetic stirrer with a salsa jar of shellac sitting on top of it

Also, I used some rottenstone in the first bits of finishing on these drawer fronts. It's fine pumice, and will abrade the surface of the wood a bit, creating a slurry in the shellac and oil, and then pushing that slurry into the grain. I decided I'd compare using it first versus using it in the second round of finishing.

The pad I used to apply shellac, worn through in a spot, showing the interior layers of cheesecloth, which are a coarser weave

The downside of using rottenstone is that it wears out the pad fairly quickly. But that's an easy problem to solve; just move the outer layer of t-shirt to a fresh spot after wearing through somewhere.

The pad with a fresh spot on the t-shirt moved to the center

A few more coats of oil and shellac, and the second batch of drawer fronts are looking pretty good.

All five boards in this batch, showing they are partially finished

There are still some spots where the grain hasn't been completely filled yet, but I think I can safely put the rottenstone away and just finish with shellac and oil.

A closer, and lower-angle view of the boards, showing that there are still spots where the grain has not been filled


Contents #woodworking #storage #frenchPolish #shellac

Discuss... Reply to this in the fediverse: @davepolaschek@writing.exchange