davepolaschek

woodworking

I wanted to experiment with punched metal. Well, I clearly need more practice, but it’s promising, and I think this one came out good enough to send off to a friend.

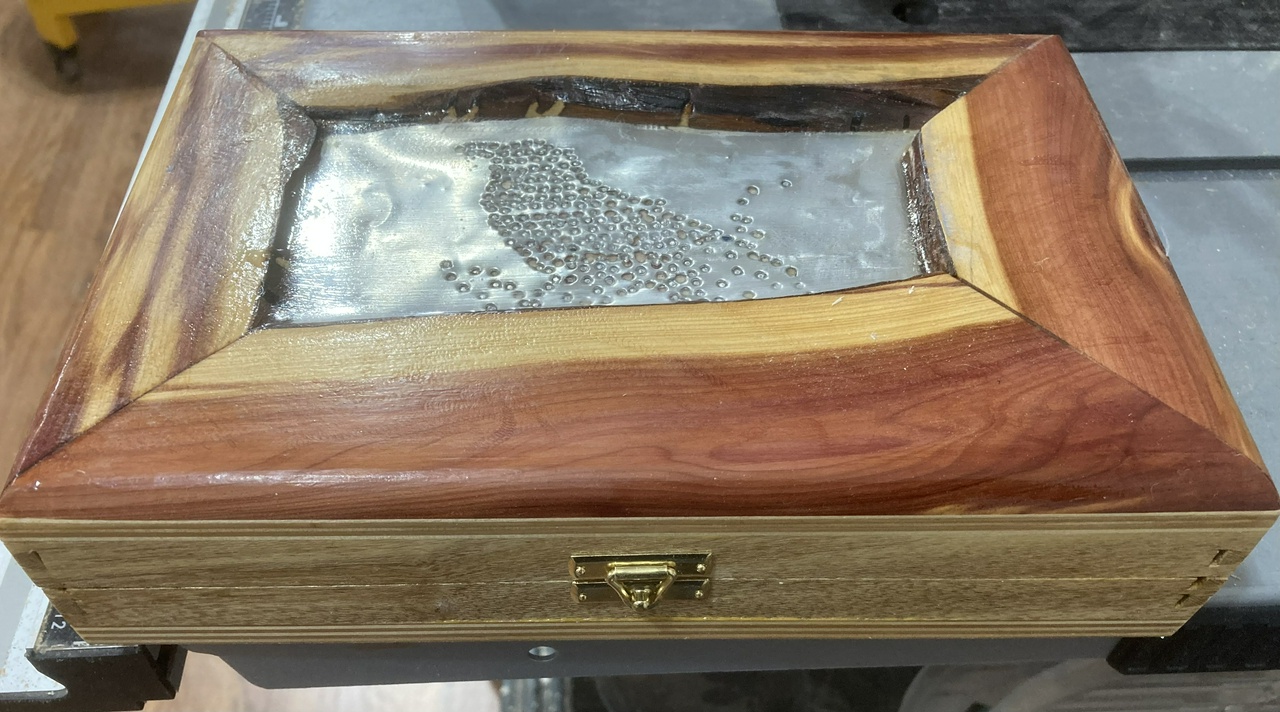
oblique downward view of the box, showing the top and front

I started with a photo of a raven that I printed onto a piece of paper, then taped it onto a cut-open and flattened-out Coke can. Then I punched where the dark was in the image, putting the punches closer together in the darker areas and farther apart in the lighter areas.

raven sitting on a juniper branch, head slightly raised

The biggest problem is that I couldn’t keep consistent in how hard I was punching the metal, so about half of my strikes tore through it, rather than leaving a dimple. But when I started, I thought maybe I wanted to punch through the metal, so I learned something there. I also was using a 1/32 inch nail set, which ends up being pretty big. I may have to grind my own punch for this. Or make a few.

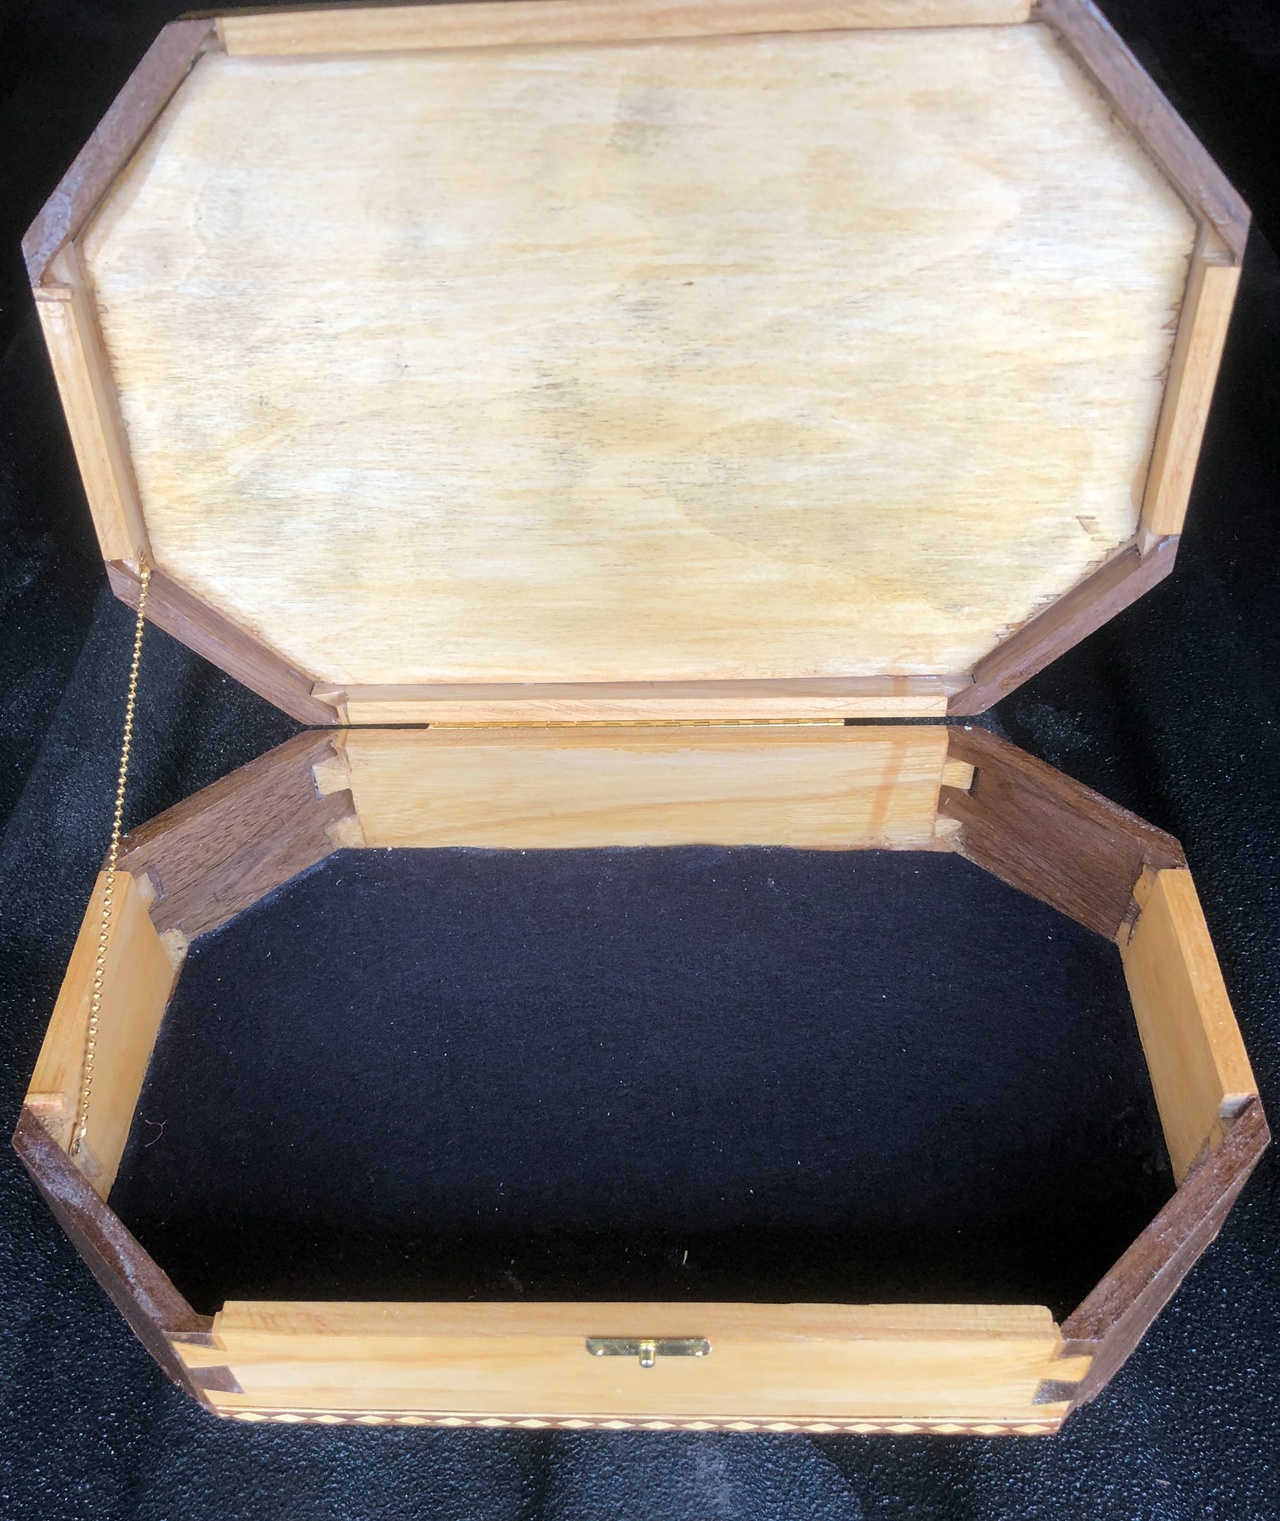
interior view of the box - quite plain

The box is dovetailed salt cedar sides, a 9mm plywood bottom, and a 6mm plywood top with juniper put on top of it to hold down the metal. After gluing that up, I poured about 50ml of epoxy over the metal to protect it. A pop can might be thinner than is ideal for is sort of thing, as pieces of metal broke loose as I was trying to glue it down. More learning, there.

top view of the box, showing the metal with no reflections

The box is finished with a few coats of shellac. Super blonde, I believe. I like the way the salt cedar grain darkens when finished, and the juniper really popped when the shellac hit it. It’ll fade some over time, but the contrast between the red heartwood and blonde sapwood will remain. It’s going to a friend, and hopefully he’ll like it.

#woodworking #project

Discuss... Reply to this in the fediverse: @davepolaschek@writing.exchange

Originally written May 2, 2018

I couldn't find anyone describing how to cut dovetails for non-square corners, so I decided to write this up. This trick will work for any angle dovetails, but you'll have to change up the workholding jigs.

This is a description of how to cut dovetails for a 135 degree corner. This is the angle used on an octagonal box (if all the angles are equal). They're not perfect, and there's probably a better way to do it, but this is the best I found.

My first try cutting 135 degree dovetails used no special workholding. I just threw the pieces in the vise and started cutting. I cut tails first and I cut them pretty much as normal, except with the end of the board at a 45 degree angle, so they were pretty easy.

Tails cut on a board with the end cut at 135 degrees

The pins were fairly straight too. This is feeling easy!

Pins marked on a board with a 135 degree angled end

But the fit left something to be desired.

First attempt at a 135 degree dovetailed corner, showing a fairly loose fit

So I sat and thought for a bit and decided that maybe I could use a square piece in the corner, all tails, and put pins on the edge pieces that would go into it, and then cut the 45 degree angle afterwards. It couldn't be any worse than the previous attempt, could it?

A corner piece with tails cut into it from two directions at 90 degrees to each other

Cutting long pins into the end of a board

Boards with long pins inserted into the board with two sets of tails cut into it

The assembled corner, with the corner sanded off, leaving the pin boards almost meeting

Well, that worked okay, and I might end up trying that method again, but I'll have to think harder about the grain direction in that corner piece when I do.

So I tried again. Third time's the charm, right?

I cut the tails square this time, just like you would on a normal dovetail. I even gang-cut them two at a time.

Gang-cutting tails on two boards, as I typically do for dovetails

Then I cut the pins on a board with the end angled 45 degrees using a jig I made for the purpose. I made the 45 degree end on the board using a miter jack before cutting.

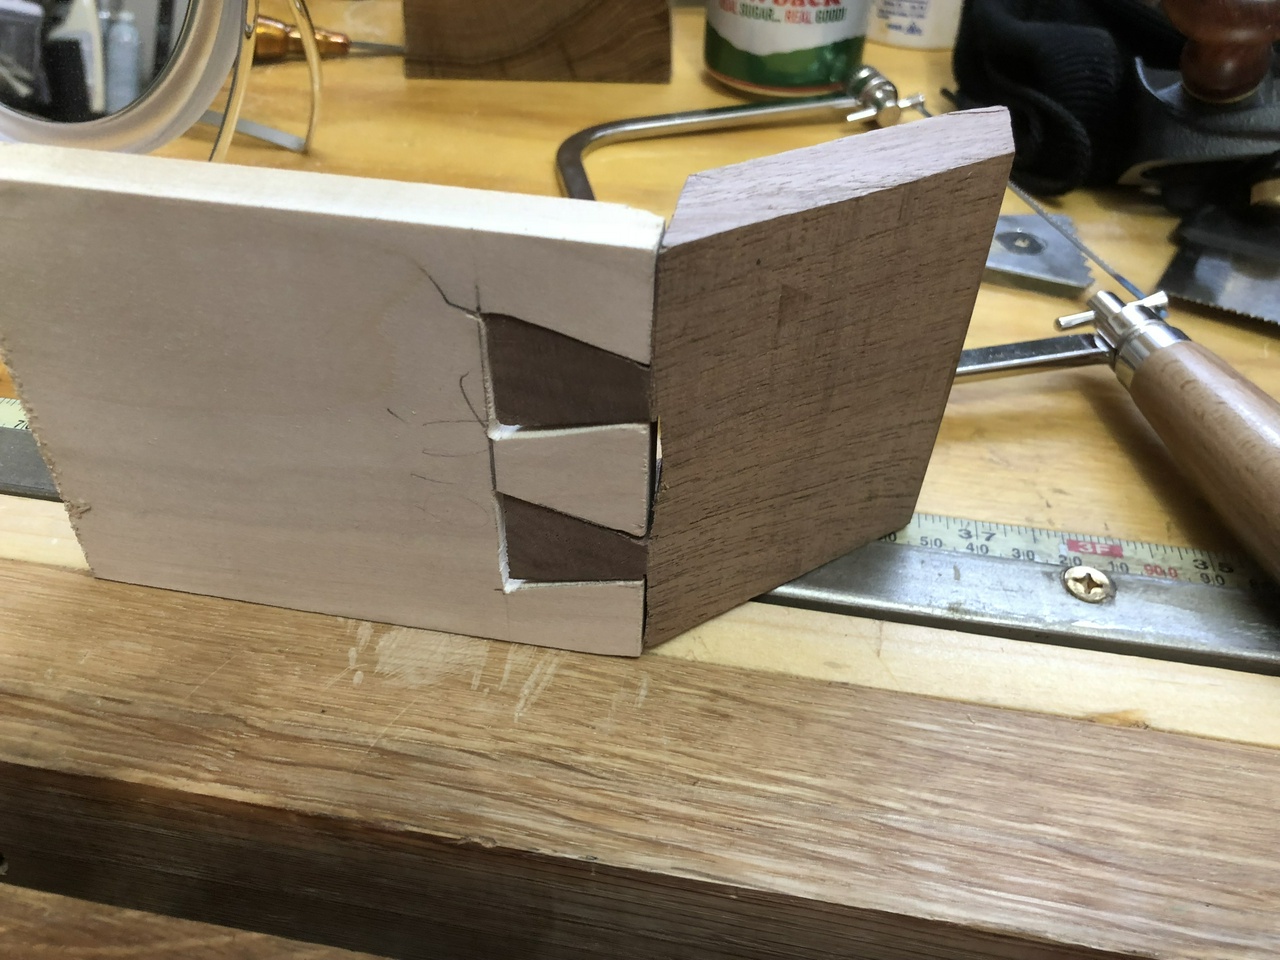
One corner together with the pin-board fitting into the tails

Two adjacent corners fit together, with a mirror behind so the inside of the joint is visible too

Those came out pretty good I think. They're a little gappy where I went astray with the coping saw while cutting out the waste, but they glued up solid.

Hopefully someone else will learn from this and find it useful. To get the boards to look good in the corner, just make the corner piece (the walnut in the above photo) 0.7 times as thick as the edge piece (the ash). The example I show has the walnut thicker, and the corner looks kinda goofy to my eye.

#technique #woodworking #dovetails

Discuss... Reply to this in the fediverse: @davepolaschek@writing.exchange

Originally written May 3, 2018
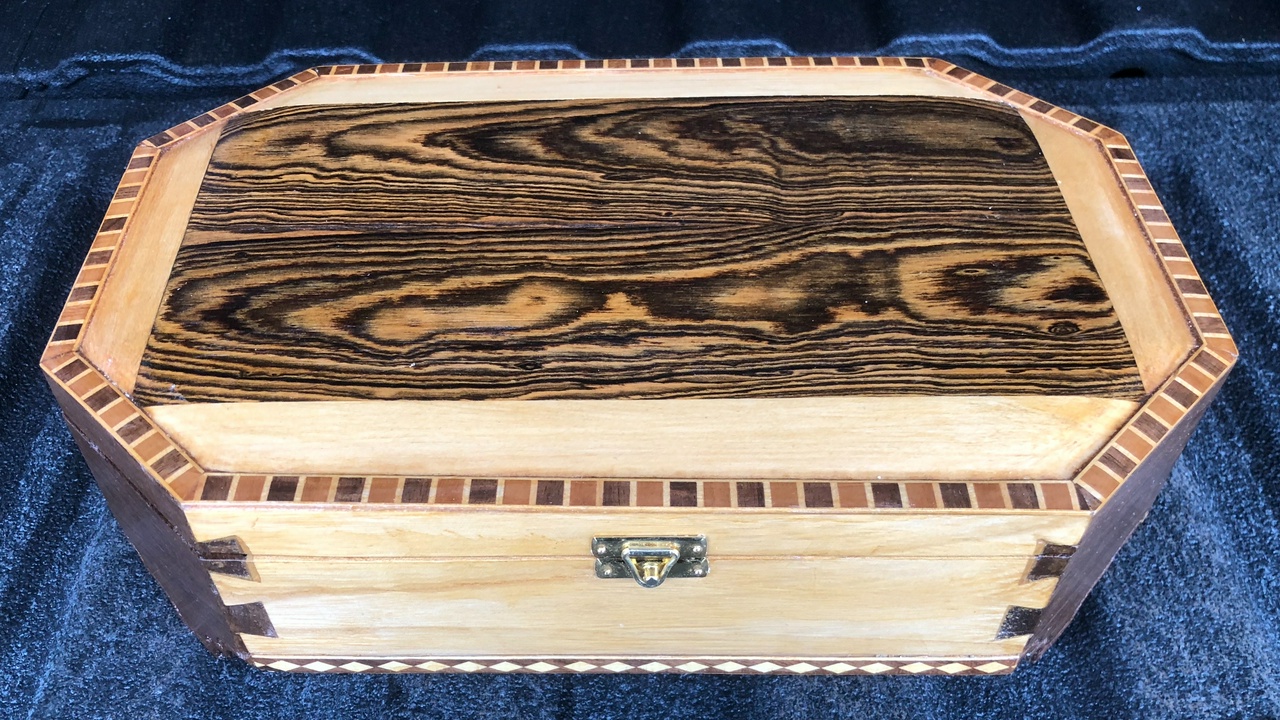
Finished Octagonal dovetailed box

I wanted the box I built for the box swap in 2018 to be different. I looked through nine-hundred-some box projects on Lumberjocks and saw that octagon boxes, while not common, weren't entirely rare either. But none that I saw were dovetailed. What the heck, I had just learned to cut dovetails this year, so how hard could it be?

I started with some sketches. As you'll see, the design diverged a little from the sketches, but some things stuck all the way through.
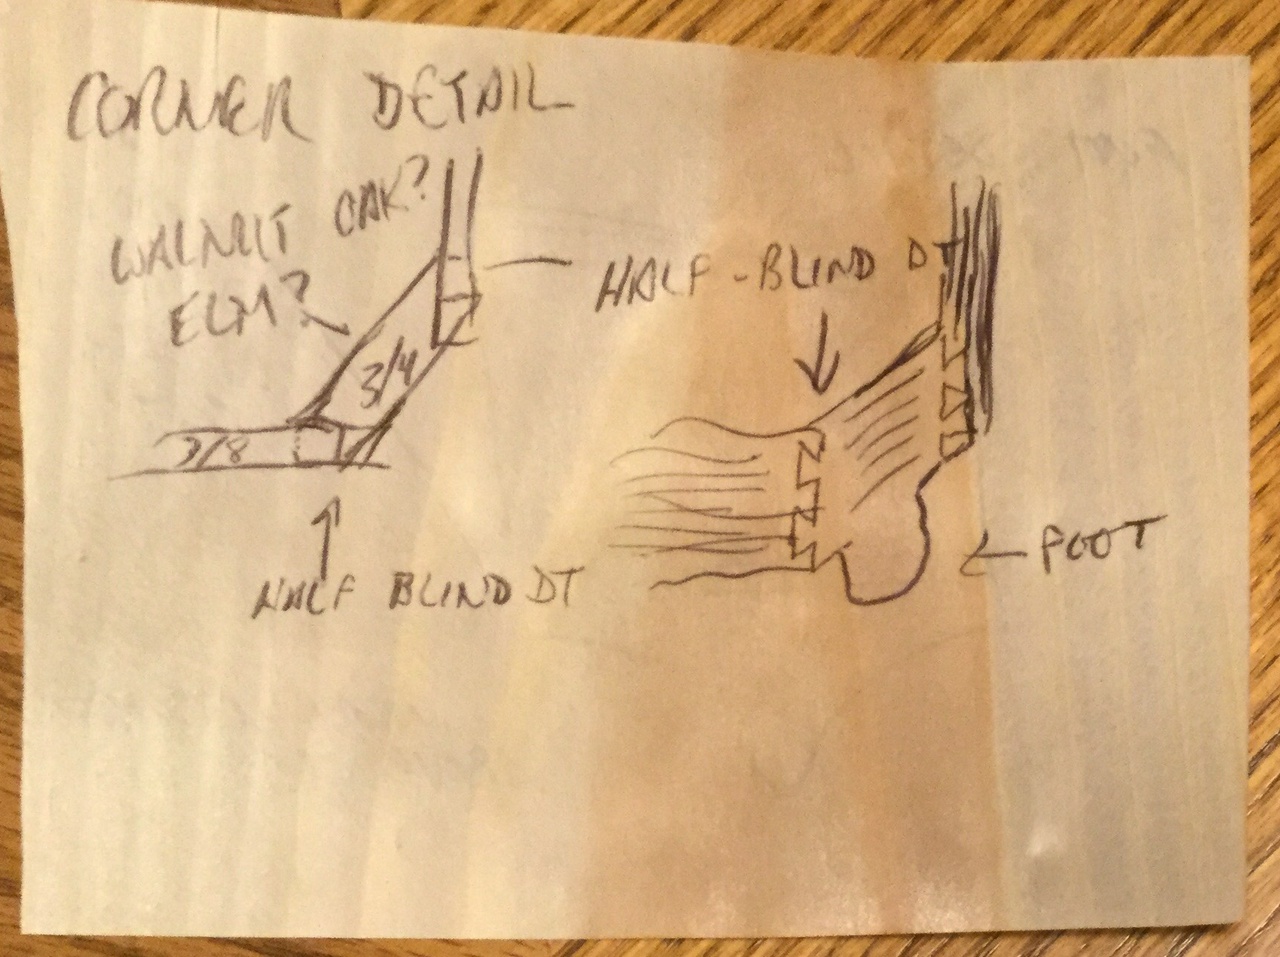
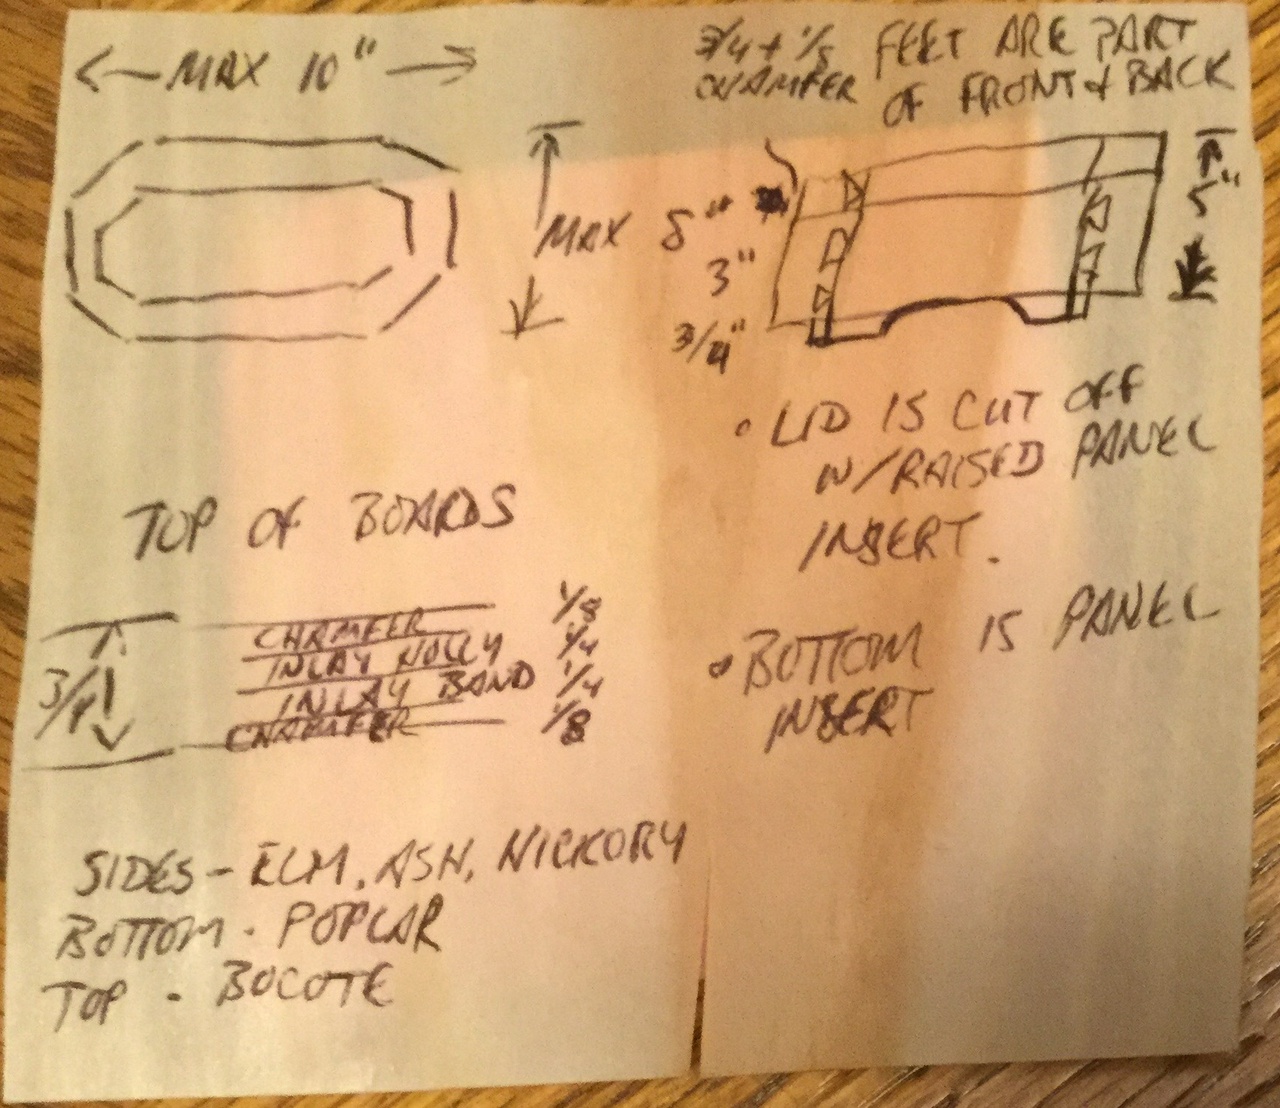
Corner detail sketch for box, showing half-blind dovetails and feet on the corner pieces

Overall dimension sketches and preliminary sizes for octagonal box

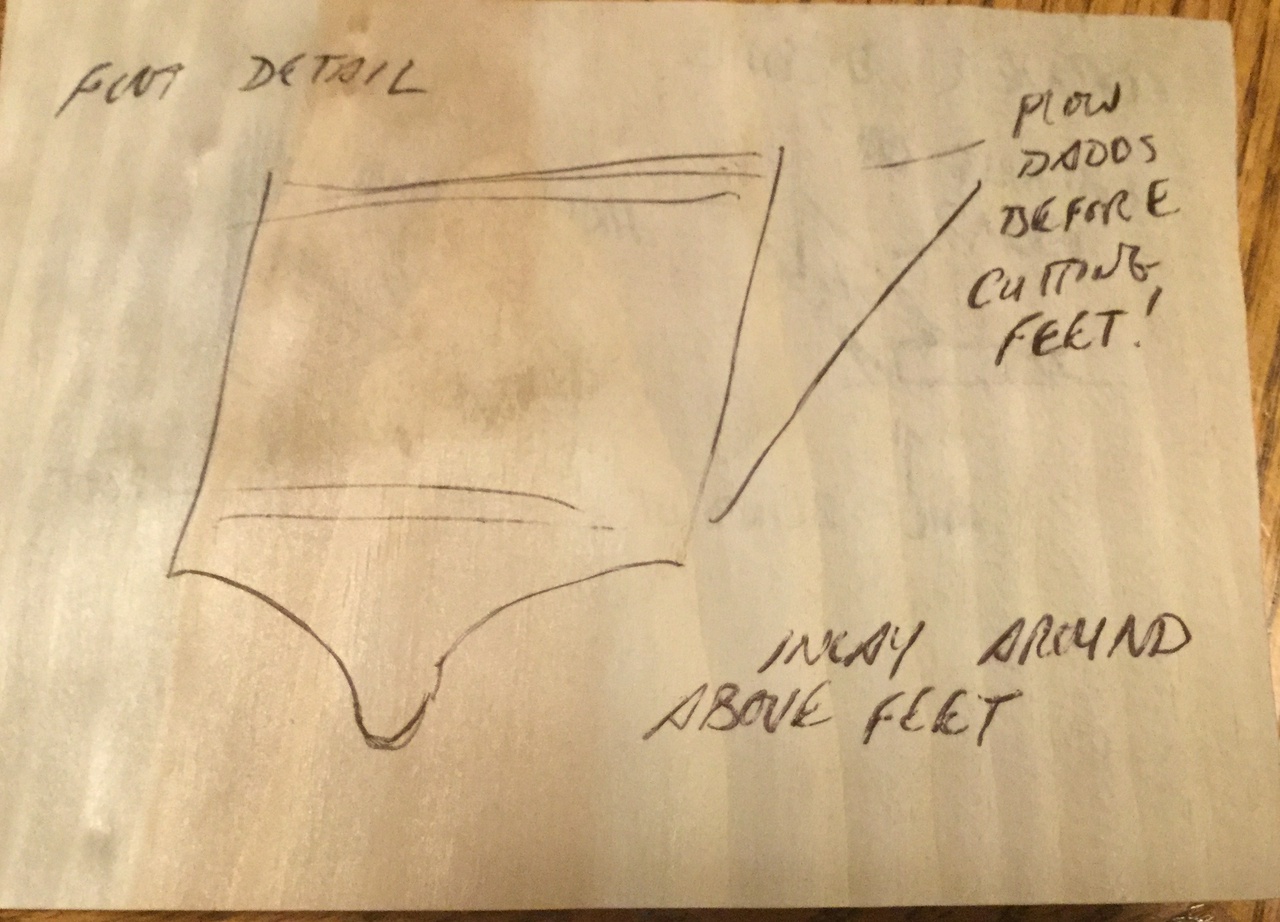
Foot / corner detail sketch with ideas for decorating the corners

I started out with experiments in cutting 135 degree dovetails and built a jig to help me get them right.

I also started resawing the wood I was going to need to build the box. I had some ash that had nice grain, plus some walnut that would look good for the corners. I also had a piece of bocote that I planned to use for the lid. First step, resawing the ash.
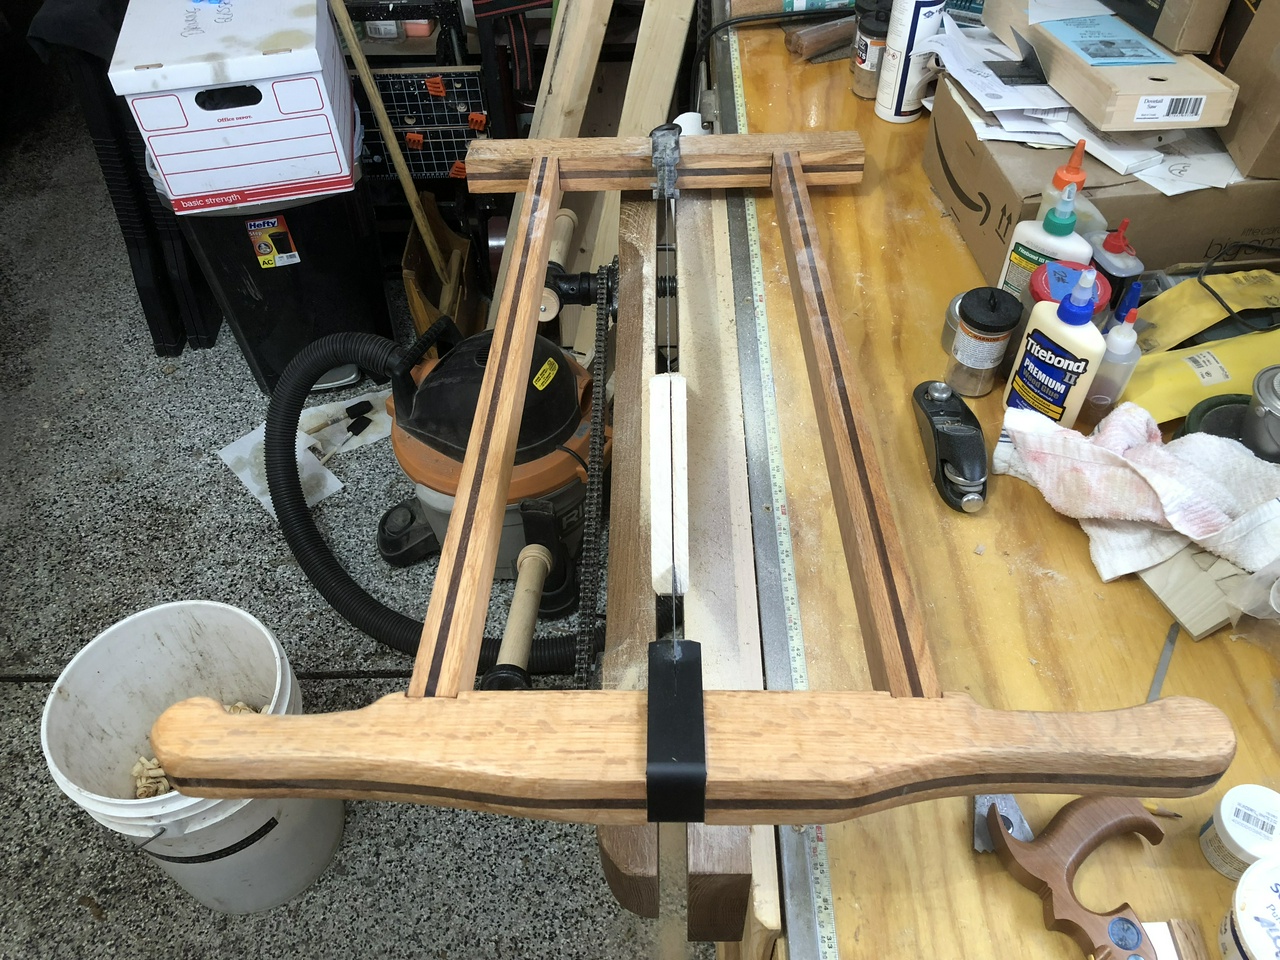
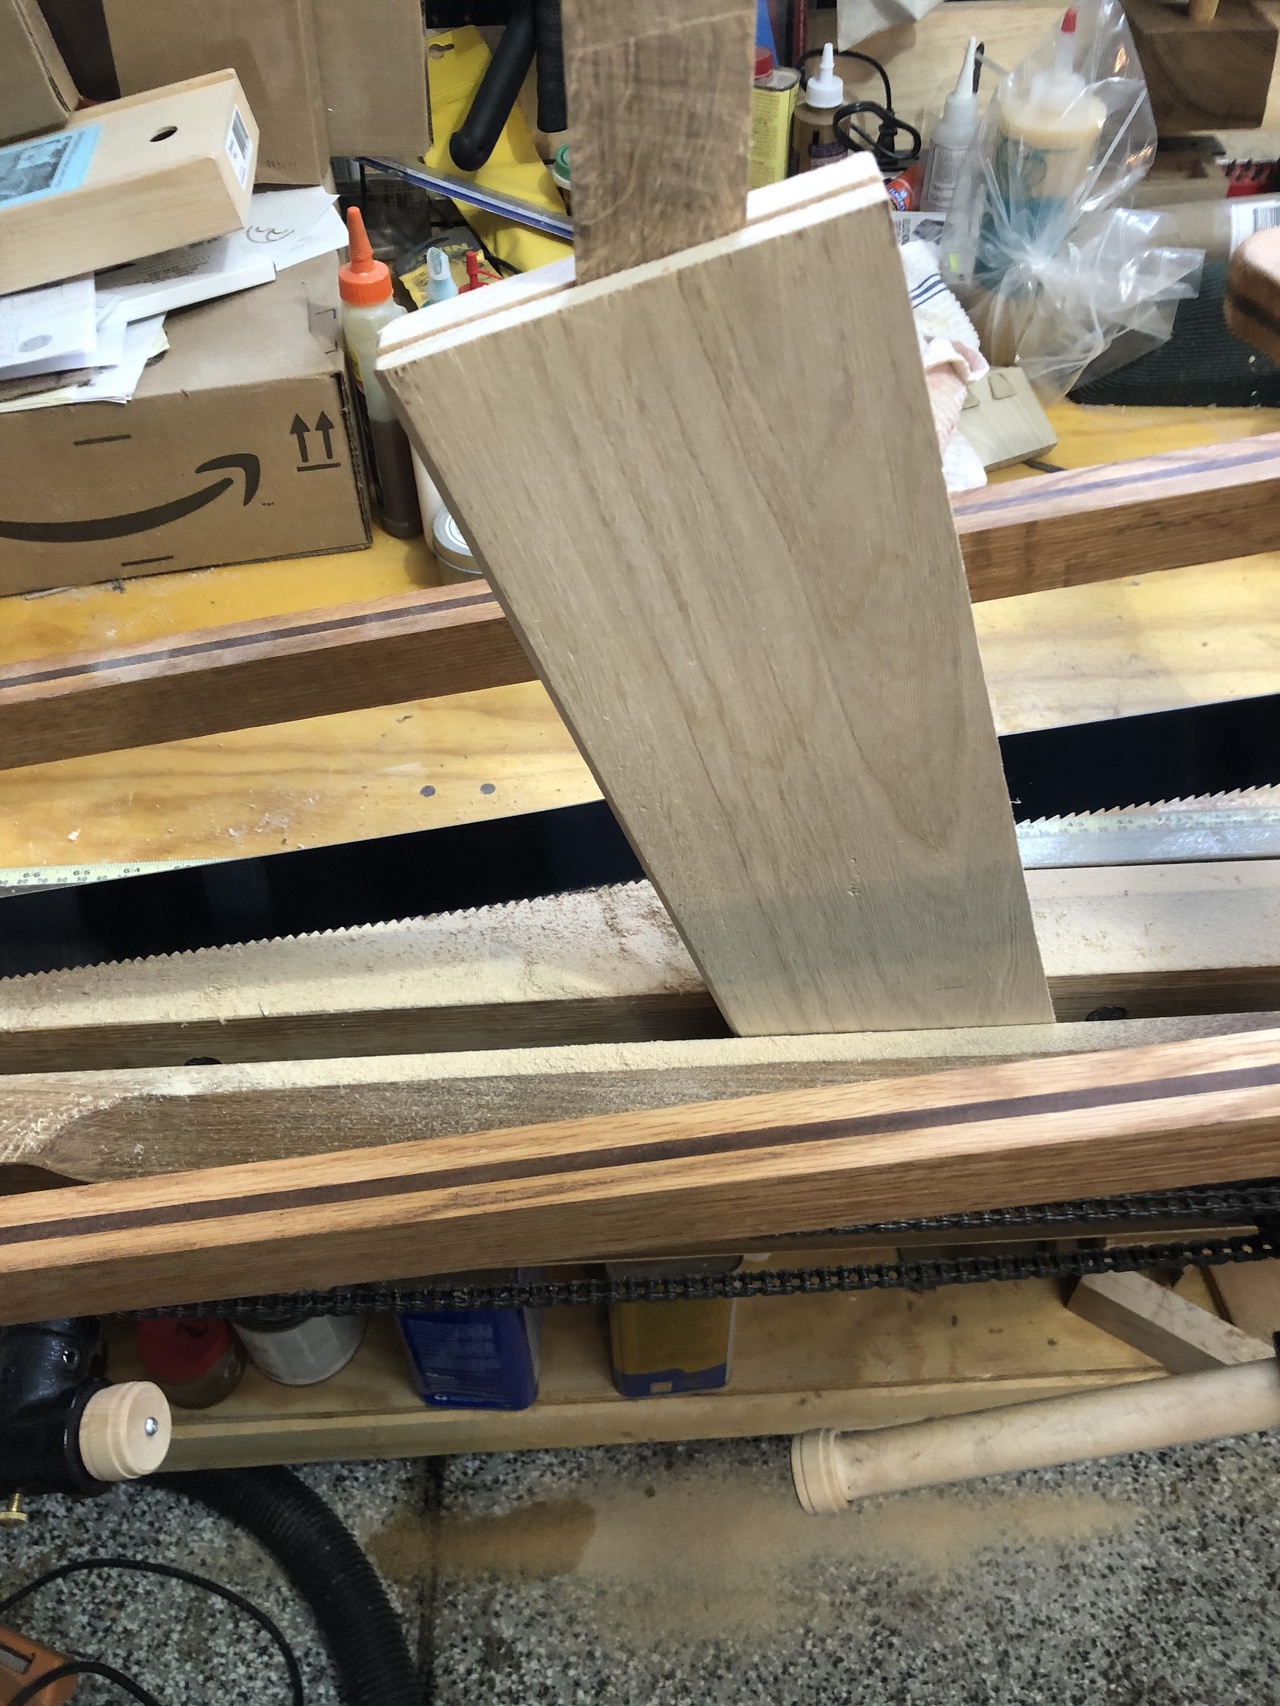
Resawing the ash boards with a big frame saw

Using a wedge to hold the board open while resawing it

Once that was done, I made a template for the corner / feet and printed out a half-dozen copies of it. I would only need four, but I figured a spare or two might prove handy along the way.
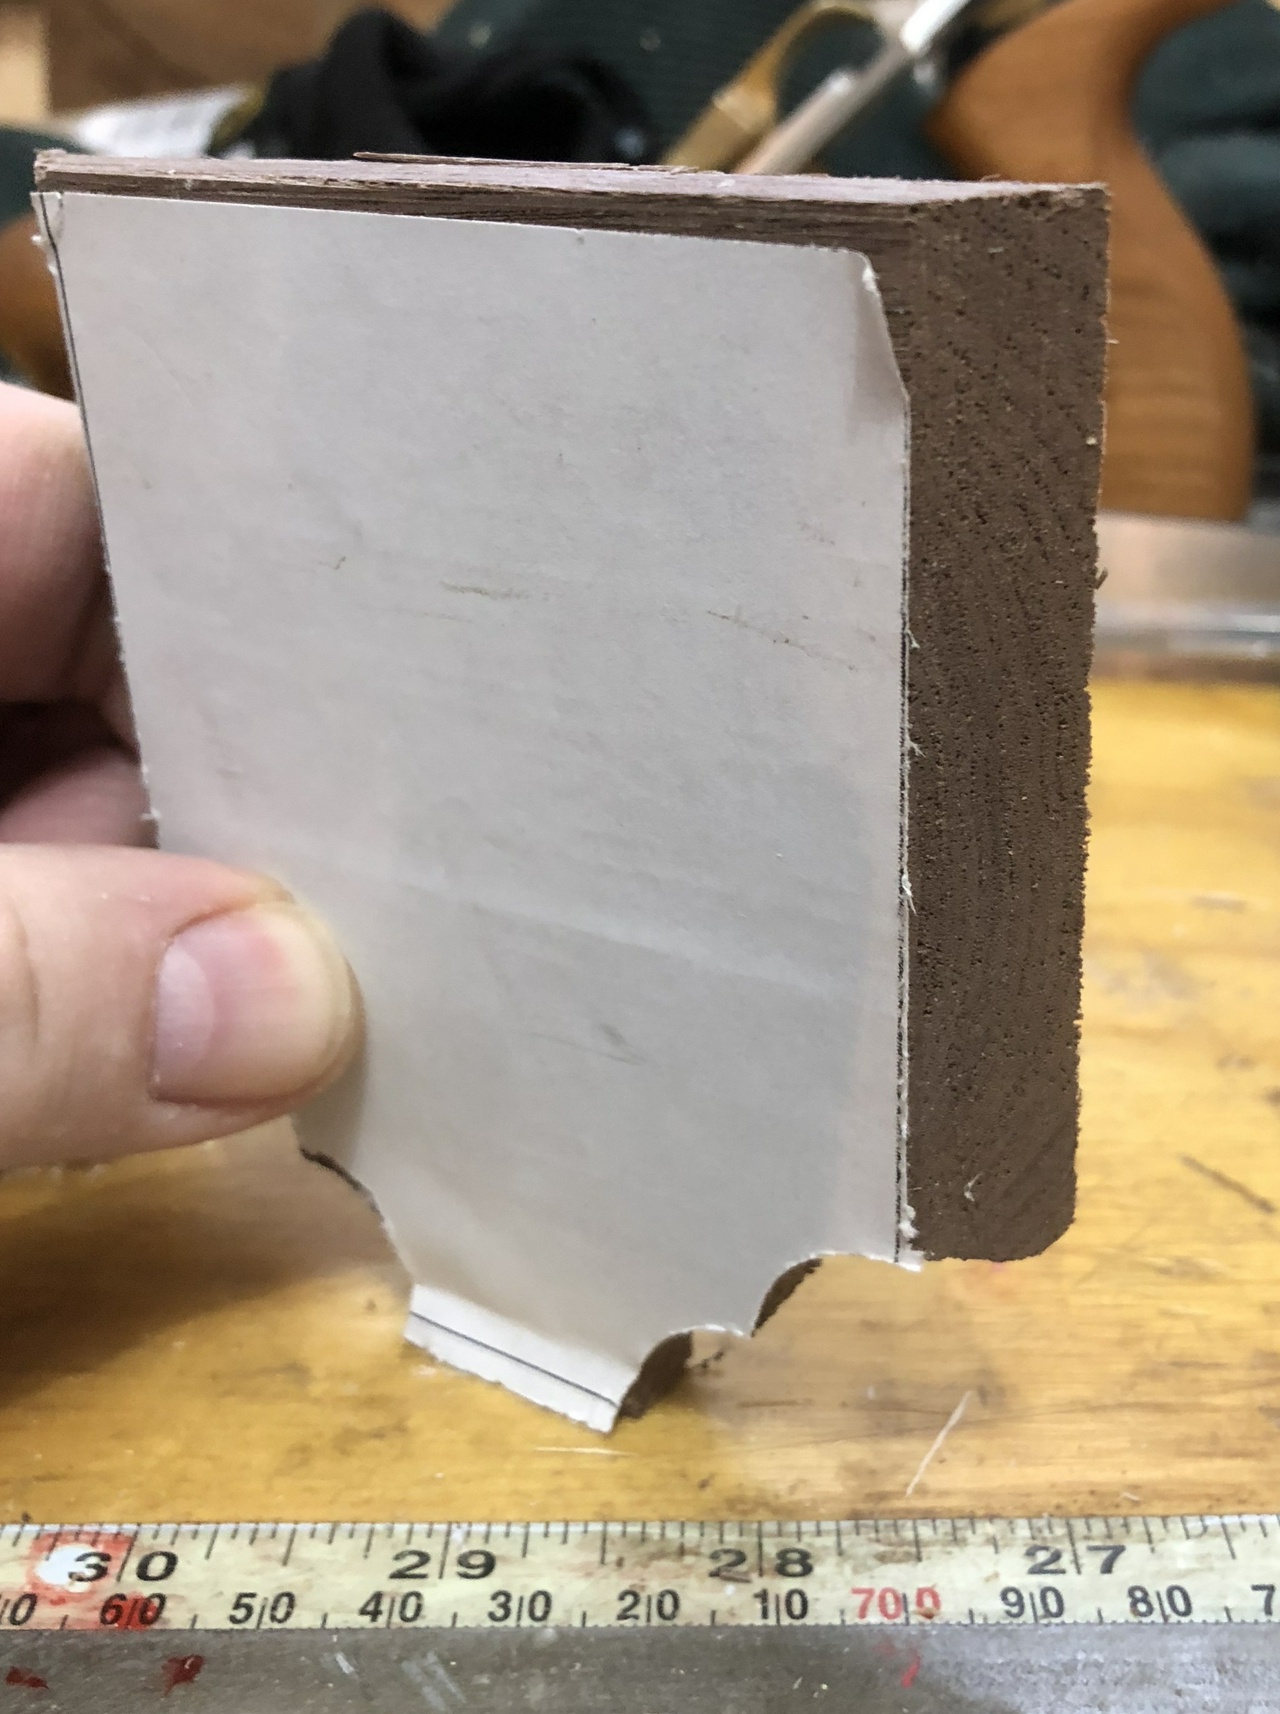
Corner template glued onto a piece of walnut and the wood cut to match

I glued the templates onto the walnut and cut out the corners. Took them to the miter jack to put 45 degree ends on them. Then basing the height of the sides on those templates, I cut the sides, using the usable lengths of ash I had (my resawing wandered a little, as it usually does, so I had about half the length of the boards that was actually usable).
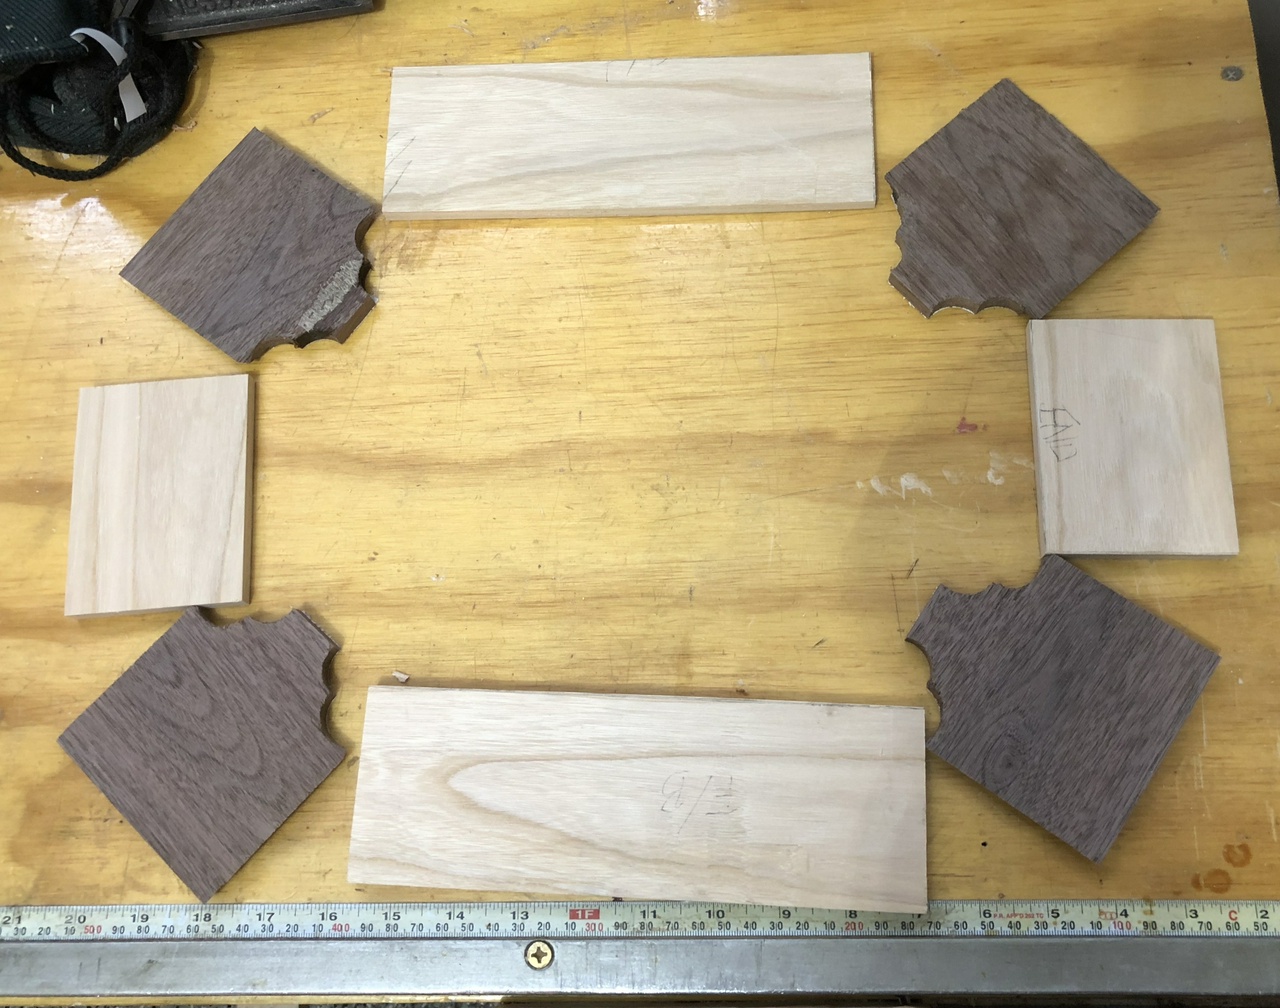
Then I cut the pins in the walnut. Not everything went perfectly, but I figured the worst case was that I'd cut the ends off and try again.
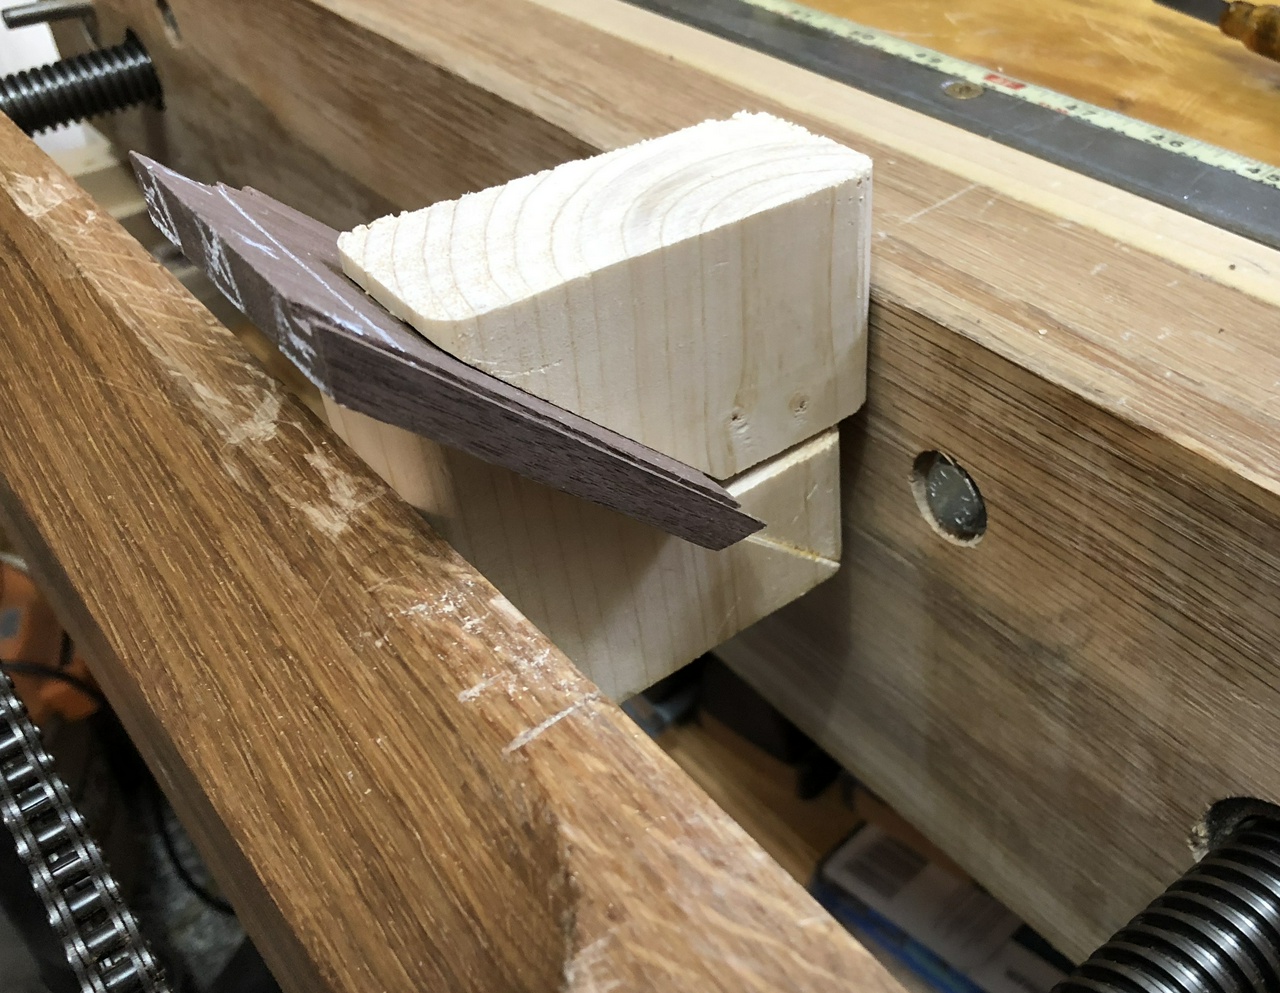
Cutting the pins with the walnut held in the 45 degree jig so I could be sawing level

With all the dovetails cut, I tried my first test-fit. It wasn't great and the dovetails were gappy in spots, but the box felt pretty solid, so I'd done well enough.
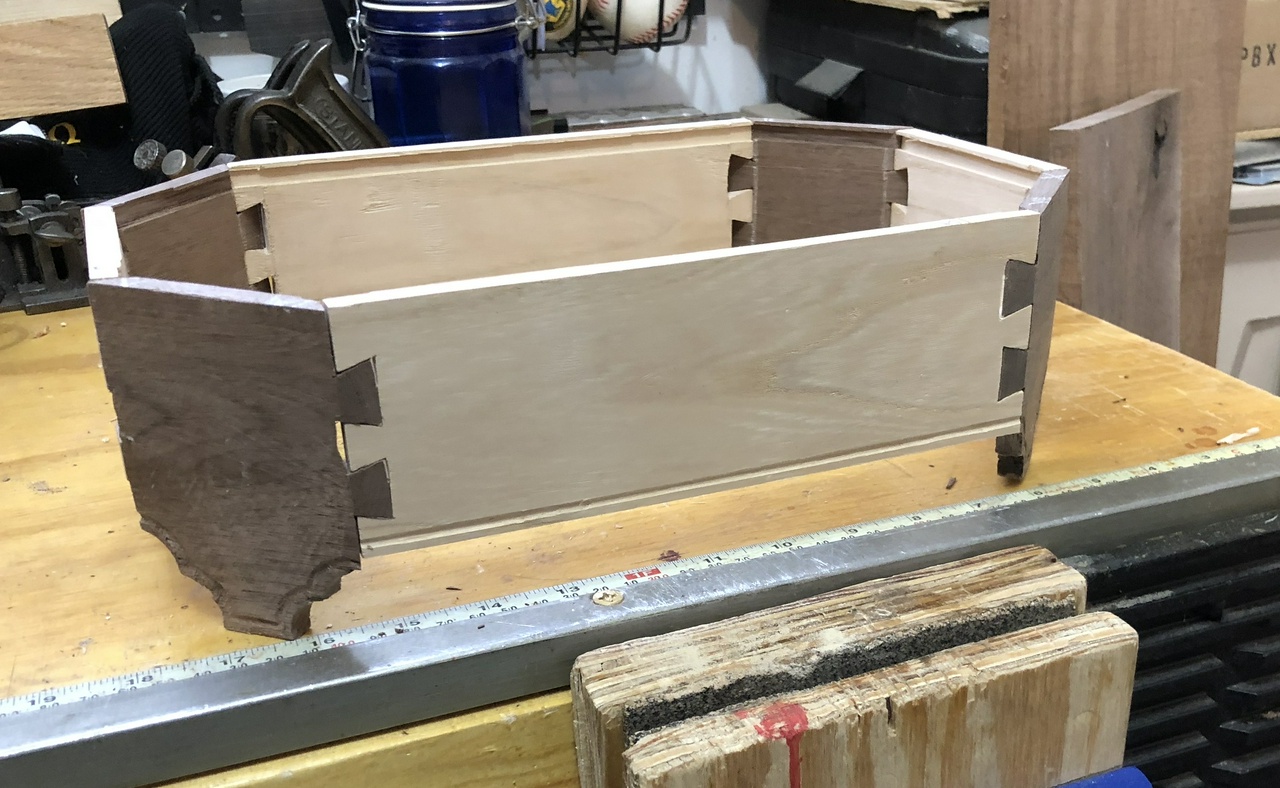
The box test-fit together

Now it was time to get started on the top. I glued up the bocote with some basswood on a piece of ¼” birch plywood. I had originally planned to use some holly around the bocote, but the pieces I had weren't large enough to work with the box-sides I'd cut, so I had to switch to something larger. I lined up the bocote to make the grain pretty to my eyes, then put the basswood around it. I forgot to take a picture of trimming it square and then putting on the end pieces. Oops.
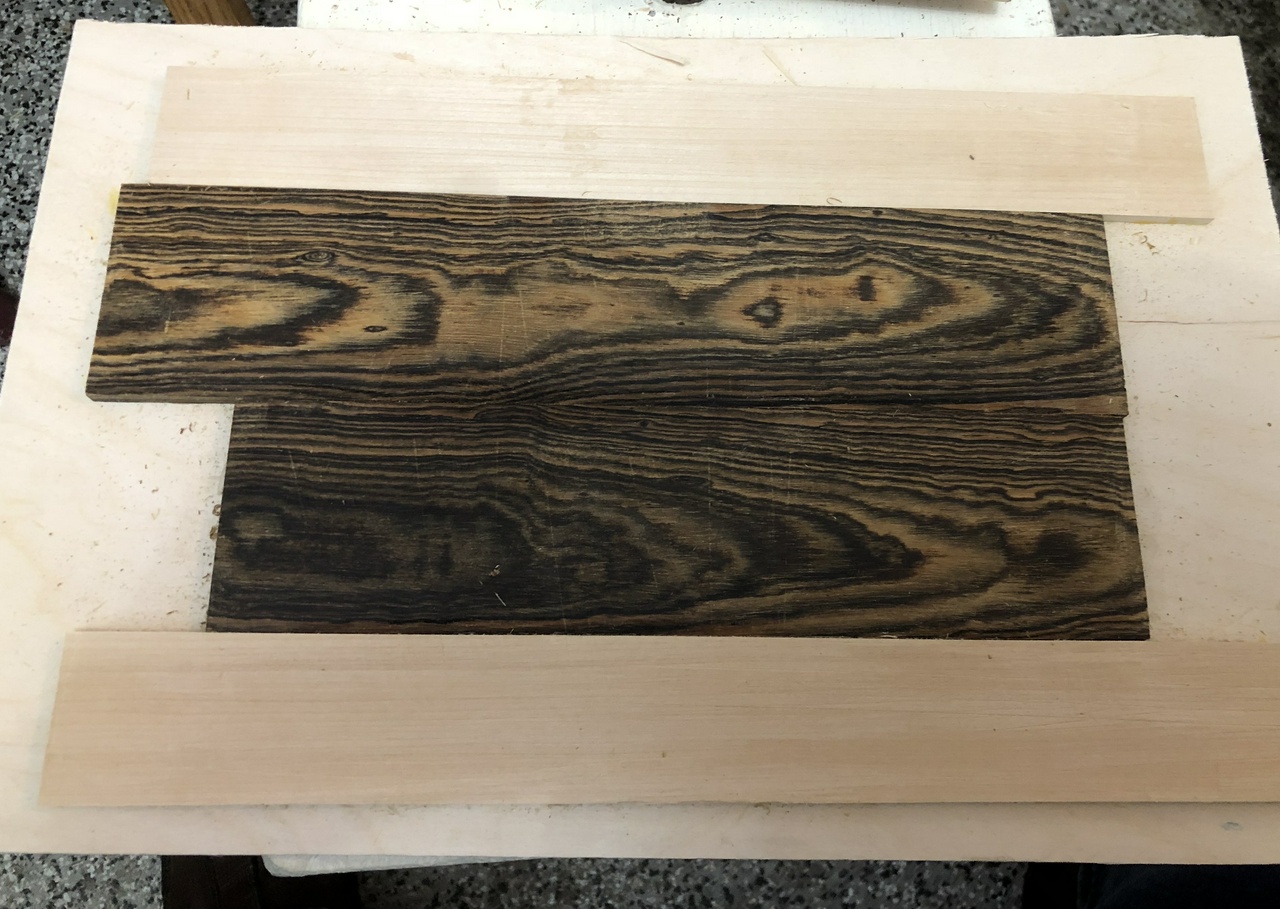
The pieces which will become the lid of the box

Next up was the bottom. I cut the angled cut-outs for the corners with a coping saw, leaving the flats plenty long, then trimmed them to size with the plane. I've found this helps me sneak up on a good fit slowly. I just wish I'd been able to think of a way to do that for the corners too, since they ended up with gaps between them and the corners when I test-fit everything. Oops.

With the top and bottom cut, it was time for the initial assembly.
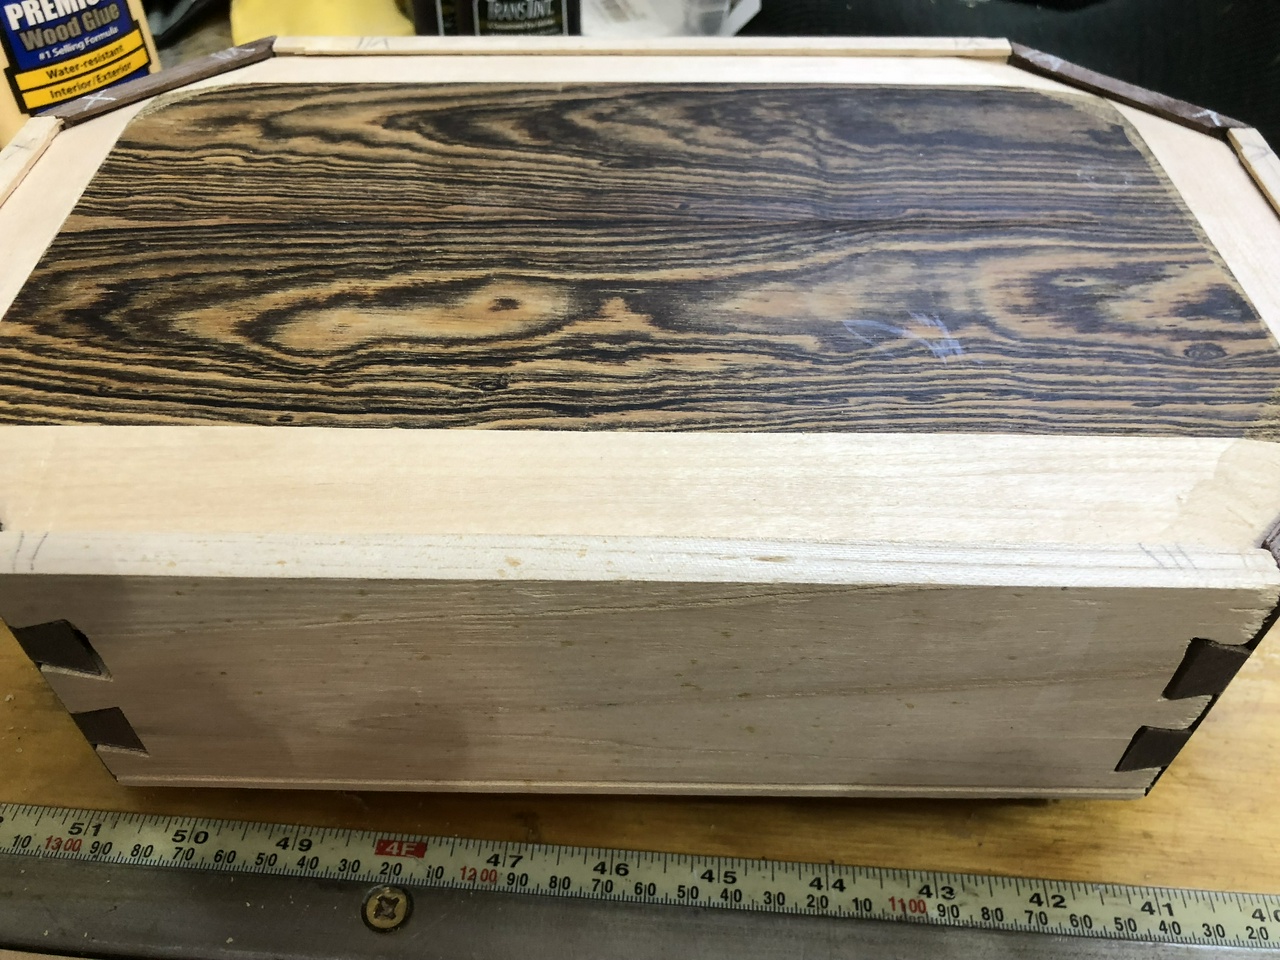
Test-fit of the box with the lid and bottom in

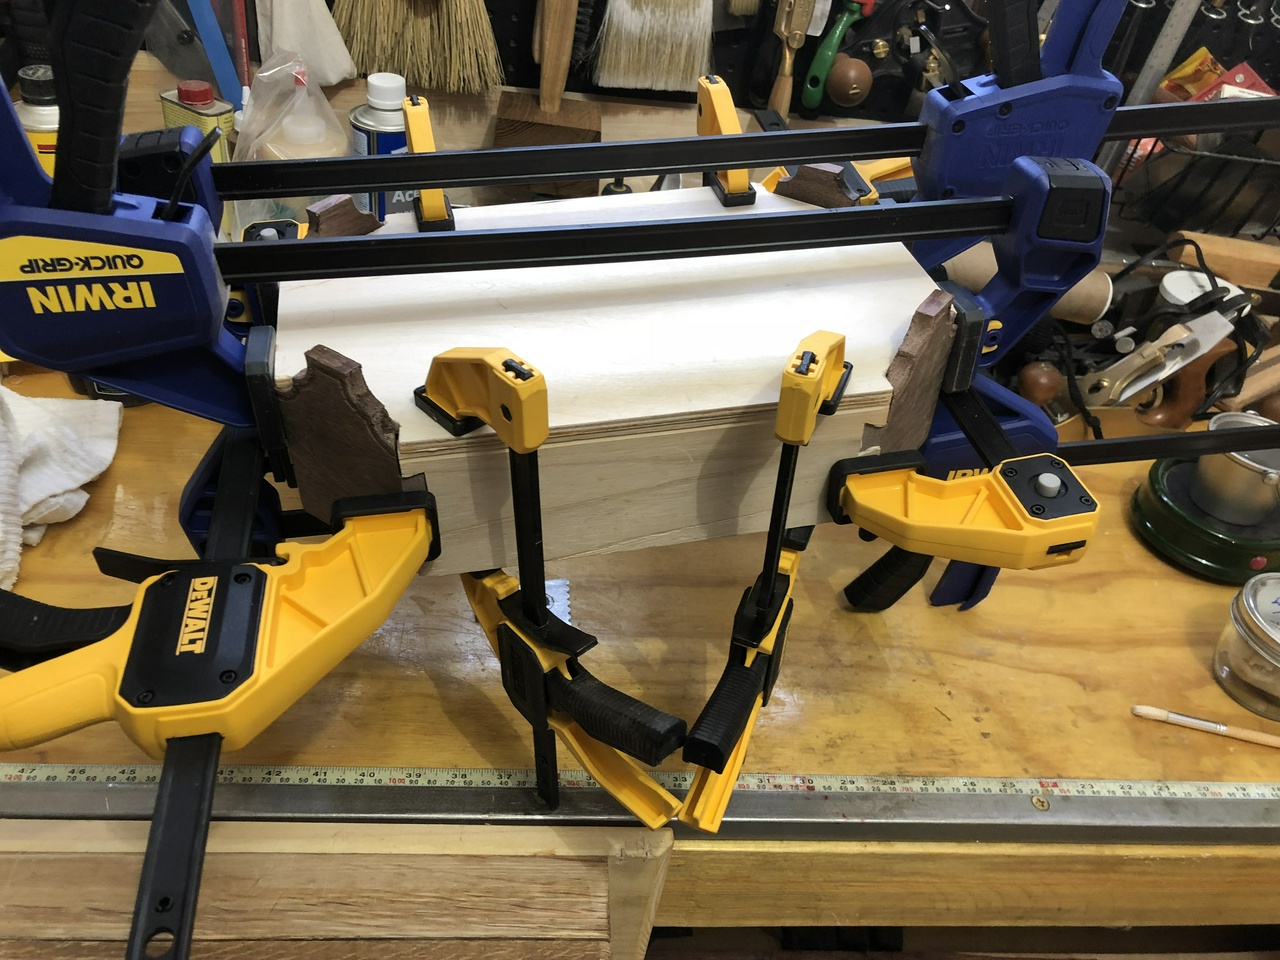
Clamping the bottom onto the box

I glued everything together and crossed my fingers. Since I could see that the top wasn't a great fit, and I'd have the edges of the plywood exposed, I got online at inlaybanding.com and ordered some banding. I figured that could cover the edge of the plywood nicely, and also could dress up the top of the box.

While I waited for the banding to arrive, I planed the top down, essentially freeing the top from the dado (or turning it into a rabbet). But as the top was glued in, it held, and I wanted a level surface to attach the banding to.
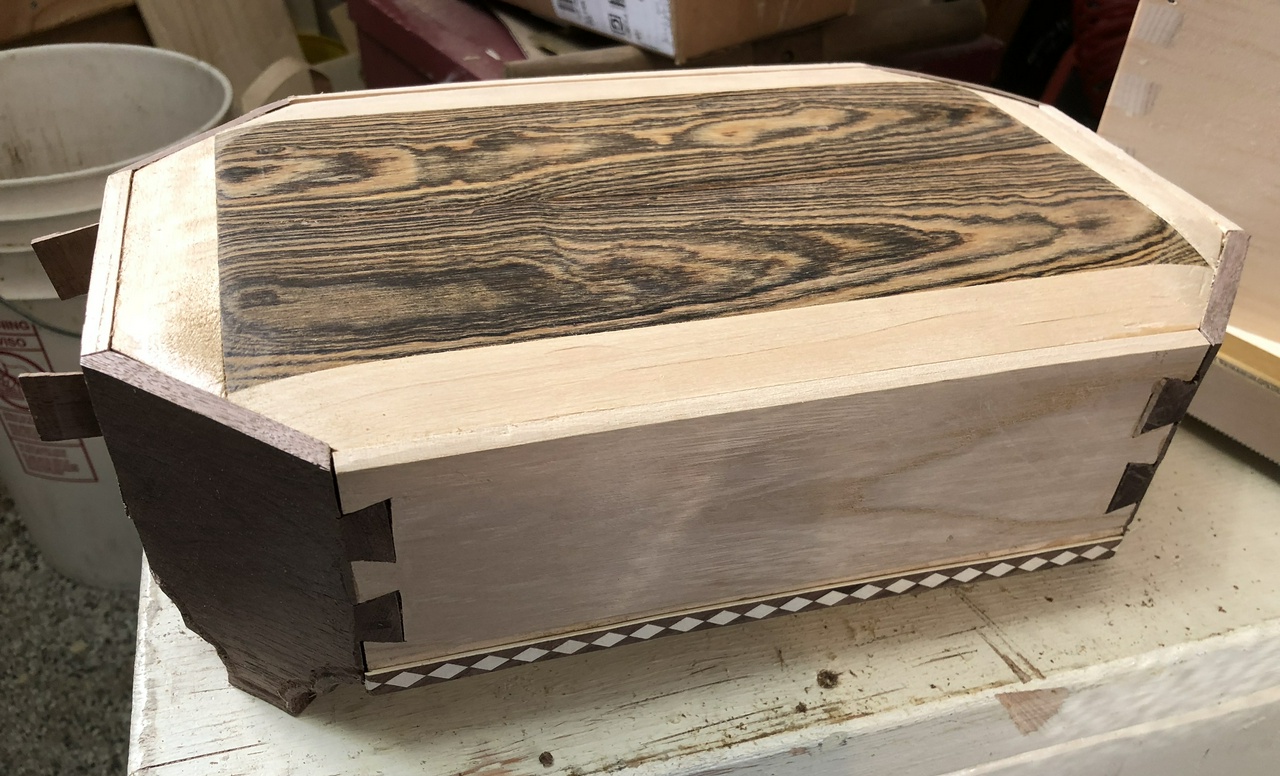
Assembled box with banding covering the plywood edges of the bottom of the box

I glued the banding to the edge of the plywood, but the banding I'd picked was ⅜” so it extended beyond the ¼” plywood and almost covered the groove I had put in the ash sides.

I also realized that I needed a way to cut the miters for the top. I built a guillotine for cutting the banding using some scraps and a utility knife blade.
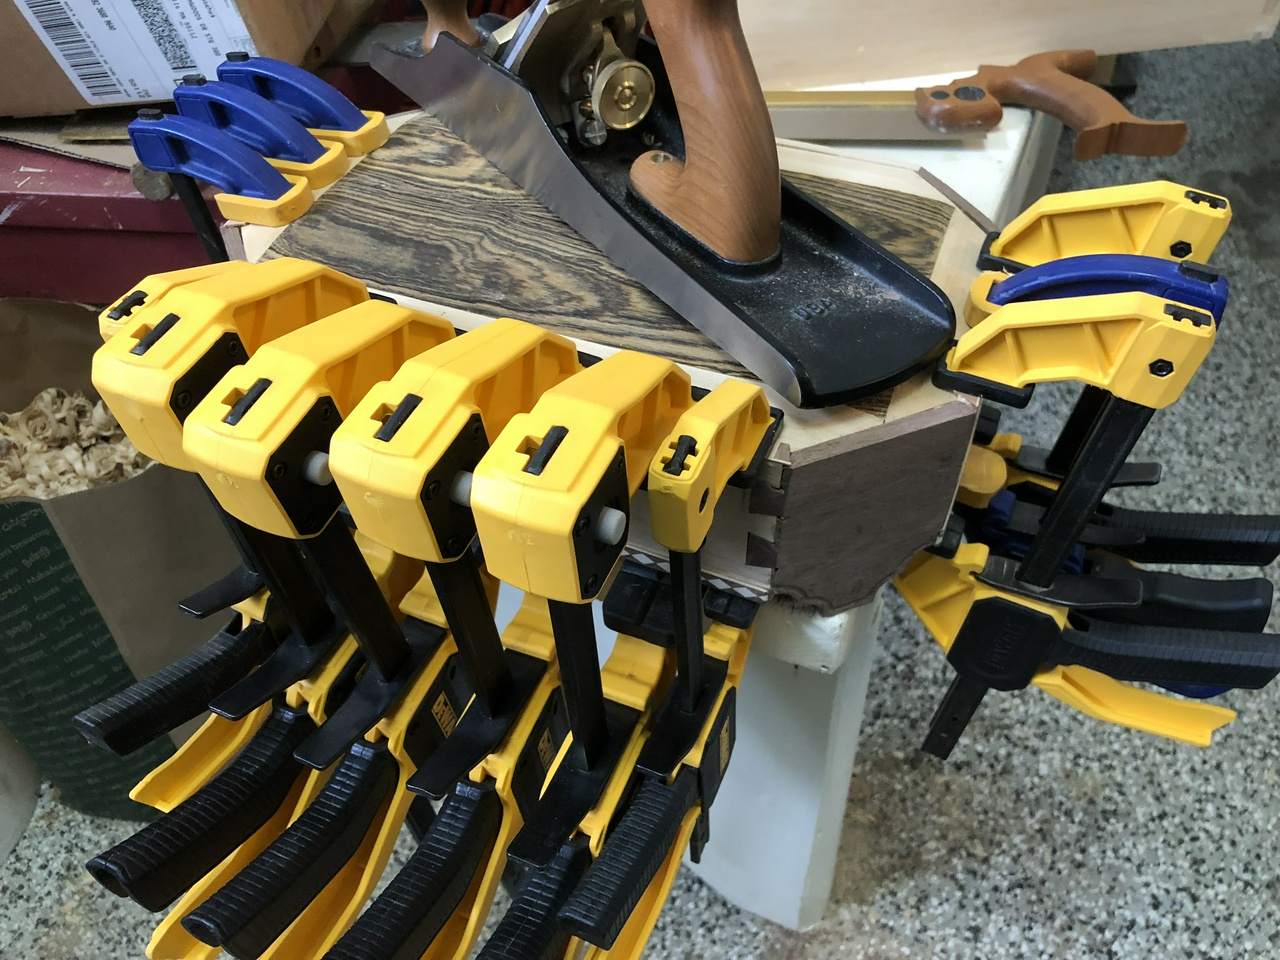
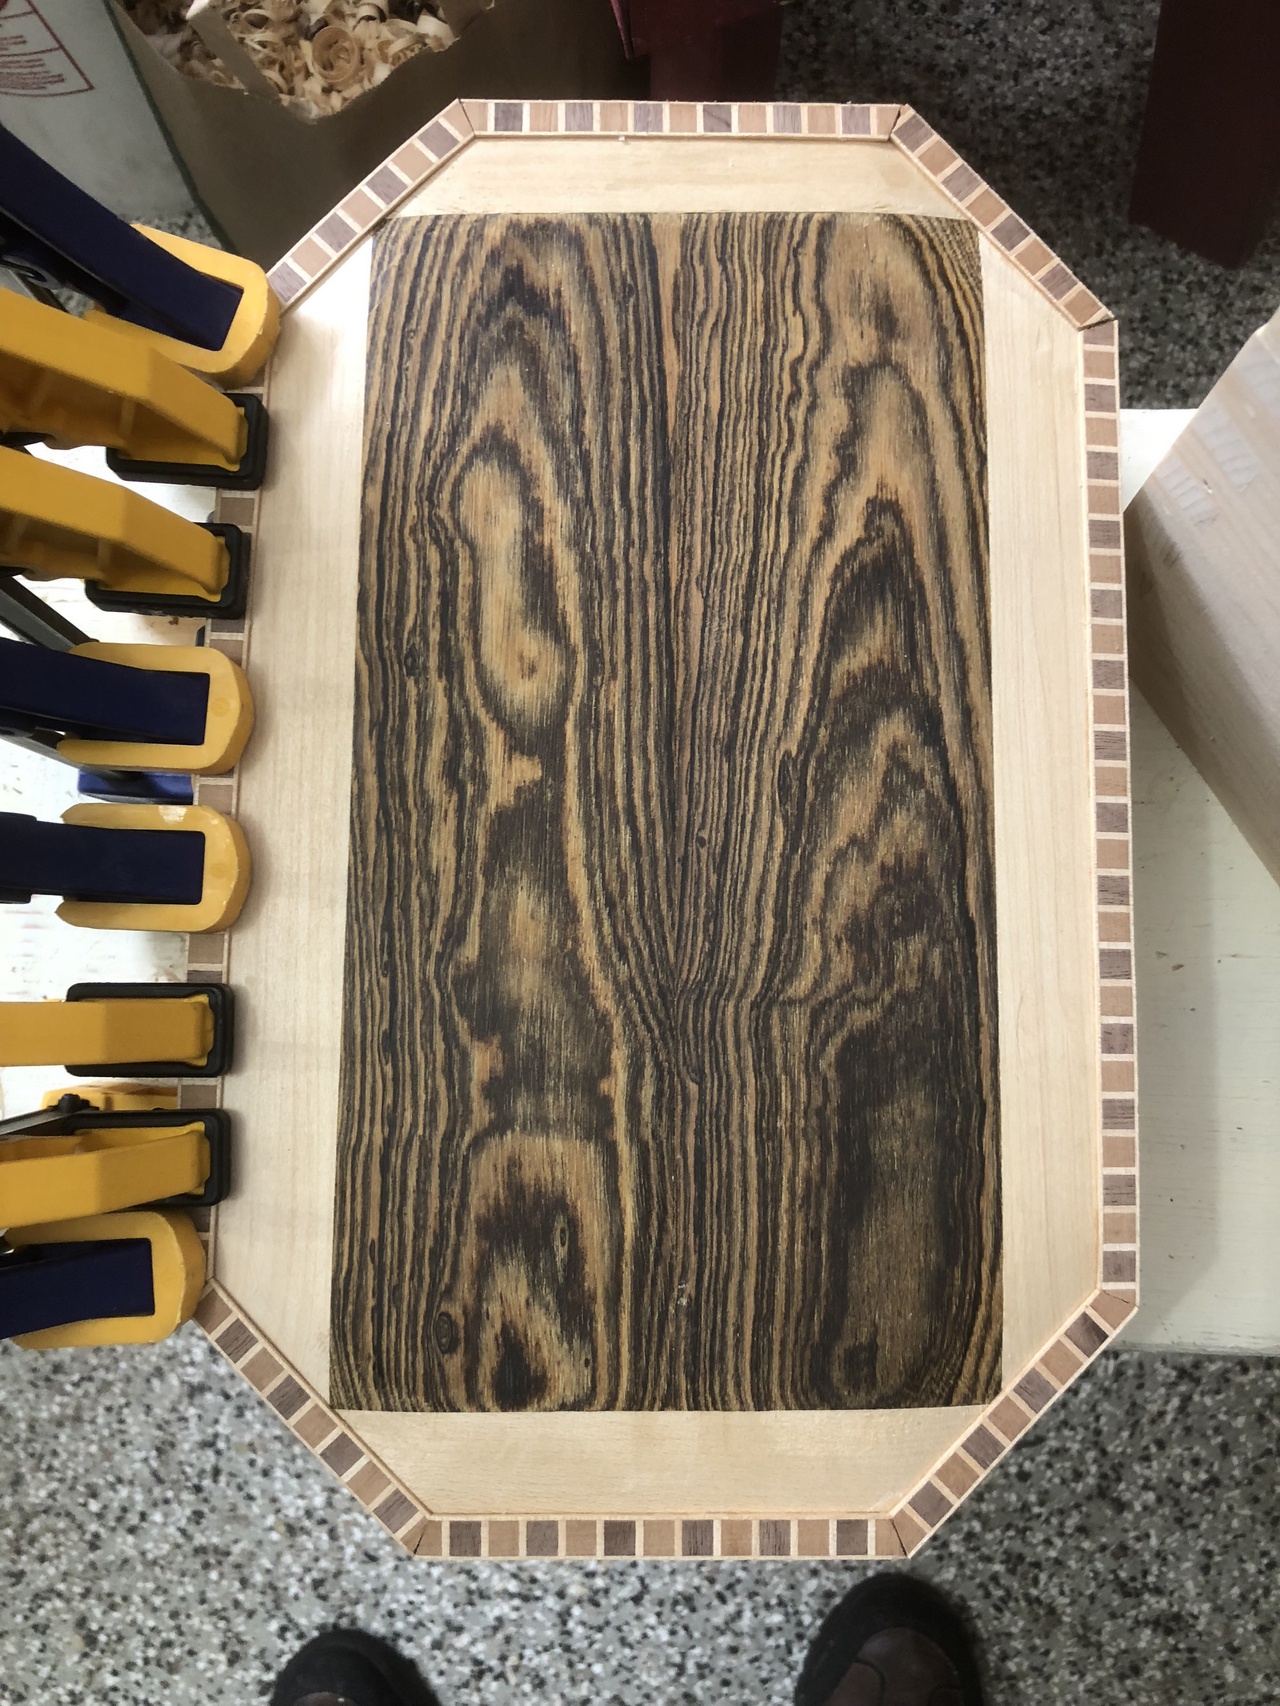
Clamping the banding to the lid to cover gaps

Clamping the last of the banding to the lid, seven of the eight sides are visible

With the banding on, it was time to fill the gaps. I used sawdust (mostly ash) to pack the gaps, and then wet it with CA glue. I've found this a pretty good trick for filling small gaps. I also dripped CA glue into the tiny gaps in the banding and then went over it lightly with a sanding block while the glue was still wet, pushing dust into the gaps. That filled the gaps in the banding reasonably well, too.

I put five coats (two of platina, then three of orange) shellac on the outside of the box at this point. I wanted to get to the final color before cutting open the box, and it was a lot easier to pad on the shellac with the box intact.

Next up was sawing off the lid. I had never done this before, and we were getting close to the end of the swap, so a mistake at this point would have been catastrophic. I carefully applied blue tape to the box where I wanted to cut, and then started sawing. It all went well, but I was sweating up a storm in the 45 degree shop that day.
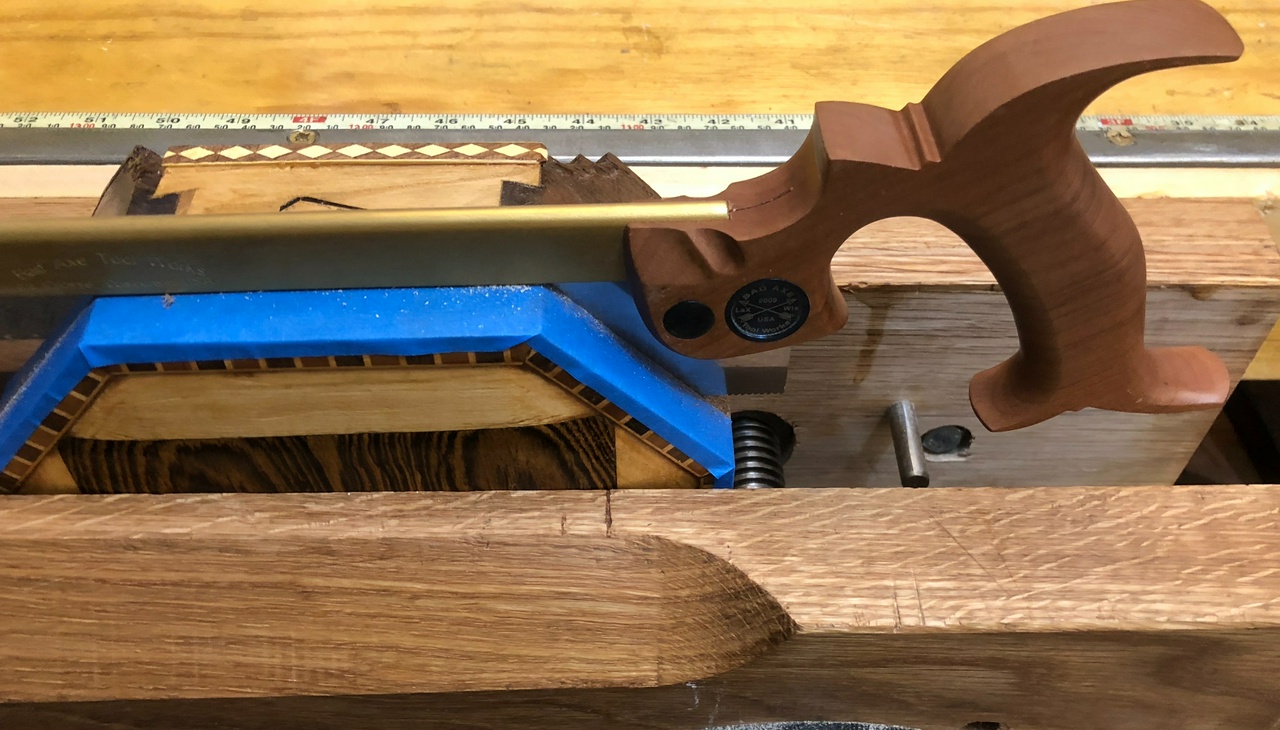
Sawing the lid off the box with a backsaw - blue tape marks the line to saw to

With the lid off, all that was left was applying the hinge and latch, putting a couple coats of shellac on the inside, and then gluing in the felt bottom with contact cement (handy tip: do one half of it first, then once that's in straight, do the second half). I had done it!
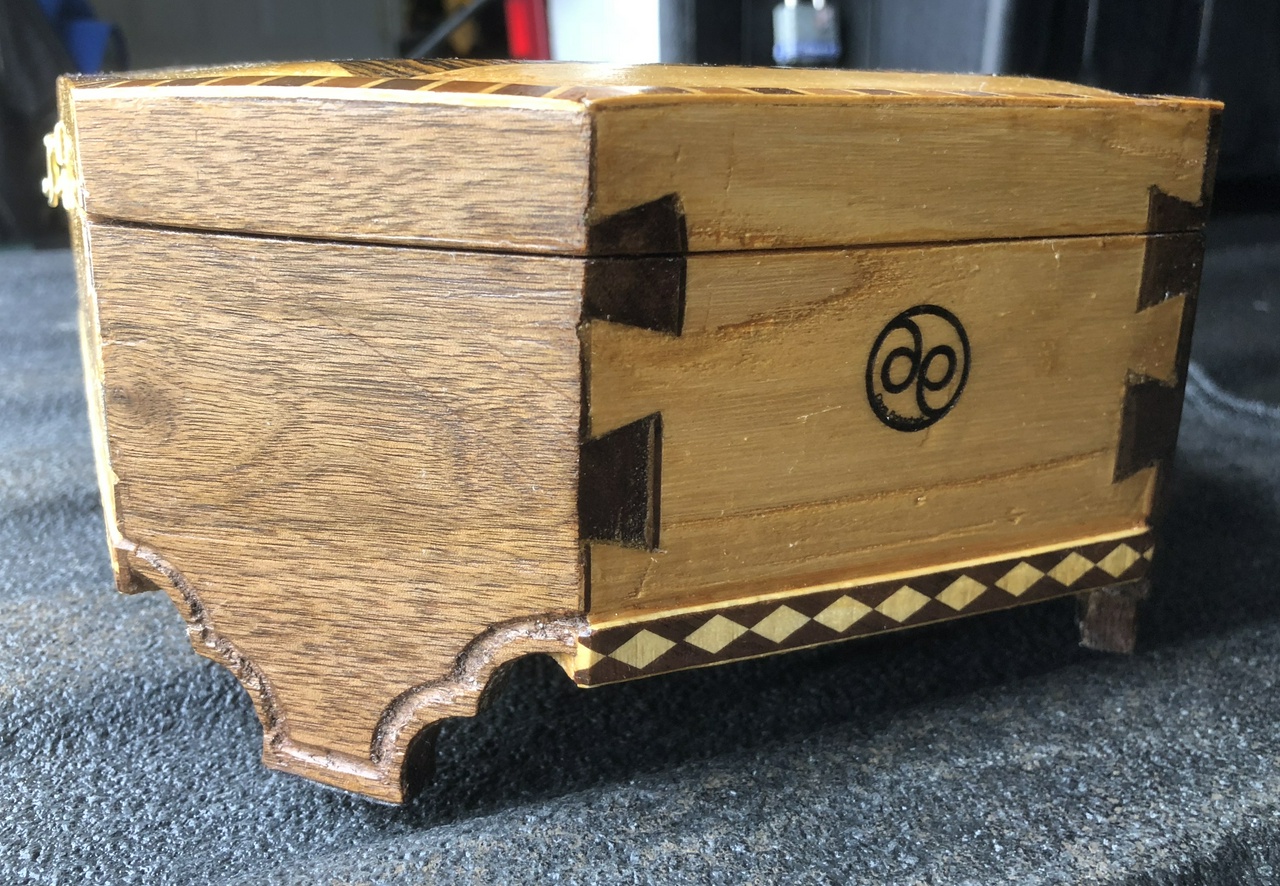
Detail of one end of the box, showing my maker's mark

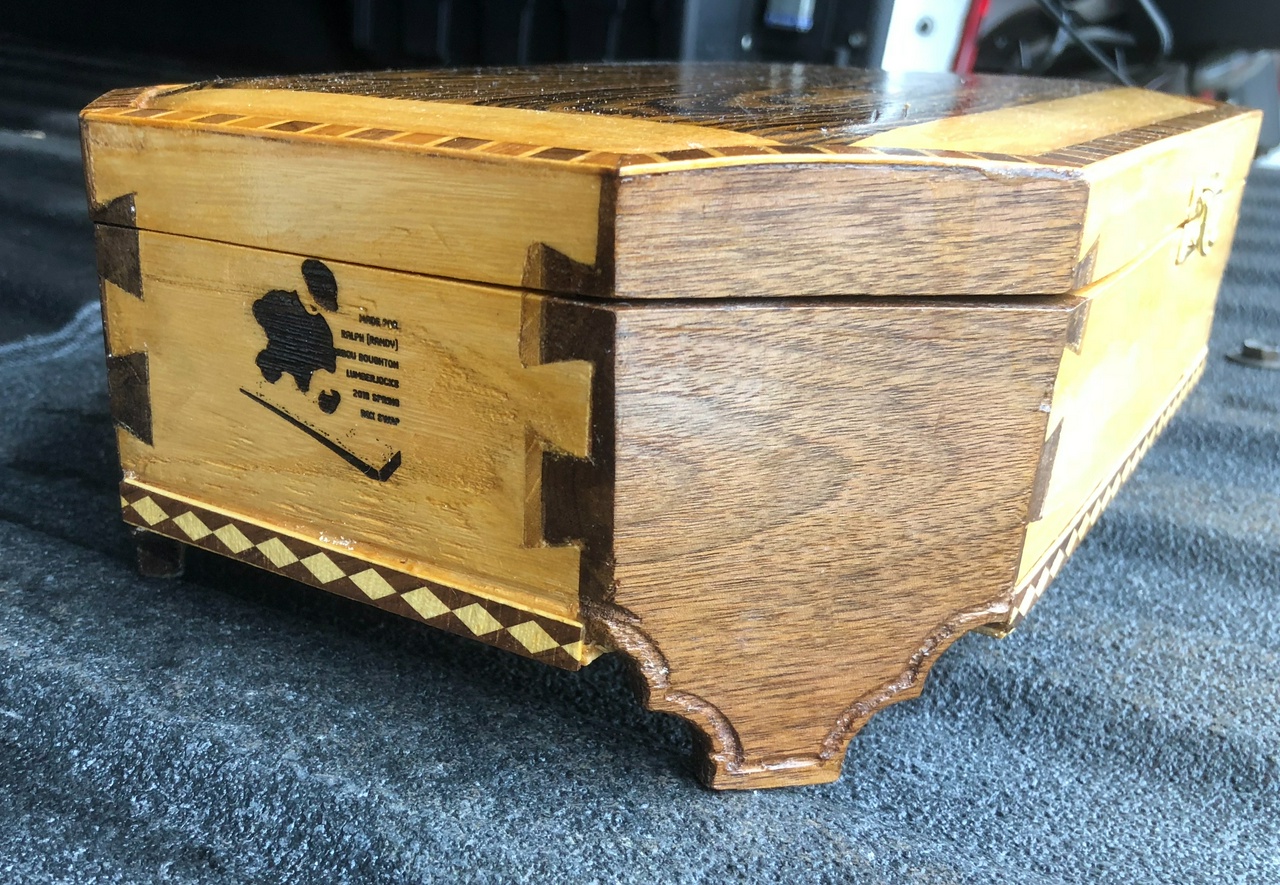
Detail of the other end of the box, showing the dedication

View of the interior of the box, showing the black felt lining the bottom

#project #woodworking

Discuss... Reply to this in the fediverse: @davepolaschek@writing.exchange

Originally written Dec 26, 2017

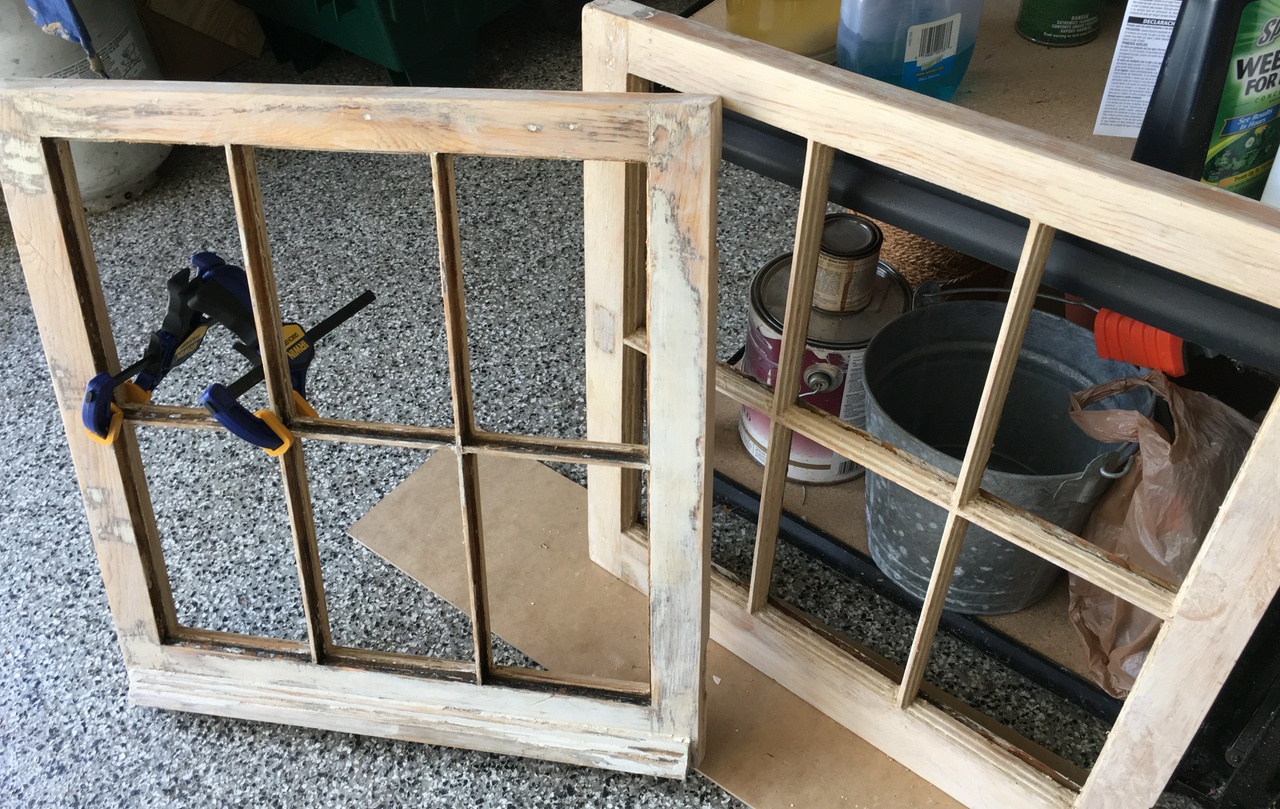
My house in Minneapolis had piano windows (which were apparently a sign of bourgeois striving ) in the dining room which looked out over the back yard. The house had been built in 1929, and had good bones but it wasn't in the best shape when I bought it. When I had the stucco replaced on the house in the summer of 2017, I had the exterior windows on the piano windows replaced as well, and figured I should replace the interior windows. With winter arriving, it was time to get them done. I started by pulling all the hardware from the windows and stripping the many layers of old paint from them.

Windows with the majority of the old paint stripped

They were in pretty rough shape, but I didn't think I had the skills to recreate them from scratch yet. So out came the glass, and I stripped them a few more times to get as much of the paint, plus various patches done by previous owners of the house off.

Completely stripped windows with the glass removed

The windows were rotted in spots, and some of the muntins broke when I pulled the glass, so I glued them back in and cleaned things up with scrapers and knives to get the windows as bare as possible.

Detail of the muntins with most of the old paint, glazing and putty removed

Then it was time to stabilize the rotting wood. My hardware store guy recommended Minwax Wood Hardener. Since he had been glazing and repairing windows for nearly fifty years, I figured I'd listen to him. It took a few applications, but basically you slop on the wood hardener, letting it soak into the rotted wood, and then let it dry. Sand off any excess or rough spots. Repeat until you've got solid wood and hardener composite. I think it took three applications to get them solid enough that I felt comfortable calling it good.

Windows after application of wood hardener

A coat of primer and two coats of paint later, and it was time to take the windows to the hardware store for glazing. Then I needed to strip the dozen or so coats of paint from the hinges and latches. The hinges were cheap plated steel under all the paint and thin brass plating, so I ended up buying new hinges, but the latches were more sturdy construction. I may brown them with Birchwood Casey Plum Brown come warm weather, but for now everything is back together and the windows are keeping the cold at bay.

One completed window

Completed window, swung open so the outside side is visible

Not so much a wood-working project as a restoration, but it was a good learning experience. I had dozens of hours spent with these windows through the year, and there are two more similar windows (but in even rougher shape) left in my house. I might rebuild those from scratch, as I think I'm close to knowing enough to build and assemble all the pieces from scratch now.

Both completed windows

#woodworking #restoration #project

Discuss... Reply to this in the fediverse: @davepolaschek@writing.exchange

Originally written August 20, 2021

I blogged the construction of these over many of the months I spent building them, so if you want excruciating detail on the construction, the previous entries in this series is place to look.

Short version, each shelf is a separate box. Should I ever need to move again, I can fill each box with packing paper, then screw a front onto the box, and it's ready to move. Some of the largest cases will be heavy for one guy to move, but I can pick up every one of them myself if I have to. And should I decide to rearrange them, I can do that without taking all the books out of the cases.

They're built of ¾ pine. Mitered through-dovetails on the corners, with the back rabbetted in, and in most cases made of two boards ship-lapped so they can move with the changing humidity. The backs are glued top and bottom, and nailed on the sides, again so they have an opportunity to move without tearing themselves apart.

I count 70 boxes. Took me over a year, but there were plenty of distractions along the way. When all is going well, I can complete about three or four boxes in a week, including finishing, which is two or three coats of shellac.

The bedroom bookcases - the tallest stack is 9 cases high

The hallway cases, plus a stack behind the door between the bedroom and the hallway

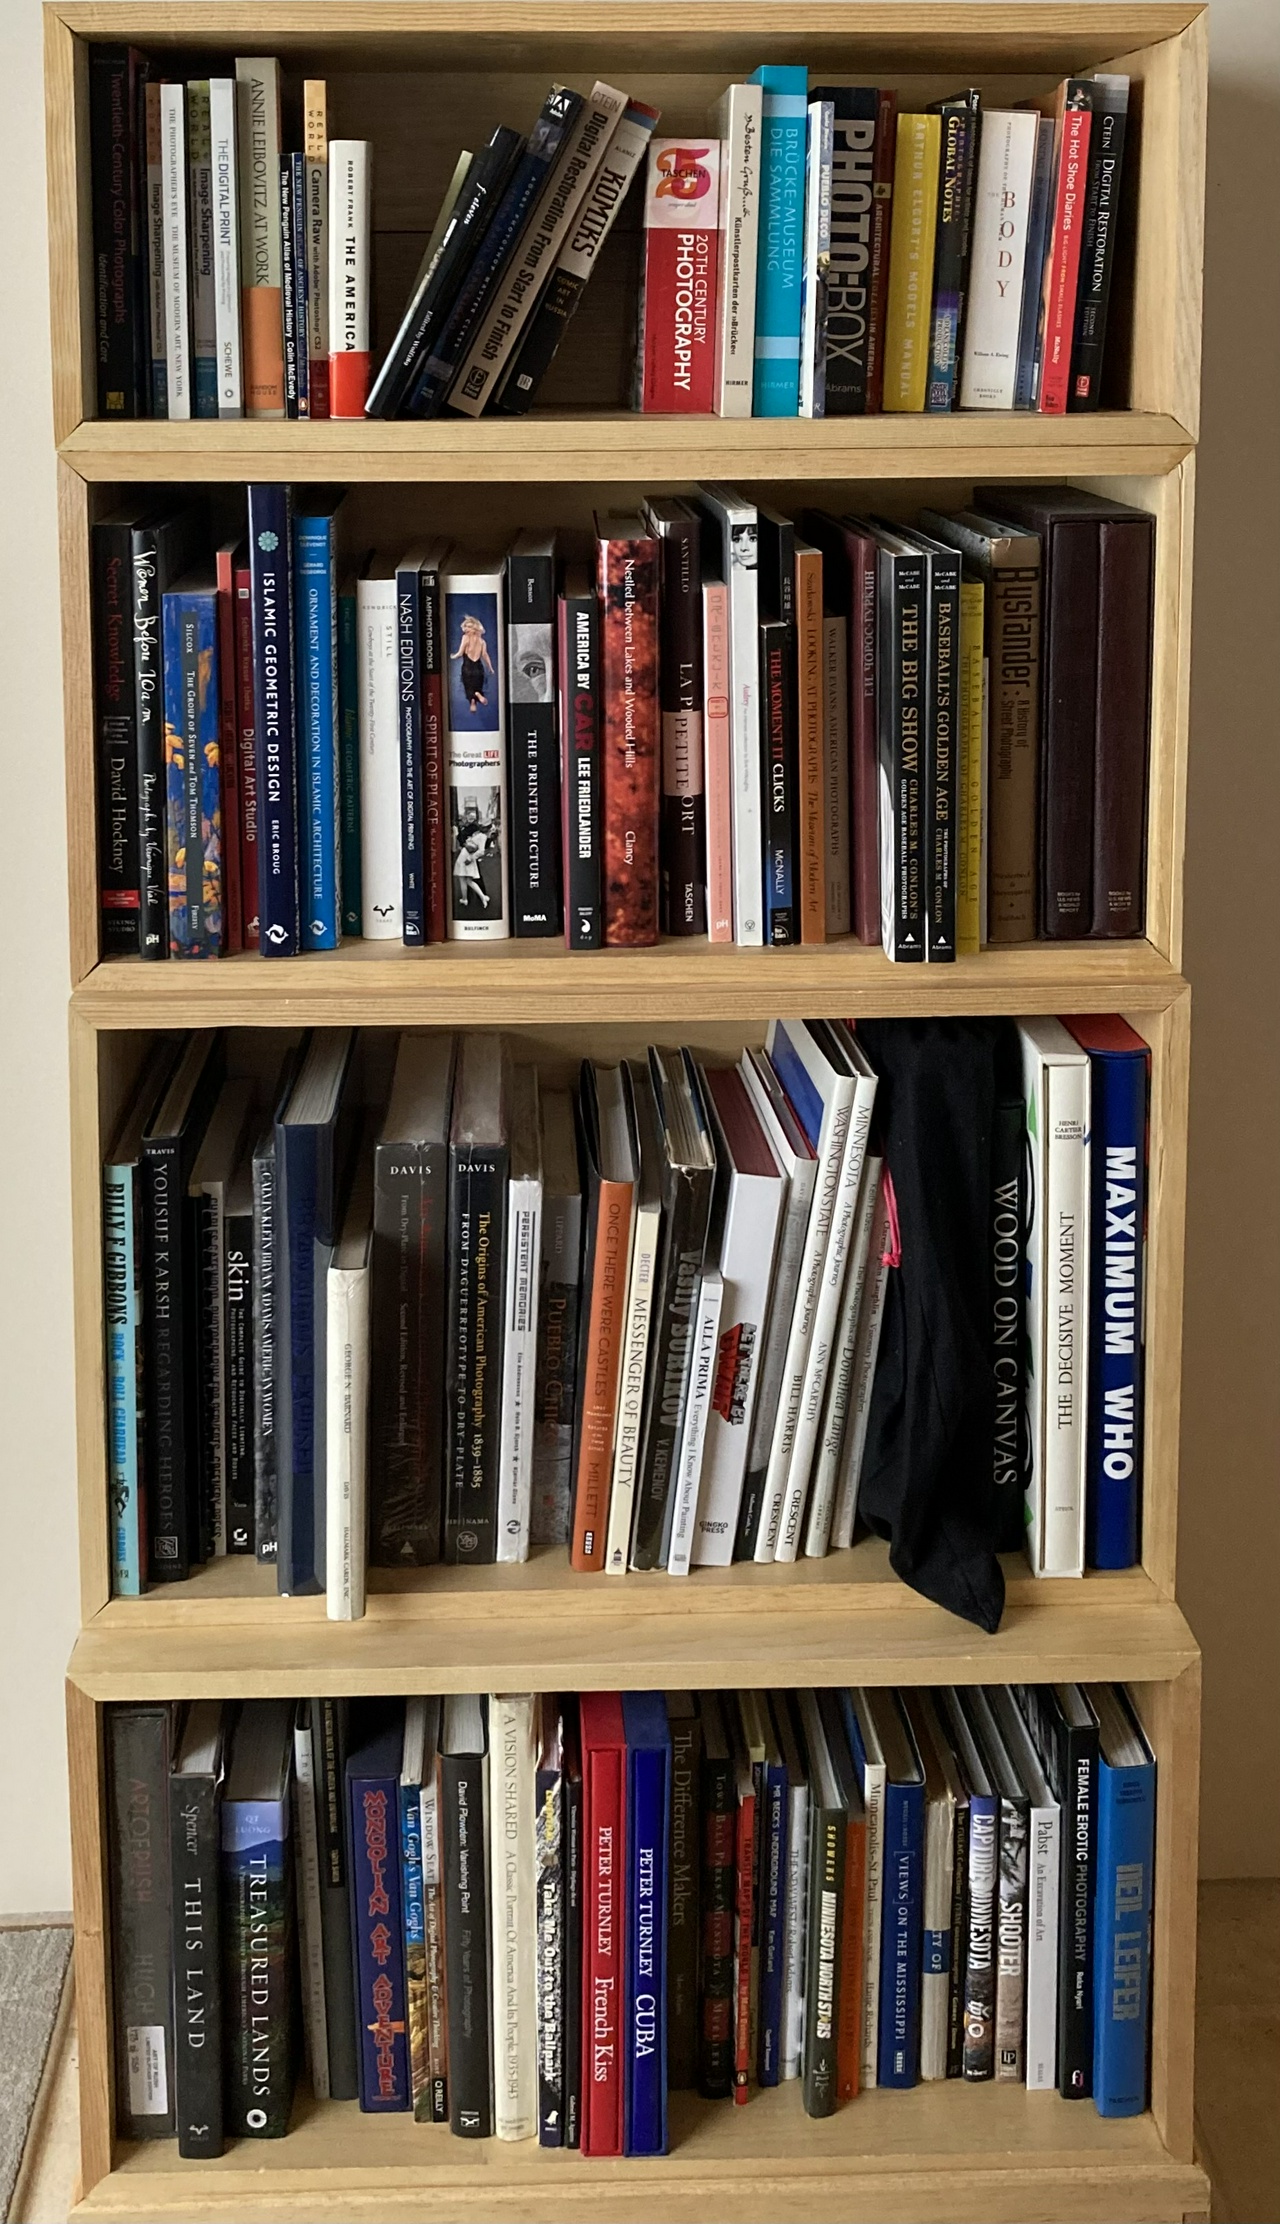
The art-book cases, a single stack of four cases in the living room

Thanks for looking!


Jefferson Bookcases Contents #woodworking #bookcases #project

Discuss... Reply to this in the fediverse: @davepolaschek@writing.exchange

Originally written April 10, 2021

Been a while since my last update. I've been busy building bookcases, turning bowls, and carving birbs. Plus it's yard-work season here in New Mexico, and we've planted eight smaller plants and three trees already this year.

Here's what the stacks of cases look like today.

The cases in the bedroom - seven stacks are visible

The "art" cases in the living room - a single stack of 4 cases

The hallway books, three stacks of three cases each

There's going to be one more stack of cases, and maybe two before I'm done. I have four boxes of books to unpack yet, plus 11 rows of paperbacks, each of which should get its own case. But I may donate some to the library. Or I may leave some on the shelves built into our master closet.

Some things I've learned in the process of building this many cases:

  1. Make sure the opposing boards in a case match in size. A sixteenth of an inch variance doesn't look like much, but it can make for quite a head-scratcher trying to figure out why a guy can't get the case square while the glue is setting up. Check ahead of time!
  2. The depth of the cases (the width of the boards) is much less critical. But it's not very hard to fix either before cutting the dovetails or even after the case is glued up. Planing a little width off a board isn't a big deal. And even if the cases vary in dimension by as much as a quarter inch (6mm), they can be stacked with the fronts aligned, and everything will look ok.
  3. It's a lot easier to inspect boards for checks, knots, etc before starting to cut the dovetails. If there's a flaw on the back of a case, it's not a big deal. If it's on the front, it kinda sticks out.
  4. While a flaw on the back of a board is not a deal breaker, it's even better to cut it or plane it away entirely before starting to cut the dovetails. Because having the cases vary in depth a little isn't a big deal, and because I got the boards long enough from the lumber yard that I have a few inches of waste from every longer board, which makes a top or bottom and a side of a case, I find I can get rid of a lot of knots and dings that would otherwise either take extra work to hide later, or which will give me fits while trying to plane the surfaces of the box flat later.
  5. Similarly, because the backs are rabbeted into the cases, I've cut a 3/8 inch square piece off the edge of every board. That's a great place to put a flaw so I can throw it away. As long as I know it's there before I saw the first dovetail and lock in the orientation of the board.
  6. When planing the sides of the box smooth, remember that a concave top or bottom is fine. A convex one will cause rocking. So when planing from the end towards the middle to clean up the dovetails, make sure to do more passes on the middle of the box than the ends. And make sure to do more passes (even if it's only one or two) on the middle of the board than the front or back.
  7. When building the plinths, have the back legs be a tiny bit shorter than the front, so the stack of cases will tend to lean closer to the wall, rather than toppling into the middle of the room. For stacks three or four cases high, it's not a big deal, but when they're stacked seven or eight cases high, it will definitely be noticeable which way the plinth leans.
  8. If you do have a plinth that's off, put it under a shorter stack of cases. The lean will be a lot less noticeable.
  9. Not all publishers use the same sizes for books. I've had to make at least two cases of each size in a “tall” version, which is an inch taller than all the other cases of the same depth. I've also been able to make a few “short” cases, but they're generally not worth the extra effort.

I think that's it for now. Fifty-seven cases down. Roughly a dozen to go.


Jefferson Bookcases Contents #woodworking #bookcases #progress

Discuss... Reply to this in the fediverse: @davepolaschek@writing.exchange

Originally written January 29, 2021

Been a couple pretty slow weeks on the bookcase front. I've had a few other projects pop up, most notably a sign to go on the dog-poop-bag-dispenser station I'm going to be putting at the corner of our lot once the ground thaws a little more, which has required me to learn how to carve round letters better (because there's lots of curves in “POOP”), and just getting a bit fatigued with building bookcases.

I've started on three new (small) plinths to go in the hallway. They'll hold stacks of four cases of paperbacks each. Between that and another tall stack of paperbacks behind the door, I'm hoping I can get closer to getting all the boxes unpacked.

Plus there's been time reorganizing the books I do have unboxed. The Jefferson cases have made some of this easier, as I've done significant reorganization by moving entire cases of books around, rather than having to take them out of one case and put them into another. The library isn't organized yet, but it's getting closer, and I may actually stand a chance of finding a book when I go looking for one.

I've also lost a couple days to sloth. I spent the days just reading a book in the house, rather than heading out to the shop, and that felt pretty good too. But my new gouges (a 15mm wide #5 and #7 so I have the right radius gouges for carving the Os I need) should arrive in the mail today, so I can make some progress on the sign, and I've cut the lumber for the three plinths to size and cut the dovetails and the curve for one, which I'll glue up this morning. Maybe I can finish gluing up the other two before the mailman gets here with my new tools.

So that's the update. No photos with this update. I'll probably wait until I get the next three stacks of cases built, or at least get a good start on them, before I update again.


Jefferson Bookcases Contents #woodworking #bookcases #progress

Discuss... Reply to this in the fediverse: @davepolaschek@writing.exchange

Originally written Jan 6, 2021

I'm still building cases. I'm down to ten boxes of books remaining to open, but I have thirteen rows of paperbacks waiting for me to build small boxes to hold them. Looks like my library is going to expand into the hallway, with three stacks of four or five paperback cases, and another stack of a bunch of paperbacks living behind the door (behind where this picture was taken from). The current panorama shows 47 completed cases.

Panorama showing 47 cases in eight stacks

I've donated four boxes of books to the library, and have another almost ready to go. I suspect they'll be selling most of the books I've donated. Or passing them on to prisoners who can't use the prison libraries because they're closed due to COVID. Regardless, better that someone gets to read them.

I picked up the fourth load of pine just after Christmas. I'm pretty sure this will be enough to finish the job, but I said that after the third load, too.

Oh well. Back to cutting dovetails…

Totals so far: * Number of pencils sharpened down to less than 2 inches: 5½ * Number of dovetail saws resharpened by RMSW: 3 * Number of pounds of shellac used: 4.5 * Number of gallons of alcohol used: 3

A pencil, sharpened to less than 2 inches


Jefferson Bookcases Contents #woodworking #bookcases #progress

Discuss... Reply to this in the fediverse: @davepolaschek@writing.exchange

Originally written Dec 8, 2020

As I was building another book case today, I thought about some of the little things I do that make the process easier. These aren't all things I've been doing all along, and while there's nothing surprising here, it took me a while to incorporate these into my process. Maybe this will help someone else.

Square up the stock, making sure opposite sides of the case are the same size.

Two boards held in a face-vise

Since I tend to cut the lumber to size in batches, all of the pieces are pretty close in size. There's less than 1/16 inch difference in length, usually. But straight from the lumber yard, there are some boards that are a little wider than others. I've had two pieces that differed in width by 1/8 inch, which will cause issues. So I generally take a couple minutes before starting on a new case to make sure that the two opposite sides are the same size. If not, I'll throw them in the vise and plane them to the same width.

Lay things out from the front of the case.

I always make sure the side boards and top and bottom boards are aligned on the side that will be the front of the case. If there's a mismatch, I generally plane the boards even after the case is glued up, but it's a lot easier to do that on the back of the case. The fronts are generally aligned to within one pass of the block plane, which I like to do anyhow, just to clean up the wood.

Make sure my pencils (and other tools) are sharp before I start

A very short pencil in a pencil sharpener

It's not the end of the world if the pencil isn't sharp, but having to get up and sharpen it throws me out of my rhythm, so I've gotten in the habit of making sure the three pencils I have on my bench are all sharp when I start in the morning. Similarly, if a saw or plane needs sharpening, I'll set it aside and switch to a sharp one before starting for the day. If I have to stop to sharpen tools in the middle of the day, it throws me off a little. Easier to make sure everything is ready to go before I get started. And then when it's time to sharpen, I concentrate on that.

Make templates

The five different templates for cutting dovetails for the various size cases

I figured out the spacing of dovetails once for each size case, and I keep those templates handy. If I make a new size of case, I make a new template, and label it appropriately. It saves me having to figure out the “right” spacing from scratch again.

Have fresh shellac mixed up

Two jars of shellac, one on a magnetic stirrer, and one on the bench top, with other assorted tools scattered around

It takes about an hour to mix up a new batch of shellac using the magnetic stirrer. I find it's a lot easier if I just have two jars of shellac always ready to go. When one gets empty, I'll finish the case I'm working on, and then mix up another batch right away, so I don't have to wait for the shellac to be ready.

Here's a photo of the progress as this was written. I had to switch to panorama mode in order to capture all the cases. There are 37 cases in 8 stacks at this point.

A panorama showing 37 bookcases in eight stacks


Jefferson Bookcases Contents #woodworking #bookcases #tipsTricks #progress

Discuss... Reply to this in the fediverse: @davepolaschek@writing.exchange

Originally written Nov 23, 2020

I made a big case recently, and since that will be at the bottom of a stack of cases of books, I needed to make a special-sized plinth for it. And I have a spot behind the bedroom door where I will build a stack of cases with the largest case being the middle-sized case, so I needed a smaller plinth to hold that.

The nice thing about building other sizes of plinths is that they're all the same width, so the front, back and glue-blocks are all the same, it's just the sides that change to accommodate the different depths of cases.
cut list for the basic plinth, with added notes for the other two sizes

As before, the plinths have the following measurements:

Front and back: 2 – 1×4×31 Internal front brace: 1 – 1×4×29½ Glue blocks (front): 2 – 1×1×2⅝ Glue blocks (rear): 2 – 1×1×3⅜

And the sides for the various sizes of plinths are: Small: 2 – 1×4×8¼ Medium: 2 – 1×4×12 Large: 2 – 1×4×15¼

I used the same template for constructing the curve on the front piece, and the same template for the dovetails. As before, the tops of the pieces got a chamfer equal to 8 passes of my block plane at whatever thickness it was set to before. I'm not sure of the exact measurement, but it looks right.

large, medium, and small plinths

With the dovetails cut and everything glued up, I smoothed the sides with my smoothing plane and hit everything with shellac. A second coat of shellac after a quick pass with the 400 grit sandpaper, and they'll be done and ready to hold more stacks of cases.

small, large and medium plinths, with shellac on them


Jefferson Bookcases Contents #woodworking #bookcases #cutList

Discuss... Reply to this in the fediverse: @davepolaschek@writing.exchange