davepolaschek

bookcases

Originally written Aug 21, 2020

One of the things where I've improved my workflow while building these bookcases is the process of cutting all the rabbets on the boards that make up the backs of the cases.

Each back is made up of two boards, rabbeted into the case, and ship-lapped where they overlap. The rabbets are all ⅜ from the front or back of the board, and the rabbets on the edges that join the case are ⅜ wide. The ship-lap is ¾ wide, because with my 1×8s, that means the outside of the joined boards is about 14 inches, with the inside being 13¼ inches, to fit into an opening that's about 13½ inch, so they fit pretty well. When I start building cases that are smaller, I'll have to adjust things.

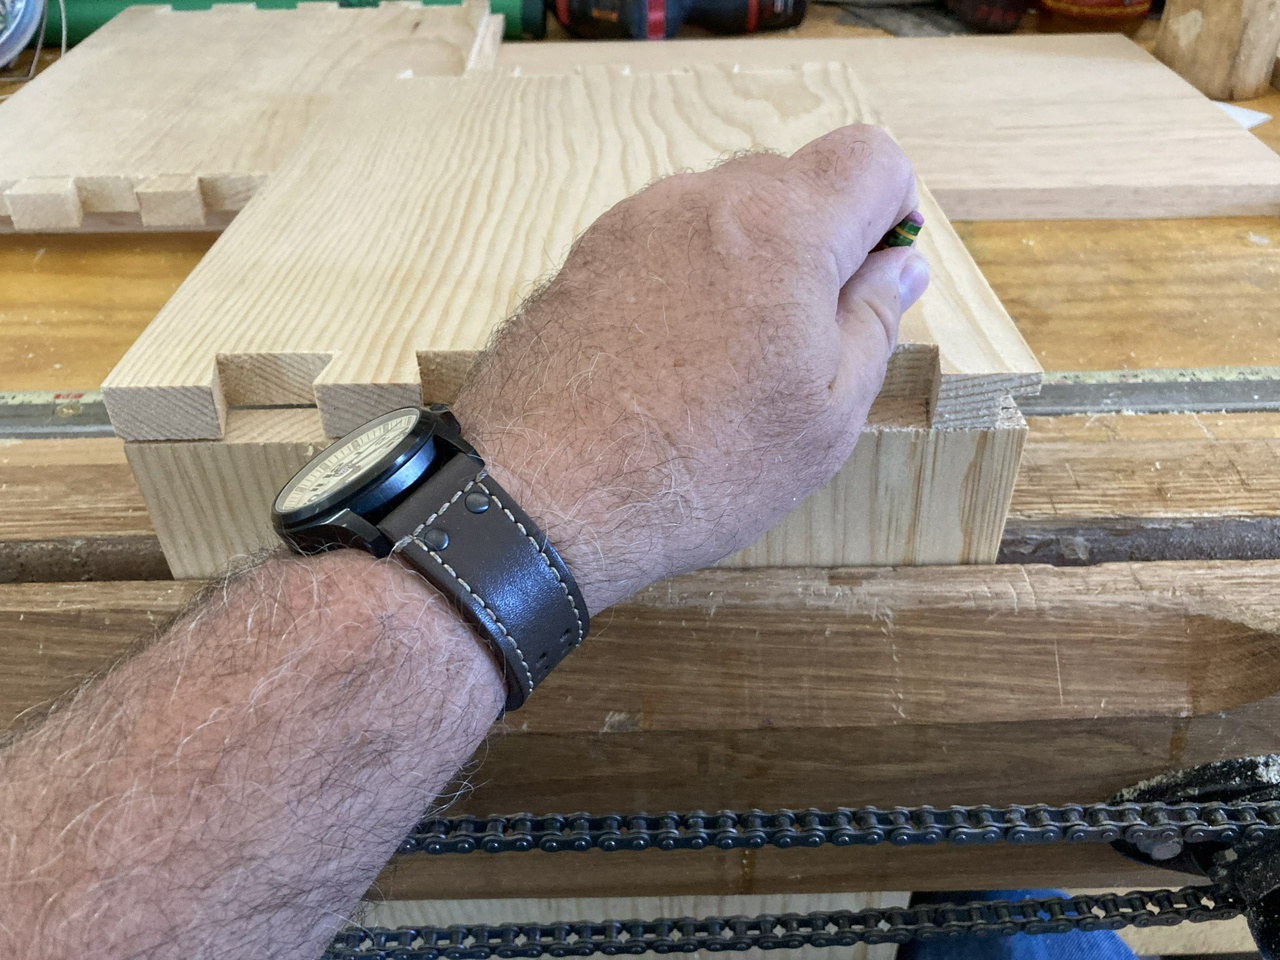
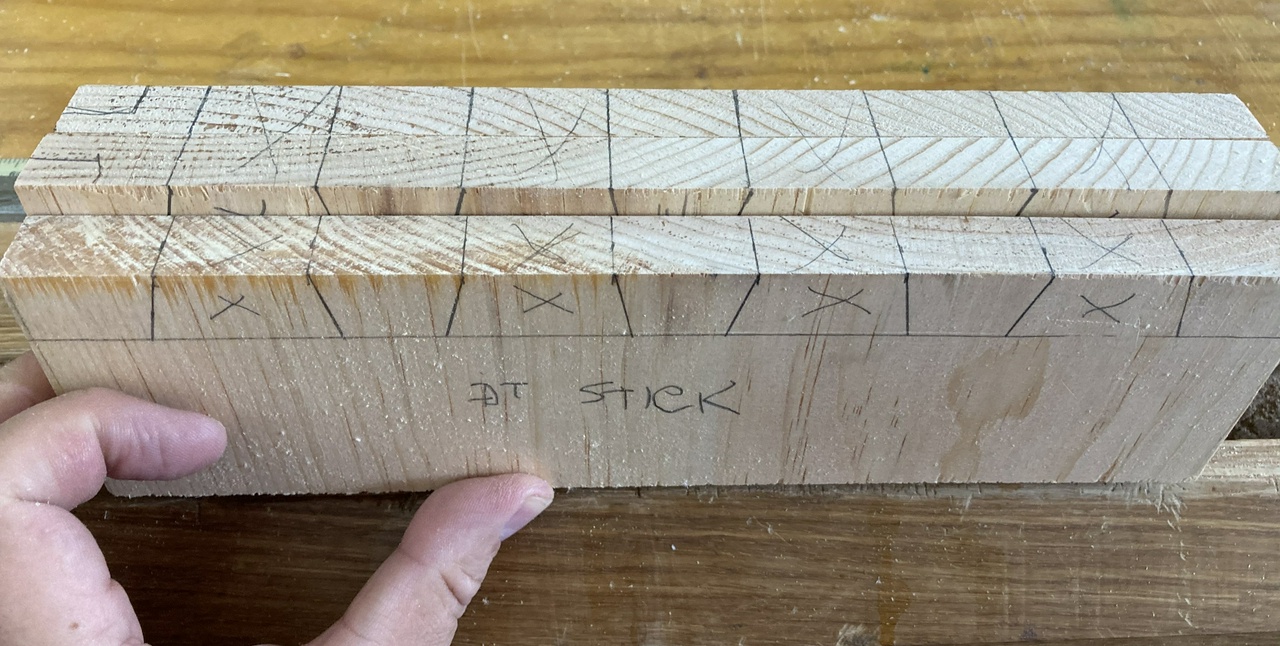
So I start by pairing up the boards. Mostly I'm looking to avoid huge differences in color. Each pair gets the shiplapped rabbets marked first. I'm using my ⅜ inch kerfing plane and my ¾ inch kerfing plane to do the marking. Originally I was cutting the rabbets with them, but a 30 inch long rabbet, ¾×⅜ inch deep is a lot of work.

Small sawn marks down the middle of two 3/4 inch wide boards

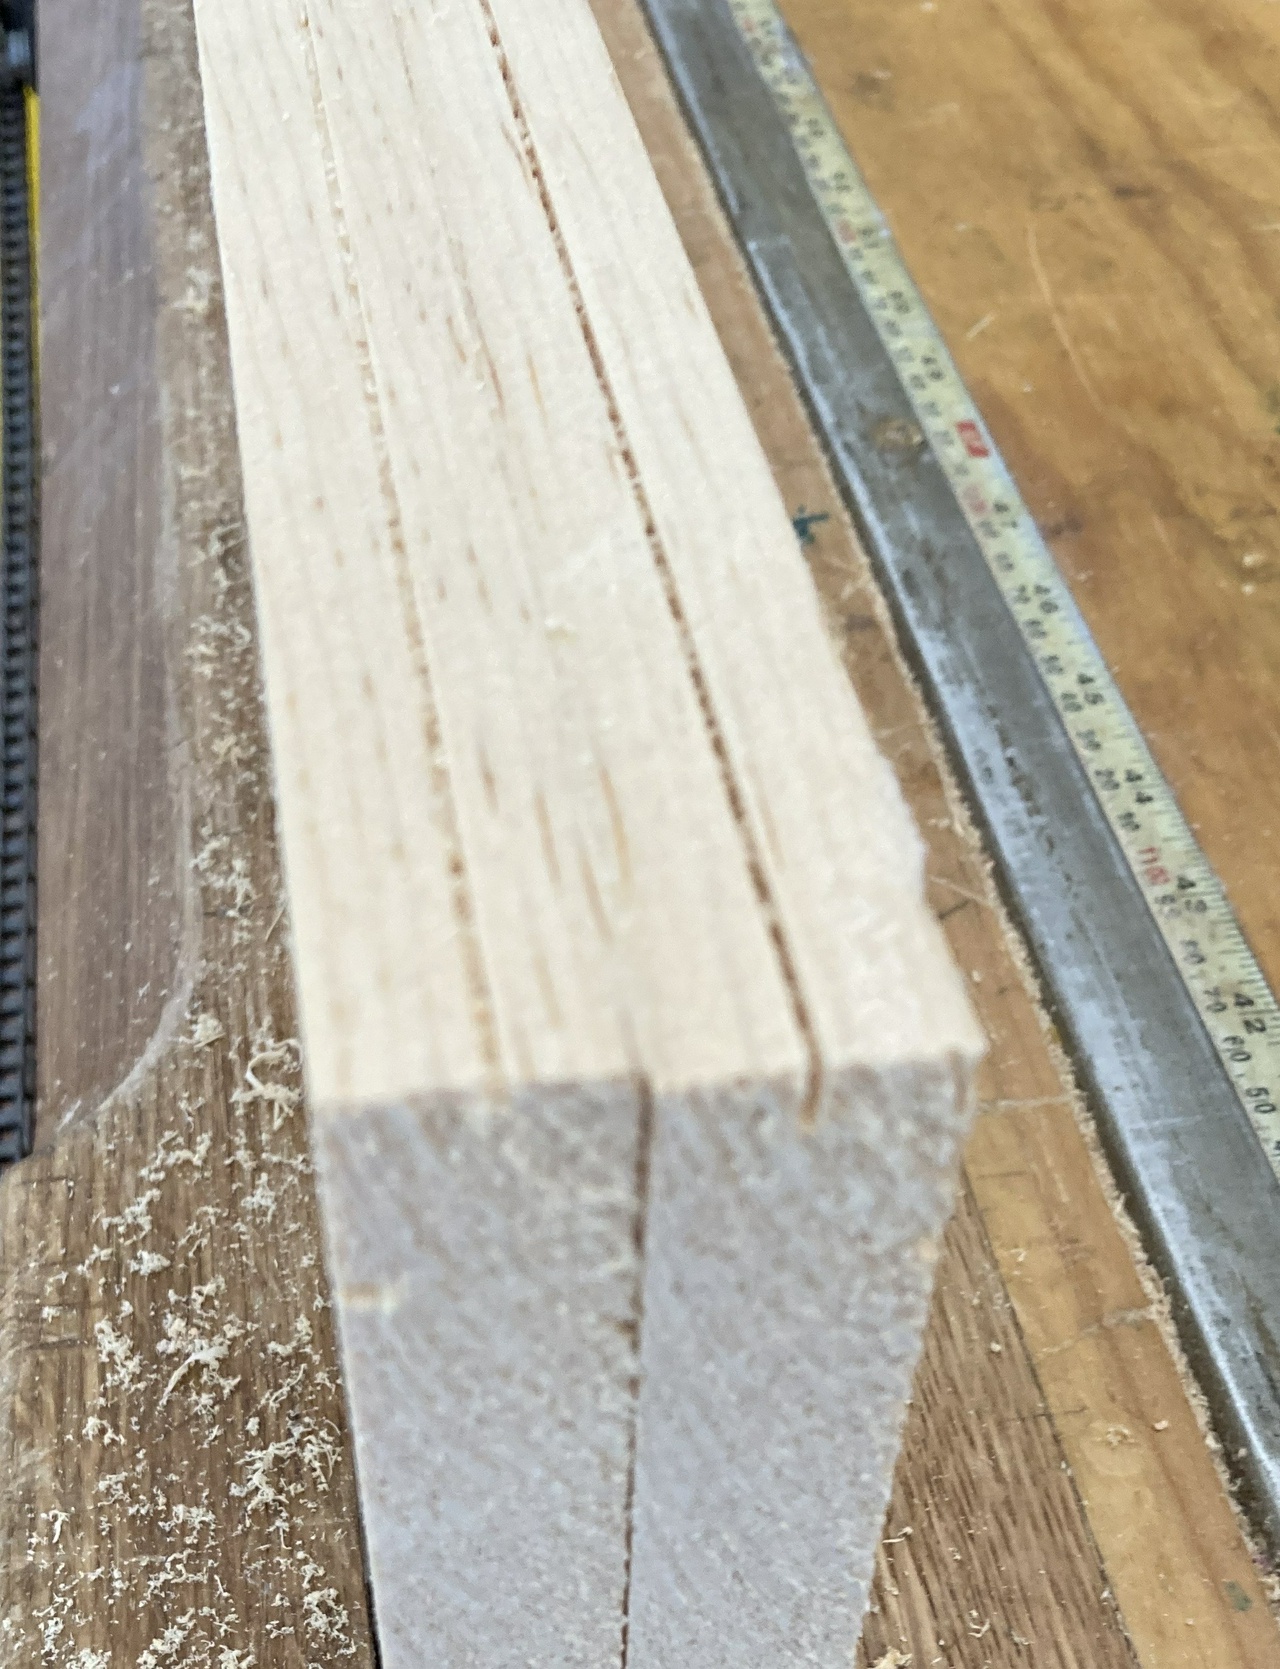
With my marks ⅜ from the outside of the boards, I set the circular saw to make a cut ¾ inch deep.

Setting the blade of the circular saw to make a 3/4 inch deep cut, using the width of the board to set the depth

And I make the two cuts.

The circular saw about to cut the board

Making the cut down the length of the board

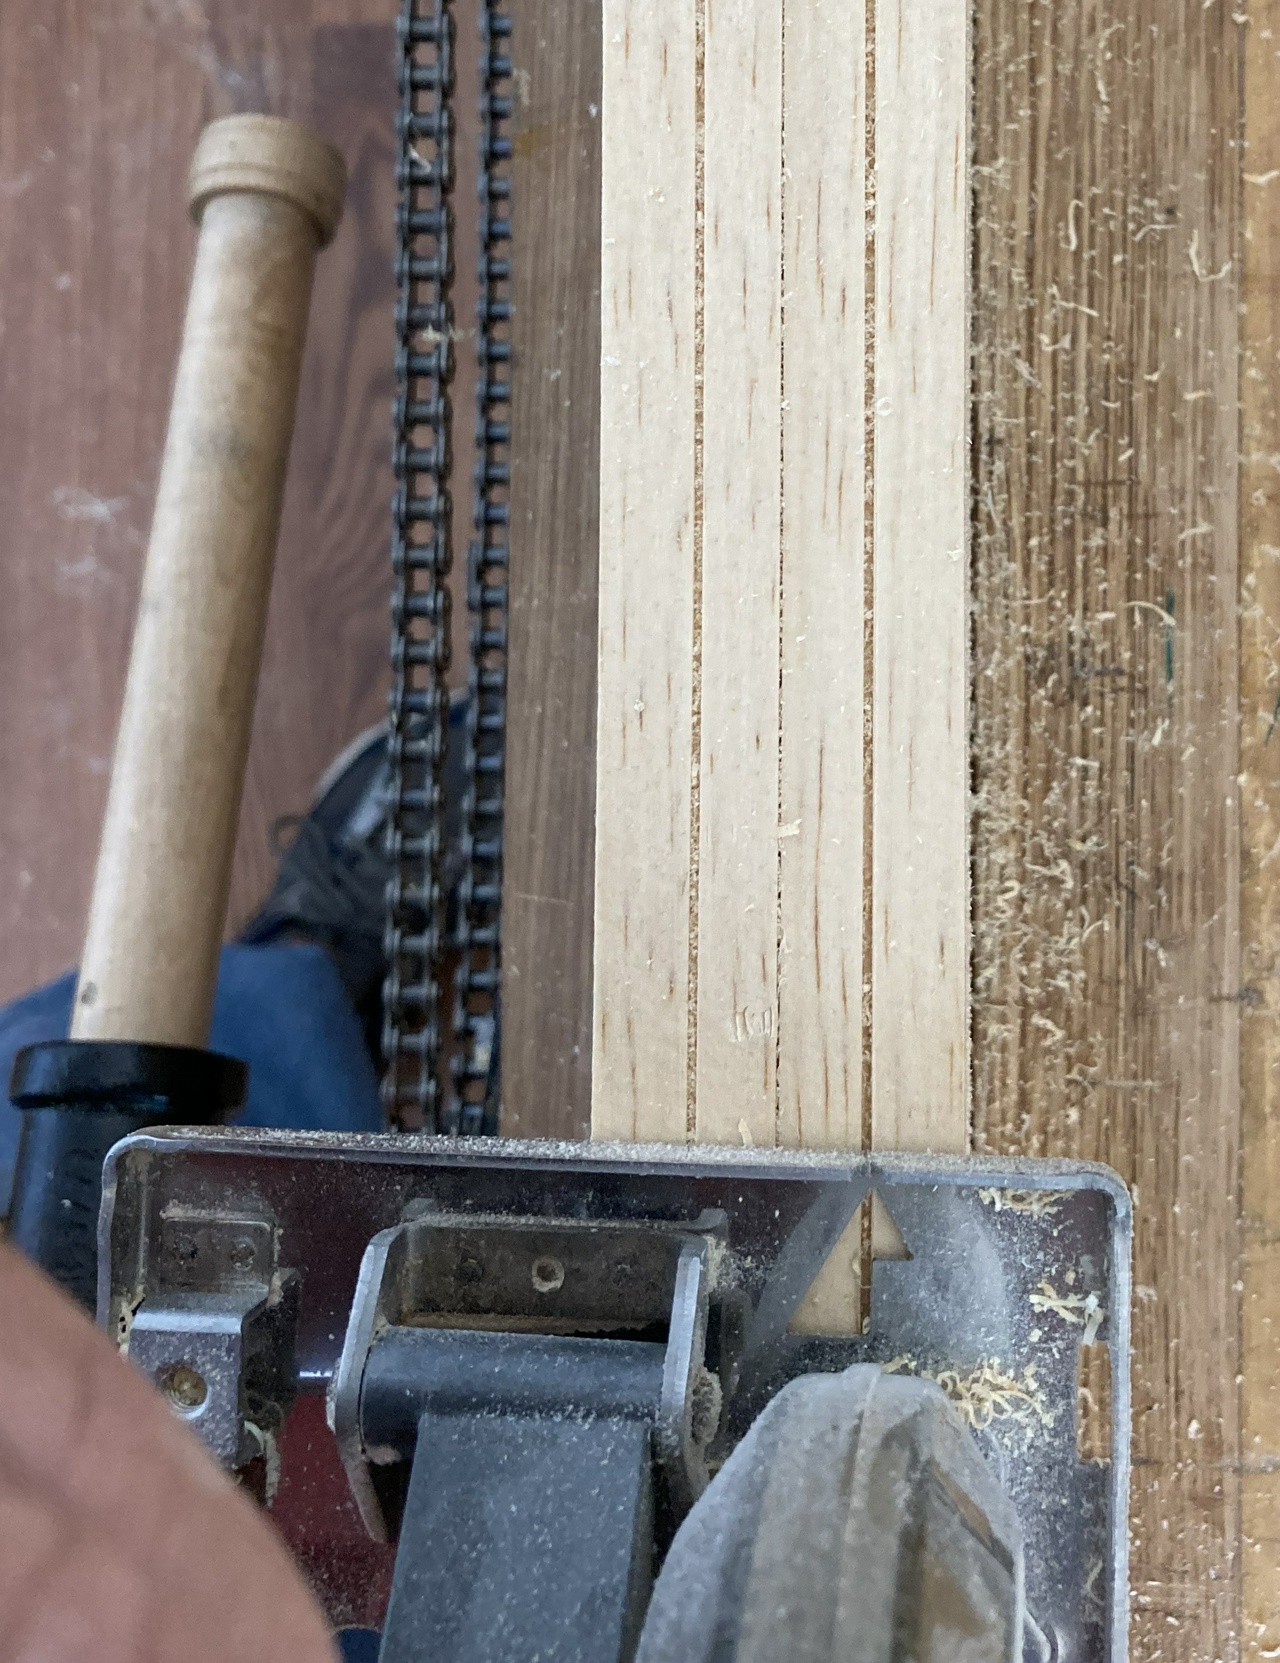
Then I set the saw to make a ⅜ deep cut.

Setting the circular saw's depth to the distance to the cut I just made in one of the boards

And cut the other part of the rabbet.

Making a cut into the face of the board to complete the rabbet

By having the two boards side-by-side while cutting, I've got a wider surface for the circular saw to ride on, and I end up with reasonably good cuts.

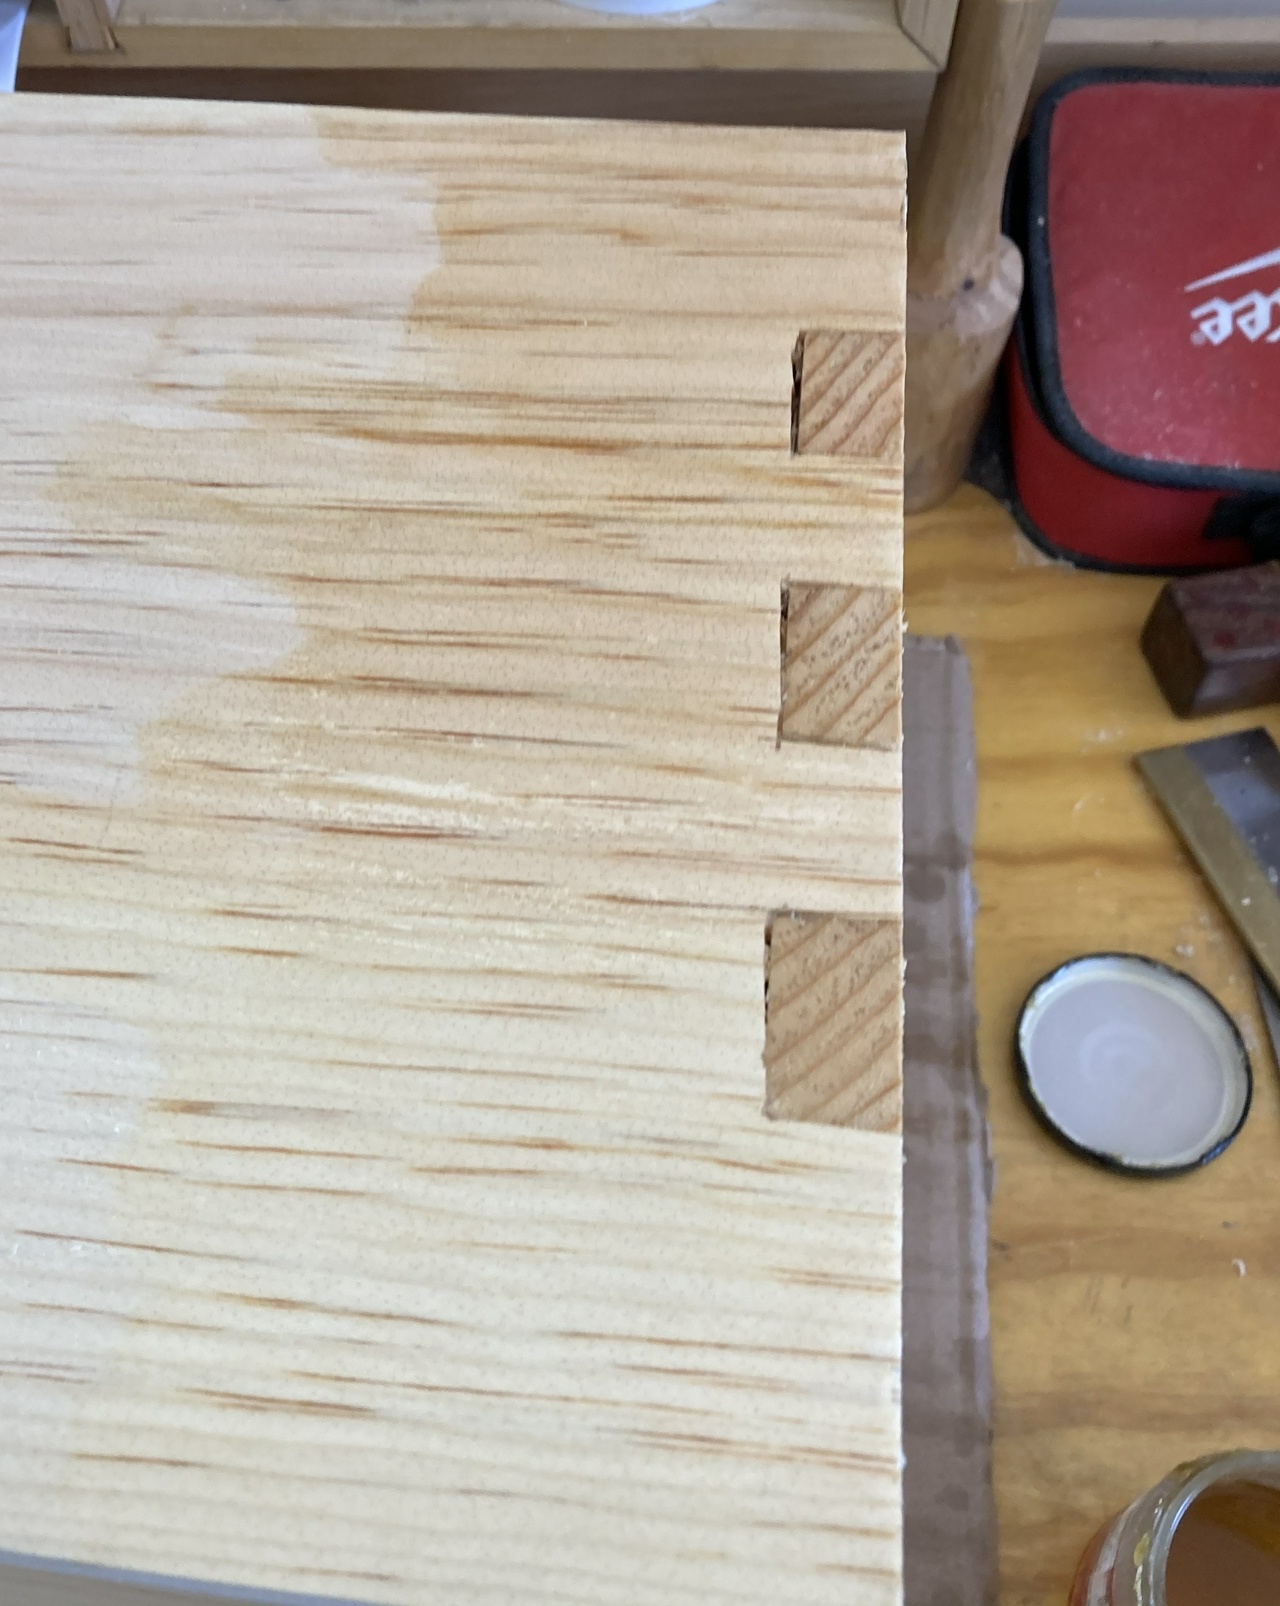
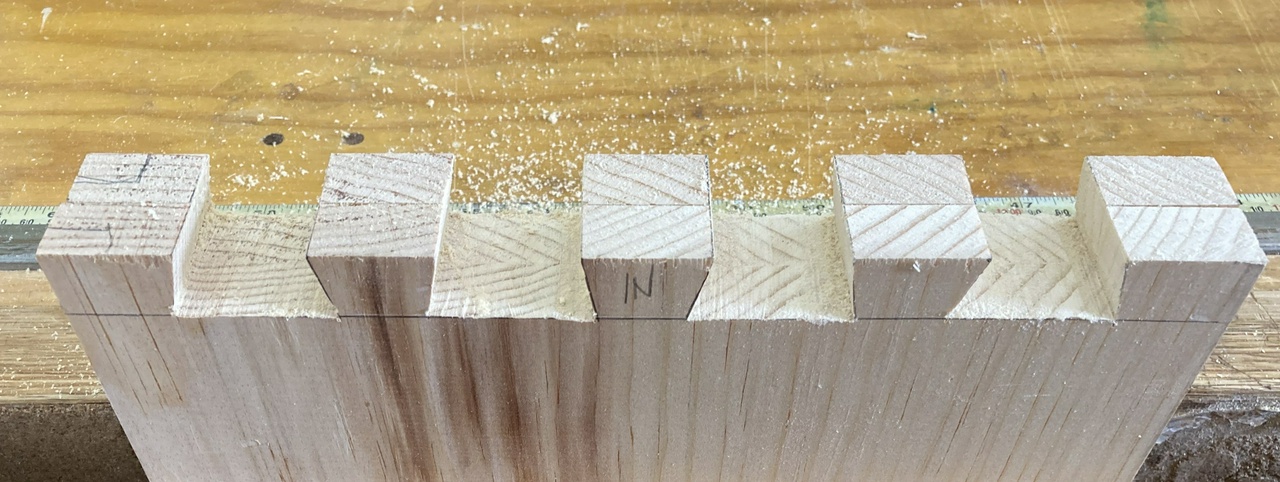
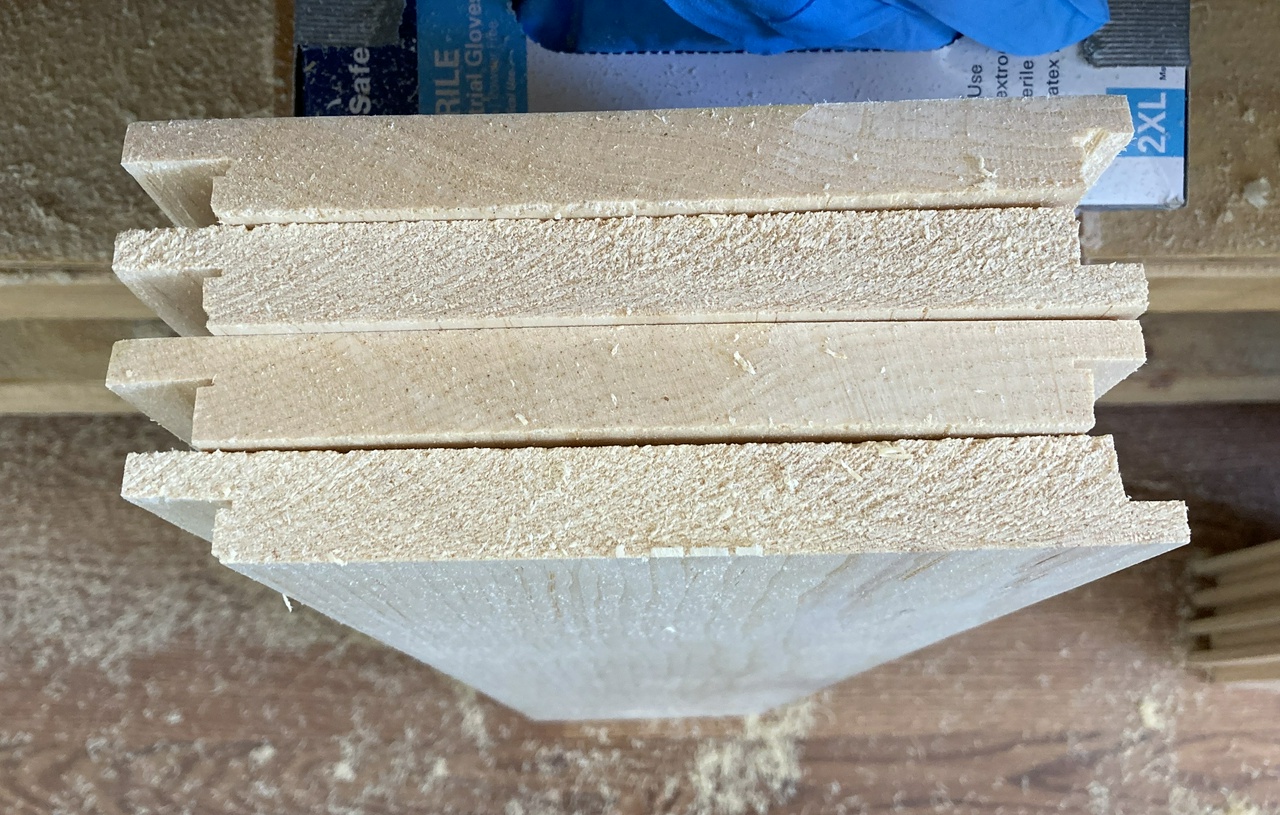
Here's the stack of eight back boards (for four cases) with the larger rabbets cut.

Eight boards with rabbets

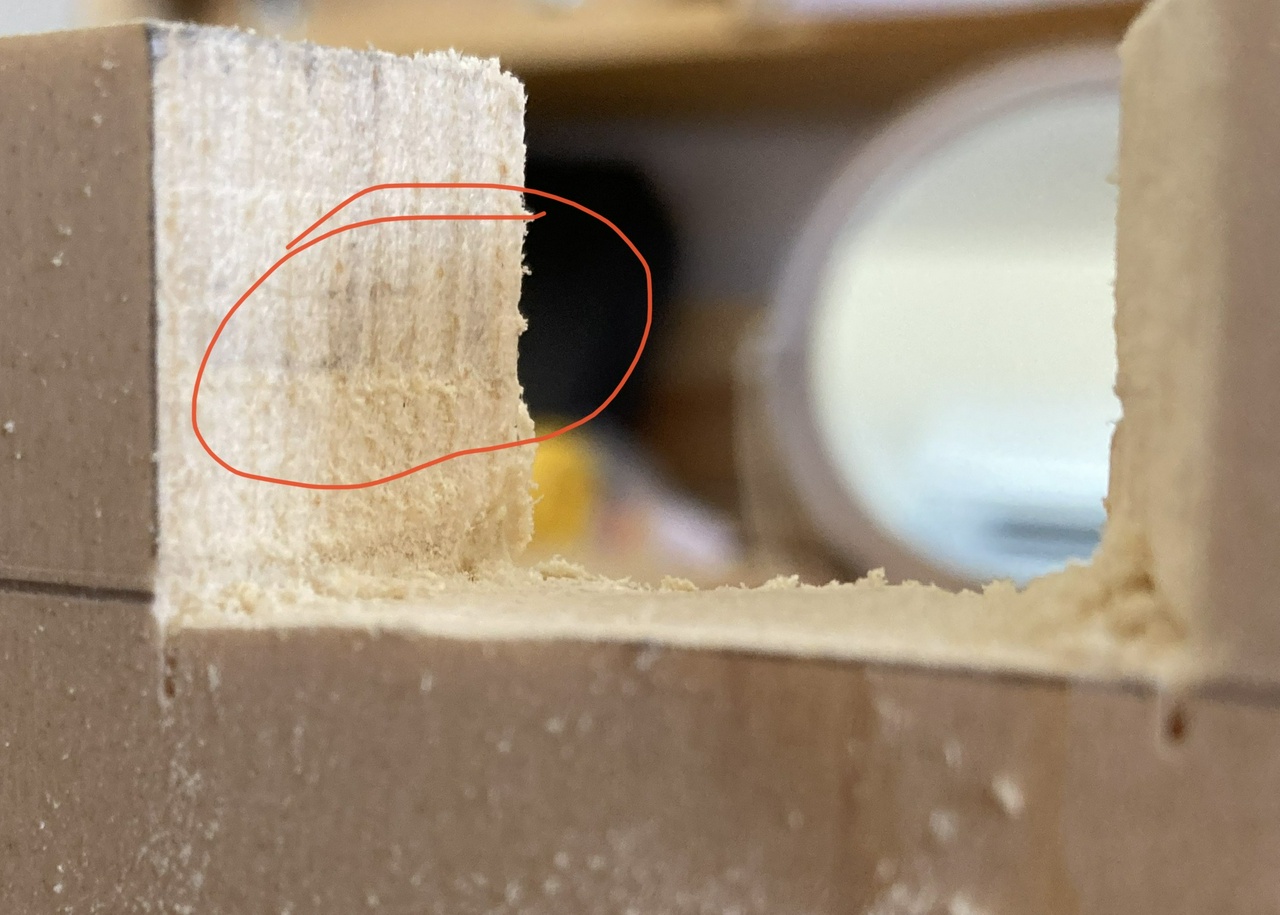
At this point I consult my story stick (not shown) and see if the boards are too big. If so, I'll plane down the pair of boards so they'll fit.

Planing the edges off two boards to make them fit correctly

I flip half of the boards, so all of the rabbets are now on the same side, and set the up in the vise again.

Two boards in the face vise. The previously-cut rabbets are visible on the side of the boards that is down

And I make the marks.

Marks sawn into the edges of the two boards, roughly down the middle of each board

And make the cuts.

Making the second cut for the second rabbet on one of the boards

Yep. I got them alternating correctly.

A stack of four boards, viewed from the end, showing how the rabbets alternate sides in each pair

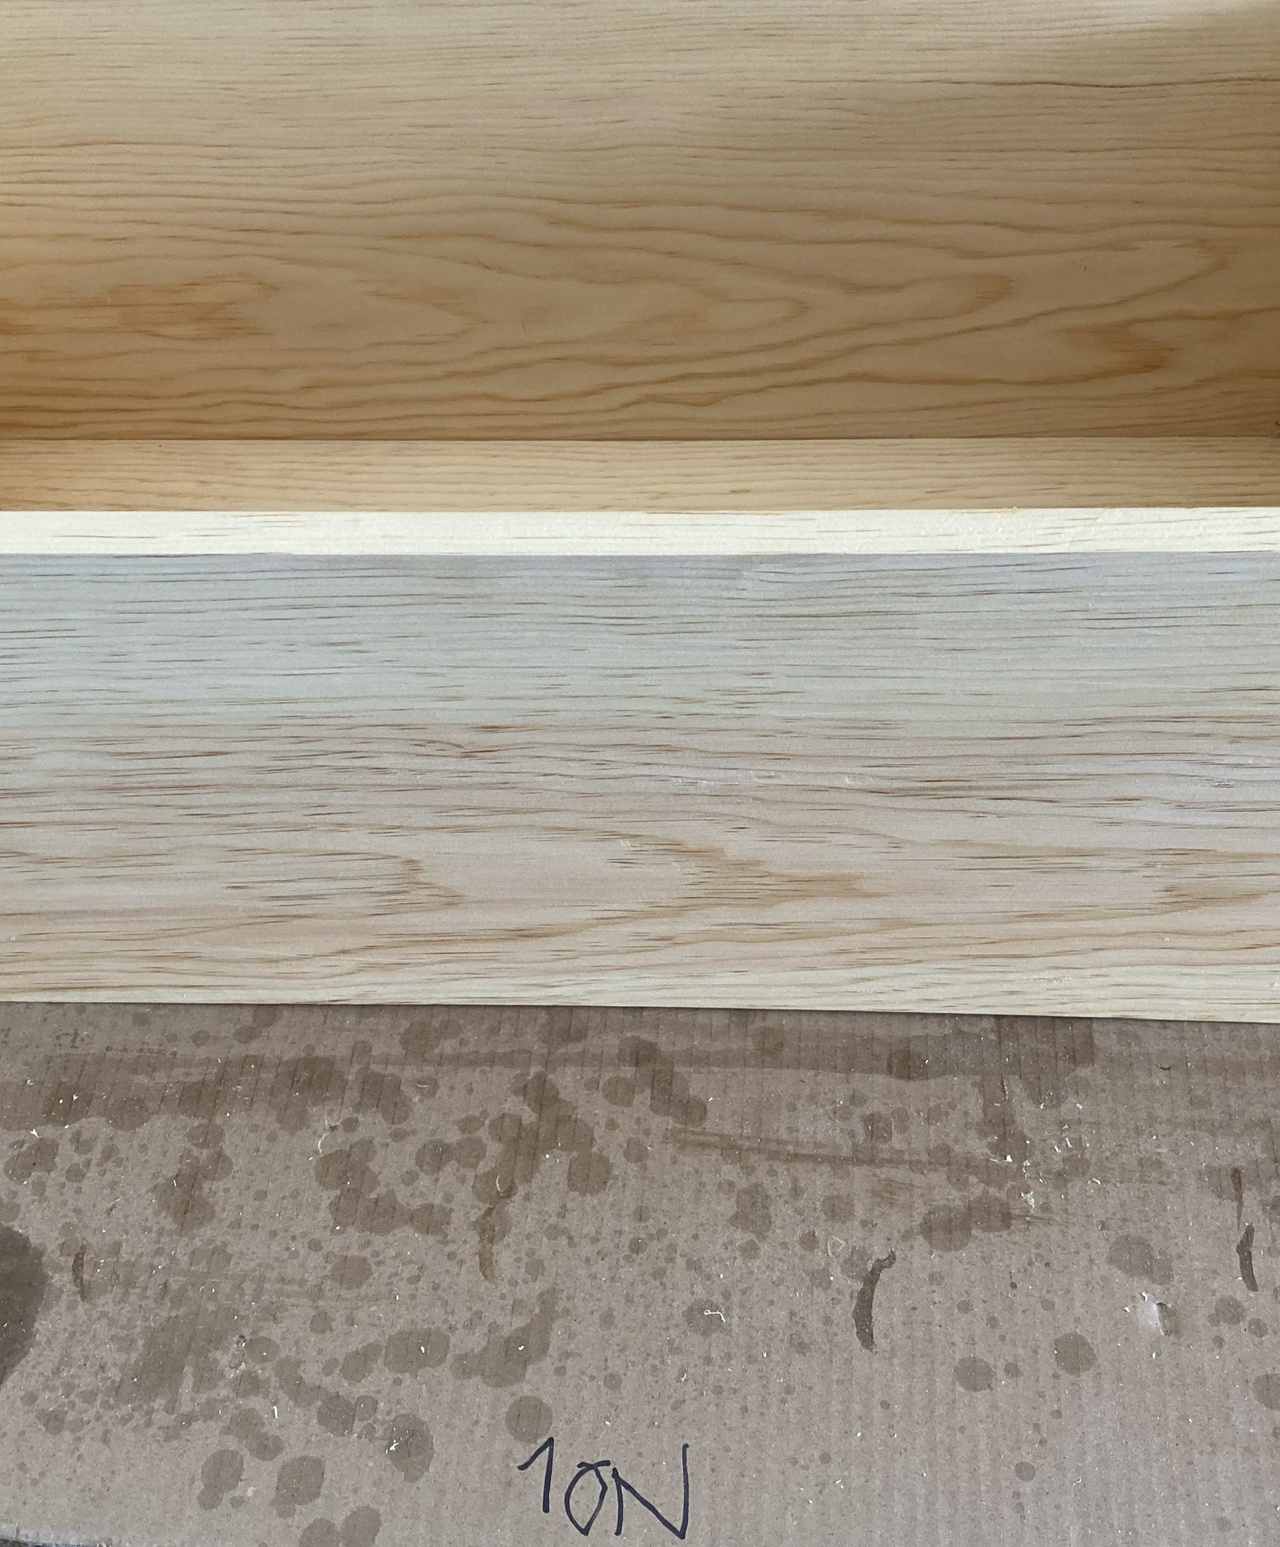
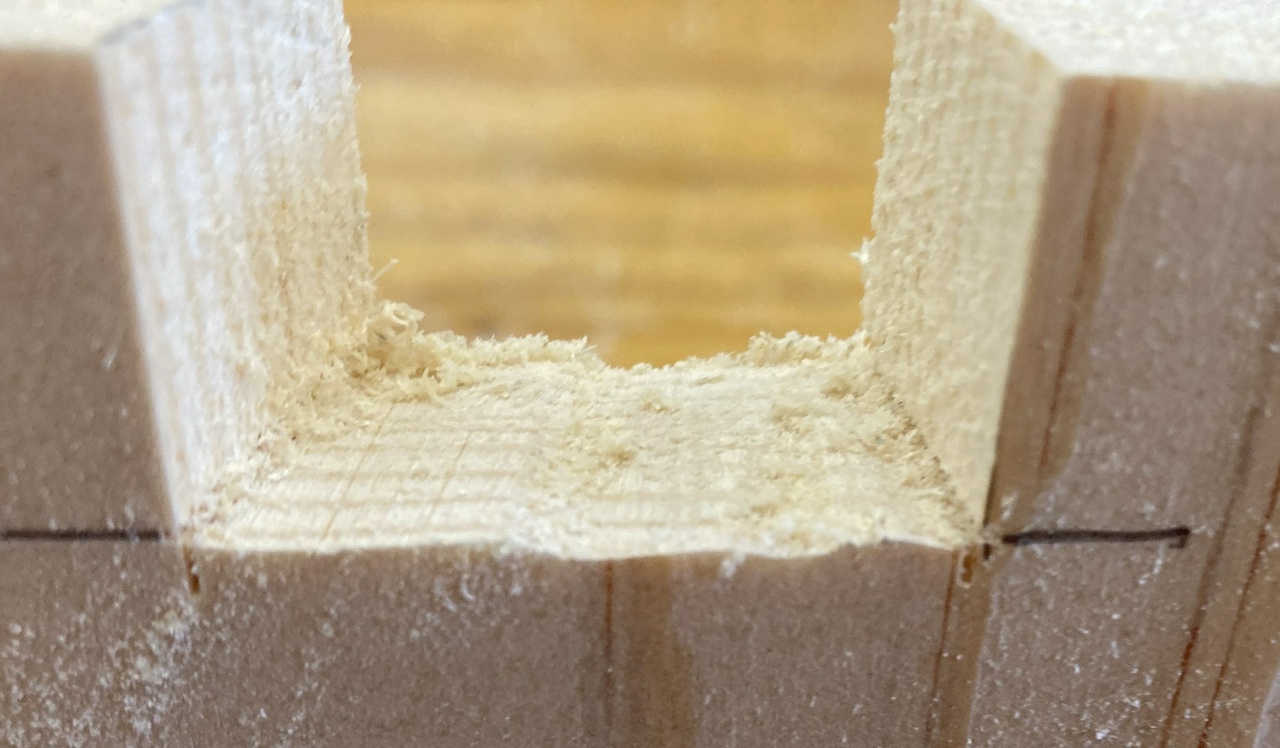
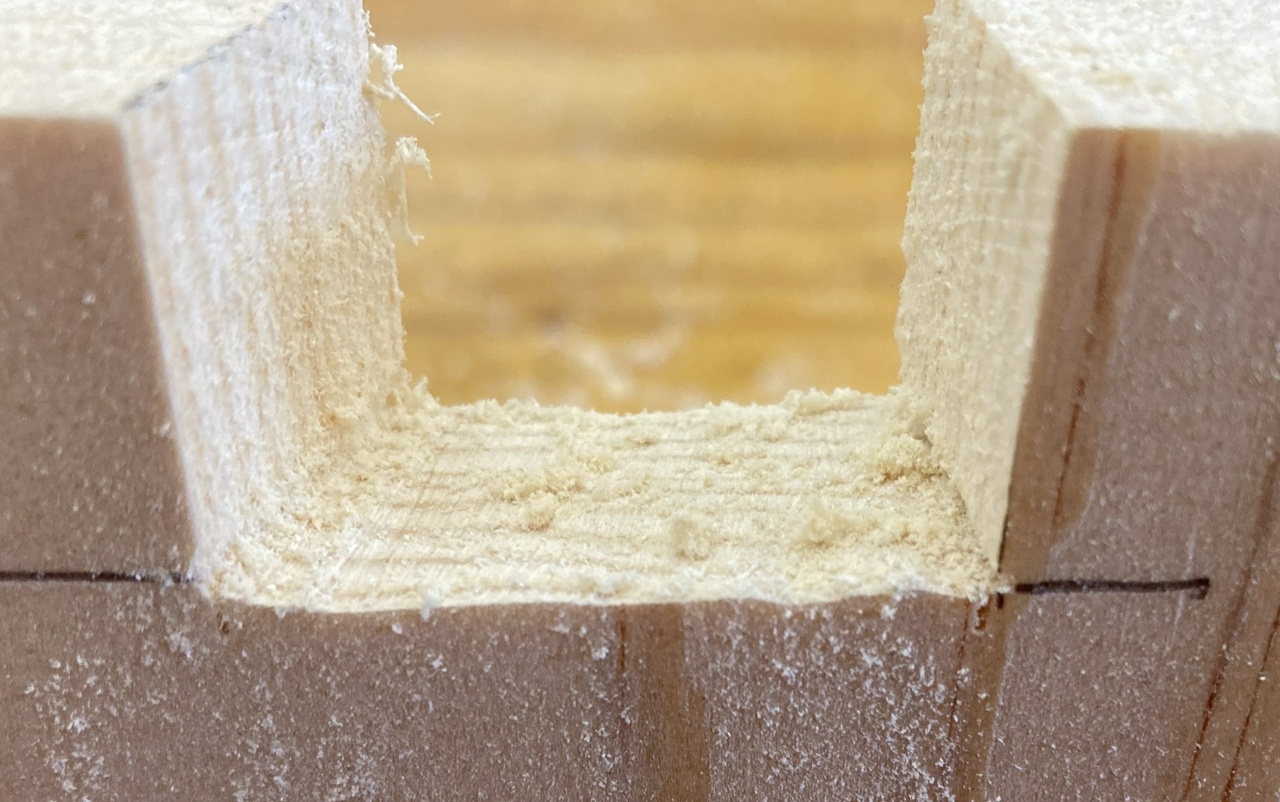
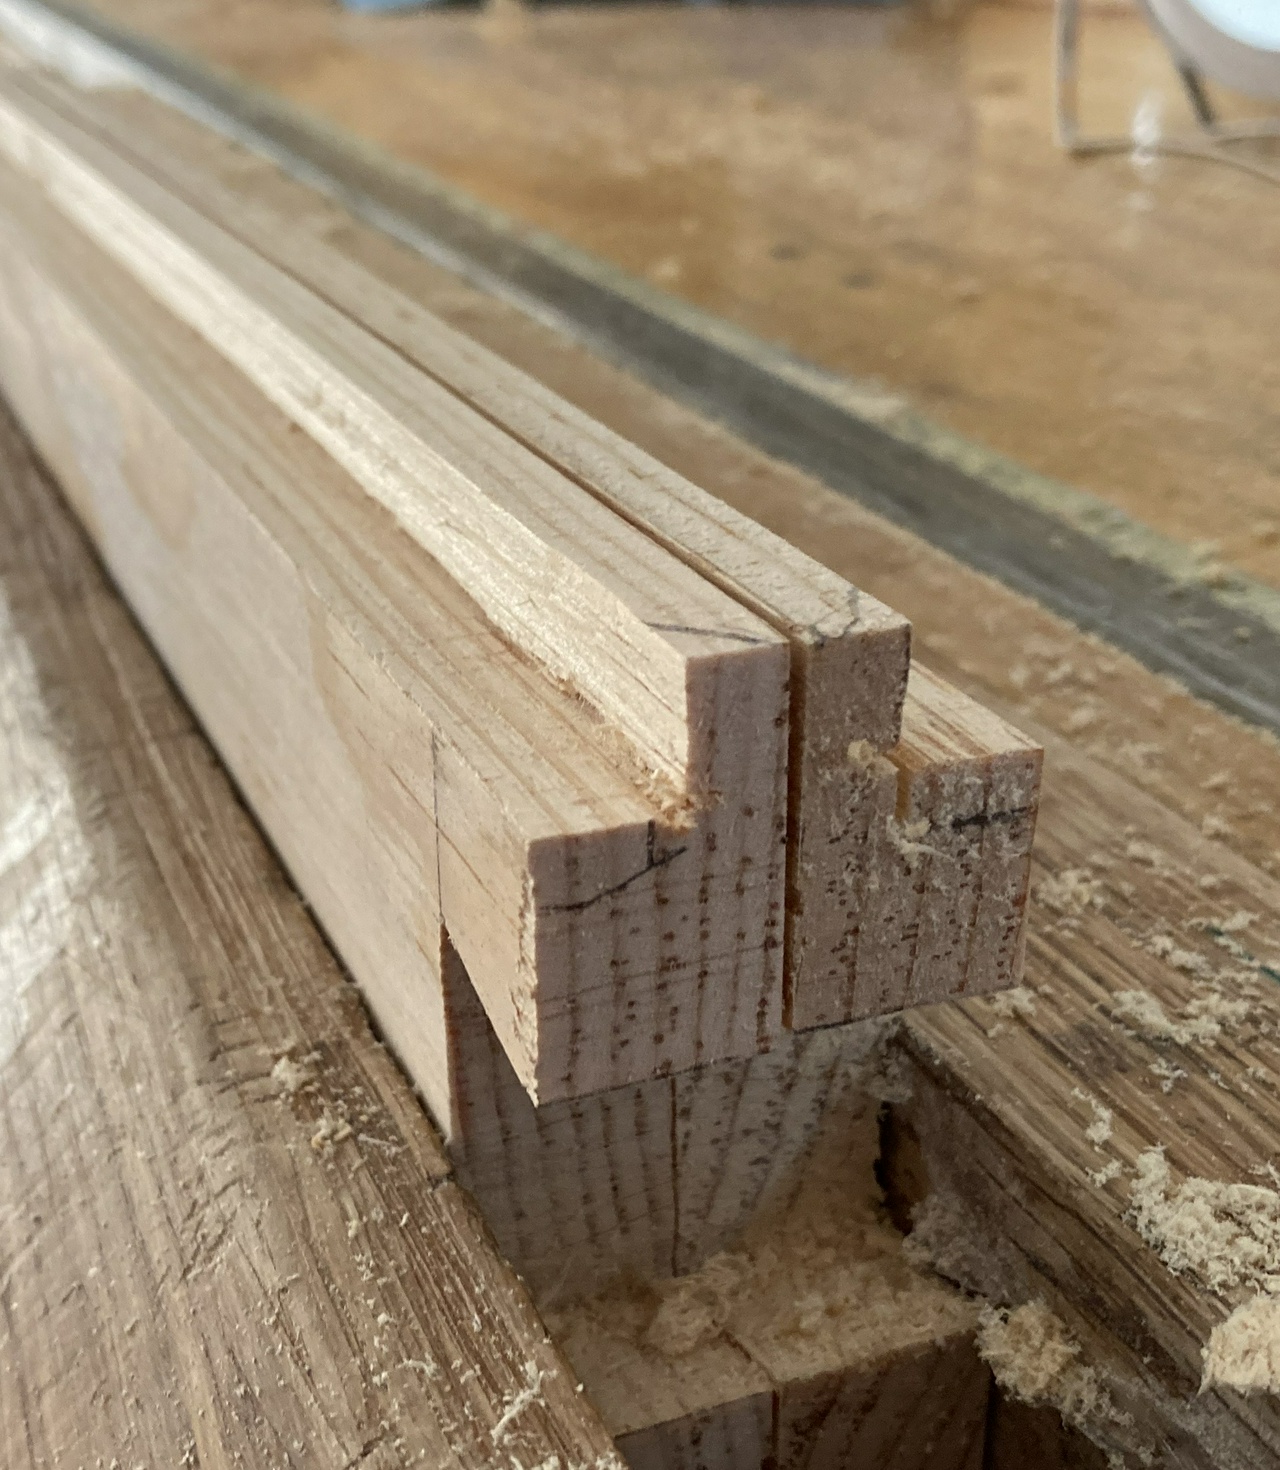
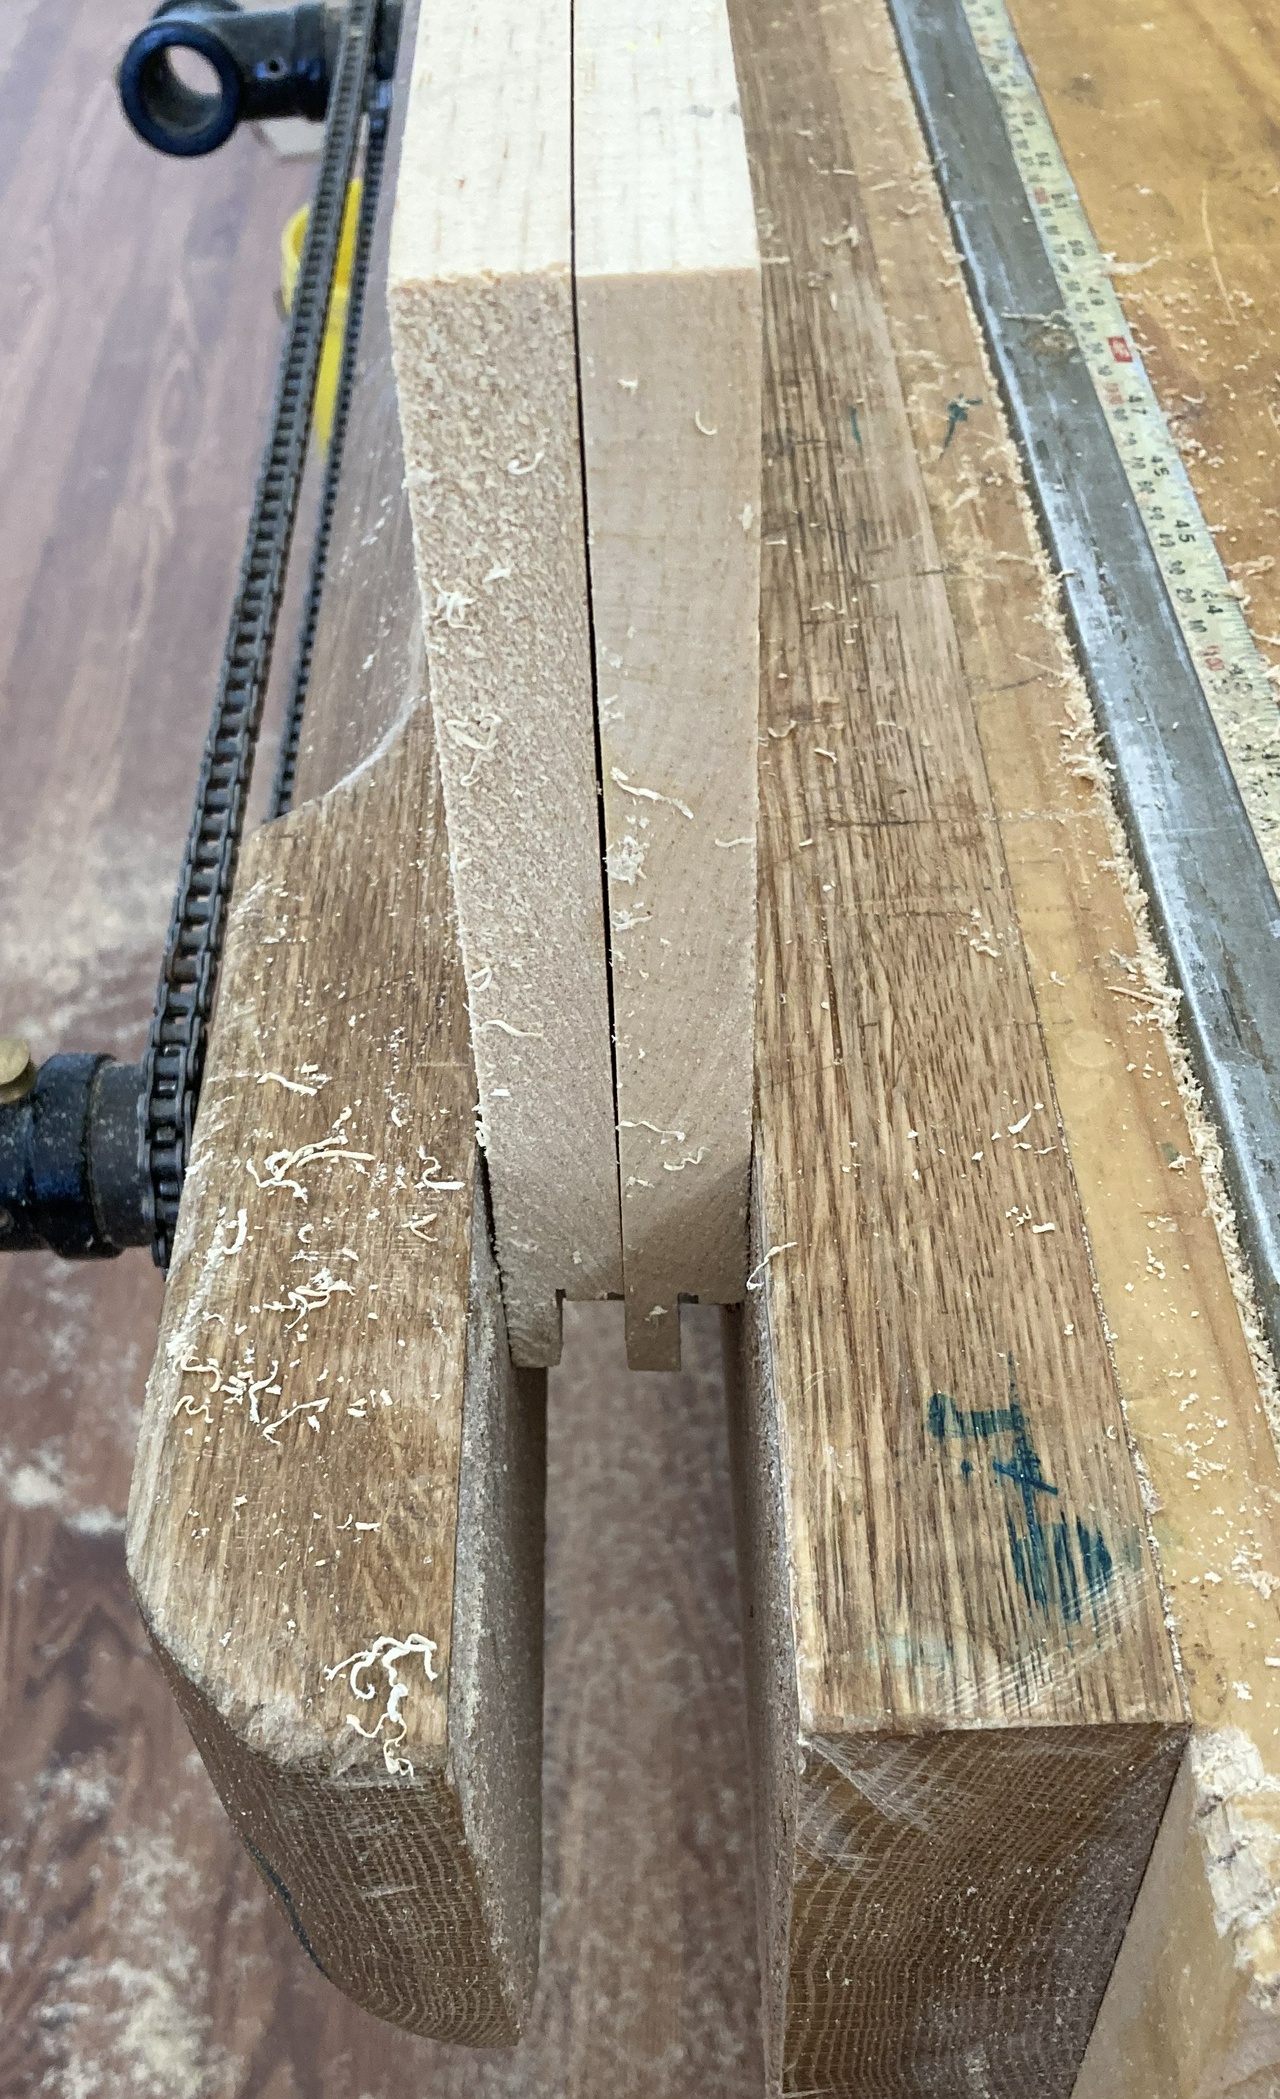
Then they go into the vise edge up, with the inside of the back away from me.

A board with the end-grain up, in the vise

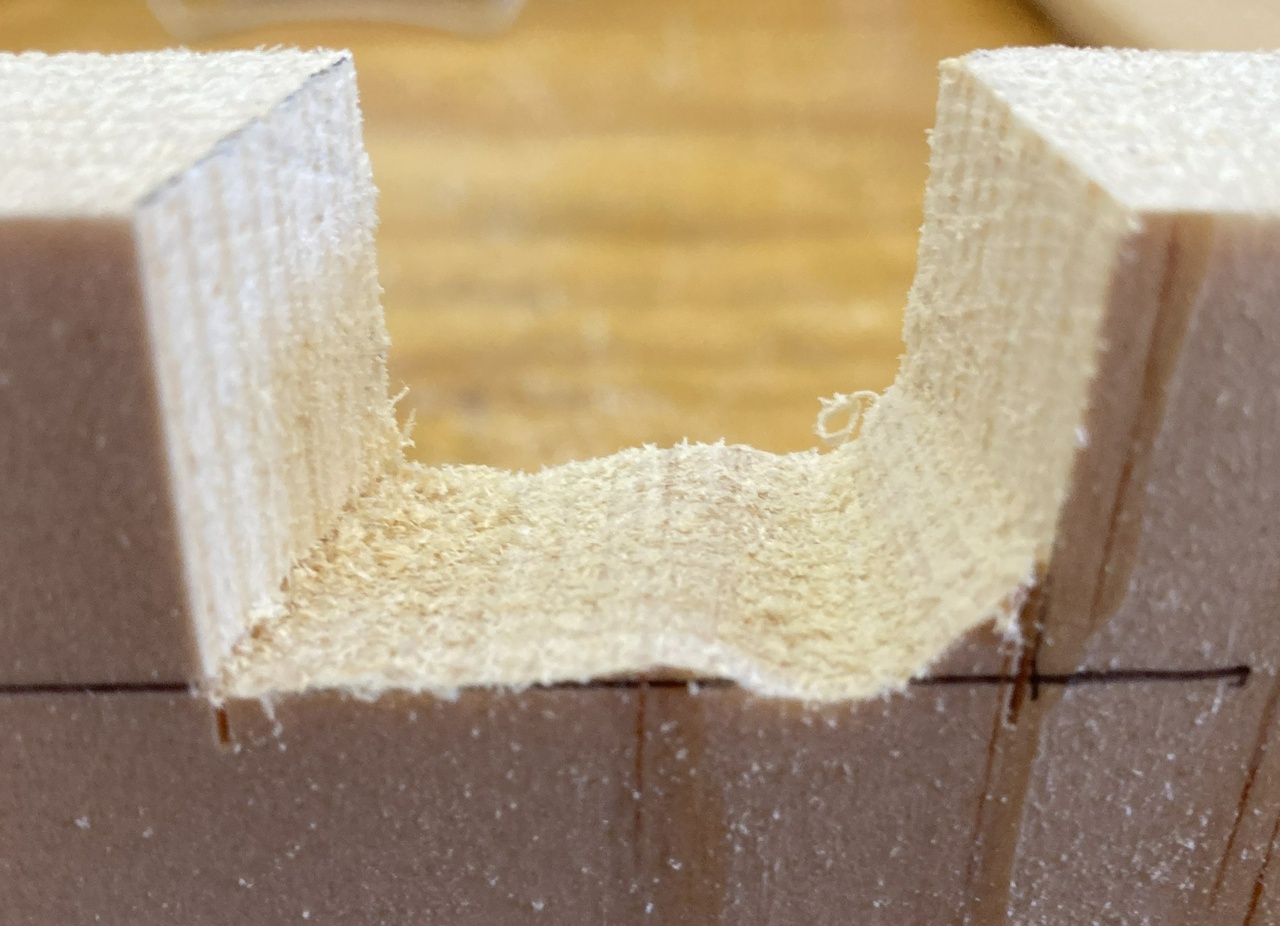
And I hand-cut the rabbets on the ends of the boards. It goes pretty quickly.

Using the 3/8 inch kerfing plane to cut a rabbet on the end of the board

The completed rabbet is visible

The completed rabbet on the other board is visible

And that's it. Took me about an hour to cut four pairs of backs, as opposed to about an hour for a pair of backs doing it all by hand.

And yeah, if I had a table saw, it would go even quicker. But I don't, and don't do this sort of mass production often enough to make me want to get rid of something else from my shop to make room for a table saw.


Jefferson Bookcases Contents #woodworking #bookcases #rabbets

Discuss... Reply to this in the fediverse: @davepolaschek@writing.exchange

Originally written Aug 15, 2020

The second set of shellac generally goes on the day after the first set of two coats. I put the shellac on thickly enough with those first two coats that it takes a while to dry. Not overnight, but it doesn't hurt it to wait, and letting it dry overnight keeps my production line moving smoothly.

While the goal with the first two coats was coverage, the goal with this one is getting a good finish. So I start by inspecting the case, lightly sanding each side with 320 or 400 grit sandpaper. This turns it from a slightly rough surface (because of dust and raised grain) to something that feels very smooth to the touch. If there are any runs or seams, I'll give them a second swipe with the sanding block and make a mental note to hit them more heavily with the brush so today's coat of shellac will redissolve that area and smooth out the imperfection.

I do the front and inside of the case first, followed by the four outside sides, working clockwise like yesterday, and finishing with the back of the case.

I'm laying on a fairly heavy coat still. I want to make sure any exposed end grain on the dovetails gets good and wet, and the rest of the visible surfaces of the case look good.

That's about all there is to it. I use the window light to inspect each side of the case as I'm working on it. Looking at the wood from a low angle will show any seams or drips so I can fix them up.

Once the case is done, it goes onto the marked piece of cardboard to dry.

A glossy case on a piece of cardboard labeled "2 ON"

Tomorrow I'll give it a rub with my hands as I carry it into the house, and if there are any rough spots, I'll wipe them with a piece of brown paper bag before stacking the case with the others and filling it with books.


Jefferson Bookcases Contents #woodworking #bookcases #finishing #shellac

Discuss... Reply to this in the fediverse: @davepolaschek@writing.exchange

Originally written Aug 14, 2020

After prepping the case, it's time for shellac. I start by laying the case on its front and putting a coat of shellac on the back.

I mix my shellac with 2oz of shellac flakes to 12oz of alcohol (I use the Kleen Strip denatured alcohol from the hardware store, and measure it by volume). This is near a 1½ pound cut. I use pint salsa jars (which hold about 14 oz), and that gets the jar full enough that I can completely cover a case, but leaves enough headroom in the jar that I can still shake it to dissolve the shellac, though I've moved to a magnetic stirrer more recently, since that allows me to get a new batch of shellac mixed up more quickly.

Back of a case

This isn't going to be seen, so I just put it on pretty quickly and move on. Next, the case goes on its top (or bottom) and a coat goes on. For the outsides of the dovetails, I cover each end first, then come back and fill in the middle. I make sure to get plenty of shellac into the end grain of the dovetails. I want them to look completely wet.

brushing shellac onto the end-grain of the dovetails

end grain of the dovetails, looking wet

Coming back to fill in the middle:

brushing shellac onto the middle of the top or bottom

I'm using a 1” chip brush, and I load it as full as I can without dripping shellac. For a first coat, this will cover about 20 square inches, or half that if it's end grain. I'm putting the shellac on pretty thick at this point, but it'll soak in and still dry before I put the side I just did down so I can finish the opposite side.

After doing the outside, I do the inside of the side that's down. Again, I get the edges first, then do the edge along the back, then I fill in the middle. I'm concentrating on getting complete coverage.

Brushing shellac onto the inside of the case

The ends of the case are wet with shellac, and I'm painting shellac into the middle

Then I rotate the case 90 degrees clockwise, and do the next pair of outside and inside.

Painting the end-grain on the case end

After repeating that for all four sides, I go around a second time, giving those four sides a second coat.

My goal for coverage is that the first coat should get some shellac on every bit of exposed wood. The second time around should build on that. I'm not particularly worried about edges as I move fast enough that I'm almost always applying shellac to a wet edge. But if there's a spot that shows a seam, I can fix that on the second coat, or on the second day.

Then I lay the case on its back, and do the front edges and the inside of the back of the case. The inside and outside of the back only get one coat today instead of two. They're going to see less wear, and I think they'll be fine.

I'm also not super careful about dust at this stage. If I see a piece of sawdust or a shaving in the shellac, I just pull it out (that's one of the reasons for the blue gloves) and put a dab of shellac on the spot where it was. I'm not trying to make a mess, but I will be sanding this lightly and applying more shellac tomorrow, so I can fix any small problems.

the case is on its back, and it's time to coat the inside

Then once I'm done, I set the case on a labeled piece of cardboard so I know how far I've gotten on it.

Case resting on a piece of cardboard with the label "1 ON"

I have three cases in progress most of the time. One glued up, in clamps. One with one coat of shellac, and one with two coats of shellac.


Jefferson Bookcases Contents #woodworking #bookcases #shellac #finishing

Discuss... Reply to this in the fediverse: @davepolaschek@writing.exchange

Originally written Aug 12, 2020

A couple years ago, when I was new to woodworking, I read about how to cut dovetails by hand, and how to clean them up. But a lot of it was mysterious. How close can I saw to the line? What happens if the dovetail is too tight to go together when I test fit it? What if it's too loose?

So in order to write down some of the things I've learned over the years, here's a look at one dovetail on the pin-board, from after I've made the vertical cuts to until the tail board fits over it well enough to glue it together.

First up is cutting out the waste between the pins. I do this with a turning saw because the fine blade from Gramercy Tools leaves a pretty good finish, plus the 12” long blade cuts through the waste between pins in just a few strokes (maybe six) if I'm cutting full-length strokes, plus I've never had good luck chopping out the waste with a chisel, especially in pine and poplar.

So after the first cut, I end up with something like this.

Waste partially cut out between dovetail pins. The bottom of the space is wavy with a chunk of extra waste yet on the right

I slid the blade to about a quarter inch from the bottom of the cut, and started cutting out the waste. I angled down until I was less than a millimeter from my line (probably a little too far) and then started turning horizontally. I overshot a little, so angled back up, and then when I got close to the line, I worried about finishing up with the back side of the cut about on the line.

So that'll need some cleanup. But I still have to cut from left to right. Left to right or right to left first doesn't really matter, but it's a lot easier if you're consistent. I always cut right to left first, then left to right. I start on the rightmost bit of waste first, too, so I'm moving right to left, then moving back left to right. Not sure why, that's just the way I've settled on.

So cut left to right. I concentrate on getting the back end of the blade to the line, and sort of let the front follow, trying to level everything out. And this is what I get.

Waste mostly cut out between dovetail pins. The bottom of the space is now much more level.

Not too bad. If everything is going well, I'll have just a hint of my original pencil line left. In this case, not so much, but it's just missing, so I'm not sunk. I'll take a fairly fine rasp and try to hold it level from to back and side to side and just knock off anything sticking up above the line. And avoid dinging the walls on the left or right with the edges of the rasp if possible. Maybe a dozen strokes if I've got a pretty messy cut. I'm not trying to get it perfect, just close enough that it'll go together. So this is what I got to.

Waste cut out between dovetail pins. The corners of the space are nearly square now

I cleaned off a couple high spots on the near side, and generally cleaned up the back side, removing a lot of the fuzz left from sawing.

Next up is test fitting the tail board in. In this case, the pin to the left was a little tight. After putting the pieces together and pulling them apart, I could see a burnished bit on the pine (it's why I enjoy cutting dovetails in pine: close is plenty good, because the wood will compress a little). So I took the rasp and smoothed off just a little on the wall of the pin to the left, where the red circle is, and then down to the bottom of the pin (which was so tight it didn't even get burnished because I couldn't close the joint up).

A view of the same gap from farther to the right. There is now a burnished spot on the left side which does not extend all the way to the bottom

And with that (plus similar cleanups on the other pins), the joint went together. Tight enough that the glue will hold, and loose enough that nothing will crack when I drive it together with a mallet. I don't even really need a mallet, and can push the joint together by hand if I want. But I'll probably give it a whack just to be sure, because, as Chris Schwarz says, IQs drop about 50 points as soon as the cap comes off the glue bottle. Hammer good! Bang!


Jefferson Bookcases Contents #woodworking #bookcases #dovetail #fineTuning

Discuss... Reply to this in the fediverse: @davepolaschek@writing.exchange

Originally written Aug 10, 2020

I had planned to blog about applying shellac next, but realized that getting ready for finishing is more important than applying the finish. So let's get a case ready for finishing.

I have two primary tools for this prep work. A wooden smoothing plane I made (as a prototype for the Swooshy Smoothing Plane and a block plane. The first is for planing long grain, and the latter for end grain, though if I just have a tiny bit of end grain to do and it's well supported so I don't have to worry about blowing out the edges, I'll use the smoothing plane. When I'm cleaning up the (long grain) rabbets on the back of a regular case, I'll use the block plane because it gives me better control at the mitered corners.

The smoothing plane resting on a case that needs some smoothing

I start with the front of the case, using a block plane to even up the miters. I generally lay out the case with the front aligned, so this is just a swipe or two on each mitered corner so it feels level.

Next are the longer sides of the box. I can work on them on the bench and it's more comfortable work. I first lower the end-grain if needed, then use the smoother to plane from the end of the case to slightly beyond the middle, lifting off to end the stroke.

If I encounter one of the cathedral grain bits that wants to lift off, I will lift it with a knife, put a little glue under it, and then come back and carefully plane or sand it smooth. Best to pick the lumber to avoid these if you can, though.

A tongue of cathedral grain which wanted to lift up if I were to plane it the wrong direction

This is also when I take care of the seam between the two back boards, leveling it if needed.

Leveling the seam between the two back boards

While I have the case laying on its front, I will also clean up the rabbets or chamfer the edges of the back boards, whichever is appropriate. The block plane gets used for this.

Chamfering the edges of the back boards

While I've got the block plane in my hand, I'll move the case to the floor, gripping it between my feet and knees, and clean up any end grain on the smaller ends of the box.

Cleaning up the end grain on the back boards

Cleaning up end grain on the dovetails

Then plane from the ends to the middle, smoothing out everything else. If there's anything that needs patching or a quick shot with some sandpaper, I do that now. Usually I use either 150 or 180 grit, and I'm just cleaning up things like a lumberyard chalk mark that didn't quite get planed out when I was cleaning up the sides. I'll also use sandpaper on any rough spots on the inside of the case, since getting in there with a plane is tough.

For a 30×17×11.5 box, like this oversized case, I'll end up with a couple gallons of shavings in a five gallon bucket. If I were a little better at dovetailing, I wouldn't have to plane off so much material, but I'm not really too worried about it.

A yellow five-gallon bucket half full of wood shavings planed off while smoothing the case discussed in this chapter


Jefferson Bookcases Contents #woodworking #bookcases #finishingPrep #handPlaning

Discuss... Reply to this in the fediverse: @davepolaschek@writing.exchange

Originally written Aug 8, 2020

After getting my third case glued up, and my second one finished and installed, I unpacked a box which held some of my big-ass art books and measured a few of them. Sixteen inches tall! That's not going to fit!

Two large cases with large books

So I called an audible. Since all the lumber I bought was in four foot lengths (48 inches), and the cases are 30¼ inches wide on the outside, I can pretty easily make a case that's… carry the one… 17¾ inches tall on the outside, minus ¾ inch twice for the wood thickness, and I've got a case that'll hold a book that's 16¼ inches tall.

An "extra large" case in the clamps

For back boards, a 1×12 and a 1×8 will add up to 18 inches and change, but I'll need to nail them to the back outside of the case instead of rabbeting them flush, so the big-ass art books won't hang out the front of the box. And because it's been a long day, I figured I'll work out all the math for those boards tomorrow. I should have enough width to overlap them by at least a half inch. ⅜ and ¾ are my fixed width rabbet saws, so one of those will hopefully do the trick.

Also of note, each box takes 2oz of shellac flakes in 13oz of denatured alcohol to finish (filling a Late July brand salsa jar). I'm going to have to order more shellac, and probably pretty soon. Guess I should've gone for the five pound discount last time.

Oh well. Another day, another two boxes (though the second one still needs a quick sanding and a final coat of shellac). I'll write up my finishing schedule another day.


Jefferson Bookcases Contents #woodworking #bookcases #extraLarge

Discuss... Reply to this in the fediverse: @davepolaschek@writing.exchange

Originally written Aug 7, 2020

Today it was time to start making boxes. The first step is to cut the pin boards. I start by transferring the tails to them and marking everything out.

Marking pin board from the tails board

On the front, I should draw the baseline to the second to last line I transferred from the tails.

Baseline drawn only partway across the board on one side

On the back, I only need to mark the outermost two lines, as those will be part of the mitered corner, and I'll be sawing the top and back, but not the front.

View of the back (i.e. inside) side of the pin board, showing where the lines for the miters are marked

After cutting the sides of the pins (the ones I marked on the front), I saw out the waste.

Removing the waste using a turning saw

Then I saw down at a 45 degree angle, cutting where the side of the pin meets the miter. Do that on both sides, as these cases will have miters front and back.

Sawing the edge of the pin next to the miter downward at a 45 degree angle

After that, I turn the board in the vise so I can saw the miters.

With the board running horizontally in the face vise, sawing the miter waste out

Then I saw the miters on the tail board and test fit the corner. After I have two corners sawed on the pin board, I rabbet the back edge of the board using the kerfing plane (later I would switch to using my circular saw for this).

Sawing out the rabbet with the kerfing plane

Then I rabbet the two back boards, and cut rabbets so I can shiplap them together. I actually need about 14 inches, and the boards are 7½ inches or so each, so I'll trim one of them to fit at this point rather than making a huge ship-lap.

There are multiple reasons for doing the backs like this, one of the biggest being that if the back-boards expand due to rising humidity, you want there to be room for them to move without pulling the case apart, so the ship-lap joint should have a small gap so the boards can both expand a bit. The other reason is that 14 inch wide boards are hard to get and expensive, and two 8 inch wide boards are a lot cheaper and easier to move around the shop.

One of the back-boards fit into the case

Both back-boards fit into the case

Once everything fits, it's time to glue up the case and tack in the back boards with two finish nails on each side. Only glue the top and bottom of the back boards so they can move with the changing seasons. The sides of them are just tacked with the nails, closer to the edge than the middle (again, so the boards can expand or contract a little due to changing humidity).

Case in clamps, back-boards nailed in place

Then it's time to let the glue set while I work on the next case. Next up, finishing!


Jefferson Bookcases Contents #woodworking #bookcases #miteredDovetails

Discuss... Reply to this in the fediverse: @davepolaschek@writing.exchange

Originally written August 4, 2020

First, some measurements. I spent the tail end of yesterday sawing all the boards for eleven of the largest cases to size. Here's the cut-list:

Two 1×12×30¼ – top & bottom Two 1×12×14½ – left & right Two 1×8×29⅝ – back boards

Today I spent the day making tail boards, which are the left and right sides of the cases.

Here are the steps for them.

  1. Mark out a pair of boards on one end. I usually plan to make the outsides of this pair the inside of the case. The main reason this matters is that you probably want to mark the miters and rabbets on the board now so you don't forget what you're doing and miter them the wrong way. It happens. Marking out the tails using a template
  2. Cut the tails you've marked. Note that I'm just using pencil lines. They're plenty accurate for sawing dovetails in pine, especially for the first cuts (tails in my case), as I measure the pins from the tails. That's where I need to be more accurate. Tails cut out in a pair of boards
  3. Mark the other end of the board. If your tails are asymmetrical (mine aren't, but if you're making smaller pins, you might want the rabbeted edge of the board to have a thicker tail on the end), make sure to flip the marks. Note my handy story stick. Using a template like this means I'll have all dozen cases looking fairly uniform. Marking the tails on the other end of the board with the story-stick inverted so that the same edge will always be the front of the case
  4. Saw those tails.
  5. Cut the rabbets on the back side of the board for the back boards to fit into. First cut of the rabbets Rabbets completed

If you're in mass-production mode, like I am, repeat. I've got a total of ten more pairs of tail boards to make. I bundle the pairs together with blue tape.

That's it for the tail boards. In a full day, making ten pairs of them is a pretty good goal for me. Whew!


In response to a few questions, I later added the following:

I cut the ends of the boards using my circular saw track guide with a hybrid saw blade in my little cordless circular saw. They're mostly straight off that, but if the two boards in a pair are slightly different in length, or one is rougher, I'll use a finely set block plane to even things out.

I'm cutting everything using a 1:4 dovetail marker I made. They're getting more uniform, and my most common failure is cutting below the baseline when taking out the waste with the turning saw. But I'm getting better and faster with that. Also, when cutting tails, I do all the cuts that slant to the right first, working left to right, then do the cuts that slant to the left, working right to left. Not sure why that exact pattern, but it works for me. I'm also cutting them while sitting on a rolling mechanics stool so I'm sawing only slightly below eye level.

When gang-cutting the tails in ¾ inch stock, I drop the handle of the saw to get started on the line. Two strokes get the line established all the way across, then I raise the handle and three or four more strokes take me down to the baseline. One final stroke, looking in the mirror behind the work to make sure that I'm to the line on the back side of the board, and it's on to the next cut. I think it was a Rob Cosman video I learned from. The turning saw for waste removal is from Chris Schwarz. And then I use a rasp to clean up the bottom of the tail, which is my own fault. Especially in pine, I have too many tear-out issues with a chisel. A rasp lets me clean things up quickly with the tail board still in the vise.

I'm also happy I have my kerfing plane handy. The ⅜ inch fixed fence is perfect for almost all of the rabbets I'm cutting, plus for the shiplap on the two back boards.

My honey commented the other day that she's happy I finally got started on this project, and I haven't said anything, but I realized that almost half the tools I'm using on this project are ones I made myself, and I don't think things would be going as smoothly as they are without them. I've developed a number of tools that work well for me, and I built the prototype box using them and have added where necessary. Plus I have two block planes sitting on my bench. One set super fine for touching up the end grain before cutting dovetails (if needed), and one set fairly heavy, so eight passes on the edge of the board gives me a 3/16 wide chamfer.


Jefferson Bookcases Contents #woodworking #bookcases

Discuss... Reply to this in the fediverse: @davepolaschek@writing.exchange

Originally written August 2, 2020 – Note that this is long, and covers how I cut #dovetails in what might be excruciating detail if you already know how to hand-cut dovetails. I won't be offended if you skip ahead.

For this style of bookcase, there is a plinth, which serves as a base, supporting the stack of boxes. Since the plinths are mostly hidden, and the weight is mostly carried by the four glue blocks in the corners, I figured they were a good place to start. Half of the dovetails will be hidden, and only one of the four boards is very visible.

Here's my checklist for building the plinths, along with some pictures of the intermediate steps:

  1. Cut all the boards to length. There are three different lengths of pine 1×4 and two lengths of ash 1×1 glue blocks. Two 1×4×12, two 1×4×31, one 1×4×29½, two 1×1×3⅜, and two 1×1×2⅝.
  2. Mark out and cut tails on side boards (no miters yet). Using a template to mark where the dovetails should be Making small marks for the dovetails Marking line across the board Lines marked on the end of the board Marking the thickness of the pin board Pin board thickness marked Marking the angles for the tails (1:4) Mark waste and rabbet position Saw the edges of the tails With the edges sawn, begin removing waste with turning saw Waste removed from rightmost tail Work left to right, removing remaining waste from each tail Use a rasp to flatten the bottom of each tail
  3. Cut rabbets on side boards, using my kerfing plane with a fixed ⅜ inch fence, and clean them up with a chisel First (vertical) cut with kerfing plane Second (horizontal) cut with kerfing plane Clean up rabbet with chisel
  4. Mark and cut pins on front board, including miter. If you cut the miter on the tail board before marking this, you won't have a full tail to transfer the mark to the pin from, and you'll have to guess where the pin edge should be. That's not a killer, but it'll make for a sloppy joint. Pins marked on pin board, along with double-X marking for where the mitered corner will be Cutting out waste between pins Angled cut for miter
  5. Cut miter on matching corner of side (pin) board.
  6. Test fit. Test fit of first corner
  7. Cut other corner pins on front board, including miter.
  8. Cut miter on matching corner of side board.
  9. Test fit and adjust.
  10. Cut rabbet on front board.
  11. Cut curved cutout on front board. Cutting curved cutout using a turning saw
  12. Smooth cutout with knife and spokeshave. Trimming the end-grain of the cutout with a knife Smoothing the long-grain of the cutout using a spokeshave
  13. Cut pins on rear board, including miter.
  14. Cut miter on matching corner.
  15. Test fit and adjust.
  16. Cut pins on final corner, plus miter.
  17. Cut miter on final corner of side (pin) board.
  18. Test fit and adjust.
  19. Check for square.
  20. Glue up, making sure to glue the front cross-brace to the front board before clamping. The cross-brace's purpose is to reinforce the front board, which has material removed for decorative purposes. It's probably not necessary, as I made a smaller cutout than Schwarz did in his version, but it won't hurt anything, and it helps me ensure that the plinth remains square when clamped up. Plus, as I'm going to be stacking the cases 6 high at a minimum, there will be a fair amount of weight. I'd rather not find out I under built in the middle of some night as books and lumber come crashing to the floor. Thus, the brace. Clamp cross-brace to front board, and clamp plinth together
  21. Double-check for square.
  22. Unclamp after the glue has dried overnight.
  23. Glue ash glue-blocks into corners, short ones underneath the cross-brace board. Note the spacers set in the rabbets so that the glue blocks will be flush with the rabbets, giving good support to the cases. Clamp glue-blocks into corners of plinth, note blocks beneath plinth to help set glue-blocks to the correct height
  24. Plane smooth with a smoother plane, and chamfer the top-outside corners of the boards with a block-plane such that the chamfer is 3/16 inch wide. This should make the top edges more durable as they inevitably get dinged by the cases being set into them. Chamfer top edges of plinth
  25. Three coats of shellac, brushed on. I'm using a 1½ pound cut of blonde shellac.
  26. Sand lightly with 320 grit sandpaper to remove raised grain, dust nibs, etc.
  27. Apply final coat of shellac.

Here's a stack of three of the finished plinths. The middle one is my prototype and doesn't have the mitered dovetails, so doesn't look as nice as the others. I'll hide it in the corner or something.

Stack of three plinths, with prototype version in the middle

And note that while I'm working, I keep all the pieces on my benchtop laid out in order so I can more easily keep track of where I am.

Plinth-parts partway through the procedure, laid out so I can see which part is which

And here's a photo of a completed plinth with the first case sitting on it.

Completed box and plinth


Jefferson Bookcases Contents #woodworking #bookcases #plinth #cutList

Discuss... Reply to this in the fediverse: @davepolaschek@writing.exchange

This is a #buildBlog of the process of building the bookcases that hold my books in Santa Fe. I built them myself, and learned a lot about #woodworking along the way, and hopefully can share some of that knowledge in these articles.

  1. Introduction, including a photo of how I set up my workbench for building the bookcases. Having my mise en place consistent made building 70 cases possible.
  2. Building the Plinths, which describes and shows the method I use for cutting mitered dovetail corners while constructing the plinths, on which stacks of bookcases rest.
  3. Large Case Tail Boards (sides), which covers cutting the tails on the side boards of the largest (at this point) cases. I also included answers to some questions people had asked me about the construction process, and linked to some of my Handy Tools I used while building the cases.
  4. Large Case Pin Boards and Backs walks through the rest of the construction of a case. When this finishes, the case is in the clamps with the glue drying.
  5. Winging it with Big Cases talks about how I discovered that the largest cases I had designed weren't large enough for some of my very large art books. So I had to change the design a bit. This is one of the many nice things about building the cases myself. Had I ordered them from a builder, the discovery of the extra-large books would've blown up the cost quite a bit.
  6. A Back for the Oversized Case shows details of the ship-lap joint between two back-boards and puts a back on the oversized case. It also shows how to square up a case which was slightly out of square.
  7. Smoothing and Prep for Shellac in which the hand planes come out.
  8. Cleaning up a Dovetail shows how I cut out the waste between pins (it's a similar process for tails) and then clean up a little using a rasp until the joint goes together smoothly.
  9. First Shellac sees me applying the first two coats of shellac to a case.
  10. Second Shellac gets the third (and final) coat of shellac on a case.
  11. Back Boards discusses one of my first big “performance optimizations” building the bookcases. I cut the time per pair of back boards for a case to a quarter of the time it previously took, from about an hour to about 15 minutes per pair of boards.
  12. Interlude and Medium Bookcases talks about the size of the medium-sized cases to hold hardcovers and shows the cut-list for the lumber. It also has a guest appearance by my Lava Lamp.
  13. More Plinths, Different Sizes covers a couple more sizes of plinths (one for the art books, which will have a deeper case, and four for stacks with a medium case as the base, and smaller paperback cases atop that).
  14. Art Books Case has another cut-list, this time for a larger case to hold art-books. It also describes making 1x16 boards out of narrower pieces by edge-jointing them and gluing them together.
  15. The Littlest Case has the cut-list for the smallest case for very small hardbacks or standard (5¼×7¼ inch) paperbacks.
  16. Three Sizes of Plinths has cut-lists for all three different sizes of plinths I ended up building to accommodate the different-sized cases.
  17. The Little Things covers some tips and tricks I've learned along the way, and has a progress update showing 37 cases in 8 stacks.
  18. A Periodic Update gets the total up to 47 cases in 8 stacks and shows some other numbers in the months of making boxes.
  19. The End of January Update didn't have a lot of progress, but that seems to be how Januarys go around here.
  20. The Home Stretch? is another progress update. Up to 57 cases at this point.
  21. The Wrap-up is a completed project post. The grand total was 70 cases in just about 18 months.

#Contents #bookcases #buildBlog

Discuss... Reply to this in the fediverse: @davepolaschek@writing.exchange