davepolaschek

Woodworking

May 12, 2020

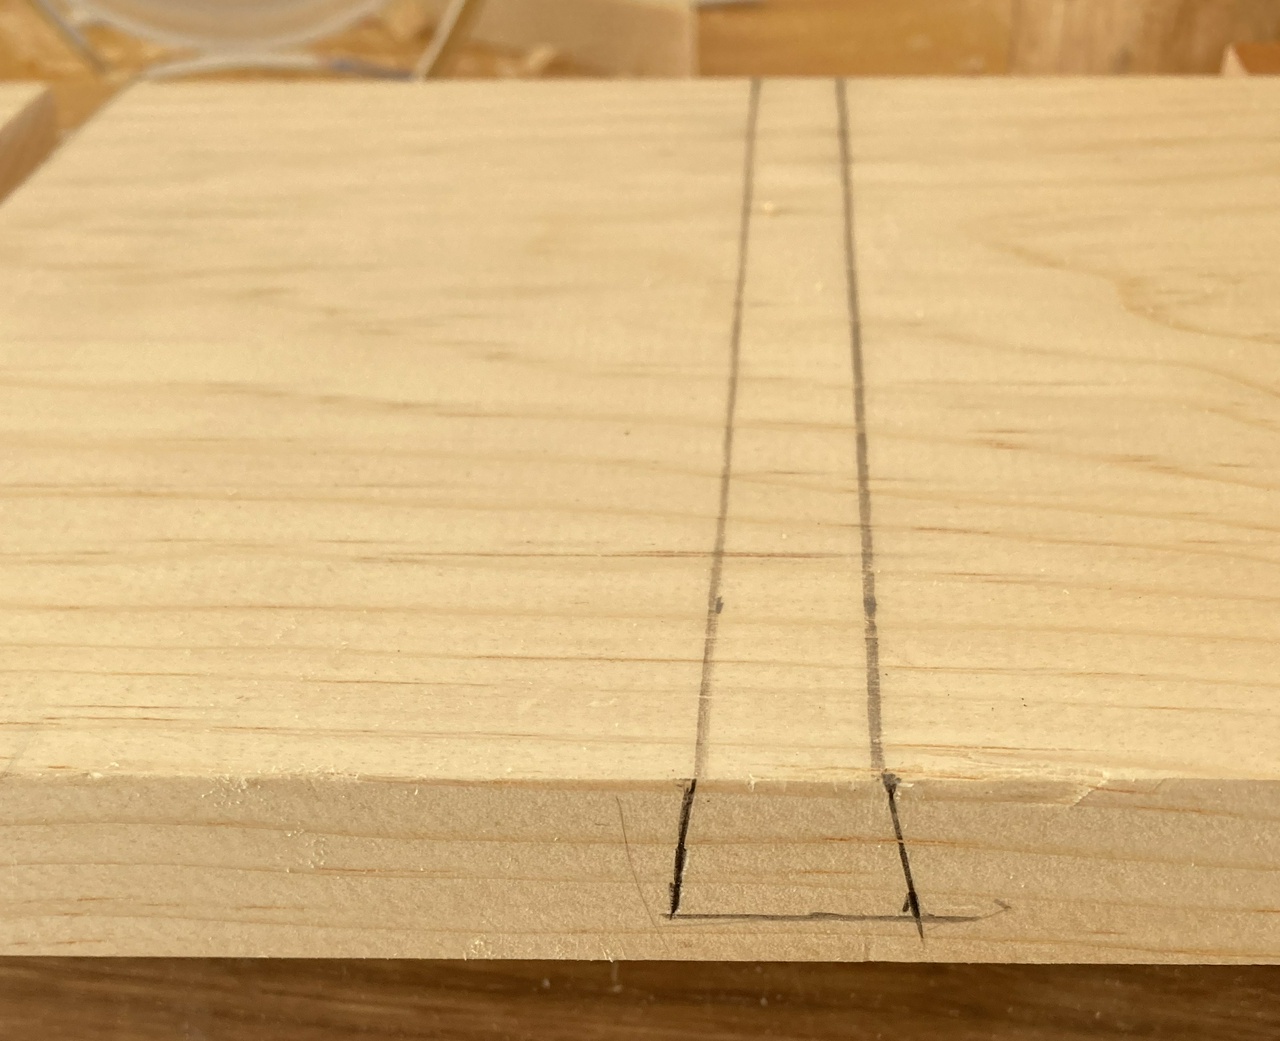
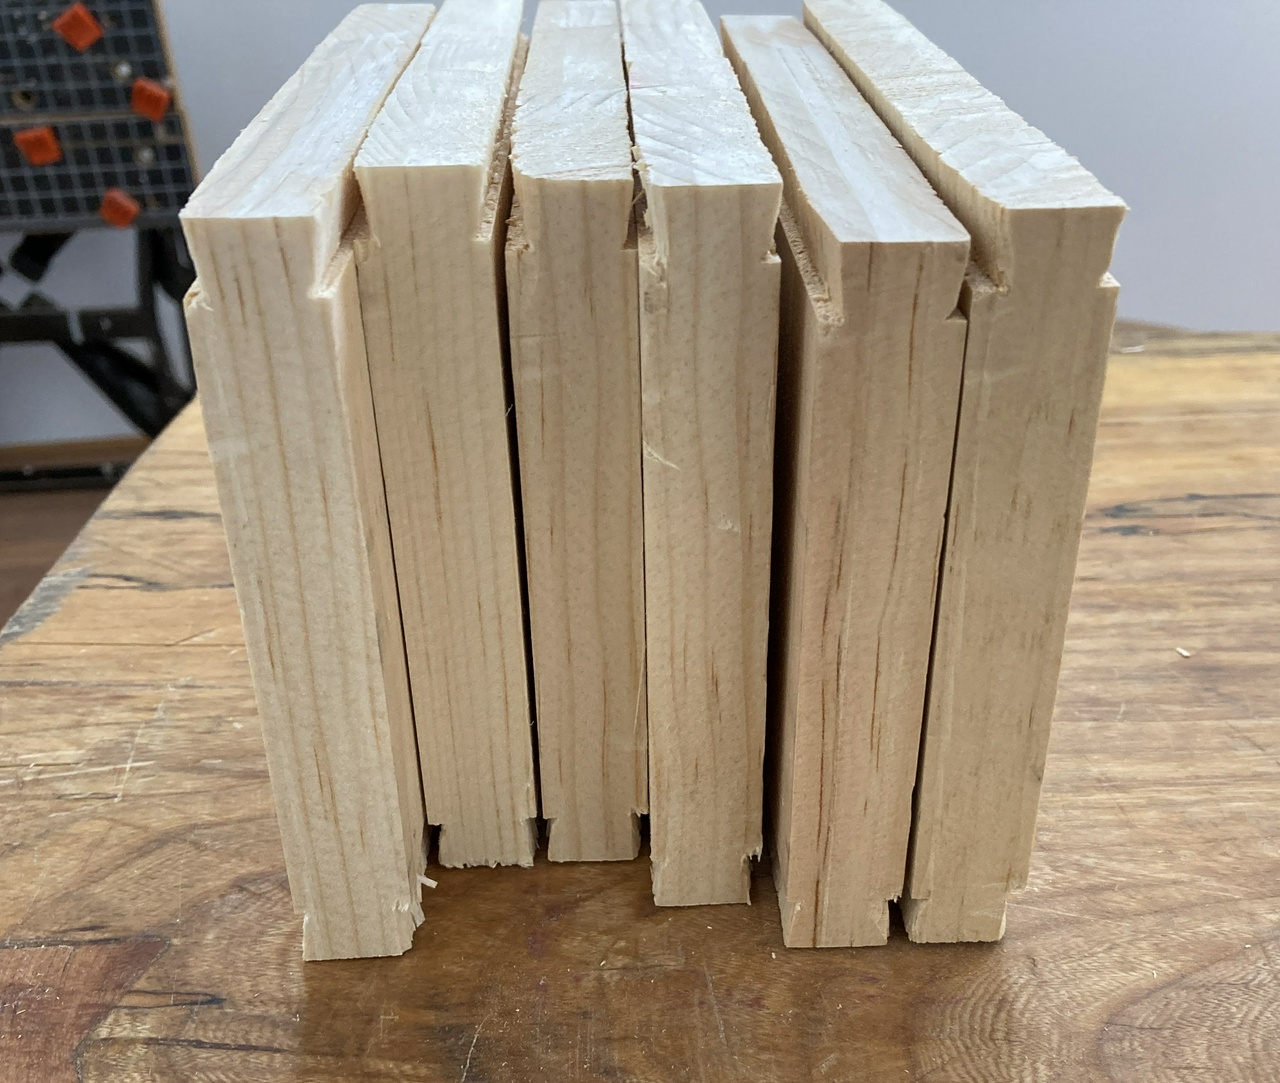
Spent the past few days with a mix of yard work and thinking about how to reinforce the rack that'll hold the braces. With the grain running across, the slots cut into it leave some very weak tongues, which will be almost certain to snap off over time. I've seen this happen with my chisel till, and I'm going to have to rebuild that at some point.

Slotted shelf to hold braces, held in a vise

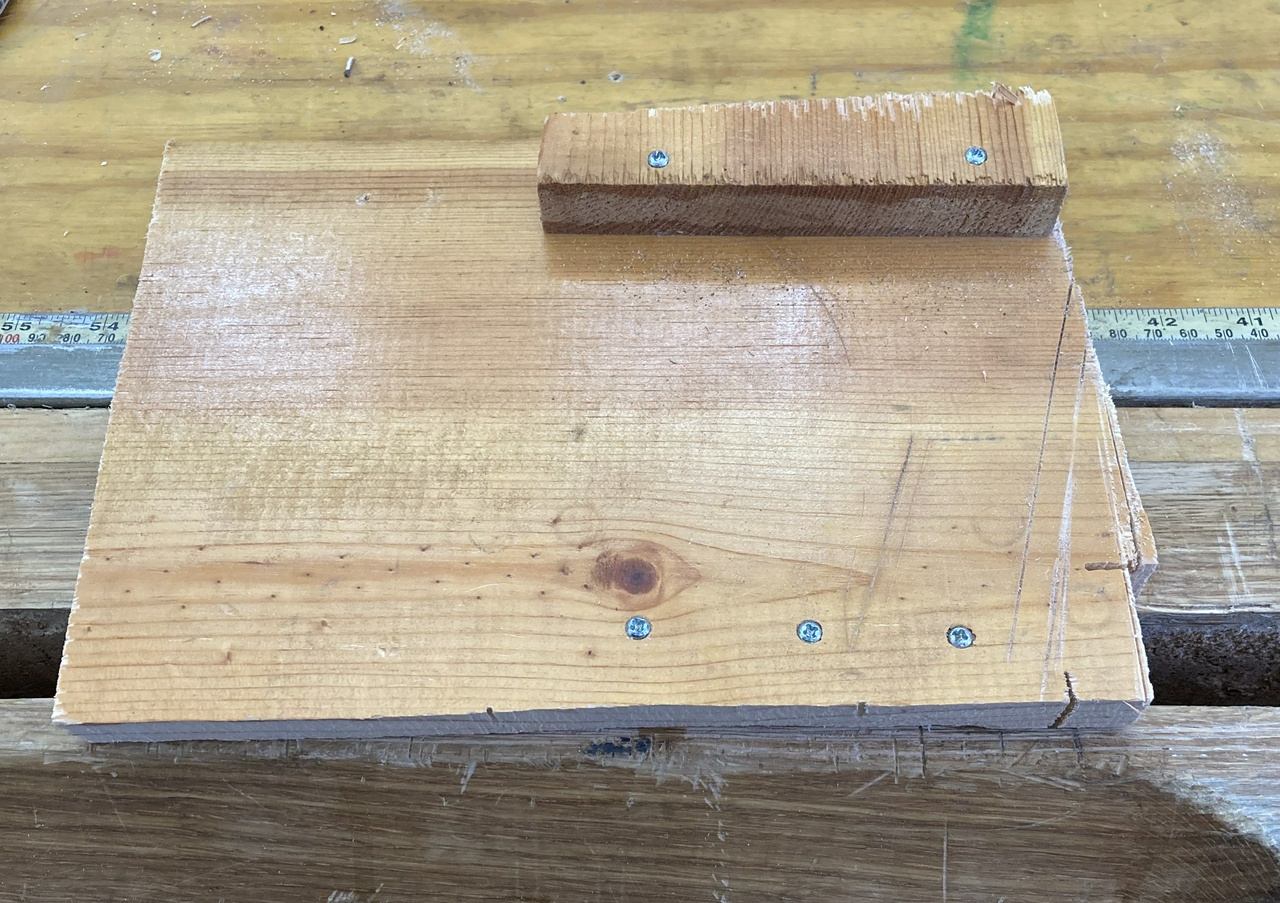
So I thought a bit, and dug through my various piles of shorts. I found a chunk of walnut and decided that running pieces of that from front to back under the tongues would strengthen them in compression, and then I could put some veneer on top (running the same direction) to strengthen the rack in tension. Or looking at it another way, I'm making plywood, with a dang thick core.

Clamping three pieces of walnut onto the brace shelf to reinforce the weak grain

My first few test pieces went well yesterday, and I finished cutting them and gluing them up today. I'll give the glue time to dry overnight, and I can plane the ends smooth and chamfer the edges of the holes nicely tomorrow morning. And some 1/16” thick bubinga veneer I ordered should be here in tomorrow evening's mail, so I can glue that onto the top on Thursday.

Completed bottom-side reinforcement for the brace shelf

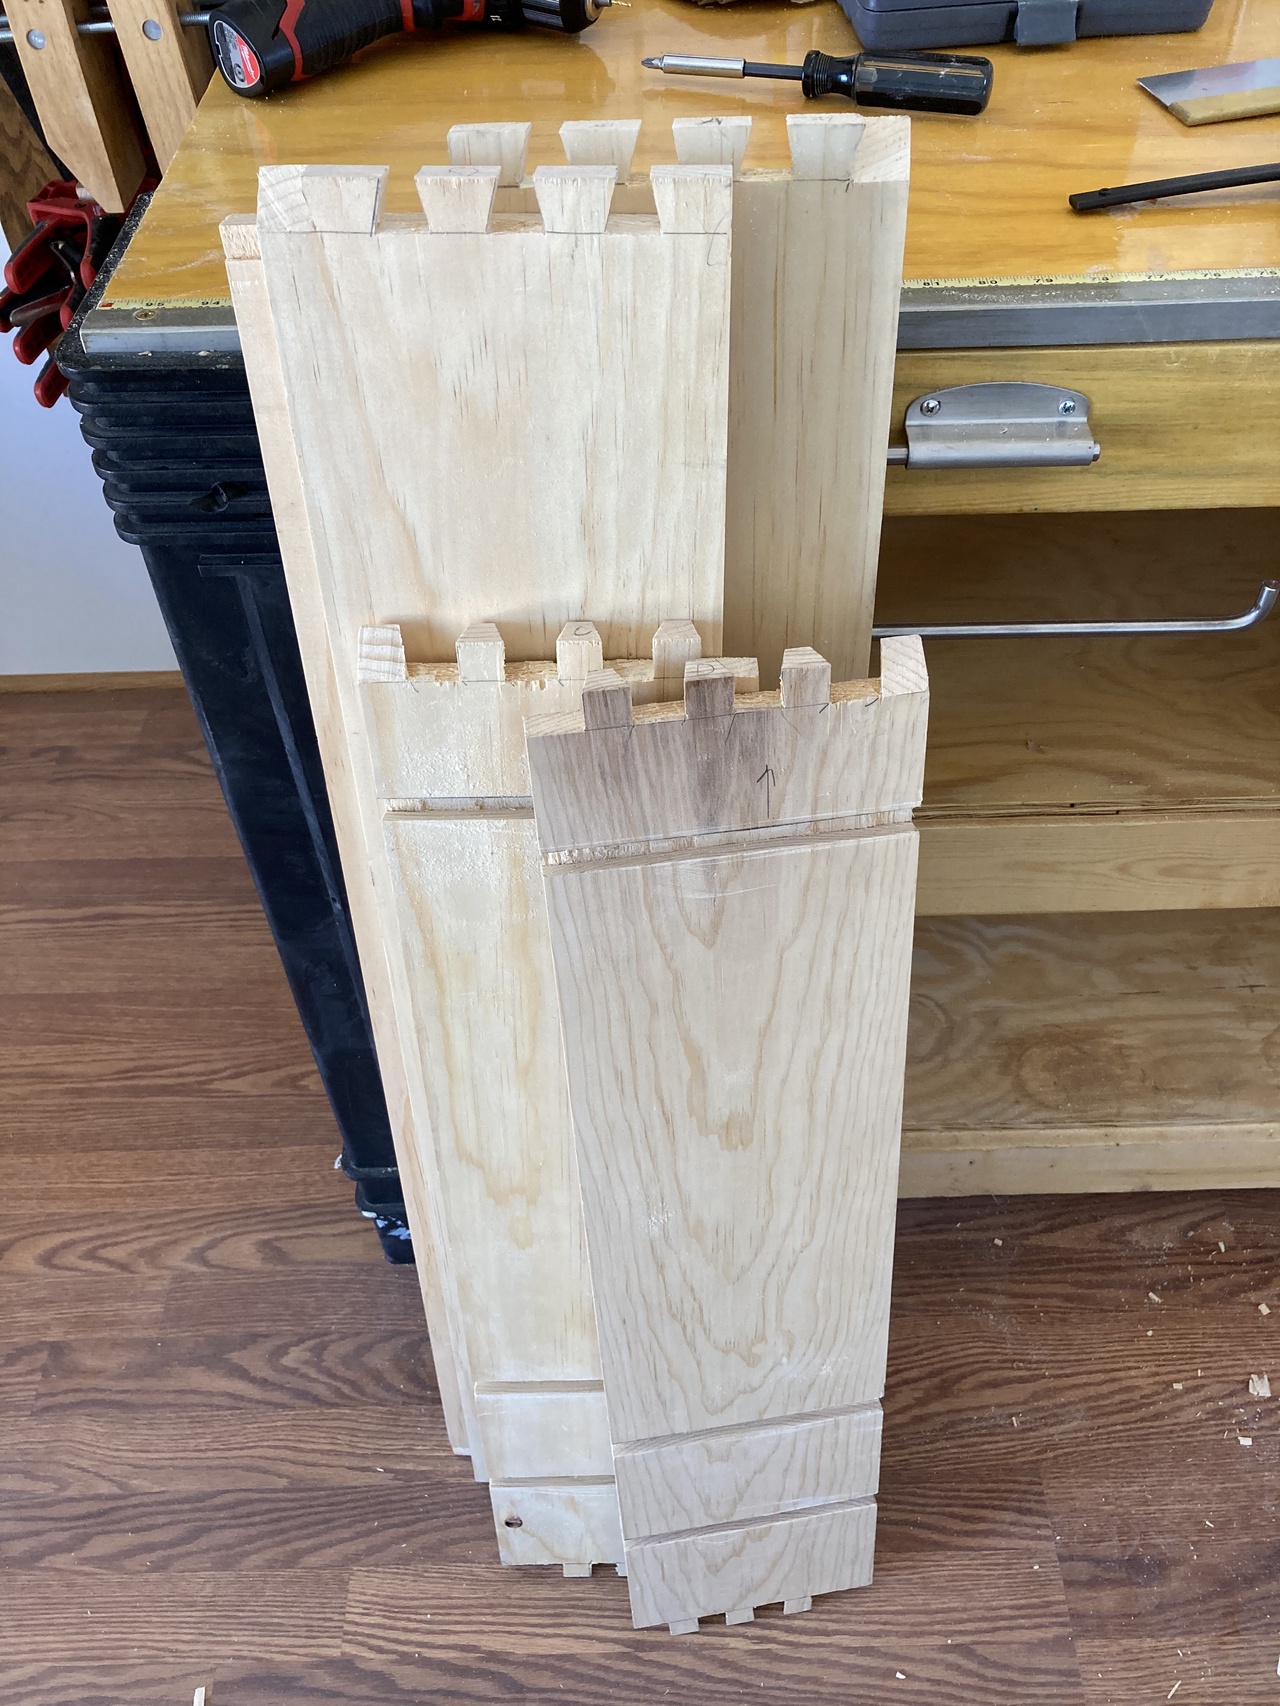
I also finished cutting all the sliding dovetail sockets today, and will do a test fitting of the carcass tomorrow. I may be able to glue up some sub-assemblies, but we'll have to see how the test fitting goes.


Contents #woodworking #storage #lamination #reinforcement

Discuss... Reply to this in the fediverse: @davepolaschek@writing.exchange

May 7, 2020

I started cutting sliding dovetail sockets in the horizontal bits today. More of the same, but I had a little blowout on the third socket I was cutting, so I glued that back together and decided to work on the part that will hold the braces.

I started by laying out marks 3½ inches apart, and drew marks four inches from the edge of the board (or 3½ from the other edge). Picked out the 12/16 bit, chucked it in my brace, and started drilling holes. I picked the ¾ inch bit because it had relatively sharp spurs (I think I touched them up before we moved), and it's big enough to fit the brace I was using into. The fat part of the handle is closer to an inch, but if I have to enlarge the holes a little bit later on, I'll deal with that then.

Board which will hold the braces, marked out

Drilling a hole using a bit and brace

With everything laid out and drilled, I took my square and drew lines more or less to the edge of each hole. If I was off a little, I didn't worry too much.

Marking the edges of the slot which I'll be cutting

I put the board in my face vise and started sawing. I was using my Veritas tenon saw, as it had enough reach to make the cuts without bottoming out the back. It's filed hybrid, and I'm cutting pine, so it made pretty short work of the cuts.

One cut slot, shown in detail

Once that was done, I took my knife and chamfered the edges of the slots, and used my spokeshave to chamfer the front edge of the board. Then it was time to sweep up for the day and go start cooking dinner. Hopefully tomorrow I can finish up the remaining two shelves and ponder putting the carcass together.

All of the slots cut in the board which will hold the braces

I also should think about some sort of reinforcement on the board that'll be carrying the braces. Three inches of pine between holes will probably mean that I'll snap something off eventually. Maybe I'll start tomorrow by digging through my scrap bucket and see what I have that I can glue under that board with the grain running front to back to strengthen things up. On second thought, I think I have some heavy veneer somewhere, so I may detour to unpack a few boxes and see if I can find that.


Contents #woodworking #storage

Discuss... Reply to this in the fediverse: @davepolaschek@writing.exchange

May 5, 2020

Today was dovetail day, and I'm still not done, but I made a lot of progress.

As I'm doing mitered shoulder dovetails on the carcass (to practice them for the bookcases I'm building next), I took my time laying them out and cutting them. Spent all morning just cutting the tails.

After lunch, I headed out to the shop to cut the pins. That went pretty well, so I got started on the sliding dovetails for the shelves as well. They're not super hard, but I took pictures along the way, so I'd be better able to remember what I did and any improvements I found along the way.

First step is to layout your lines. Make sure the width is the width of the narrow part of the dovetail (cut in part 1 of this blog).

Lines marked for a sliding dovetail socket

Then saw the two angled lines. As with normal dovetails, start on one end, then angle to the other end. I started on the near side, since it was easier for me to see.

Starting to cut the sliding dovetail with a dovetail saw

After cutting the two angled lines, cut a straight line between them. This will make is easier to chisel out the waste. Note that the depth of this line you're sawing is your depth-gauge, so try to cut it to the line, but no further.

Sides and a middle relief cut made for a sliding dovetail socket

Then chisel our the waste. I did half from the front, turned the board around and did another half (to ¾ of the final depth) from the far side, and about an inch to full depth, then turned the board around again, and finished up from the front.

Chiseling out the waste for a sliding dovetail socket

Half of the waste removed on the first half of the board for the sliding dovetail socket

And that's where I finished the day. I still need to saw out the ten sliding dovetail sockets for the vertical pieces between the two shelves, and also the slots to hang the braces in. And I need to cut rabbets in the rear of the sides and top for the back, so there will be a couple more entries before I'm finished with the carcass.

Major boards for the till with the sockets cut for the sliding dovetails

Thanks for following along!


Contents #woodworking #storage #slidingDovetails #joinery

Discuss... Reply to this in the fediverse: @davepolaschek@writing.exchange

April 30, 2020

I was asked to finish moving my tools from the garage to the shop the other day, so I did that. Still haven't found and unpacked all of my tools, so I took a little detour to build a dovetail marker so I could lay out the dovetails nicely. In the course of making that, I needed a bench hook, so I slapped one of those together, too.

Bench hook - very quick and dirty

I think I can start laying out the dovetails now, but since I'm planning on doing mitered dovetails (as practice for the corners on the bookcases I need to build), I might need to study up on those first.


And the next day, further detour to make a clamp rack.

Clamp rack, with clamps on it


Contents #woodworking #storage

Discuss... Reply to this in the fediverse: @davepolaschek@writing.exchange

April 28, 2020

I looked at my braces as I was unpacking, and discovered I have four, plus a couple eggbeaters, plus another brace I've bid on on eBay… It's time to build a till. Also, I'll have a place to keep my bits if I do that.

So the first step was to get out the graph paper and sketch out what I think I'll need. I figure I'll eventually have braces of 6-14 inch sweeps, probably doubling up on 8 and 10 since they're more common. So I sketched a till that could hold those plus a couple eggbeater drills.

Boring Tools Till Plan

This is a first for me. Most of the time I just start building and then realize afterwards that I've underbuilt, so it feels kinda weird making a plan, but I think I'll survive. Also, the Bad Axe magnet is handy for holding my plan to the whiteboard so I don't lose it in a pile of sawdust.

Given that, I decided I'd use pine I have on hand for building my bookcases. I've got a lot of S4S 1×8s, so I started with those. That should give me enough depth that I can put doors on the till and still get a 14 in there. Plus it means my existing boxes of bits can fit in the cubbyholes at the bottom.

I started by cutting boards to length. All of my lumber on hand is cut to 4 foot lengths, so it worked out pretty well. The 38 inch long pieces had an offcut that gave me two pieces that were not quite 5 inches long, so I was efficient in my lumber use.

I've also got a new ECE dovetail plane so I've decided I'll put the shelves into the case with sliding dovetails and put the uprights between shelves with sliding dovetails as well.

As for the dovetail plane, it's pretty slick. It took me a while to get the fence set correctly for a half-inch deep sliding dovetail, but once I did, I spent more time grabbing a new board and whacking the holdfasts to hold it down than I did planing. There's a little spelching on the pine, but I lightened up the cut a little and that took care of the worst of it. The plane was usable out of the box, but would have benefited from a few minutes honing the blade, especially since I was working on pine.

Boards for the till, cut to length

Short uprights for the till, with sliding dovetail pins cut on the ends of them

I put the dovetails on the ends if the boards and called it a day. Tomorrow I'll start joinery on the carcass, and hopefully get the dovetails cut in the four exterior joints and maybe get started on the sliding dovetails for the shelves. We'll see how it goes!


Contents #woodworking #build #storage #shopFurniture #plan

Discuss... Reply to this in the fediverse: @davepolaschek@writing.exchange

Dovetail marker with katalox and elm, front view

Dovetail marker with katalox and elm, bottom view

When I got to the point where my next big project was my brace till, I needed to cut the dovetails for the corners of the carcass, and couldn't find my dovetail marker. Rather than completely wing it, I grabbed a scrap a katalox and set up my shooting board at 14 degrees (which is darned close to 1:4), and then found a piece of elm to put that katalox into. A couple cuts with the saw, a little trimming with a knife, and a dowel later, I had the marker mostly done. Glued it up, then did a little practice carving to label it so I won't get confused later. A coat of oil, and it's ready to go.

Dovetail marker of katalox and elm, top view

Looks like I need to practice carving serifs some more, but otherwise I'm happy with it.


Contents #woodworking #tools

Discuss... Reply to this in the fediverse: @davepolaschek@writing.exchange

This is a collection of notes – I haven't done a lot of kolrosing other than on my baby bowsaw but I've collected a bunch of references I don't want to lose.

  • Basics of Kolrosing from Del at Pinewood Forge
  • Color Kolrosing
  • White on brown kolrosing
  • Chinkin-bori and with other materials than gold – the Japanese is 沈金彫り
  • Martin Adburg actually tried Chinkin in Japan. He says polyurethane is tricky, since any blemishes or minute scratches will hold the gold dust, messing up the design (similar to what I saw with TiO2 on walnut). Traditional Japanese is red or black lacquer, and there are a number of scribers that are used to scratch the surface, but just a simple point will do the trick. Similar to engraving boulle marquetry, but it's definitely scratching the lacquer surface rather than cutting.
  • Martin also suggests that an epoxy finish might work. Nitrocellulose lacquer might work too, or a harder varnish.
  • Another link from Martin: chinkin technique
  • And the Echizen Lacquerware Cooperative (where Martin and his wife did their workshop when they visited Japan).
  • urushi / lacquer techniques

I expect next time I try, I'll try a shellac or lacquer surface, rather than naked wood as one does with kolrosing, but I might also try some tighter-grained woods with coarser pigments. I think there's a lot of decorative possibilities here.

#woodworking #finishing

Discuss... Reply to this in the fediverse: @davepolaschek@writing.exchange

Today got the forge table across the finish line. I had a piece of aluminum diamond plate cut to roughly the right size, and today was the day it got attached to the table-top.

First up was figuring out how to bend it. I settled on clamping the bent edge in my twin-screw vise, then using a little 2-pound maul to hammer the main part of the plate flat onto my bench. It went pretty smoothly, except on the first corner, I couldn't figure out which way to cut off the metal for the corner, so I did both. The other corners got cut correctly and folded over the edge, and then I got out a drill and a handful of brass screws and screwed the metal onto the table-top.

diamond-plate bent into a corner and screwed to the table-top

Once things were screwed down, I used my hammer to round the corners, then filed off any stabby bits, cleaning the edges up so I won't hurt myself when I try to move the table.

Table, inverted, with the sharp bottom edge of the metal partially rounded over

And with that, the table is done, I think.

Table, right-side-up, finished

As one of my buddies commented, Kind of a 19th Century/modern fusion, truck-box chic!


Contents #woodworking #ForgeTable

Discuss... Reply to this in the fediverse: @davepolaschek@writing.exchange

Today was a fairly light day on the table. Sawed off the protruding wedges and tenons, sanded them smooth, filled a few holes with sawdust and CA, and then hit the table with a coat of BLO.

Before:

Assembled table

After:

Assembled table with the wedges trimmed flush and a coat of oil on the table

Tomorrow I'll see if I can bend the diamond plate so it'll fit over the top and figure out how to address the corners of it. Mostly a metal-working day tomorrow, rather than woodworking.


Contents #woodworking #ForgeTable

Discuss... Reply to this in the fediverse: @davepolaschek@writing.exchange