Jefferson Bookcases – Cleaning up a Dovetail
Originally written Aug 12, 2020
A couple years ago, when I was new to woodworking, I read about how to cut dovetails by hand, and how to clean them up. But a lot of it was mysterious. How close can I saw to the line? What happens if the dovetail is too tight to go together when I test fit it? What if it's too loose?
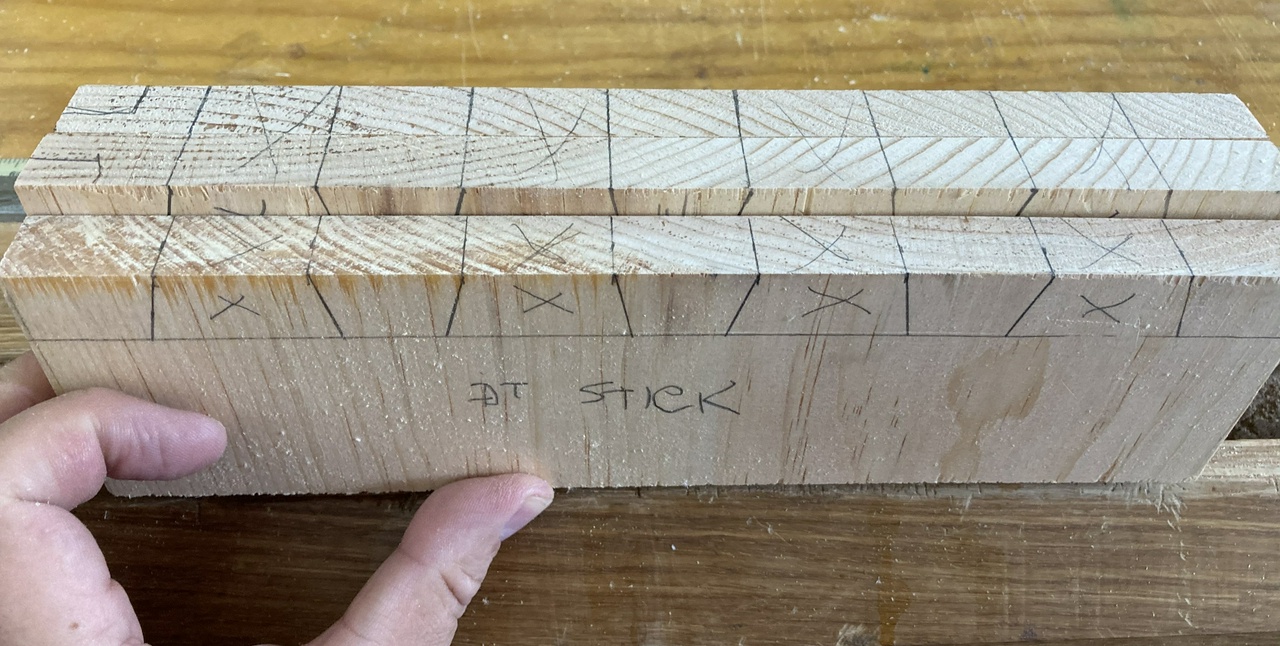
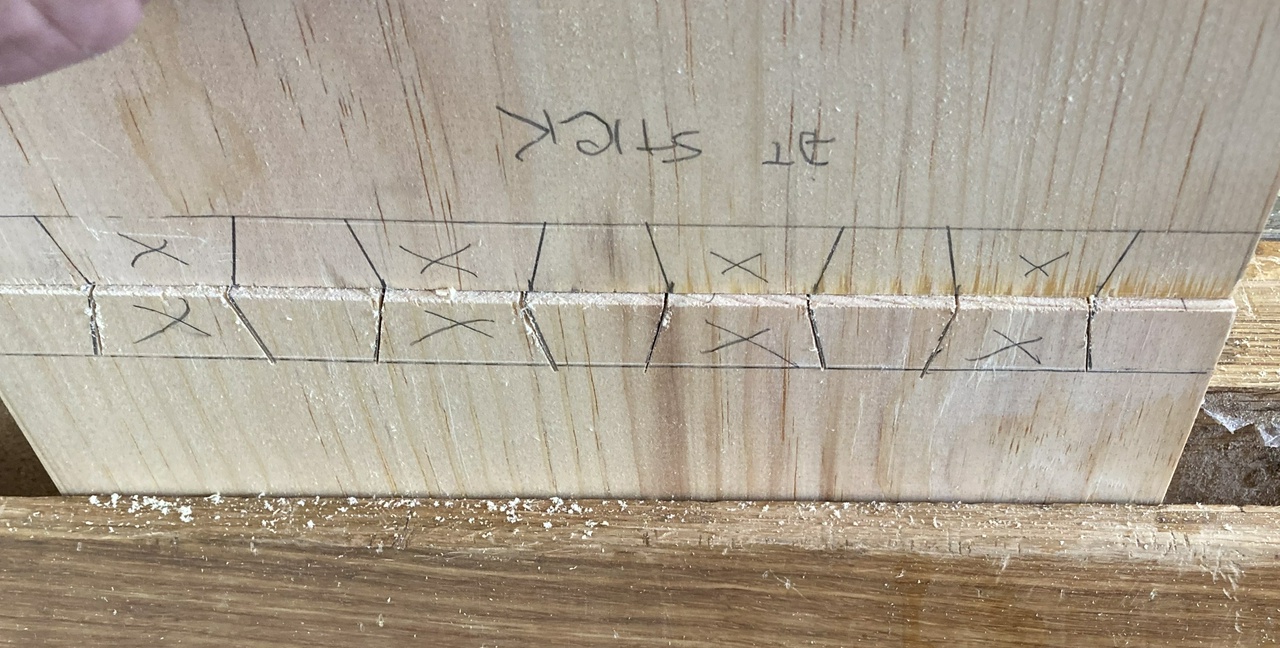
So in order to write down some of the things I've learned over the years, here's a look at one dovetail on the pin-board, from after I've made the vertical cuts to until the tail board fits over it well enough to glue it together.
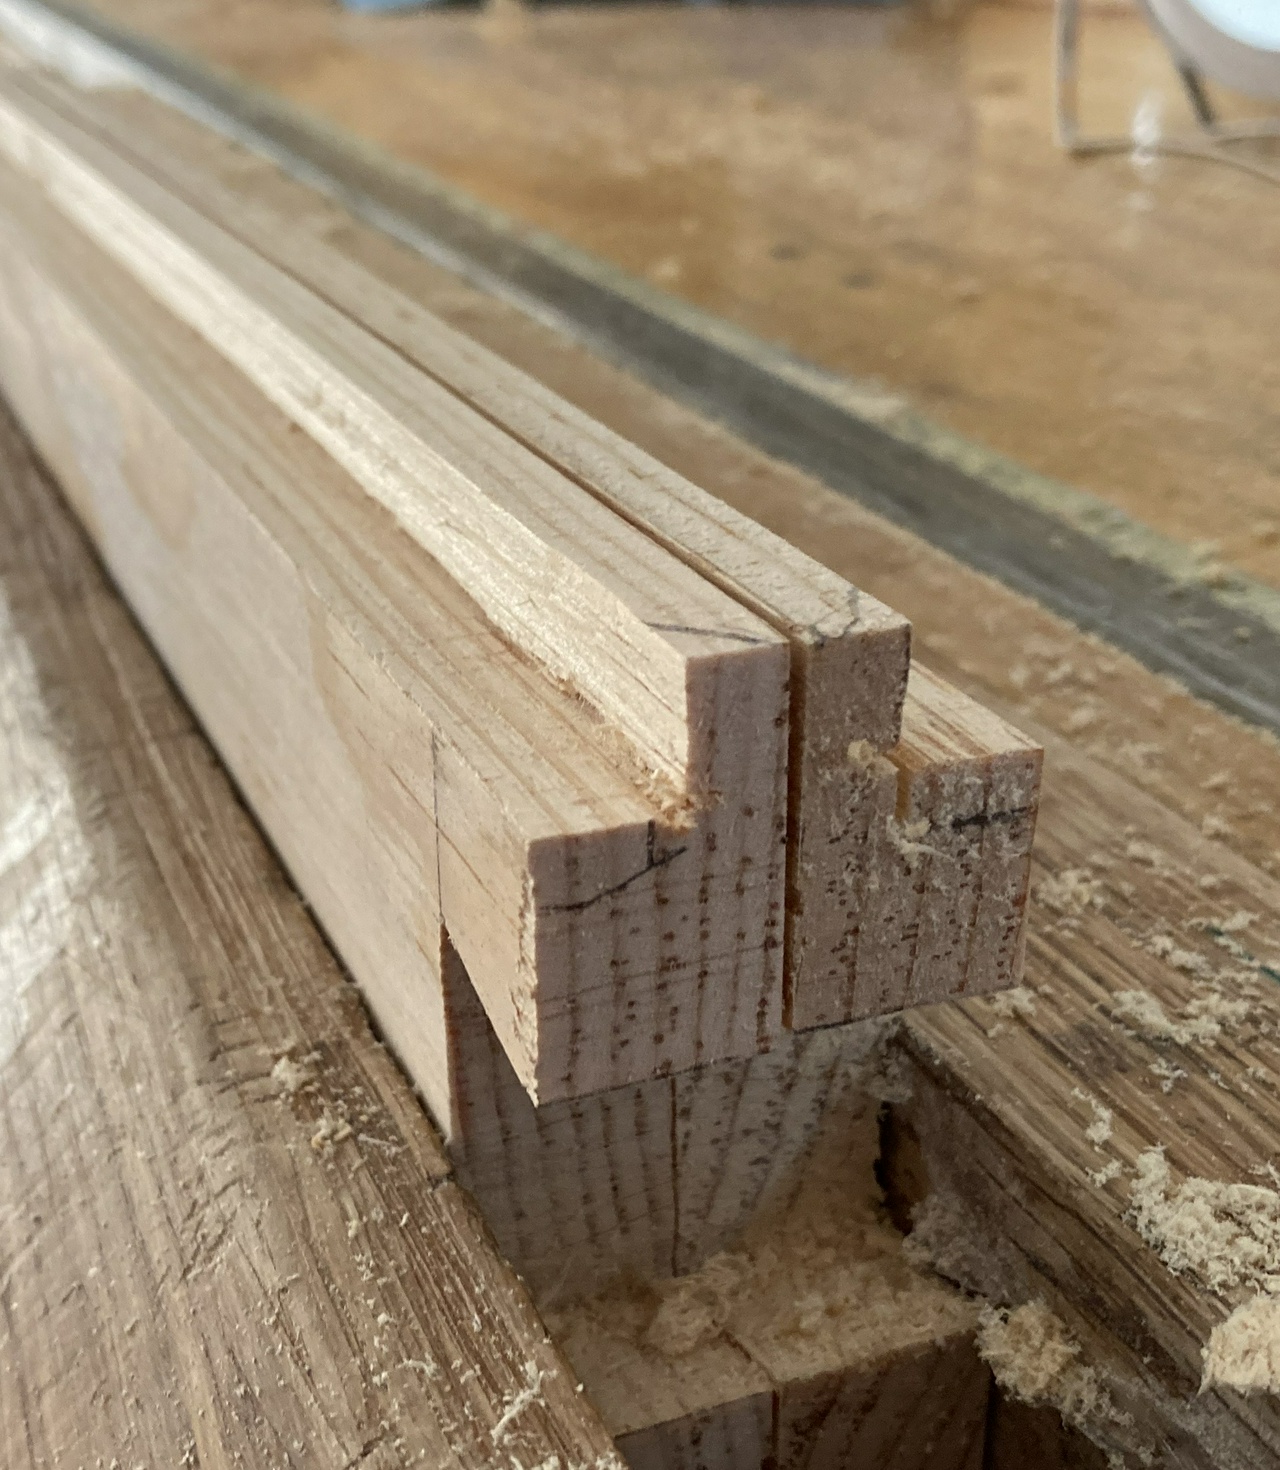
First up is cutting out the waste between the pins. I do this with a turning saw because the fine blade from Gramercy Tools leaves a pretty good finish, plus the 12” long blade cuts through the waste between pins in just a few strokes (maybe six) if I'm cutting full-length strokes, plus I've never had good luck chopping out the waste with a chisel, especially in pine and poplar.
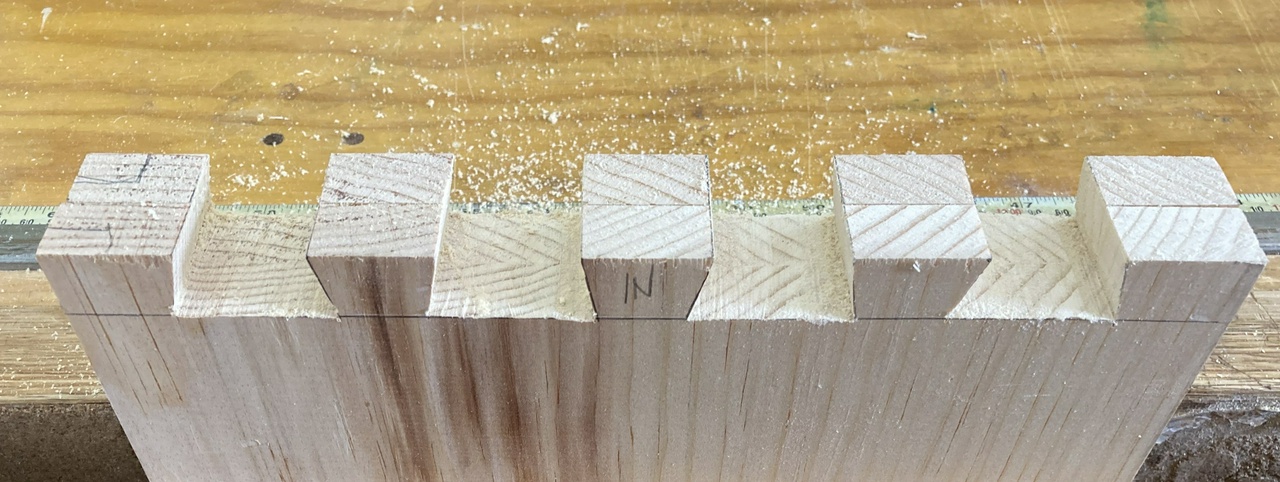
So after the first cut, I end up with something like this.
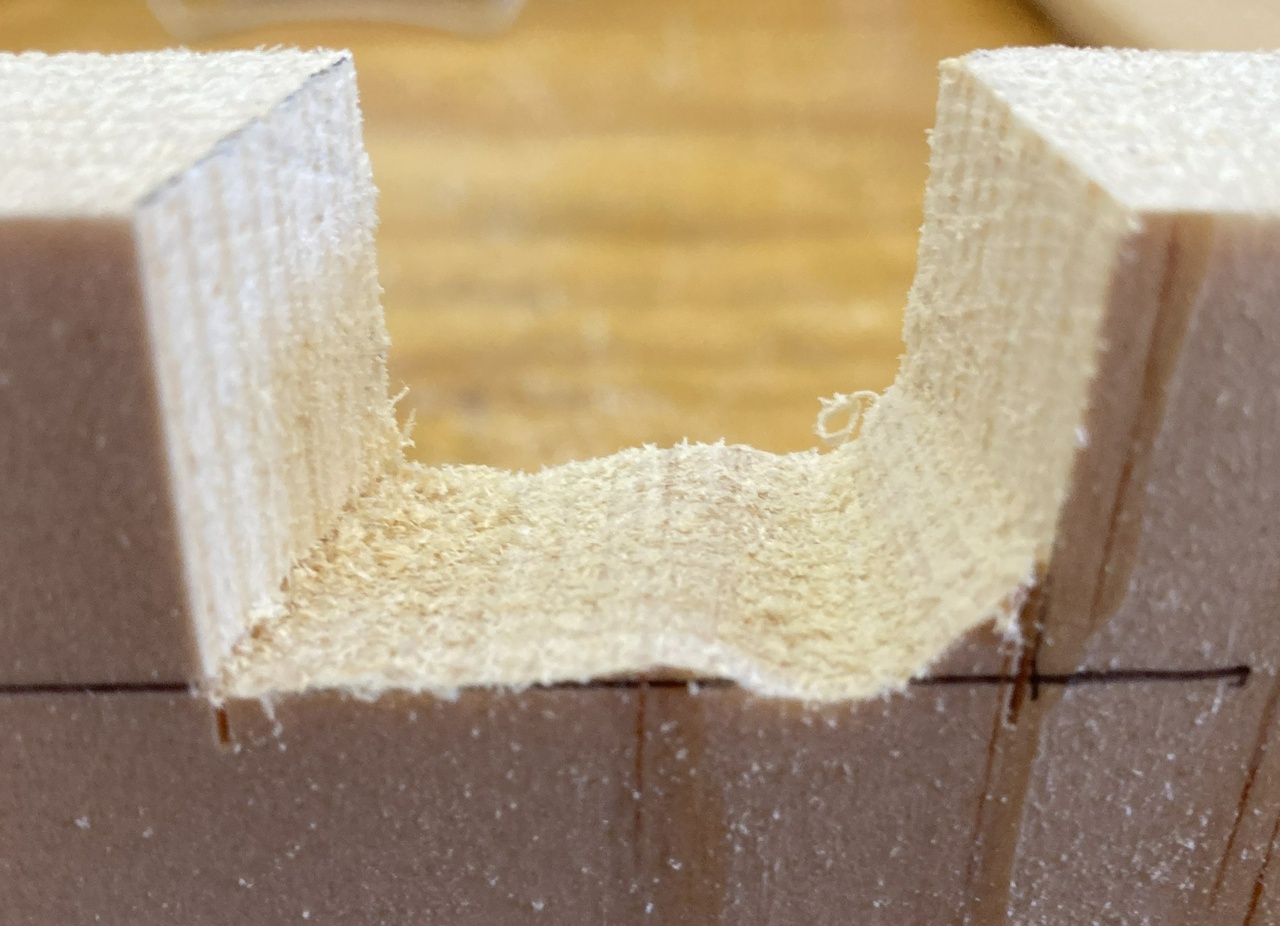
I slid the blade to about a quarter inch from the bottom of the cut, and started cutting out the waste. I angled down until I was less than a millimeter from my line (probably a little too far) and then started turning horizontally. I overshot a little, so angled back up, and then when I got close to the line, I worried about finishing up with the back side of the cut about on the line.
So that'll need some cleanup. But I still have to cut from left to right. Left to right or right to left first doesn't really matter, but it's a lot easier if you're consistent. I always cut right to left first, then left to right. I start on the rightmost bit of waste first, too, so I'm moving right to left, then moving back left to right. Not sure why, that's just the way I've settled on.
So cut left to right. I concentrate on getting the back end of the blade to the line, and sort of let the front follow, trying to level everything out. And this is what I get.
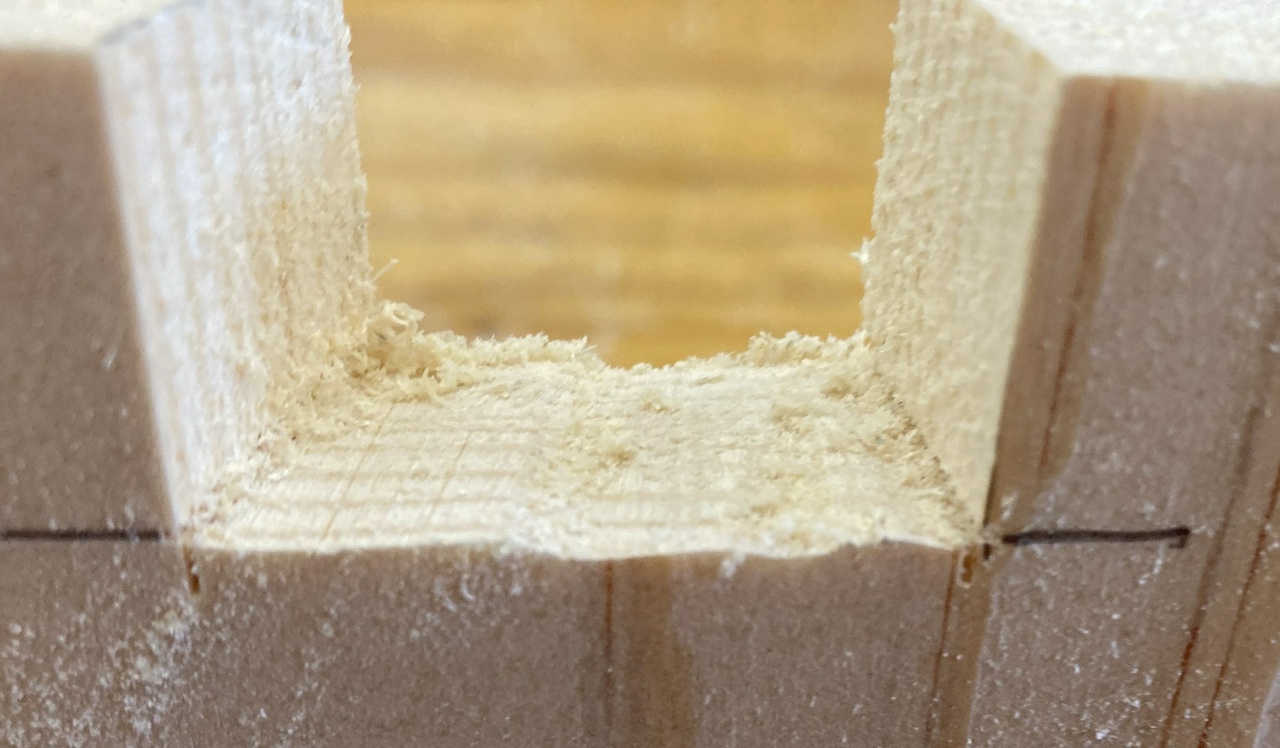
Not too bad. If everything is going well, I'll have just a hint of my original pencil line left. In this case, not so much, but it's just missing, so I'm not sunk. I'll take a fairly fine rasp and try to hold it level from to back and side to side and just knock off anything sticking up above the line. And avoid dinging the walls on the left or right with the edges of the rasp if possible. Maybe a dozen strokes if I've got a pretty messy cut. I'm not trying to get it perfect, just close enough that it'll go together. So this is what I got to.
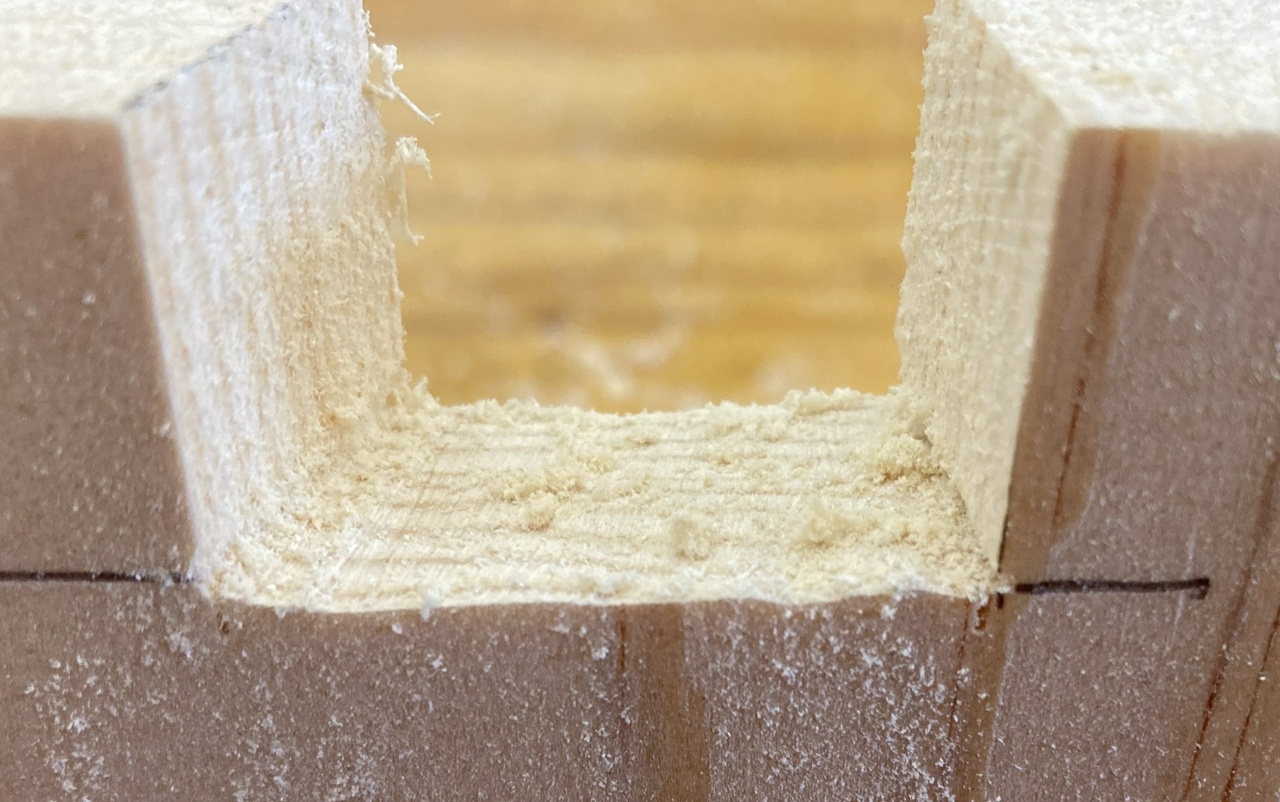
I cleaned off a couple high spots on the near side, and generally cleaned up the back side, removing a lot of the fuzz left from sawing.
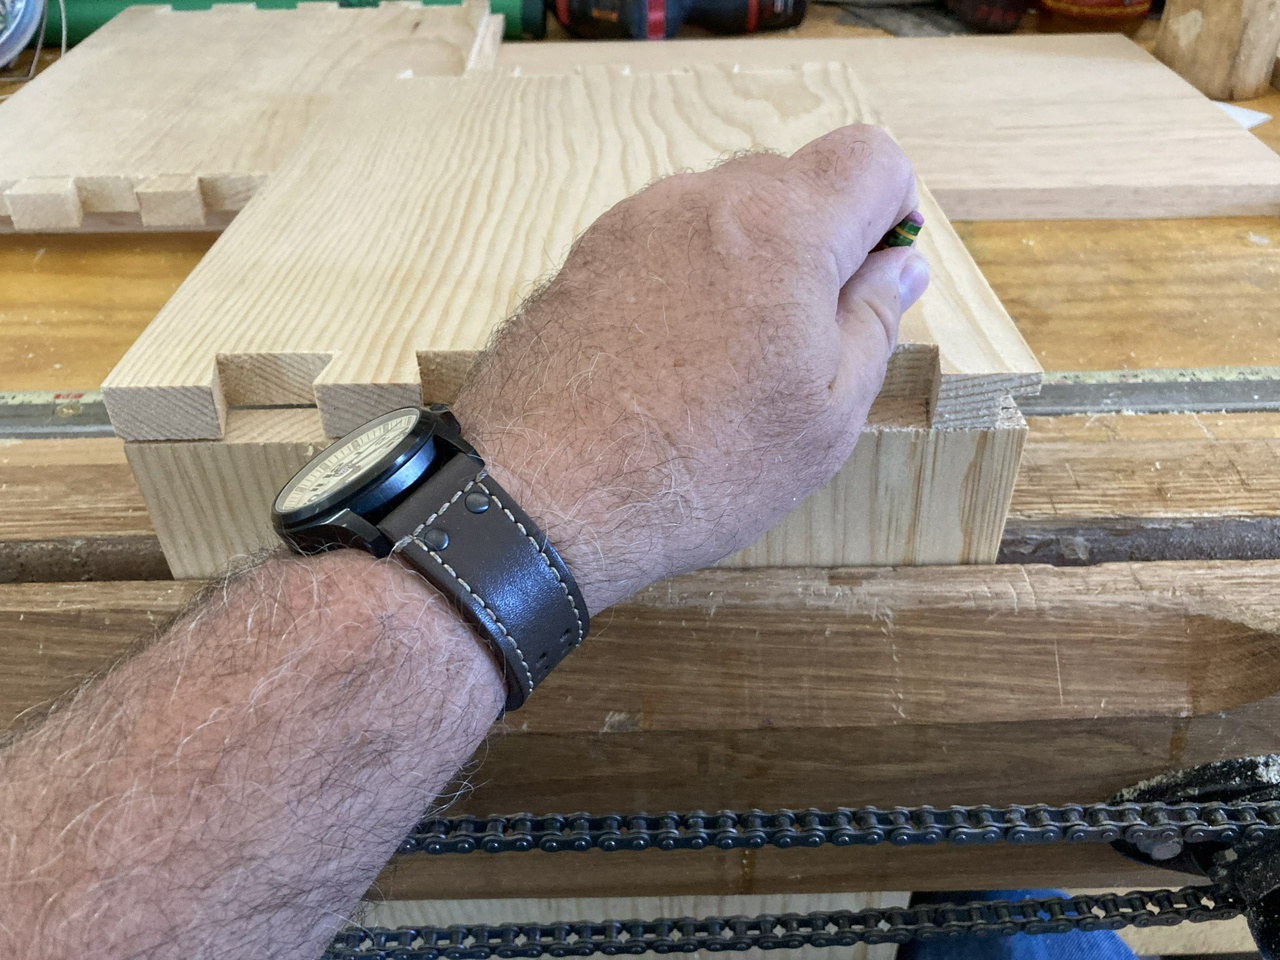
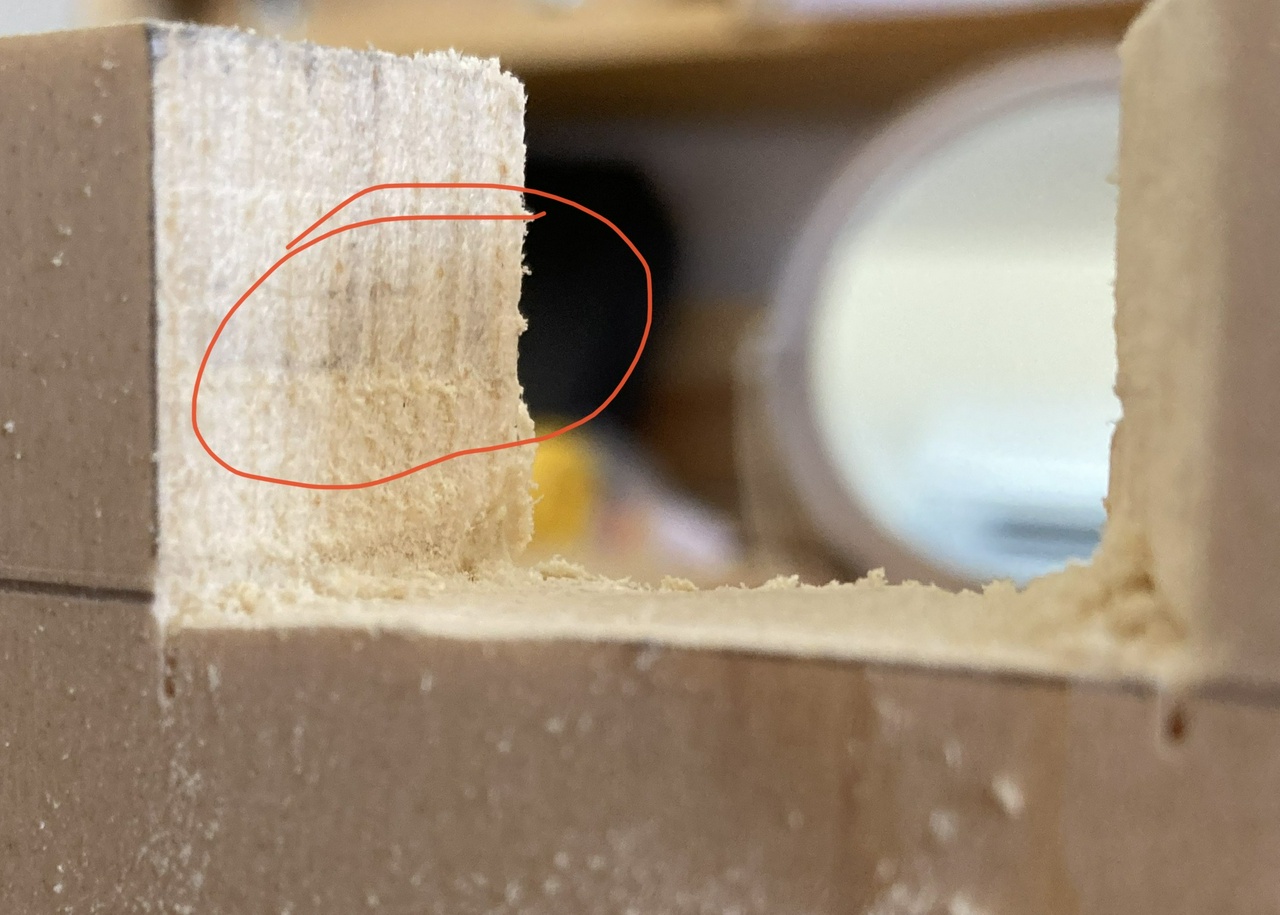
Next up is test fitting the tail board in. In this case, the pin to the left was a little tight. After putting the pieces together and pulling them apart, I could see a burnished bit on the pine (it's why I enjoy cutting dovetails in pine: close is plenty good, because the wood will compress a little). So I took the rasp and smoothed off just a little on the wall of the pin to the left, where the red circle is, and then down to the bottom of the pin (which was so tight it didn't even get burnished because I couldn't close the joint up).
And with that (plus similar cleanups on the other pins), the joint went together. Tight enough that the glue will hold, and loose enough that nothing will crack when I drive it together with a mallet. I don't even really need a mallet, and can push the joint together by hand if I want. But I'll probably give it a whack just to be sure, because, as Chris Schwarz says, IQs drop about 50 points as soon as the cap comes off the glue bottle. Hammer good! Bang!
Jefferson Bookcases Contents #woodworking #bookcases #dovetail #fineTuning
Discuss... Reply to this in the fediverse: @davepolaschek@writing.exchange